The Rapid Elearning Blog

Archive for September, 2018


scenario

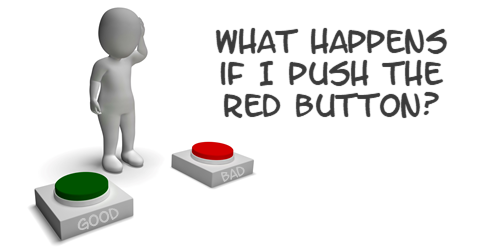
Between the workshops I run, blog emails received, and helping in the community, I get to see hundreds of e-learning courses. A common issue for many courses is transitioning from sharing content to helping people use the content to make the appropriate decisions.

Many course developers focus on making the content interactive, which is good. But much of the interactivity is novel or exists at a very basic level. What tends to be missing is the more complex decision-making interactivity.

The challenge is how to move past rote facts and get to a place where the learners can practice making the kinds of decisions they’d  make in the real world.

Interactive E-Learning 101

There are some core building blocks for interactive e-learning:

  • provide relevant content that fits in context to their real world
  • instead of pushing content, getting them to pull it
  • create ways to explore the content
  • challenge them with decision-making activities or scenarios

We’ve discussed many of these things in previous blog posts.

“What If?” Scenarios

The one thing that could add to this pursuit is to provide more “what if” scenarios:

“What happens if I do this? Or what happens if I choose this other option?”

I was thinking more about this the other day as we were presenting on how to use variables in one of our webinars. Variables allow the learner to do something that can be tracked. And then use that information to provide feedback unique to the learner’s experience. They’re perfect for creating this type of training.

scenario

  • Challenge the learner to analyze all of the available information and form some sort of hypothesis.
  • And then create the means for them to apply it and see what happens.
  • Provide the appropriate feedback based on the results.
  • Let them make adjustments and test it again.

The obvious reason why we don’t do more of this in our courses is that it takes more time to build. The reality is that most clients seem satisfied with basic click-and-read type content. And building more complex interactivity takes time, especially if we want to do it right. It also means more nuance to the way we package the course content. This wouldn’t work if all of the decisions to be made are very obvious.

Another challenge is that we tend to be in this somewhat nonsensical tracking and quizzing mode where it seems we’re less concerned with the actual learning and more concerned with course completion. In that world, there’s little room for testing ideas. And once the course is completed, it’s usually locked down by the learning management system. Thus it’s not even a great resource for reviewing later.

Creating these types of “what if” scenarios won’t work for all courses and content. And they do take more time and skill to build. However, they can enhance the learning experience and make the courses more engaging.

What types of courses do you think lend themselves to this type of training? And how would you set up the scenarios and process to test ideas?

Events

Free E-Learning Resources

Want to learn more? Check out these articles and free resources in the community.

Here’s a great job board for e-learning, instructional design, and training jobs

Participate in the weekly e-learning challenges to sharpen your skills

Get your free PowerPoint templates and free graphics & stock images.

Lots of cool e-learning examples to check out and find inspiration.

Getting Started? This e-learning 101 series and the free e-books will help.


how to create animated gif

Some people asked how I created the animated .gifs similar to the ones I gave away for free in this recent blog post. So today I’ll share a simple way to create them.

Start with Animated .Gif Software

There are a number of tools to create animated .gifs. I’m going to focus on just one for this post.

ScreenToGif is free and you don’t need to install it. Just run the .EXE file. It’s a great product and I use it all the time for quick demos or some of the animations I use in the blog.

I’m not going to do an exhaustive overview, so I recommend downloading the app and playing with it a bit. It’s intuitive and easy to figure out. As a side note, if you do use it, I encourage supporting the developer.

Understanding the Cover Image .Gifs

Cover images are mostly decorative. And because of the responsive nature of the Rise courses, the cover image gets cropped based on the screen’s aspect ratio. That means what you see in portrait won’t look the same in landscape.

animated .gif responsive design

The key is keep the cover images simple. Animated .gifs can become very large files. The more visual information on the screen, the larger the file size. And if the file is too large, it’ll take too long to download and ruin the effect and experience.

Stick with fewer colors. Solid backgrounds are good because you don’t get that blocky color striping that you get with pictures.

We’ll look at two ways to create the cover image animated .gifs. One way is by recording something onscreen and the other is to import a video.

Record Screen to Create Animated .Gif

The easiest thing it to play a video and record the screen. Then do some basic editing. Since the animated .gif is decorative, you just need something simple. The key is not to have a massive file. The more you record, the larger the file.

View the animated .gif tutorial on Youtube

Once you have a recording, figure out what you want and where to cut it. Again, I look for something simple that looks good looping. Subtle movements or repeating animations (like a spinning gear) work perfectly.

It does take some messing around. I usually do a basic edit and then save the file to see how large it is. Then I play around with more edits and image size to find the right balance between quality and file size.

You’ll have a lot more luck recording vector images that are solid versus photos. The less the screen has to change from one frame to the next, the better quality you’ll get and smaller file size.

For the .gifs where the quality doesn’t look as good, I set the cover images’s overlay color darker. This way the text really pops off the screen and the animation quality isn’t as much of an issue. That’s what I did in this example where there were so many colors it just didn’t look as good as I wanted.

Import a Video to Create Animated .Gif

ScreenToGif makes it really easy to import a video. It breaks down all the frames and from there it’s just a matter of editing it to what you want.

Just like above, play around with different settings to see what gives you the right balance between file size and quality. And keep in mind, they’re header images so subtle movement is fine. For this overhead desk video, I just focused on the pencil moving and cut out hundreds of frames.

View the animated .gif tutorial on Youtube

Bonus tips:

  • You won’t get crisp images because the file size needs to be manageable. I try not to go over 1.5 MB. That’s why you have to play around with settings that strike the right balance.
  • You need to test different dimensions, but I generally keep the images somewhere between a 16:9 and 2:1 aspect ratio. There’s no golden rule. It’s mostly based on what you are showing. The image is going to crop based on the screen, anyway. I make different versions and modify the image size to see what I get for file size and quality.

animated gifs from vector videos

  • Solid and/or fewer colors is best. There are a lot of free or inexpensive ways to create simple vector-based animation videos. That’s what I did to create these two headers above which you can see in these two examples: Call Center and Team Meeting. I inserted some animated characters and published a video. Then I made the .gif from the video. Because I’m not building a big animated explainer video, this only took a few minutes to do and looks decent.

Animated .gifs add some flavor and visual novelty to your courses. And as you can see, they’re easy to create.

Events

Free E-Learning Resources

Want to learn more? Check out these articles and free resources in the community.

Here’s a great job board for e-learning, instructional design, and training jobs

Participate in the weekly e-learning challenges to sharpen your skills

Get your free PowerPoint templates and free graphics & stock images.

Lots of cool e-learning examples to check out and find inspiration.

Getting Started? This e-learning 101 series and the free e-books will help.


create videos in PowerPoint

One of my favorite features in PowerPoint is saving the PowerPoint slideshow as a video. That means anything you put on the PowerPoint slides (from animations to slide transitions) is output as video. With some creativity, you can pull together some pretty slick explainer-type presentations with a tool most of us already have.

Today, I want to show something simple that may give you some ideas for your own training videos.

Create Videos in PowerPoint: Examples

Before we get started, here’s a cool example from Duarte that Microsoft included in the PowerPoint 2010 template pack. The Duarte team created a great presentation that showed off what could be done with the new features back in PowerPoint 2010. And as you can see below, their presentation translates to video, as well.

Create Videos in PowerPoint: Slide or Slideshow?

While the example above was an entire slideshow that included some cool animations and effective transitions, you don’t need to create whole presentations. You can publish single slides, too.

And the slide doesn’t need to be normal slide content. It could be a single video. And that video can be formatted using the PowerPoint features.

That means you can insert video into a PowerPoint slide, make some simple edits, and then output that slide as a video. Pretty slick when you think about the possibilities.

And that’s the trick I want to share.

Customize Framed Videos in PowerPoint

Why do videos need to be rectangular? Why can’t they have frames or display as shapes? That’s all possible in PowerPoint.

Here are the basic steps to create framed videos in PowerPoint.

  • Insert a video on the slide.
  • Add whatever effect you want for the video.
  • Size the video to fit the slide.
  • Save the video as MP4.

Here’s a demo of some of the videos in a Rise.

Click here to view Rise demo.

As you can see, there are some neat things you can do, especially considering that you are doing all of this in PowerPoint and not required to use a more sophisticated video application.

Now it’s your turn.

Events

Free E-Learning Resources

Want to learn more? Check out these articles and free resources in the community.

Here’s a great job board for e-learning, instructional design, and training jobs

Participate in the weekly e-learning challenges to sharpen your skills

Get your free PowerPoint templates and free graphics & stock images.

Lots of cool e-learning examples to check out and find inspiration.

Getting Started? This e-learning 101 series and the free e-books will help.


free animated gifs

I did a workshop on simple ways to create animated .gifs for e-learning courses. In part of the workshop we play around with using them as header graphics for Rise courses.

Header graphics are mostly decorative so the trick is to get decent enough quality while keeping the file size down (which is a major challenge with animated .gifs). I created a number of .gifs from some generic videos and figured I’d share them here for those who may be interested in using them.

Examples of Headers Using Animated Gifs

Here are some nice example courses that use .gifs. I think the animations really work well because they add some visual novelty and interest.

animated .gif headers from Rise

Click through the course examples because there are some other really cool uses of animated .gifs throughout.

Examples of Free Animated Gif Headers

free downloads animated .gif headers for Rise

Here are a few demos to see what they look like as headers in Rise courses. Personally, I am more partial to the vector examples. Which do you prefer?

There are more in the folder. You can download the animated .gifs here.

Keep in mind that these were used for training activities, but I did keep the headers somewhat generic so that they may be used in other projects. Hopefully you can use them and get some ideas on how you could create your own.

Events

Free E-Learning Resources

Want to learn more? Check out these articles and free resources in the community.

Here’s a great job board for e-learning, instructional design, and training jobs

Participate in the weekly e-learning challenges to sharpen your skills

Get your free PowerPoint templates and free graphics & stock images.

Lots of cool e-learning examples to check out and find inspiration.

Getting Started? This e-learning 101 series and the free e-books will help.