Articulate 101: How to Make the Most of Your Recorded Audio
This is the 27th post in the Articulate 101 series. It was written by Articulate MVP Phil Corriveau (AKA Spectre), who uses Articulate tools to help power Fannie Mae’s elearning programs.
This month, Justin Wilcox has already provided us with some great tips on selecting a microphone and how to get the best recordings. Following his advice will help you get the optimal quality for your recordings.
Today I’ll offer some suggestions that can help you enhance the quality of your voiceover audio after the recording.
Note that the tips discussed here are based on the assumption that you are using a dedicated audio application for your recording and editing chores.
Important: Make a copy of your audio files before trying these tips.
Be sure to use headphones!
 Whether you are recording a new file or editing existing ones, the use of headphones is a must — as this is the only way you’ll be able to truly hear the recording (warts and all) versus the use of built-in PC speakers or cheap external speakers. Besides, much of your audience will probably be using headphones, so why not hear what they are going to hear? Although the price and quality of headphones can vary widely, even an inexpensive set ($20 or so) with no bass enhancement should be sufficient for editing audio you’ll be importing into Articulate Presenter and listening to the published output.
Compression
The use of audio compression (not to be confused with .MP3 file compression) can be an effective way to enhance the quality of your voiceover recordings. The most immediate benefit of compression is that it helps to maintain a consistent volume level across audio clips, which is why radio stations regularly use it. But an additional benefit of audio compression is that it can add punch to the narrator’s voice.
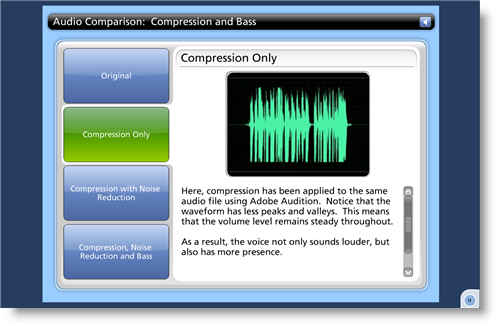
Here’s a brief explanation of how audio compression works: The software first looks at the range of peaks and valleys in an audio clip (which is natural with the human voice), then narrows this range in volume. Below is an example of how an audio waveform looks before and after compression. Keep in mind that in places where the waveform is taller, the sound is louder. In places where the waveform is shorter, the sound is softer.
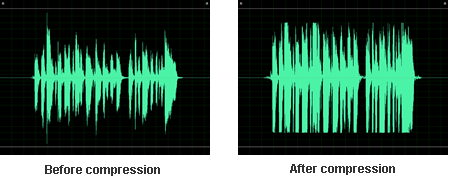
As you see in this comparison, the audio clip that was compressed has a greatly diminished number of peaks and valleys, with a majority of the waveform on the tall side. This results in a consistently loud volume throughout the audio clip.
In case you were wondering, compression differs greatly from normalizing audio (known in Articulate Presenter as "optimizing audio volume"), which simply raises the overall volume of an audio clip a certain amount based on its loudest part. Because of the way normalization handles volume levels, it is not uncommon to have a group of files that sound like they are at different volume levels — even when they are all normalized at the same settings. However, normalization is not a bad thing — it can work very well in a number of situations, including working with audio that has already been compressed.
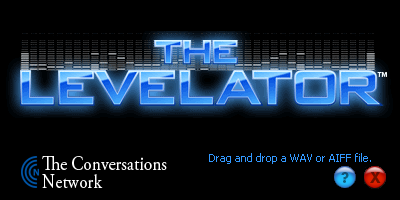
The Levelator is one freeware tool that does a nice job of compressing and normalizing waveforms, and has an easy, drag-and-drop interface with no settings to play with.
If you would like to have more control and the ability to apply a greater degree of compression, there are a number of noteworthy applications, including Adobe Audition and Sony Sound Forge.
One caveat about using compression: if you have a considerable amount of background noise in your recording, applying audio compression can actually raise the volume of this noise. That is why starting with well-recorded audio is paramount.
Noise reduction
Let’s face it: Most of us don’t have the luxury of recording in a perfectly quiet environment when we record. A/C vents, fluorescent lights, and microphone/soundcard buzz are among the background noises that can challenge our ability to produce clean-sounding recordings.
The Noise Reduction (NR) feature that is included in many of the mid-level sound applications (approximately $250 and up) can substantially reduce the amount of steady noise in your recordings. Although this function will vary slightly by application, it will allow you to specify the consistent unwanted noise in a audio clip and have it removed throughout. These same applications may also offer other NR functions that are highly effective.
The concept of NR can get complicated and is not something I’ll go into detail here. But you can find a number of tutorials on the web that address using NR with a particular software product.
I should point out that the NR feature is not a miracle worker for every noisy recording, but it can often salvage audio that was once thought unacceptable due to noise. Whether you regularly encounter noise challenges or simply aim to have the cleanest-sounding audio, you might consider investing in software that offers NR functionality.
Add some bass
In the Articulate Forums, we occasionally hear from users who express disappointment about their recordings sounding washed out when compared with their originals. First, let me explain why this happens.
When your audio files are published in Articulate, they are encoded in the .MP3 format, which reduces file sizes to a fraction of the original. To perform this trick, certain frequencies are removed from the audio — with bass frequencies taking the biggest hit (especially with Articulate’s quality settings of 32Kbps and below).
Keep in mind that a considerable loss in quality will always occur when audio is .MP3-encoded to such small file sizes. With that said, there is one little trick that can often help reduce this side effect: Add some bass to your audio before importing into Articulate. It can be particularly effective with recordings of higher-pitched voices.
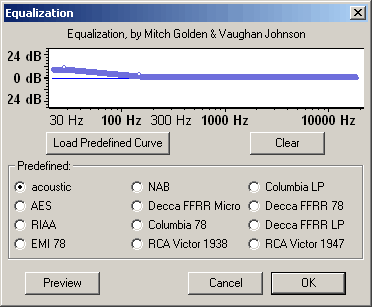
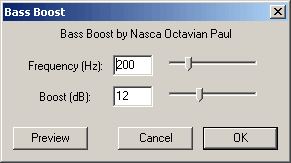
Most audio editing applications — including the freeware Audacity — have a graphic equalizer function that will give you the ability to add the right amount of bass to your audio clips. Audacity also offers a bass boost feature as well.
After applying bass to a file, do the following:
- Import the file into Articulate Presenter
- Publish the presentation
- Listen with your headphones
If it doesn’t sound right, go back to the original and try it again with different bass settings. Although it may take a few minutes to find the correct bass adjustments, you are likely to obtain some improvement in the sound quality.
Hear for yourself
I encourage you to listen to some audio samples I posted that demonstrate how an audio file can sound when compression, noise reduction, and bass are applied.
View the audio compression demo
All of the samples have been published at a quality setting of 32Kbps. When listening, do you notice a difference? Is there one sample that stands out in your mind?
The tips I’ve provided here are merely suggestions on how you can massage your audio. There is a great deal of subjectivity involved in audio enhancement, and it will require some trial and error on your part. But you’ll find that by trying some of these tricks — and by having a little patience — you can take your audio to the next level.
Subscribe to the blog via email or RSS feed to make sure you don’t miss out on tomorrow’s tip.
Phil is a member of Fannie Mae’s Customer Education Group in Washington, DC. His 20 years of experience has involved technical writing, instructional design and standup training, as well as audio production, video production and interactive media development.

20 responses to “Articulate 101: How to Make the Most of Your Recorded Audio”
Phil – great stuff!!
Was the Audio Compression demo done in Engage?
Thanks for the question Sheila and I appreciate the kind words.
Yes, I used Engage–importing the WAV audio files (edited with Adobe Audition)into Engage. The Engage output was inserted into a single slide PPT file and lastly, I published with Presenter.
I hope that info helps. If you have further questions, please let me know.
-Phil
Good post and great examples.
[…] How to Make the Most of Your Recorded Audio […]
Excellent post, very helpful, practical and clear information! The audio demonstration was particularly helpful in convincing me to take a few extra steps to ensure quality.
Is there any way to set the initial volume to anything other than 100%?
If I understand correctly, Presenter compresses whatever audio is imported at the point of import. — Even if that audio is already an mp3 file. Is that correct? Is there any way to circumvent this double compression?
And what about .jpg, .gif, and .png images? What do you recommend in terms of preparing images for insertion in Powerpoint to be converted to Presenter assuming the output will be to the Web? Should they be optimized for Web before being inserted? Or will that result in a second compression being applied?
Perfect – Just what I was looking for!
My client will be pleased!
Paul.
I have a doubt regarding audio inserted in a flash file and then the flash file is imported into articulate. When published there is a difference in audio levels in the flash file and audio inserted through articulate. Any inputs on how to tackle this situation?
Great info only one question:
I have several presenters using simple PPT narration functionality (they do not have presenter). I then grab their PPT with narration auio included and I use presenter to publish it. Is this a good practice? do I need to change/compress, etc each audio bit for each slide before I do that? Can someone recommend a good way to do this?
Thanks in advance.
R.
It really depends on the quality of the recordings and if you can spend the time performing the enhancements. Because I highly value audio quality (and can be very picky), I generally perform enhancements on all of my recordings.
If you were to do this with audio embedded in a PowerPoint deck, you would need to first save the PowerPoint file as a web page–which would create not only an HTML file, but a folder with WAV files as well (of course, save a backup copy first). Here’s an article that gives a quick description of the process:
http://eventsmedia.blogspot.com/2005/08/extract-sound-files-from-powerpoint.html
Before importing the enhanced files, you would also need to remove the embedded audio from each of the slides..
Moving forward, it would be easier (for you at least) to have them record using the freeware Audacity–saving a WAV file for each slide. This way, you wouldn’t have to jump through hoops to get the audio out of the PowerPoint deck.
Just some thoughts…hope it helps…
Phil
[…] Here’s a video snippet from one of the excellent customer presentations by Phil Corriveau of Fannie Mae, talking about audio recording tips (as he’s also written about on this blog): […]
High quality sound is very important to us as well, since our primary business is producing audio and video podcast programs. Phil is on the right track when he points out the low default bitrate Articulate proposes using for encoding the narration files into the finished project. Many podcasters use bit rates of 32kb or 64kb to encode their podcasts but we find that produces far too many artifacts and makes the finished sound seem muddy. We encode audio for our podcasts and our Articulate presentations at 192kb, which is closer to CD quality. We use Levelator, which is an excellent tool for smoothing out variations, especially if you have multiple speakers on separate channels where the levels might not be matched as well as you like. We also use a very excellent (expensive) VST plug-in called Bias Sound Soap Pro which gives broad control over noise reduction of several different kinds of noise and the ability to adjust the noise reduction in various slices of the frequency spectrum.
We know this produces a much larger output file, but with the vast majority of users accessing the Internet over high-speed broadband connections rather than dial-up, we think audiences appreciate the fact that our sound is crisp and nearly as good as the commercial broadcast podcasts they hear from NPR, CNN and others.
[…] Use The Levelator to make the most of your audio […]
[…] How to Make the Most of Your Recorded Audio by Articulate MVP Spectre […]
Phil – How do you use the preloader with engage files? I am using the multimedia with multiple swf files. Do I load each swf file in order? I am playing the engage through presenter.
Thanks for your help.
Jack Brown
Jack, this article addresses audio. Please see my answers to your questions in my other article:
http://www.articulate.com/blog/articulate-101-how-to-improve-download-time-for-your-presenter-course/
[…] Remember if you want good audio, starts with a good mic like the Samson Go Mic (a deal at less than $50) and then learn to do some basic audio production. […]
I see someone else a while back made the same observation we are making – the audio of imported flash and imported wav files is different once the product is published. However, I also wonder why when the same wav is imported for the slide and then again for an engage interaction (with no adjustments made to the original wav) – why does the interaction audio sound better than the slide audio? They were the exact same wav. Does engage compress differently than presenter? Why? How do I off-set that difference? I understand that there are audio compression, noise reduction, and normalizing options to try to improve the audio for Articulate, but it seems that there is something else going on that the slide audio is so much different than the engage interaction and the flash that was imported (both of which should’ve been compressed some as well). Suggestions of how to make all audio the same (particulary between the engage and slides)??
Presenter and Engage use the same encoder/compression for audio. From my experience, if you specify the same audio quality settings in both applications, you shouldn’t hear a difference.
If you have further questions or want to discuss further, I encourage you to check out the Articulate Forums (http://community.articulate.com/forums/)–as this blog entry is nearly four years old and will likely get few responses from others.
Comments are closed on this post. Need more help? Post your question in the E-Learning Heroes Discussions.