Working in Higher Education? You Can Be an E-Lecture Rock Star
This guest blog entry was written by Mike Enders, a psychology instructor at Northcentral Technical College in Wisconsin. Mike augments his classes with e-learning created in Articulate Studio. He’s also sole proprietor of Enders Design.
 This one goes out to all the folks in higher education.
Suppose your Dean just requested that you start delivering your courses online. You’re struggling to figure out how to do it. Where do you start? Do you just type out your lectures and give learners a printable document? Do you create a podcast?
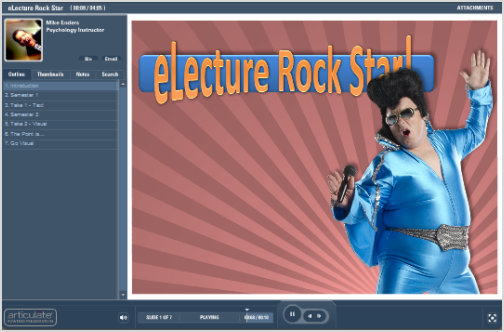
Oh no, my friends, you can do better! Buckle up and grab your Articulate Studio, because we’re going to turn you into an e-lecture rock star!
Semester 1: Just Narrate, Baby!
Let’s take this in stages. We’ll call the first stage Semester 1. This is when you create audio narration for your lecture, and move your material to an online format. All this might not feel particularly glamorous, but even rock stars need to start somewhere, and moving from point A to Z is going to take a little time and thought. So the first semester is all about pragmatism!
 Here’s what I recommend: copy all that text you have on your lecture slides, and paste it into the notes pane of your PowerPoint file. This will be the foundation of your script. Next, mentally perform your lecture, and alter the script in the notes pane to match what you actually say when you talk to your students. Reality is, you’ll share more meaningful information and you’ll say it in a natural way.
Once you’ve gotten your script prepared, your assignment is to narrate your course with Articulate Presenter (check out this tutorial if you need help with that) and then revel in the victory as you publish your e-lecture!
Semester 2: Mimic McCloud and Get Visual!
Okay, you’ve recorded your narration, and you’ve taken your first pass at publishing your e-lecture. That’s a good start. Now, to really crank things up a notch, let’s move to the next stage — Semester 2 — where we’ll look at how to make your e-lecture more visually powerful.
But before we do that, a moment of painful self-disclosure. When I was a new faculty member, my frantic preparation for class looked like this: I’d simply grab the publisher’s PowerPoints, add some more text, and off I’d go. And, to be honest, I used the slides as a presentation crutch. Recently, I went back into my archives and pulled out some of my old slides. Take a look at these beauties:

It didn’t take long to realize that my students were missing out on some important learning outcomes, if all I gave them was hours of me lecturing over a bunch of text-filled screens.
We humans are drawn to good stories, and the best story tellers are able to help us visualize the worlds they are describing. As it stands, your lecture has a good script and narration, but it’s probably lacking some compelling visuals. And to be an e-lecture rock star, you need to get visual.
To illustrate the power of visuals, I offer one of my favorite TED talks, by Scott McCloud. Imagine how much less powerful McCloud’s presentation would be if he filled his PowerPoint slides with text instead of images (you’ll get the gist within the first few minutes):
View this talk on the Ted.com site
So your next goal is to mimic McCloud and redesign your PowerPoints as story enhancers. Start trimming down the amount of text on your slides. Replace it with images that support your narrative. Think like a movie director. What are the images that you want people to see as you tell them your story? Understand that it’s not simply about making the presentation more aesthetically pleasing. Rather, there’s a real science behind building meaningful visuals into your PowerPoint slides.
Ask yourself: how can I use images to increase my learners’ understanding and retention? Build those images into your slides to replace some of that text. (And don’t forget to take advantage of Articulate Presenter’s annotation tools to point out the important details of your images!)
Here’s an example I created in Presenter to illustrate the important change that happens when we get more visual with our e-lectures:
Semester 3: Leverage the Articulate Tools!
By now you’ve created a much more engaging e-lecture for your learners. Now let’s move on to Semester 3, when you’re going to take your act to the next level by embracing the glory that is Articulate Studio. Here are a few ideas for how you can do it:
- Use Quizmaker to provide periodic learning checks to test your students’ understanding of the material during your e-lecture. Tom Kuhlmann’s recent blog post on Quizmaker is a great starting point and will give you inspiration for how you can begin taking advantage of this powerful tool.
- Build some of your lecture content in Articulate Engage. This is a quick, easy way to give your learners a more interactive experience. Perhaps you’re teaching a computer hardware course and you can leverage a Process interaction to provide a quick “how to” process for your students. Or maybe you want to provide a Labeled Graphic showing key areas of the brain, so that learners can explore details about particular structures. The possibilities are wide open. Explore some of the interaction types available, and give them a try.
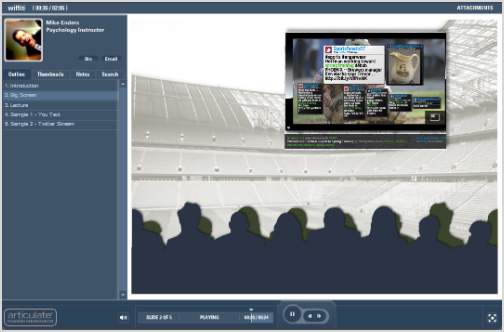
- Use Presenter’s Web Objects to enhance your presentation with web resources. Brian Batt’s blog post from earlier this month provides some cool ideas for embedding Web Objects such as maps and videos. If your institution has a subscription to an online video repository, this is a great way to integrate it. Or here’s another idea: create a Wiffiti screen to bring some dynamic content into your course. Check out this example:
I hope the ideas here will help you begin to take what used to be a passive lecture and transform it into a more active, engaging, memorable learning experience. If you wish to travel further down this path, I highly recommend that you become active in the Articulate Community and subscribe to the Rapid E-Learning Blog. You’ll not regret the education you receive!
What other ideas do you have for integrating Articulate tools into your e-lectures? I’d love to hear them. Please share in the comments section below.


3 responses to “Working in Higher Education? You Can Be an E-Lecture Rock Star”
Hi Mike. This is a great post. I had never heard of Wiffiti before and your demo got my thinking of some new possibilities. Thank you for sharing your Articulate ideas and tool suggestions.
Stephanie
[…] This post was mentioned on Twitter by Brian Batt, unbonline, ASTD-VOS, Mary Beth Messner, CharityDishonFischer and others. CharityDishonFischer said: Fantastic post! @endersdesign: Working in Higher Education? You Can Be an E-Lecture Rock Star http://bit.ly/aPwKu7 […]
Jeanette,
Wow, you did quite a makeover on the blog post! =)
Mike
Comments are closed on this post. Need more help? Post your question in the E-Learning Heroes Discussions.