Articulate 101: How to Use Multiple Images in a Quizmaker Question
This is the 17th post in the Articulate 101 series. It was written by Articulate MVP Dr. Rob Blankenship, who uses Articulate tools to help power EMsono – Online Emergency Ultrasound Education.
Have you ever wanted to have more than one image in your Quizmaker question? I have. I had never seen any Community Forums posts on the topic, so I decided one day to find a way to make this happen.
In short, you can accomplish this with Engage, Captivate, or other such products. However, I want to show you how to do this easily with SnagIt. I chose SnagIt because it is a very inexpensive program that offers lots of other capabilities for your e-learning projects.
Create an Interactive Image in SnagIt
Let’s say you are delivering instruction on wildlife and would like to ask a question about animal size. One way to accomplish this would be to combine all the images into one image and then insert them into Quizmaker. You could do this, but the image sizes would be small and may not look nice. By using SnagIt, we can cheat a little and show all three.
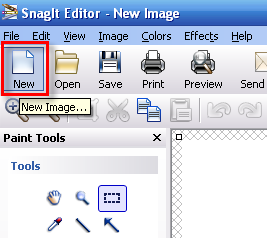
The first step to accomplishing our task of inserting multiple images into Quizmaker is to open SnagIt editor and select New:
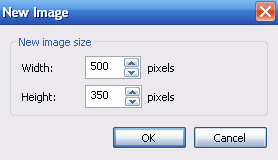
Then set the image size to 500 by 350 pixels:
Next, let’s use the Text Tool (![]() ) to insert some directions on how to view each image:
) to insert some directions on how to view each image:

Next, I use the Shape Tool (![]() ) to make three buttons along the bottom of the screen:
) to make three buttons along the bottom of the screen:

I then add some descriptive text for each of these buttons:
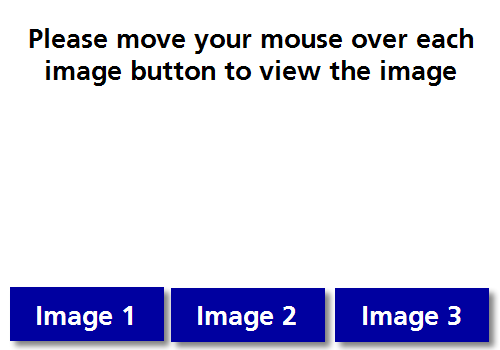
Now I have the basic framework of my "image" that I plan to use for Quizmaker. Now, I need to add some hotspots. To accomplish this, I will click the Links / Hotspots link in the Tasks bar:
![]()
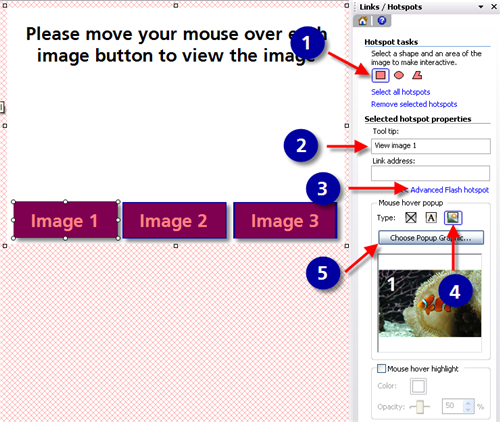
Then, I will add hotspots that cover each button. Luckily, making an interactive hotspot in SnagIt is very simple:
- First I select a rectangular hotspot to cover the image I have made (1).
- Then I type in the Tool Tip that I want displayed when the mouse hovers over this hotspot (2).
- To have an image appear when the mouse is over this hotspot, I need to click on the Advanced Flash hotspot link (3).
- Next, I select the image graphic to tell it I want an image to display when the mouse hovers over the hotspot (4).
- Lastly, I click on the Choose Popup Graphic button to select the image I want displayed with a mouse hover.
It may sound complicated, but it only takes about 10 seconds when you get used to the steps. I then need to repeat these steps for all of the buttons I have made.
When you have finished inserting your hotspots and the activities for each of them, click on the ![]() button.
button.
The last step to create your interactive image is to save the SnagIt file as a Flash .SWF file by selectingSave As… from the File menu and then naming your file:

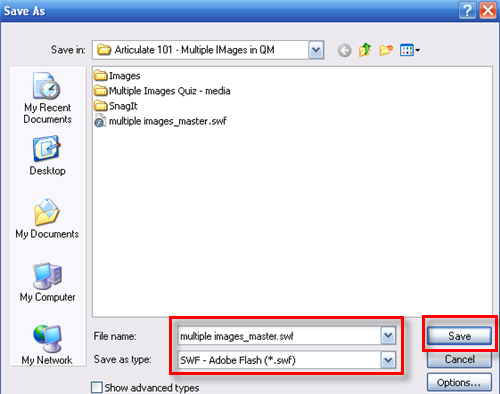
You are now finished with the “hard stuff.”
Insert Your Interactive SWF in Quizmaker
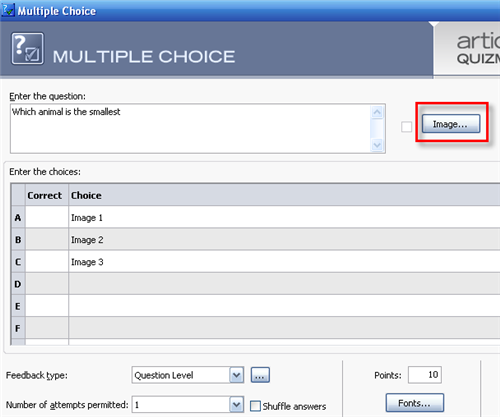
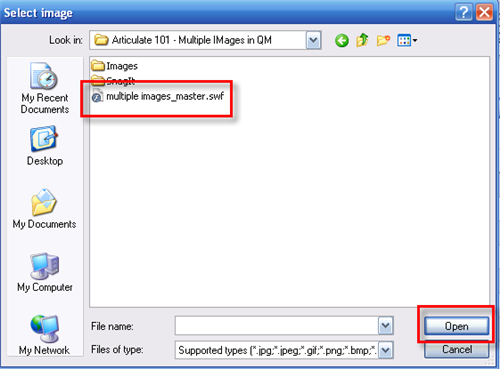
Now all you have to do is insert the .SWF file you just created as the "image" in your Quizmaker quiz question:
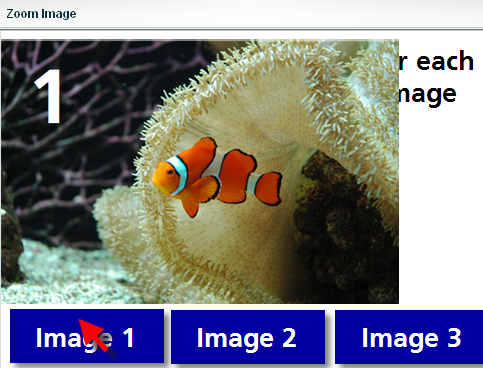
Now, when you publish your quiz (view published demo quiz), the user can see all three pictures, depending on which button the mouse is hovering over:
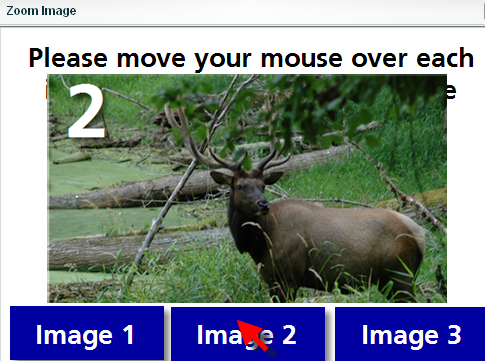
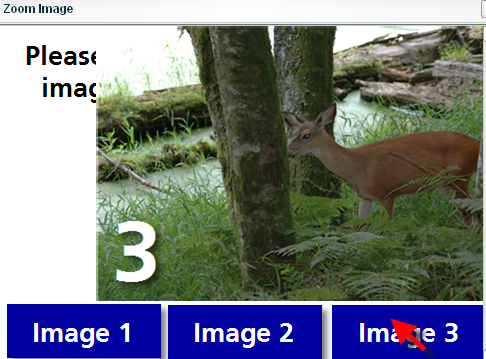
Want to test it out yourself? Get started by downloading the source files used in this blog entry:
Subscribe to the blog via email or RSS feed to make sure you don’t miss out on tomorrow’s tip.

5 responses to “Articulate 101: How to Use Multiple Images in a Quizmaker Question”
Thanks for the great tip, Rob. You Articulate MVP’s know your stuff!
Thank you for the kind words Mike.
This is great! Should the images be a certain size for each of them? I learned the hard way that the images I used were too large and got cut off…
I noticed that each of your three images had different dimensions… maybe to compensate for where they show up in the window when you hover over each?
Any suggestions for guidelines to use?
Thanks!
Pink Lady,
You do have to watch the sizes so they do not get cut off. When I use this technique I try to not let my images get larger than 400 x 230.
[…] your Quizmaker quizzes. Let’s say that we are adding another question to your wildlife quiz we built yesterday. This time, though, we are not testing size, but rather we want to know if our users can correctly […]
Comments are closed on this post. Need more help? Post your question in the E-Learning Heroes Discussions.