The Rapid Elearning Blog

Archive for January, 2009


One of the most common scenarios for rapid elearning developers is to take an existing PowerPoint presentation and convert it to an “elearning course.”  Sometimes you get the luxury of meeting with the subject matter expert and then reworking the content to transform it from a presentation to an elearning course.  However, there are many times when you have to take the content “as is” and then put it online.  The subject matter expert’s not too interested in reworking the content much.

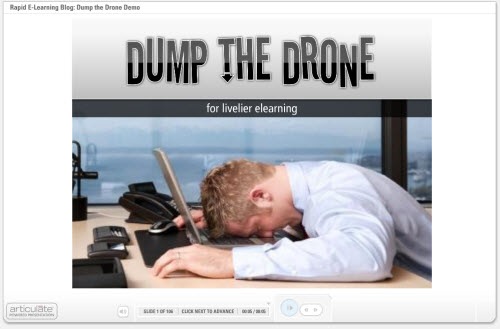
Cathy Moore’s Dump the Drone presentation is a good example of the type of presentation a client might ask you to convert and put online.   There’s really nothing wrong with Cathy’s version, but I asked her if I could use it for this post because as Elaine Bettis would say, “It’s blog-worthy.”  The content is great and I don’t have to come up with a fake presentation. 🙂

So here’s Cathy’s slide show that she gave as a conference presentation.


Click here to see the original slideshow.

Now, check out the demo I did using the Dump the Drone slides.  What I did was take Cathy’s  PowerPoint slides as if she were the subject matter expert and then applied different treatments to them. The idea here is not to convert Cathy’s slides verbatim. Instead I want to take you on a tour of different ways you can treat the slides that you get from your client. If this was a real course (and not a demo) I wouldn’t use all of these ideas together. I’d select a look and feel that was consistent throughout the course. This is just intended to give you some ideas to play with.

The Rapid E-Learning Blog - Dump the Drone Demo

Click here to view the elearning course.

There’s more than one way to create your slides.

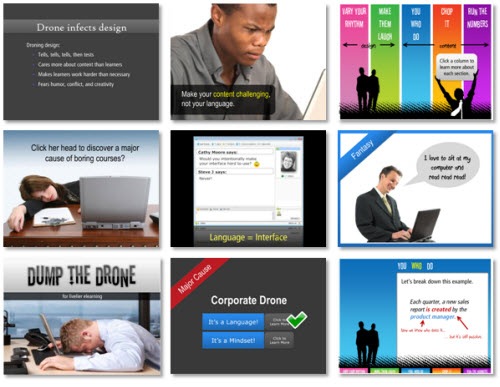
Just because you get a bullet point slide show doesn’t mean it has to stay that way.  Feel free to change the look and feel of the slides.  Look at the images below, they represent the different looks used in the demo.
The Rapid E-Learning Blog - Various presentation styles

As you can see, there are all sorts of ways to present the content.  You have a lot of freedom in how you design the look of the slides.  Even if your client gives you a very bland PowerPoint file, you can dress it up and make the visuals more appealing.  That’s not the case with Cathy’s file, but it might be with your subject matter expert.

Make the navigation non-linear.  

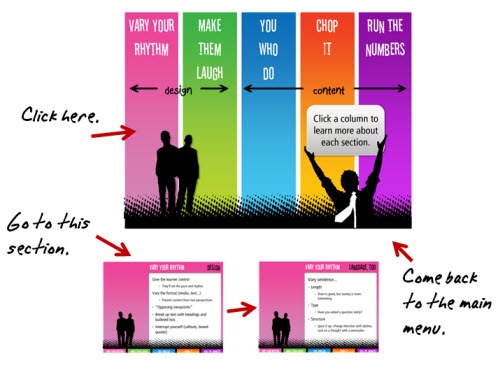
Most presentations follow a linear process where you go from one slide to the next.  When you convert those into elearning courses, you can rework some of the content by creating groups and a branched menu. 

For example, in Cathy’s presentation, I broke a few of the sections down into groups.  For each group I created a main menu.  The learner can click on a section within the main menu.  When they’re done, they always return to the main menu.  
The Rapid E-Learning Blog - Change up the navigation 

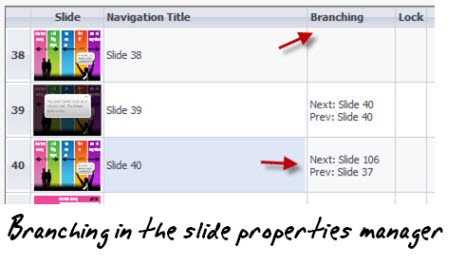
To build the menu, I used PowerPoint’s hyperlinking.  That lets me branch to the slide of my choice.  Depending on your software, you can control the branching of your player.  For example, in Presenter ’09, you can set the slides to branch back and forth to the slide of your choice.  That makes this approach very effective.
The Rapid E-Learning Blog - Branching in the slide properties manager

The benefit to this approach is that you can make the course seem more compressed and it gives the learner easier navigation.  They also have freedom to click where they want, which is a little more engaging than having to follow the path you direct.  So if they want to review all of the sections they can, or they can choose to go to the next section.  This works well if you have a mix of new and old learners who need different levels of information.

The Rapid E-Learning Blog - Tracking the user choice

If you notice on the first menu section on the “Corporate Drone,” I even built a little logic in the section.  When you select a path and come back, it’s checked off.  Go to the demo and try it out.  Click on the Mindset button first and see what happens.

Let your learners click on the screen to advance the presentation.

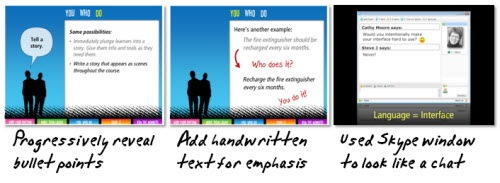
As you go through the demo, you’ll notice that there are some slides with just bullet points.  In some, the bullet points are all on the screen at the same time.  This makes it easy to read and move one.  However, on other slides, the bullet points progressively build. 

Even if you’re stuck with bullet points, there are a number of ways that you can present the information.  Progressively revealing your points is one way.  I think that switching to a handwritten text to highlight key pieces of information looks nice and draws the person’s attention to the screen.
The Rapid E-Learning Blog - Different ways to present linear information

If you can, convert some of your text to graphics.  This works really well if you have audio narration with your slides.  In one of the slides, I took the bullet point info and made it look like a chat session.  Get creative.  Cathy also has some good tips on
how to make your linear navigation more interesting.

Shhh!  Here’s a secret.

A lot of software applications have “Easter eggs.”  They’re secret buttons or steps you have to take to find additional information.  There’s no reason, you couldn’t do that in your courses.

For example, I routinely add secret navigation to my courses so that it’s easier for me to jump around when I test my demos.  I put one in this course, as well.  Click on the top left corner of the screen and you can quickly return home.
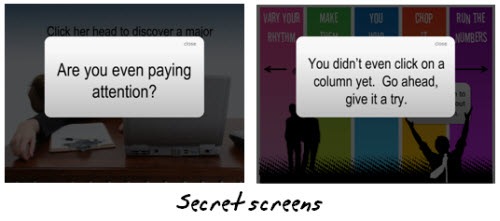
The Rapid E-Learning Blog - Secret screens

I also have some of those “Stop…you messed up!” screens, as you can see above.  The learner only sees them when they take a wrong turn.  There’s even a bonus Easter egg.  I’ll give you a hint.  My kids helped me add it and they were laughing the whole time, so it’s going to be juvenile.  Also, there’s a certain irony to the Easter egg. 🙂

I want to thank Cathy for letting me use her slides for this demo.  Aside, from my points, the content is spot on and very relevant to what rapid elearning is all about.

Speaking of Cathy, she’s also one of the presenters at the Articulate Live ’09 conference in Orlando.  She’s doing a session on action mapping that will be really good.  She does a great job teaching you to convert all of the subject matter content to create a great elearning course.  It’s all very practical information you’ll be able to apply to your projects right away.  In fact, if you register before February 20, you can win 2 hours of consulting time with Cathy Moore.  There’s more information below.

One last thing I’ll add because I hear so many negative things about PowerPoint. Outside of the images that came with Cathy’s presentation, everything else was built in PowerPoint 2007.

If you have any tips or tricks when converting your PowerPoint presentations to an elearning course, I’d love to hear them.  Feel free to share them with the community by going to the comments section at the end of this post.

Events

Free E-Learning Resources

Want to learn more? Check out these articles and free resources in the community.

Here’s a great job board for e-learning, instructional design, and training jobs

Participate in the weekly e-learning challenges to sharpen your skills

Get your free PowerPoint templates and free graphics & stock images.

Lots of cool e-learning examples to check out and find inspiration.

Getting Started? This e-learning 101 series and the free e-books will help.


A good elearning course always starts with good content.  However, content alone isn’t your only consideration when building elearning courses.  How your course LOOKS plays an important role.

One of the beefs people have with rapid elearning courses is that they tend to look like PowerPoint slide shows.  Even if the content is good and well presented, odds are that many of your learners will quickly tune out of your course.

There’s no reason that has to be the case because there are simple things you can do to make your courses look different and be more effective in teaching.

To get started, I highly recommend books like Beyond Bullet Points and Presentation Zen.  One that I’ve heard a lot about, but haven’t read yet, is Slide:ology.  These books help you think about how to present information in a new way.  You’ll learn to craft a better message and make screens that are more visually interesting.

If you have the budget, it’s always a good idea to bring on a graphic designer.  But the reality is that a budget and rapid elearning usually don’t go hand-in-hand.  In that case, you’re kind of left to fend for yourself.

In today’s post I’m going to talk about using blurred images.  Normally you don’t want a blurry image…like when you’re out walking and take a picture of a UFO hovering over the neighborhood.  However, when building your elearning course you can use blurry images to your advantage.

Direct Where Your Learner Looks

If you shoot a photo or video, you can change the focal depth. This allows you to blur the background and focus on the subject.  You do this; so that the eye is naturally drawn to the area that’s in focus.  It’s also a good way to take the focus off of background items that might interfere with the subject.

Suppose you’re presenting a scenario in your course.  Dave the accountant is on safari.  His driver was attacked by a baboon and carried off into the brush.  Dave’s stuck in the middle of nowhere by himself.  What’s he to do?  Compare the two images below.

blurry_dave1

There’s a lot going on in the screen above.  It might confuse your learners.  However, if you apply a simple blur to the image, you pull the focus away from less important information and transfer it to Dave where it belongs.

blurry_dave2

In the past I’ve used this to clean up images where there was a lot of noise in the background.  I even recall one project where there was an obvious safety violation in the picture and we couldn’t reshoot it.  So all I did was blur the background to hide it (and then prayed no one lost an eye).

Something that a lot of people don’t consider is that everything on your screen should be planned.  Whatever you put in front of your learners should contribute to the course.  You definitely don’t want irrelevant information competing with what you’re trying to convey.

Add Some Action to Your Image

Motion blurs are a good way to convey a sense of action without explaining a lot or having to spend the time to set a scene.  Look at the two images below.  If you saw them in a course, what do you think they say?

motion_blur3

motion_blur4

While the examples above are simple, the main point is that with some creativity, you can use the motion blur filter (or even a radial blur) to help set the tone for content in your elearning course.

You can get some good ideas of how to use a motion blur by looking at examples on some of the stock photo sites.  Just type in: motion blur.

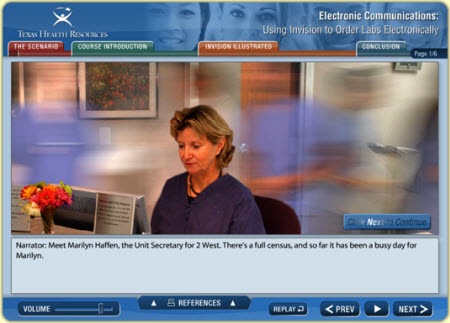
Here’s a screen shot of a course created by Enspire that I saw online a while back.  I did the screen grab because I thought it was a great example of how you can take a still image and give it a sense of action.  Add some busy office background noise and you can easily convey the sense of a lot going on…without having to explain it.

motion_blur5


Layer Images to Create Activity and Focus

Something that I like to do that doesn’t require a lot of work is to layer images that are out of focus.  By switch between them, I can direct the learner’s attention.  It’s kind of like the technique you might see in a movie.

For example, you focus on a flower, but then the focus shifts from the flower to something in the background.  You end up with the background in focus and the flower out of focus.  You can do something similar in your courses.

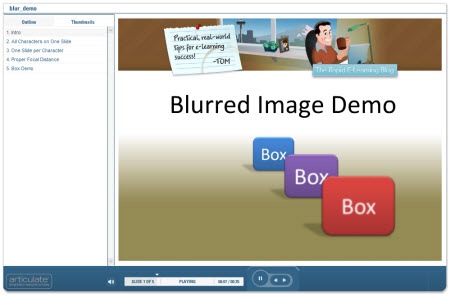
Check out the quick demo to give you some ideas and see it in action.

blur_demo

Click here to view the demo.

Here are a few points from the demo:

  • A blurred background can add visual interest to your course.  It adds some depth and helps pull your other content into focus.
  • You can mix and match clip art and photos.  Even if you don’t use the blur on your images, don’t be afraid to experiment.  The worst that can happen is that it doesn’t work.  In the demo, the background is a real photo and the characters are clip art.  I think if works on those slides.
  • You don’t need to put everything on one slide.  The first example is one slide.  The others are stretched over multiple slides.  I just hid them in the navigation panel.
  • As you can see, you can apply the effect to more than just your pictures.  It works great on text and shapes.

That’s a quick overview of how you can use blurred images in your elearning courses. You’ll have to learn how to do that with your graphics editor.  However, it’s usually a pretty easy process and the blur filter is standard.

Here’s a quick demo that I did to show you how to apply the blur effect with two free tools.  One is web-based.  The other is a desktop application.  Here are some links to free resources if you don’t have a graphics program.

I look forward to your comments and any ideas or tricks that you use.  Feel free to share them in the comments section.

Events

Free E-Learning Resources

Want to learn more? Check out these articles and free resources in the community.

Here’s a great job board for e-learning, instructional design, and training jobs

Participate in the weekly e-learning challenges to sharpen your skills

Get your free PowerPoint templates and free graphics & stock images.

Lots of cool e-learning examples to check out and find inspiration.

Getting Started? This e-learning 101 series and the free e-books will help.


If you want to learn to be a better elearning designer, look for good examples of what you’d like to do and then try to replicate them.  That’s what we discussed in the previous post Now You Can Design E-Learning Courses Like a Pro.  By doing this, you learn new production techniques, think through instructional design ideas, and gain confidence in your skills.

In today’s post, I’ll take you through the Froguts demo that I replicated and talk about some of the things I learned.  But first I want to cover two critical parts of successful rapid elearning design when working with PowerPoint.

Get over the PowerPoint stigma.  A screen’s a screen.  No one cares if what they see was built in PowerPoint or Flash.  All they care about is what it looks like and if it works.  Besides, when you build something in PowerPoint and you publish it with your rapid elearning software, it becomes Flash.  So instead of using Flash to build a SWF, you’re using PowerPoint to build a SWF.

Think in layers and not linear.  People are always asking me about how many slides a course should have.  This is the wrong approach when you’re building elearning courses.  Don’t think slides.  Think content.

You’re building an elearning course and not a presentation.  Even though you might be using PowerPoint to build both types of products, when you build an elearning course you need to think in a different way.

Think of slides as layers of information that you bring to the screen.  In other elearning applications, you have a screen with a layered play track.  Each object on the screen sits on its own layer. 

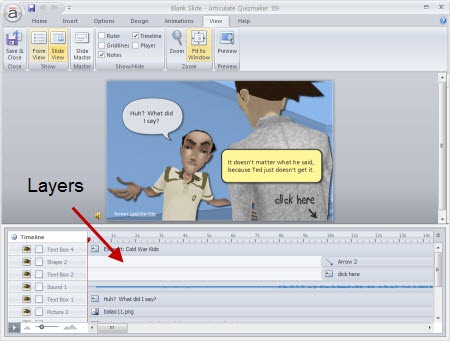
As an example, here’s a screen shot from Quizmaker ’09.  You see a single screen with layers for each object on the screen.

The Rapid E-Learning Blog: Quizmaker layers example

While PowerPoint’s interface is different, you want to think of each slide as a layer of information.  Some screens might consist of one slide of information and some might be ten slides of information.

Here’s a demo from my post, 10 Sure-Fire Tips to Becoming a Rapid E-learning Pro…Rapidly!  It’s a good example of how you see a single screen that’s actually made up of more than one slide.  The learner doesn’t care about slide count.  She’s just focusing on the interaction.

The Rapid E-Learning Blog: nonlinear use of PowerPoint slides

Click here to view the demo.

Once you start to think in layers rather than linear, it really opens up what you can do in PowerPoint.  But most important, it gets you to think about what you can do in different ways.  It’s all just a matter of figuring out how to do it.  And that’s what learning’s all about.

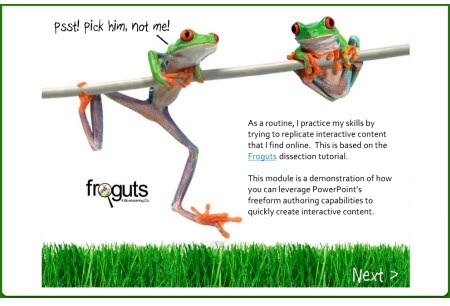
Here’s the Froguts demo.  Below that is a tutorial that is more show and tell.

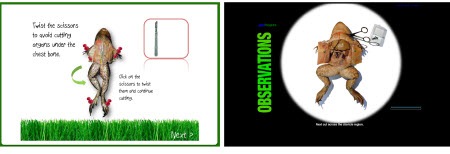
The Rapid E-Learning Blog: Fruguts recreated in PowerPoint

Click here to view demo.

There are some things in the demo that I would have changed if it was a real project but I left them because I can talk about what I’d do different.  Here’s a quick rundown of what I cover in the tutorial.

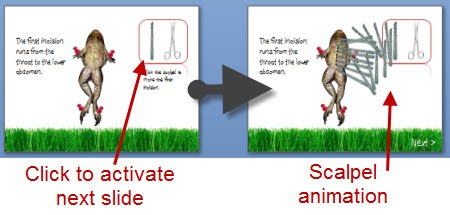
Duplicate slides that are linked can create interactivity.  One of the main challenges when working with PowerPoint was trying to replicate the drag and drop interaction.  Since you can’t build those in PowerPoint, what I did was duplicate the slides and use a combination of PowerPoint hyperlinks and custom animation.  When you click on a linked object it goes to the duplicate slide that starts the animation.

The Rapid E-Learning Blog: PowerPoint animation trigger 

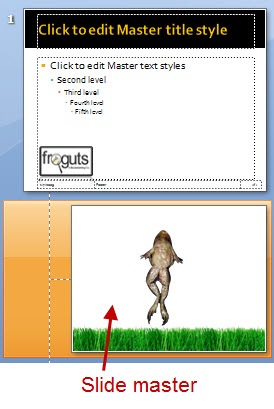
Use PowerPoint masters for images that you use a lot.  Originally, I had the frog images on all of the slides.  When I published the files, I ran into some alignment issues plus it took a little longer to publish because of all of the extra objects.

The Rapid E-Learning Blog: place images on the master slide

I fixed that by putting the main frog body on a master slide.  Then all I had to do was drop the dissection pieces on the slide.  The frog body was always in place and I didn’t need to worry about accidentally moving it.  It was also one less object on the screen to worry about during production.

PowerPoint slides can look like anything you want.  Since PowerPoint is a blank screen and you can move objects around freely, you can pretty much create or recreate any look you want.  PowerPoint 2007 has some nice graphic effects so all of the drop shadows and reflections you see in the demo were created with PowerPoint.

The Rapid E-Learning Blog: There's a lot you can do with the look of slides in PowerPoint

I like a more open feel, so I opted to change the darker spotlight effect of the original and went with more white space.  I also used a “fun” font.  I think the white screen with a little color from the grass is fresh.  That (and the font) gives the demo a lighter feel.

It’s important to consider the tone you set with your course.  The fonts, color schemes, and placement of objects on the screen all contribute to that. The tone you set for you course contributes to the impression people have of the course.  It gives you a chance to say something before you actually say something.

That’s a quick overview.  For more detail and to see some of the techniques in action, click on the tutorial below.  I’ve also included the PowerPoint file for you to download and deconstruct.

Here are some relevant tutorials from previous posts:

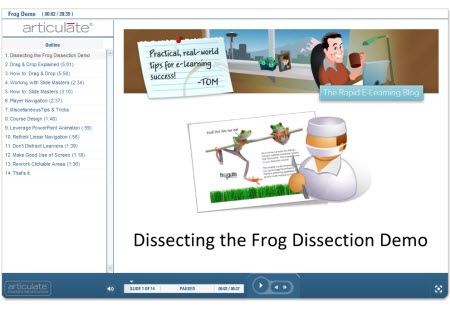
The Rapid E-Learning Blog: dissecting the course demo

Click here to view tutorial.

As you can see, there’s a lot to learn by deconstructing the elearning courses that you see.  And it doesn’t require that you replicate the entire course.  Perhaps it’s just a matter of figuring out how to get a certain type of interactivity or effect.  You’ll run into some challenges when you work with PowerPoint.  But by making a habit of doing this, you’ll learn new production techniques and you’ll come up with new ways to approach your own elearning courses.  And most of all, you’ll become more confident in your elearning skills.

I’ll be doing more of these types of posts this year.  Let me know what you think and feel free to share your own ideas and tips in the comments section.

Events

Free E-Learning Resources

Want to learn more? Check out these articles and free resources in the community.

Here’s a great job board for e-learning, instructional design, and training jobs

Participate in the weekly e-learning challenges to sharpen your skills

Get your free PowerPoint templates and free graphics & stock images.

Lots of cool e-learning examples to check out and find inspiration.

Getting Started? This e-learning 101 series and the free e-books will help.


I love to watch the TED videos.  I usually watch them on the plane when I travel.  What I like about them is that the subject matter is really interesting, the videos are just about the right length, and I always learn something.

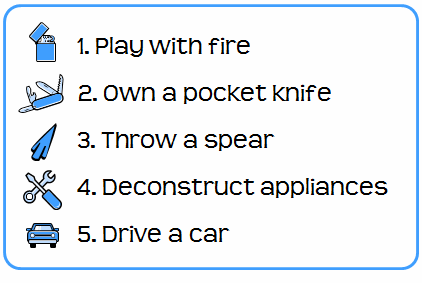
Recently I was watching Gever Tulley’s TED presentation, 5 Dangerous Things You Should Let Your Kids Do.  If you haven’t seen it I highly recommend it.  His five dangerous things are:

The Rapid E-Learning Blog - 5 Dangerous Things You Should Let Your Kids Do

After watching the video, I decided to get my seven-year-old son a small tool kit for Christmas so that we can work on dangerous thing number four and take some stuff apart.  My wife’s not too keen on him throwing spears or driving a car…or worse yet, throwing a flaming spear (that he sharpened with his pocket knife) out of a moving car.  So deconstructing appliances is the family-approved danger for now.

This past weekend we took apart an old toaster.   As we were dismantling it, we discussed how the toaster worked and what the different parts did.  It’s really kind of cool taking apart old appliances.  I was amazed at the simple yet effective design of the toaster.  There are things I wouldn’t know about it had I not taken it apart.

The Rapid E-Learning Blog - future rapid elearning designer

There’s a lesson in here for us instructional designers.  Sometimes the best way to learn is by taking apart the stuff other people have built.  And if that’s not possible, at least try to replicate it.

When I was learning video production, I’d record TV commercials and then break them down frame by frame.  I wanted to know how the edits were made and try to figure out what motivated them.  It proved one of the best learning processes for me.

I do something similar with elearning courses.  If I see a really good course that I know required some programming skills to build, I’ll try to rebuild it using PowerPoint and the rapid elearning software.  I want to see what I am able to do within those constraints.  In fact, one of the best ways to enhance your creativity is to work with constraints.  It forces you to problem solve and think in new ways.

Not everything can be replicated but it’s a great way to learn new techniques and to think through what makes a good course good.  If you want to learn how to use your rapid elearning tools better or to build more engaging courses, I highly recommend that you deconstruct those courses you find to be really good.

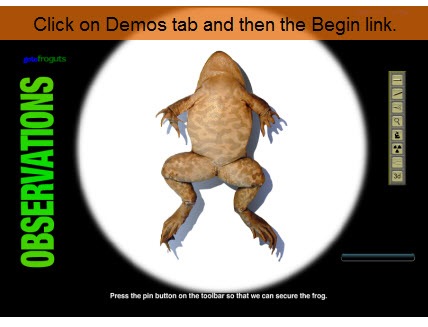
At a recent conference I was talking to someone who lamented that she was “stuck using PowerPoint” and didn’t have a Flash programmer.  I asked her for an example of what she’d like to do.  She pointed me to the Froguts.com demo

The Rapid E-Learning Blog - Froguts.com demo

Click here to view the demo*

If you haven’t seen it, check it out.  It’s really well done and a great way to avoid killing frogs for school experiments.

I told her that while she couldn’t replicate that type of course completely, she could definitely make a similar course with her rapid elearning software.  Not only that, it would probably be easier to make and take less time.

She didn’t buy that.  So I took up her challenge and built a quick mock up to show her how I’d approach this type of course.  Take a look at the demo I built below.  Once I had the assets, it took me about 5 hours to pull it all together.  It’s built entirely in PowerPoint.

*I did notice that the demo on the Froguts site has been updated, so the one I built is a little different.  However, it doesn’t change the essence of this post.

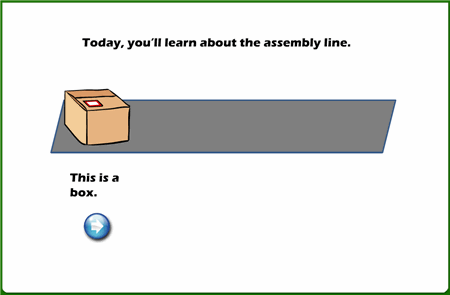
The Rapid E-Learning Blog - deconstructed frog demo

Click here to view demo.

While there are some limitations when you work in PowerPoint, I think you’ll agree that the version created in PowerPoint is a viable solution. There were some challenges trying to replicate the drag and drop functionality.  You’ll see what I did to overcome them. I also learned a few things while doing the demo that will make my next project go a little faster.

The main point here is that by trying to replicate good courses you’ll learn techniques that you can apply to your own elearning courses.  They’ll make your courses better and help you be more productive when building them.  You don’t even need to replicate the entire course.  For example, in this demo I could have just focused on the drag and drop functionality.

In next week’s post I’ll go through the version I built and discuss what I did and some of the things I learned that I can use the next time I work on a course.

Let me know what you think by clicking on the comments link.

Events

Free E-Learning Resources

Want to learn more? Check out these articles and free resources in the community.

Here’s a great job board for e-learning, instructional design, and training jobs

Participate in the weekly e-learning challenges to sharpen your skills

Get your free PowerPoint templates and free graphics & stock images.

Lots of cool e-learning examples to check out and find inspiration.

Getting Started? This e-learning 101 series and the free e-books will help.