What is the copyright law for using photos/images found on the internet for educational/training purposes only (not selling them)?
10 Sure-Fire Tips for Creating Your Own Stock Photos
December 16th, 2008Going to a stock image site and looking for just the right pictures can be very time-consuming and a drain on your limited resources. Why not create your own stock images? If rapid elearning software makes everyone an instructional designer, then surely a digital camera makes us all photographers. 🙂
Obviously, this approach doesn’t work for everyone and taking good photos is an art in itself. However, it is a cost effective approach and with some practice very viable.
Here are a few basic tips to get started.
1. Flood the area with light.
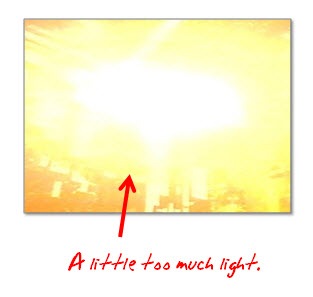
A lot of images appear grainy because there’s not enough light. A good rule of thumb is to flood the area with light. You’ll want to use as much light as possible without actually vaporizing your subjects. The more light you have, the better clarity you’ll get on the images. You can control the stark shadows by diffusing the light which you can do by bouncing it off of the walls or ceiling. Or just move the light source back a little.
2. Keep the image in focus.
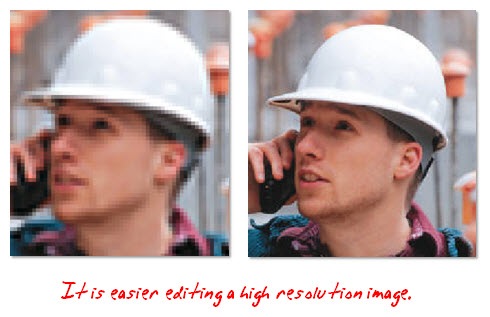
The problem with a lot of digital cameras is that after you take the shot, it looks great on that tiny LCD screen. However, when you get into the office to edit the photo you see that the image is a little out of focus. Your best bet is to use a tripod (or at least rest the camera on a solid surface).

3. Use the best quality settings you can to get the best image quality.
I had a friend who would always use the lowest settings on his digital camera because he wanted to have room for as many photos as possible. That made no sense. He had room for something like 5000 photos. If he had used the highest quality settings, he would have still been able to put a few hundred photos on the camera.
Here’s the deal. You can’t make a bad image good (even if you send it to Sunday school). So, you want the best quality possible from the get go. You can always frame and resize the pictures later. However, you won’t be able to make a low quality image better.
4. Remember the “rule of thirds.”
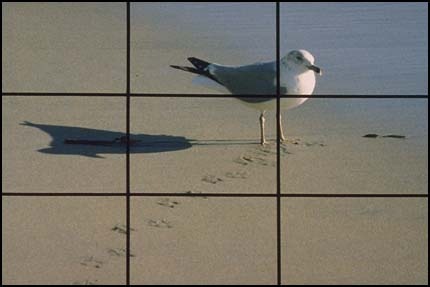
Divide your image in thirds. The best pictures will have the subject intersect two perpendicular lines. You can find a quick explanation of the rule of thirds here. My digital camera even has a grid feature to make this easier. Yours might, too.
The good thing with editing software is that you can always crop your photos to better frame your subjects and make the pictures more interesting. This is also why you want the best quality and highest resolution as a starting point.
5. Don’t take just one shot.
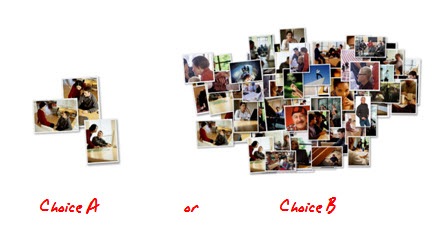
It used to annoy me when I’d send someone out to get a photo of a machine operator on the shop floor and he’d come back with just one picture. It’s a digital camera, for crying out loud! Take as many pictures as you possibly can. It’s not film. There are no development costs. The more choices you have, the better off you’ll be.
6. Create visual interest.
Make the images interesting by shooting from multiple angles and distances. Take one wide angle shot. Get another that’s closer and tighter. And, then do a close up, or even extreme close up. Get down low. Get up high. Tilt the camera a little. You don’t want all of your photos to look the same or be from the same angle.
Also, try to keep the people from looking at the camera. You want things to look natural.

7. Use real employees to make the images authentic.
People like to see co-workers and themselves in the elearning courses. Take advantage of this. It’s also a way to build some interest in the course prior to roll out since the break room will be abuzz, eagerly anticipating the final product.

8. Don’t use real employees because they could be losers.
There’s nothing worse than having John Doe (or your state’s governor) in your ethics course and then find out two weeks later that he was fired for lying about his sales quotas or worse.

Depending on your project, it might even be worth your while to hire a few people for a day and take as many photos as you can. For example, get a bunch of people in a business casual setting and then shoot images of all sorts of conversations. You can use the extras for future projects.
To keep costs down, I’ve done projects where I’ve had friends come in and we shot some quick photos. This works as long as they’re not fugitives or have warrants for their arrest.
9. Get signed releases.
You want to get signed releases to make sure all of your bases are covered. Here’s a link to learn more about releases. You probably want one for adults and one for minors.

10. Share your photos.
Everywhere I’ve worked, having the right type of images has been an issue. Sometimes all you need is a guy in a hard hat, or someone who’s not in a suit. These aren’t always easy to find. And, it’s not always cost effective to buy one, either.
Why not share your photos?
I have a friend that has shared his photos on stock.xchng. You can also join a user group on a site like Flickr and share your pictures using a Creative Commons license.
If you’re not inclined to shoot your own images, you can always find inexpensive stock photo subscriptions.
Shooting your own photos can save you a lot of time and money. With a little practice, there’s no reason why you can’t learn to do a good job. What are some other tips to help get the best image quality possible? Feel free to share them with us by clicking on the comments section.
Events
- Everyday. Check out the weekly training webinars to learn more about Rise, Storyline, and instructional design.
Free E-Learning Resources
 |
 |
 |
|
Want to learn more? Check out these articles and free resources in the community. |
Here’s a great job board for e-learning, instructional design, and training jobs |
Participate in the weekly e-learning challenges to sharpen your skills |
 |
 |
 |
|
Get your free PowerPoint templates and free graphics & stock images. |
Lots of cool e-learning examples to check out and find inspiration. |
Getting Started? This e-learning 101 series and the free e-books will help. |
35 responses to “10 Sure-Fire Tips for Creating Your Own Stock Photos”
A wonderful read and timely advice! It really is hard to find teh right pictures sometimes and I think many people are intimidated by the whole idea of photographing others. The release forms are an often overlooked (but essential) part of this process. You provided quick concise tips that will help anyone (even those of us who “think” we know what we’re doing when it comes to photography).
Excellent ideas.
We instituted a “picture day” at our company recently where we staged photos at multiple locations and corrdinated employees, lighting and props to get the pictures we identified as needing for our new webpages. It took a lot of planning and coordination but we now have a the perfect stock photos that not only show exactly what we need but are also recognizable people within the company. May benefits beyond the photos.
Tom,
Great article. Re: obtaining a release, would you prescribe the same thing for an employee doing voiceovers?
Check the following web page, if you want to know more about copyright laws and use in education/training materials. http://www.copyright.gov/fls/fl102.html
Don’t you think it’s funny that in every cop drama on TV, they can take a pixilated image from a surveillance camera with a fuzzy image of a license plate, and then the hero says, “Can you clean that up a bit” and Voila!, a super-crisp, perfectly focused image of the actual license and all it’s digits. I just love that… Someday, someone is going to finally admit that it’s all BS and that you can’t put pixels in a image that aren’t there. If you do, they’re approximations and going to be wrong most of the time. Your advice to take the pictures at the highest resolution is good advice.
This is very helpful! If I can use more of my own stock images, I believe that I would actually use images more often! 🙂
Photography is no longer as intimidating as it once was back “in the day” when grabbing a great “shot” was thwarted by the laymen’s lack of technology and good equipment.
I am quite interested in the copyrights for these created photos. I mean how do you get started with it.
Great idea with creating a group for your blog readers on Flickr. It can prove to be very useful if we try to keep it updated. If possible, I would like more information on the image licenses. I have tried to understand various types, but if there is one consolidated place where I can read about the various licenses and what it means to me as a corporate educator, it would be great.
As a professional who has over 20 years of experience with photography (and over 20 years of experience with instructional design), I’m always curious to see how “easy” it is to take photographs. However, I commend your efforts to encourage content developers to try creating their own photographs.
Your suggestions are helpful and point to a few of the common issues that I hear about each time I train people to improve their images. There’s always more to a skill involved when a skill looks easy; in fact, that’s how I know a person is really good: they make it look easy.
Besides, I continue to gain new students who want some help once people realize that owning a digital camera doesn’t transform a person into a photographer.
I enjoy your blog. Keep up the good work.
It is also very important to use photos, and graphics for that matter, that relate to the learning content. A good photo that supports the content adds a great deal to a course, but a good photo that has nothing to do with the content will confuse the learner.
These are great photography tips, thanks.
With all due respect I added some wording to your opening paragraph:
“If rapid elearning software makes everyone an instructional designer (along with the appropriate application of an ISD model such as ADDIE), then surely a digital camera makes us all photographers.”
I just couldn’t let that get by.
Thanks
A couple more photography tips:
1. Kill the Flash. Unless you have professional umbrella flashes and lighting, nothing makes your subjects look washed out and amateur like the “in camera” flash on most cameras. As Tom says, flood the area with light- enough light that you don’t need the flash (tripod are a must).
and speaking of light:
2. Use Three Light Sources, when shooting indoors. You should always try to use one direct light, one “diffused light” (a light that’s bounced off a wall or ceiling, and one back light that ensures that the background is well lit in addition to the foreground. Some of the best lights out there are those yellow “work lights” that someone probably has lying around in their garage.
3. Make-up. Yea, it’s true, make-up works.
I may have missed it in the Comments regarding Model Releases from any employees of your company.
If you’ll be taking photos at your place of employment, check with your H.R., Marketing, and Legal advisors first. Some companies do not allow their employees to be photographed, even to promote the company.
Just a suggestion learned from previous experience!
~Jenise
Tom, Its true. This works very well when we make use of our owm employee for the stock images. Recently for one of our e-learning course we did make use of our own staff’s postures for case studies to developed a course and it was really working out well…..
Some comments:
RE: It’s easy!:
Welll.. for a real professional look, use a professional photgrapher. However, many of the images we need are small and viewed over the web or via a browser and don’t need to be of perfect quality. So I suppose it depends on your needs.
RE: Copyright Issues:
Making your own avoids that, but getting releases is a smart move. Of course, you may not be the owner – in many cases, the company you work for will own the rights to what you create.
RE: Picture Quality:
If you’re handy with image software like Photoshop, note that digital pictures can often be shot in RAW format. Most digital cameras have internal software to compress the image files to make them smaller. Information is lost. When you use the RAW format, all of the information captured by the camera is saved and it gives you more to work with in the editng application.
Thanks for a truly wonderful and timely post!
Thanks for the article some good tips and confirmation my process is on the right track.
I have been collecting pics to use for some years now and the one tip I can agree with fully is TAKE LOTS OF THEM. You only make work for yourself if you get back to the production area and have to fiddle with the pics or compromise with second best.
Another tip I am sure was from here is that your pics must relate to your content otherwise you are sending conflicting messages and learning is diminished.
Hey,
It also matter what type of images you use throughout the course. Some may prefer photos while some illustrations. So if your are using Photos that has to be also consistent with the requirements. All the photos in a course should be a same style and color tone.
Having a professional photographer will be of great help in getting the right snap for your e-learning content. You always check, some of your staff may have all these qualities for taking the right snap. But its the Instructional designers role to plan the scene setting and the posture in coordination with the photographer.
Paulsharma Chakravarthy
This is a great article for us amateur photographer wannabes 🙂
I definitely try to take my own photos, too. They tend to add a little more life to the blog, and make things more personal.
5-10 were pretty new to me, so thanks for the tips!
[…] If, however, you happen to have talent in this area, here are
[…] 10 Sure-fire tips for creating your own stock photos. […]
[…] Last month the Rapid eLearning Blog by Tom Kuhlman included these 10 Sure-Fire Tips for Creating Your Own Stock Photos. […]
[…] possible solution is to shoot your own photos, which I covered in a previous blog post on creating your own stock images. However, you can run into issues with the image quality and who can and cannot be in the […]
[…] 10 Sure-Fire Tips for Creating Your Own Stock Photos […]
Always use the highest jpeg quality as you may end up using the photo for print and web. I find RAW a little cumbersome. Unless you are printing in National Geographic, it should not be necessary. You should invest in Photoshop LE as it is easy to select size and resolution. Many make the mistake of just stretching or shrinking the photo to fit. You should choose the size you want and then specify the resolution for web or print. For on-line only, I usually choose 100 dpi and for printing 300.
A Mac screen res is 72 dpi and a PC is 96. This means that it is wasted space to make the images any higher res than 100. Although Flash is pretty good at handling data, the best approach is to make the image as light as possible for the application you are using.
Also, break down and get a 35mm type camera with a minimum of 6 megapixels. As the newer cameras come out, buy last years version for a lot less. 10 megs is a pretty good deal now. Resolution is only half of what you need. The cheap home cameras do not have the lens quality of a Cannon or Nikon.
This program is very good to created a very lesson. The problem here is that this need a litter more practicing. And it so extend that it has a variety of tool to work with .
Nice for Presenter 09 I can use power point .
Thank you nice post
[…] Rapid E-Learning Blog offers 10 Sure-Fire Tips for Creating Your Own Stock Photos. In the post, you’ll learn these ten […]
I’ve always had problems with light. Whether I go for a lot or dim it slightly it just never looks professional.
Thank you for your ideas Tom. I’m an instructional designer and love photography. If I want to take my own shots for courses, what is the best way to get a simple image without any background. I like using the images on Microsoft’s images site with a simple image and no background. They look very clean and simple.
A great site for free stock images is http://www.sxc.hu. Another tip I find is to always have your camera with you. You never know when you’ll spot something priceless – even just a great view from a top-floor window. I might not take a Nikon D40 with me shopping, but you’d be surprised how often I pull out the iPod camera while out and about. Now that they can produce pretty good quality…
Thanks for all the tutorials, really make a difference!
I was wondering if I did get some “models” together (some neighbors, broke college kid acquaintances) how much should I offer to pay them? My budget is fairly low. I was the one who suggested we needed some stock photos of our own instead of paying a designer to create them. We’re a small faith-based non profit, and I just want to know what you might have paid some of your subjects in the past for a photo shoot. Mine certainly wouldn’t take all day.
[…] And read this post that offers more tips and tricks. […]
thanks for this post as im trying to put together a stockphoto gallery so my web design customers that my can use and i dont to create shoddy photos. ill take these tips on board


0
comments