I’m very new to Storyline, and this tutorial on what seems to be a complex concept was very clear and easy to follow. Mind you, I’ll have to watch it more than once to be able to do it myself, so I’m grateful this resource exists!
The Answer to the Community’s Number 1 E-Learning Question
August 14th, 2018
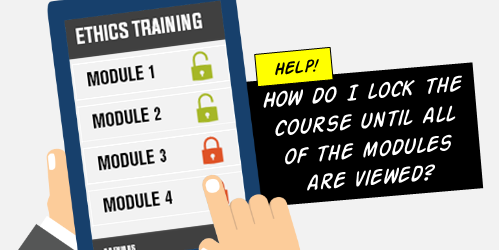
The question I see asked almost every day revolves around locking navigation until a user has completed a task. In the most common case, the first slide is a course menu. The user clicks a button, goes to a module, completes it, and comes back.
At that point, the module is marked complete and the user goes to another module and repeats the process until all of the modules are complete. Once that is satisfied, the user can continue.
There are a number of ways to approach this, but I’ll show the way that probably makes the most sense and is easiest to troubleshoot. In the process, I’ll offer a few bonus tips. Watch the tutorials for the details.
It Starts with Variables
Learn to use variables. The getting started tutorials show how and they offer some practice activities. In fact, the true false variable tutorials actually answer the top question asked.
For the novice, variables may seem intimidating, but once you understand them, they’re easy to use and give you a lot more control over the design of your course.
In Storyline, working with variables is a three-step process:
- Create a variable
- Use a trigger to adjust the value
- Use that value to do something
A variable is a piece of information. In this case, we use a variable to track if the person’s done something. We’ll use a true/false variable and start with an initial value of false (1. create variable). When the user completes a module, we create a trigger to change the value from false to true (2. adjust value). When all of the module variables are true, we can use a trigger to unlock the navigation (3. do something).
Tracking Navigation with Variables
Now let’s get started. I’ll write out the basic steps, but I recommend watching the video tutorial to get the detail.
Download the source file here.
Menu Slide
- Create a trigger to disable the next button when the timeline starts. This prevents the user from clicking forward.
- On the module buttons, add a custom “complete” state rather than using the “visited” state. You’ll use this to indicate the module is completed.
- Add a trigger on the buttons to jump to the specific modules.
- Add a trigger to change the state of the module button to complete when slide starts on the condition that the variable for that module is equal to true.
- Add a trigger to change the state of the next button to normal when the slide timeline starts on the condition that all variables are true.
Module Slides
- Create a true/false variable for each module that you’re tracking.
- Set the initial value to false.
- Name the variable so when it’s read it makes sense: such as Module1Complete = False
- On each module, add a trigger that adjusts the variable from false to true. It doesn’t matter what you use to trigger the event. Some people use a button and some use the last slide’s timeline. It really doesn’t matter. The main point is to have a trigger that adjusts the variable from false to true.
- Create a button that returns to the menu slide.
A few tips and common issues:
- Trigger order matters. Often the button has two triggers. One jumps to a slide and the other adjusts the variable. If the user jumps to the slide first, it leaves before the variable can be adjusted. Change the trigger order so that the variable changes and then leave the slide.
- “When timeline starts” is key when you visit the slide. Many people use a trigger to do something when the variable changes. However, when returning to the slide, the variable has already been changed. Thus nothing happens. You need to load the slide and then evaluate the value of the variables.
- Create custom states and don’t use the built-in visited state. I like to create custom states so that there’s no conflict with pre-built states. The built-in visited state doesn’t require triggers. If a user clicks on the object, it is visited. I’ve seen dozens of examples where users create conflicts between their triggers and the built-in states. It’s good to create your own states for specific control.
- Variables are best when leaving slides. A lot of people use states to trigger objects, such as change next button when the state of all buttons are visited. However, states are slide-specific and variables are available throughout the course. Variables also give you complete control. It just makes it easier to troubleshoot when using variables because you can see what’s going on.
- Use text references for variables. They let you see that the values are set and what they need to be. It’s challenging to troubleshoot if you can’t be sure that the variables are changing.
While today’s tutorial is relatively simple and limited to locking navigation, once you understand the core concepts, you can use similar techniques to create branched scenarios and adaptive learning paths.
That’s a quick run down of the most commonly asked question. Be sure to watch the video tutorial to see all of the details and some bonus tips. And if you haven’t watched the getting started tutorials, make the investment to go through them. They do answer many of the the questions I see in the community.
Events
- Everyday. Check out the weekly training webinars to learn more about Rise, Storyline, and instructional design.
Free E-Learning Resources
 |
 |
 |
|
Want to learn more? Check out these articles and free resources in the community. |
Here’s a great job board for e-learning, instructional design, and training jobs |
Participate in the weekly e-learning challenges to sharpen your skills |
 |
 |
 |
|
Get your free PowerPoint templates and free graphics & stock images. |
Lots of cool e-learning examples to check out and find inspiration. |
Getting Started? This e-learning 101 series and the free e-books will help. |
7 responses to “The Answer to the Community’s Number 1 E-Learning Question”
Thanks Tom. This is really helpful. I love variables, but they always scare me. This tutorial gives all the steps with multiple ways to set up the navigation.
Two questions:
1. What’s your source for the characters. Are those only in 360?
2. The video said you would share the source files, but I don’t see a download link in the article. Will you please add it?
Informative blog! Thanks for sharing it.
Nice blog! Thanks for sharing it.
Thanks for answering this question, Tom. This is a very thorough explanation and valuable for all the times I need to include variables.
I’m saddened to find that this is the most asked question, though. No other medium seems to think it so important to view every bit of content that users are prevented from proceeding until they do so. This is even true of live courses where learners progress in lock step, whether they have viewed the content or not (a disadvantage of live classrooms).
If we are operating with a Design ethic that focuses on user-centeredness, shouldn’t we allow users to go at their own pace and view content only as needed? I think this is something Michael Allen has been promoting heavily. Even Thiagi has his “Four Rooms” of learning – The library, the cafeteria, the playground, and the classroom.
As helpful as this post is (and it was VERY well done in conveying the information you want us to learn!), I would like to see a discussion on whether we should actually employ the skill you just imparted to us.
Thanks.


0
comments