The Rapid Elearning Blog

Archive for the ‘E-learning Examples’ Category


drag an drop example

It helps to look at what others are doing to get ideas and inspiration for your own work. Sometimes looking at what others have done also gives us confidence that we can do something similar.

Drag and Drop Examples

drag and drop examples

This week I’d like to feature a number of drag and drop interactions that people in the community have created over the past couple of years.

On a side note, there were a lot of interactions that I couldn’t share because it was either a broken link because the file was moved or the interaction was hosted on Google Drive. Google Drive links are not going to work in about a month. You can fix that here.

Drag and Drop Examples from Weekly Challenges

drag and drop challenges

Here are two challenges that featured some drag and drop interactions. You’ll need to go to the following week to see the recap.

There’s a pretty diverse selection of interactions. Many of the interactions submitted in the weekly challenges also come with the source file for you to review and deconstruct.

If you have an example of a drag and drop that you’ve created using Storyline feel free to share it via the comments link.

Events

Free E-Learning Resources

Want to learn more? Check out these articles and free resources in the community.

Here’s a great job board for e-learning, instructional design, and training jobs

Participate in the weekly e-learning challenges to sharpen your skills

Get your free PowerPoint templates and free graphics & stock images.

Lots of cool e-learning examples to check out and find inspiration.

Getting Started? This e-learning 101 series and the free e-books will help.


350-community e-learning community

I’m a big fan of community and how it helps us learn from each other. This is especially important for those of us in the elearning industry.

If you are a financial analyst, odds are that there are a number of seasoned financial analysts in your organization who could draw from their experience and offer you all sorts of tips. Often that’s not true for elearning. Many of us work on small teams and don’t have access to seasoned pros. And that’s why community is so important for us.

The Value of the E-Learning Community

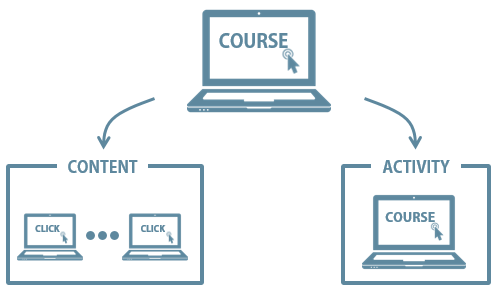
Community isn’t content. Instead its about learning from each other while we exchange tips, best practices, and share resources. It’s a means to help you grow. You’ll expand your support network and build your expertise (and eventually your reputation among your peers).

Here’s one example of how this happens in the community.

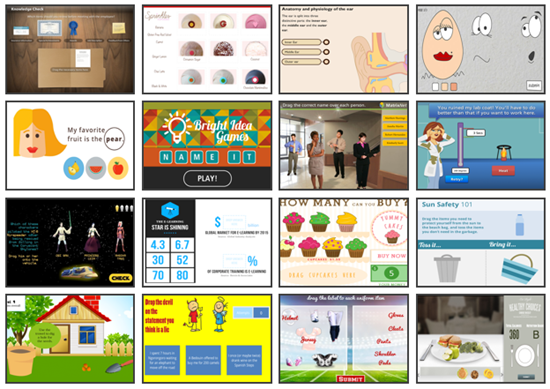
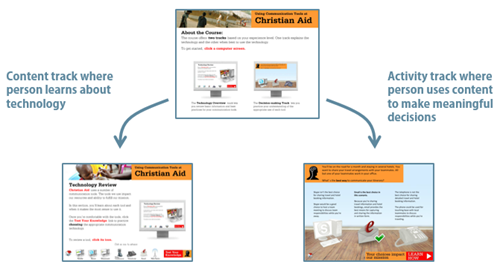
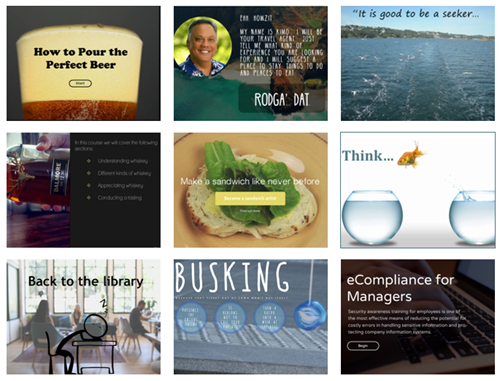
I think one of the best ways to learn to build better courses is by reviewing and deconstructing what others do. When I facilitate elearning workshops I routinely show the examples created for the community’s weekly elearning challenges. They’re authentic and created by real community members.

What I like about the modules is that I often learn something new. There are a number of occasions where I spend time deconstructing the demo trying to figure out how it was created. Sometimes I can’t, which bugs me. But most of the times I learn some new production techniques or a new way to think about the software.

Today I’d like to feature one of the community members who does a great job representing what’s good about community and how to participate in a way that’s meaningful and useful to others.

The E-Learning Community Shares Out-of-the-Box Ideas

I met Joanna Kurpiewska a few years ago at a workshop in London. She shared a little about her trajectory in the industry, some of her ideas, and what she hoped to accomplish. It’s really exciting to see how well she’s done over that time and to know that we played a small role in that.

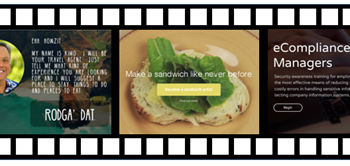
There were two recent challenges where the demos she submitted were pretty cool.

e-learning community example 1

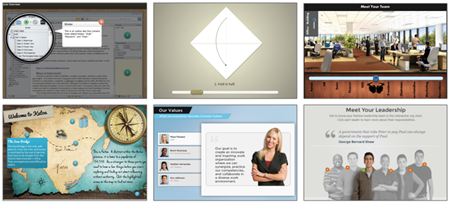
Click here to view the slider demo.

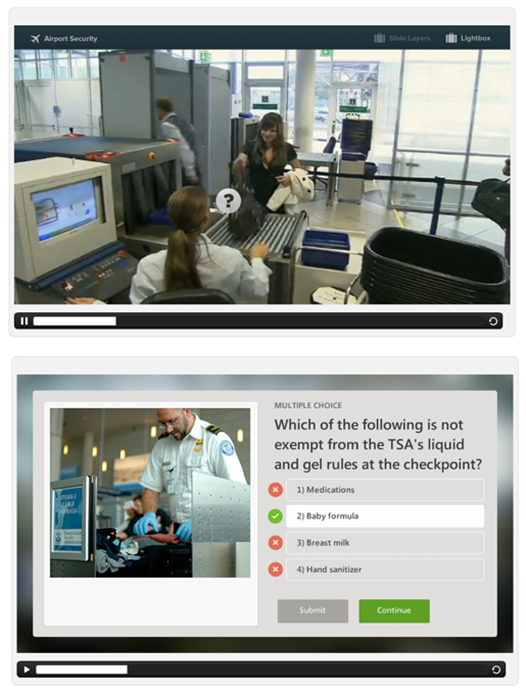
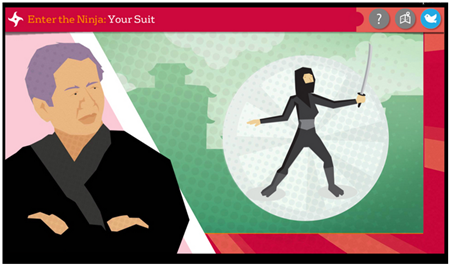
The first challenge above was on using the slider feature in Storyline. The one Joanna did really stood out to me. First, it wasn’t a typical looking slider and second, it introduced a novel way to navigate the course, essentially removing the need for a previous and next button.

e-learning community example 2

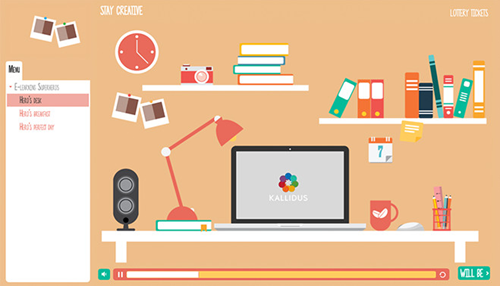
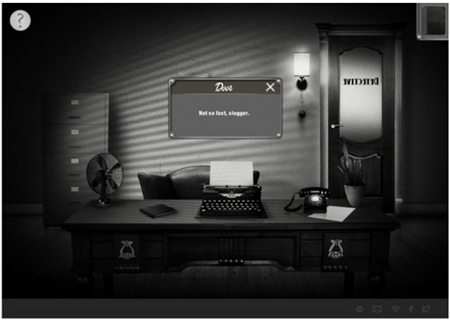
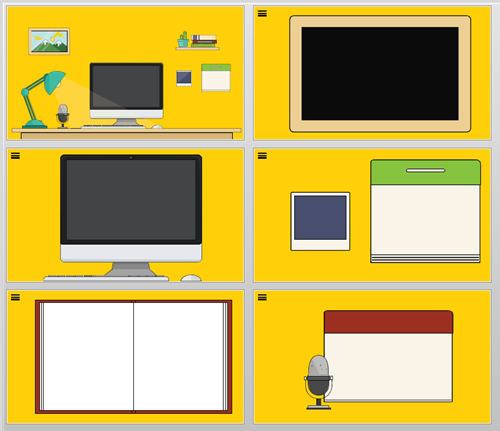
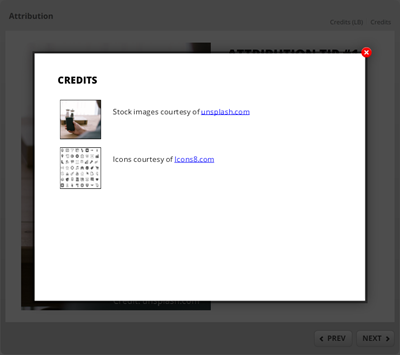
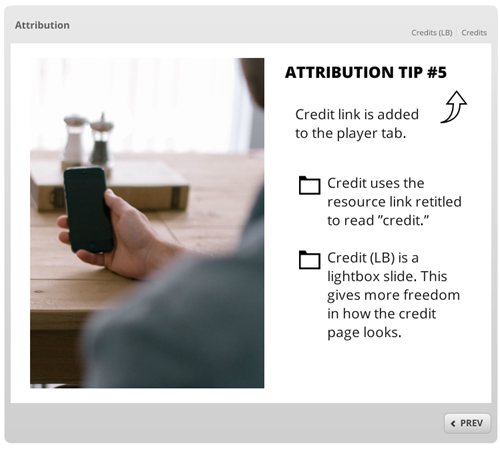
Click here to view the player demo.

The second challenge above was on creating a customized player. Again, the submissions were pretty creative and introduced some neat ideas. Check them out.

There were a few things that I like about Joanna’s submission. I like the informality of it with the cluttered desktop, the informal font, the lottery ticket link, and the structure of the next button. I also like the way she colored the player and filled the presenter image area with the Polaroid graphics to push the player out a bit.

Joanna’s not the only one who submitted creative ideas, so be sure to look at some of the other demos.

The key point is that your peers who share their work in the elearning community will help you see things in a new light and expand your understanding of what you can do (and possibly do it in new ways).

The E-Learning Community Shares What They Learn

As you know, I’m a big fan of PowerPoint and using it to create your own custom illustrations. I’ve featured that capability in a number of posts, such as this one.

In the past Joanna’s done something similar where she’s shared how she creates some of her own illustrations:

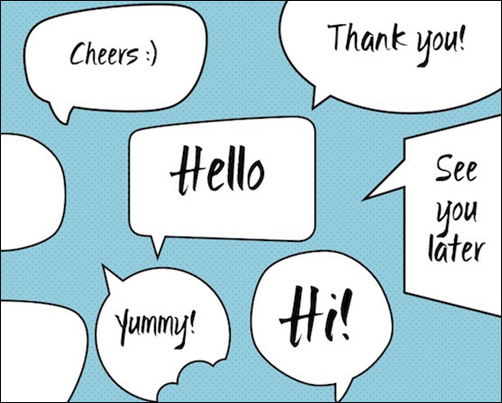
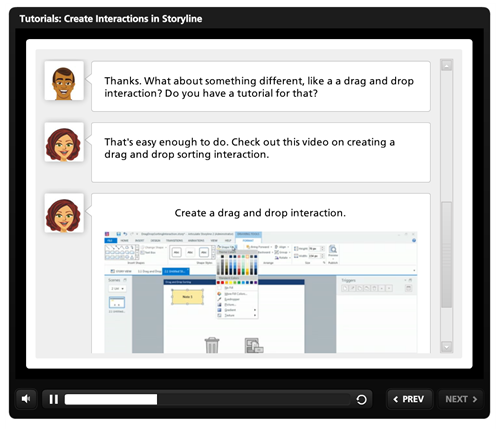
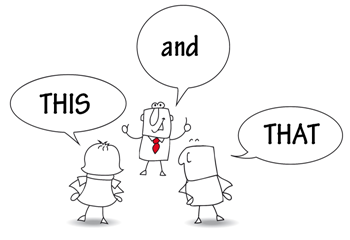
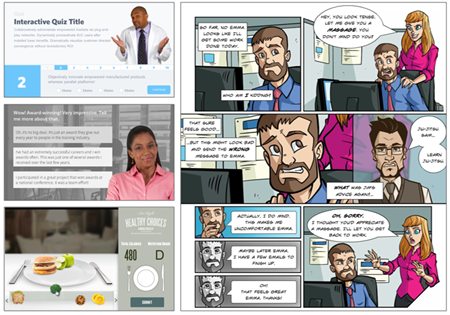
Recently she shared a great demo on how to create custom callouts and speech bubbles. You can read the article here and watch the tutorial video on YouTube. And of course, there’s a free download for those who want the files.

e-learning community free speech bubbles

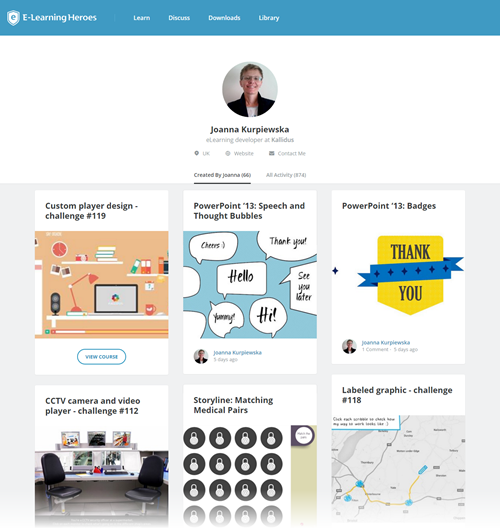
The E-Learning Community Establishes Your Authority

If you look at Joanna’s community profile you can see she regularly participates in the challenges and shows her work. She also freely shares her expertise by answering questions, doing tutorials, and making her source files and assets available for free. And she also maintains her own blog where she does even more of the same.

e-learning community example 3

All of this activity allows her to build her own brand and expertise outside of the community. This is important because it allows your community activity to bleed over into your elearning portfolio which may lead to a stronger network of peers, more professional contacts, and potential business opportunities.

I know many people in the community who do the same thing and it’s paid dividends as they get all sorts of inquiries for freelance work.

What’s in it for me?

Community is all about practitioners getting together and learning from each other. The ultimate goal is to build expertise in the given domain, which in this case is using the Articulate elearning software and becoming a better elearning course designer.

This sharing and learning from each other is authentic and not manipulative. It’s not a marketing vehicle to sell your services and templates (which unfortunately some of the community members don’t quite get yet).

That’s why I chose to focus on Joanna, because I met her and know her story. What she shares and how she engages in the community is based on acquiring and sharing expertise. The modules that show off her skills and the free assets that she shares are merely artifacts, a by-product of what’s happening as she’s engaged with the community.

Are you stuck in a cubicle building the same course over and over thinking that the elearning world is passing you by? Do you want do something different and be connected to people who can help you grow? Then think about participating in the community. Even if you can’t answer questions or participate in the elearning challenges, at least make it a point to see what’s going on. And it’s easy to stay on top of that by following the weekly recaps.

Come join us and let’s learn together.

Events

Free E-Learning Resources

Want to learn more? Check out these articles and free resources in the community.

Here’s a great job board for e-learning, instructional design, and training jobs

Participate in the weekly e-learning challenges to sharpen your skills

Get your free PowerPoint templates and free graphics & stock images.

Lots of cool e-learning examples to check out and find inspiration.

Getting Started? This e-learning 101 series and the free e-books will help.


course design

Course design is a challenge as you try to balance the needs of the client, subject matter experts, learners, and your own course design sensibility. One of the biggest issues with many online courses is that the course is a single solution designed to accommodate multiple learners. And most of them are designed the same way: start, click, click, click, knowledge check, click, click, click, and final quiz.

course design simple

I suspect many courses are designed this way because they’re easy to build and, as we’ve noted before, many course designers are stretched thin with limited time and resources. I also know that many customers demand all of their information to be presented in the course, which makes it hard to move past a click-and-read model.

So what can you do to remedy this and not create too much extra work? Here’s a strategy I’ve used in the past.

Course Design: Separate Content from Activity

Create a two-pronged approach to the course design.

  • Content: this is similar to the way the course is designed now.
  • Activity: what should they do with the content? Create scenario-based activities so that they use the content.

course design strategy

This creates splits the process. Many clients want all of the content and won’t budge. That’s OK. You can present all of the content in the content track. In addition, there are many people who want or need the content. The content track gives them free access.

On the other side, build activities that require use of the content. And then let learners access the activities. A well-designed activity will present the appropriate level of content and provide the right types of decision-making to ensure the person learns and meets the course objectives. You can also provide access points to the content track and even create mechanisms that force people to pull certain types of content during the activities.

Or you scrap any focus on content, throw them in the pool and let them know where they can find life-saving information (the content track).  Some people will jump right into the activity and try to figure things out and some will refer to the content track when needed. An activities focused approach provides a lot of flexibility, especially when your learners range from beginner to experienced.

Course Design: Simple Example

course design

Click here to view elearning example.

Here’s an example that David and I built for a LINGOs course a few years ago. The client gave us a number of Word docs full of content. All of the content needed to be in the course. However, we wanted to create interactions built around some real world decision-making.

So we created a two track course. One track featured all of the Word doc content. And the other track worked around the use of the content to make appropriate decisions. We also included ways for the person to go between the two tracks.

course design

Building the course didn’t take much more time than if we had just made it linear because we used a simple question structure for the activities and broke up the flow with some good-to-know information about the organization.

What I like about this approach is that it’s a single course yet meets the needs at a more individual level. One person can learn through the content, and another through the activities. Or they can learn through both. And it meets the client’s demand to have all of the content present. You can also make the course more complex and accommodate different skill and experience levels with an adaptive learning path.

Events

Free E-Learning Resources

Want to learn more? Check out these articles and free resources in the community.

Here’s a great job board for e-learning, instructional design, and training jobs

Participate in the weekly e-learning challenges to sharpen your skills

Get your free PowerPoint templates and free graphics & stock images.

Lots of cool e-learning examples to check out and find inspiration.

Getting Started? This e-learning 101 series and the free e-books will help.


share e-learning courses

[UPDATE March 1, 2022: The essence of the post is still accurate, but you can find an updated tutorial and instructions here.]

Today I am going to show you how to set up an Amazon S3 account to share e-learning courses and portfolios. You can also share your courses using Google Cloud which I cover in a different post.

However, this post provides more detail and it’s super important to those who use Google Drive to share their e-learning courses because Google is discontinuing that option on August 31, 2016. Now’s the time to come up with a better solution before all of your links no longer work.

Here’s what you’ll need to do:

  • Create an Amazon S3 account.
  • Download Cloudberry Explorer (free).
  • Create an account in Cloudberry to upload your courses.
  • Set the appropriate viewing permission.

I created a video that walks through the process. Below are the basic steps and the video provides a bit more detail.

Click here to view the YouTube Video.

How to Create an Amazon S3 Account to Share E-Learning Courses

Creating an Amazon S3 account is really easy. You’ll need to add your personal info and credit card for payment. Initially you get 5 GB free for the first year and then pay a fee after. For a personal account I wouldn’t expect to pay much, maybe just a couple dollars a year. It’s a very affordable option.

Once you have an account, you’ll need to locate the security settings and find your access keys.

  • Go to User Name
  • Security Credentials
  • Access Keys

This will expose your access key and secret access key. You’ll need them so that Cloudberry Explorer can access your S3 account.

Download Cloudberry Explorer to Share E-Learning Courses

Cloudberry Explorer is the application you use to access your S3 account. Once you have access, you can upload files and get the URL to share.

Create an Account in Cloudberry to Share E-Learning Courses

Once Cloudberry is installed you’ll need to create an account that’s connected to your Amazon S3 account.

  • Go to File>New Amazon S3 Account.
  • Create an Account Name
  • Go to Amazon S3, copy and paste the Access Key and Secret Access Key into the form.

cloudberry-explorer share e-learning courses

You should now be able to access the account using Cloudberry Explorer.

Create a Bucket and Set Permissions to Share E-Learning Courses

On the left side you can display your desktop folders. And on the right, you display the S3 account and folders.

cloudberry-explorer-1 share e-learning courses

Initially there will be nothing in the S3 account. The first thing you need to do is create a bucket. That’s where you’ll host your folders and save files. You can create more than one bucket. For example, you may have one bucket for your portfolio and another for personal files. And you can limit who has access to the files in your bucket.

  • Create a new bucket. It should have a unique name. All of your folders and files will go into the bucket.

bucket share e-learning courses

  • It’s a good idea…You can set the permissions for the bucket so that anything you add to it can be viewed when you share the link. Otherwise, you have to set permissions every time you upload a course.
  • Click on the Bucket Policy icon and add your policy. This site explains it in more detail.
  • Once you’ve established the policy, you can start to add folders and files.
  • To share a file, click on the Web URL icon.

That’s about it. Of course, you should read more on what you get with both Amazon S3 and Cloudberry Explorer. But for the most part, what you see here and in the video is all you need to do.

Now’s a good time to set up an Amazon S3 account. The cost is nominal and the service works well for sharing your e-learning courses.

Events

Free E-Learning Resources

Want to learn more? Check out these articles and free resources in the community.

Here’s a great job board for e-learning, instructional design, and training jobs

Participate in the weekly e-learning challenges to sharpen your skills

Get your free PowerPoint templates and free graphics & stock images.

Lots of cool e-learning examples to check out and find inspiration.

Getting Started? This e-learning 101 series and the free e-books will help.


a dozen free stock video sites

A while back we had a great challenge on how to use video as the slide background in your elearning courses. It’s a great way to add texture and novelty to screens that are usually plastered with static images and bullet points.

Video backgrounds also force us to think how we’ll lay out the content to accentuate the video. That helps us think about layouts in different ways.

There are over 50 excellent examples in the challenge recap link above. Be sure to take a peak for inspiration. Here are a handful of the ones that stood out to me.

Examples of Free Stock Video Courses

free stock video examples

There are a ton more great examples for this challenge. Be sure to check them out. Which ones do you like best?

Find Free Stock Videos

One of the first questions that comes up is where to get free stock videos. Most of us have our own media production studios in the form of our smart phones and tablets. It’s easy enough to shoot high quality footage to use in your own courses. This adds real context and a connection to your subject matter and organization. If you’re not comfortable shooting your own stock video, try out some of these free stock videos sites. And don’t forget about all of the free stock photo sites we covered earlier.

free stock video site

  • Coverr: seven new videos every week.
  • Pexels: lots of good stuff and link to free stock photos, too.
  • Distill: not to be out done, ten new videos every ten days.
  • Fancy Footage Club: site is closed but they provide a Dropbox link to download all of the free stock videos. Get it while you can.
  • Videvo: free but want a social media share when you use the video. That’s fair for free content.
  • Vimeo: miscellaneous free stock videos.
  • Cute Stock Footage: some cool green screen videos.
  • Videezy: decent selection, but they lead with Shutterstock examples, which requires an account.
  • Mazwai: lots of videos, but the site seems to freeze when they all load.
  • Vidsplay: totally free stock videos.
  • Clip Canvas: free but not a big selection.
  • Pond5: free stock videos found by Geraldo in Al Capone’s vault.

There’s more than enough free stock videos to keep you busy for a while. Now it’s your turn. Take a stab at the background video challenge and submit an example here.

You can always find inexpensive stock photo subscriptions. In fact Graphic Stock (which has a good selection) regularly runs a $99/year subscription with unlimited downloads. They also have a video  and audio service that is reasonably priced.

Events

Free E-Learning Resources

Want to learn more? Check out these articles and free resources in the community.

Here’s a great job board for e-learning, instructional design, and training jobs

Participate in the weekly e-learning challenges to sharpen your skills

Get your free PowerPoint templates and free graphics & stock images.

Lots of cool e-learning examples to check out and find inspiration.

Getting Started? This e-learning 101 series and the free e-books will help.


interactive video for e-learning made easy

A few years back working with video was not all that easy. Most networks couldn’t support the delivery of video and producing video was expensive and really time-consuming. However, that’s changed quite a bit over the years.

Rapid E-Learning Makes Interactive Video Easy

Here’s one of my favorite examples of how things changed with the advent of rapid elearning. A few years back, one of our Flash developers was a little behind on a project to create a flash-based video player for one of our courses. When I looked at what he was doing, I asked why he didn’t just use Engage’s media interaction since it was easy enough to insert the video and required no programming.

interactive video for e-learning

Click here to see an example of an Engage interaction with video.

Of course, since he was an experienced Flash programmer (who took pride in his programming chops) he hemmed and hawed about why rapid elearning sucked and how it was better if he did it on his own. However, with some prodding he relented and gave Engage a chance. And guess what? 5 minutes later he was done which meant he could use his advanced programming skill on other projects that required it more.

The point is that today’s tools have made video production so much easier. Gone are the days of burdensome programming. On top of this, most of us have smartphones and tablets that are pretty awesome media production tools. And now delivery over the organization’s networks is also much better.

So that means today producing interactive and engaging video-based courses is viable and a great way to deliver your training. Here are a couple of easy ways to use interactive video for your online training.

Interactive Video: Click and Collect or Explore for More

In this example the video plays and at certain points a clickable object displays. The user can ignore it and continue viewing the video or she can click on the object which pauses the video and exposes additional content. Here’s quick demo I created using this video from YouTube produced by Union Gas.

interactive video for e-learning example

Click here to view interactive video example.

Here are a couple of other examples of similar interactive videos:

This approach works great for annual refresher training where the experienced person watches the video, but the less experienced person has the option to stop and learn more. It’s also a great way for the user to collect information that may be critical for other interactions in the course.

Interactive Video: Click & Quiz

This example is similar to the example above. The main difference is that you can pause the video to assess the users understanding at certain points in the instruction.

interactive video for e-learning example 2

Click here to view the interactive video quiz example.

The example above also introduces two options. One is for quick assessments where tracking is not required. And for those times where tracking in the LMS is required, the lightbox method works perfectly.

Here are a few other examples of similar interactive videos.

This use case is perfect to confirm that they’re acquiring information from the video to quiz them on what they’ve learned. While the quizzes in these examples are basic, there’s no reason why you couldn’t make them more complex using variables or branched video interactions.

As noted earlier, interactive video for e-learning is a viable solution. Check out some of the other examples here and try your hand at your own interactive video. And of course, if you have any questions, don’t be afraid to ask. We’re always there to help.

Events

Free E-Learning Resources

Want to learn more? Check out these articles and free resources in the community.

Here’s a great job board for e-learning, instructional design, and training jobs

Participate in the weekly e-learning challenges to sharpen your skills

Get your free PowerPoint templates and free graphics & stock images.

Lots of cool e-learning examples to check out and find inspiration.

Getting Started? This e-learning 101 series and the free e-books will help.


e-learning examples and free stock images

For many of you, this is like the start of a new year. The summer’s gone, kids are starting school, and it’s back to building some elearning courses.

I’ll keep this post quick so you can get back to the work at hand.

More Free Stock Photos

free stock photos

I just noticed that one of my favorite free stock photo sites, StartUp Stock Photos, released a bunch more photos. I like their photos because they can be used in a lot of elearning contexts. To save you some time, I downloaded them all and zipped them up into a single download.

You can always find inexpensive stock photo subscriptions. In fact Graphic Stock (which has a good selection) regularly runs a $99/year subscription with unlimited downloads. They also have a video  and audio service that is reasonably priced.

Don’t Share Courses in Google Drive!

google drive

Google Drive’s been a popular way to share published courses and web sites. However, that’s all changed. Effective August 31, 2015, Google Drive no longer supports this feature. If you have some shared courses on Google Drive, you’ll need to move those to another service. You have until August 2016.

Here’s a post where I shared a few alternative methods for sharing courses. I like the Amazon S3 option. That’s what I use for the blog.

Articulate Guru Award Winners

articulate guru e-learning example

Articulate just announced the Guru Award winners. I’ll have to say this year was one of the best because we had so many diverse and creative submissions. One thing that stood out to me is how many people use the elearning applications for more than course creation.

Personally, I love all of the Guru submissions (even the ones that don’t win) because they represent so many clever ideas and production techniques. I like to deconstruct them to figure out how they were built. It’s a great way to learn and get ideas.

Here is an article that highlights the Articulate Guru winners and links to the demos.

GOLD GURU

Enter the Ninja
Phil Mayor
Elearning Laboratory

Articulate Guru e-learning example gold

Click here to view the guru winner.

SILVER GURU

Audiometry Refresher Training
Richard Edwards
MOD

Articulate Guru e-learning example silver

Click here to view the guru winner.

BRONZE GURU

Robot Wars
Nancy Woinoski
Pinched Head

Articulate Guru e-learning example bronze

Click here to view the guru winner.

HONORABLE MENTION GURUS

Galactic Games
Jerson Campos
Visual E-Learning

Articulate Guru e-learning example 1

Click here to view the guru winner.

Ebola Fatality Rates
David Tait
4pt Limited

Articulate Guru e-learning example 2

Click here to view the guru winner.

Everyday Employee Relations
Jack Quantrill
Boots

Articulate Guru e-learning example 3

Click here to view the guru winner.

The Case of the Fraudulent Pharmacist
Kate Atkinson
The Training Room Online

Articulate Guru e-learning example 4

Click here to view the guru winner.

Like I said, there were lots of really good entries and many covered more than elearning. As you can see they range from simple games and quizzes to interactive graphics. In either case, they show off some of the capabilities and features of the Articulate tools. There’s a lot to glean from these examples.

Now back to work and have a great week!

Events

Free E-Learning Resources

Want to learn more? Check out these articles and free resources in the community.

Here’s a great job board for e-learning, instructional design, and training jobs

Participate in the weekly e-learning challenges to sharpen your skills

Get your free PowerPoint templates and free graphics & stock images.

Lots of cool e-learning examples to check out and find inspiration.

Getting Started? This e-learning 101 series and the free e-books will help.


free interactive image template and tutorials

As noted in an earlier post, an easy way to build interactive elearning modules is by choosing a single image and adding interactive elements to it. This is a great solution for those who don’t have graphic design skills or access to a graphic designer. The key is finding a single image that has a few potential content buckets.

Finding images is relatively easy today. I look for images like the ones below. They need to have some visual interest, a consistent context, and potential content areas that can be clicked on or zoomed into.

interactive image examples

Interactive Image Example

In a previous post, I shared this interactive image demo and had lots of questions about the zoom effect I used and how it was built. To help you out, I recorded a few tutorials that go through the basics. I used a different image for the tutorials and included a new free template for you to download.

Here’s the new template in action:

interactive image example

Click here to view the demo.

Interactive Image Tutorials

Here are some tutorials that walk through how I created the zoom in and out effect in this elearning template.

Free Interactive Image Templates

I’ve included the source file for the original demo and a new template based on the image I used in the video tutorials. As a bonus, I used the same image to create a free PowerPoint template.

free interactive image template and characters

  • The templates also include a slide of individual characters. Create additional slides in the template and add the characters.

So now it’s up to you—find some images, watch the tutorials above, and create your own interactive image templates.

Events

Free E-Learning Resources

Want to learn more? Check out these articles and free resources in the community.

Here’s a great job board for e-learning, instructional design, and training jobs

Participate in the weekly e-learning challenges to sharpen your skills

Get your free PowerPoint templates and free graphics & stock images.

Lots of cool e-learning examples to check out and find inspiration.

Getting Started? This e-learning 101 series and the free e-books will help.


free desktop PowerPoint template for interactive course

This post gives you a two-fer: that’s two freebies for one. I found a free desktop image made available by Anastasia Kolisnichenko. I used the free image to create an interactive course prototype for an upcoming workshop activity. The template is free for you to download and use as you wish.

Below is an example of the template in action. It’s embedded on the blog page. Click here to view the template if the embedded version isn’t visible in the email.

The example above was created in Storyline and uses the zoom region feature and triggers to pause the timeline. Here’s a PowerPoint (no zoom). I like the push transition.

How to Create an Interactive Course Using a Single Image

If you had access to a graphics designer, you could create anything you want. But for many of you, that’s not an option. This means you’re limited to searching the Internet for free downloads and then using those for your courses. The challenge with this is that it can be difficult to modify or customize the free downloads that you find.

However, here’s a simple technique that doesn’t require a lot of extra work. It just requires an image that has clear potential content buckets. Then you add links to those buckets and add your content. It’s a straightforward way to create an exploratory interactive course.

  • Locate an image that has multiple components. The free desktop download is a good example. It has areas that can be made clickable with links to additional content. Another example could be a collage style image or a comic book layout image.

free template layouts for interactive course

  • Create a separate slide for each distinct area. In the example above I made slides for the computer, picture frame, bookshelf, microphone, and calendar. Those are all exciting potential content buckets.
  • Link from the main image to a slide of the isolated element. Also add a link back.
  • Apply a transition. In Storyline, the zoom feature is a wonderful way to transition in and out. In PowerPoint, it’s a bit more challenging to create a zoom that’s easy to edit. In that case, I used a push transition.

In this demo I used the free desktop image to create the interactive course design. However, this production technique works great with other images. The key is that you start with a single image, so you need to do minimal editing and customization.

Download the Free Templates to Create an Interactive Course

Here are the download links to the free template. I also included the original graphic in case the link breaks somewhere down the road. Be sure to give props to Anastasia Kolisnichenko who made it available to use.

Enjoy!


Events

Free E-Learning Resources

Want to learn more? Check out these articles and free resources in the community.

Here’s a great job board for e-learning, instructional design, and training jobs

Participate in the weekly e-learning challenges to sharpen your skills

Get your free PowerPoint templates and free graphics & stock images.

Lots of cool e-learning examples to check out and find inspiration.

Getting Started? This e-learning 101 series and the free e-books will help.


interactive e-learning: why do we do it

What is interactive elearning?

In previous posts we discussed different ways to interact with onscreen elements. Generally, interactions are limited to click, mouse over, or dragging interactions.

Then we explored two key points when building interactive elearning. The first point is to get the users to “touch” the screen. Find ways to have them interact with onscreen elements. The second point is to have them interact with the content to create a great learning experience.


Interactive e-learning comes from interacting with the screen and the e-learning content

Now let’s look at common reasons why people interact with the elearning courses and then we can use that to build better interactive elearning. To keep things simple, we’ll look at three common reasons why people interact with their courses.

Interactive E-Learning: Course Navigation

The most obvious reason why people interact with the elearning course is to navigate from one point to the next. The “next” button is the most common form of interaction. We click it to navigate from one screen to another.

Of course, there are all sorts of others ways to navigate content. It could be an onscreen button, like a gate screen that we click to advance. Or perhaps it’s something like the example below that uses a slider instead of next buttons to navigate from one screen to the next.

What I like about the slider interaction is that we are able to replace a clickable button with a draggable slider. This novelty helps engage those viewing the course and gives them better control of the navigation.

interactive e-learning slider example

Click here to view the slider navigation.

When building your next interactive elearning course, think about ways that the user navigates the content. Play around with ideas that move beyond clicking and the next button. Perhaps there’s a way to include more mouseovers and dragging.

Interactive E-Learning: Exploration

Another common reason why people interact with the onscreen content is to explore and collect information. Most courses are linear and they require that a person click in a specific sequence. However, by allowing for non-linear interactivity, the user gets a bit more control and can access the content they need, when they need it—or at least start with the content that seems the most interesting to them.

interactive e-learning examples

Here are a few common types of exploratory interactions to give you some ideas:

Couple exploratory interactions with decision-making and you have the foundation for solid interactive elearning and dynamic branched scenarios. They let users explore and collect information to make the decisions required to demonstrate their understanding of the course content.

Interactive E-Learning: Make Decisions

Outside of navigation, the most common reason we interact in our online courses is to make decisions. Usually, it’s a simple quiz question with a submit button. But interactive elearning could also include decision-making scenarios or other non-standard assessments.

Ideally, it’s designed to make decisions and then get feedback based on our decisions. Sometimes the feedback is immediate and sometimes it’s delayed and compounded.

interactive e-learning decision-making branched navigation

Here are a few simple decision-making interactions:

As you can see, assessments and decision-making interactions don’t have to rely on the out-of-the-box quiz questions. There are all sorts of ways to make the decision-making interactive to create a better learning experience. As you plan your next assessment, see if there’s a way to add some novelty or different ways to interact during the decision-making.

Interactive elearning means the learner interacts with the screen and course content. There are only a few ways to interact with the screen. In addition, there are specific reasons why they’re interacting. Do you want them to go from one piece of information to another? Are you giving them opportunities to explore? Or do you want them to collect some information and make decisions?

Understanding why they’re interacting with the course content will help you better determine how you want them to interact. And in turn, you’ll build better interactive elearning courses.

Events

Free E-Learning Resources

Want to learn more? Check out these articles and free resources in the community.

Here’s a great job board for e-learning, instructional design, and training jobs

Participate in the weekly e-learning challenges to sharpen your skills

Get your free PowerPoint templates and free graphics & stock images.

Lots of cool e-learning examples to check out and find inspiration.

Getting Started? This e-learning 101 series and the free e-books will help.


Articulate Rapid E-Learning Blog - share elearning courses

To share elearning courses via a learning management system or Articulate Online is common. However, sometimes getting access to an LMS isn’t easy, especially if you want to share elearning courses that are quick prototypes or demos to solicit opinions. You definitely don’t want to fill out requisitions and wait for your LMS administrator to send you a link.

There are also many of you who participate in the weekly elearning challenges and need an easy way to upload your demos. Below are a number of solutions that work if you need to share elearning courses. Here are the five options we’ll review:

  • Tempshare
  • Amazon S3
  • Custom Domain
  • Dropbox [UPDATE 9/5/2016: Dropbox is disabling this feature effective 10/3/2016]
  • Google Drive [UPDATE 9/1/2015: Google is deprecating this feature and it will no longer work after Aug 2016.]

Here’s a quick tip before we get started: most of the solutions give you long links with a lot of gibberish. They look confusing and may break when sharing via email. In that case, it makes sense to use a URL shortener to get a shorter link. Google offers a link shortener, bit.ly is a popular one (and you can customize the link), and if you use Cloudberry (referenced below) there’s a link shortening option when you grab the web URL.

Share E-Learning Courses via Articulate Tempshare

This free solution only works if you use Articulate Storyline or Studio ‘13. It’s an easy way to upload your course and quickly get a link to share. Tempshare provides a temporary link and it only lasts about 10 days so it’s not a permanent solution.

  • Publish your Articulate course.
  • Create a .zip file of the published course.
  • Drag the .zip file to the Tempshare site. The course is uploaded and you’ll get a temporary URL good for a few days.

Articulate Rapid E-Learning Blog - share elearning courses using Articulate Tempshare

  • Share the link. Again the link isn’t permanent and it can’t be overwritten. If you make changes, you’ll need to repeat the process.

I like Tempshare for its simplicity especially because I don’t have to open up other apps and load the course on a different site or LMS and then mess around to get the link. It’s just a simple drag and drop and then paste the link.

Share E-Learning Courses with Amazon S3

Amazon S3 is a better solution than Dropbox and Google Drive because the files will play as intended. It’s the method I prefer and the one I use to host the content I share for this blog and in the elearning community.

Amazon S3 is a fee-based service but provides a free tier that consists of 5 GB of storage. That is probably more than enough for the courses you share. Even if you did pay, the storage is so inexpensive that I’d be surprised if you exceeded one dollar
per year.

What you need to do:

  • Check out this post for more detail: How to Share Course with Amazon S3.
  • Download and install Cloudberry Explorer (freeware). Drag and drop your files from the desktop folder to Cloudberry and they’ll get uploaded to your online folder. There are other applications that work, so if you don’t want Cloudberry do a search and find one you do prefer.
  • Create an Amazon S3 account. You need an account. Since it’s a fee-based service, you’ll need to provide real information so they can authenticate the account. You’ll also need to provide a credit card number. Again, you probably won’t exceed the free tier and if you do the charges are going to be miniscule.
  • Locate your access key. Amazon S3 provides an access key. You’ll find that under security credentials. You’ll need those to add your account to Cloudberry.

  • Connect your Amazon S3 to Cloudberry. Once connected you’ll be able to create folders and move your course files into them. It’s as simple as dragging them over.
  • Get your web URL. Once the files are uploaded to Amazon S3, right click on the .html file and get the web URL to share.
  • Shorten the link. You can shorten the link inside of Cloudberry or use your own preferred method.

Amazon S3 also lets you control viewing permissions and set expiration dates. It does take a few steps to get the account set up, but in the long term it’s a better solution than Google Drive and Dropbox, especially if they make changes to how files are shared.

Share E-Learning Courses on Your Own Domain

If you’re doing professional work or building a portfolio, then this is probably the best option because it’s a solution directly tied to your brand.

  • Get a domain name. The first step is to get your own domain. There are plenty of web services to do that and the cost is relatively low for a domain and hosting. A simple hosting plan may only cost $5-$10/month.
  • Create a site. You’ll need to create a site. WordPress is probably the easiest solution. Most of the service providers have WordPress and other tools already loaded so it won’t take much to get up and running. Be careful of site builder solutions since they typically don’t offer an easy way to upload and store your course files.
  • Load the courses on your site. I use FileZilla (freeware) which lets me easily upload and manage my content. You can still use Amazon S3 (like I do for the blog here) and add the URL to your website text.
  • Share your link. One of the benefits of using your own domain is that the link is always tied to your site and a great way to get people to look at what you do.

Share E-Learning Courses with Dropbox

[UPDATE 9/5/16 Dropbox is removing this feature effective 10/3/16.]

Dropbox is a great product and makes sharing files super easy. There are two ways to share your published courses for viewing in Dropbox.

Share Your Folder

This first method assumes the person you’re sharing with has a Dropbox account.

  • Put your course files in a folder and share the folder.
  • The end user gets the folder downloaded to their Dropbox account and can access the published folder from their computer. They just need to double click on the .html file to launch the course.

This is fine if the person has a Dropbox account. If they don’t have one, they can open an account. But that may not be an ideal solution or option for some.

Share a Public Link

This solution is similar to the Google Drive version because all you need to do is share a URL link. However it requires a “public” folder and only works for those who have a Dropbox account prior to October 4, 2012 or those who have a Pro account.

  • Place your published course folder in the Dropbox public folder.
  • Right click on the .html file and select copy the public link. This will give you a URL you can share.

  • Shorten the link as mentioned above for a cleaner link.

WARNING: For the most part Google Drive and Dropbox do a decent job of sharing published course files. However, they’re not designed to deliver elearning courses and often the load time is slow or you may have some issues with the content playing the way it should. That’s something to keep in mind because if this is for client work, you want to give the best experience possible and you may not get that with Google drive and Dropbox.

Share E-Learning Courses with Google Drive

[UPDATE: Read this before using Google Drive. Google is removing this feature.]

If you have Google Drive then you can upload and share elearning courses in no time at all. Mike does a great job explaining how to share your courses in Google Drive. The basic steps are:

  • Change the launch file in your published course to index.html. For example, in Storyline you get a story.html. I duplicate it and change the duplicate to index.html.
  • Create a folder in Google Drive and make it public.
  • Add your published course folder to the public Google Drive folder you created. The folder gives you a long list of characters. Copy those.
  • Add the copied characters to this URL http://googledrive.com/host/
  • Share the link for others to see.

There you have it—five four easy ways to share your elearning courses. Again, I think for the money and performance, the Amazon S3 option is probably best. What do you do to share your elearning courses (assuming you don’t upload to an LMS)?

Events

Free E-Learning Resources

Want to learn more? Check out these articles and free resources in the community.

Here’s a great job board for e-learning, instructional design, and training jobs

Participate in the weekly e-learning challenges to sharpen your skills

Get your free PowerPoint templates and free graphics & stock images.

Lots of cool e-learning examples to check out and find inspiration.

Getting Started? This e-learning 101 series and the free e-books will help.


Articulate Rapid E-Learning Blog - free stick images

If you do a search online you’ll find all sorts of free assets like free stock images, icons, fonts and other media that work perfectly for your elearning courses. But often you find that free isn’t really free. Instead, free is free with strings attached.

One of my pet peeves is people who give away free assets and then only allow them to be used for personal use. I guess there’s a big demand for free stock images and free fonts for family use. While it’s the asset creator’s prerogative to attach strings, personally I find it kind of lame. Either it’s free or not. Why work to get eyes on your product and then create that sort of friction? However, if that’s the stipulation then we need to stick by it and respect the desires of the content authors. Mostly likely those resources won’t work for your project.

Another issue is that the free content comes with attribution requirements. That’s much better than free for personal use only. But it still creates some friction because the attribution requirement may conflict with your project.

How to give proper credit to the creator of the assets and still maintain a professional looking course is a challenge. Here are a few ways to attribute content to the asset creator.

Add Attribution Credits to the Image or Slide

  • Credits on the image. This is the easiest, but doesn’t always look good.
  • Credits as a caption. This is also easy and easy to template. It also creates consistency, but still can be a bit distracting.

Articulate Rapid E-Learning Blog - add attribution links to the image

The two options above are fine for school projects, but don’t look very professional. They also only allow for text descriptions and URLs. But no hyperlink to the creator’s site.

  • Mouseover credits as the person moves the mouse over the image the credits appear. They can be over the image or as a caption box and you can link to the site.
  • Add credits and links at the bottom of the screen. This works but may look a bit busy and not many clients want to see a bunch of outside content in their course screens.

Articulate Rapid E-Learning Blog - add attribution links to the screen

Add Attribution Credits to the Course Player Tabs

  • Use the player’s resource tab. Change the resource tab to read “credits” and then add links to the sites. This is really easy and looks nice.

Articulate Rapid E-Learning Blog - add attribution links to the resource tab

  • Use Engage to create an “About” player tab. Add information about the organization and course developers. An additional section could be attribution for free resources with a link back.
  • Lightbox slides on player tabs. Create a custom slide and insert it using the lightbox feature. This lets you make it look any way you want and add any type of information and links back to the site.

Articulate Rapid E-Learning Blog - add attribution links as a lightbox slide

Personally I like the resource tab and lightbox options. The resource tab is simple and the lightbox means I can make the credit page look anyway I want. Icons8 allows this for their free content. You can find it in their licensing. And I’m sure most of the others would, too.

If you’re not sure, ask the source of the free content. I’ve found that often they’re happy that people are getting use out of the free assets and appreciate that I’ve even bothered asking. Often they’ve given me permission to use their assets. It doesn’t hurt to ask.

Here’s a published version of the different ways to attribute the free resources if you want to see them in action.

Articulate Rapid E-Learning Blog - add attribution links example course

Click here to view the attribution demo course.

What do you do when you get free assets that require attribution? How have you attributed free content in your elearning courses?

Events

Free E-Learning Resources

Want to learn more? Check out these articles and free resources in the community.

Here’s a great job board for e-learning, instructional design, and training jobs

Participate in the weekly e-learning challenges to sharpen your skills

Get your free PowerPoint templates and free graphics & stock images.

Lots of cool e-learning examples to check out and find inspiration.

Getting Started? This e-learning 101 series and the free e-books will help.