The Rapid Elearning Blog

Archive for the ‘E-learning’ Category


branched scenarios

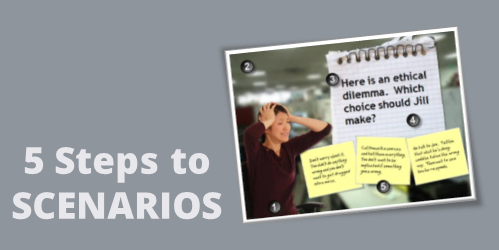
In a previous post, I wrote about a simple way to structure a scenario by using the 3C model.

  • Challenge: This could be something as simple as a question or a very involved case study.  The goal is to get the learner to think through the content and make a decision.
  • Choice: Once the learner is ready to make a decision, you provide choices.  A good scenario is nuanced and not completely black or white.  You want to engage the learner and really get them to think through the scenario.  You don’t want the choices to be too obvious.  If they are, then a scenario might not be what you need for the course.
  • Consequence: Each decision the learner makes produces consequences.  At this point you can provide feedback.  It could be simple text with instructions to continue.  Or you could advance the learner to another decision-making challenge.

The 3C model is an easy way to build the scenario infrastructure.  You can save this as a scenario template.  That’s easy enough to do.  Where a lot of people struggle is how to create the visuals for the scenarios.  That’s because most of us don’t have the technical skills to build out the right graphics.

To make the task easier, I broke the graphics for scenarios into five parts: characters, environment, text, containers, and buttons.  Using that approach makes it easier to think through the visual design.

Here’s a quick overview.  The image below shows a scenario screen with the five elements.  You have characters.  The are in an environment.  The scenario usually has some text.  It’s either going to be on the slide or in some sort of container like a box or callout.  Then you’ll have the choices for the learner to activate.  These can be actual buttons or hotspots.


The Rapid E-Learning Blog - all of these parts added together make a scenario

Those five parts together make up the visual elements of your scene.  Now let’s look at them in a bit more detail.

Interactive Scenario: Characters

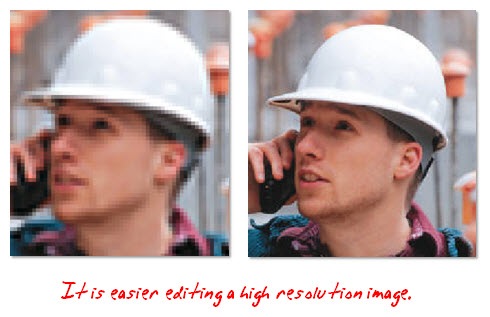
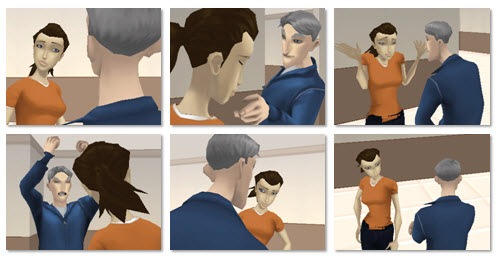
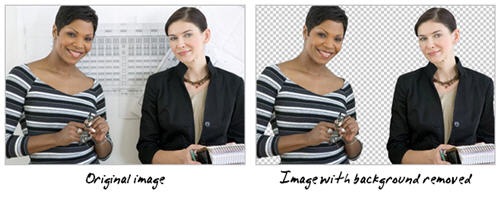
Characters are the people or avatars you use for the scenario.  You can have a single character or multiple characters.  I prefer to build a few different templates from which to work.  In the examples below, there’s a single person scene and one that represents two people talking.  As you can see, nothing fancy, just a bunch of placeholders.

The Rapid E-Learning Blog - create various templates with different character placeholders

Interactive Scenario: Environment

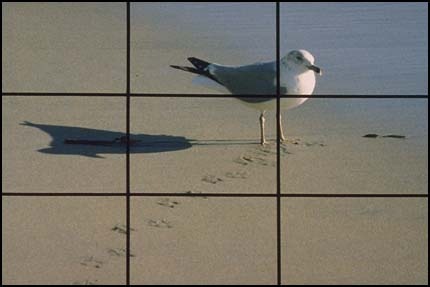
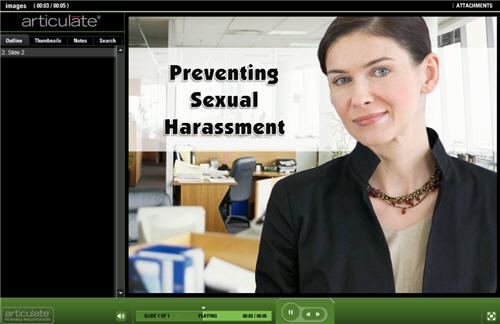
The environment is the backdrop for the scenario.  Is the character in an office, public area, warehouse, or a production environment?

The environment sets the tone for your scenario.  If you add some ambient background noise, that will lend to the reality of the scene.  For example, if it’s a business environment you could add some office machine sounds or people murmuring the background.

The Rapid E-Learning Blog - easily swap out your environments

Interactive Scenario: Text

In most cases you have onscreen text.  There are all sorts of ways to add the text so you want to consider the font you use and how it’s positioned onscreen.

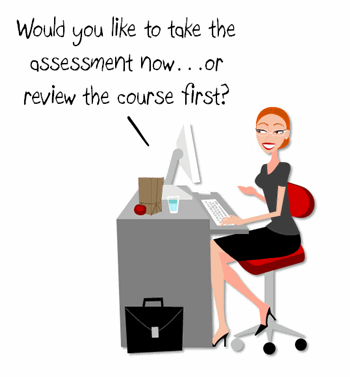
Keep in mind, the text not only conveys the written word, it’s also a graphic that conveys its own meaning and helps set the tone for the scenario.  For example, in the thought cloud below, I used Comic Sans because it’s more personal than something like Times New Roman.  It fits a text bubble.  On the chalkboard, I used a handwritten font to look like it was written on the board.

The Rapid E-Learning Blog - the text can be represented in many ways

Interactive Scenario: Containers

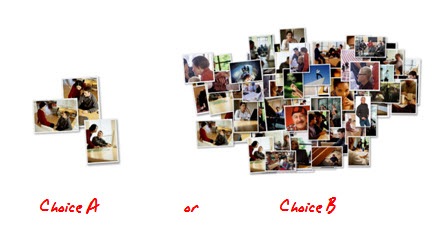
Containers are the boxes you use for the text or scenario-specific content.  For example, a text bubble or call out is a container.  You might have other containers on the screen such as an instruction box, or one of those text boxes that contains key points or a call out.  These containers will change based on the layout and look of your course.

In the examples below you can see a number of containers from paper strips to a picture frame.  There’s really no limit to the type of container you can use.

To keep with the visual theme make sure to pick images and fonts that go with the theme.  You want everything to be cohesive and look like it belongs together.

The Rapid E-Learning Blog - containers can be simple text boxes or elaborate images

Interactive Scenario: Buttons

A button is where the learner clicks to activate the choice.  It could be an actual button or it could be a place on the screen where the learner is going to click (like a hotspot).  If it’s a hotspot, you usually have to design a unique graphic or text that indicates that is part of the choice.

In the first example below, the “button” is actually a hotspot over the paper strips.  However, in the second image, I used real buttons.

The Rapid E-Learning Blog - what's the learner going to click on and how will it look?

I use this simple framework to build my scenario templates which contain placeholders for all of the five visual elements.  When I know that I am going to use a scenario template, then I know what elements I have to custom build for that scenario.  Once they’re built, all I have to do is swap the placeholder graphics with the real course assets.  However, it doesn’t mean that the screen is going to look exactly like the placeholder.  Look at the example below and compare the placeholder screen to the final screen.  You’ll notice that while all five elements are represented, the layout isn’t verbatim.

The Rapid E-Learning Blog - template before and after

  1. Character:  The character isn’t full body like the placeholder.
  2. Environment: I added an office environment.  I blurred the image so you can tell it’s in an office, but I didn’t want too many details that might distract.
  3. Text: I pasted in my content.
  4. Container: In this case the container isn’t a text box.  Instead I chose to go with a note theme and used the grid pad for the container and sticky notes for the choices.
  5. Buttons: The buttons are made to look like sticky notes.  The learner clicks on them to make a choice.

Here are some considerations:

  • You want to be able to right click and swap out the placeholder content without a lot of tweaking.  Because of that, make sure your assets are the same size.  Otherwise, when you make the switch, you’ll have to scale and move the inserted assets around.
  • On the other hand, it’s just a template.  The template is just a guide.  You’re not locked into the way it’s initially designed. Don’t worry about having to move stuff around or changing your content.  Feel free to delete items you don’t need.  Or adding additional assets.
  • Keep it simple.  Don’t over complicate the scenario.  Remember, the elearning course is just one facet of the learning process.  I’d rather build a simple scenario and get it out to my learners in a few days, then spend weeks (or months) building out a more complex scenario.
  • Remember good visual design.  It’s easy to add too much to the screen when building a scenario.  Only add what you need and make sure that it’s clear to the learner what you want them to do.

Building elearning courses can be quite the undertaking.  Most people I know are one person shops or work on small teams with few resources and usually no graphic design support.  Hopefully these tips will help you the next time you need to build out a quick scenario.

Events

Free E-Learning Resources

Want to learn more? Check out these articles and free resources in the community.

Here’s a great job board for e-learning, instructional design, and training jobs

Participate in the weekly e-learning challenges to sharpen your skills

Get your free PowerPoint templates and free graphics & stock images.

Lots of cool e-learning examples to check out and find inspiration.

Getting Started? This e-learning 101 series and the free e-books will help.


interactive branched scenario

This post is in response to some conversations I had during the last ASTD conference in Washington, DC.  There were some people who suggested that rapid elearning was only good for basic linear courses and they lamented that they couldn’t build interactive scenarios.

I’ve built hundreds of rapid elearning courses and I can tell you that building branched scenarios with your rapid elearning tools is not only possible, but it’s actually pretty easy to do.

In today’s post, I’ll start by showing you the three-step model I use to build the scenario infrastructure.  Once you know how to do this, you can pre-build all sorts of scenario wire-frames with placeholder content.  Then when you want to use one in your course, it’s just a matter of inserting the pre-built scenario, setting your links, and adding your content.

The Three C’s of Scenario-Building

I like to keep things simple.  So I use what I call, the “3C Model.”  Each scenario consists of a challenge, some choices, and then consequences of those choices.  That’s basically it.

The Rapid E-Learning Blog - 3C model for elearning scenarios

When I build out my scenarios, sometimes I’ll use one branch to let the learners test their understanding.  I don’t score it or anything like that.  I just want to give the learner a way to test what they know.  Other times, I’ll use the branch to sort the learner.  If they get it, they move on.  If not, I can send them down a path to get additional info.  With interactive branching you can also convert a linear elearning course into more of a story-like course that both engages the learner and lets them interact with the content.

I start by creating a generic 3C model where I provide a challenge, choices, and consequences.  Then when I want a scenario, I drop in a 3C.  If I want to continue the scenario, I drop in another 3C.  So I can make my branch as simple or complex as I want it to be.  Once I have the infrastructure built, I swap out the placeholder content with my real course content and I’m done.

The image below represents the structure for a generic three-choice branch.  This is what I pre-build.  I also pre-build two-choice and four-choice branches.  Then when I need them, all I have to do is insert them into the course.

The Rapid E-Learning Blog - generic 3 choice elearning scenario branch

So in the example above, you’re presenting a challenge to the learner.  The learner makes a decision and then selects the appropriate choice.  The choice made produces consequences.  At this point you can provide feedback and have the learner continue through the course.  Or you can add another 3C structure at the end of the consequence.  So you’d end up with something that could look like the image below.

The Rapid E-Learning Blog - adding the 3C model template to branched elearning scenarios

There are a few ways to structure this ongoing branch.  In the first 3C section, the learner gets to the consequence.  At that point, you could provide feedback.  Then move on and present another challenge.

Or you could do what I did in the second section.  Instead of providing feedback, I just jumped right into another challenge.  Thus, the consequence of the choice the learner makes creates another challenge.

To make my scenario-building easier, I have some pre-built scenarios that I can quickly drop into my course.  They represent the generic scenario structure and they’re built with placeholder content which I can easily swap out with the content from my course.

The 3C model is a very simple model to use.  Whenever you want to create a decision-making scenario, just drop in a 3C template.  If you want to continue the scenario, then add another 3C template.  You can add as many as you like and make your scenario as simple or complex as you want.

Just keep in mind that if you want to make a complex scenario (which could provide a very rich learning environment) you really need to understand the subject matter and create something of value.  Don’t just create branched scenarios to be “interactive.”  Make sure that they’re relevant and meaningful.  There’s nothing worse than forcing your learners to click through a meaningless scenario that is both obvious and a waste of their time.

If you can tell the person in one sentence what they’d learn through a ten-click scenario, odds are that you’re better off sticking with the one sentence.  Personally, I’m from the Archie Bunker School of Scenario-building.  I don’t have the patience to click through a bunch of pointless choices.  And my guess is that your learners feel the same way.

The Rapid E-Learning Blog - Archie Bunker quote

One last point, spend some time pre-building all sorts of scenario looks.  Then duplicate them and create versions with different choice options.  For example, each scenario look should have a two-choice, three-choice, and four choice option.  You could add more, but typically, it’s hard to come up with more than four viable choices.  And if you continue the branching, you could end up with a real confusing mess since the options would grow exponentially.

The image below shows three different scenario looks.  There’s the placeholder look that you’d create, and an example of how it might look with real content.

The Rapid E-Learning Blog - before and after examples of scenario templates

As you can see, building a scenario using the 3C model is pretty easy to do.  It always starts with challenging the learner’s understanding or assumptions.  Then you present choices for the learner to make decisions.  Each decision produces a consequence where you can provide feedback or move the learner to a new challenge for more decisions.

Events

Free E-Learning Resources

Want to learn more? Check out these articles and free resources in the community.

Here’s a great job board for e-learning, instructional design, and training jobs

Participate in the weekly e-learning challenges to sharpen your skills

Get your free PowerPoint templates and free graphics & stock images.

Lots of cool e-learning examples to check out and find inspiration.

Getting Started? This e-learning 101 series and the free e-books will help.


Going to a stock image site and looking for just the right pictures can be very time-consuming and a drain on your limited resources.  Why not create your own stock images?  If rapid elearning software makes everyone an instructional designer, then surely a digital camera makes us all photographers. 🙂

Obviously, this approach doesn’t work for everyone and taking good photos is an art in itself.  However, it is a cost effective approach and with some practice very viable.

Here are a few basic tips to get started.

1. Flood the area with light.

A lot of images appear grainy because there’s not enough light.  A good rule of thumb is to flood the area with light.  You’ll want to use as much light as possible without actually vaporizing your subjects.  The more light you have, the better clarity you’ll get on the images.  You can control the stark shadows by diffusing the light which you can do by bouncing it off of the walls or ceiling.  Or just move the light source back a little.

The Rapid E-Learning Blog: subjects are vaporized by too much light

 2. Keep the image in focus.

The problem with a lot of digital cameras is that after you take the shot, it looks great on that tiny LCD screen.  However, when you get into the office to edit the photo you see that the image is a little out of focus.  Your best bet is to use a tripod (or at least rest the camera on a solid surface).

The Rapid E-Learning Blog: keep images crisp by using a tripod

3. Use the best quality settings you can to get the best image quality.

I had a friend who would always use the lowest settings on his digital camera because he wanted to have room for as many photos as possible.  That made no sense.  He had room for something like 5000 photos.  If he had used the highest quality settings, he would have still been able to put a few hundred photos on the camera.

Here’s the deal.  You can’t make a bad image good (even if you send it to Sunday school).  So, you want the best quality possible from the get go.  You can always frame and resize the pictures later.  However, you won’t be able to make a low quality image better.

The Rapid E-Learning Blog: get the best resolution possible

4. Remember the “rule of thirds.” 

Divide your image in thirds.  The best pictures will have the subject intersect two perpendicular lines.  You can find a quick explanation of the rule of thirds here.  My digital camera even has a grid feature to make this easier.  Yours might, too.

The good thing with editing software is that you can always crop your photos to better frame your subjects and make the pictures more interesting.  This is also why you want the best quality and highest resolution as a starting point.

The Rapid E-Learning Blog: follow the rules of thirds


5. Don’t take just one shot.

It used to annoy me when I’d send someone out to get a photo of a machine operator on the shop floor and he’d come back with just one picture.  It’s a digital camera, for crying out loud!  Take as many pictures as you possibly can.  It’s not film.  There are no development costs.  The more choices you have, the better off you’ll be.

The Rapid E-Learning Blog: take as many images as you need

6. Create visual interest.

Make the images interesting by shooting from multiple angles and distances.  Take one wide angle shot.  Get another that’s closer and tighter.  And, then do a close up, or even extreme close up.  Get down low.  Get up high.  Tilt the camera a little.  You don’t want all of your photos to look the same or be from the same angle.

Also, try to keep the people from looking at the camera.  You want things to look natural.

The Rapid E-Learning Blog: create visual interest

7. Use real employees to make the images authentic.

People like to see co-workers and themselves in the elearning courses.  Take advantage of this.  It’s also a way to build some interest in the course prior to roll out since the break room will be abuzz, eagerly anticipating the final product.

The Rapid E-Learning Blog: Jim the hero

8. Don’t use real employees because they could be losers.

There’s nothing worse than having John Doe (or your state’s governor) in your ethics course and then find out two weeks later that he was fired for lying about his sales quotas or worse.

The Rapid E-Learning Blog: Jim the loser

Depending on your project, it might even be worth your while to hire a few people for a day and take as many photos as you can.  For example, get a bunch of people in a business casual setting and then shoot images of all sorts of conversations.  You can use the extras for future projects.

To keep costs down, I’ve done projects where I’ve had friends come in and we shot some quick photos.  This works as long as they’re not fugitives or have warrants for their arrest.   

9. Get signed releases.

You want to get signed releases to make sure all of your bases are covered.  Here’s a link to learn more about releases.  You probably want one for adults and one for minors.

The Rapid E-Learning Blog: get a signed release

10. Share your photos.

Everywhere I’ve worked, having the right type of images has been an issue.  Sometimes all you need is a guy in a hard hat, or someone who’s not in a suit.  These aren’t always easy to find.  And, it’s not always cost effective to buy one, either.

Why not share your photos?

I have a friend that has shared his photos on stock.xchng.  You can also join a user group on a site like Flickr and share your pictures using a Creative Commons license.

If you’re not inclined to shoot your own images, you can always find inexpensive stock photo subscriptions.

Shooting your own photos can save you a lot of time and money.  With a little practice, there’s no reason why you can’t learn to do a good job.  What are some other tips to help get the best image quality possible?  Feel free to share them with us by clicking on the comments section.

Events

Free E-Learning Resources

Want to learn more? Check out these articles and free resources in the community.

Here’s a great job board for e-learning, instructional design, and training jobs

Participate in the weekly e-learning challenges to sharpen your skills

Get your free PowerPoint templates and free graphics & stock images.

Lots of cool e-learning examples to check out and find inspiration.

Getting Started? This e-learning 101 series and the free e-books will help.


This is kind of a bittersweet post.  Originally, I was going to write about using Google Lively’s virtual world to build scenes and characters for your elearning courses.  The application was free and had some potential as a learning tool.  Apparently, I was the only one who was using it, so Google decided to pull the plug.  Oh well.  If it’ll help the stock price, I’m all for it.  The 8 shares I own aren’t doing too well right now.

Even with the demise of Lively, the essence of the post still stands.  So I’m moving forward with it.  You’ll just need to find a different virtual world tool.  Any of them should work.  Make sure to read the terms of agreement.  If you’re not quite sure where to start, there’s always Second Life.  TechCrunch recently did a blog post that mentions a few of them for even more choices.

What makes this approach so compelling for rapid elearning is the cost, ease of use, and ability to create virtually any type of scenario for your courses.

Build Characters

The Rapid E-Learning Blog: create avatars

Almost all of the virtual world applications let you build your own avatars.  You typically get a broad range of choices.  In the demo above, I created a couple of characters and then made them look like normal people.  I wanted something that looked more like the real world for my scenes.

Unless you’re doing training for groundhogs in Wyoming then the avatar above probably isn’t the best choice. However, that doesn’t mean you couldn’t use a creature like that as a guide or character in your scenes.  It could lighten up the tone or add a little humor.

Set Your Scene


The Rapid E-Learning Blog: create diverse scenes

Most virtual worlds come with all sorts of rooms and settings.  I created the images above in just a few minutes.  I didn’t have to build anything.  I just entered the room and made the image.

As you can see, there are many options.  The character can go from discussing the movie My Cousin Vinny to being a discriminating blog reader.  You get a ton of freedom and creativity in where your characters can interact.

Build Your Scenario

Virtual worlds give you an assortment of characters and settings.  But the real power comes from the camera movement and views.  Because you’re in a 3D environment, you can move the camera around to quickly change the look and feel of your scenario.

The Rapid E-Learning Blog: switch camera angles

Here are a few images.  The characters are in the same location.  I changed the camera angle and then added an action to add a little drama.  The advantage to this approach is that the custom camera angles lets you set your scenario from multiple perspectives.  This is really helpful when you have dialogue between two people.  I think you’d agree that it seems more engaging.

So, how did I do it?

It really is pretty easy.  We’ll assume that you already have a script and know what types of images you want.

  • Log into the virtual world of your choice.
  • Add you characters.
  • Choose your setting.
  • Move your camera (view) into position.
  • Do a screen capture.  Depending on what you can do in the virtual world, you might even be able to make quick videos and add your own audio, like I did in the demo.

That’s it.  Pretty simple and a great way to get the types of images you want.  Of course, this approach doesn’t work for everybody and every organization.  However, it is a very easy and inexpensive way to make your elearning scenarios look a bit more engaging.

I’d love to hear what you think.  Or if you’ve done something similar, feel free to share examples or give us some tips.

Events

Free E-Learning Resources

Want to learn more? Check out these articles and free resources in the community.

Here’s a great job board for e-learning, instructional design, and training jobs

Participate in the weekly e-learning challenges to sharpen your skills

Get your free PowerPoint templates and free graphics & stock images.

Lots of cool e-learning examples to check out and find inspiration.

Getting Started? This e-learning 101 series and the free e-books will help.


create e-learning learning objectives

All courses begin with an overarching goal.  Assuming that the goal is clear, you build learning objectives to meet the goal.  In today’s post we’ll explore a simple way to create objectives for your course.

Learning Objectives Start with Clear Goals

Make sure that when you work with your clients you have very clear goals.  What do they hope the course will accomplish?  From that conversation, you’ll be able to discern what the learning needs are.  This helps you build your objectives.

The main area of focus is to understand where you currently are and where you need to be.  Then map out the activities and learning experience to get from one point to the next.

learning objectives start here

What is the Core Learning Objective?

Start by creating your main objective and then use that to drill down to the additional content you need to meet it.  Basically, your objectives are built on three critical questions.

  • What needs to be learned?
  • Who needs to learn it?
  • What do they need to know before they can start?

What needs to be learned?  What you teach should be linked to real performance.  Essentially it’s all about what the learner is going to be able to DO with what they learn from the course.  Avoid using words like “understand.”  That’s not clear.  Find the basis for understanding and then build your objective around that.

Here’s a common type of objective: Understand how to edit time cards. 

This is vague because it is not aligned to a real measure.  What does “understand” mean?  A better objective is to state what the learner will be able to DO with the new information.  If they understand something, how would you know it?  Build a measurement around that.

explaining learning objectives

Who needs to learn it?    Who are your learners?  Who is going to take the course?  By including this in your objective you are able to qualify potential learners and tell your client who is being taught.  Are they new employees?  Managers?  At this point you don’t need to do a full analysis of the learner.  You only want to identify the audience for the course and what they’ll be able to do after completing it.

The Rapid E-Learning Blog: clear learning objectives help your client and learner know what's going on

What do they need to know before they can start to learn?  All elearning courses require some prerequisite understanding or experience. By identifying what that is, you avoid some assumptions about the learner. You can either require it prior to starting the course or you need to create the additional content to get the learner to the prerequisite level.

Think of it this way.  I give you a map and tell you to go to Seattle.  First you locate Seattle (your goal) and then you figure out where you’re at (prerequisite) so that you can chart your course.  You can’t reach your goal, if you don’t know the starting point. In the same sense, it’s difficult to teach your learners without knowing where they’re at.

The Rapid E-Learning Blog: learning objectives help tell you here does the learner start?


Once you have your main objective, you can start to drill down.  What assumptions does your objective require you to make?  Those assumptions become the foundation for your sub-objectives.  Let’s look at the example below.

The Rapid E-Learning Blog: learning objectives defined; who's the learner, what's being taught, and what do I need to know before I start?

You know who is going to learn (front line managers), what they’ll learn (edit time cards), and what they need to know to learn it (ACME payroll system).

Editing time cards assumes that the learner knows how to use the ACME payroll system. Thus, if you want your learners to be successful at editing time cards, they need to know how to use the payroll system.  So you can create another objective that includes learning to use the ACME payroll system.  From there, the prerequisite might be that the person knows how to collect the time card data.  Or perhaps they need to understand the company’s time card policies.

The key is to continue to drill down and ask what the learner needs to know prior to learning this new information.  At that point, you determine if you make it a requirement to take the course or if you’ll teach the additional content in your course.  Once you have your objectives, you can begin to collect and sort your content to meet them.

You have a lot of latitude in how you write your objectives.  You’re not stuck in any particular model.  What’s critical is that the objective is performance-based and that who the learner is and what she needs to know prior to starting is clear.

By following the approach above, you’ll align your course objectives with the overarching goals.  You’ll also communicate to your client what the course accomplishes.  And your learners understand what’s in it for them.  Once you have your learning objectives, you can begin to build the course.

When you build you courses, what do you do to determine your learning objectives?

Events

Free E-Learning Resources

Want to learn more? Check out these articles and free resources in the community.

Here’s a great job board for e-learning, instructional design, and training jobs

Participate in the weekly e-learning challenges to sharpen your skills

Get your free PowerPoint templates and free graphics & stock images.

Lots of cool e-learning examples to check out and find inspiration.

Getting Started? This e-learning 101 series and the free e-books will help.


I once had a client who was adamant about never using “cartoons” (as she called all illustrations) in her elearning projects. For her, we either used pictures of real people or we didn’t use graphics at all.  This caused some problems for us because we didn’t have a lot of images of real people with which to work.  On top of that, we didn’t have a large budget that allowed us to buy want we needed.

This issue wasn’t new to me, and from what I gather from the emails I receive, it’s pretty common.  Over the years, I’ve learned to work with tight budgets and limited resources.  In a previous post, I shared how I use stock photos to create characters for my elearning courses.  Today, I share some tips and tricks on how to find free or inexpensive stock images.

Multi-task and put on your photographer’s hat.

Get a digital camera and take your own images.  With some practice and basic understanding of photography, this is a very viable option.  In addition, people like to see themselves and their friends in the courses.

The Rapid E-Learning Blog - woman with camera

I’ve also found that using this approach offers some side benefits.  As you recruit subjects for your photos, it’s a good way to show that a new training program is being developed.  You can leverage this as a way to get some buy-in for the project from your future learners.

At one place I worked they called us trainers the “upstairs people.”  Culturally they did not see us as part of them. The fact that some of the learners can help with the construction of the course goes a long way in them accepting it.  I’ve found this especially true in the production environments where the learning departments are separated from the day-to-day grind.

Obviously, shooting your own photos doesn’t work for everyone or all elearning projects.  However, it is a cost effective approach and with some practice very viable.  Besides, you can always use a graphics program to fix you bad photos later.  🙂

Find free images.

When it comes to working with limited resources, my mentor, Dr. Werner says, “Before you spend a dime, invest the time.”  With a little searching you’ll find that there are all sorts of places to get free images.  Here are some of my favorite options.

The Rapid E-Learning Blog - Miscellaneous stock images

  • Microsoft Office Online.  Microsoft offers quite a few really nice images.  For example, just do a search of “business people” to start.  If you’re like Bono and still can’t find what you’re looking for, then click around on the picture’s key words to get ideas for more images.
  • Stock.xchng.  This is a good blend of free images and links to relatively inexpensive stock images.  They even have some interesting tutorials for aspiring photographers and graphic artists.  You might find the tutorials relevant to editing your images.
  • Flickr.  There are many photo community sites like Flickr where people upload their photos for use based on the Creative Commons license.  Here’s a link to learn more about Flickr’s Creative Common agreements.  While the quality for these images is “hit or miss,” as you can see from the link, there are over 7 million images that are available by attribution, where all you have to do is give credit for the image.  Compfight is a great site that makes searching Flickr easier.

Free is good, especially if you have more time than money.  However, free also offers some challenges such as image quality and easy access to just the right images.  You also run the risk that eventually you run out of pictures and your sexual harasser also has to play the role of senior manager.  While this might work in some cases, this probably isn’t preferable.

Use inexpensive stock photo sites.

There are a number of inexpensive alternatives to the free sites.  Typically you can pre-buy credits and then just download images when you need them.  If I do an external client project, I’ll budget in the cost of stock images and go that route rather than the free alternatives.  It ends up saving time and you get better quality.  Plus, you avoid licensing and copyright issues.

The Rapid E-Learning Blog - Example from stock image site

The stock photo sites are generally easy to navigate and not only can you find the right images, you can usually find them as a series.  This comes in handy when you want an image of the same people in various poses or environments.  You can also download watermarked images to use while you’re building your course before you make the commitment to buy.

I’ll look for a certain style and then click on the photographer’s profile to find more from that photographer.  Sometimes you can also contact the photographers and have them shoot specific photos for you at a reduced price.  It just depends on how “starving” the artist is.

You can always find inexpensive stock photo subscriptions. In fact Graphic Stock (which has a good selection) regularly runs a $99/year subscription with unlimited downloads. They also have a video  and audio service that is reasonably priced.

Paid stock images typically are better quality and offer more choices.  The challenge with them can be the licensing and royalty agreements.  Make sure that you read the license before you download and use the images.

When you look for images, you can end up spending a lot of time.  Make sure you budget that time into your projects.  Sometimes, I’ll make a list of the images we need and let the client do the leg work.

Here are links to some additional sites that were recommended by blog readers.

This should help you get started with the next elearning course where you have to use more than clip art.  If you know of any good resources or have additional tips and tricks on getting access to free or low-cost stock images please share them with the community by clicking on the comments link.

Events

Free E-Learning Resources

Want to learn more? Check out these articles and free resources in the community.

Here’s a great job board for e-learning, instructional design, and training jobs

Participate in the weekly e-learning challenges to sharpen your skills

Get your free PowerPoint templates and free graphics & stock images.

Lots of cool e-learning examples to check out and find inspiration.

Getting Started? This e-learning 101 series and the free e-books will help.


The Rapid E-Learning Blog

“Help! My client just dumped a 200-slide PowerPoint file on my desk and wants me to turn it into an elearning course.  What do I do?”

Do you feel his pain?  If you’ve been building elearning courses for any length of time, then you know exactly what he’s going through.  In fact, this is one of the questions I’m asked the most.  Everyone wants to know how to weed through all of the text and data that the client wants to throw into the course and still make it a good course.

In this post, I’ll go through a few considerations when you’re reviewing the course content and give you some ideas on how to weed out the unnecessary data.

Define the Objectives

Your client wants an elearning course for a reason and your job is to figure out what that is.  I put courses in one of two buckets.  The course objective is to change behaviors for performance improvement or the objective is to share information.

The Rapid E-Learning Blog - Is it performance or information-based?

Performance-based courses have some sort of measurable goal that lets you know if behaviors have changed and what impact it had on performance.  Information-based courses are a little trickier.  Typically, the objective is to share the information without explicit behavioral change and the measure of success is a report of completion.  This is typical of compulsory training.

By identifying the objectives of the course, you’re able to figure out what content you need to meet them.

If It Doesn’t Help Meet the Objective, Take it Out of the Course

Your subject matter experts will always give you more information than you need.  But, you don’t need every piece of information they have to share.  As an instructional designer, your job is to determine what to keep and what to leave out?  These three questions help you make that determination.

1. What’s the learner supposed to do?

Design the course from the learners’ perspective.  What are they supposed to do at the end of the course?  Typically the learners are expected to accomplish a specific task or be able to solve certain problems.

Training focused on just sharing information gets tricky because the focus is less on doing so the measurable expectations are not as evident.  In those cases you need to ask how the learner is expected to use the information in the course.  This helps you shift the compliance content out of the information bucket and into the performance bucket to make it relevant to the learner’s performance expectations.

2. What course content will help the learner meet the course objectives? 

Once you understand the objectives and performance expectations, sort the the course content and identify what information the learner needs to meet the course goals?

For example, I once did an elearning project for a financial institution where the learners were trained on completing a financial form.  However the training not only covered the process of completing the form, it also covered the whole history of the financial industry through a series of Congressional reforms and various regulations.

While the background information was important, it wasn’t critical when it came to the performance expectations of completing the form accurately.  And that’s the key point.  You’re trying to find the content that is critical to meeting the objectives.  The rest of it is just extra information.  There’s a place for it, just not as the essential course content.

3. How will the learner use this in the real world?

Effective elearning connects the course’s information to the learner’s world.  Knowing what that connection is will help you build the right course and sort through the pages of subject matter information.

Why does the learner need to know this information?  Which situations does the learner experience in the real world that requires knowing the course content?  How will the learner use the information?

Going back to the lending course, unless Alex Trebek shows up to get a loan, most likely the learner only needs to know how to collect the right information from the borrowers to accurately complete the form.  And, that’s what the course content should focus on.  All of the contextual information about the industry and the various regulations can be added as resource data to augment the course, but it’s not critical to completing the form.  So in that case, you’d build an elearning course that mirrors the lending process so that the learner understands why the course is relevant to meeting performance expectations.

Put the Course Content into the Learner’s World

As you sort the content, you’ll end up with two piles.  One pile has “need to know” information and the other pile has “nice to know.”  The “need to know” is used to build learning activities to help change the learner’s behaviors.  The “nice to know” is resource data to provide additional information if the learner wants or needs it.

 needtoknow

Have the learner use the “need to know” information in a real world context.  Instead of doing an information dump with multiple slides of bullet points and text, create a situation where the learner needs to use the new information.  Generally, you’d do something like this to share the information with the learners:

  • Set up the real-world scenario and then provide critical background information.
  • The learner will go through a decision-making process.  At that point you can provide additional information.
  • After the learner makes a decision, you can provide even more information as feedback.

As you can see, this simple approach gives you three ways to pump information into the course that you might have previously just put on a few screens with bullet points.

Use the “nice to know” information as a way to augment the course content.  Some learners like to know more before they make decisions.  They’ll want some of the information you pulled out of the course.

There are a number of ways you can provide access to the additional content without dragging down the course or interfering with the learning process.  Here are a few ideas.

  • Link to a help line.  This could be a link to an intranet site or if you want to get creative you can create a virtual helper like an HR assistant who can provide more information.  It could be as simple as a clip art image of “Sally the HR Manager” that links to a screen with additional information.
  • Compress the data into resource tabs.  For example, using an Engage interaction you can build FAQs or a Glossary that can easily hold all of the contextual information that you weeded out of the main course content.  They sit on the top of the player as drop down tabs and whenever you need more information, you can click on them without losing your place in the course.
  • Create additional documentation that the user can access.  You can put it online as a simple web page or publish a PDF that the learner can download a
    nd use as a resource later.

You’re always going to have more information than you need for the course.  Clear learning objectives (tied to performance expectations) provide a framework for filtering out the critical information from all of the extra information.  Keep focused on how the learners use the course content and build activities that let them get the information in a way that’s real to their world.  In this way, you’ll streamline your course content and build courses that have a positive impact on your organization.

I look forward to your thoughts and feedback.  Feel free to add them by clicking on the comments link.

Events

Free E-Learning Resources

Want to learn more? Check out these articles and free resources in the community.

Here’s a great job board for e-learning, instructional design, and training jobs

Participate in the weekly e-learning challenges to sharpen your skills

Get your free PowerPoint templates and free graphics & stock images.

Lots of cool e-learning examples to check out and find inspiration.

Getting Started? This e-learning 101 series and the free e-books will help.


At a recent conference, I was showing people how to build interactive scenarios using illustrated clip art characters.  Someone asked how I would build a scenario with people from photos because some people don’t like using the illustrations.

Essentially, you can do the same thing with people in photos that you can with illustrated clip art people.  However, photos present a few challenges.  The first is finding the right images.  And the second is pulling the people out of the background.  The good news is that you can find a lot of images in the package that comes with Microsoft Office.

In addition, there are a number of resources online where you can buy PC quality images for about $1 each.

Find Your Photos

If you’re using PowerPoint to build your courses, you have access to Microsoft’s online resources.  There are a number of images that you can use. You can always find inexpensive stock photo subscriptions. In fact Graphic Stock (which has a good selection) regularly runs a $99/year subscription with unlimited downloads. They also have a video  and audio service that is reasonably priced. I’ve found that in most cases, the lower resolution images work since I’m only using the images online and not for print.

The Rapid E-Learning Blog - search for images on Microsoft Online

I start by doing a search for “people.”  Since I’m going to separate the people from the background, I’m not concerned about the backgrounds or context of the images as much as I am about getting the right type of person.

The Rapid E-Learning Blog - example of image search

When I find an image that’s interesting, I’ll look at its properties to find similar images using the keywords.  To do so, just click on the image and look at the words that are used to tag it.

The Rapid E-Learning Blog - using keywords when doing an image search

Pull People out of the Photos

Finding the photos is pretty easy.  Here’s the part that is a little trickier.  It requires that you use an image editor to separate the people from the background.  There are a number of ways you can do this.  Some applications like Photoshop have ways to easily extract images.  At the least, you can use an erase tool.

Here are some tutorials on how to do this.  Even if you don’t have the same software as the tutorials, you’ll get the essence of the process.  If you have some good tips or tricks that will help others, feel free to share them in the comments section.

You’ll need to set the background to transparent so that you can put the image on top of another image.  I prefer to save the image as a .PNG file to preserve the image quality and the background transparency.

When I look for images, I don’t really care much about the original photo and what’s in it, as long as I have good images of the types of people I need for my screen.

The image below is of two women that appear to be in an architectural context.  I don’t care.  All I want is the women.  I cut both of them out and can use them in different contexts.  And, I don’t need to use them together.  So, in this case, the single photo gives me two people.

 The Rapid E-Learning Blog - cutting people out of the images for use in an elearning course

Put them on Backgrounds

Once you separate the people from the original image, you have the freedom to combine them with any background.  You can do a search for the types of background photos you need.  For example, do a search for “factory” or “office” to get some interesting images.

In the example below, the two women from the image above are now characters for a scenario that plays itself out in an office environment.

 The Rapid E-Learning Blog - example of images used in elearning course

As you can see, with a new background the images represent something completely different.  To change them up a little, you’ll notice that I just flipped the first woman and scooted her a little off screen.  For the second woman, I increased the size of the image and hid the books she’s holding.  It seems to change her posture a little.  Add the images to your elearning course and you’re on your way to building a custom scenario.

The Rapid E-Learning Blog - modified image used in elearning course demo

While this approach does take a little practice, once you master it, you’ll have all sorts of characters to use in your courses.  Keep in mind that this technique isn’t limited to scenarios.  I use it all the time to create just the right images.  Sometimes I have the right person but the wrong background.  I’ll quickly cut out the person and then find a background that better fits my needs.

I will say that one of my pet peeves with stock images is that it seems all of the people are posed and staring at the camera.  This can present some challenges when trying to build scenarios where the characters are interacting.

I’d love to have a stock site that sorts the people by groups like the clip art styles and where the characters look more candid rather than smiling at the camera like a virtual Stepford wife.  If you know of one, let me know.  Also, if you have some practical tips or ideas, feel free to share them with the rest of us in the comments section.

Events

Free E-Learning Resources

Want to learn more? Check out these articles and free resources in the community.

Here’s a great job board for e-learning, instructional design, and training jobs

Participate in the weekly e-learning challenges to sharpen your skills

Get your free PowerPoint templates and free graphics & stock images.

Lots of cool e-learning examples to check out and find inspiration.

Getting Started? This e-learning 101 series and the free e-books will help.


 The Rapid E-Learning Blog - motivation

There’s a good chance that if you neglect the information in this post you’ll lose your job.  Want to know why?

You can present a lot of good information in your e-learning courses, but you can’t really control whether a person learns from them.  The learners own what they learn and much of it is determined by their level of motivation.

The good news is that while you can’t make a person learn, you can create an environment that is more conducive to learning.  You do this by tapping into the learner’s motivation.  Your job is to figure out what will motivate your learners and then use that angle to lure them into the course.

Typically, people are motivated when their learning has meaning.  For example, if I know that passing a course will equate to an increase in my income, I am motivated to pass the course.  The same can be said for being motivated by personal safety.

When I was in basic training at the beginning of my military service, I was given one opportunity to throw a live grenade.  I was in Finance and normally they didn’t trust us with much more than a pencil.  Before I got to throw the live grenade, I had to go through a series of practice sessions and safety procedures.  Considering the implications of making a mistake while throwing the grenade, you can be sure that I paid real close attention to what I was being taught.

The odds are that most of your e-learning content doesn’t have life or death implications, so you must be a little more creative at tapping into what will motivate those who take your e-learning courses.

5 Ways to Motivate Your Learners

Reward Your Learners.  People are motivated by rewards.  Figure out what type of reward you can give the learners and then build that into the course.  Sometimes the rewards can be timed challenges or reaching a certain level of achievement.  Other rewards could be actual merchandise, like winning an iPod.  It all depends on the course.

Rewards don’t have to be tangible items.  They can be simple things like affirmation and encouragement.  The main point is to connect with the learners and find a way to have them feel good about some sort of achievement in your course.  The reward is something as simple as being able to test out of the course.

Make Sure Your Course Has Real Value.  Before your learners click on that first button, they want to know if the course has any value or benefit.  The truth is that most people who take e-learning courses don’t see the real benefit and because of that they either aren’t engaged with the course, or they don’t complete it.  If it happens to be a mandatory course, then they’re just trying to figure out how to click through it as fast as possible.  That doesn’t have to be the case.

I used to work at an organization where any time we met with a certain executive, he’d ask about our company’s performance metrics or last quarter’s earnings report.  He wanted to make sure we knew why we were working for him.  Because he had this knack for putting you on the spot, you were more motivated to pay attention to the organization’s goals and performance.

In that case, each e-learning course had meaning and implications to my job.  This also had an additional benefit.  Not only did I have a heighten sense of awareness to previously “boring” information, but I also always felt good (see the first point) when he called me out and I knew the answer.

Help Your Learners Perform Better.  This ties into the previous point.  Your course needs to have value and it needs to be relevant to what your learners do.  People will be motivated to take your course and pay attention as they know it will help them perform better.

Your job is to connect the learner to the course content.  If I’m taking a site safety course, I’m less motivated by clicking a button on a simple assessment than if I’m thrown into a real-life scenario where I am challenged to work through some issues like what I’ll face at work.  This type of approach connects me to the content, more so than screen after screen of bullet point information.

Set Clear Expectations for the Course.  I’m amazed to see my children just click around on the computer screen to get what they want.  On the other hand, I’ve watched adults fearful of clicking a next arrow not sure what will happen.

People tend to be leery of things they don’t understand, or if they’re not sure where they’re going.  However, once they get a sense of what’s going on, they’re more apt to be responsive to the course.

If you want your learners motivated, then an effective way to get them there is to let them know what to expect from the course that you want them to take. This all ties into the points above.  You’re asking the learners to spend some of their valuable time going through your course.  They expect clarity on what they’ll do, why, and what type of outcome to expect.

Along with clear expectations is to make sure that the learner knows how to navigate your course.  I’m not saying that you must create an addendum course on how to click the “next” button.  Instead, what I’m saying is that you don’t want to create a frustrating learning experience because the learner doesn’t know what to do with the course or how to get through it.  One of the best ways to de-motivate your learners is to make your course navigation so confusing that they just leave and never come back.

Tell Them They’re Wrong.  Controversy gets our attention and is a good way to motivate.  Challenge what a person believes, or even tell him he’s wrong, and you’ll see a person motivated to prove you wrong.  Of course, this approach needs to be tempered with common sense.

However, there is a lot of value in challenging people and what they know.  It’s just a matter of knowing how to do it in a manner that is appropriate.  When a person is challenged it puts them at risk and they tend to pay more attention.

Create an environment where they can safely fail or make mistakes and you’ll challenge them and keep them engaged.

These are some basic tips and things to consider when building your courses.  What you can do in your e-learning courses to motivate your learners is dependent on the course and your resources.  However, the main point is that you find the angle that works for your learners and the course you build, and then use it to engage your learner’s motivation.  A motivated learner will learn.

Events

Free E-Learning Resources

Want to learn more? Check out these articles and free resources in the community.

Here’s a great job board for e-learning, instructional design, and training jobs

Participate in the weekly e-learning challenges to sharpen your skills

Get your free PowerPoint templates and free graphics & stock images.

Lots of cool e-learning examples to check out and find inspiration.

Getting Started? This e-learning 101 series and the free e-books will help.


The Rapid E-Learning Blog - Needs Analysis Paralysis

We all know that doing a needs analysis is a good idea.  The problem is that we can become so focused on the analysis that we never get anything done.

I’ve worked on projects where I spent more time analyzing and filling out project forms than I did on actually creating courses.  On the other hand, I’ve also worked on projects where we did no analysis at all.  You can waste time and money using either approach.  So, where’s the balance?

Keep this goal in mind: create courses where the content is real to the learners.  That is the essence of all of the analysis.

If you have the resources, I’m sure that you can go through a very structured process to collect data and then put together some nice charts to show your client a bunch of bell curves and talk about statistical standard deviations.

What about those who don’t have time or money to do an exhaustive analysis?  Today, I’m going to give you some quick tips on how to collect the information you need to create relevant elearning courses.

Leave your cubicle.

I’m sure you work a lot of hours and you’re under pressure to get your work done.  Because of this, you get stuck at your desk and lose sight of the world around you.  This is especially true if you design elearning away from the world of your learners.

You have a computer at your desk, but your learners might share a computer in a lab.  Or, some of them don’t have sound cards or fast network connections.  You use a computer every day, but some of your learners don’t even know how to use a mouse, let alone click a “next” button.

Schedule some time to investigate the physical environment of those who’ll take your elearning course.  It’ll help put the course in the proper context.

Meet your learners.

In the same way you want to know the learner’s world, you also want to know the learner.  Who are the people that are taking your course?  Why do they need that information?  How will they use it?

Sit with your learners and get a feel for the work they do and how they’d apply the course content to their work.  The better you know your learners, the more relevant you can make the course.  If you’re pressed for time, only meet with two people.  Sometimes, just spending a couple of hours watching them work can be enough.

Assemble a pilot team.

If you don’t have the luxury of scheduling time to meet learners or visiting their work locations, a good alternative is to assemble a pilot team of people who represent your learners.  In fact, I’d assemble a pilot team either way.

These are people who can help you navigate the content and give you insight into how to make it relevant.  While you want experience and expertise on the team, make sure you don’t get stuck with the “know-it-all” expert.  Some of your best insight will come from recent learners.

Rapid prototype your courses.

I’ve worked on projects where we followed formal ADDIE steps and it would take months to roll out the courses.  Not anymore.  Why wait for it to be “perfect” if it means a delay in getting critical content to the right people?  With today’s tools, you can quickly build a course, test it out, get feedback, and then make adjustments.

While the tools let you build the course structure rapidly, a nice way to get the right context for the course is to get your users or pilot group to brainstorm scenarios where’d they use the content.  You get the benefit of learning more about their jobs and you get to rapidly prototype scenarios for use in your courses.

Create a survey.

So you work at one location and you don’t have access to your learners.  You won’t get to meet them.  In that case, create a survey.  It’s not as dynamic as spending real time with people, but you can still collect good information.  In addition, you can probably touch more people with a survey than you can with face-to-face contact.

There are a lot of good survey tools.  If you’re an Articulate user, you can leverage the surveys in Quizmaker.  If not, try one of the services like Zoomerang or Survey Monkey.  The trick with the survey is to collect the right information and to avoid collecting so much that you can’t process it.

Don’t bother doing an analysis.

Sometimes you don’t need an analysis.  There’s a good chance that your customer can give you what you need or you’re resourceful enough to trust your intuition.

I know I’ll get some flack for this advice, but from my experience that’s what’s happening anyway.  The last three organizations that I’ve worked for have been multibillion dollar companies with tens of thousands of employees.  At one, we actually were named the #1 training company.  I can tell you now, that doing any sort of analysis was in the minority.  And it wasn’t just at those companies.  It’s been that way everywhere I’ve worked.

Don’t feel bad if you don’t do an analysis.  There are just some projects that don’t require a lot.  Collect the information you need and do what you think is best.  Worst case, you learn what projects to spend time analyzing.

The goal in all of this isn’t to avoid doing a proper analysis of your course and determining how to best meet your objectives.  Instead, it’s to find the right balance between collecting the relevant information and getting your courses delivered in a timely manner.

I know that the blog readers come from diverse industries and what’s true from a corporate perspective might not be for those who design curriculum for the academic world or K12.  I’m interested in hearing your thoughts and tips on quickly doing a needs analysis. Feel free to share them with us in the comments section.


Events

Free E-Learning Resources

Want to learn more? Check out these articles and free resources in the community.

Here’s a great job board for e-learning, instructional design, and training jobs

Participate in the weekly e-learning challenges to sharpen your skills

Get your free PowerPoint templates and free graphics & stock images.

Lots of cool e-learning examples to check out and find inspiration.

Getting Started? This e-learning 101 series and the free e-books will help.


compliance training

Last week we looked at some of the issues with compliance-based elearning and how taking a different approach to its design can save your organization time and money.  And of course an additional benefit is that it makes your employees happier.  There are a number of good comments to the post and some ideas that you can explore.

Many times, how we approach building our compliance training is based on hearsay or regulatory urban legends.  So we end up with bloated and time consuming courses that only serve the purposes of sleep-deprived insomniacs.

One of the key points of last week’s post was to contact your legal department and find out what are the real requirements for your organization.  Then build your training around them rather than what you think the regulations say.

The ideal is to meet your compliance needs and at the same time identify legitimate gaps in understanding.  This allows you to address those gaps and provide the type of intervention that gets people up to the desired skill and performance level.

While there are many ways to design your elearning courses, today’s post features three simple strategies that will help you meet your certification needs and get your people back to work.

1. Create a Pre-Assessment

Put the certification test at the beginning of your course.  Make it a very comprehensive assessment so that you can truly identify their knowledge and skill level.  If the user passes the test, he jumps to the end and is certified.  If the user doesn’t pass, then you direct him to the course where he can get remedial training and additional assistance.

Keep in mind that even though it’s an assessment doesn’t mean it has to be a standard multiple choice or true/false quiz.  You can do an assessment as a series of case studies or scenarios, as well as a traditional quiz.

The Rapid E-Learning Blog - preassess your learners

How you design the assessment and course is up to you.  You can use a simple linear approach, or create a dynamic scenario-based process.  It really doesn’t matter.  The point is that even if you use a simple structure like this, you can make the assessment more than a click-and-read process and, instead, make it as engaging as you want.

2. Empower the User

The first idea is to create the assessment up front and then direct the user based on the assessment result.  While it is a simple approach and easy to design, this can be intimidating for some users.  Here’s a way to soften it up and empower them at the same time.

Instead of just starting with the assessment, give the user a choice.  Tell them that they can go through the course and at any time they like, attempt to take the assessment.  Then unlock the course so the user can navigate it and see what’s covered.

Think of it this way.  You go to a book store and look through the pages of a good book on elearning.  Most likely, you’ll look at the table of contents, and then perhaps go to the index and look for specific areas of interest.  If you’re visual, you’ll flip through the pages to see what type of illustrations and examples are in the book.  It’s your way of assessing the book’s value and relevance.

The Rapid E-Learning Blog - would you like to take the assessment now?

In a similar sense, when it comes to elearning courses, many people like to skim through the course content to get a sense of what’s in it.  Once they see the content and how it’s laid out, they get a sense of what they know and can determine if they need the course or not to help them pass the assessment.  This is why it’s important to unlock the course and give the learners room to explore.

Remember, these are courses for people who most likely already know the content and just need to demonstrate it and be certified.  It’s kind of like an experienced driver getting a new license.  The driver doesn’t need to take a driving class.  Instead, she takes a driver’s test.  If she passes, she gets a license.  If she can’t pass the test, she takes a class and practices until she can.

Using this approach lets the user see what’s required and mentally assess what he does or doesn’t know.  He can jump into a few sections to test his knowledge and comfort level and then take the assessment at any time.  In addition, odds are that he will self-assess and identify the area where he needs to know more and then review those sections.

3. Break the Content into Sections

Even if you can create courses with pre-tests, I’ve found that some organizations still won’t do it.  They’ll still request a formal “course.”  I’ve had customers tell me that even if people already know the information, it doesn’t hurt them to go through the course anyway.  I assume they think the information is going to stick to the learners like a static cling sock right out of the dryer.

In addition, some customers just aren’t comfortable with this type of approach where the user can self-navigate and choose when to take the assessment.  They don’t like the fact that people can test out.  Instead, they want them exposed to something that resembles a course.

While some customers shy away from a pre-test and still want a formal course, I’ve found that many are flexible enough to embrace the following approach.

Break the course content into distinct sections.  At the beginning of each section, give the user a choice to assess or go through the content.  At the end of all of the sections, do a final assessment.

You can still capture some time savings because a knowledgeable person can go through each section and test out quickly.  However, by breaking it into sections you can be more specific in the assessment process and catch areas where people might not be as fluent.

The Rapid E-Learning Blog - review and assess each section

For example, if you only had one assessment for a course, a person might pass at 80% and be certified.  However, what happens if the 20% she didn’t get correct was all from the same area?  That could be a potential problem.

The advice in this post probably doesn’t work for courses where you’re trying to teach new skills.  However, if you do a lot of certification or annual refresher training, these three approaches should come in handy.

If you do something different or have an approach that you’d like to share with the community, feel free to do so.

Events

Free E-Learning Resources

Want to learn more? Check out these articles and free resources in the community.

Here’s a great job board for e-learning, instructional design, and training jobs

Participate in the weekly e-learning challenges to sharpen your skills

Get your free PowerPoint templates and free graphics & stock images.

Lots of cool e-learning examples to check out and find inspiration.

Getting Started? This e-learning 101 series and the free e-books will help.


e-learning

Building an e-learning course can be time-consuming and costly.  Because of this you don’t want to waste your resources by making your e-learning course more complex than it needs to be.  Instead, your objective is to create the best e-learning course you can with the limited resources you have.

Identify the Course’s Purpose

The intent of most e-learning courses is to change performance.  However, the type of course that’s usually built focuses on sharing information rather than performance improvements.  This happens because most people focus on delivering content rather than on changing performance.

Your first step is to get your client focused on the real performance goals and then guide them to the right type of intervention.  Sometimes it means they don’t need an e-learning course.  In that case you save time and money by not building the e-learning course.

However, if they still need (or want) an e-learning course, then determine what type of course they need.  By identifying the type of course you are building, it’s easier to determine what resources you can commit.

Understand the Type of Course

 elearn_types

E-learning courses typically focus one of two things: sharing information or changing performance. And, within that framework, there are basically three types of e-learning courses.

  1. Communicate information with no performance expectations.   Information-based courses communicate new information but have no built-in expectations of changed performance.  A good example is a course that highlights new features of a software application.  You learn about the new the features but you aren’t required to do anything with this new information.
  2. Give step-by-step instructions that have specific outcomes.  These courses are focused on procedures and how to do something.  They’re made up of repeatable tasks that are very close to what the learner will do at work.  A good example is showing someone how to complete a worksheet or use software.
  3. Share guidelines to help the learner solve problems.  The most challenging courses to design are those where you teach principles or guidelines versus repeatable steps.  You really have to understand the nuances of the learner’s situation and how the principles can be applied while respecting the fact that each application is somewhat unique.

All three types of courses can be as simple or complex in design as you want to make them.  Keep in mind that the more complex the course is, the more time and effort it will take to build it.

Your best bet is to minimize the complexity and free your resources for the projects that are going to make the most impact.

To build good e-learning courses means that you have to know what type of course you’re building and get the most out of your resources.  Learn to differentiate between information and performance based courses.  Then move your resources to those courses that are going to have the most impact.

Events

Free E-Learning Resources

Want to learn more? Check out these articles and free resources in the community.

Here’s a great job board for e-learning, instructional design, and training jobs

Participate in the weekly e-learning challenges to sharpen your skills

Get your free PowerPoint templates and free graphics & stock images.

Lots of cool e-learning examples to check out and find inspiration.

Getting Started? This e-learning 101 series and the free e-books will help.