The Rapid Elearning Blog

Archive for the ‘Free Downloads’ Category


free text to speech narration

Occasionally, I get questions on free text-to-speech applications. While there are a number of free text-to-speech applications out there, many have character limits or don’t allow for commercial use. I’m not sure how many people have personal use cases for text-to-speech, but if you do, there are plenty of options. Another challenge is that many blogs in our industry create linkbait lists of text-to-speech applications, but for the most part, those lists are worthless.

Today we’ll look at a really good solution if you need a free text-to-speech application.

Why Use Text-to-Speech?

Despite the mechanical voice quality, there are some viable use cases for text-to-speech in e-learning (outside of accessibility issues):

  • For example, text-to-speech makes sense if you send a script out for professional narration. Use text-to-speech to create placeholder content for your reviewers so that you can get the voiceover script approved before sending it out for professional recording. This will save on the cost of do-overs.
  • Another good use case is the training content changes often. It is time-consuming to continually update and record narration. Text-to-speech applications make that easy. And because the content is somewhat disposable, people will most likely tolerate the mechanical voice.
  • Often we have international developers where English (or other languages) isn’t the first language. They can produce the courses and insert audio narration generated by text-to-speech applications.

A word of caution, though: most text-to-speech doesn’t sound that great. It’s been getting better over the years, but the mechanical voices can be grating and hard to sit through for long form content. That’s something to keep in mind. It’s bad enough to sit through most of the e-learning people experience today, let alone having it narrated by a robot.

With all that said, here’s how to use this text-to-speech application that is free and available for commercial use.

Balabolka: Free Text-to-Speech Application

I’ve reviewed most of the free applications and find that Balabolka offers the best benefit for text-to-speech narration. Here are some of the benefits and things you can do with it:

  • It’s free. Although, I do recommend that if you get value out of the free software it is a nice gesture to support the developer with a donation.
  • Run it via USB. No need to install it. You can run the software from a  USB drive.
  • It uses the SAPI voices that are already installed on your computer. In most cases the sound fine. You can also add additional voices. I added the new mobile voices from Microsoft and they work for my needs. There are other services where you can buy more natural sounding voices. But you’ll have to do your own research on how to set those up.
  • Insert your entire narration script and output either a single audio file or split the narration into multiple audio files.
  • Leverage the Google text-to-speech service for an additional voice. Output as an audio file.

Balabolka Text-to-Speech Examples

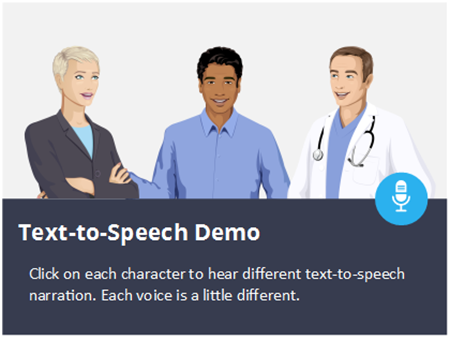
Below is a link to an example module where I converted some text from a blog post into text-to-speech audio. I created a few different examples so you can hear the quality of the voices and how they sound in the context of an e-learning demo.

text to speech narration

Click here to view the text-to-speech demo.

Balabolka Text-to-Speech Tutorials

Here’s a quick video tutorial where I walk through the basics of text-to-speech conversion:

  • Insert text and output audio
  • Create multiple audio files from one script
  • Batch convert audio from a script

Click here to view YouTube video.

If you’re looking for a free alternative for text-to-speech narration, then this solution should work for your courses.

Events

Free E-Learning Resources

Want to learn more? Check out these articles and free resources in the community.

Here’s a great job board for e-learning, instructional design, and training jobs

Participate in the weekly e-learning challenges to sharpen your skills

Get your free PowerPoint templates and free graphics & stock images.

Lots of cool e-learning examples to check out and find inspiration.

Getting Started? This e-learning 101 series and the free e-books will help.


e-learning professional portfolio

As an e-learning developer, it’s important to document your work experience and skills. One way to do this is with a professional work portfolio.

In previous posts, we discovered why you need a portfolio as part of your professional development. And we even looked at one community member who does a great job demonstrating her skills by showcasing her e-learning modules in her portfolio. Today, we’ll look at a few things to consider when creating a professional portfolio.

Most people I meet don’t maintain a portfolio. So before we get started, I’ll give you two good reasons why you need to actively maintain a portfolio.

Most likely you don’t own the e-learning software to create courses. Let’s suppose you lose your job. Now you’re scrambling to find a new job which means you need to pull together a portfolio. Oh no! You don’t have access to the courses you built and you don’t have access to the software to rebuild them.

When I posted a job for instructional designers, one requirement was to see the applicant’s portfolio. More than 80% of the people told me they didn’t have one and that they were interested in the job, but needed to create a portfolio. Which was fine.

You know what happened, though? I reviewed those applicants who did have works samples ready-to-go and they ended up getting interviews. By the time others sent me their portfolios, we were already into the second round of interviews of those who had them to start.

Your Portfolio Shows Your Work

show your work in your e-learning portfolio

The main point of the portfolio is to show your work. It’s easy to talk about what you can do, but in a multimedia industry (that’s mostly visual) it’s important to show what you can do.

Ideally, you can show real projects, but as we know that’s not always possible. In those cases, you either have to create dummy versions of the courses or build your own modules. I prefer the “build your own” route. This way you can build demos that are more interesting than the typical type courses you may be forced to build at work.

What’s in the Professional Portfolio?

what's in your e-learning portfolio

The portfolio is intended to highlight your skills and experience. It’s not supposed to be an exhaustive inventory.

  • Keep it short. No one likes to look at 800-slide courses where every screen looks the same. Find a few interesting (and interactive) parts of the course and show those. Or build some modules from the weekly e-learning challenges. That’s what many in our community do. They’re short and relatively easy to build. And perfect for a portfolio project.
  • Looks matter more than instructional design. It is a visual medium so make your visuals strong. Stay away from defaults and add some custom elements. Add some novel interactivity to catch their attention.
  • Identify common types of courses and build some modules for your portfolio. Here are a few: drag and drop interactions, decision-making scenarios, software tutorials, and custom navigation. This will give you a diversity of projects.

How to Organize the Portfolio Content

how to organize e-elearning portfolio

Ultimately, e-learning is a solution. What was the problem and how did the course help? There are four things you should outline in your portfolio:

  • Who was the client?
  • What was the need?
  • What did you do?
  • What was the result?

This can be listed as bullet points like above or just a simple statement, such as: At ACME we introduced a new processing machine and needed to train 5,000 employees. The onboarding course I created taught them XYZ and we had all employees trained in 2 weeks and saved a gazillion dollars.

Key point: no one wants to read the War & Peace version of your course. Keep it simple and provide just enough information.

Your Portfolio Builds Your Brand

Create_portfolio_10

Your peers are all over the Internet posting articles, sharing their work, and connecting with others. You can do the same with your portfolio.

  • Use it to build your brand. There are quite a few I’ve known over the years who I’ve seen grow their personal brand to the point where they’re now recognized experts. For example, it was fun to see Jackie Van Nice at the recent Learning Solutions Conference get mobbed by people who recognized her work in the community.
  • Share your work. A great way to build your brand and expand the reach of your portfolio is to share your work. Build simple templates and give them away. Show your work and then share the source files when possible. To the person who values that source file, you’re an expert. Montse Anderson does a great job sharing her nice-looking templates.
  • Build your network of peers. Many people make the mistake of just pushing their content out. The best networkers know how to pull people in. It’s important to connect with others. But it has to be real. No one wants to feel like they being played, sold to, or sucked into some sort of multi-level marketing scheme.
  • Altruism is the first step. Share freely with no strings tied. Just know you’re helping someone (perhaps thousands). Share as you learn. I love the way Melissa Milloway is always experimenting and then shows what she does. There’s a humility in her approach that works and pulls people in because it’s authentic and not just some salesy thing. You understand her learning journey and feel like you’re part of it.

There are many reasons to have an e-learning portfolio. It’s a good way to stimulate and document your own learning. But most importantly, it’s a great way build your industry expertise and show what you can do. You never know when the next opportunity presents itself, but you want to be ready when it does.

Do you have a portfolio you’d like to share? If so, share it via the comments.

Events

Free E-Learning Resources

Want to learn more? Check out these articles and free resources in the community.

Here’s a great job board for e-learning, instructional design, and training jobs

Participate in the weekly e-learning challenges to sharpen your skills

Get your free PowerPoint templates and free graphics & stock images.

Lots of cool e-learning examples to check out and find inspiration.

Getting Started? This e-learning 101 series and the free e-books will help.


simple-tips

Here are two simple tips to help save time and frustration as you work through the day. One shows how to autosave files so you don’t need to worry about losing your work. And the other lets you see which tabs and extensions in Chrome are eating up all your RAM and processing power.

How to Autosave Your Files

The first thing I learned when working with multimedia was to save my work and save all the time. It’s inevitable that an application freezes or the system shuts down and work is lost. At all the workshops I always state how important it is to save work. And with all that said, I don’t know how many times I’ve lost work not following my own advice.

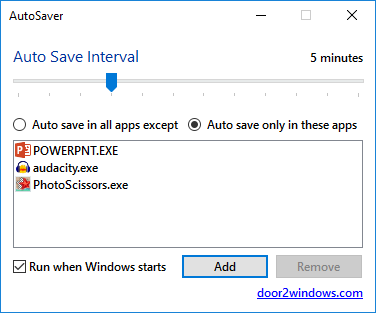
AutoSaver is a free application that autosaves files. This is super handy if you forget to save your work as you go. You can download it here. Basically, you select your apps and then at what frequency you want to save. Or you can set it to autosave every app with some exceptions. Pretty simple.

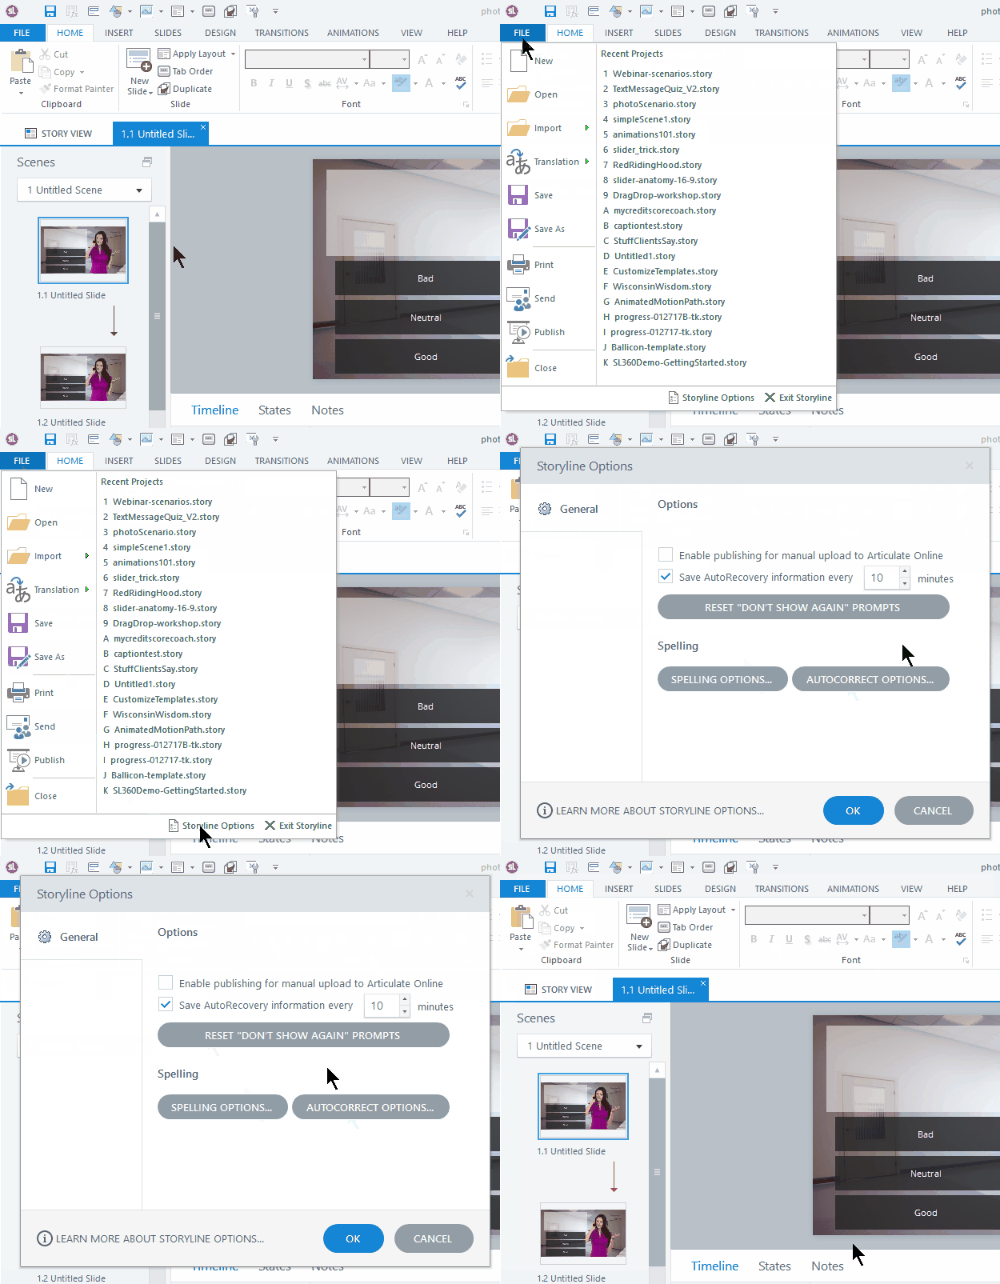
Of course, if you use Storyline, you don’t really need this because there’s an AutoRecovery feature built into Articulate Storyline.

auto recover Storyline

What’s Consuming Your RAM?

Often I find my system gets a bit sluggish and when I look at my task manager I see that my browser is consuming most of the memory in my system. That’s because I have all sorts of extensions added to my browser.

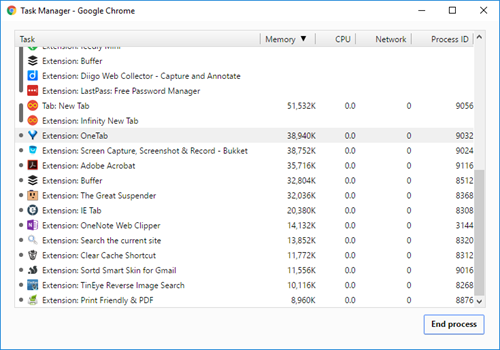
Ever wonder which tabs or extensions are consuming the most of your memory? Well, if you use Chrome, just hit SHIFT+ESC and you’ll see. This displays a list of extensions and tabs. I was surprised to see an extension I rarely use, eating up the bulk of my memory, so I just deleted it.

chrome-task-manager

I don’t know about you, but the AutoSaver has saved helped me quite a few times. And cleaning up memory can help speed up your computer. What simple tips or hacks like this do you use to save time?

Events

Free E-Learning Resources

Want to learn more? Check out these articles and free resources in the community.

Here’s a great job board for e-learning, instructional design, and training jobs

Participate in the weekly e-learning challenges to sharpen your skills

Get your free PowerPoint templates and free graphics & stock images.

Lots of cool e-learning examples to check out and find inspiration.

Getting Started? This e-learning 101 series and the free e-books will help.


free stock images for e-learning

Apparently, the internet can’t get enough of free stock images as it seems there are new sites popping up every day. Truth be told, many of the sites aren’t very good and most of the images probably don’t have a good context for e-learning design.

Free Stock Images for E-Learning Resources

I’ve already shared some resources for free stock images in previous posts, as well as a few sites that seem to curate most of the free stock images. This saves a bunch of time because you don’t need to visit every single free stock image site.

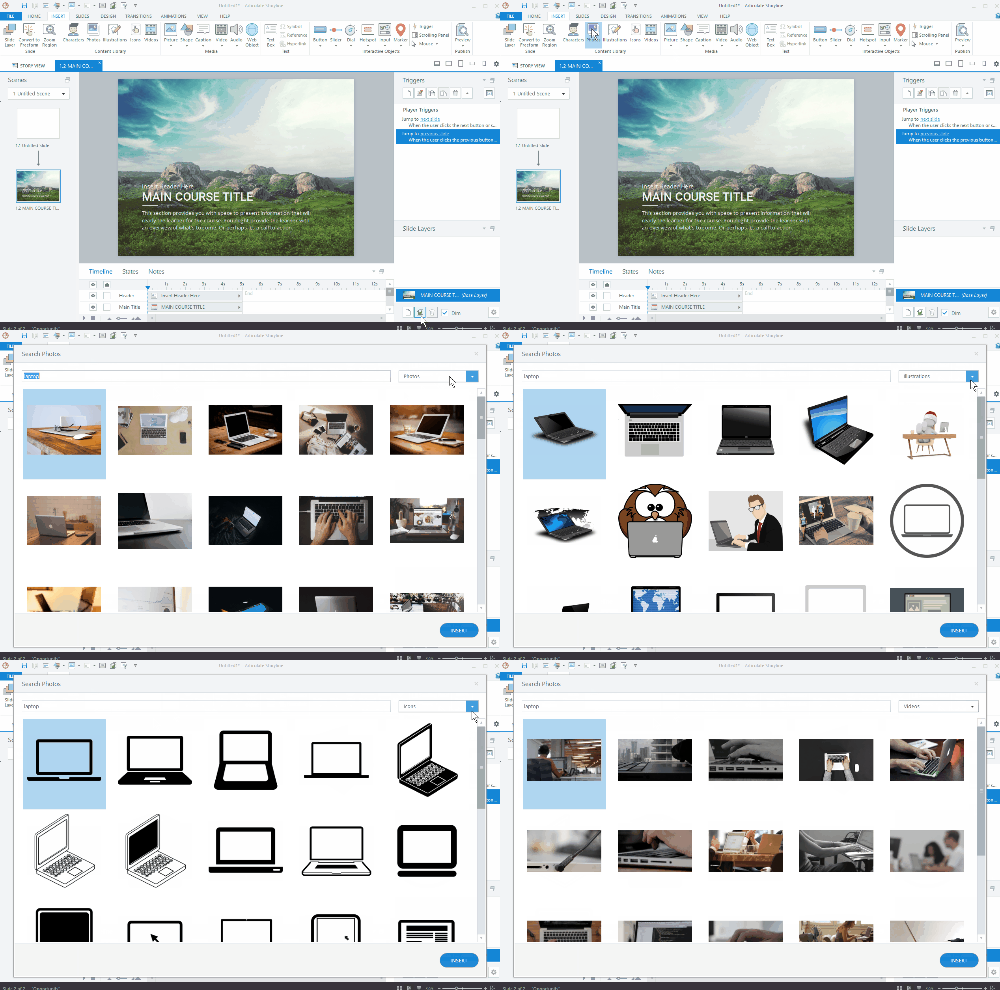
And of course, if you have Articulate 360, then there’s already an assortment of e-learning templates, character packs, and all sorts of stock images, illustrations, icons, and videos.

Articulate Storyline 360 stock images

More Free Stock Images for E-Learning

But if you need more free stock images for e-learning courses, here’s another new resource and the image quality is really great. The images are part of the Burst site, courtesy of Stopify and under Creative Commons Zero, which means you can do with them what you want and they don’t require attribution for commercial projects. But, it’s still good form to credit the source of the content and give them their props, if you can.

free stock images for e-learning

To make things a bit easier and less time consuming for you, I curated the office, business, and computer stock images. This should save you having to go through all of the images yourself. You can download the free stock images here. And of course, you can go to the source site and check out all of the other available images.

I always like the images of people meeting and working on computers. Which images do you like best? Feel free to share your thoughts via the comments.

Events

Free E-Learning Resources

Want to learn more? Check out these articles and free resources in the community.

Here’s a great job board for e-learning, instructional design, and training jobs

Participate in the weekly e-learning challenges to sharpen your skills

Get your free PowerPoint templates and free graphics & stock images.

Lots of cool e-learning examples to check out and find inspiration.

Getting Started? This e-learning 101 series and the free e-books will help.


gamified e-learning gamification

I hear a lot of people ask about gamifying their e-learning courses. And the examples they show are usually simple games modeled after shows like Jeopardy or Wheel of Fortune. Those are fine and have their places in e-learning, especially for quick knowledge checks. But they’re not the same as gamification.

In today’s post, I’ll share a few simple things to help get your brain muscles going.

What Do You Need to Know?

When it comes to building the courses in an authoring tool, you basically need to know how to use variables. Variables allow you to track and evaluate the user to provide relevant feedback, scoring, tokens, and all the other things that make up gamified e-learning courses. And once you know how to work with variables, you can build all sorts of things.

gamified e-learning

Here are some resources to learn more about variables:

Learn More About Gamification

You can do a search and read all sorts about gamification especially now that it’s also a buzzword. Essentially you are taking game concepts and applying them to a non-game context. As you play games, ask what about the game is compelling and what similar element could work in your next e-learning course.

I think the greater challenge in building gamified courses is less in constructing the mechanics and more in building a narrative that integrates gaming psychology. Building things in the authoring tools is relatively easy compared to understanding what to build.

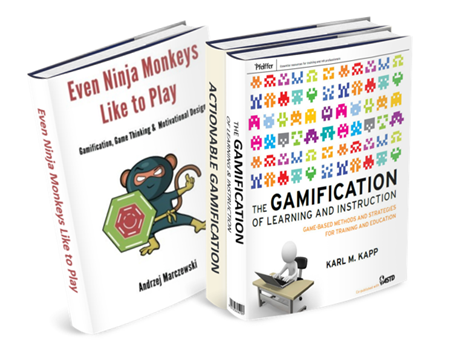
Here are three good books on gamification.

gamification books

The links to Amazon books may produce a slight commission.

What Can You Build in Your E-Learning Course?

When it comes to authoring the courses outside of a management system where you can track multiple users and build things like leaderboards, you’re confined to simple game elements such as:

  • Timers
  • Personalization
  • Progress meters
  • Tokens
  • Rewards management
  • Scoring
  • Autonomous navigation

You can make some very compelling courses that instructive and engaging. However, there’s a lot more to gamification than these simple elements above. How do you motivate learners and create the right tension between boredom and failure? Make sure you invest the right resources and develop a good strategy. Otherwise, your gamified course will transform from game to gimmick.

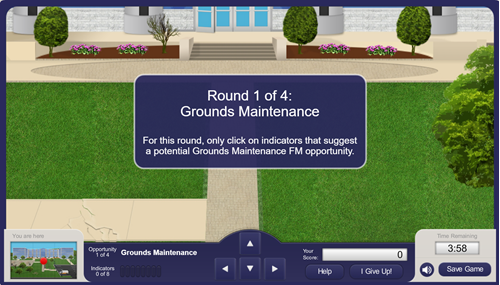
If you’re not quite sure where to get started, check out some of the cool examples in the community. They’ll give an idea of some of what you can do with the authoring tools. Here are three nice examples:

gamification example 1

Click here to view gamified e-learning course.

gamification-example-2

Click here to view gamified e-learning course.

gamification example 3

Click here to view gamified e-learning course.

And there’s nothing wrong with starting simple. If all you need is a Jeopardy-style quiz, then download this free file. It’s a great way to work with a context you know. But make a commitment to learn more about variables and start to add some of those gaming elements above to your courses.

Have you built any gamified e-learning? If so, share a link in the comments.

Events

Free E-Learning Resources

Want to learn more? Check out these articles and free resources in the community.

Here’s a great job board for e-learning, instructional design, and training jobs

Participate in the weekly e-learning challenges to sharpen your skills

Get your free PowerPoint templates and free graphics & stock images.

Lots of cool e-learning examples to check out and find inspiration.

Getting Started? This e-learning 101 series and the free e-books will help.


free fonts

In an earlier post, we looked at how to convert dingbat and wingding fonts into vector images that you can use in your e-learning courses and presentations. They’re great for creating icons or bullet lists.

Not that you know how to convert the fonts into vector images, you need some fonts to use.

I reviewed a bunch of the free fonts and tried to sort to the those that are free for commercial use. If you want to search on your own, look for facefonts, dingbats, or wingdings. They tend to produce good results. Also, most of the free font sites have an assortment of these fonts.

As always when using free resources, confirm the licensing agreement and provide proper attribution. And it’s still good practice to give the owner props.

Free Faces & Character Fonts

free font icon

Free Icon Fonts

free font icons 2

Free Shape & Arrow Fonts

free fonts arrows

Are there certain fonts like these you like to use?

Events

Free E-Learning Resources

Want to learn more? Check out these articles and free resources in the community.

Here’s a great job board for e-learning, instructional design, and training jobs

Participate in the weekly e-learning challenges to sharpen your skills

Get your free PowerPoint templates and free graphics & stock images.

Lots of cool e-learning examples to check out and find inspiration.

Getting Started? This e-learning 101 series and the free e-books will help.


free icons PowerPoint

In the e-learning community, a number of people shared free icons and shapes. There’s a lot of variety from which to choose. And they’re great for your courses, so make sure to take advantage of all of those free resources.

Looking at the free icons reminded me of simple trick we show in our PowerPoint workshops. It’s one I’ve shared in the past when I showed how to create custom shapes in PowerPoint, but today I’m adding a bit more detail.

Convert Dingbat Fonts to Free Vector Images

There are two video tutorials below. The first one jumps right into the basics of doing the conversion of the dingbat font to a vector shape and the second one adds a little more detail and context for those not familiar with the feature.

View tutorial video  (short version)

Here are the basic steps. You can watch the video for more detail and nuance. You’ll need PowerPoint 2013 or newer.

  • Install a dingbat font or use wingdings (which should already be installed).
  • Add a character on the slide.
  • Duplicate it so you have two objects.
  • Select both and then go to Format > Merge Shapes > Fragment. This converts the font into a bunch of vector shapes. Again, you’ll need PowerPoint 2013 or newer for this.
  • At that point, you can edit and customize the vector as you desire.
  • When done, select all of the shapes and group them. Ctrl+G is the shortcut.
  • Right click and Save as image. I like to save as .PNG to preserve the transparency.

Here is a long form version of the video above with a more detail and context.

View tutorial video (detailed version)

This is super easy tip and a great way to take advantage of all of the wingdings and other symbol-type fonts available to you.

Events

Free E-Learning Resources

Want to learn more? Check out these articles and free resources in the community.

Here’s a great job board for e-learning, instructional design, and training jobs

Participate in the weekly e-learning challenges to sharpen your skills

Get your free PowerPoint templates and free graphics & stock images.

Lots of cool e-learning examples to check out and find inspiration.

Getting Started? This e-learning 101 series and the free e-books will help.


e-learning screencast webinar tutorials

If you create software training then odds are you show a lot of keyboard shortcuts. If that’s the case you’ll like today’s tip where I share a simple tool that makes it really easy to display the keyboard shortcuts on-screen.

How to Display Keyboard Shortcuts during Screencast Tutorials

Meet Carnac the Magnificent. It’s a keyboard utility that displays keyboard shortcuts as they are used during your demos. This is perfect for webinars and screencast tutorials. It’s also great for live presentations where people in the back of the room can’t always hear or see what’s going on.

Here’s a quick tutorial where I show how it works and how it would look in your software training.

Click here to view the Youtube video.

  • You can download Carnac here. Read more about it here.
  • Once you download the file, double-click to install it.
  • You’ll see the purple Carnac icon in your system tray.

Once it’s active in your system tray and you use a keyboard shortcut, you’ll see the shortcut displayed on the screen as in the image below.

screencast tutorials example

How to Customize the Keyboard Shortcut Display for Screencast Tutorials

You can modify how the keyboard shortcuts display.

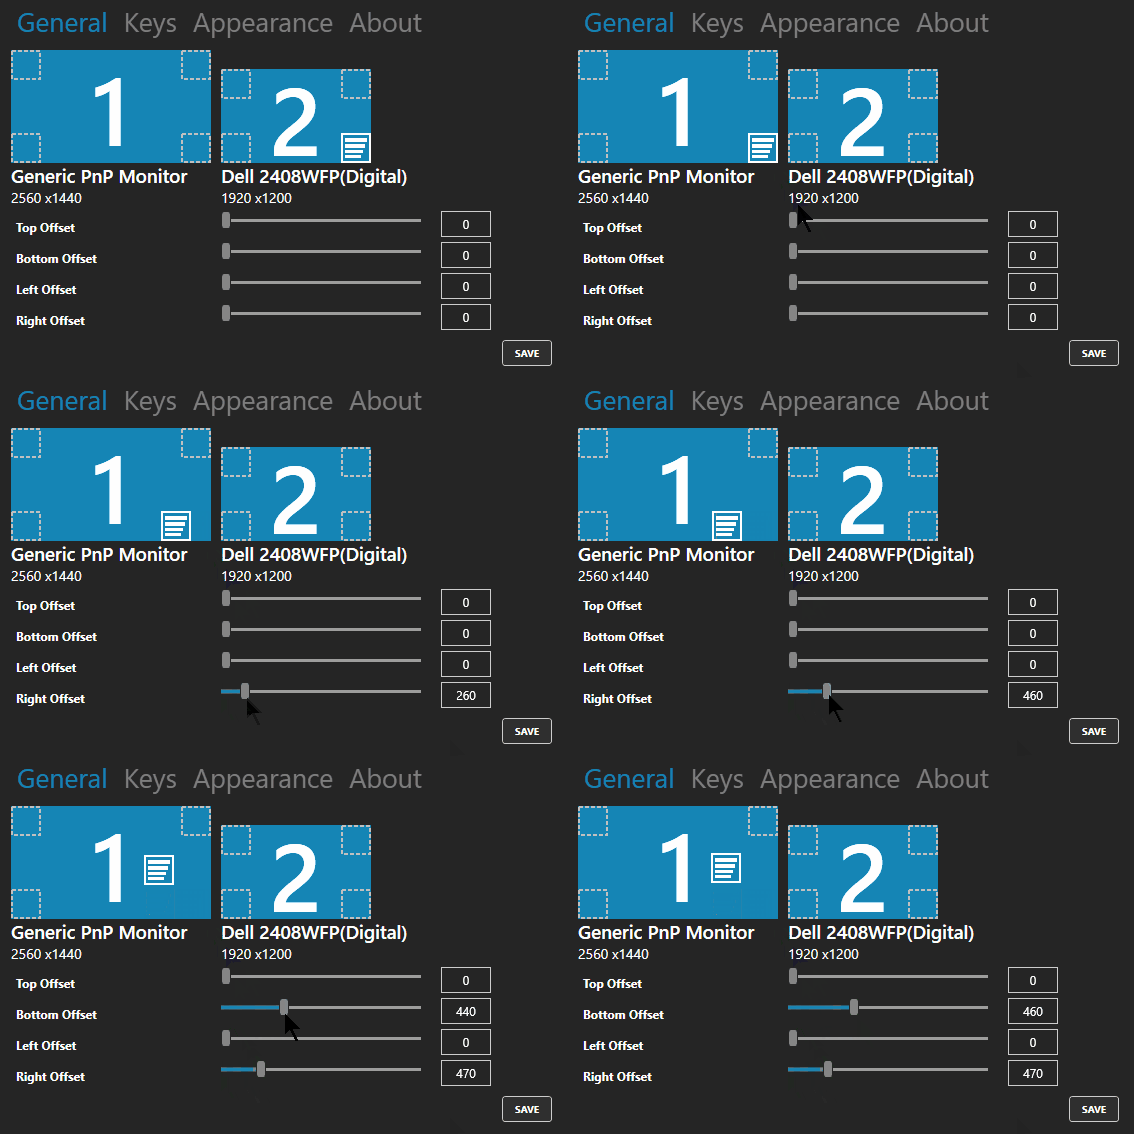
  • Double-click on the Carnac icon and it opens a setting window.
  • You’ll see the option to select monitors and where the object is displayed. You start by selecting the screen and then adjust how much you want to offset it.

screencast tutorials set properties

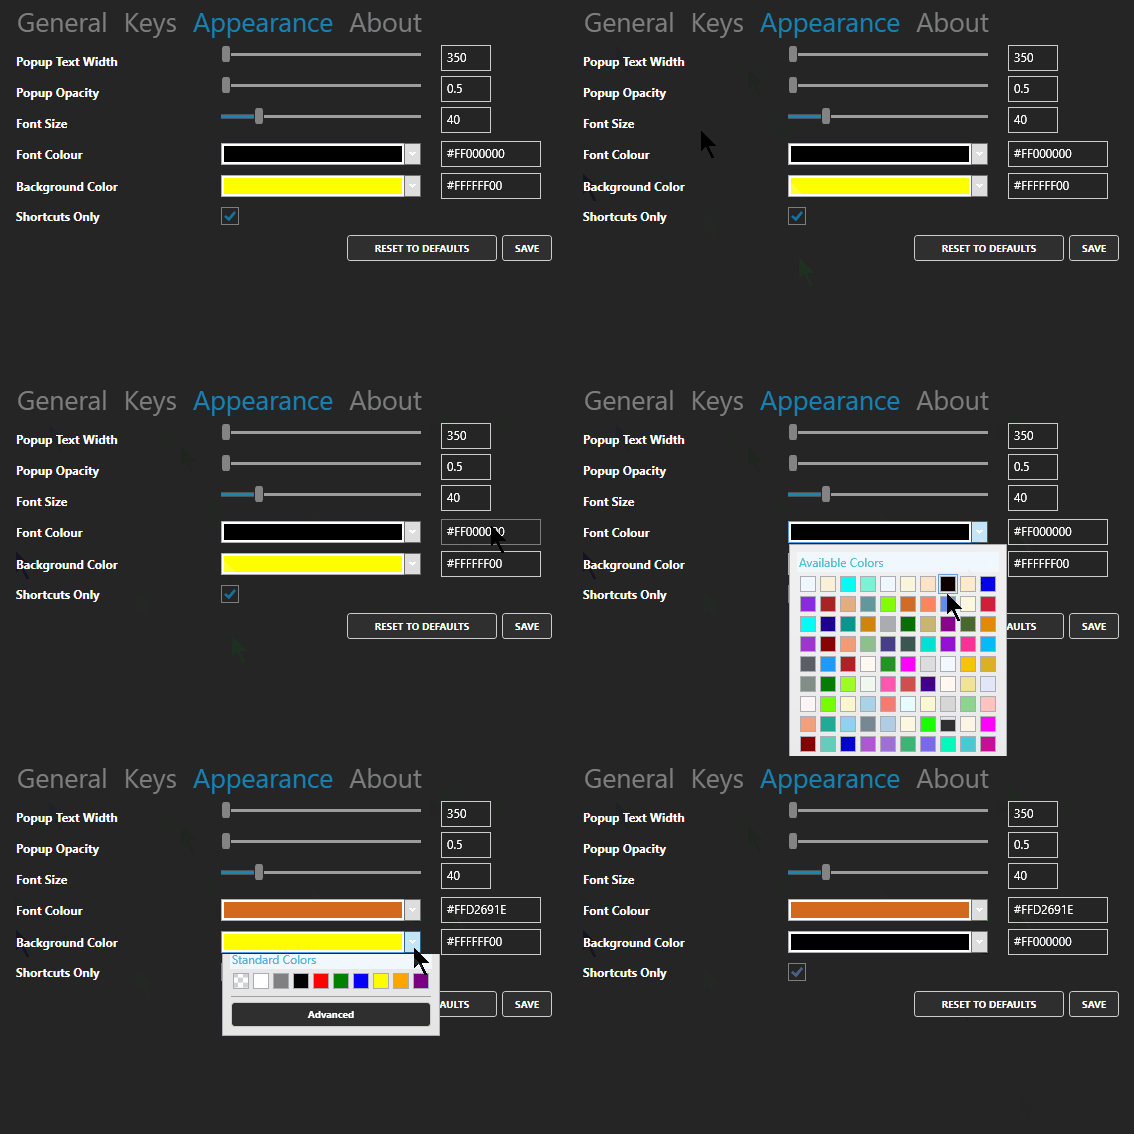
  • You can also change the appearance of what’s displayed. This includes the width, font size, and color. I couldn’t get the sliders to work, but manually entering the values did work for me. Save your changes.

screencast tutorials change appearance

It’s a fairly easy to use and it’s free. But you get what you pay for, so if you need help, you’re stuck. But I’ve found it works fine and as expected.  If you need a way to display keyboard shortcuts, then this solution should work for you.

Events

Free E-Learning Resources

Want to learn more? Check out these articles and free resources in the community.

Here’s a great job board for e-learning, instructional design, and training jobs

Participate in the weekly e-learning challenges to sharpen your skills

Get your free PowerPoint templates and free graphics & stock images.

Lots of cool e-learning examples to check out and find inspiration.

Getting Started? This e-learning 101 series and the free e-books will help.


subject matter experts relationship

This is part two of the series on working with subject matter experts when building e-learning courses. In the previous post, we looked at how to set expectations and some simple project management tips. I also shared a link to the free e-book, Essential Guide to Working with Subject Matter Experts.

Today, we’ll look at what it takes to build a good working relationship with your subject matter experts. I always take a short term and long term view. In the short term, I want to make sure that the project moves forward successfully. And the subject matter expert plays a critical role.

In the long term, it’s all about networking and building relationship within the organization. The more you know and the more people you know, the more valuable you’ll be to the organization. And you never know when you’ll need that person’s help on future projects. A good relationship proves valuable.

subject matter experts are your friends

When asked about working with subject matter experts, here’s what your fellow e-learning developers shared:

  • They are called subject matter expert for a reason – don’t be patronizing because without them we wouldn’t be doing this.
  • Be respectful of their time, especially if they’re not working on the project and only providing assistance.
  • Help them save time. You can do this by reducing their workload. Do some research and pre-work that helps them not have to provide all of the content.
  • Show that you care. They won’t care what you know until they know that you care.
  • Be nice. If that doesn’t work, then bribe with chocolate!
  • Make them feel important. They tend to have big egos. [Tom’s note: not all of them suffer from big egos unless you’re working with doctors and lawyers. 🙂 ]
  • The subject matter experts have a lot of knowledge to impart. They will be keen to ensure that the students have access to that.
  • Keep a poker face when you hear things you do not like or cannot do. Just listen and record. You can fix things later.
  • We may use the same words but they don’t always mean the same things. Make sure that terminology is understood by both developer and subject matter expert.
  • Define your role to them in concise, clear terms so it is less threatening for them (especially when it is time to cut out “nice to know info”).
  • Be ready for them not to recognize your skill set.
  • Praise, praise and more praise for their cooperation, input, and feedback.
  • Get their buy-in at every stage of the process (if they’re involved in that level of detail).
  • Face to face is better than an email sometimes.
  •  This is a different style of learning.
  • Let their managers know how much they’re contributing.

What do you do to manage the relationship with your subject matter experts?

Events

Free E-Learning Resources

Want to learn more? Check out these articles and free resources in the community.

Here’s a great job board for e-learning, instructional design, and training jobs

Participate in the weekly e-learning challenges to sharpen your skills

Get your free PowerPoint templates and free graphics & stock images.

Lots of cool e-learning examples to check out and find inspiration.

Getting Started? This e-learning 101 series and the free e-books will help.


subject matter expert tips

At a recent workshop, we had participants share their tips on working with subject matter experts. As expected they shared some really good tips that are practical and will help move your training courses forward.

Since there was a ton of tips I broke them into a series of posts. Today we’ll look at how to manage the relationship with your subject matter experts.

Establish Expectations with Your Subject Matter Experts

tips when working with subject matter experts in e-learning

  • If you can, research your subject matter expert just like you would any other client.
  • Define clearly the communication plan with your subject matter experts. Follow the 5Ws: who, what, where, when and wherefore.
  • Make sure the development process is clearly defined and understood and then define the role of your subject matter expert and how much you expect.
  • Explain the importance of the project you are working on because a lot of times they think whatever you’re working on isn’t necessary.
  • Give clear instructions to subject matter experts as to how you want their information and content submitted to you. This includes any templates, instructions for recording and submitting audio. This helps avoid issues later, especially where there is a minimum of communication and interaction with the subject matter expert due to time and cost constraints.
  • Don’t be concerned if initial meeting is the dreaded information dump. You can always refine from this big list. Sometimes it’s good to just get them to dump everything so you know what they’re thinking.

Simple Project Management Tips When Working with Subject Matter Experts

subject matter expert tips for e-learning

  • Set up a kickoff meeting in which you: declare timelines, set expectations, define the specific roles during which phases and expected outcomes and deliverables.
  • Come up with a service level agreement. And then make sure you get the requirements signed off after each phase to avoid last minute surprises. This also helps keep the project in scope.
  • Get buy-in as soon as possible during analysis and information gathering.
  • Schedule and hold regular progress check-in meetings.
  • Record and document your meetings and then send out so that everyone can see what was discussed and expectations moving forward.
  • Meetings should have agendas with action items. No action items, then no meeting.
  • Don’t miss your own deadlines!!!
  • Document what you have agreed on and refer to that for your milestones and check-ins.
  • Ensure you and your subject matter expert track changes, and ask them to be as specific as possible with their comments and feedback. e.g. writing “Clarification is needed here” isn’t good enough!

free e-book working with subject matter experts

Be sure to check out this free e-book, Essential Guide to Working with Subject Matter Experts. You can find it in the E-Learning Heroes community.

Events

Free E-Learning Resources

Want to learn more? Check out these articles and free resources in the community.

Here’s a great job board for e-learning, instructional design, and training jobs

Participate in the weekly e-learning challenges to sharpen your skills

Get your free PowerPoint templates and free graphics & stock images.

Lots of cool e-learning examples to check out and find inspiration.

Getting Started? This e-learning 101 series and the free e-books will help.


free microlearning template

Earlier I shared this free microlearning template. It is easy to use and edit. However, I did receive some questions on how it was created and how to add additional cards. So in today’s post I’ll share a few tips so you can make your own template and edit the one I shared.

Here’s a series of video tutorials that show how to create the simple, yet powerful microlearning template. Check out the last tutorial on how to quickly edit the text. It’s a neat way to leverage the translation feature to do the heavy lifting.

How to Create the Animated Card

We want the card to animate onto the screen and pause. And we want to click on the card to see the other side (of the card, not the spirit world).

Click here to view the tutorial.

  • The first step is to create a card.
  • Add an entrance and exit animation.
  • Add a selected state to the card to create the click and reveal feature.
  • Add a trigger to the card that pauses the timeline when the entrance animation completes.

When you preview, the card should animate in and pause. You can click on the card to select or deselect it.

How to Edit the Normal & Selected States

We want the selected state to have an animated object that comes on and off the screen when the card is selected and deselected.

Click here to view the tutorial.

  • Select the card and double click inside the state you want to edit.
  • Add placeholder text in the normal state.
  • Add a shape to the selected state and add placeholder text to the shape.
  • Add entrance and exit animations to the shape in the selected state.

When you preview and click on the card, it will trigger the entrance animation of the selected state. And when you click on it again, it should trigger the exit animation.

How to Bring a Card On & Off the Screen

When the card animates on the screen it will pause. This allows us to “flip the card” by clicking on the card. When we’re done looking at the card, we want it to exit the screen and trigger a new card.

Click here to view the tutorial.

  • Create a button with a trigger to resume the timeline.
  • Duplicate the card and position it on the timeline after the first card. Repeat as necessary.

When you preview the microlearning interaction, the card enters and pauses. Clicking the button causes the timeline to resume which triggers the exit animation of the first card and the entrance animation of the next card.

How to Edit the Content on the Cards

Clicking into the states of the various cards can be tedious. Here’s an easy way to edit the text for each card.

Click here to view the tutorial.

  • Go to File>Translate>Export to export the text from the course.
  • Edit the text in the document and save it.
  • Go to File>Translate>Import to import the text into the cards.
  • Preview the microlearning interaction to verify that the text alignment is correct.

Importing the text should work well and as long as you don’t add too many characters you shouldn’t have to do any editing.

Here’s another free microlearning template for you to deconstruct and see how it was built.

Events

Free E-Learning Resources

Want to learn more? Check out these articles and free resources in the community.

Here’s a great job board for e-learning, instructional design, and training jobs

Participate in the weekly e-learning challenges to sharpen your skills

Get your free PowerPoint templates and free graphics & stock images.

Lots of cool e-learning examples to check out and find inspiration.

Getting Started? This e-learning 101 series and the free e-books will help.


Free Microlearning Template

January 17th, 2017

free microlearning template

Here’s a free microlearning template I created for a workshop on interactive e-learning. The template uses the popular overhead desktop theme. I’m using the interaction as a simple microlearning module. But it could also be a quick knowledge check like this one. It just depends on how you want to use it for your own course.

Example of Free Microlearning Template

Here’s an example of the template in action.

free microlearning template

Click here to see the microlearning example.

How to Edit the Free Microlearning Template

What makes this microlearning template work is that it’s really easy to use and modify. The construction is really simple.

  • Create a card with selected states.
  • Add an entrance and exit animation to the card.
  • Create a trigger to pause the timeline when the card’s entrance animation completes.
  • Create a button to resume the timeline.

Want more cards? Just duplicate them and the triggers are duplicated, as well. You can create as many cards as you like. All you need to do is stagger them on the timeline.

Bonus tip:

  • The template starts with a single card. Since I don’t know how many cards will be in the final module, I created a cue point on the timeline. Look at the free file to see what is triggered by the cue point. If you add a bunch of cards, just drag the cue point to the end and all if its triggers move with it.
  • Here’s a tutorial post that shows how to create and edit your own microlearning interaction.

Events

Free E-Learning Resources

Want to learn more? Check out these articles and free resources in the community.

Here’s a great job board for e-learning, instructional design, and training jobs

Participate in the weekly e-learning challenges to sharpen your skills

Get your free PowerPoint templates and free graphics & stock images.

Lots of cool e-learning examples to check out and find inspiration.

Getting Started? This e-learning 101 series and the free e-books will help.