The Rapid Elearning Blog

Archive for the ‘Instructional Design’ Category


instructional design tip

This instructional design tip focuses on how to simplify and chunk content in complex training courses. Essentially, instructional design is about crafting a viable learning experience. Based on our desired learning outcomes, we create a way for people to learn (and hopefully apply) the content in a relevant context.

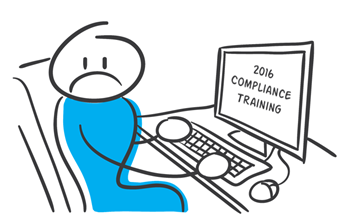
Often we have to teach content that’s too complicated for new learners. The risk is that we dump too much on them and overwhelm them with a lot of new information. Or we over-simplify the course content (especially real-life decisions) and the result it the course is not complex enough. This can also make the courses less engaging because they’re less challenging.

Instructional Design Tip: Break Your Content into Chunks

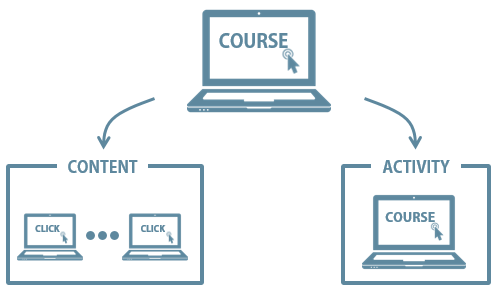
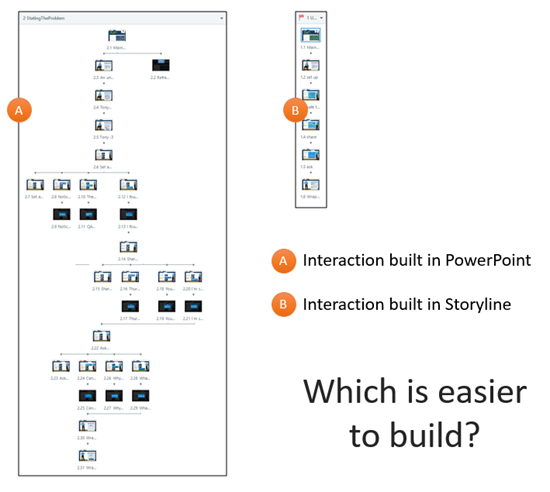
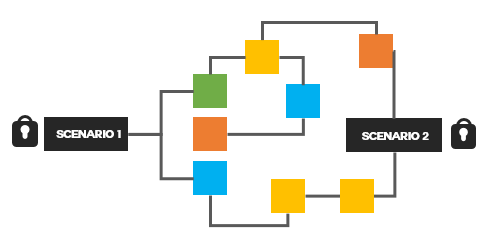
One way to teach complex content is to break it into more manageable chunks and getting rid of a lot of extra content. Guide the learners to work through the chunks and as they acquire new skills (and comfort) they’re able to work through more complex content.

instructional design tip

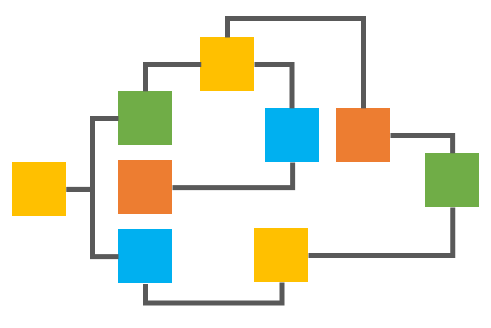
I find that one major challenge for adult learners is the unease that comes from not understanding the appropriate context and how the learning fits into the bigger picture. Because of this I like to break the content into chunks and progressively assemble the chunks to build a broader context of the course content and objectives.

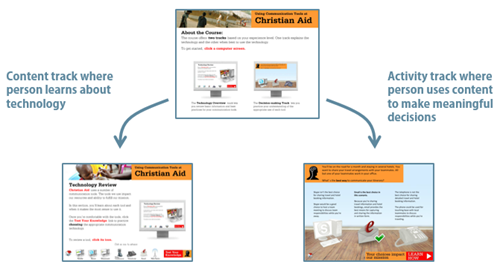
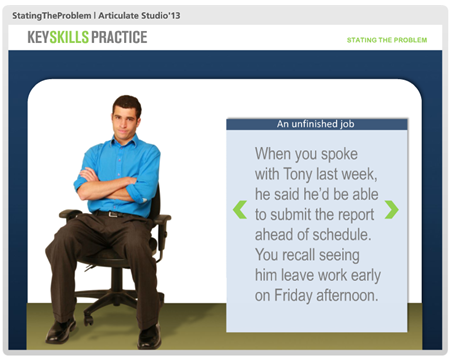
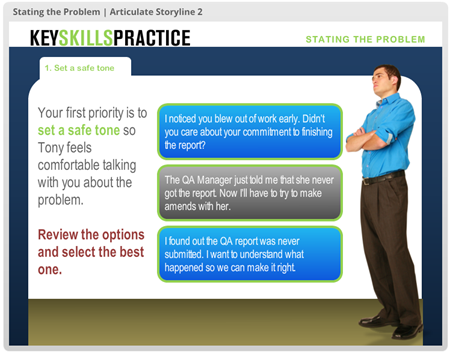
Below is an example from a previous project that may inspire some ideas for your own courses.

Instructional Design Tip: Get to Know Your Learners

A few years ago I had to design training for machine operators in a complex production environment. The machine was a linchpin in the production process because the work flow boomeranged and returned to the machine twice during production. A good operator kept things moving forward, but one less experienced could hold up the entire floor’s production and cost the organization time and money. Our task was to get all of the new operators at an acceptable level of production within 90 days.

instructional design tip

I met with managers and subject matter experts who gave me a lot of content to review. And then I spent some time on the floor. This is a key part of instructional design—get to know your learners, their work environment, and what they have to do. Don’t just review documentation or trust what the subject matter expert says. They often dismiss real world issues or present things from an ideal perspective based on years of experience.

By meeting with everyone including the learners and investigating the real world environment, I had a better understanding of how the environment impacted the learning experience for new people.

Instructional Design Tip: Identify the Discomfort

When I analyzed the workflow, one of the first things I learned was that the new operators were intimidated by the machine and the fast pace of the workflow. They had to constantly upload and unload material and then deal with machine-related issues. In addition, the work environment was really noisy so it was hard to hear instructions and get feedback. And to make matters worse, they were constantly reminded how expensive the machine was and to “not mess it up.”

These are things not covered in documentation manuals.

We designed some elearning modules around the parts of the machine. They were pulled from the production floor and took a few modules to learn about the machine, preventive maintenance, and the general workflow.

Then when they got back on the floor, all they focused on was daily maintenance of the machine. For most of the first week, they just touched the machine a lot without a lot of focus on production work. By the time they got into production, they were so familiar with the machine that they no longer were intimidated.

Instructional Design Tip: Peer Coaches Help Train

Another challenge was that all of the people were being trained by different machine operators—some better teachers than others. And most were not given an incentive to make the training stick. And they were doing the training in real time with real production in a loud facility.

A new learner benefits from having a go-to contact who provides guidance, answers questions, and provides feedback. The organization benefits from having a consistent message and a vehicle to mentor potential supervisors or managers.

instructional design tip

We trained some of the production staff to be “peer coaches.” This gave us quality control over how the content was delivered. The peer coaches became a consistent point of contact for the new learners.  And the new learners felt more comfortable when requiring help, as they didn’t feel like they were getting in the way.

The peer coach program also provided a way to train future supervisors by giving them elevated responsibilities.

Instructional Design Tip: Learning Journals

We created a learning journal. The journal served as a dynamic operator’s manual. It contained all of the core content the new learners required, all of their notes from the conversations, day’s work, and online training was captured in the journal.

instructional design tip

We also used it as the guide for the peer coaches to help them, especially when they were busy. They didn’t need to think through what to teach, they just had to follow the guide and review the learner’s progress.

Instructional Design Tip: Online Training Compresses Learning Time

One of the benefits of instructional design is being able to compress the time required to learn. For example, in a given work day, a person may do a specific task 2 times. Thus in the course of a week, they only get 10 repetitions of that task.

Instructional design allows us to pull that task out of the normal workflow and create a practice activity where they can repeat just that task many more times than what they’d do in the daily workflow. I also found that when a task only happens a few times, those are pushed out for more advanced learning and only experienced people get to do the task for fear that a new person messes it up.

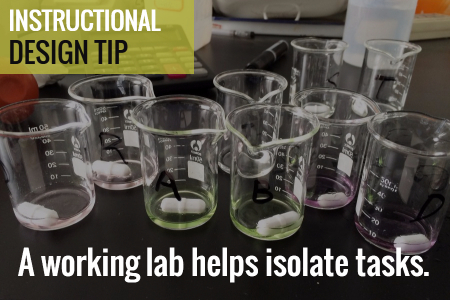
Instructional Design Tip: Create a Working Lab

We created a working lab by slowing down the production on the training machine. Initially the organization didn’t want to slow down production. But we convinced them that slowing down production allowed the learners to get meaningful repetition and as they gained confidence we would increase the speed to match the real world.

instructional design tip

For this training, we created individual activities. Thus they didn’t focus on getting everything through the machine. Instead they only focused on that one part. As they became more comfortable, we added more speed and combined tasks.

Breaking your content into distinct chunks helps make the learning experience more manageable and it’s easier to develop and update. In the example above we were able to separate the tasks from the real world flow and chunk them into smaller learning activities. And as their skills improved we combined tasks to add complexity.

The result for us was that we had almost all people trained within 10 days. In fact, we did so well with the training that we under reported our success because we didn’t want people to think that we were fibbing on the numbers.

Events

Free E-Learning Resources

Want to learn more? Check out these articles and free resources in the community.

Here’s a great job board for e-learning, instructional design, and training jobs

Participate in the weekly e-learning challenges to sharpen your skills

Get your free PowerPoint templates and free graphics & stock images.

Lots of cool e-learning examples to check out and find inspiration.

Getting Started? This e-learning 101 series and the free e-books will help.


learning interactions

Creating great interactive learning experiences requires a few core building blocks: relevant content, pull versus push, and real-world decisions. With those building blocks you’re able to structure effective learning scenarios that are meaningful to the learner and helps meet the objectives of the course.

One of those building blocks in creating relevant content or content that is placed in a meaningful context. Essentially, you want to recreate the types of scenarios that are similar to the ones the learner has in real life. This allows them to see the content in a meaningful context.

Learning Interactions: What is the Learner’s Real World Like?

Most courses have the right content, but that’s all it is–content. And the content is usually plastered over a series of bullet point screens. To make a great learning experience you need content in the right context. It needs to be relevant to the learner’s needs and world. They need to see how the content fits into their world, the interactions they have, and the decisions they need to make.

  • How is the course content used in the work environment of the user?
  • Why would they use it? And when they use it what happens?
  • Or if they don’t use it, what happens?

Learning Interactions: What Type of Environment Needs to be Built?

We make decisions all the time and they always produce some sort of consequence. These decisions happen in a real world and usually while interacting with other people like peers, managers, or customers.

When building relevant content that’s placed in the right context it’s important to understand the world of the learner.

  • Where are they located?
  • Do they need to use any equipment or machines?
  • And who are they interacting with? Peers, management, customers?

Learning Interactions: What Triggers the Need for Action?

When I build interactions in Storyline I always talk through the triggers. I ask, “What do I want to do and when do want to do it?”

In the same sense, when you build relevant scenarios for your courses where the learner has to make decisions, it’s important to know what the triggers are for those decisions.

  • What do they have to do and when do they have to do it?
  • And at what point are they going to need the course content to make the appropriate decision or take the right action?

Learning Interactions: How to Collect the Right Content?

A great way to get this information is to meet with those people who will take your courses. Ask them to give you scenarios where the course content is important or when they would need to know it to make good decisions.

  • Ask them what’s it like when things are going well? And then what it’s like when it not going so well. And what makes it go not some well? What types of things derail the day?
  • If they interact with equipment, what do they need to know? Where do they go to troubleshoot? What types of cheat sheets or job aids do they reference?
  • If they interact with people, what makes for good interactions? And what causes them to go sideways? How do they fix it?

The key in all of this is that instead of dumping a bunch of new content on your learners, find a way to put the content into a meaningful context–one that makes sense to their real world interactions. And when you do that you’ll be able to create great learning experiences.

Events

Free E-Learning Resources

Want to learn more? Check out these articles and free resources in the community.

Here’s a great job board for e-learning, instructional design, and training jobs

Participate in the weekly e-learning challenges to sharpen your skills

Get your free PowerPoint templates and free graphics & stock images.

Lots of cool e-learning examples to check out and find inspiration.

Getting Started? This e-learning 101 series and the free e-books will help.


course design

Course design is a challenge as you try to balance the needs of the client, subject matter experts, learners, and your own course design sensibility. One of the biggest issues with many online courses is that the course is a single solution designed to accommodate multiple learners. And most of them are designed the same way: start, click, click, click, knowledge check, click, click, click, and final quiz.

course design simple

I suspect many courses are designed this way because they’re easy to build and, as we’ve noted before, many course designers are stretched thin with limited time and resources. I also know that many customers demand all of their information to be presented in the course, which makes it hard to move past a click-and-read model.

So what can you do to remedy this and not create too much extra work? Here’s a strategy I’ve used in the past.

Course Design: Separate Content from Activity

Create a two-pronged approach to the course design.

  • Content: this is similar to the way the course is designed now.
  • Activity: what should they do with the content? Create scenario-based activities so that they use the content.

course design strategy

This creates splits the process. Many clients want all of the content and won’t budge. That’s OK. You can present all of the content in the content track. In addition, there are many people who want or need the content. The content track gives them free access.

On the other side, build activities that require use of the content. And then let learners access the activities. A well-designed activity will present the appropriate level of content and provide the right types of decision-making to ensure the person learns and meets the course objectives. You can also provide access points to the content track and even create mechanisms that force people to pull certain types of content during the activities.

Or you scrap any focus on content, throw them in the pool and let them know where they can find life-saving information (the content track).  Some people will jump right into the activity and try to figure things out and some will refer to the content track when needed. An activities focused approach provides a lot of flexibility, especially when your learners range from beginner to experienced.

Course Design: Simple Example

course design

Click here to view elearning example.

Here’s an example that David and I built for a LINGOs course a few years ago. The client gave us a number of Word docs full of content. All of the content needed to be in the course. However, we wanted to create interactions built around some real world decision-making.

So we created a two track course. One track featured all of the Word doc content. And the other track worked around the use of the content to make appropriate decisions. We also included ways for the person to go between the two tracks.

course design

Building the course didn’t take much more time than if we had just made it linear because we used a simple question structure for the activities and broke up the flow with some good-to-know information about the organization.

What I like about this approach is that it’s a single course yet meets the needs at a more individual level. One person can learn through the content, and another through the activities. Or they can learn through both. And it meets the client’s demand to have all of the content present. You can also make the course more complex and accommodate different skill and experience levels with an adaptive learning path.

Events

Free E-Learning Resources

Want to learn more? Check out these articles and free resources in the community.

Here’s a great job board for e-learning, instructional design, and training jobs

Participate in the weekly e-learning challenges to sharpen your skills

Get your free PowerPoint templates and free graphics & stock images.

Lots of cool e-learning examples to check out and find inspiration.

Getting Started? This e-learning 101 series and the free e-books will help.


e-learning pain points

The other day someone asked what I thought the three top pain points were for online training or elearning. I hear lots of complaints and I’m sure that there are many pain points, however if we keep them in perspective, they’re really not as painful as being stabbed or thrown down a flight of stairs. Here are some of the issues I find most challenging with elearning.

E-Learning Pain Point #1: Courses are Boring

I review a lot of courses during the year. Many of them are very basic–consisting of mostly slides, simple graphics, and bullet points. I’ll assume that the people who do take the courses probably don’t find then all that exciting. A slide with bullet point content isn’t necessarily a bad thing. However, slide after slide of this type of content isn’t the most effective way to engage and teach people.

The bigger issue isn’t usually the content as much as it is that the content isn’t relevant to the person’s needs. Here are a few tips to help.

E-Learning Pain Point #2: Developers Have Limited Skills & Resources

Many of the people I meet are the only elearning person on staff. And the majority of them didn’t start in elearning. They started as trainers who moved to elearning as the organization needed to put courses online. They end up having to do everything from instructional design, graphic design, and course authoring.

In addition to having limited experience building elearning courses, they usually lack a breadth of technical knowledge and programming skills. On top of that, they don’t get adequate support for other things such as media assets and IT help.

Many of them do a great job given their limited resources, but to build courses that are engaging, interactive, and meet learning objectives requires more than a basic understanding of PowerPoint and learning to find free clip art. This means that the developers need time to learn the skills to build more than basic courses and they need more support from their organizations.

Without organizations making a bigger commitment to their elearning teams, most courses will probably be stuck in pain point #1.

Here are some solutions for those who want to learn more and do more:

  • Check out all of the free getting started resources we have in the community. There’s a lot of good generic content, free ebooks, and of course tutorials to learn the software.
  • Participate in the weekly challenges to practice new things. Even if you don’t participate, make it a point to see what others do as a source of inspiration.
  • Take classes where you can. You can go for a formal degree or certificate at most of the universities. There are informal options like the video tutorials, lots of free webinars, and a number of opensource learning opportunities. And of course, participate in your local ATD, ISPI, and STC chapters.
  • Read a book and apply what you learn to your courses (or the weekly challenges). Here’s a good starting list. Or better yet, create a mini module on what you learned in the book and share it with others. It’s a great way to practice building courses–solidifying the content in your own brain and sharing what you learn with others.

E-Learning Pain Point #3: [Insert pain point here]

I can add an assortment of additional pain points such as courses are too long, high dropout rates, etc. But I’d like to open it up to you. What is the single biggest pain point for you when it comes to elearning and online training? Add your thoughts in the comments section.

Events

Free E-Learning Resources

Want to learn more? Check out these articles and free resources in the community.

Here’s a great job board for e-learning, instructional design, and training jobs

Participate in the weekly e-learning challenges to sharpen your skills

Get your free PowerPoint templates and free graphics & stock images.

Lots of cool e-learning examples to check out and find inspiration.

Getting Started? This e-learning 101 series and the free e-books will help.


variables for e-learning

Want to build better elearning experiences? Want to add game mechanics like achievements, levels, and points to your courses? If so, now’s the time to learn about variables and how they help build better elearning.

At a recent workshop on variables, I asked one attendee what she learned. She said, “I learned not to use variables.” While this produced a chuckle, she was speaking some truth for the beginner who’s never used variables: at first they may seem a bit confusing.

This makes sense if you haven’t used them before and don’t have a programming background. On the surface they can seem complex. But in reality they’re not. It’s just a matter of knowing the terms and gaining an understanding of how they work. And then practice, practice, practice.

Today we’ll start the process of simplifying variables.

What is a Variable?

As I mentioned in a previous post, I learned to think of variables as an empty bucket. The bucket collects things. Once I have something collected, I can use it.

We use variables in elearning to collect values that we can use throughout the course. The values may be things like the user’s name, what they’ve clicked, their achievement, or an adaptive learning path. In either case, it’s a way to collect information that is used elsewhere in the course.

Types of Variables

Generally, there are three types of variables:

  • Numbers: used for counting actions or doing calculations
  • Text: input names or display text
  • True/False: often used to track progress or if items are selected or not

Variables are used for all sorts of things and often the type of variable is interchangeable. The thing to remember is that the value is key and what type of variable you use to hold that value is not as important.

A good example is the True/False variable. Instead of T/F you could use numbers like 1 or 2, or even the text “true” or “false.” As you can see, they’re interchangeable. Of course, there are times when one type makes more sense than another.

Common Uses of Variables

Before we get into the details, let’s look at two common uses of variables: user names and counting clicks.

Variable: Add Your Name

It’s a good thing to personalize the learning experience. One way to do this is by collecting the user’s name and using it throughout the course. In the example below, you enter your name on one screen and see it displayed on another.

variables for e-learning example one

Click here to view simple name variable.

Variable: Track Onscreen Actions

Another common use is to track onscreen actions. In the example below you can click any choice but only two are correct. We track your correct and incorrect choices by counting clicks. If you click on a third wrong choice, you get some feedback.

variables for e-learning example two

Click here to view counting variable.

The examples above are simple but common to many courses. Now let’s look at variables in a bit more detail.

 How to Use Variables

Working with variables is a three-step process: 1) create, 2) adjust value, and 3) use value.

  • Create variable. The first step is to create a variable. You’ll need to select the type, give it a name, and then determine a starting value (if any).

create e-learning variable

  • Adjust value: The second step is to adjust the value of the variable. Generally, the user does something onscreen that triggers a change to the value of the variable. In the example below, we increase the Incorrect variable every time the user clicks on the wrong person.

adjust e-learning variable

  • Use value: The third step is to use the value of the variable to do something. The value of the variable determines an action. For example, since we can track wrong selections by counting clicks, we can use the value we collect to trigger some feedback. In the example below, after selecting the incorrect choice three times we provide remedial feedback.

use e-learning variable

So that’s the essence of working with variables. You create them, an action changes their value, and then you can use that value to do something else in the course, whether that’s providing feedback or displaying a user’s name. Your only limit is your creativity.

Your Mission to Learn More about Variables

Years ago when I first started to learn to work with variables, the light didn’t come on until I actually knew what I wanted to do and then had to think through how to do it using variables. So to help you out, I’m assigning three common activities that will give you an opportunity to practice using variables.

To help you out, here are some recent articles in the elearning community:

The key is to practice. And if you have any questions, don’t hesitate to jump in the community and ask. We’re always there to help.

Events

Free E-Learning Resources

Want to learn more? Check out these articles and free resources in the community.

Here’s a great job board for e-learning, instructional design, and training jobs

Participate in the weekly e-learning challenges to sharpen your skills

Get your free PowerPoint templates and free graphics & stock images.

Lots of cool e-learning examples to check out and find inspiration.

Getting Started? This e-learning 101 series and the free e-books will help.


free e-books and best e-learning books

One of my goals each year is to read one book a month that will help sharpen my course-building skills. I’m always asked for book recommendations. Some of the recommendations are for those getting started, even if you’re an experienced course designer it helps to review familiar course design concepts or expand to other fields like UX or graphic design.

If your goal is to read twelve books this year, here’s a list to help you get started. Even if you don’t read them all this year, some of these are good to have on hand in your elearning reference library.

Instructional Design Books

instructional design books free e-books and best e-learning books

Gamification Books

gamification books free e-books and best e-learning books

Gamification is more than a buzz word and the principles that make games work can be applied to course design to create more engaging and effective elearning.

Graphic & UX Design Books

graphic design books free e-books and best e-learning books

Courses are more than content. The look and feel of the content is also important as well as the user experience. Here are some good books to help you learn more.

Video Production

video books free e-books and best e-learning books

Video is viable for elearning now so it doesn’t hurt to learn more about using it in your courses. The challenge for many of us is how to do it on a budget. Here are two books that have been recommended to me. I haven’t read either yet. If you have, let me know what you think.

The links to Amazon books may produce a slight commission.

12 Free eBooks

I’ve mentioned this before, but there’s a good list of free ebooks in the elearning community. If you don’t want to spend money, this is a good place to start. You have one free ebook for each month.

free e-learning books free e-books


My first book to read will be Even Ninja Monkeys Like to Play. What are you reading this year?

Events

Free E-Learning Resources

Want to learn more? Check out these articles and free resources in the community.

Here’s a great job board for e-learning, instructional design, and training jobs

Participate in the weekly e-learning challenges to sharpen your skills

Get your free PowerPoint templates and free graphics & stock images.

Lots of cool e-learning examples to check out and find inspiration.

Getting Started? This e-learning 101 series and the free e-books will help.


Best E-Learning Posts of 2015

December 29th, 2015

best e-learning posts 2015

2015 was another great year in an industry that’s still really hot. I hope you had a great year, too. Here’s a rundown of some of this year’s rapid elearning goodness.

Things You Need to Know

Before we review the best elearning posts for 2015, here are some important things related to this blog and the community.

Best E-Learning Posts for 2015

Here is a solid collection of blog posts for those getting started with elearning and who want to learn more.

best e-learning posts for instructional design

Best E-Learning Posts with Free Downloads

We all love free stuff so here’s a list of all the 2015 blog posts with free assets, applications, and templates.

best e-learning posts with free templates, free stock images, and free downloads

I’m excited about 2016 and hope you are, too. Have a great one!

Events

Free E-Learning Resources

Want to learn more? Check out these articles and free resources in the community.

Here’s a great job board for e-learning, instructional design, and training jobs

Participate in the weekly e-learning challenges to sharpen your skills

Get your free PowerPoint templates and free graphics & stock images.

Lots of cool e-learning examples to check out and find inspiration.

Getting Started? This e-learning 101 series and the free e-books will help.


PowerPoint interactive e-learning

If you follow this blog then you know that I’m a big fan of PowerPoint. In fact, I think it’s one of the single best applications out there. And with some practice and creativity, there’s not much you can’t do to create engaging multimedia.

But is PowerPoint the best option if you want to create interactive elearning?

Here’s What Makes PowerPoint Special

Just so you know that this isn’t just another trendy PowerPoint bashing post, I’m starting with some of the cool things you can do with PowerPoint. Here’s a sampling from some of my previous blog posts:

PowerPoint is a great multimedia application. But it’s not necessarily a great application if you regularly build interactive elearning.

Interactive E-Learning 101

Let’s consider the basics of interactivity and then see where PowerPoint falls short. Essentially there are three types of onscreen interactions: click, hover, and drag. Data entry (such as adding a name) is an additional form of interactivity if you build a course using variables.

interactive e-learning PowerPoint

Which of those types of interactions can you build with PowerPoint? For the most part, you’re limited to click-and-reveal interactions. Thus, you only have a third of the interaction types available and no programming control for more advanced capability.

Here’s Why PowerPoint Fails at Interactive E-Learning

Below are two interactive scenario examples. One is built in PowerPoint and the other in an application that better supports interactive authoring. Essentially, the scenarios are the same. The big difference is in the production process and time it takes create the interactions.

Here’s the interactive scenario built in PowerPoint.

PowerPoint interactive e-learning

Click here to view the demo.

It works. However, what did it take to build? The PowerPoint interaction includes 31 slides. That’s for only one of the interactive scenarios. If I built out all 6 scenarios, I’d have to add an additional 145 slides and hundreds of individual objects and hyperlinks.

Here’s the same interactive scenario rebuilt in Storyline.

Storyline interactive e-learning compared to PowerPoint

Click here to view the demo.

The Storyline version only has 5 slides and it includes a lot more subtle interactive features, like button hovers and visited states. If I wanted to include all 6 scenarios, I’d only add 18 additional slides.

PowerPoint interactive e-learning

The image above demonstrates the difference between the PowerPoint and Storyline versions of the same interaction. As you can see, the PowerPoint version requires a lot more effort. The Storyline version is much more streamlined and easier to manage.

In fact, if I built this scenario from scratch rather than importing the PowerPoint file like I did for the demo, I’d probably get each interaction to 3 slides. And since the slides are generally the same, I only need to build one slide with three feedback options and reuse them. Not considering the content, building the structure for the interactive scenario would only take a few minutes. That’s not the case with PowerPoint which would take longer and become progressively more challenging to manage as the slide count would increase dramatically.

The other benefit is that the Storyline version of the file can be saved as a template and easily reused for future scenarios. That’s a big time saver. And time is money.

So what’s the point?

  • PowerPoint Has Limited Interactions. For the most part, you’re limited to click-and-reveal interactions. There’s no drag-and-drop or button rollovers. Try to create a simple visited state for a button clicked. You can’t. And forgot about adding data entry or variables to build more sophisticated interactive elearning.
  • Building Interactions in PowerPoint is Time Consuming. Sure, you can build interactive elements in PowerPoint. The example above demonstrates that.  However, building interactive elearning with PowerPoint will cost a lot more time and starts to get messy after a few slides.
  • Interactions in PowerPoint Get Progressively More Complicated. Interactions are a combination of hyperlinks to slides. For example, a five tab interaction requires six slides: the main slide and one for each tab. Want to build something more complex, like an interactive scenario? Your slide count increases exponentially; and the structure and maintenance of the course gets overly complicated. Whatever money you think you’ve saved in software you’ve easily spent in authoring. And each subsequent project adds to the cost.

As I stated earlier and throughout this blog, PowerPoint’s a great multimedia application. But if you want to build interactive elearning courses, it’s not the best option. The truth is that you will be saving hundreds (if not thousands) of hours building elearning courses using a tool better suited for interactive elearning.

Of course, if you do freelance consulting and bill by the hour, then it makes sense to stick with PowerPoint. If you don’t, then it’s time to move beyond it for your interactive elearning. You won’t be sorry.

Events

Free E-Learning Resources

Want to learn more? Check out these articles and free resources in the community.

Here’s a great job board for e-learning, instructional design, and training jobs

Participate in the weekly e-learning challenges to sharpen your skills

Get your free PowerPoint templates and free graphics & stock images.

Lots of cool e-learning examples to check out and find inspiration.

Getting Started? This e-learning 101 series and the free e-books will help.


engage learners

One of the big challenge in crafting a learning experience is figuring out how to engage the learners. This is especially true for a lot of corporate training that is compulsory and not always connected to performance expectations.

Today, we’ll review 5 ways to engage your learners and build a better learning experiences.

Engage Learners with Relevant Content

Engaged learners need content that is relevant to their needs. If it’s not, then they’re less apt to be motivated which leads to less engagement. It forces you have to do a lot more to increase their motivation and guide them through the content.

interactive e-learning engage learners

I discuss relevant content quite a bit throughout the blog and make it one of the key building blocks for interactive elearning.

Engage Learners with Just-in-Time Delivery

At a previous organization, we installed a new phone system. We had to train so many people on the new system that the first groups were trained months before the system rolled out. By the time the phones came online, a lot of what they learned was lost. That was OK, because we had some cheat sheets and quick tips that offered help for the most common tasks.

coursel interactive e-learning engage learners

Instead of a big course delivered months in advance it would have been easier to build lighter modules (similar to the cheat sheets) that delivered the necessary content at the point of need. I like to call these micro-learning modules, coursels (as in course morsels).

With YouTube and similar media services, people are conditioned to search for what they need when they need it. Why can’t the online training follow suit? Focus less on sharing every piece of content and more on context; and then work towards making it easy to search and access bite-sized training at the point of need.

Engage Learners with the Look & Feel

Learners perceive a product as more usable than it may actually be if the design is aesthetically pleasing. This is known as the aesthetic-usability effectIt’s also possible that they may reject a product that is actually better because it may not be as aesthetically pleasing.

visual design for e-learning course engage learners

Even if you build basic courses, place a lot of focus on getting the right look and feel. There’s a visual context that works for your course as well as a way to create novel and engaging interactions. These don’t replace good instructional design, but they do contribute to the perception the learner has of the course and its value. And that’s critical to the initial engagement.

Engage Learners with Interactive Content

Most courses are linear with little, if any, interactive elements. That’s fine for consuming information. But it doesn’t make for engaging learning experiences. An easy way to engage learners is to add interactive elements to the course.

interactive branching engage learners

Generally, there are two facets to interactive elearning. The first is getting the learner to interact with onscreen elements. These interactions are clicking, mouseovers, dragging, and/or data entry. The second is getting the learner to process and interact with the content. Usually this involves some Socratic questions or more involved interactive, branched scenarios.

Engage Learners with Free Navigation

One of my pet peeves is locked navigation. We all know why it happens: the customer wants to make sure that the learner sees all of the information. Otherwise, how else would they learn it?

Obviously, this is a false assumption. People don’t learn just because you expose them to content. And making it mandatory to see content is not an appropriate way to assess knowledge.

Instead of locking content down, give them the freedom to access and explore the content. If you want them to learn more, provide a challenge that causes them to pull in the content and make decisions. This is a much better mechanism than you pushing it out to them.

branched scenario engage learners

If you want to ensure they have learned something, then instead of locking the navigation, lock the course at decision points. Give the learner freedom to move around the content and explore. However, for them to advance, provide decision-making scenarios that require an understanding of the content. This gives the learner more control and the course owner some assurance that the learners know the content.

There are many ways to implement these tips to create engaging and interactive learning. The key is to engage the learner and create an experience that is memorable and enjoyable as well as educational.

Events

Free E-Learning Resources

Want to learn more? Check out these articles and free resources in the community.

Here’s a great job board for e-learning, instructional design, and training jobs

Participate in the weekly e-learning challenges to sharpen your skills

Get your free PowerPoint templates and free graphics & stock images.

Lots of cool e-learning examples to check out and find inspiration.

Getting Started? This e-learning 101 series and the free e-books will help.


instructional design tips

At a recent workshop I was asked to put together a post with some of my top instructional design tips. So here it is. Of course, over the past 8 years most of the posts are littered with various tips related to instructional design.

If there’s a single best tip it’s that the course content needs to be relevant to the learner’s needs. If not, why is the person taking the course?

Instructional Design Tips

Here’s a list of blog posts related to instructional design.

Instructional Design Tips from the Community

I’m a big advocate of the weekly elearning challenges because they offer a reason to step away from the daily grind of building the same types of courses and doing the same thing over again and again. We get to try out some new ideas, practice production techniques, show off our skills, and see how others approach the same challenge.

Here is a list of challenges that offer an extra bonus because they each share some tips and tricks that will help you build better courses.

Do you have any instructional design tips to share?

Events

Free E-Learning Resources

Want to learn more? Check out these articles and free resources in the community.

Here’s a great job board for e-learning, instructional design, and training jobs

Participate in the weekly e-learning challenges to sharpen your skills

Get your free PowerPoint templates and free graphics & stock images.

Lots of cool e-learning examples to check out and find inspiration.

Getting Started? This e-learning 101 series and the free e-books will help.


Articulate Rapid E-learning Blog - pre-assessment scenario

Organizations operate at the speed of business and don’t like to waste time or money. That’s especially true when it comes to pulling people away from their daily tasks. And this is something that happens every time a person is asked to complete an e-learning course. So it’s important to create the most cost-effective process possible and still meet the organization’s goals.

One way to make e-learning courses cost-effective is by sorting your learners and then pushing them to a successful learning path. Some who take the courses are more experienced and don’t need the same course that the new person does. And the new person probably needs a lot more context and content.

Understand Your Learners Before Building a Pre-Assessment Scenario

People come to the courses with varying levels of experience, skills, and understanding. In an ideal world, you can craft an adaptive learning process where everyone gets a unique learning experience, but that’s usually not an option. Most of the time, you have to create one course that meets the needs of everyone.

  • Experienced learners already have a lot of contexts. And often the e-learning courses act more like a certification process than new learning experience. So, in that sense, let them prove what they know and move on to completion.
  • New learners are new and don’t have a record of accomplishment of experience. Often, they don’t know what they don’t know. Some may know more than others. And some may think they already know the content.

Let Learners Test Out Instead of Using a Pre-Assessment Scenario

A common option is to let learners test out by successfully completing a pre-test. Present an assessment upfront. If they pass it, they go to the end and are done. If they don’t pass it, they go to the beginning and take the course. This is a viable model and works great for simple compliance training where an annual course completion certificate is the main objective.

Articulate Rapid E-Learning Blog - pre-assessment scenarios let you test out

However, many of those pre-assessment tests are very basic and what do they really prove? They may prove the person knows the content, but it doesn’t mean that they know how to apply it. Or it may prove that they’re good guessers. In either case, they generally don’t prove understanding, especially in a performance environment.

Create a Pre-Assessment Scenario

Functionally a pre-assessment scenario is the same as a pre-test. The goal is to sort the learners and move the experienced and novice learners down different paths. However, the core difference is that the assessment scenario attempts to assess deeper understanding of the content and its proper application.

Pre-tests typically ask a series of multiple-choice questions. And again, this is fine for a simple end-of-year certification. However, if the course is more performance-based, then the scenario allows you to stage an event that lets the learner demonstrate that they can meet the performance requirements by successfully navigating the pre-assessment scenario.

Articulate Rapid E-Learning Blog - pre-assessment scenario flow

A couple of additional benefits is that a pre-assessment scenario helps remind the experienced person of what they need to do and for the new person it helps expose deficient understanding and the types of situations they may encounter in the real world. The pre-assessment scenarios also help cement the objectives for the course. When a person isn’t successful, they’re more apt to pay attention to the course content since they’ve already been proven to lack some of the expected understanding.

A few production tips:

  • Keep it short. Instead of big, long scenarios which take more time to produce, create a series of quick hit scenarios.
  • This is a pre-assessment. So don’t feel obligated to do much to set up or support the assessment with resource content. If they can demonstrate their understanding, they can pass the pre-assessment. If they can’t, well, that’s why you created the course.
  • Create templates. You can create interactive scenario templates and reuse them for quicker production.

Pre-tests are a great way to efficiently and effectively move learners through the training process. However, they are limited in what they can assess. Switching to a real-world pre-assessment scenario provides a better way to assess understanding and application of the training content. It also lets those who don’t pass understand why they need to take the course.

Events

Free E-Learning Resources

Want to learn more? Check out these articles and free resources in the community.

Here’s a great job board for e-learning, instructional design, and training jobs

Participate in the weekly e-learning challenges to sharpen your skills

Get your free PowerPoint templates and free graphics & stock images.

Lots of cool e-learning examples to check out and find inspiration.

Getting Started? This e-learning 101 series and the free e-books will help.


build effective e-learning with this free e-book

I’m not sure you noticed but we just updated the Insider’s Guide to Becoming a Rapid E-Learning Pro. The first edition of the free e-book was released in 2007, and as you can imagine a lot has changed in our industry. This new addition addresses some of those changes and offers more practical tips and tricks.

How Has E-Learning Changed?

In 2007, most of the options for creating interactive elearning required Flash. If you wanted to build courses, you were required to either learn Flash or hire a Flash programmer. That meant a lot of organizations were shut out of building their own elearning courses.

But along came the PowerPoint-to-Flash products. They enabled people to create their content in PowerPoint and convert it to the Flash. Essentially, each slide was converted to a Flash movie. Thus the non-programmer was empowered to create Flash-based courses at a fraction of the cost. They weren’t perfect, but they definitely were viable. I imagine that many of you seasoned elearning developers cut your teeth in a PowerPoint-based product.

PowerPoint e-learning and free e-book

These tools didn’t get their start in 2007. Articulate Presenter was around well before eHelp (one of the leading companies) was purchased by Macromedia that was purchased by Adobe. In fact, eHelp licensed Articulate Presenter for their own RoboPresenter product. So while all of this happened in the early 2000’s, rapid elearning and PowerPoint-based authoring didn’t really start to take off until around 2008 or so.

Today things are different. PowerPoint’s not as important to elearning because there are more advanced elearning applications like Storyline that let you do all sorts of things with PowerPoint ease and a host of form-based tools (like Engage) that only require copy and paste editing.

And we won’t even get started on the state of Flash. While it’s still viable, I don’t know many people working with it anymore and I think it’s been almost four years since someone’s asked me a Flash question.

As you can see, the industry has changed over the past seven years and the free e-book, Insider’s Guide to Becoming a Rapid E-Learning Pro, has been updated to reflect that change.

What’s New in the Free E-Book?

When I wrote the first e-book I wanted to help people who were just transitioning to the elearning industry. Many of them had limited experience and were mostly working by themselves (or on small teams) and with limited resources. Today, things are a bit different.

free e-book for e-learning developers

The industry continues to grow. That means there’s an ongoing influx of new elearning developers mixed with the first generation of rapid elearning pros, who’ve mostly moved past PowerPoint-based authoring. The free e-book reflects this transition. Here are some of the key topics I’ve updated:

  • Tips and tricks on managing your success. Building a course is one thing, being successful doing it is another.
  • Learn to be a proactive partner to the organization. Don’t be an order-taker; learn to understand the organization’s needs and help them meet their objectives.
  • Understand the types of tools on the market. Many organizations make the mistake of creating a checklist of features to compare tools. But they disregard the types of tools on the market. The e-book discusses the pros and cons of the different types of products without looking at any one specific vendor.
  • Create interactive elearning courses. In 2007, if you were working with PowerPoint, your options were limited. Today, that’s not the case.
  • Save time and money by creating reusable content. One of my favorite features in Storyline is being able to build an interaction and then saving it as a template. This speeds up my production time and after a few projects, I end up with a tool chest of reusable content. You’ll learn a bit more on creating reusable content.

How Do You Get the Free E-Book?

free e-book for e-learning

Getting the free e-book is super easy. If you’re a current blog subscriber, the e-book is linked at the bottom of each post. That means all you need to do is scroll down and click on the download link. If you’re not a blog subscriber, you can get the free e-book here.

Download the free e-book and let me know what you think.

Events

Free E-Learning Resources

Want to learn more? Check out these articles and free resources in the community.

Here’s a great job board for e-learning, instructional design, and training jobs

Participate in the weekly e-learning challenges to sharpen your skills

Get your free PowerPoint templates and free graphics & stock images.

Lots of cool e-learning examples to check out and find inspiration.

Getting Started? This e-learning 101 series and the free e-books will help.