The Rapid Elearning Blog

Archive for the ‘Microlearning’ Category


create and edit AI illustrated characters

There’s a lot of promise to artificial intelligence (AI) for image generation. However, as it currently works it’s not as simple as prompting an image and getting something perfect to download and use. AI can generate a lot of nice results quickly. However, using the images for production work can be a challenge.

My key objective is to create viable (not necessarily perfect) characters that I can use in online training programs or PowerPoint presentations. I am not a professional illustrator or Photoshop pro, so I want some steps that are simple and not too time consuming.

Here are some previous posts where we looked at some ideas:

I’ve been playing around with some AI image generators to get a better feel for how they work and how I can use them when I create e-learning courses. I narrowed it down to a few basic steps that seem to work for me:

  • Create the character(s) using prompts in AI
  • Edit it to fix artefacts
  • Crop to isolate the character
  • Upscale for better quality
  • Remove background
  • Convert to vector

The Reality of Working with AI Illustrated Characters

AI generates a lot of weirdness with illustrated characters between the twisted hands, distorted faces, missing eyes, odd poses, and missing limbs and fingers. I don’t always find the same issue with photographic characters probably because there are more models from which to learn.

Consistency is the other issue. Getting one good character isn’t too hard but getting that same character in multiple poses is a challenge. Or getting different characters with the same style. It takes a little practice and willingness to settle for close enough.

Quick Microlearning Course for Creating AI Illustrated Characters

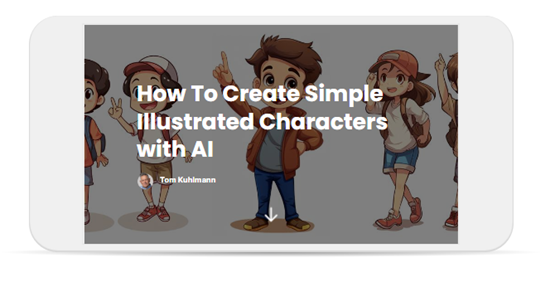
I used Rise 360 to put together a simple course that shows the process I go through to create the free illustrated characters I’ve been sharing. You’ll notice that my editing skills in Photoshop are basic, so hopefully you’ll be inspired to try creating characters yourself.

free microlearning course how to create AI illustrated characters

Click here to view the course.

I also added a quick survey if you want to share character ideas with me. I’ll use the results to test things out.

Events

Free E-Learning Resources

Want to learn more? Check out these articles and free resources in the community.

Here’s a great job board for e-learning, instructional design, and training jobs

Participate in the weekly e-learning challenges to sharpen your skills

Get your free PowerPoint templates and free graphics & stock images.

Lots of cool e-learning examples to check out and find inspiration.

Getting Started? This e-learning 101 series and the free e-books will help.


Articulate Rapid E-Learning Blog - knowing your online training and online learners

Many online training courses go by a one-size fits all model: build one course and everyone has to take it exactly the same way. I like to think of this as the e-learning gulag where there’s not a lot of freedom for online learners and little concern for their experience.

Who Are Your Online Learners?

Regardless of how you design your online courses, it is important to understand your online learners, their needs, and what motivates them. In this post we’ll look at a few different types of online learners and some ways to create online training that meets their needs.

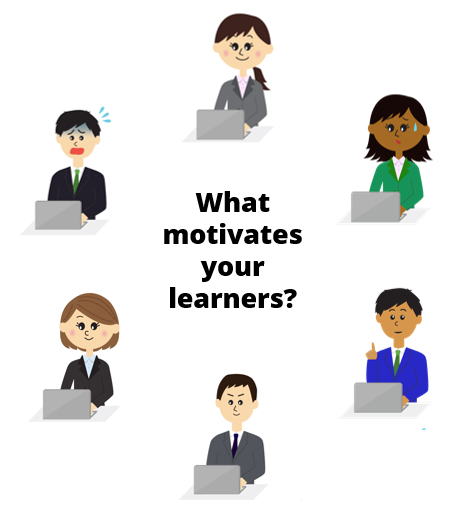
Articulate Rapid E-Learning Blog - what motivates your online learners

  • Get to the point: these learners have a pretty good idea of what the course covers. They’re not interested in a bunch anecdotal stories or case studies. They’re happy with a list of information, how it impacts them, and what they need to do.
  • Curious: these learner are motivated by new things; they’re really interested in the material and what’s in the course. They want opportunities to test ideas and see what happens.
  • Mandatory: these learners start out bored and not motivated because the course is mostly irrelevant to the job; however it’s mandatory. They’re going through the motions, looking for the next button, and waiting for the final quiz.
  • Tenured: these learners are experienced and already know the content. They’re interested in what’s new and how it changes what they do. They don’t want to waste time covering what they already know.
  • Skeptical: these learners are challenged by change because what they know is different and where they may be going isn’t always certain. They’ll embrace the learning but need a safe way to learn at their own pace.
  • Multitasker: these learners are a by-product of the Internet’s easy access to information. They like a lot of information, tend to jump around, and don’t have the patience to do more than bite-sized activities.

The key point is that while we build a single course, the reality is that it’s delivered to an audience that’s not homogenous. The online learners come from different backgrounds, levels of motivation, skill, and experience. This makes crafting a great learning experience a bit of a challenge.

How a Single Course Can Accommodate Multiple Online Learners

However, one thing online training does do well is that it offers a lot of flexibility. The key is to take advantage of what it offers to build an online training course that meets the needs of many online learners. Here are a few thoughts:

  • Let online learners test out. If the objective is that the person can demonstrate their understanding of the content, then give them an opportunity to do that at the forefront. Passing demonstrates their understanding so they’re done and can get back to work. If they don’t pass then they’re now aware of their deficiencies and prepared to learn.

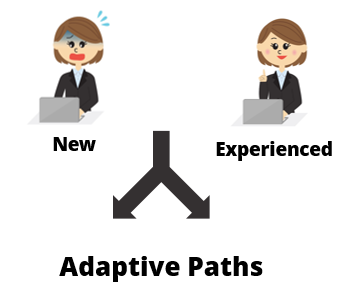
Articulate Rapid E-Learning Blog - knowing your online learners and adaptive paths

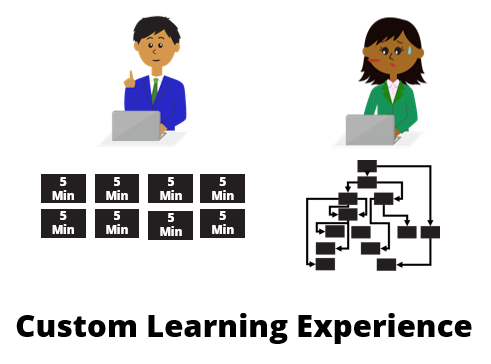
  • Create adaptive learning paths to accommodate the different needs of your online learners. This could be giving them the opportunity test out (as mentioned above) or taking them on a custom journey based on their learning needs. Essentially, the person with more experience doesn’t need the same course as a new person.
  • Package the online learning in relevant scenarios and let the learner make a lot of decisions. There’s all sorts of ways to present content and feedback that is engaging and fun. Here’s a post to help you get started.

Articulate Rapid E-Learning Blog - knowing your online learners and custom online training experience

  •  Create bite-sized training modules. Instead of big, long courses, break the content into smaller and more palatable coursels. It’s a great way to make the training appear faster and it’s easier to package the smaller modules into custom training solutions to accommodate different audience needs. It also satisfies the needs of those who want quick access to just-in-time content.

There’s a lot you can do to create custom online learning experiences all inside the same course. But you’ll need to step away from the bullet points, free up the navigation, and give the learners more freedom.

The next time you build a course consider the different people taking it and how you can help meet their needs.

Events

Free E-Learning Resources

Want to learn more? Check out these articles and free resources in the community.

Here’s a great job board for e-learning, instructional design, and training jobs

Participate in the weekly e-learning challenges to sharpen your skills

Get your free PowerPoint templates and free graphics & stock images.

Lots of cool e-learning examples to check out and find inspiration.

Getting Started? This e-learning 101 series and the free e-books will help.


Rapid E-Learning Blog - how long should e-learning course be

I’m often asked how long an e-learning course should be. My quick response is that it should last long enough to meet your objectives. On the surface that’s not a bad answer, but it’s usually one that doesn’t satisfy either. There are a few variables when it comes to determining how long an e-learning course should be.

However here are some tips that may help answer the question.

Chunk Your Content

The trend in online learning is small, digestible chunks. Some people call it YouTube learning or microlearning. I like to call them coursels (as in course morsels).

The trend makes sense. We’re using more and more mobile devices where quick hit training works better and chunked content is easier to process. By chunking the content, you also have a more agile production environment. The modules are easier to update and modify; and they’re easier to move around to create custom learning solutions.

Rapid E-Learning Blog - how long should e-learning course be using coursels

As far as course length, with chunking it may be determined by the learner and not content. Some people may only need one chunk to meet your learning objectives while others may need more.

Space the Learning Events

There’s a lot of evidence that suggests that spacing the learning events over time may improve learning outcomes. Some organizations create coursels that are introduced over time. The first coursels introduce the big picture concepts and then over time the learning is reinforced through various activities that require recall and application.

Rapid E-Learning Blog - how long should e-learning course be using spaced events

Years ago we built a training program where we had a few basic courses that highlighted the organization’s specific performance expectations. And then we scheduled a series of follow up challenges that required the learners to process various scenarios (using what they learned) and then discuss their solutions with their managers.

There’s also an effective way to space training over a shorter period of time in a single sitting. The main idea is to present the course content three times divided by ten-minute breaks. It may look like this: 1) the instructor presents content, 2) 10 minute break activity, 3) students recall content, 4) 10 minute break activity, and 5) students apply the content to demonstrate understanding of content.

I haven’t seen this approach applied to online learning, but I can see how this could work in a blended environment where live instruction blends with online content. In either case, chunking content and spacing out how it’s delivered changes our understanding of how long a course should be.

Be Learner Centric

One of the great advantages of e-learning is that it’s asynchronous which means it’s not confined by geography or time. That gives the learner the flexibility to take the course at a time most convenient to the learner.

Another advantage is that the learning is self-paced, which directly relates to the question of how long the course should be. An experienced person may learn a lot faster than the new person. Thus, length of time is irrelevant.

Rapid E-Learning Blog - how long should e-learning course be providing learner centric

Take advantage of what e-learning provides to create an environment that works best for the learner.

Here are a few tips:

    • Give them reasons to explore the course content.
    • Have them prove understanding as a measure of success.
    • Provide a lot of resources and guides to reinforce what they’re learning.

Slide Count is Irrelevant

Often when people ask about course length they also ask how many slides or screens the course should have. Some of this probably comes from the presentation mindset where each slide represents X minutes and if you have a 30 minute presentation you’re constrained to X slides.

However when it comes to e-learning, slide count is irrelevant. The learner looks at a screen, they don’t look at slides. You can put five pieces of information on a single slide or spread that same information over five slides. To the learner it makes no difference.

Essentially the screen shows content—mostly text and some sort of media like images and shapes. That content changes throughout the course. Does it matter if the content changes at the slide level with layers or by jumping to new slides? The end user only knows what’s displayed has changed. They don’t really care how you made it change.

It’s All About Meeting Your Learning Objectives

We all come to learning with different experiences and levels of understanding. Some people can pick up new content quickly while others may need more practice activities and feedback. E-learning is perfect for this approach because it’s flexible and can be tailored to learner needs and progress.

However, any course you build is only a solution to meet specific goals. We don’t build e-learning courses just to build courses. We build them to meet specific needs. Thus looking at the best length for a course is a bit misguided and focused in the wrong area. Ultimately we need to determine which intervention on our part helps the learner meet the learning expectations.

If the tips above don’t work for you, then the next best answer is “15 minutes.”

How do you determine course length?

Events

Free E-Learning Resources

Want to learn more? Check out these articles and free resources in the community.

Here’s a great job board for e-learning, instructional design, and training jobs

Participate in the weekly e-learning challenges to sharpen your skills

Get your free PowerPoint templates and free graphics & stock images.

Lots of cool e-learning examples to check out and find inspiration.

Getting Started? This e-learning 101 series and the free e-books will help.


instructional design for a new generation

Ok…I’m not sure that’s the right title. I’m working on a presentation that covers instructional design challenges and wanted to share a few points to consider about course design and how we need to move past the way many of today’s courses are constructed.

Technology has changed the landscape for today’s course designers

instructional design content owners

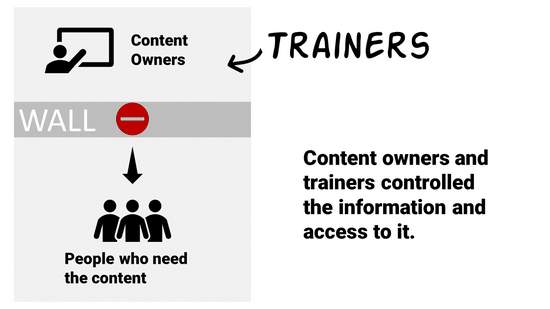
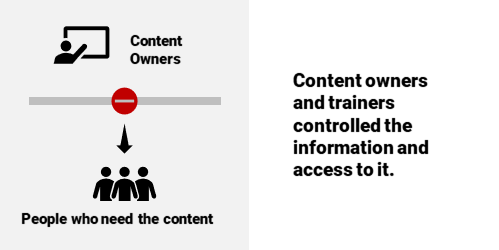
Years ago, someone other than the learner controlled access to content. We were all beholden to the subject matter experts and their walled gardens. We saw this in universities. We saw this in organizations. Subject matter experts owned content and they determined how it was packaged and delivered. Organizations created their learning management systems and determined who had access to what and when. Their quizzes determined who was smart enough.

But a lot of that has changed.

instructional design learners

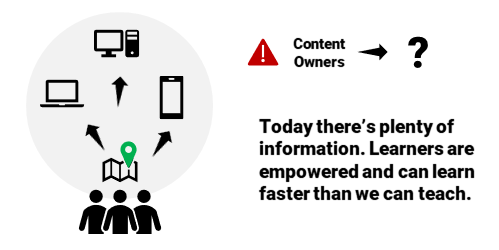
The internet and mobile devices give us access to everything we need to know, and mostly at a point when we need to know it. It doesn’t make us deep experts, but it makes us experts enough.

Need to repair sheetrock gone bad? Find a YouTube video. I won’t be quitting my job to build sheetrock walls, but I can learn to do what I need to do when I need to do it.

If I know something and want to share it. I’ll join a community. I can create a video (or some other asset) and make that available for others who want to learn what I know. The people who want to learn can find what they need when they need it. And they can find some comfort in the personal connection to an expert. They won’t feel sold to or manipulated. It’s a community and not a place worried about optics and spinning the meaning of every word.

instructional design today's learner

Course designers need to embrace a new role

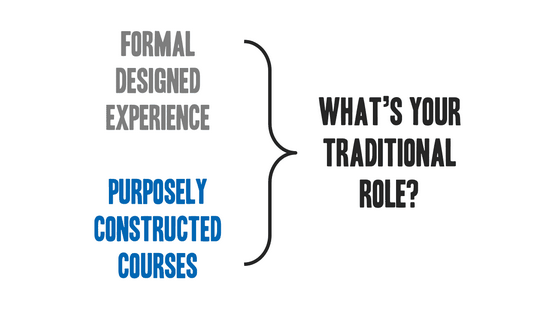
It’s not enough to build a course and upload to a learning management system. This forces all of the content behind a wall. We should start to see our role evolve.

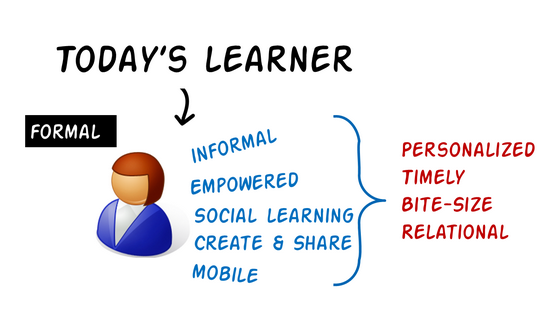
Today’s learner has access to what they need. They can get it when it makes the most sense to them. It’s usually in context. And it’s not overwhelming.

However, they may not always know what they need or how much of it. And they may not know what’s most critical or what’s best for meeting objectives. They may also waste a lot of time on irrelevant content.

traditional instructional designer

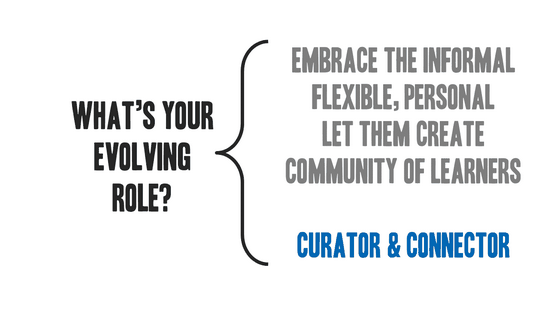
This is where we step in. Instead of just being traditional course creators, we should become both curator and connector.

Curating resources helps sort through the noise and package what’s most important to meeting objectives.

Connecting is all about facilitating a learning community and connecting experts with novices. It allows the content to live and breathe. The community has a knack for sorting value.

evolving instructional design

There will always be a place for formal course design and delivery. Government regulations and the fear of lawsuits will ensure that. However, if learning is really the goal, then how we make content available and help people succeed must be more than just putting together a bunch of online presentations and quizzes. Look at the way you learn things today and where you go to learn them. Find ways to make that part of your instructional design, too.

Events

Free E-Learning Resources

Want to learn more? Check out these articles and free resources in the community.

Here’s a great job board for e-learning, instructional design, and training jobs

Participate in the weekly e-learning challenges to sharpen your skills

Get your free PowerPoint templates and free graphics & stock images.

Lots of cool e-learning examples to check out and find inspiration.

Getting Started? This e-learning 101 series and the free e-books will help.


e-learning example

There are so many creative examples in the e-learning community. Many of them you can see in the weekly e-learning challenges. If you don’t have it on your docket to review them every week, you should. You can checkout the recap every Thursday for some good inspiration and often fun examples.

Here’s an e-learning example from Sarah Hodge that wasn’t part of the e-learning challenges but is a great example. Some of the things I like about this demo:

interactive e-learning example

Check out her example. And the next step is to try to figure out how it’s built. That’s a great way to learn to use your e-learning software.

  • Creative use of animations throughout, starting with the opening transition
  • Excellent use of simple graphics to create an engaging interaction
  • Good self assessment…not everything needs to be graded; and this could be used in all sorts of contexts
  • Reuses some items shared in the community
  • Visual prompts for right/wrong; learner self assess and the colors dynamically change on drag
  • Subtle (and appropriate sound effects); often we don’t use these

Sarah Hodge does great work and she has some other cool e-learning examples in the community. I love her How to Fight a Bear and Live demo (which I featured before) and this Mad Libs design, another fun assessment idea with a free download.

Events

Free E-Learning Resources

Want to learn more? Check out these articles and free resources in the community.

Here’s a great job board for e-learning, instructional design, and training jobs

Participate in the weekly e-learning challenges to sharpen your skills

Get your free PowerPoint templates and free graphics & stock images.

Lots of cool e-learning examples to check out and find inspiration.

Getting Started? This e-learning 101 series and the free e-books will help.


4 things to think about before building e-learning courses

It costs money to build e-learning courses and it costs money to take e-learning courses. Considering the cost, it’s important to ensure that you get the most value out of the courses you create.

One way to get value is to not create a course. Seriously. We don’t want to admit it, but many courses are pointless and a waste of time.

However, if you do need to create e-learning courses, then consider the following points below:

Create a Resource Hierarchy

You have limited resources and you want to make sure you use them wisely. In a recent post, I shared how I’d determine which e-learning application to use and when. This type of approach will save resources and help you get the most out of the e-learning software you use.

Move Content Offline

A lot of e-learning content is content that already exists in other formats. And most of that content is text-based. If the course is mostly reading and lots of text, why not take it offline and create PDFs or some other medium that’s easier to read? If you need a course, make it an abstract of the resource content with some activities to demonstrate understanding.

Teach How to Find & Use Resources

Since a lot of content already exists in other places, perhaps it’s better to teach them how to find and use those resources than it is to copy and paste that content into e-learning screens. Create real-world activities and then design the courses so that the learner is accessing resources and using that content to solve the activity.

Make the Courses Smaller

Do you need big courses? That seems like something from the 1990s and not the YoutTube generation. Instead of one big course, perhaps it makes sense to create a series of mini courses. They can always be bundled to create a cohesive learning path.

Events

Free E-Learning Resources

Want to learn more? Check out these articles and free resources in the community.

Here’s a great job board for e-learning, instructional design, and training jobs

Participate in the weekly e-learning challenges to sharpen your skills

Get your free PowerPoint templates and free graphics & stock images.

Lots of cool e-learning examples to check out and find inspiration.

Getting Started? This e-learning 101 series and the free e-books will help.


To quote the famous bumper sticker, “Learning Happens!”

I use that quote all the time with the entry-level instructional designers I train. It’s a reminder that people learn regardless of the training plans we put in place. And often they learn despite them.

Learning is innate to being human. It’s part of our nature and we’re never in a mode where we’re not learning something. It doesn’t mean that we always learn the right things or make the right adjustments to what we learn, but we are in a continual process of learning.

In that sense, learning hasn’t changed much over the years.

Training Today Versus Yesterday

What has changed is how we acquire and use content to learn. In the past, training teams (or the content owners) controlled access to most of the content. In a sense, they were the knowledge brokers. They organized content into “training” and provided “certification.”

Learners Today

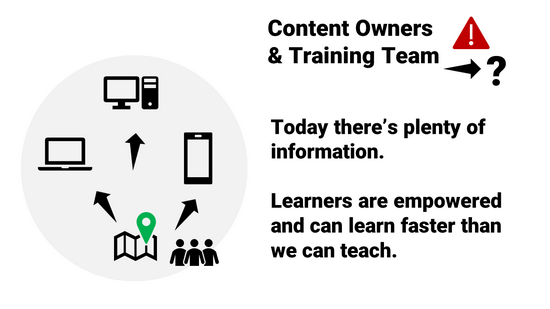
Today, it’s a bit different. Learners are empowered in ways they weren’t a few years ago.

  • The Internet (and internal networks) make it easier to catalog and find content.
  • Online communities connect peers who can extend the one person’s realm of expertise.
  • What they find, they can save, curate, and share with their community of learners.
  • Mobile devices mean people can access content at a point of interest or need. It gives them information at the right time, and often at the right place.
  • There’s an app for everything (or so it seems). And in the same vein, there’s a YouTube video for everything, too. Thus, you may not gain a deep understanding of the content, but you generally can get a functional understanding.
  • Do you need to be a certified expert? Seems people are more inclined to become micro experts with their fingertip learning.

Trainers Today

What can today’s trainer do to respond to these changes?

  • Focus less on formal training programs that tend to be too long and provide more content than is needed.
  • Lean more on bite-sized learning modules that are chunked to focus on single objectives.
  • Learn from online tech and marketing. They track people and know what to deliver and when. I’m not a big fan of online ads, but I will have to say I’m always impressed with the ads that Facebook serves. Usually, they are things that interest me. The same with when I travel. Google knows where I’m at and serves up relevant information, often before I need it. Seems that training could implement similar ideas.
  • Build a community and let it be organic. There’s a place for formal training. But there’s also a place for learning communities where people can curate and share. And they can do that with little formal oversight.
  • There’s still a need to vet content, but what’s vetted can be packaged differently in formats more flexible to meeting real needs.

The reality is that people learn. And they don’t always depend on what we put in front of them. In fact, often they learn faster than we can teach. Are we adjusting to the needs or still relying on an old-school model?

How are you addressing the changes in our industry?

Events

Free E-Learning Resources

Want to learn more? Check out these articles and free resources in the community.

Here’s a great job board for e-learning, instructional design, and training jobs

Participate in the weekly e-learning challenges to sharpen your skills

Get your free PowerPoint templates and free graphics & stock images.

Lots of cool e-learning examples to check out and find inspiration.

Getting Started? This e-learning 101 series and the free e-books will help.


gamified e-learning

The other day I got one of those marketing emails that I tend to delete without looking over. However, this one featured some ideas on gamification. And what got me most interested was looking at their examples. As we all know, gamification is a hot topic and it’s always neat to see how different groups build the gamified elements in their courses.

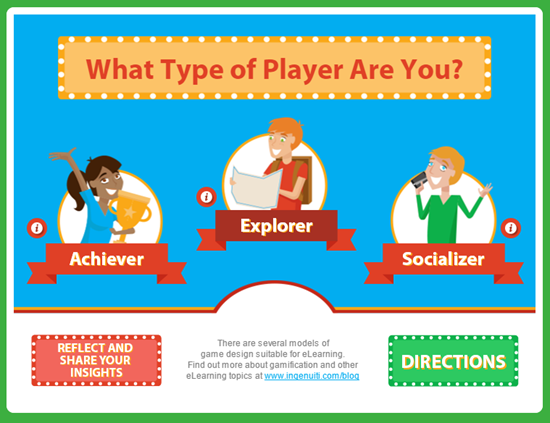
Ingenuiti put together a portfolio page with three different gamified examples. They use three micro games to teach and demonstrate some core gamification concepts.

I reviewed their modules and want to highlight a few production tips that not only work for gamified e-learning courses, but are just as useful in other contexts. For today’s post, I’ll focus on the first micro game.

Here’s a link to the video tutorial series.

Gamification Micro Game #1

gamified e-learning example

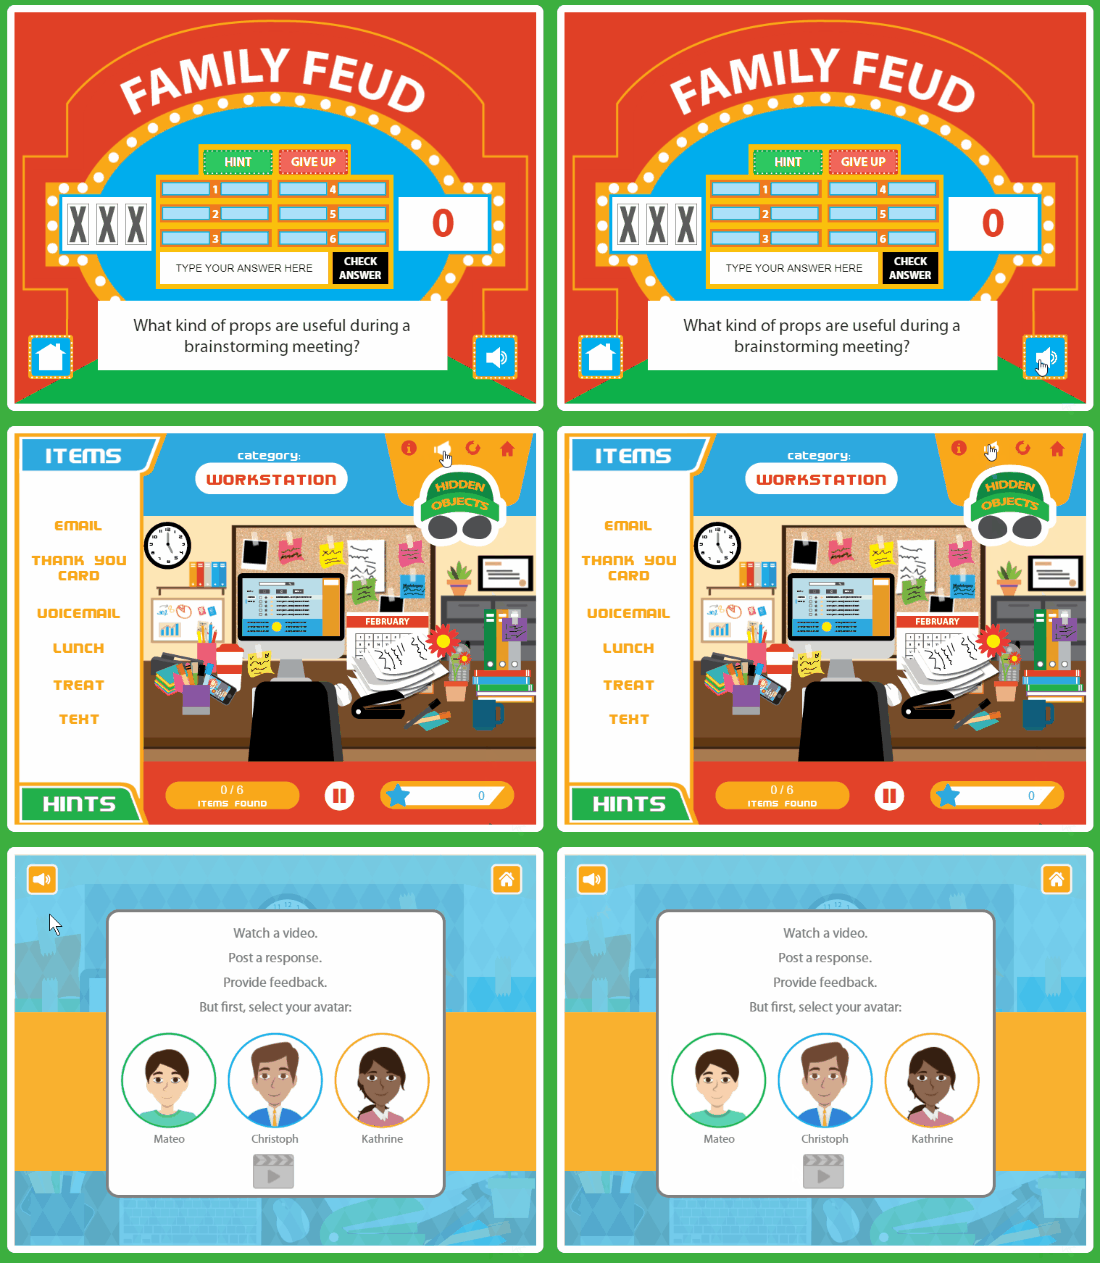
The first micro game focuses on three types of learning activities:

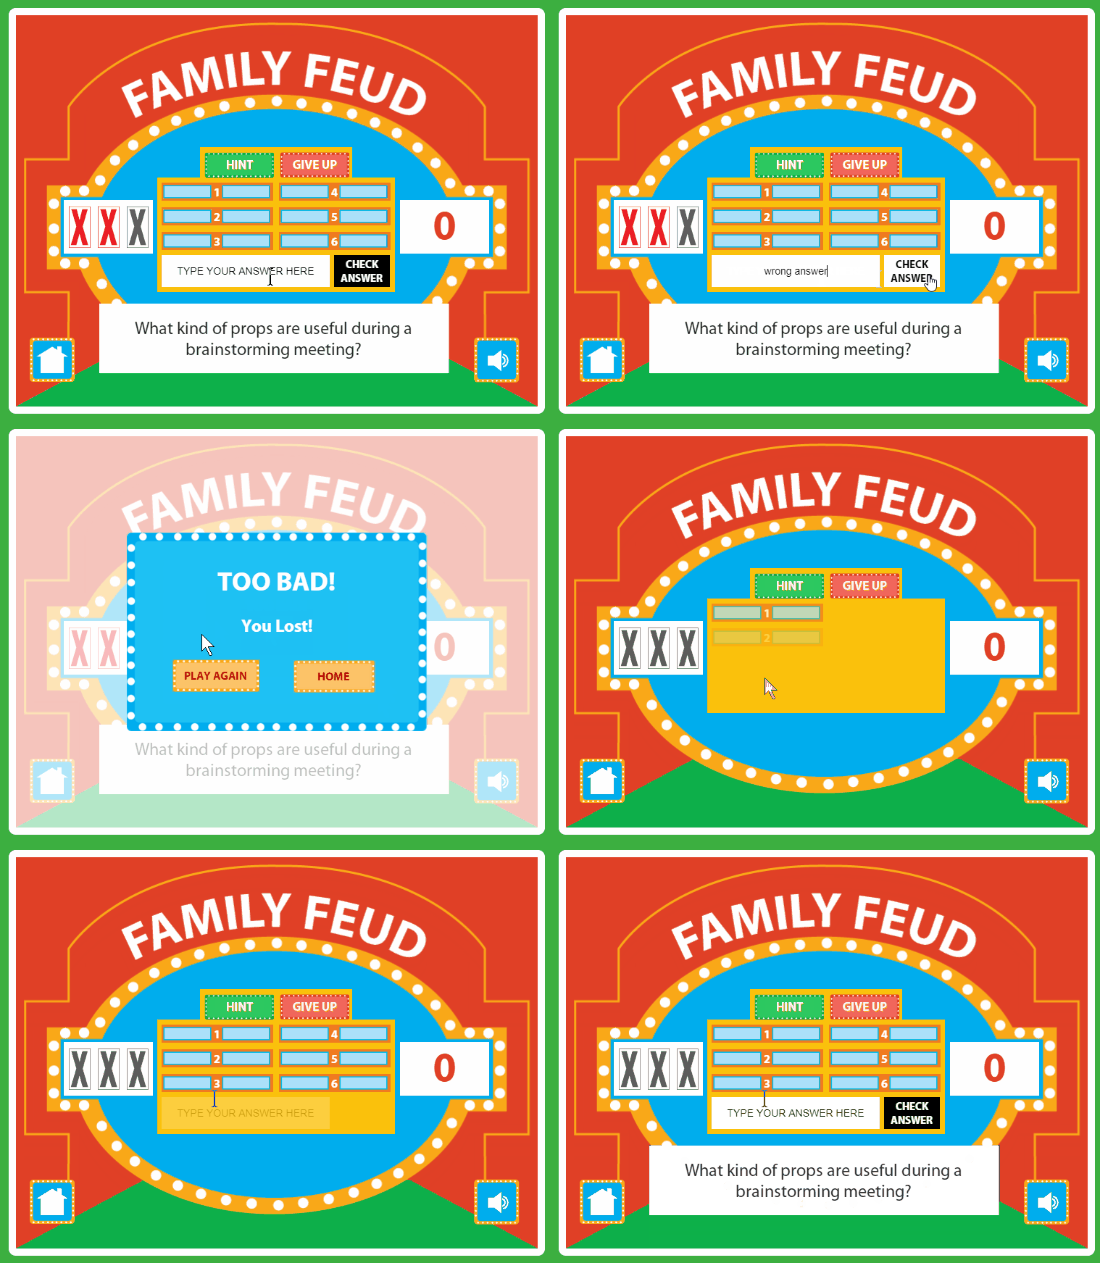
  • Simple Game: challenge the learners understanding in a common game format. It’s a great way to rehearse and recall information and do it in a fun way that is familiar to most people.
  • Explore Activity: have the learner explore the environment and collect information or rewards. I always consider exploration to be one of the core building blocks for interactive learning. Given the right context, exploration is a great way to engage and inspire critical thinking.
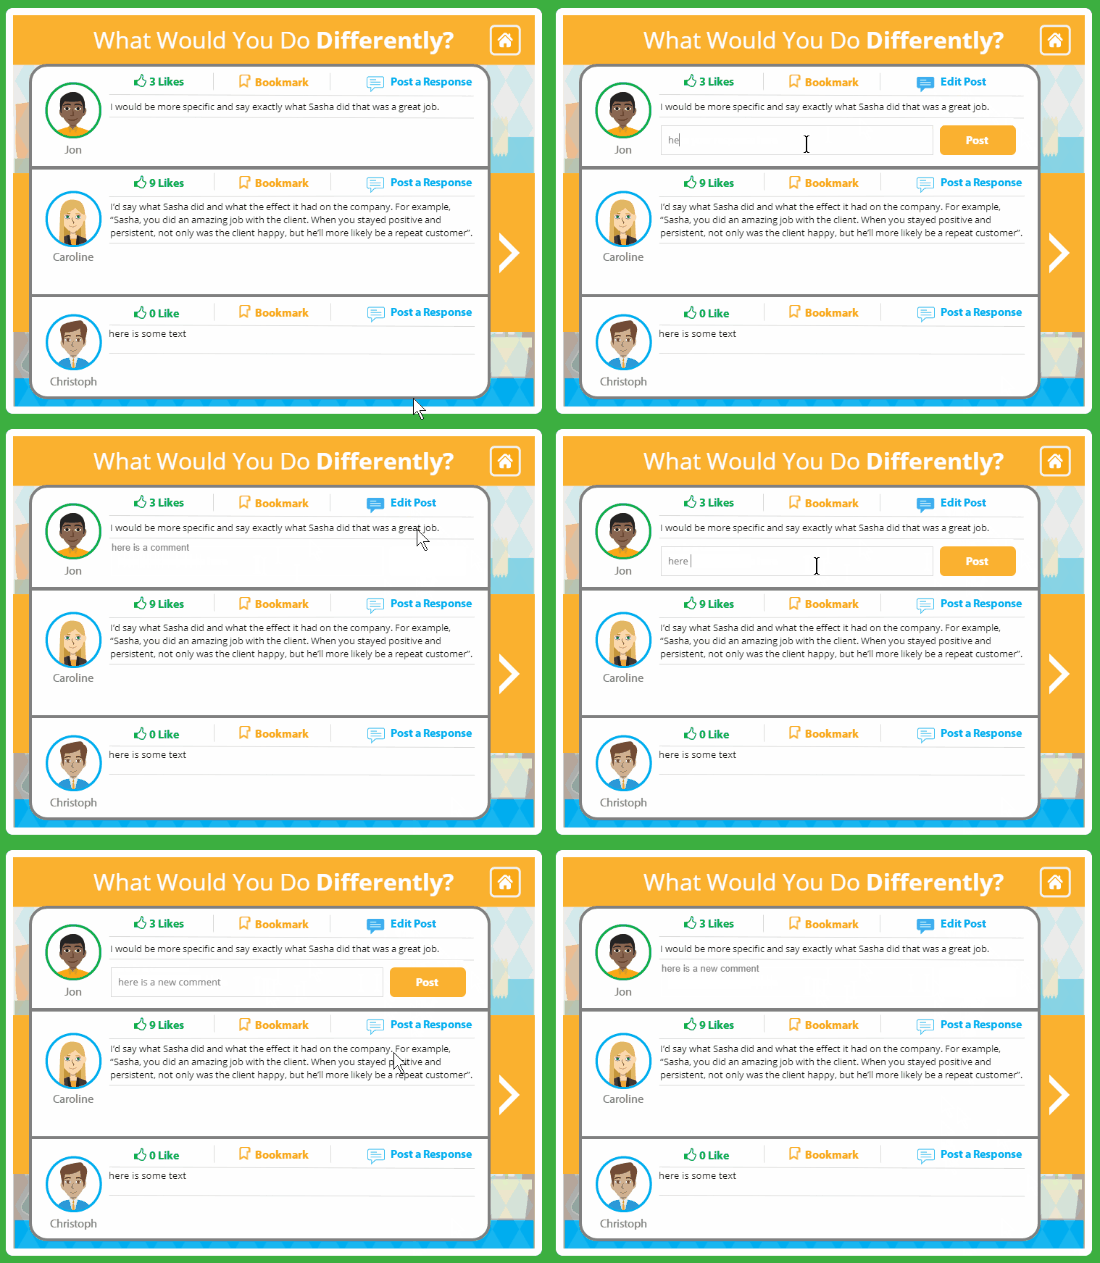
  • Simple Scenario: the learner observes an interaction, reflects on it, and then offers constructive input. Mimicking real-world type interactions is a good way to reinforce the learning experience. They do some clever things with the commenting, liking, and bookmarking.

There’s a lot going on in their modules. I isolated a few things that they did so that I can show some production tips and nuances of the software. Keep in mind, there’s always a few ways to do the same thing in software. So if you have different or even better ideas, feel free to share them in the comments.

Here are some videos that offer some real quick tutorials on how you can create similar effects and interactions in your own e-learning courses. I’m using Storyline because it’s easy to use, but you’re free to use the software of your choice, especially if you have plenty of time on your hands and not rushed to get things done. 🙂

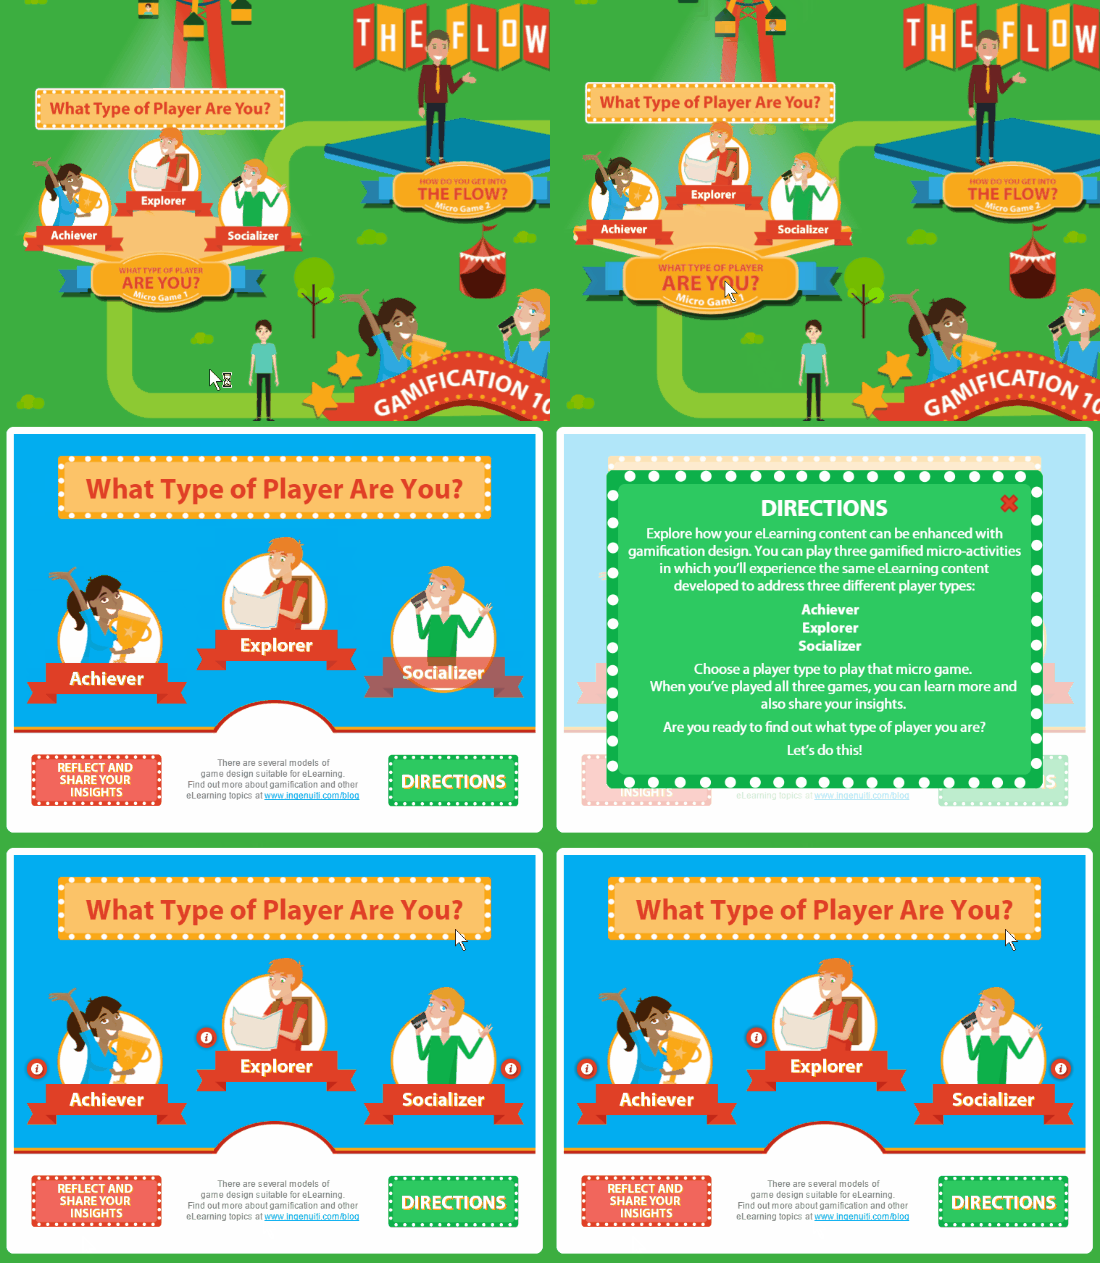
E-Learning Tip #1: Gate Screens

gamification example gate screen

Many courses have starter pages with simple instructions. Also, it’s also a good idea to stop progress in the course when changing directions on types of interactivity or navigation. It helps set expectations and orients the user. I call those gate screens.

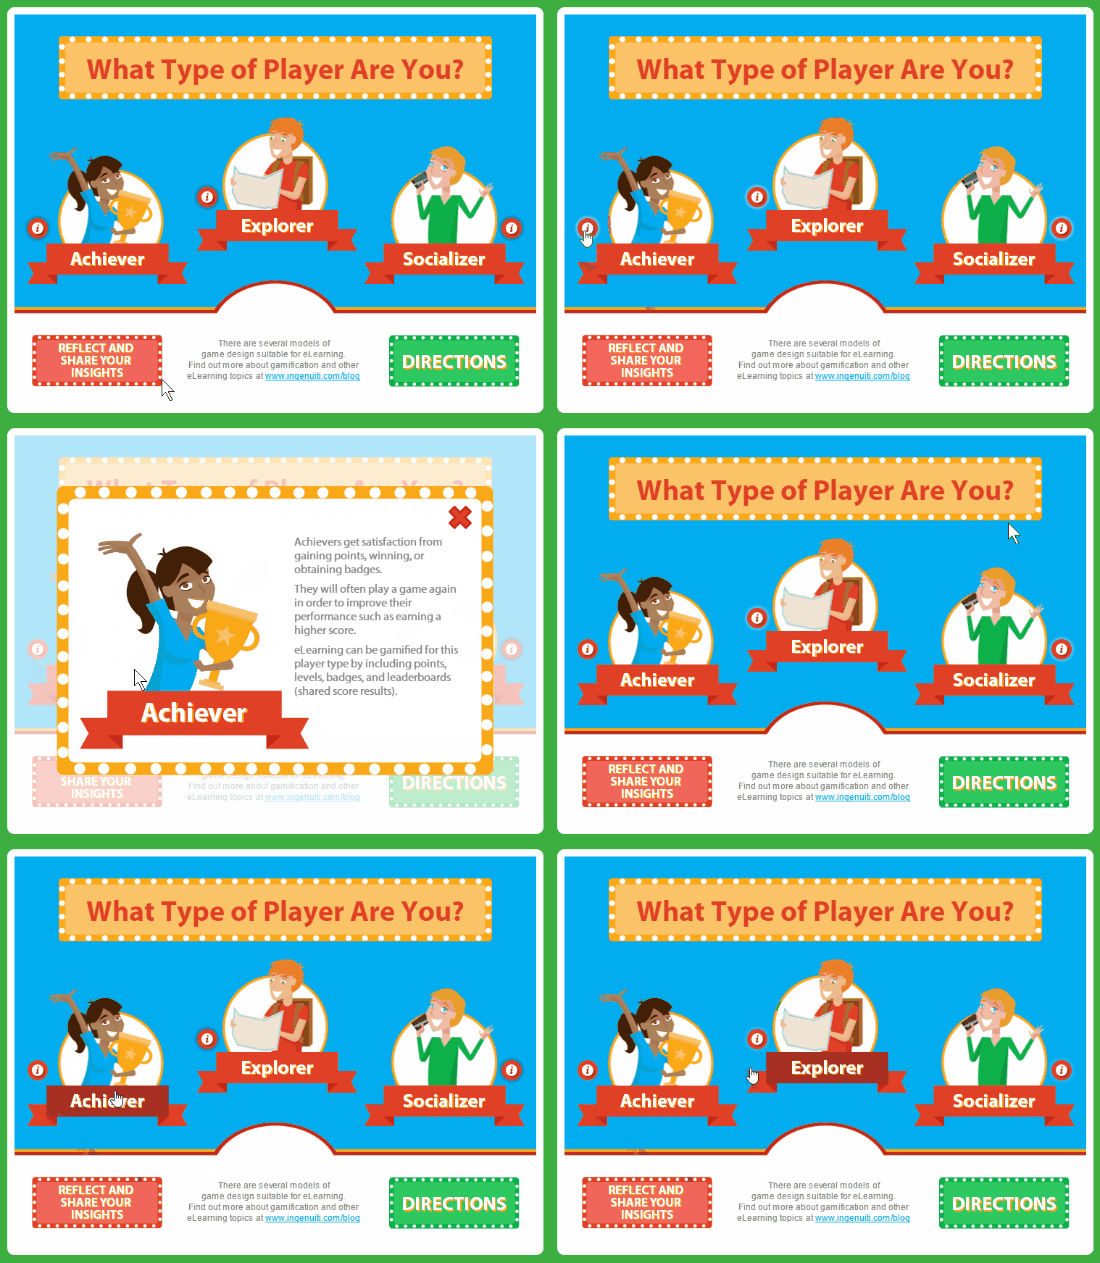
E-Learning Tip #2: Custom Markers with Animated Content Boxes

gamified e-learning example custom markers

In their demo, they used the marker feature but turned off the marker labels and had their own content appear. Also, after clicking the marker, the pulsing stops. When clicking the marker, the background fades and the content box animates in and out (upon leaving).

E-Learning Tip #3: Turn Audio On/Off

In a few places, they have running background audio which can be turned on or off. Normally, one oculd use the player volume control, but since the player isn’t present, custom controls need to be enabled.

E-Learning Tip #4: Simulated Posting of Chat Response

gamified e-learning example simulated conversation and text chat

I really like the way they build this mini scenario and the simulated chat. Have the user post a response to a chat. You notice that you can post and edit comments. As you do that, the other comments are disabled.

E-Learning Tip #6: Free Dragging Objects

gamified e-learning example free dragging interaction

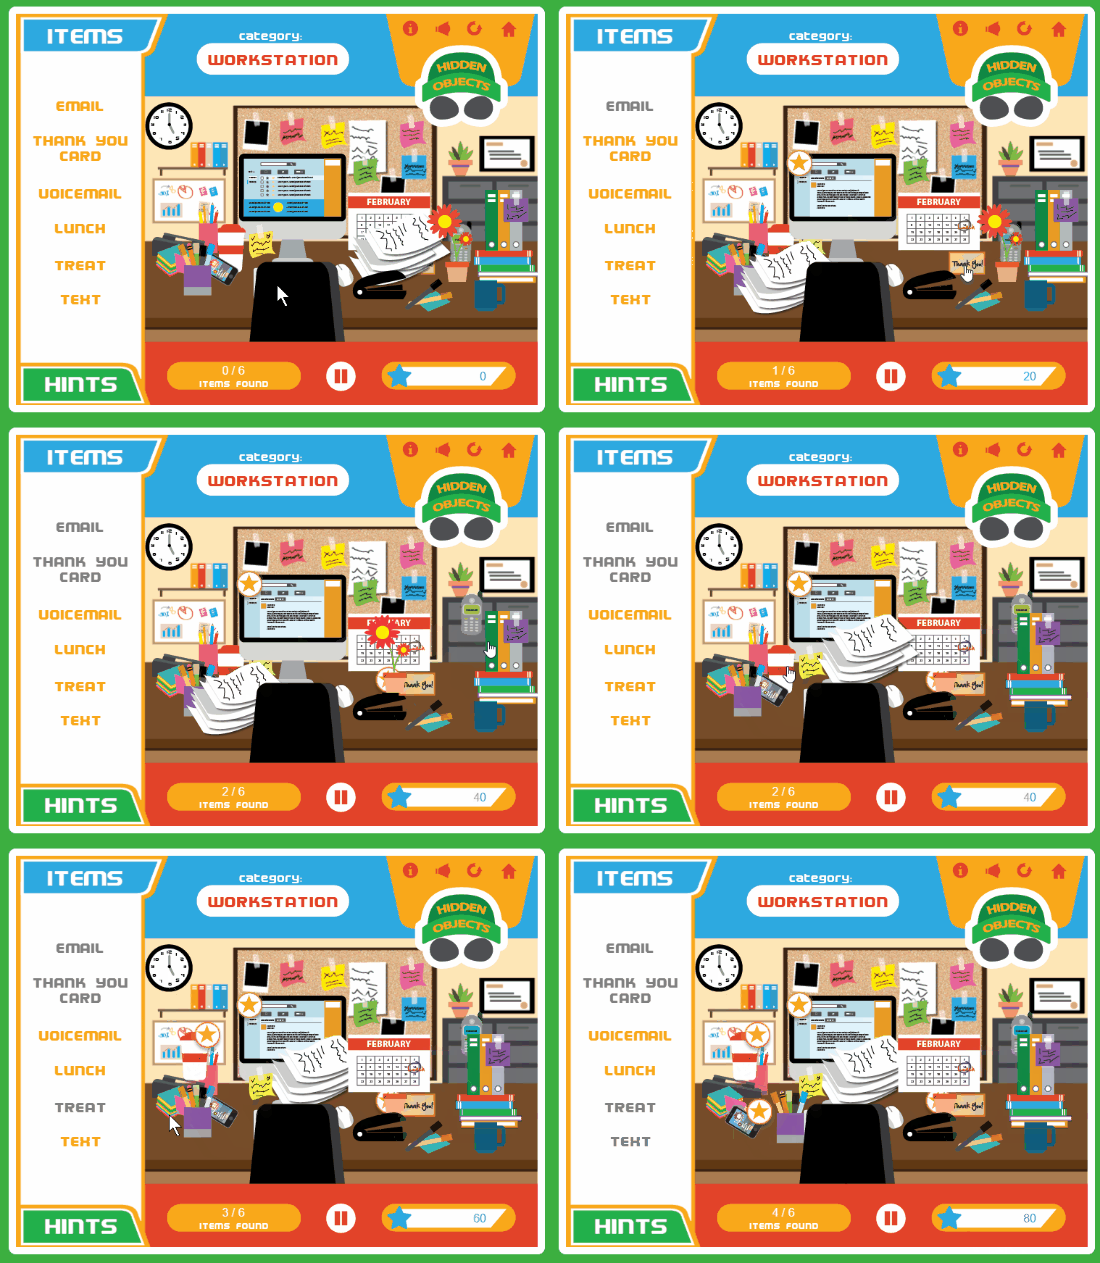
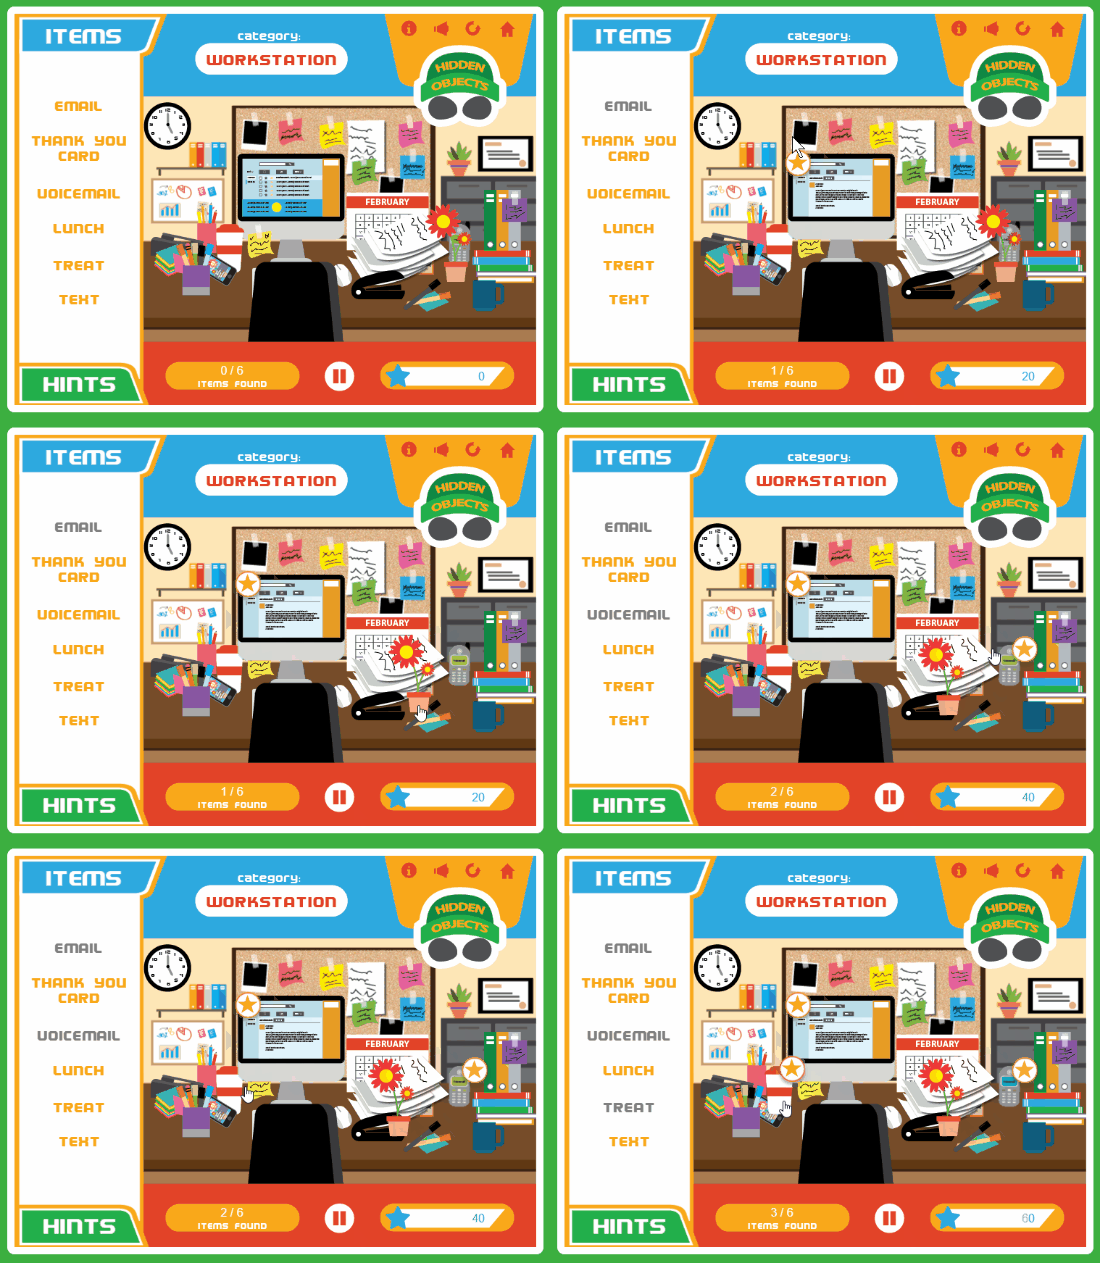
This exploration activity let’s the user drag objects and move them. Normally, dragging objects are associated with drag and drop activities. However, these are free moving objects with no specific interaction to them. They just let the user move objects freely out of the way to see what’s underneath.

E-Learning Tip #7: Changing State of Selected Objects

gamified e-learning example selected states

When a correct choice is made, the object displays a star to indicate it’s been selected correctly. You’ll also notice that the side panel indicates which objects are selected and which remain.

E-Learning Tip #8: Play Again Option

gamified e-learning example retry interaction

Let the user quit or play the game again. This resets the interaction to the initial state.

These are a few of the cool things the Ingenuiti developers did in their module. Whether you’re building a gamified e-learning course or something else, these production tips should come in handy.

Events

Free E-Learning Resources

Want to learn more? Check out these articles and free resources in the community.

Here’s a great job board for e-learning, instructional design, and training jobs

Participate in the weekly e-learning challenges to sharpen your skills

Get your free PowerPoint templates and free graphics & stock images.

Lots of cool e-learning examples to check out and find inspiration.

Getting Started? This e-learning 101 series and the free e-books will help.


screencast tips

Screencast tutorials are some of the most common forms of online training. This makes sense since a large part of e-learning is predicated on learning new software. One challenge is creating effective and engaging screencasts. So today, we’ll look at a few simple production tips to help you get started.

Screencast Tip: Establish Context Quickly

It helps to know what you’re learning and why. At the beginning of the screencast, introduce what you’re going to teach and why (or what the outcome should be). Many screencasts aren’t clear about what the value of the screencast is. They either jump into instruction with no context, or they spend too much time on non-essential content.

Screencast Tip: Get to the Point Quickly

The other day I was reviewing a product video for some new gadget. The video was about seven minutes long. I wanted to know how the gadget worked and what features it had but the guy in the video spent the first three minutes talking about a bunch of nonsense that had nothing to do with the video topic. As Archie Bunker used to say, “Get to the point, Edith.”

Screencast Tip: Don’t Focus on Features

Many of the screencasts I view go through a feature list. They spend way too much time on the user interface and the features buried within it. You don’t need to explain everything in the software or everything you can do with it. And not all features are created equal. Some are used all the time and some rarely. Skip the feature-by-feature dissertation. Focus on the key features and the ones most critical to the user’s objectives.

Screencast Tip: Focus on Action

What are people supposed to do with the software? Make a list of required actions or responsibilities. Then build your screencasts around actionable objectives and how to meet them. Give them real-life challenges and how the software meets them. For example, if I were teaching someone how to use a spreadsheet, instead of showing them how to to use specific features, I’d start with a real-world challenge: “You need to create a report using this data.” And then from there, I’d go through the process of instruction and focus on the features relevant to the objective.

Screencast Tip: Don’t Stop at One

People need multiple opportunities to practice. Many screencasts and the associated activities are built on a single action. This is fine. However, use the activities to reinforce a previous lesson as you introduce new skills. Give them opportunities to review and repeat the previous process.

The more practice, the more fluent they’ll be. This is really key with software training where you build on skills from previous training videos.

Screencast Tip: Keep it Short

Shorter videos are better. Stay focused and get to the point, as I noted above. It’s better to have a series of shorter videos than to have a single long one that forces the user to scrub through looking for relevant info. Try to stay focused on a single objective.

Screencast Tip: Provide Post-Screencast Resources

Because the screencast videos will be shorter and tied to specific actions there may be some learning gaps or other things the person wants to know. It’s always a good idea to curate a list of additional resources for the viewer to access after they’ve completed the screencast video.

Screencast Tip: Don’t Make a Screencast

Screencasts take time and some require multiple edits. And if the content changes (like a new interface or features) then they need to be redone. Often it’s easier to show a static screen and use labels to highlight specific areas. These are also easier to update when the subject matter is still in flux. And it helps you avoid long videos when they just need simple information.

I like this interactive screenshot prototype that David built a while ago. It looks good and it’s easy to build. It’s also available as a free download.

Here are some additional resources for those who want to create screencasts:

What tips do you have to share?

Events

Free E-Learning Resources

Want to learn more? Check out these articles and free resources in the community.

Here’s a great job board for e-learning, instructional design, and training jobs

Participate in the weekly e-learning challenges to sharpen your skills

Get your free PowerPoint templates and free graphics & stock images.

Lots of cool e-learning examples to check out and find inspiration.

Getting Started? This e-learning 101 series and the free e-books will help.


e-learning books summer reading fun

The end of summer usually serves as the beginning of the school year. In a sense, it also kind of serves as the beginning of the work year. It’s always good to come into a new year with a fresh perspective. Reading is one way to do that.

I’m always asked about good e-learning books from those just getting started who want to learn more.  Here are some new books I haven’t referenced in the past. I think they’re worth considering for your e-learning library. The links to Amazon books may produce a slight commission.

Microlearning Guide to Microlearning

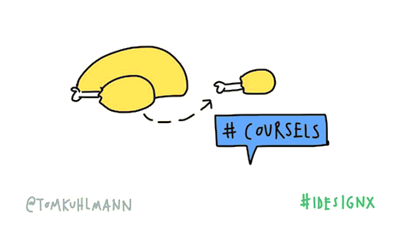
Microlearning is all the rage. Although I think short courses have always existed, it’s just today they have a trendy name. I like to call them coursels (as in course morsels). But that hasn’t taken off despite my efforts over the past twenty years. I guess my legacy will rest on something else.

coursels microlearning

If you want to learn about microlearning then check out Carla Torgerson’s Microlearning Guide to Microlearning.

microlearning book

Here are a few things that stand out:

  • The book presents each point as distinct micro ideas. There are 141 in the book. It may seem a bit gimmicky and some of the ideas are obvious, but for the most, part it works and the points are really good. Besides, the essence of microlearning is to distill ideas into smaller, single topic points. There’s nothing earth-shattering in the book, but it’s a fast read and has most of the core points you’d find in other books and articles on microlearning. Having them in a single resource is nice.
  • I still like to read paper books and end up having to write a lot of notes and my thoughts on the back cover because there’s no room in the margins. Because she presents single micro ideas in the book, there’s lots of room to reflect and take notes.
  • She offers the MILE model as a means to help guide the content development. Here’s the essence of the model: objectives, structure, resources, promote, and evaluate. There’s a lot more to it, but it’s a good model.

Overall, a good book and easy to get through.

Write and Organize for Deeper Learning

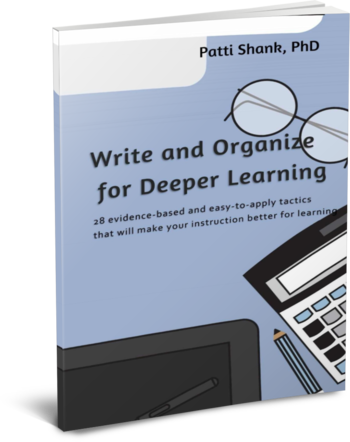
Many of you are probably familiar with Patti Shank. She’s a frequent speaker at industry conferences and has written a number of good books. And now she has a new one, Write and Organize for Deeper Learning. This is book one of the “Make It Learnable” series.

patti shank write and organize for deeper learning

Here are a few key highlights:

  • The book focuses on four key strategies built around the audience’s needs and ability to learn based on how the content is structured and presented.
  • She offers lots of ideas and tactics to help make the book’s content learnable and something you can apply.
  • I’m a simple person. I have plenty of big, thick books on instructional design and learning, but I like to fall back on thin, easy-to-digest books. This is a good one for beginners who are dipping their toes in the water and not sure where to start. It covers a lot of foundational content. And for those of us who are a bit more tenured it’s a fast read with lots of reminders.

Like Julie Dirksen’s Design for How People Learn, this is one of those books I’d recommend to someone just getting started.

Map It: The Hands-On Guide to Strategic Training Design

Cathy Moore’s done a great job taking course design concepts and making them easy-to-understand, especially for those just getting started. I always recommend her action mapping ideas to subject matter experts at the workshops and conferences I attend.

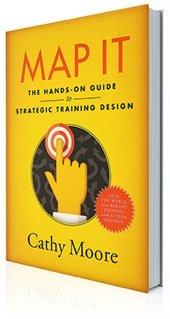
Now she has a book, Map It: The Hands-on Guide to Strategic Training Design, to go with everything else she shares.

cathy moore action mapping Map It: The Hands-On Guide to Strategic Training Design


Other Good E-Learning Books

Here’s a list of books I’ve recommended in the past and some from the community.

Do you have any good e-learning book recommendations?

Events

Free E-Learning Resources

Want to learn more? Check out these articles and free resources in the community.

Here’s a great job board for e-learning, instructional design, and training jobs

Participate in the weekly e-learning challenges to sharpen your skills

Get your free PowerPoint templates and free graphics & stock images.

Lots of cool e-learning examples to check out and find inspiration.

Getting Started? This e-learning 101 series and the free e-books will help.


free microlearning template

Earlier I shared this free microlearning template. It is easy to use and edit. However, I did receive some questions on how it was created and how to add additional cards. So in today’s post I’ll share a few tips so you can make your own template and edit the one I shared.

Here’s a series of video tutorials that show how to create the simple, yet powerful microlearning template. Check out the last tutorial on how to quickly edit the text. It’s a neat way to leverage the translation feature to do the heavy lifting.

How to Create the Animated Card

We want the card to animate onto the screen and pause. And we want to click on the card to see the other side (of the card, not the spirit world).

Click here to view the tutorial.

  • The first step is to create a card.
  • Add an entrance and exit animation.
  • Add a selected state to the card to create the click and reveal feature.
  • Add a trigger to the card that pauses the timeline when the entrance animation completes.

When you preview, the card should animate in and pause. You can click on the card to select or deselect it.

How to Edit the Normal & Selected States

We want the selected state to have an animated object that comes on and off the screen when the card is selected and deselected.

Click here to view the tutorial.

  • Select the card and double click inside the state you want to edit.
  • Add placeholder text in the normal state.
  • Add a shape to the selected state and add placeholder text to the shape.
  • Add entrance and exit animations to the shape in the selected state.

When you preview and click on the card, it will trigger the entrance animation of the selected state. And when you click on it again, it should trigger the exit animation.

How to Bring a Card On & Off the Screen

When the card animates on the screen it will pause. This allows us to “flip the card” by clicking on the card. When we’re done looking at the card, we want it to exit the screen and trigger a new card.

Click here to view the tutorial.

  • Create a button with a trigger to resume the timeline.
  • Duplicate the card and position it on the timeline after the first card. Repeat as necessary.

When you preview the microlearning interaction, the card enters and pauses. Clicking the button causes the timeline to resume which triggers the exit animation of the first card and the entrance animation of the next card.

How to Edit the Content on the Cards

Clicking into the states of the various cards can be tedious. Here’s an easy way to edit the text for each card.

Click here to view the tutorial.

  • Go to File>Translate>Export to export the text from the course.
  • Edit the text in the document and save it.
  • Go to File>Translate>Import to import the text into the cards.
  • Preview the microlearning interaction to verify that the text alignment is correct.

Importing the text should work well and as long as you don’t add too many characters you shouldn’t have to do any editing.

Here’s another free microlearning template for you to deconstruct and see how it was built.

Events

Free E-Learning Resources

Want to learn more? Check out these articles and free resources in the community.

Here’s a great job board for e-learning, instructional design, and training jobs

Participate in the weekly e-learning challenges to sharpen your skills

Get your free PowerPoint templates and free graphics & stock images.

Lots of cool e-learning examples to check out and find inspiration.

Getting Started? This e-learning 101 series and the free e-books will help.


Free Microlearning Template

January 17th, 2017

free microlearning template

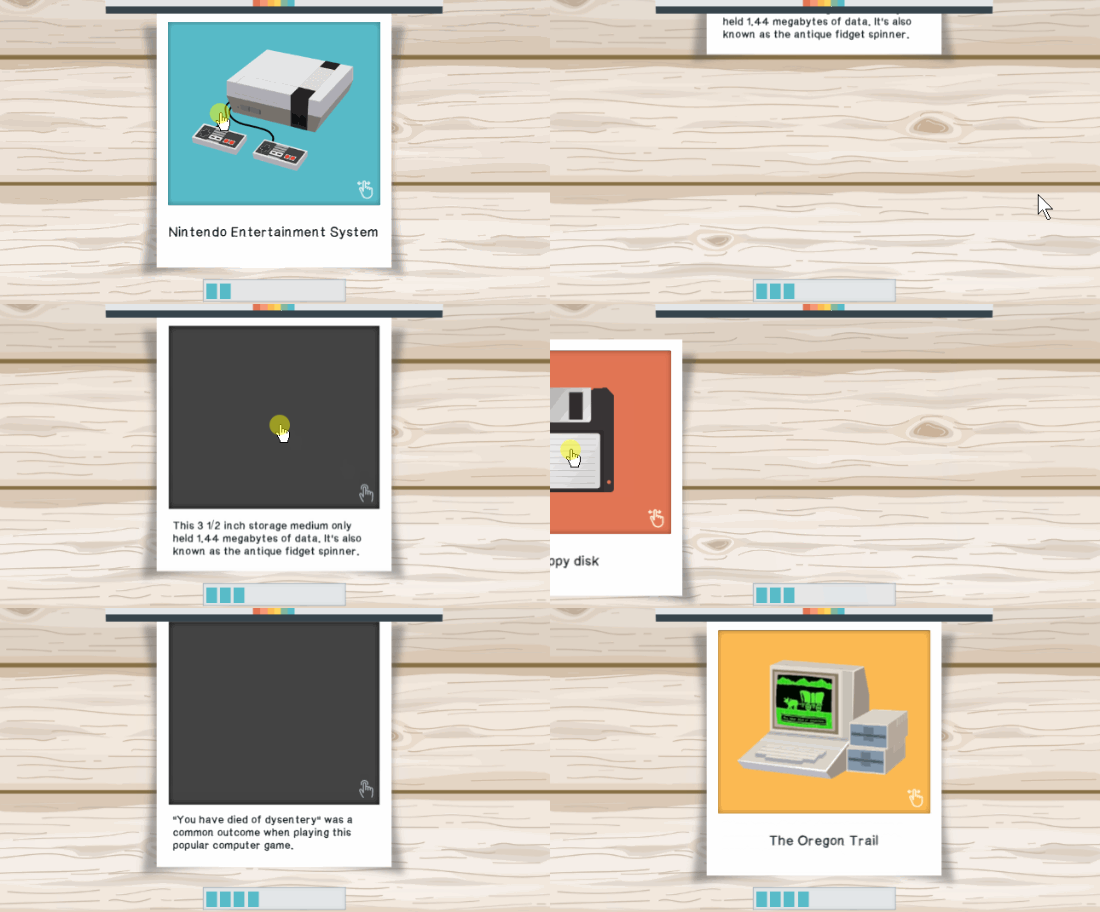
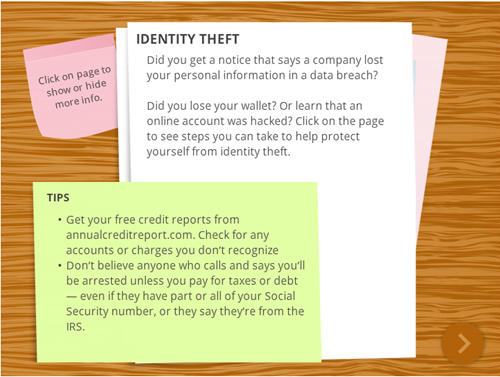
Here’s a free microlearning template I created for a workshop on interactive e-learning. The template uses the popular overhead desktop theme. I’m using the interaction as a simple microlearning module. But it could also be a quick knowledge check like this one. It just depends on how you want to use it for your own course.

Example of Free Microlearning Template

Here’s an example of the template in action.

free microlearning template

Click here to see the microlearning example.

How to Edit the Free Microlearning Template

What makes this microlearning template work is that it’s really easy to use and modify. The construction is really simple.

  • Create a card with selected states.
  • Add an entrance and exit animation to the card.
  • Create a trigger to pause the timeline when the card’s entrance animation completes.
  • Create a button to resume the timeline.

Want more cards? Just duplicate them and the triggers are duplicated, as well. You can create as many cards as you like. All you need to do is stagger them on the timeline.

Bonus tip:

  • The template starts with a single card. Since I don’t know how many cards will be in the final module, I created a cue point on the timeline. Look at the free file to see what is triggered by the cue point. If you add a bunch of cards, just drag the cue point to the end and all if its triggers move with it.
  • Here’s a tutorial post that shows how to create and edit your own microlearning interaction.

Events

Free E-Learning Resources

Want to learn more? Check out these articles and free resources in the community.

Here’s a great job board for e-learning, instructional design, and training jobs

Participate in the weekly e-learning challenges to sharpen your skills

Get your free PowerPoint templates and free graphics & stock images.

Lots of cool e-learning examples to check out and find inspiration.

Getting Started? This e-learning 101 series and the free e-books will help.