The Rapid Elearning Blog

Archive for the ‘Uncategorized’ Category


The Rapid E-Learning Blog - abandoned airport terminal

Had a great time last week in Indianapolis presenting to the Central Indiana ASTD chapter.  David and I met some nice people and got to do some research to support a recent blog post.  we also discovered that Indianapolis has two airport terminals.  One is new and looks great.  The other one is shuttered with grass overtaking the parking lot.  Guess which one the PGS lead us to?  We felt like the Griswolds when they got to Wally World.

It really didn’t matter that we were detoured because thunderstorms in Chicago grounded my flight for the evening.  So I had time to kill and decided to pull together a free elearning template for the blog readers.

Here’s an example of the template with some placeholder content.  You can find the tutorials and source files below.

The Rapid E-Learning Blog - example PowerPoint elearning template

Click here to view the elearning template

Notes on Creating the Template

Some people have innate design skills.  Most of us don’t.  It takes some practice.  If you want to succeed at rapid elearning, you have to develop your PowerPoint skills.  And there’s no better way than to find an inspiring design, then practice recreating it.

The first step is to replicate the design.  See what you can do with PowerPoint.  You’ll be surprised to find that PowerPoint’s a pretty capable graphics tool.  That’s how I created the envelope and television icons below.

The Rapid E-Learning Blog - use PowerPoint to build graphics

Once you have the steps down, start to play with the layout.  When it comes to elearning templates, I usually create a few core screens.  The first is a title or section screen, the second is one where I might combine text and graphics, and then I like an open screen with maximum real estate for multimedia.

There really are no rules, though.  You can create as many derivatives of the screen as you like.

PowerPoint Tips

  • Create in PowerPoint and then save the images as graphic files.  This way they’re easier to work with in your course.
  • Play around with the backgrounds.  I like to use the default color theme so I can easily apply a new theme.  But adding an image, like a wood panel in this demo, looks really nice.
  • Incorporate some animated elements.  What would it look like to have the note slide out from the bottom?  Or have the cards animate in?
  • Try to get as many of the elements on the master slide as you can.  This saves time in production and speeds up publishing.

Here are some tutorials that show how I created the template with some additional tips.  You can view them via the Screenr links or in the course below.

The Rapid E-Learning Blog - tutorial on how to build the PowerPoint elearning template

Click here to view the template tutorials.

Screenr tutorials:

The Rapid E-Learning Blog - download the source files here

Click here to download the PowerPoint files in pptx and ppt versions.

How would you modify the template?  Feel free to download it and make your own changes.  Share what you create by clicking on the comments link.

Events

Free E-Learning Resources

Want to learn more? Check out these articles and free resources in the community.

Here’s a great job board for e-learning, instructional design, and training jobs

Participate in the weekly e-learning challenges to sharpen your skills

Get your free PowerPoint templates and free graphics & stock images.

Lots of cool e-learning examples to check out and find inspiration.

Getting Started? This e-learning 101 series and the free e-books will help.


The Rapid E-Learning Blog - get help building elearning courses

Many of you are either working alone or on very small teams with limited resources.  With some creativity, you can do quite a bit.  In fact, many of my tips and tricks came from working in a similar situation.  It’s amazing what can be done do with a computer and a little duct tape.

With that said, working solo has some drawbacks.  One of the biggest is not having peers (or a more experienced person) who can help you brainstorm and think through the process of building a course.  You really are left to fend for yourself.  Or so it seems.

In the past we looked at how to navigate social media and manage all of the streams of information.  We also discussed ways that being part of the community can help make you an elearning superstar.  With today’s Internet and social media, you can redefine who’s a peer.  And that’s a good thing. 

I get a lot of emails about how to get started with elearning or how to learn more.  One of my first suggestions is to jump into the community forums and start asking for help.  It’s good for help and for your career.  In today’s post, I want to highlight a recent interaction in the community that shows how you can become better in your elearning design. 

A Quick Note about Communities

Communities typically work like the image below.  Most people aren’t active participants.  They kind of lurk at the edges looking for a quick tip here or there and following the threads.  Only a handful is active in real conversation. 

The Rapid E-Learning Blog - truth about online communities

Lurking isn’t bad.  There’s nothing wrong with looking for the quick tips and tricks.  Who really has the time to hang out in communities chatting about elearning?

If all you want is a quick tip or fast help, then it’s fine to be on the outside.  Just jump in, get some help, and go back to work.  However, there is a lot of practical value in becoming part of your user community.  Let me share a few ways:

  • Real people get real help.  No one knows the lurkers who quietly observe and pull out the help they need.  When you ask questions and engage in conversation, you become a real person.  And people who are in the community want to help real people.  Become part of the 5%.
  • Become an expert.  What’s common to the community is that everyone is developing expertise in some capacity.  Sure we all come to it from different angles and levels of experience, but ultimately what binds us together is our pursuit to become better at what we do.  Share what you know and try to help others, too.  You’ll feel better and your goodwill pays dividends when you need help.
  • Virtual brainstorming.  If you’re working solo, odds are that you don’t have a place to think out loud or bounce around ideas.  The community offers that.  Are you working on a course and trying to figure out how to do something?  Do you want some feedback from others?  Jump into the community and ask.

A Practical, Real-World Example

It’s one thing to talk about learning communities.  But it’s another to make it a practical reality.  The truth is most of us don’t have time to hang out in online communities.  We have work to do and can’t spend every waking hour checking links in Twitter, following threads in forums, and updating Facebook pages.

Because of this, most people don’t fully participate in community activities.  That’s fine.  However, here’s a recent community interaction that is both practical and a great example of how the community offers real valuable help and not just good discussion.

Joe Deegan is a recent Articulate customer.  And he’s quickly learned to get his value out of the community.  A while back he posted a question looking for ideas on building an interactive sales course.  My guess is that he got at least ten good ideas to play around with.

Just the other day, he posted another question in the forums:

I am working on a project where I am creating a slide that looks like the inside of a store that my users work in. I am having a hard time adding perspective to the floor so that it looks 3D as if I am inside the room. I’ve seen many of you do a great job of this so I wanted to get your ideas on how I can make my scene look better.

He uploaded a quick screencast of what he wanted to do; and then asked for some help.

The Rapid E-Learning Blog - Joe Deegan's initial question

You can follow what happened in the community by clicking this link.  But I’ll give you a quick rundown.

His question generated a good conversation and some advice which compounded as others jumped in.  It produced a few screencasts, some quick prototypes, and a great discussion.  By the end of it, Joe interacted with six others and came away with some good ideas.  His one-person team sure did grow. 🙂

The Rapid E-Learning Blog - the elearning community in action

I especially like the way Bruno took the essence of the conversation and created a quick screencast that not only addressed the original question, but also shows some great PowerPoint tips.  Check it out, below.


Click here to view Bruno’s tutorial.

Think about the value Joe brings to his workplace.  W
hen they hired him, in a sense they also hired a team because Joe comes bundled with his network of resources.  So if you’re a Joe Deegan and want to learn more (or just need help with your courses) don’t be afraid to jump into the community.  You’ll find it a great experience and get the tips and tricks to help you grow as an elearning developer.

Events

Free E-Learning Resources

Want to learn more? Check out these articles and free resources in the community.

Here’s a great job board for e-learning, instructional design, and training jobs

Participate in the weekly e-learning challenges to sharpen your skills

Get your free PowerPoint templates and free graphics & stock images.

Lots of cool e-learning examples to check out and find inspiration.

Getting Started? This e-learning 101 series and the free e-books will help.


The Rapid E-Learning Blog - are you ready to be a guru

I get emails all the time from freelancers or elearning vendors asking how to get more work or exposure.  I also have quite a few managers ask for ways to get their staff up-to-speed building better elearning courses.  So, I’m going to take this opportunity to plug the Articulate Guru Awards and show how you can use the awards as a way to grow your business and rapid elearning skills.

Get Lots of Exposure & Free Marketing of Your Services

The past few weeks, as people have been reaching out to me looking for work, I’ve told them about the Articulate Guru Awards and recommended that they submit something.  Almost as if scripted, they most say, “I would but I’m too busy,” or “I don’t have any courses to enter.”  I have to chuckle at the first response considering that they’re contacting me looking for work.

The Rapid E-Learning Blog - show off your courses

Running a small business always creates this tension between doing revenue-generating projects and spending time looking for it.  So for many people it’s feast or famine.  I have to think that if I were trying to make a name for myself, contests like the Articulate Guru Awards and the eLearning Global Giveback Competition would be my first priority.  It’s free advertising.  And most likely one of the most important courses you’ll ever create.

Here’s the deal, there are very few elearning awards out there, especially ones that are free.  So why not take advantage of the opportunities that exist?  And these elearning awards are a great way to do this.

While it’s cool to win, that’s not the only benefit.  If you build a good course, you’ll get featured in other ways that give you exposure and will help you out.  In fact, it’s exactly what eVision said.  Entering the Articulate Guru Awards “was one of the best things for marketing their services.”

Build Your Personal Portfolio

With the way things are going, you never know when you’ll be looking for work.  So you want to be prepared, which I discussed in a previous post on why you need an elearning portfolio.

The Rapid E-Learning Blog - example courses

One of the challenges with compiling elearning portfolios is that many organizations have you build the same courses over and over again; and most of them are probably pretty simple or not very interesting.  It’s hard to show off your skills if you company is happy with basic PowerPoint-to-Flash courses.

With the guru awards you aren’t limited to submitting work-based courses.  You can choose to submit whatever you want.  The CPR course eMersion created wasn’t a real course.  It was just a proof of concept to show off what they can do.  And the Evernote demo that Chris did was something he chose because he is a fan of the product.

Take advantage of the opportunity to create the type of course you want to build and show off what you can do.  You can create a course on any subject.  Here are some examples from the previous competition.  As you can see they don’t have to be corporate-type projects.

Become an Award-Winning Team

Lots of managers ask me how to get their staff up-to-speed or train them to become better at building courses.  One good way is to have the team go through a book together, something like E-Learning & the Science of Instruction or E-Learning by Design.  Discuss the key points and then practice applying them to projects or small prototypes.  You can also use these prototypes as examples that you can share with your clients.

Another way to build your team’s skills is to challenge them to create an award-winning elearning course.  They don’t need to build an entire course.  Keep it short.  Pick a generic subject, like planting a garden or building a birdhouse.  Find something with lots of content so you don’t have to spend a lot of time on that and can focus mostly on the course design.

While it didn’t win, one of my personal favorites from a previous contest is this sexual harassment course from Cognizant.  Here’s why I like it:

  • It was built in just four days—from script to final product.  That’s pretty impressive.
  • It’s not an information dump.  With that quick turn-around, it’s easy to build a simple, linear PowerPoint-to-Flash course. They didn’t.
  • They used lots of video and included some interactive scenarios.

The Rapid E-Learning Blog - team-building activity

Click here to view Cognizant’s Sexual Harassment Course.

The course received high marks and rave reviews from their peers.  And my guess is that as a team, they had a lot of fun creating it.

Are You Really an E-Learning Pro?

This is a challenge to all of the elearning gurus out there.  I see all sorts of opinions and criticism of rapid elearning from many in the industry.  But most of the critics do not offer examples of how they’d build the courses with rapid elearning tools.

But I know that many of them do build courses with the tools.  In fact, when I ask some of the critics for examples of their own work, I typically get the “I’d love to show you, but it’s all proprietary” answer.  I’m not sure I buy that.  It seems to me that you should be able to offer more than just your opinion.

The Rapid E-Learning Blog - shouldn't elearning gurus be prepared to sho w you what they can do

Many of you more experienced elearning developers are building rapid elearning courses.  So take this opportunity to show off your skills (and your potential clients why they should choose your services rather than build their courses in-house).

The reality is that a good instructional designer should be able to build a good course regardless of authoring tools.  So if you’re in the industry and are known for giving advice on building courses, why not show us all what you can do?  In addition, your examples are good inspiration for all of those up and coming developers who want to learn from you.

Tips to Get Started

I’ll close with this, good fortune sits at the crossroads between opportunity and action.  You have the opportunity, now just take action.  Besides, this stuff’s so easy, even a monkey can do it.

The Rapid E-Learning Blog - so easy a monkey can do it

Events

Free E-Learning Resources

Want to learn more? Check out these articles and free resources in the community.

Here’s a great job board for e-learning, instructional design, and training jobs

Participate in the weekly e-learning challenges to sharpen your skills

Get your free PowerPoint templates and free graphics & stock images.

Lots of cool e-learning examples to check out and find inspiration.

Getting Started? This e-learning 101 series and the free e-books will help.


The Rapid E-Learning Blog - beer infused elearning

Did you know that Portland, Oregon has more than 30 breweries?  That is the most breweries per capita in the US.  Being from the Pacific Northwest, I’m kind of partial to craft beers.  I might not like every beer that I taste, but I do enjoy the diversity in flavor.

The thing with beer is that there’s not a right or wrong beer.  It would be foolish to argue that a stout is better than a pilsner.  They’re different beers for different tastes and occasions.  The same can be said for elearning.  In fact, I like to use beer as a way to look at elearning courses.  Let me explain.

The Many Levels of E-Learning

Often elearning courses are presented in a hierarchy.  You may see them described as levels, where level one is information only and level five may be highly interactive.  Or you’ll see elearning qualified by the tool used.  For example, if the course is created in PowerPoint, then by default it’s low.

The Rapid E-Learning Blog - levels one through five

While there’s nothing wrong with creating a model like this to describe the different types of elearning, there are a few things I don’t like about it.  First, because we assign a number to the levels it implies value without regard to purpose.  We tend to view low level as less effective.  Or as often is the case, we’ll deride an information-based course as a mere “page turner.”

In fact, at a recent conference an elearning vendor came by the Articulate booth looking to pawn off what she labeled level one courses.  She told me that she couldn’t find anyone on her staff that was willing to do “those types of courses.”  Apparently, times are good for them.

On the surface a highly interactive, branched scenario might appear to be a better elearning than a very simple linear course.  But that may not be the case.  It all depends on the purpose of the course.

The Rapid E-Learning Blog - PowerPoint ranked low by default

Something else I see in these models is that PowerPoint authored courses are typically placed at a low level. They’re usually identified as information-only courses.  However, by now we all know that’s not necessarily true.  PowerPoint’s just a software application and content neutral.  You can create either simple, information-only courses or much more sophisticated learning interactions.  It just depends on your needs.

Build a Course to Meet Your Objectives

The ultimate goal for elearning is to build a course that meets your client’s needs and learning objectives and that can mean any type of course.  Let’s place a flight simulator course at level five and a simple annual compliance review at level one.  If I wanted to train pilots to fly the new Boeing 787, I sure wouldn’t want them going through a simple, information-only series of screens.  With the people’s lives at stake, they need to be trained in the most sophisticated manner possible.  In the same sense, building a complex simulation for a simple compliance course is also the wrong approach.

There’s a place for all types of courses and sometimes what we think of low level is actually the best course.  That’s why it’s important to not to get too dogmatic about how a course is built and whether or not it’s interactive.  That’s why I like to think of them less in terms of levels and more like beer.

The Rapid E-Learning Blog - think beer when considering your course design

On a hot day, after mowing the lawn, a cold pilsner is more satisfying than a heavier stout.  But when I go out to have a beer, I typically prefer the richer flavors of a porter over something lighter.  There’s no right or wrong beer where one is of higher value than the other.  Beers are just different.  So here’s my beer-based elearning meter:

  • Is the objective to share information or change performance?
  • What level of interactivity do you need in your course?
  • What should the course look like?

The Rapid E-Learning Blog - are you viewing or doing

You’re either viewing or doing.  There are plenty of compliance and annual review type courses that are mostly informational.  While we could argue that all all courses need to be performance-based, that’s not going to happen.  Besides, the course is just one part of the learning process and sometimes all you need is information.

It’s kind of like a text book.  Some you just read and reflect.  But some are workbooks that provide exercises for you to practice what you’re learning.  They all have their place in the learning process; just like elearning courses.

The Rapid E-Learning Blog - what level of interactivity do you require

Not all courses require interactivity.  While it may be shocking to hear, some people like a bullet point list and don’t want to go through an interactive scenario.  On the other hand, one of the valuable elements of elearning is being able to create interactivity that is cost-effective and can be tailored to the learner’s needs.

Don’t bore your learners with bullet point screens, when they’d be better off working through a problem-solving scenario.  In the same sense, don’t offer a complex scenario, when all they need is a few key points.  Create the interactivity that is appropriate to your objectives.

The Rapid E-Learning Blog - visual design is important

We don’t want to underestimate the power of good visual design.  Graphic design and visual communication are important parts of the learning process.  That includes everything from the graphics, the user interface, and how the graphics contribute to the learning objectives.

With that said, there’s no reason to overbuild the graphics either.  A first rule is to keep it simple and guide the learner’s attention.  You’re better off with a simple line of text on a white screen if it helps the learner focus and understand what you’re trying to teach.

On the other hand, the visual design of your course plays an important role in what you’re communicating.  People are drawn to good graphic design.  Plus, good design implies value that tells the learner this is worth exploring.  It can contribute to an immersive experience that draws
the learner in.

I like the beer model because it’s flexible and acknowledges that elearning courses have differences and some are richer than others.  However, it also recognizes that the value of the course isn’t based on where it sits in the model but more on the objectives of the course.  And that’s the key, you’re building an elearning course to meet specific objectives and you need to build the right course to do so.

Events

Free E-Learning Resources

Want to learn more? Check out these articles and free resources in the community.

Here’s a great job board for e-learning, instructional design, and training jobs

Participate in the weekly e-learning challenges to sharpen your skills

Get your free PowerPoint templates and free graphics & stock images.

Lots of cool e-learning examples to check out and find inspiration.

Getting Started? This e-learning 101 series and the free e-books will help.


 The Rapid E-Learning Blog - blog creation gadget

I love all of the web apps and cool sites that pop up on the Internet.  Many of them are cool in a gadgety way but not always practical; but they are fun to play with.  And then there are some that are practical.  For example, I use the social bookmarking tool, Diigo, quite a bit.  At my last place, the internal network was so lame that I used Diigo to bookmark and manage all of my internal links.  It made my life a lot easier and more productive.  Currently, we use Diigo’s linkroll feature to track our community tutorials.

I’m also a big Dropbox fan.  It’s one of my favorite tools because it makes team collaboration and file syncing so easy.  I also use Clusterurl quite a bit.  I like to create clusters when I’m doing research. Here’s a screencast I did to show how that works.

Those are just a few of the types of sites that can make your life and work easier.  In today’s post, I thought I’d share a few that work well with this blog and allow you to access the blog posts in a different format.

Listen to a Podcast of the Rapid E-Learning Blog

Hear a Blog offers a free service where they convert the blog posts to a podcast.  So if you’re a fan of this blog, then you can always download and listen to the blog posts rather than read them.  It’s a great way to share all of this elearning goodness with your friends and family (especially children on long road trips).

Of course, lost in the podcast are the graphics and links to examples.  So you may think that it could make the podcast irrelevant, but that’s not the case.  Let me tell you why and how it relates to elearning design.

When we access information the same way all the time, the familiarity could produce a certain level of complacency.  For example, I have hundreds of RSS feeds in my feed reader.  I’ve gotten used to quickly scanning headlines, images, and bold text for pertinent information.  I can quickly get the gist of the posts, but I definitely don’t get all of the details, and many times miss important points in the posts.

The post as a podcast makes me stop and listen.  It changes how I focus on the information and possibly helps something different stand out.  This is something to consider when you build courses.

Are there ways to change up the info or structure of the elearning course so that it forces the elearner out of a complacent mindset?  Find ways to keep your learners looking for the next button.

Seth Godin had an interesting post about doing a 200 slide presentation to change up the pace of your presentation.  It’s similar to what I’m suggesting.  With multimedia communication it’s as much about the content as it is about the flow and pacing.

As a side note, if you’re looking for a voiceover career, Hear a Blog may be a great place to start.  It looks like there are opportunities to record podcasts to pad your portfolio.

Convert the Rapid E-Learning Blog to PDF

Many blog readers ask how to print the blog posts so they can read them offline or share the posts with others.  Web2PDF offers an easy way to create a PDF of any blog post.

The Rapid E-Learning Blog - convert the post to a PDF

Here’s what you do:

  • Copy the blog post’s address
  • Then go to Web2PDF and paste the address into the form to create a PDF
  • Now you have a PDF version of the post with comments included. This is good because sometimes there are a lot of nuggets in the comments section. It looks like all of the links work, as well.

While this is a cool site to use with the Rapid E-Learning Blog posts, you’re not limited to creating PDFs from this blog alone.  Use it anytime you find a post you like.

The other day I was going through a folder of web links that I’ve collected over the years.  They have all sorts of content from meeting with clients to Photoshop tips.  Unfortunately, about 60% of the links no longer work.  The content was gone.  Now, when I find a post or site that has information I want to preserve, I just save it as a PDF.  Even if the site no longer exists, I’ll always have the content and source for reference.

Web2PDF offers some browser tools that make it super simple to save the page as a PDF.  Here’s what it looks like if I right-click on a blog post while in the Firefox browser.

The Rapid E-Learning Blog - PDF browser tool


Those are two good sites that let you get the blog posts in a different format.  What are some of the sites you use that help make your life easier?  Feel free to share them in the comments section.

Events

Free E-Learning Resources

Want to learn more? Check out these articles and free resources in the community.

Here’s a great job board for e-learning, instructional design, and training jobs

Participate in the weekly e-learning challenges to sharpen your skills

Get your free PowerPoint templates and free graphics & stock images.

Lots of cool e-learning examples to check out and find inspiration.

Getting Started? This e-learning 101 series and the free e-books will help.


The Rapid E-Learning Blog - free PowerPoint template

I was moving some files around the other day and found a tabbed PowerPoint template I started working on about a year ago.  So I finished it up and am giving it away today.  Feel free to use it as you wish.

I like making these PowerPoint templates because it’s a good way to practice production techniques.  They can make you more efficient when building your elearning courses.  I also added some tips and tutorials below.

First, here’s a quick mock up of the template in action.

The Rapid E-Learning Blog - tabbed template demo

Click here to view the demo.

PowerPoint Tips

  • Keep graphics development separate from the elearning course.  It’s a good idea to have one PowerPoint file to build the graphics.  And then have another for the actual course.  The advantage is that the course file will have fewer objects on the screen and make publishing faster.  It’s also a good idea to keep the graphics production separate from the course file.
  • Use colors you can modify.  PowerPoint 2007 has a color scheme feature.  I design my templates with the default color scheme and then if I want a unique color applied, I just create my own scheme.  Get used to building your template for quick editing and reusability.
  • Create multiple masters.  You can have as many master slides as you like.  If I have four slides or more with mostly the same content, I’ll create a master slide.  It makes it easier to edit and publishing is also a bit faster because a lot of the redundancy is removed.
  • Build navigation in your masters.  You can add hyperlinks to the master slide and they will work across all of the slides.  That’s how the tabs work in the demo above.  In addition, if you add something like a next arrow to a master (and you don’t want it to show on your slide), create a box that covers it up.
  • Use slide masters as a repository for items you’re not using, but want access to.  Sometimes I’ll create shapes or objects that work with the template but am not currently using.  I create an extra master layout and dump those objects on the screen.  They remain in the file, but don’t end up in the final publish.
  • Keep hyperlinks separate from the objects.  Create a rectangle shape and add the hyperlinks to that.  Then place the link shape on top of the place where you want the link to be.  This makes it easier to work with the links when you want to do edits or move the links around.  Prior to publishing, I make the link boxes completely transparent.
  • Rename your objects.  Starting with PowerPoint 2007, working with layered objects is a lot easier. You can move them around; and show/hide them, too.  Because of this, it’s a good habit to rename the objects so it’s much easier to work with them as layers.

I did a series of quick tutorials to show these tips in action.  You can view them below.

The Rapid E-Learning Blog - PowerPoint tips

Click here to view the tutorials.

You can download the PowerPoint templates here.  I also included the demo file so you can see how I pulled it together.  Feel free to use the template as you wish for your elearning projects.

Want to take a stab at creating your own tabbed template?  I’d love to see what you come up with.  Feel free to add a link to the comments section.  Or better yet, create a template that you can share with the community.

var
pdfbuttonlabel=”Save page as PDF”

Events

Free E-Learning Resources

Want to learn more? Check out these articles and free resources in the community.

Here’s a great job board for e-learning, instructional design, and training jobs

Participate in the weekly e-learning challenges to sharpen your skills

Get your free PowerPoint templates and free graphics & stock images.

Lots of cool e-learning examples to check out and find inspiration.

Getting Started? This e-learning 101 series and the free e-books will help.


The Rapid E-Learning Blog -  ten tips for elearning tables

I had a blog reader ask about the best way to animate a table in her rapid elearning course.  Like a lot of things, it’s usually less about the best way and more about understanding the many ways that you can do something.  Once you know what you can do, it’s easier to choose the best option that meets your objectives.

Her question did cause me to think about some of the different ways you can use tables in an elearning course.  So I put together ten ideas that may help the next time you need to add a table to your course.  Below is a quick demo that shows them in action.  I explain more below.

The Rapid E-Learning Blog - elearning tables demo

Click here to view the table demo.

The No Frills Approach

Just add the table and do nothing else.  Add some narration that explains the table.  If you want to make it a bit more interactive, ask the learner to look for information.  One challenge with this approach is that there are no visual cues.  The learner could easily lose track of the narration and where it’s at on the table.

The Rapid E-Learning Blog - plain table

Simple PowerPoint Animations

Use PowerPoint shapes or images to point out things on the table.  Add on-click animations to the objects and you can sync the animations to your audio.   This provides good visual cues and helps direct the learner’s focus.

The Rapid E-Learning Blog - table with PowerPoint animations

A downside to this approach is the time it takes to build the animations and get them just right.  Also, if you want to print out the PowerPoint files, you have to remove all of the animations from the slide.  Otherwise, they’ll cover up the content.

Progressive Reveal Animations

Another way to use on-click animations is to cover the table with rectangles.  Set them to fade out on mouse click.  Then as you talk and click the animation, the box fades away.  It looks like the table is actually fading in.

The Rapid E-Learning Blog - table with PowerPoint animations that are progressively revealed

This looks nice and is a bit easier to build and manage than the other types of PowerPoint animations.  You still have to remove the objects if you want to print the slides.

Just-in-Time Annotations

Articulate Presenter has that cool annotations feature.  They look great and can be added on the fly.  So there’s no building of animations or cluttering your slides with content you have to remove prior to printing.

The Rapid E-Learning Blog - table with Articulate Presenter annotations

Annotations are probably my favorite solution.  I just like the way they look and using them is really no different than how you might use a laser pointer.  Of all the solutions it’s probably the easiest.

Duplicate Slides & Hyperlinks in PowerPoint

If you want to get a little trickier and add more content than just audio narration, then this approach may work for you.  Essentially you make a duplicate slide for each category.  Then add hyperlinks to those slides.

The Rapid E-Learning Blog - table that uses duplicate slides and hyperlinks

The benefit to this approach is that it makes the entire slide area open to you as you focus on a single point of information.  In the demo, I show a few different ideas.  The negative to this approach is that it requires a lot more work.  But if you have the right type of table and content it is a neat way to do it.

Create a HTML Table

Sometimes the table content is dynamic and can change more frequently than you choose to publish the course.  Using the web object feature is a great way to avoid a bunch of extra work.

The Rapid E-Learning Blog - table as HTML and via web object

What you do is create the table as a HTML file; then place it on a server.  Insert the URL as a web object and publish your course.  You can update the table on the server and it’
s automatically updated in the course.

Adding Interactive Multimedia

Sometimes, tables are just boring.  It’s cool when you can augment the table’s information with audio, images, and videos.  So I played around with a few ideas in Articulate Engage.  What I like about this approach is that you can make the information more interesting and relevant to the learner.

For example, what if each cell included a video of a subject matter explaining how the information impacts the organization in a real way?  That could be impactful.  It definitely would make the table more engaging and possibly help the learner connect it to the real world.

Add Interactive Multimedia Labels

The labeled graphics interaction lets you insert an image of the table.  From there, you can add labels on top of the image.  The labels can contain audio, images, and video or Flash files.

The Rapid E-Learning Blog - table using Articulate Engage labeled graphic

What I like about this approach is that I can add a label over each cell.  It allows the learner to explore and click on only the area of interest.  Combine that with an interactive Flash file (such as the one in my demo) and you have a pretty dynamic multimedia table.

Use a Guided Image with Multimedia

The guided image interaction is similar to the labeled graphic because you can add text, audio, and multimedia.  However, it’s more of a linear presentation of the information.  Personally, I like to give the learners more control so I’d probably go for the labeled graphic over the guided image.

The Rapid E-Learning Blog - table using Articulate Engage guided image

You do have the option of having the arrows come from the top, bottom, or either side.  While the guided tour isn’t as interactive as the labeled graphic, it does look nice and much easier to work with than a PowerPoint slide if you want to augment the information with some multimedia.

Let the Media Tour Progressively Reveal

This one’s similar to the progressive reveal in PowerPoint.  However, instead of adding the rectangles and having them exit on click, you insert multiple images.  When the learner advances, the table builds.

The Rapid E-Learning Blog - table using Articulate Engage mdia tour

The media tour lets you add an image (or other media) and some audio.  You also get the text are on the bottom.  For this example, it’s probably not the option I’d select, but it is a different way to display the table in your course.  And that’s the main thing.

Understand the tools you have and what they can do.  Then look at all of your options and match the best option to what you hope to accomplish in your course.  My favorites are the annotations (because of ease) and the labeled graphics (because I like to give the learners control).

Can you think of other ways to add table to your elearning courses? If so, add your ideas by clicking on the comments link.

Events

Free E-Learning Resources

Want to learn more? Check out these articles and free resources in the community.

Here’s a great job board for e-learning, instructional design, and training jobs

Participate in the weekly e-learning challenges to sharpen your skills

Get your free PowerPoint templates and free graphics & stock images.

Lots of cool e-learning examples to check out and find inspiration.

Getting Started? This e-learning 101 series and the free e-books will help.


The Rapid E-Learning Blog - use one clip art style

It would be great to have a graphics artist on staff who could build the graphics you need for your elearning courses.  But the reality for many of us is that’s not going to happen.  So you’re left to fend for yourself.

In previous posts, I shared a lot about how to customize your clip art so that you have some flexibility when building your elearning courses in PowerPoint.  In today’s post I want to expand on that a bit by showing you how you can use a single clip art style to create your basic elearning template.

Find a Style You Like

Look over the clip art that you have and locate a style that you like.  For this post, I’m using Style 802.  What I like about it is the hand drawn look and simplicity of the style.  I also like that there’s a lot of variety.

A few things that I look for:

  • Characters:  What type of people, poses, and variations exist?  I look for heads that can be removed and matched to other bodies.  This way I can create the same character in multiple settings.

The Rapid E-Learning Blog - combine clip art to create custom images

  • Objects: What objects are available that I can pull out and use?  I look for rectangular shapes that could become boards or pieces of paper.  Computers are another hot item for elearning.

The Rapid E-Learning Blog - look for shapes that you can use in your elearning courses

  • Lines and shapes:  Are there some shapes or lines that I can pull from the clip art and use in other places?  Style 802 is a good example for this.  The images have a hand drawn look.  Adding a PowerPoint shape or line really stands out.  So I want to find lines and other shapes I can pull from the clip art and apply elsewhere.

The Rapid E-Learning Blog - use shapes from the clip art style to create a consistent look

Play Around with Ideas

Try to build a template structure using elements from the clip art.  For example, you probably need some content boxes.  Perhaps you’ll want sections or menu options.  You might even offer a little resource section with clickable icons.

The Rapid E-Learning Blog - startinc screen for an elearning course

The Rapid E-Learning Blog - create a scenario or case study screen for your elearning course

You might also change up the look.  Many times, the images are all sized the same way.  Try something new.  Make your images real big.  Or, make them real small.  Flip them.  Crop them.  Bring them in at different angles.  Try bold colors.  Make a comic book panel.

Once you start moving the images around, you might find some interesting layouts.

The Rapid E-Learning Blog - kind of boring look

The Rapid E-Learning Blog - play around with the layout of your characters and screen elements

The Rapid E-Learning Blog - use clip art to create comic book style elearning course

I created a quick mockup using the Style 802 clip art.  Hopefully, it gives you some ideas for your next elearning course.

I also included the PowerPoint files so you can see what I did.  Feel free to break them apart and build your own ideas.  Download the PowerPoint files used in this post.

The Rapid E-Learning Blog -  elearning tutorial using PowerPoint clip art style 802

Click here to view the demo.

There’s a lot more that you can do with these clip art styles.  Then main thing is to train your eyes to recognize usable shapes and lines, as well as which characters work.   

Here’s a link to some clip art styles that might work for this.  What clip art style do you think work best?  Add your favorite by clicking on the comments link.

Events

Free E-Learning Resources

Want to learn more? Check out these articles and free resources in the community.

Here’s a great job board for e-learning, instructional design, and training jobs

Participate in the weekly e-learning challenges to sharpen your skills

Get your free PowerPoint templates and free graphics & stock images.

Lots of cool e-learning examples to check out and find inspiration.

Getting Started? This e-learning 101 series and the free e-books will help.


The Rapid E-Learning Blog - this elearning course rocks

I’m no audio engineer.  And odds are that neither are you.  So I won’t get into all of the nitty gritty details of audio editing.  If you want more details, one of the community MVPs shared some tips on how to improve your audio quality.  It’s a good post and worthy reading.

Today I want to share some free or inexpensive ways to work with the audio in your elearning courses.  Let’s start with narration.

Do the Basics Right

Your audio quality is never going to be better than what you originally recorded.  So you need to do the best you can to record good quality audio from the start.  The two best things you can do are:

  • Invest in a good microphone.  I’m surprised that organizations will invest hundreds of dollars in software, pay someone thousands of dollars to build courses, and then only let them buy a cheap microphone for $20.  Makes no sense. Even if you’re on a limited budget, you can get a good microphone for about $50.
  • Control your recording environment.  If you record in a conference room next to the copy machine or at your office cubicle, odds are that you’ll have sub-par audio.  Try to find a consistent place to record audio so that you can better control your environment.

You can find some additional tips in these posts on recording high quality audio and recording narration like a pro.

Audacity

I’ve mentioned Audacity before.  It’s an audio editor that is free and easy to use for beginners.  But if you want to do more than basic editing, you have a lot of features to work with.  So it’s a tool that you can grow into.

Here’s a good tutorial from Brian that shows how to clean up your audio starting with those “little itty bitty” wave forms.

Click here to view the screencast.

If you want a little bit more detail, David did a few tutorials that show how to edit your narration for greater impact.

Myna (out of business)

Aviary’s Myna is an online audio editor.  It’s easy to use; and as long as you have a decent Internet connection, it’s a practical tool.  It’s also free, which is a big plus.  What I like about Myna is the library of assets available to you.

I did a quick screencast to show how it works.  If you want to learn more, go to the site and check out the demo and tutorials.

Click here to view the screencast.

Levelator

Levelator is a really simple way to make some improvements to your audio narration.  I can’t think of any easier way to adjust your audio.  Basically, all you do is drag and drop you audio files onto the desktop shortcut and the application does the rest.  Levelator does its magic and provides edited copies right inside the same folder.

Below is a quick tutorial that shows just how easy it is to use.  I’ve also added a before and after audio file to hear the difference.  It’s a little richer and louder.  You can also see the differences in the wave forms below.

Click here to view the tutorial.

Levelator – before


Levelator – after

Creative Commons Audio

The tools above ar
e free and help you get better sounding audio.  But sometimes our audio needs aren’t just for narration.  Sometimes we need background music or sound effects.

If you have some money you can always buy background music and sound effects on CD.  When I did video production, we had a CD binder that held about 200 disks full of just about any music style you would need.  It was a great resource.

Even if you don’t have money, there are some free resources available to you.  Here are a few sites that offer sound effects and free music.  Be sure to check out their Creative Commons License agreements before using them.

Another option is to buy stock sounds.  I’ve used Soundsnap before.  iStockphoto also sells stock audio.  They have a good library and the prices are decent.

Another idea is to contact an independent artist who may give you permission to use some music.  It never hurts to ask.  Of course, even a good song can’t make a bad course enjoyable.

The Rapid E-Learning Blog - the elearning course was boring, but it had a beat and I could dance to it

Create Your Own Audio

When all else fails you can create your own audio files.  If you want simple sound effects, record your own.  Need ambient office noise?  Just set up a mic in a busy area and record the audio.  Or go to the cafeteria.  That’s what Chris Kelly did to get the busy pub sound for his Beer Brewing Overview.  Love the tips on sustainable brewing. 🙂

The Rapid E-Learning Blog - make your own music

You can even create your own music.  You can create everything from a hip hop beat to softer background audio. Musicshake and TuneAround are free tools that let you easily create your own music and soundtracks.  Be careful, though.  You can end up spending hours playing around and creating your own music.  As an example, I used Musicshake to create Dr. Werner’s SMART Goals: The Musical.

You can always download and use Microsoft’s Songsmith and create brilliant stuff like this.  The video kind of reminds of all of the lame training programs I’ve been in where we had to write and perform songs based on what we learned.


Click here to watch the Songsmith video.

I’m not sure what Microsoft is thinking or why anyone would pay $30 for it considering the alternatives above, but Songsmith is available for free to educators.  Based on how my kids have played with it, I can see where this could be a good tool to use in class as part of a creative exercise.  For example, write a song about something you learned.

So those are some simple tools that you can use when including audio in your rapid elearning courses.  Have any other free audio tools to recommend?  Feel free to share them in the comments link.

Events

Free E-Learning Resources

Want to learn more? Check out these articles and free resources in the community.

Here’s a great job board for e-learning, instructional design, and training jobs

Participate in the weekly e-learning challenges to sharpen your skills

Get your free PowerPoint templates and free graphics & stock images.

Lots of cool e-learning examples to check out and find inspiration.

Getting Started? This e-learning 101 series and the free e-books will help.


The Rapid E-Learning Blog - 10 rules to create engaging elearning

At the recent ASTD conference, I was asked how to create engaging elearning.  If you’ve been reading the Rapid E-Learning Blog for a while, then you know I’ve tackled this subject before.  I decided to pull ten ideas that are fundamental to building good elearning courses.

Rule 1: Don’t Create the Course

This is probably not the advice your client wants to hear.  But let’s face it; there’s quite a bit of elearning that’s just a big waste of time.  If the course isn’t tied to real performance improvements, it might not be worth building.  During the initial project meetings, I try to get the client to tie the course to real performance goals.  If they can’t, then I suggest that a course might not be the best option.

The Rapid E-Learning Blog - is your coruse a waste of time

Besides, many of the courses we create are just sharing information that’s already available in other places like the organization’s intranet or via job aids. Why build an elearning course that rehashes information available elsewhere?  If anything, build a course that teaches people how to find the resources already available to them.

Rule 2: The Course Needs to be Relevant to the Learner

Most boring courses are the result of the content not being relevant to the learner.  Even if you build simple compliance training, there’s a way to make it relevant.  Talk to your learners and find out how they use the compliance information.  Then place the course in a context where it makes sense for the learner.

Also, consider that not all learners are created equal.  They come to the courses with different levels of experience and knowledge.  By creating a learner-centric course, you can accommodate their diverse needs.

The key to interactive courses is not multimedia, rollovers, or drag-and-drop interactions.  Instead, it’s how the learner will interact with the content.  Create courses where the learner doesn’t just passively receive information.  Instead give them opportunities to reflect on and use the information to make decisions and get feedback.

Rule 3: Understand Your Objectives

If all you’re trying to do is share information and track completion before December 31, then build a course that’s appropriate for those objectives.  The best bet might be to make it easy for the learners to find the information, complete the course, and get back to productive work.

 The Rapid E-Learning Blog - what type of course are you building

On the other hand, if you’re building a course where you desire to change behaviors, an information dump is not going to work.  In that case, you want a course that builds the skills the learner will need to meet the performance goals.

Rule 4: Free Up the Navigation

In a recent article on iPad usability, Jakob Nielsen had this to say:

Using the Web has given people an appreciation for freedom and control, and they’re unlikely to happily revert to a linear experience.

In the same sense, people like the freedom to review and scan information in the elearning course.  Nothing is more frustrating than locked navigation where control is stripped from the person who’s supposed to be doing the learning.

Here are a few things that bug the learners:

  • People like to explore and experiment.  It helps them build context.  Locked navigation doesn’t allow this.
  • We can read faster than the narration.  Don’t make people wait for the narrator to advance if you give them the option to read.
  • You have a screen that’s 5 minutes long.  At 4:18, the learner misses a key point.  Because the navigation is locked he can’t rewind a few seconds.  Instead he has to go back (if he can) and repeat the first four minutes.

Many times the navigation is locked for fear the learner will just click through the course.  If that’s the case, see Rules 2 and 5.  Instead of locking the navigation, control their movement through the course via decision-making.  This gives them the freedom to move around and odds are you make the course more engaging.

Rule 5: Don’t Push, Let the Learner Pull

Many courses are designed to push information out.  But that’s not best for learning.  You’re better off if you can create an environment where the learner has to pull information in.

The Rapid E-Learning Blog - give the learner a reason to use the information

Instead of a series of click-and-read screens, give the learner a problem to solve.  Then provide all of the information that you would normally have pushed by creating access to additional, just-in-time resources.  As the learner attempts to solve the problem, she’ll pull the information she needs.

Rule 6: Consider the Pacing & Flow

Learning is like eating.  You don’t just shovel spoonful after spoonful of food into your mouth, at least not normally (unless it involves Nutella).  Instead, you take in a spoonful of food; chew it up to break it into smaller pieces; and then swallow it so that it can be processed further down the digestive tract.

The Rapid E-Learning Blog - remove teh strain and train teh brain

In the same way, you can’t expect to shovel new information on top of new information in the brain.  You have to pace it.  Take in new information; reflect on it (maybe practice using it); and then send it to other parts of the brain for processing.

Avoid shoveling too much information by working on the pacing and flow of the course.  With new information provide opportunities to use it.  On a side note, I don’t advocate the classic 5 screens of information and then a knowledge check approach.  Try something more creative.

Rule 7: Look for Inspiration Outside of E-Learning

Sometimes in the elearning industry we tend to become so idealistic about what real elearning is or isn’t that all we do is complain o
r force all sorts of instructional design rules that diminish creativity.  There’s a good chance that if you listen to elearning people you’ll end up with a course that does a great job avoiding cognitive load but little to engage the learner. 🙂

Seth Godin made an interesting point about finding good ideas.

The best ideas come out of the corner of our eye, the edge of our consciousness, in a flash. They are the result of misdirection and random collisions, not a grinding corporate onslaught. And yet we waste billions of dollars in time looking for them where they’re not.

Put yourself in a position where things can randomly collide.  Media Journalism is a field that is similar to elearning.  Every day they have to crank out all sorts of interactive multimedia.  Why not be inspired by that industry?  Follow David Anderson in Twitter.  He does a great job collecting good examples.

Personally, I like to review design sites and the advertising industry.  I focus on how they structure the message and layout the screens.  Those are ideas I can use in my courses.

Rule 8: Create a Course That is Visually Appealing

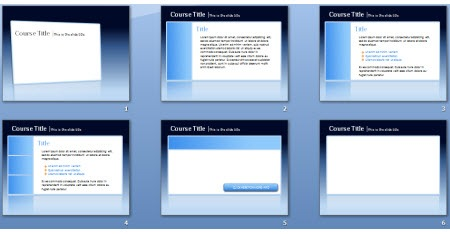
Unless you’re doing a sleep study with a group of insomniacs, most likely a white screen full of bullet points won’t attract their attention.  People are attracted to things that look interesting.  Compare the two images below.  Which one gets your attention?The Rapid E-Learning Blog - visual design and themes are key

If you want to engage learners, start by crafting a visual theme that is visually interesting, relevant to the content, and immerses the learner into the course.

Rule 9: There’s a Place for Novelty

While we don’t want to go overboard with superfluous navigation or rollovers, there is a place for novel design.  There are times I’ll think a game or some whiz bang effect in a course is lame.  But I’ll debrief some of the learners and they’ll mention how much they liked it (or appreciated that the course didn’t look like the rest of the courses).  Thus, a novel approach or design to your course can be critical to engaging the learner.

The Rapid E-Learning Blog - email based elearning interaction

Here’s a mock up I did for creating a course that looks like an email exchange for a previous post on mimicking the real world in your courses.  Something like this is different than a typical course and could be a fun.

Just remember that what’s novel at the beginning of a course can quickly become annoying.  So you want to balance it with good design and probably look at giving the learner an alternative, or a more traditional, means of getting information.

Rule 10: Commit to Engaging E-Learning

It’s easy to rant and rave about PowerPoint and rapid elearning, and then place the blame for bad elearning on those tools.  But the real reason that a lot of elearning is no good is that there’s no real commitment to make it more engaging.  And that falls on the shoulders of those who build the courses, whether the client, subject matter expert, or instructional designer.

Regardless of the tools you use, you can create effective elearning.  Step away from the information dump and focus on the learner.  Then find creative ways to place the course content in a context that is relevant to the learner.  If you do these two things, you’re on your way to creating effective and engaging elearning.

There are more than enough resources out there to help you build better elearning.  In addition to this blog, I like what Cathy Moore has to share.  Her action mapping is a straightforward approach to building effective courses.

As far as books, I usually recommend the standards that cover everything from graphic design to presentations to elearning.  Here are a few that I think are worth owning if you don’t already own them (the links to Amazon produce a small commission):

Those are ten rules to help you get started.  Your next step is to start applying them.  What else would you add to the rapid elearning developer who’s just getting started?  Any other books that you’d recommend?

Share your thoughts by clicking on the comments link.

Events

Free E-Learning Resources

Want to learn more? Check out these articles and free resources in the community.

Here’s a great job board for e-learning, instructional design, and training jobs

Participate in the weekly e-learning challenges to sharpen your skills

Get your free PowerPoint templates and free graphics & stock images.

Lots of cool e-learning examples to check out and find inspiration.

Getting Started? This e-learning 101 series and the free e-books will help.


Many of the blog’s subscribers are new to elearning.  Because of this I get a lot of questions and many of them are similar.  So today I’m going to do a recap of a few of the more common questions.

The Rapid E-Learning Blog - What type of microphone do you use?

What mic I use is the most frequent question I get.  There are all sorts of good mics out there.  I can’t speak to all of them, but I can share my experiences.  I used to use a headset mic, but I didn’t like that it was more susceptible to picking up the “popping p” sound.  So I switched to a desktop mic and haven’t looked back. 

The Rapid E-Learning Blog - Samson CO1U and Samson Go Mic

I’ve been using a Samson CO1U for the past three years.  But I just bought a Samson Go Mic from Amazon for about $50 (about half of what I paid for the CO1U).  I really like it.  I’ll probably make it my default microphone because it’s much smaller, sounds great, and it gives me three audio recording modes.

Here’s what I like about desktop microphones.  They tend to produce a richer sound; and you can share them.  I don’t know how you feel about this, but I don’t want someone else’s spit on my mic.  You also have more control over recording because you can position the microphone where you want for the best sound.

Some people run their audio through a mixer.  Not me.  I just plug the mics into my computer and record.  In fact, here’s my audio set up.  Pretty simple, huh?  Fortunately, the Essential Articulate Studio ‘09 is such a well-documented book, because its size makes the perfect portable mic stand. 🙂

The Rapid E-Learning Blog - adjustable mic stand

For those who want to hear the difference, here’s a test I did of the Go Mic.  And here are a couple of demos that show the difference between a headset and desktop mic.  There are also a few community members who also shared what they use and recorded some demos

I like my Samson mics, but there are a lot of other affordable options.  The key point is that your audio should sound good.  And you really hurt your elearning course it if looks great but sounds bad.  If you do a lot of narration, then a desktop mic is the way to go.

Related links:

The Rapid E-Learning Blog - How cna I make my courses look different?There are a few common issues when working with rapid elearning tools.  A form-based application makes creating your course real easy.  But since it’s a form, you’re locked into a distinct look.  Think of it like a Jell-O mold.  You get what the mold is designed to give you.

Typically, with a form-based tool, you have limited customizations outside of changing the template colors and fonts.  But, with some creativity you can make the output appear different.  For example, in the LINGOs course we built, we inserted the Engage interactions as Flash files and then moved the .SWF up to hide the black title bar.  If you use Quizmaker ‘09, make sure to take advantage of the Slide View feature.  This lets you break the standard form look and create a product that can be very rich-looking, like the example below.  This lets you be as creative as possible.

The Rapid E-Learning Blog - Quizmaker example Click here to view demo.

Another issue is when working with PowerPoint.  We tend to gravitate towards the templates and placeholder structure that PowerPoint provides.  While it’s fast to assemble content, the trade off is that you get stuck in that dreaded “PowerPoint” look. 

The first thing I recommend is to get rid of the templates and placeholders, and start with a blank slide.  Then I suggest getting inspiration from web design sites.  These are great places to get ideas for color schemes and page layout.  That’s where I got the ideas for these free PowerPoint templates.

The Rapid E-Learning Blog - template idea

The Rapid E-Learning Blog - template idea

After you do a few of these types of designs, you’ll start to get a better feel for how to move past bullet-point elearning and start to work on something more creative.

Related links:

The Rapid E-Learning Blog - How do I add Screenr vidoes to my elearning

Screenr’s a great product for quick tutorials.  In fact, since it launched a few months ago there are already a few hundred free elearning-related tutorials that cover all sorts of topics.  While it’s not an option for everybody, if you can use Screenr videos for your training here are a few ideas: 

  • You can insert the Screenr video in PowerPoint using the developer tab and inserting the .SWF link from the embed code.  Here’s a tutorial that shows how.  This works fine if you are working in PowerPoint only.  If you’re publishing your course to Flash, follow the steps below.
  • Insert the tutorial as a web object.  Screenr gives you an embed code.  Use that embed code to insert the video as a web object.  Here’s an example of what it looks like.  This tutorial explains the two ways to use the web object feature with Screenr
  • Download the video as an .MP4.  The first two options require that the learners have Internet access.  By downloading the .MP4 video file and inserting the video into the slide, the learner won’t need Internet access.  Screenr has some preset record options.  720×540 is the 4:3 ratio of PowerPoint slides.  You can also record at 980×560 and insert the video using the no sidebar option in Articulate Presenter.  That’s what I did in this demo.

Concerned about the 5 minute limit and lack of editing in Screenr?  That’s easy enough to fix.  Just record your video in chunks.  Don’t worry about edits or the time limit.  Then download the .MP4s and edit them in Microsoft MovieMaker.  It’s free and easy.  Plus you get all of the advantages of editing video applications like cool transitions, inserting additional audio, and adding titles and captions.  Here’s a tutorial that show you how to edit the Screenr videos in MovieMaker.  

Related links:

 The Rapid E-Learning Blog - Show off your elearning super powers

Good question.  We just announced the 2010 Articulate Guru Awards.  It’s a great way to show off your rapid elearning skills.  If you don’t have a real course to work on, create a fake one.  Do one on setting goals or how to make toast.  The content really doesn’t matter.

Now’s the time to show the world what you can do.  As I tell some of my friends, “Quit your belly achin’ about what’s wrong with elearning! And show me what YOU can do.”

The Rapid E-Learning Blog - Articulate Guru Awards 2010

If you have any specific questions or things you’d like to see covered in the blog, let me know.  I’ll see if I can work them in.

Events

Free E-Learning Resources

Want to learn more? Check out these articles and free resources in the community.

Here’s a great job board for e-learning, instructional design, and training jobs

Participate in the weekly e-learning challenges to sharpen your skills

Get your free PowerPoint templates and free graphics & stock images.

Lots of cool e-learning examples to check out and find inspiration.

Getting Started? This e-learning 101 series and the free e-books will help.


The Rapid E-Learning Blog - top secrets to becoming a rapid elearning pro

It would be great if elearning was just about learning and building the perfect course.  Unfortunately, that’s not always the case.  Much of your success hinges less on the actual course and more on the process you go through to create it.  And much of that centers on the relationship you have with your customer.

In a previous post, I offered seven techniques to keep your customer happy, today I’d like to offer a few tips to help manage the expectations and relationship you have with your customers.  That will help keep you happy.

Who’s the Decider?

Here’s a problem I’ve run into quite a few times.  I spend three months working on a project.  Right before it goes live, the proud customer invites her boss to look at the new course.  The boss who was never involved in the process reviews it, offers some opinions, and wants to make changes.

Find out who has final say.  And then find out what they said. 

You can save a lot of heartache by finding out who will approve the final course.  You want to know who signs the dotted line.  If you run the risk that a “boss” is going to throw a wrench into the process, then get that boss involved when you’re still prototyping the course.  Don’t wait until it’s too late or time-consuming to make changes.

Also, create an agreement that specifies deliverables and due dates.  If the customer wants to make changes, then request to make changes to the agreement so that you’re not held to expectations that were created prior to additional requests.

Clarify Desired Results

There’s usually a reason that the client wants to build an elearning course.  With that reason comes some desired results.  Find out what those are and then build your course to meet their expectations.

I had a client once who wanted an IT security course to teach employees how to protect themselves (and the organization) while using the organization’s technology (Internet, laptops, etc.).  However, when I drilled down for more information, their real issue wasn’t security.  Instead, too many people were surfing the web and visiting inappropriate sites.  They wanted that to stop.

In that instance, the course on IT security was not the right solution.  They needed to focus on appropriate use of the organization’s resources.  Unfortunately they opted for the first course and saw no significant improvement.  Fortunately, they were oblivious to the futility of the elearning course and our team didn’t take the blame.  But I’ve worked on similar projects that didn’t produce results because of the client’s demands and in those cases the client had no problem blaming the training group.

Get Access to All Relevant Resources

There’s a lot that goes into building a course.  Make sure you get access to the right people and resources.  Who can review the content? Who can provide assets like logos, images, and documentation?  How will you connect with the potential learners? Who will review or pilot the course?  What’s the implementation strategy?  What type of IT support or technology do you need?

You need the right assets and you need the right collaborators.  Make sure you have access to what you need including the subject matter experts, learners, and IT group.

If you’re to work with others on the client’s team, it’s a good idea to have them pulled into the process early.  I usually ask the client to invite the person, explaining the project and expectations of how that person will support it.  It helps define roles and expectations, especially when you run into roadblocks.

Set a Budget

If you’re a vendor and working for an external client, setting a budget is a given because you expect to get paid.  However, if you’re building elearning courses for an internal group, budgets are rarely discussed.

It’s a good idea to ask for a small budget for additional assets like stock images or even custom development.  But set that expectation up front.  Tell the client you’ll need $200 and see what they say.  If they say they don’t have $200, tell them you need $500.  When they see prices going up, they’ll be inclined to give you $200.

In all seriousness, it doesn’t hurt to ask for some money.  The worst they can say is no.  It’s a lot easier to negotiate a small budget upfront than it is to come back halfway through the project requesting some money or worst case being stuck with the same old PowerPoint clip art images.

Determine How You’re Going to Measure Success

In an ideal world, all elearning courses are performance-based with very clear goals.  Then you can measure performance before and after the course.  However, sometimes performance isn’t the only goal.  Other measures of success might include:

  • Lower costs. What was the cost of training prior to elearning?  Did you reduce travel costs?  Are your services less expensive than alternatives?  One organization I talked to was paying $15,000 per course.  By doing their own production, they reduced the cost to about $3000 per course.
  • Convenience. People like instant access to elearning courses and being able to take the course when it fits their schedules, especially when they’re trying to balance their workload with surfing the web. 
  • Satisfying service level agreements.  I have my clients document expectations around key milestones and deliverables.  Then I aim to beat those.  At the end of the course, I solicit feedback from the customer based on the agreement.  Sometimes the customer rates your performance based on imaginary agreements.  By crafting a service level agreement you’re able to establish a clear understanding of expected outcomes and whether or not you met those rather than some undisclosed expectation the customer may have had.

There are other ways to measure success besides performance improvement.  The key is to determine if the course has performance goals or not.  If not, don’t fight trying to come up with some mystical ROI.  Just find a different way to determine the value you bring to the client.

Ultimately, your success hinges on two things.  The first is good communication between  your client and yourself.  Don’t make assumptions; clarify everything that you’re not sure about.  Also don’t wait until the end to show what you’re doing.  It’s a good idea to schedule regular meetings to review your progress and prototype ideas to get immediate feedback.  The second success factor is action.  Do the things you promised to do by the date promised.  You’re client will be happy and so will you.

What are some tips that you’d offer to make elearning courses a success?  Share them by clicking on the comments link.

Events

Free E-Learning Resources

Want to learn more? Check out these articles and free resources in the community.

Here’s a great job board for e-learning, instructional design, and training jobs

Participate in the weekly e-learning challenges to sharpen your skills

Get your free PowerPoint templates and free graphics & stock images.

Lots of cool e-learning examples to check out and find inspiration.

Getting Started? This e-learning 101 series and the free e-books will help.