The Rapid Elearning Blog

Archive for October, 2019


e-learning template header

I get lots of questions about e-learning templates. Recently, I shared some tips on how to get the most value out of a template, which I’ll build on today.

Templates make sense to speed up production and create some visual consistency. They don’t make sense if you’re doing a lot of editing and tweaking. At some point, it becomes easier to build from scratch rather than modify templates.

Many people mix and match templates, which generates many of the questions I get. Today, I’ll like to share some thoughts on what makes a template and how that impacts mixing and matching.

Most e-learning templates consist of a few core elements:

  • Fonts
  • Colors
  • Layouts
  • Design elements

E-Learning Template Fonts

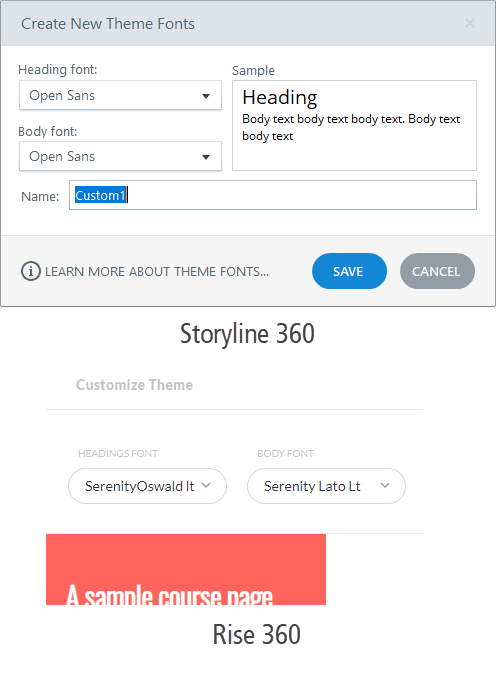
Most templates consist of a header and body font. If you mix and match templates, you’ll want to make sure they use the same fonts. This works in other tools, as well. For example, if I use a Storyline block in Rise, I want the Storyline content to look like it’s part of Rise. So I’ll incorporate the same template elements. In this case, I want the fonts to match even if they use different means to manage the fonts.

e-learning template font

The same thing if I import PowerPoint slides. They use a header/body template structure, too. When you leverage existing PowerPoint content, switch the template elements to match.

E-Learning Template Color Schemes

Generally you can use as many colors as you want in a course. However, in Storyline (and PowerPoint) you get six colors. And with the five tones, that gives you thirty color swatches. You probably don’t need thirty color choices. I usually recommend two colors: a main color and a complimentary color, and perhaps a third accent color.

e-learning template colors

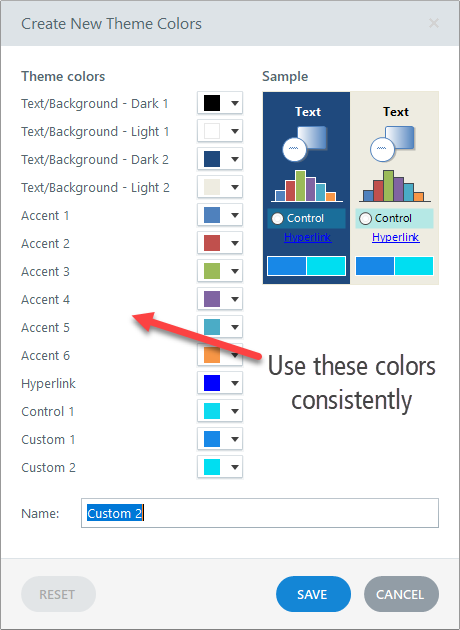
Regardless, when working with templates and colors, you want to be consistent in how you use them. If the main color is accent one, then do that with all templates. The challenge with already existing templates is that the template designer may have followed a different rule. Thus, when using different templates, you want to get them aligned and using colors the same way. Then, going forward, they’ll all work the way you want.

Rise 360 makes it easy as you get one accent color. However, you can also bring in other colors using the block fills and font colors. But, you’ll still want a plan as to how you’ll use colors.

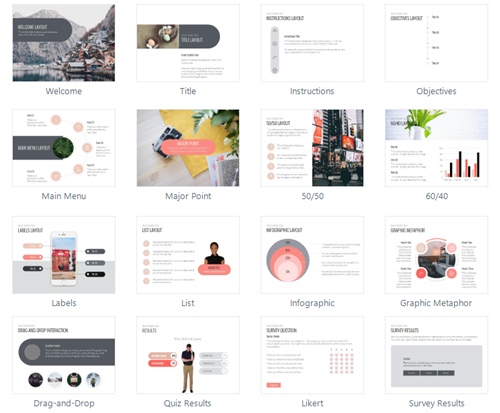
E-Learning Template Layouts

There are all sorts of ways content can be laid out on the slide. Things can be up, down, left and right; and aligned at different percentages.

The key thing with layouts is that the content placeholders are the same. They don’t need to be in the same position, but they need to be the same in terms of content placeholders. When they start the same, then you can mix and match different templates and apply different looking, but similar, layouts. If they’re not the same, the inheriting template won’t know how to assign the extra content placeholders. This will require extra work to get it aligned.

e-learning template layouts

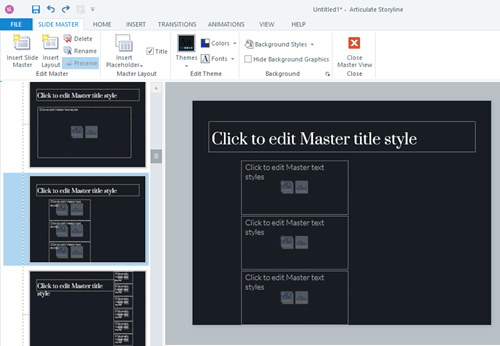
For example, the layout above has a header and three content placeholders. Applying that layout to a different slide, requires that the other slide has the same core structure of a header and three content placeholders.

Before inserting a layout from one template to the next, make sure they having matching content placeholders. If they don’t, that’s OK. You can modify the template or just know you’ll need to make some adjustments later.

E-Learning Template Design Elements

There are design elements that are unique to the templates. When I mix and match, I try to identify what makes the template visually unique outside of the things mentioned above. Then I add those elements to the other content so they have unifying characteristics.

e-learning template design elements

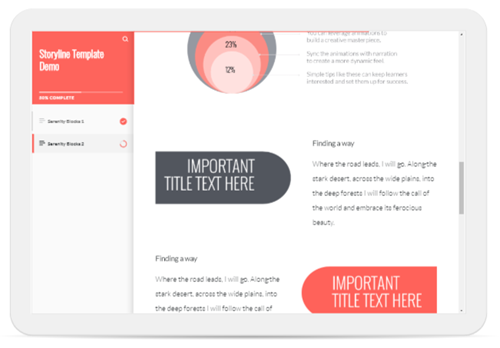
Here’s an example where I integrated some Storyline content into Rise, which is a completely different type of tool. One of the key elements of the template is the rounded rectangle and pill shape. I integrated some images with those shapes in Rise and the two pieces look like they belong together. You’ll notice I leveraged the colors and fonts to match, as well.

e-learning template serenity rise

Those are the four core elements that make up most templates. Before mix and matching slides from different templates, review how they use fonts, colors, and layouts. And then identify the design elements that make the template unique. Add those to the new slides where appropriate.

What template tips do you have?

Events

Free E-Learning Resources

Want to learn more? Check out these articles and free resources in the community.

Here’s a great job board for e-learning, instructional design, and training jobs

Participate in the weekly e-learning challenges to sharpen your skills

Get your free PowerPoint templates and free graphics & stock images.

Lots of cool e-learning examples to check out and find inspiration.

Getting Started? This e-learning 101 series and the free e-books will help.


how to export video for LMS

Recently, I did a webinar on transforming PowerPoint content into an interactive e-learning course. One of the tips is to save your PowerPoint file as a video. Here’s why I like that tip.

Save PowerPoint as Video

Assuming the PowerPoint slides look good and the content doesn’t need to be restructured, why spend a lot of time copy and pasting from PowerPoint into a different application? Save a lot of time by outputting your PowerPoint slideshow as a video.

All of your animations, narrations, inserted media, and slide transitions remain in a single file. If all you’re doing is sharing the content, this is an easy way to go. It’s one click to create the video.

Here’s an example from the Duarte group. They built this really dynamic presentation in PowerPoint that they shared in a previous version of PowerPoint. In includes animations, narration, slide transitions, and even other video. Here’s an example of the file as a video.

Click here to view the example on YouTube.

Assuming the slides are fine and you don’t need to rework your content, saving as video is a no brainer. The challenge is how to get the video into your LMS so you can track it as a course.

How to Get the Video Into Your LMS

Articulate 360 comes with a number of great authoring tools. It also comes with Review 360 where you can upload your courses and solicit feedback from your clients and subject matter experts.

Another nice feature is that you can upload a video into Review 360. And from there, export the video for LMS. This lets you set the LMS tracking options and how to measure completion.

upload video to LMS

You’ll get a .zip file with the video and all of the LMS required files so that you can load it on the LMS and treat the video like a trackable course. Super fast and super simple.

Click here to view the tutorial on YouTube.


Events

Free E-Learning Resources

Want to learn more? Check out these articles and free resources in the community.

Here’s a great job board for e-learning, instructional design, and training jobs

Participate in the weekly e-learning challenges to sharpen your skills

Get your free PowerPoint templates and free graphics & stock images.

Lots of cool e-learning examples to check out and find inspiration.

Getting Started? This e-learning 101 series and the free e-books will help.


e-learning storyboards

A couple of weeks ago, David posted a challenge where community members were asked to share their storyboard templates. As you can see, there were quite a few different storyboard templates shared for downloads. There are also additional free storyboards in the community downloads section.

What I found interesting was some of the conversation about storyboards. There are quite a few who don’t use formal storyboards. Instead they just build everything from inside their authoring tool.

Why There’s No Need for a Storyboard

Years ago when I first started working with e-learning, storyboards were really important. That’s mostly because it wasn’t just me working on the course.

The storyboard was how we determined how to construct the screen layouts and user interface. We determined where things were placed, how they animated, and what supporting media was required. Because more than one person worked on the course, the storyboard was really critical to communicate on the project design.

On top of that, working with customers and getting them to “see” what we were building was a challenge because it wasn’t as easy and quick to prototype the courses back then. Thus, we used the storyboard to walk through the course design with out clients.

This helped them understand what we were going to produce and get their agreement. It was also an easy way to show what other assets were required and the extra production required to deliver the course.

Rapid E-Learning Changed Things

A lot of this changed when we shifted from custom development in Flash and Authorware to Articulate Studio and PowerPoint. PowerPoint let me add all of the assets (or placeholders) and build animations quickly. Because I could prototype quickly in PowerPoint, I found I spent a lot less time working with formal storyboards. I suspect that’s common for many of you as well.

And it’s only easier with Storyline because there’s so much more interactive capability and one could build a quick prototype faster than it probably takes to complete a formal storyboard.

If you’re a team of one doing most of the production yourself, then a formal storyboard is less likely. Essentially, the prototype course really is a storyboard. It’s just in the authoring tool and not a separate document.

When a Storyboard Makes Sense

Throwing a bunch of slides and quiz together and calling it a course is one thing. In that world, what does a storyboard solve? However, when you start to build more complex learning experiences, you need to be more intentional about what you design. That requires a lot more planning. And most likely there’s a lot more media production.

In those cases, working with a storyboard helps you properly plan the course structure as well as the required content and media.

Also, when working with a clients (especially paying clients) it’s important to show them you’re organized. And a storyboard helps you walk through the project requirements before spending a lot of time prototyping and working on more time-consuming interactions.

There’s obviously a lot more that can be said about storyboarding. I find that people who’ve been in the industry a while, use storyboards more often than not. But people who’ve joined the industry over the past three years or so, don’t rely on them as much. Which makes sense, because the tools are so much easier to use.

I’m curious. Do you storyboard your courses? If so, how are you doing it? If not, why not?

Events

Free E-Learning Resources

Want to learn more? Check out these articles and free resources in the community.

Here’s a great job board for e-learning, instructional design, and training jobs

Participate in the weekly e-learning challenges to sharpen your skills

Get your free PowerPoint templates and free graphics & stock images.

Lots of cool e-learning examples to check out and find inspiration.

Getting Started? This e-learning 101 series and the free e-books will help.