The Rapid Elearning Blog

Archive for the ‘Assessment’ Category


meaningful e-learning courses

We spend hours building courses that look great and have rich interactive elements, but often we’re missing the key component to an effective course: tapping into the learner’s motivation.

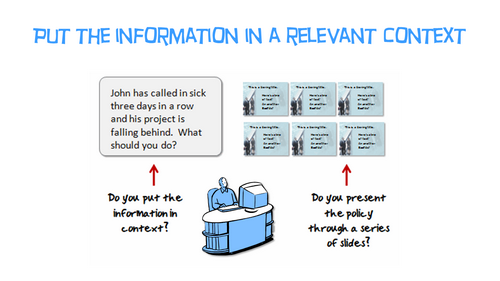
When you frame the e-learning content into a meaningful context, you’ll not only tap into the motivation of the learner, but there’s also a good chance you won’t be tempted to stuff the course with meaningless interactivity (that has the appearance of value).

When building courses, can you answer the following three learner questions?

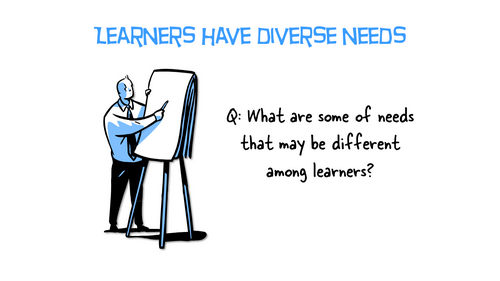
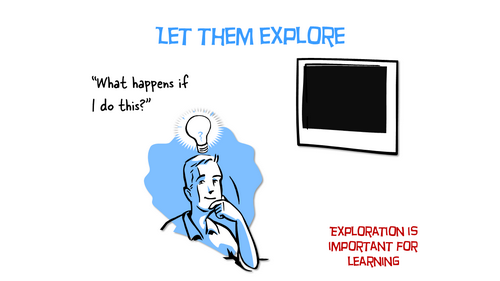
Meaningful E-Learning: Why Am I Taking This Course?

Good e-learning courses start with solid, actionable learning objectives. The goal is to help the learner to see the value of the objectives. Sure you can start with a bullet point list of objectives and what they’ll learn.

But you really want to convince them that this course has value. And once they understand the value, their more motivated to succeed. And learner motivation is the foundation of a great learning experience.

Meaningful E-Learning: What Am I Supposed to Do with All of This Content?

There are three main parts of e-learning course construction:

  • What content needs to be in the course?
  • What does the course look like?
  • What does the learner do?

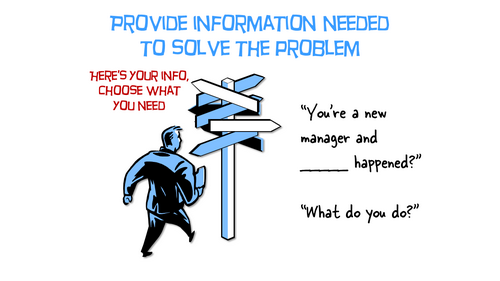
Not only does the course need clear objectives that convince the person of it’s value, it also needs clarity around the action required to use the content. What is the person to do with all of this new information?

A real challenge with e-learning is that we’re good at pushing content out. And the reality is most e-learning is rooted in some sort of compliance or regulatory training with little focus on more than a final quiz to certify course completion. But even those courses are rooted in performance expectations.

Help the learner to see the value in the course and then create a means for them to use the new information to improve or enhance their performance.

Meaningful E-Learning: How Can I Prove I Know it?

If you don’t answer the two questions above, the incentive is to click through the course to get to the final quiz and get back to work.

Quiz questions are fine for simple assessments, but do they really measure true understanding of the content and the ability to use it in real life?

Ultimately, the course mimics real world experiences and expectations. In that environment, the learner gets to learn meaningful content and practice using it in a way that demonstrates their understanding. That’s how they prove they learned the information.

It’s easy to build content heavy courses with simple quizzes at the end. That’s why there are so many. And maybe it’s not always wrong. Let people take a course, quick quiz, and get back to work. However, if we want course to be effective we need to engage the learner and create meaningful learning experiences. And that starts by answering the three questions above.

Events

Free E-Learning Resources

Want to learn more? Check out these articles and free resources in the community.

Here’s a great job board for e-learning, instructional design, and training jobs

Participate in the weekly e-learning challenges to sharpen your skills

Get your free PowerPoint templates and free graphics & stock images.

Lots of cool e-learning examples to check out and find inspiration.

Getting Started? This e-learning 101 series and the free e-books will help.


free e-learning interaction

I built a simple sorting interaction to show how to work with sliders and variables for a workshop. It’s a fun and simple interaction so I cleaned out the data and made it so it can work as a template. It’s yours to use as you wish.

free e-learning interaction

Click here to view the demo.

Tutorial: Interactive Sort Activity

Here’s a YouTube tutorial that walks through the template and explains how to customize it.

A few things you’ll learn:

  • Customizing the slider
  • Animation-based triggers
  • How to customize the sorting activity

Events

Free E-Learning Resources

Want to learn more? Check out these articles and free resources in the community.

Here’s a great job board for e-learning, instructional design, and training jobs

Participate in the weekly e-learning challenges to sharpen your skills

Get your free PowerPoint templates and free graphics & stock images.

Lots of cool e-learning examples to check out and find inspiration.

Getting Started? This e-learning 101 series and the free e-books will help.


scenario

Between the workshops I run, blog emails received, and helping in the community, I get to see hundreds of e-learning courses. A common issue for many courses is transitioning from sharing content to helping people use the content to make the appropriate decisions.

Many course developers focus on making the content interactive, which is good. But much of the interactivity is novel or exists at a very basic level. What tends to be missing is the more complex decision-making interactivity.

The challenge is how to move past rote facts and get to a place where the learners can practice making the kinds of decisions they’d  make in the real world.

Interactive E-Learning 101

There are some core building blocks for interactive e-learning:

  • provide relevant content that fits in context to their real world
  • instead of pushing content, getting them to pull it
  • create ways to explore the content
  • challenge them with decision-making activities or scenarios

We’ve discussed many of these things in previous blog posts.

“What If?” Scenarios

The one thing that could add to this pursuit is to provide more “what if” scenarios:

“What happens if I do this? Or what happens if I choose this other option?”

I was thinking more about this the other day as we were presenting on how to use variables in one of our webinars. Variables allow the learner to do something that can be tracked. And then use that information to provide feedback unique to the learner’s experience. They’re perfect for creating this type of training.

scenario

  • Challenge the learner to analyze all of the available information and form some sort of hypothesis.
  • And then create the means for them to apply it and see what happens.
  • Provide the appropriate feedback based on the results.
  • Let them make adjustments and test it again.

The obvious reason why we don’t do more of this in our courses is that it takes more time to build. The reality is that most clients seem satisfied with basic click-and-read type content. And building more complex interactivity takes time, especially if we want to do it right. It also means more nuance to the way we package the course content. This wouldn’t work if all of the decisions to be made are very obvious.

Another challenge is that we tend to be in this somewhat nonsensical tracking and quizzing mode where it seems we’re less concerned with the actual learning and more concerned with course completion. In that world, there’s little room for testing ideas. And once the course is completed, it’s usually locked down by the learning management system. Thus it’s not even a great resource for reviewing later.

Creating these types of “what if” scenarios won’t work for all courses and content. And they do take more time and skill to build. However, they can enhance the learning experience and make the courses more engaging.

What types of courses do you think lend themselves to this type of training? And how would you set up the scenarios and process to test ideas?

Events

Free E-Learning Resources

Want to learn more? Check out these articles and free resources in the community.

Here’s a great job board for e-learning, instructional design, and training jobs

Participate in the weekly e-learning challenges to sharpen your skills

Get your free PowerPoint templates and free graphics & stock images.

Lots of cool e-learning examples to check out and find inspiration.

Getting Started? This e-learning 101 series and the free e-books will help.


variables dashboard to save time e-learning

Variables add all sorts of capability to the learning experiences you create. They allow to move past linear, click-and-read content to more complex interactions with branched scenarios and personalized, adaptive learning.

Today I’d like to share a tip that really comes in handy when working with variables. It’ll save time and really help when you use a bunch of variables that are interdependent.

The 1-2-3 of Variables

Working with variables is a three-step process:

  • Create the variable: which is a like a bucket waiting to have a value
  • Adjust the variable: some action or trigger changes the value of the variable
  • Use the value: once the variable has a value or new value, that information can be used to trigger a different action

I explain that in more detail in this post on how to simplify working with variables in e-learning.

Add a Reference to the Variable for Troubleshooting

When working with variables, there is some trial and error and continuous testing. I always recommend adding a variable reference to the screen so that when troubleshooting or testing you can see the current value of the variable. This really comes in handy. If triggers depends on the value of the variable, you want to see that the variable is actually changing. If not, then you know where to start looking.

I explain that in more detail in this post on how to work with reference variables in e-learning.

Testing Variables in Your E-Learning Course

Here’s where it gets tricky. Some courses can have a ton of variables. For example, you may have a slide at the end of the course that requires dozens of interactions throughout the course. These interactions allow you to display personalized feedback. And each interaction is connected to interdependent variables.

Testing that everything works requires going through the course to activate triggers that adjust the values of the variables. This is really time-consuming. Unless you create a variables dashboard.

How to Create a Variables Dashboard

A variables dashboard allows you to be anywhere in the course and test how something would work depending on the value of certain variables.

For example, in a previous post we discussed how to lock navigation based on completing specific actions. To test it, requires completing all of the actions.

However, with a variables dashboard you can manually adjust the variables and then go to that single slide to test it. That saves a ton of time and frustration.

variables dashboard

Here are the basic steps to create a variables dashboard:

  • Create a slide that shows the current value of the variables and also allows you to manually adjust them. In the image below you can see I have buttons that let me change from true to false. There are text input boxes to add text-based values, and ways to adjust the numbers for variables that count specific activities.
  • Add this slide as a lightbox slide. I add it to the player so that it’s persistent and available throughout the course.
  • Prior to final publishing, get rid of the lightbox slide so that it’s not available to those who actually take the course.

variables dashboard

Below is an example of a test module I used for a recent gamification webinar. You’ll notice the “Set Variables” link on the top right corner. Go ahead and test it.

variables dashboard example

Click here to test the variables dashboard.

If you want to learn more, here’s a tutorial where I explain how and why it’s set the way it is.

Hopefully, you’ll find using a variables dashboard helpful and productive when build your own courses.

Learn More About Variables

If you haven’t used variables before, it’s time to learn how and then start to create all sorts of cool courses.

Here are some posts that will help you learn more:

Events

Free E-Learning Resources

Want to learn more? Check out these articles and free resources in the community.

Here’s a great job board for e-learning, instructional design, and training jobs

Participate in the weekly e-learning challenges to sharpen your skills

Get your free PowerPoint templates and free graphics & stock images.

Lots of cool e-learning examples to check out and find inspiration.

Getting Started? This e-learning 101 series and the free e-books will help.


successful e-learning

Successful e-learning is measured in many ways. It’s important to provide measurable value. However, a large part of success revolves around how others view your contributions. Thus it’s important to manage how you work with customers and how they understand your contributions.

If you’re just getting started, here are some things to keep in mind:

Successful E-Learning Pleases the Customer

Your customer is why you have a job. Thus it’s important to ensure the customer’s needs are met.

Who is your customer? The obvious answer is the one who commissions the e-learning course. However, there’s also the dynamic between you and your manager (who may not be the customer) but is the person who influences your employment.

How to Please the Customer

There are many things you can do, but here are a few basics:

  • Establish clear expectations. Write them down and get affirmation. This way everyone is on the same page. I create a Service Level Agreement that documents the project details and expectations.
  • Find ways to make your customers look good. Often I’ll send encouraging emails and CC their managers. I try to deflect credit from myself and pass it to others. Give them the credit when possible.
  • Control your costs and resources. Everyone’s on a budget and has limited time.
  • Finish ahead of schedule. I try to pad extra time into the production, get agreement on the production schedule, and then work to be done early. Sometimes it doesn’t matter if you’re early because they may not be prepared for it, but it builds your reputation and how they perceive you.
  • Take care of details before they become issues. Be proactive and do this before the customer is aware. The more projects you do, the more you’re able to anticipate potential issues. I always make a list of things that may derail the process so that I can think through a work around before it happens.

Successful E-Learning Knows that the Business is the Business

Ultimately you’re hired to help meet specific organizational goals. Sometimes we lose sight of that. It’s easy to get stuck in the way things have always been done or on our own pet projects. Keep your focus on what the organization says is important and the metrics they use.

When working with customers, try to steer them towards measurable results and not just content. From there you set clear objectives that are tied to a metric which helps measure the course’s efficacy. If the client has no metrics (sometimes that happens with compliance training) measure cost and production time as well as a reduction in training time.

How to Report the Results of Successful E-Learning

It’s important to show the results of your work. The challenge is knowing what to report, getting the numbers, and how to report them. Here are a few thoughts:

  • Performance results. Create courses with measurable objectives. That gives you something to measure. How does the client know that they need training? What metrics are they using? Use the same process. Connect with the team that collects and curates results. Often training is a small part of the process thus you may not see significant results from training alone.
  • Measure before and after performance. Create a means to pre-assess the learners and then compare how they did after the training. You may not directly impact real-world performance but you can state that before the training they were at X and after they were at Y.
  • Measure what was saved. Some training is not performance-based. Thus it’s a challenge to report performance metrics. In those cases, track how much training costs before and how the e-learning courses saved time by reducing travel costs, etc. Another benefit is the flexibility training offers because it is time-shifted. Worst case, compare your production costs to that of an outside vendor.

Building engaging and relevant e-learning is the main measure of success. That happens in the context of supporting a customer and your organization. Develop some strategies to manage those relationships and the expectations. Help them focus on real results and do a good job reporting your success. And their success will be your success.

Events

Free E-Learning Resources

Want to learn more? Check out these articles and free resources in the community.

Here’s a great job board for e-learning, instructional design, and training jobs

Participate in the weekly e-learning challenges to sharpen your skills

Get your free PowerPoint templates and free graphics & stock images.

Lots of cool e-learning examples to check out and find inspiration.

Getting Started? This e-learning 101 series and the free e-books will help.


no LMS

Generally, delivering e-learning courses is a two-step process: 1) create the course in your favorite e-learning software and 2) host the course in a learning management system.

There are many small organizations that don’t use formal learning management systems; however they want simple tracking of the courses. I had someone ask how they could track people in their organization who have taken a compliance course. He didn’t have a lot of learners and wanted something simple.

Here are two quick solutions that work well. They don’t require a lot of work to set up and they’re mostly free.

This solution assumes that the user gets a URL that links to the course. We have no identifying information so we need a simple way to collect who they are and track their completion.

Create a Form

Create a form using a hosted service. In these examples I am using Google Forms and Jot Form. However, you can use a different service if you want (or create your own form on a server). It doesn’t matter. The main thing is you have a way for the person to share info and send it your way.

form no LMS

Embed the Form

Once you have the form, you’ll embed it into the course. In these examples we’re using Rise’s embed block. If you use Storyline, the web object works perfectly for this.

Embed form no LMS

Create a Gate to the Form

The goal is to only expose the form when the course is complete. There are many ways to do this. For these demos, I’ll show two ways. In the first, I use a continue block that is locked until the learner affirms completion of the course and agreement with the content. In the second example, I use a quiz to serve as the gate.

no LMS two options

Examples of Embedded Forms

These are simple examples to show how the form looks embedded in the course and how you could create a gate to get to the form.

  • Jot Form Example: the course has free navigation and user affirms completion to unlock the the gate
  • Google Form Example: the course is locked and passing the final quiz unlocks the certificate of completion

Jot Form offers a bit more control and looks more integrated with the course. I colorized the block to match the form’s color.

JotForm example no LMS

On the other hand, Google Forms has that enormous header space and scrollbar. I removed the header image and filled it with white to avoid the Frankenform look but it still looks like something pasted into the course. It would be nice to have more control over the look, but it still works fine for what we need and it’s free. Also, the integration with Google Sheets saves a few steps later.

Google fomr example no LMS

Upload the Course

Since we’re not using an LMS, we need a place to upload the course. I use Amazon S3 which I showed how to set up in a previous post; but it could also be Google Storage. But it can be any web server.

no LMS Amazon S3 free

Track Course Completion

The form collects the data and sends it to the service. Jot Form displays a table with the option to download. Google Form sends the data to a Google Sheet.

Google Sheet no LMS

Of course, there are many other ways to do something similar to avoid using an LMS, especially if you have programming skills.

At a previous place, we used the course URL to drop a cookie on the person’s computer. At the end of the course, we inserted an .ASP file via a web object. The .ASP file collected the info from the cookie and sent it to the database. Thus we knew who took the course, when they completed it, and their minimum passing score.

Do you have any other ways you use to track the course without using an LMS or paid service? Please share in the comments.

Events

Free E-Learning Resources

Want to learn more? Check out these articles and free resources in the community.

Here’s a great job board for e-learning, instructional design, and training jobs

Participate in the weekly e-learning challenges to sharpen your skills

Get your free PowerPoint templates and free graphics & stock images.

Lots of cool e-learning examples to check out and find inspiration.

Getting Started? This e-learning 101 series and the free e-books will help.


effective e-learning tips

Here’s part two of a recent presentation I did on letting learners drive. It presented foundational ideas on how to build engaging e-learning courses and then focused on tips that help make the courses more learner-centric.

In part one, we looked at how to create engaging training. And in this part, we’ll look at how to make it effective.

Generally speaking, most training is info-centric where content plays the main role. Obviously, content is important. But when it comes to building a course, content in a meaningful context is what matters.

Here are some tips on how to create courses that focus on the learner’s context.

Effective Courses Creating Relevant Context

effective courses are relevant

As we mentioned in the previous post, content needs context and that context needs to be relevant to the end user. How is the content used in what they do in real life situations?

Effective Courses Address Diverse Learner Needs

effective courses

Some people come to the courses as experts and some as novices. Thus, courses can’t all be one size fits all. Do a user analysis to understand the learners and their needs. Then build mechanisms in the course that give them the freedom to learn where it works best for them.

Effective Courses Give the Learners Control

effective courses let users choose

Think of your course live a textbook. Many are designed to flow in a linear path, but most people jump around topics for reference. They don’t always read everything. They usually just read to learn what they need.

That’s how it works online, as well. Want to learn something? Do a  search on YouTube.

effective courses free navigational control

My guess is you jump right into the heart of the matter and skip over a lot of nice-to-know content that wasn’t critical to your search objective.

Why not design the learning experience more like that? Why does it have to be linear?

Effective Courses Expose the Need for Learning

effective courses expose the need to learn

We tend to push content out, but we want the learner to pull it in. But we need to give them a reason to pull. One way is to expose the need to acquire content. We could challenge what they know—challenge their understanding.

This could happen with a simple assessment upfront. Not designed to pass or fail them, but instead, it’s designed to expose their need to know more. Or the assessment can be more complex like an interactive scenario.

Effective Courses Let the Learners Explore

effective courses let learners explore content

The learning experience is more than just presenting information. Information needs to be used in context. A great way to do this is to allow the learner to explore and discover content. Of course, they need to have a reason to explore.

Effective Courses Provide Contextual Scenarios

effective courses decision-making scenarios

One way to get learners to pull in contact is to have them make decisions. Create decision-making scenarios where they have to solve a problem or take some sort of action. Then use that as a way to present content they can explore, collect, and consume to make the best decision.

Effective Courses Sort Learners by Experience

effective courses sort learners

One way to provide better learning experiences is to sort learners. This can be by role, tenure, or competency. The sorting process can be simple or complex, adaptive learning paths. In either case, it helps you build a better course and it creates a better experience for the one who has to go through it.

Effective Courses Sort by Understanding

effective courses sort by understanding and competency

An easy way to sort learners is by how much they understand. This is an effective way to design annual compliance training. At the front end, challenge their level of understanding. If they demonstrate competency, then move them past content (or to the end). If they can’t demonstrate competency, move them through the content.

Effective Courses Sort by Experience or Role

effective courses sort by experience

Another common way to build the learning path is by role or experience. Create a mechanism at the front end to sort learners and then create a path that adapts to how they were sorted. If there are places where this is common content, put that up front and then branch them once they get past it.

There’s a lot that goes into building effective courses. It all starts will clear objectives that can be measured. From there, create meaningful and contextual decision-making opportunities. Ultimately, a course is designed for learning, so giving the learner as much control as possible in the process will only make it that much more effective.

Events

Free E-Learning Resources

Want to learn more? Check out these articles and free resources in the community.

Here’s a great job board for e-learning, instructional design, and training jobs

Participate in the weekly e-learning challenges to sharpen your skills

Get your free PowerPoint templates and free graphics & stock images.

Lots of cool e-learning examples to check out and find inspiration.

Getting Started? This e-learning 101 series and the free e-books will help.


gamified e-learning

The other day I got one of those marketing emails that I tend to delete without looking over. However, this one featured some ideas on gamification. And what got me most interested was looking at their examples. As we all know, gamification is a hot topic and it’s always neat to see how different groups build the gamified elements in their courses.

Ingenuiti put together a portfolio page with three different gamified examples. They use three micro games to teach and demonstrate some core gamification concepts.

I reviewed their modules and want to highlight a few production tips that not only work for gamified e-learning courses, but are just as useful in other contexts. For today’s post, I’ll focus on the first micro game.

Here’s a link to the video tutorial series.

Gamification Micro Game #1

gamified e-learning example

The first micro game focuses on three types of learning activities:

  • Simple Game: challenge the learners understanding in a common game format. It’s a great way to rehearse and recall information and do it in a fun way that is familiar to most people.
  • Explore Activity: have the learner explore the environment and collect information or rewards. I always consider exploration to be one of the core building blocks for interactive learning. Given the right context, exploration is a great way to engage and inspire critical thinking.
  • Simple Scenario: the learner observes an interaction, reflects on it, and then offers constructive input. Mimicking real-world type interactions is a good way to reinforce the learning experience. They do some clever things with the commenting, liking, and bookmarking.

There’s a lot going on in their modules. I isolated a few things that they did so that I can show some production tips and nuances of the software. Keep in mind, there’s always a few ways to do the same thing in software. So if you have different or even better ideas, feel free to share them in the comments.

Here are some videos that offer some real quick tutorials on how you can create similar effects and interactions in your own e-learning courses. I’m using Storyline because it’s easy to use, but you’re free to use the software of your choice, especially if you have plenty of time on your hands and not rushed to get things done. 🙂

E-Learning Tip #1: Gate Screens

gamification example gate screen

Many courses have starter pages with simple instructions. Also, it’s also a good idea to stop progress in the course when changing directions on types of interactivity or navigation. It helps set expectations and orients the user. I call those gate screens.

E-Learning Tip #2: Custom Markers with Animated Content Boxes

gamified e-learning example custom markers

In their demo, they used the marker feature but turned off the marker labels and had their own content appear. Also, after clicking the marker, the pulsing stops. When clicking the marker, the background fades and the content box animates in and out (upon leaving).

E-Learning Tip #3: Turn Audio On/Off

In a few places, they have running background audio which can be turned on or off. Normally, one oculd use the player volume control, but since the player isn’t present, custom controls need to be enabled.

E-Learning Tip #4: Simulated Posting of Chat Response

gamified e-learning example simulated conversation and text chat

I really like the way they build this mini scenario and the simulated chat. Have the user post a response to a chat. You notice that you can post and edit comments. As you do that, the other comments are disabled.

E-Learning Tip #6: Free Dragging Objects

gamified e-learning example free dragging interaction

This exploration activity let’s the user drag objects and move them. Normally, dragging objects are associated with drag and drop activities. However, these are free moving objects with no specific interaction to them. They just let the user move objects freely out of the way to see what’s underneath.

E-Learning Tip #7: Changing State of Selected Objects

gamified e-learning example selected states

When a correct choice is made, the object displays a star to indicate it’s been selected correctly. You’ll also notice that the side panel indicates which objects are selected and which remain.

E-Learning Tip #8: Play Again Option

gamified e-learning example retry interaction

Let the user quit or play the game again. This resets the interaction to the initial state.

These are a few of the cool things the Ingenuiti developers did in their module. Whether you’re building a gamified e-learning course or something else, these production tips should come in handy.

Events

Free E-Learning Resources

Want to learn more? Check out these articles and free resources in the community.

Here’s a great job board for e-learning, instructional design, and training jobs

Participate in the weekly e-learning challenges to sharpen your skills

Get your free PowerPoint templates and free graphics & stock images.

Lots of cool e-learning examples to check out and find inspiration.

Getting Started? This e-learning 101 series and the free e-books will help.


drag and drop interaction essentials

There are three main ways to interact with the course: click, mouseover, and drag. While click-based interactions are the most prominent, a good drag and drop interaction is usually more engaging. In fact, anytime I feature a drag-based interaction in a blog post, I’m always asked how it was created.

Drag and drops are engaging, they let the user “touch the screen” or lean into the course a bit, and they’re novel because they’re not used as often as the other types. With that said, here is everything you need to know about drag & drop interactions from previous posts:

essentials of drag and drop interaction

So there you have it, everything you need to know to get started building effective and engaging drag and drop interactions for e-learning. And if you want to learn to build them, check out these tutorials and take part in these drag and drop challenge activities: challenge #16 and challenge #21.

Is there anything you’d suggest when building drag and drop interactions?

Events

Free E-Learning Resources

Want to learn more? Check out these articles and free resources in the community.

Here’s a great job board for e-learning, instructional design, and training jobs

Participate in the weekly e-learning challenges to sharpen your skills

Get your free PowerPoint templates and free graphics & stock images.

Lots of cool e-learning examples to check out and find inspiration.

Getting Started? This e-learning 101 series and the free e-books will help.


free microlearning template

Earlier I shared this free microlearning template. It is easy to use and edit. However, I did receive some questions on how it was created and how to add additional cards. So in today’s post I’ll share a few tips so you can make your own template and edit the one I shared.

Here’s a series of video tutorials that show how to create the simple, yet powerful microlearning template. Check out the last tutorial on how to quickly edit the text. It’s a neat way to leverage the translation feature to do the heavy lifting.

How to Create the Animated Card

We want the card to animate onto the screen and pause. And we want to click on the card to see the other side (of the card, not the spirit world).

Click here to view the tutorial.

  • The first step is to create a card.
  • Add an entrance and exit animation.
  • Add a selected state to the card to create the click and reveal feature.
  • Add a trigger to the card that pauses the timeline when the entrance animation completes.

When you preview, the card should animate in and pause. You can click on the card to select or deselect it.

How to Edit the Normal & Selected States

We want the selected state to have an animated object that comes on and off the screen when the card is selected and deselected.

Click here to view the tutorial.

  • Select the card and double click inside the state you want to edit.
  • Add placeholder text in the normal state.
  • Add a shape to the selected state and add placeholder text to the shape.
  • Add entrance and exit animations to the shape in the selected state.

When you preview and click on the card, it will trigger the entrance animation of the selected state. And when you click on it again, it should trigger the exit animation.

How to Bring a Card On & Off the Screen

When the card animates on the screen it will pause. This allows us to “flip the card” by clicking on the card. When we’re done looking at the card, we want it to exit the screen and trigger a new card.

Click here to view the tutorial.

  • Create a button with a trigger to resume the timeline.
  • Duplicate the card and position it on the timeline after the first card. Repeat as necessary.

When you preview the microlearning interaction, the card enters and pauses. Clicking the button causes the timeline to resume which triggers the exit animation of the first card and the entrance animation of the next card.

How to Edit the Content on the Cards

Clicking into the states of the various cards can be tedious. Here’s an easy way to edit the text for each card.

Click here to view the tutorial.

  • Go to File>Translate>Export to export the text from the course.
  • Edit the text in the document and save it.
  • Go to File>Translate>Import to import the text into the cards.
  • Preview the microlearning interaction to verify that the text alignment is correct.

Importing the text should work well and as long as you don’t add too many characters you shouldn’t have to do any editing.

Here’s another free microlearning template for you to deconstruct and see how it was built.

Events

Free E-Learning Resources

Want to learn more? Check out these articles and free resources in the community.

Here’s a great job board for e-learning, instructional design, and training jobs

Participate in the weekly e-learning challenges to sharpen your skills

Get your free PowerPoint templates and free graphics & stock images.

Lots of cool e-learning examples to check out and find inspiration.

Getting Started? This e-learning 101 series and the free e-books will help.


Free Microlearning Template

January 17th, 2017

free microlearning template

Here’s a free microlearning template I created for a workshop on interactive e-learning. The template uses the popular overhead desktop theme. I’m using the interaction as a simple microlearning module. But it could also be a quick knowledge check like this one. It just depends on how you want to use it for your own course.

Example of Free Microlearning Template

Here’s an example of the template in action.

free microlearning template

Click here to see the microlearning example.

How to Edit the Free Microlearning Template

What makes this microlearning template work is that it’s really easy to use and modify. The construction is really simple.

  • Create a card with selected states.
  • Add an entrance and exit animation to the card.
  • Create a trigger to pause the timeline when the card’s entrance animation completes.
  • Create a button to resume the timeline.

Want more cards? Just duplicate them and the triggers are duplicated, as well. You can create as many cards as you like. All you need to do is stagger them on the timeline.

Bonus tip:

  • The template starts with a single card. Since I don’t know how many cards will be in the final module, I created a cue point on the timeline. Look at the free file to see what is triggered by the cue point. If you add a bunch of cards, just drag the cue point to the end and all if its triggers move with it.
  • Here’s a tutorial post that shows how to create and edit your own microlearning interaction.

Events

Free E-Learning Resources

Want to learn more? Check out these articles and free resources in the community.

Here’s a great job board for e-learning, instructional design, and training jobs

Participate in the weekly e-learning challenges to sharpen your skills

Get your free PowerPoint templates and free graphics & stock images.

Lots of cool e-learning examples to check out and find inspiration.

Getting Started? This e-learning 101 series and the free e-books will help.


locked navigation e-learning

“How do I lock navigation?” is one of the first questions we get when showing people how to use our software. In fact it’s one of the questions we had to revisit in a recent Articulate Live webinar where people wanted to see the features used to lock navigation.

I understand the question and why it’s asked, but from an instructional perspective it’s one of the most frustrating questions to answer because locking navigation may inhibit learning and it’s a miserable experience for the person stuck in a boring course irrelevant to their needs.

Why Are We Asked to Lock Navigation?

There are a number of reasons why courses are locked. Most of the time the customer wants some assurance that the course taker isn’t just clicking the next button and skipping important information. Locking the navigation and forcing people to go through the course slide by slide is one way to guarantee that they’ve seen the slide.

But does being exposed to the content meet any real objectives? Doesn’t the content exist to promote some sort of decision-making or performance?

How to Move Past Locked Navigation

There are a number of ways to move past locking your course navigation. Here are a few ideas:

  • See the course in two parts. Part one = information required to make decisions. Part two = the types of decisions they need to make to show they know the information. Focus on how the course takers can demonstrate their understanding.
  • Step away from the solution. The elearning course is a solution to meet specific objectives. My guess is that the business objective isn’t to look at screens of information. Why does the course exist? Build it to meet those objectives and rest assured that locked navigation doesn’t meet them. Activities where they practice and demonstrate understanding is a better way to meet objectives.
  • Avoid linear courses. Most courses are linear, “A to Z” courses. They beg to be locked. If you open them up and make them more exploratory, this makes locking them less critical.
  • Create relevant content & context. People don’t normally make a habit of reading policies at work. But they routinely make decisions that hopefully align with the policies. Convert your content into real world activities where they use the information to make decisions. This requires them to know the information and prove it.
  • Lock the course at decision points. You probably can’t get past some form of locking. In that case, create decision points where the course taker demonstrates understanding of the content to move on. This allows you to give them freedom to explore content between the decision points.
  • Replace locking with rewards. Instead of forcing them through content, provide an incentive to collect information (or make good decisions with the information). This can be in the form of a dashboard where they collect badges to reward completion.
  • Chunk the course into smaller segments. Even with all of these tips, there’s a good chance you still have to create locked navigation. In those cases, chunk the course content into smaller segments. I like to call them coursels (course morsels). No one likes locked navigation, but it’s definitely a lot less frustrating when it’s a quicker experience.

What tips do you have for those who are stuck in the world of locked navigation?

Events

Free E-Learning Resources

Want to learn more? Check out these articles and free resources in the community.

Here’s a great job board for e-learning, instructional design, and training jobs

Participate in the weekly e-learning challenges to sharpen your skills

Get your free PowerPoint templates and free graphics & stock images.

Lots of cool e-learning examples to check out and find inspiration.

Getting Started? This e-learning 101 series and the free e-books will help.