The Rapid Elearning Blog

Archive for the ‘E-learning’ Category


free microlearning template

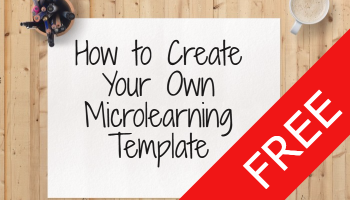
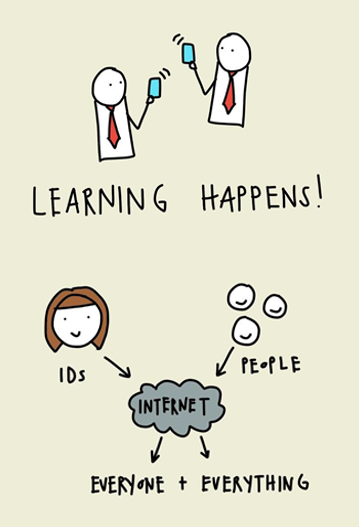
Earlier I shared this free microlearning template. It is easy to use and edit. However, I did receive some questions on how it was created and how to add additional cards. So in today’s post I’ll share a few tips so you can make your own template and edit the one I shared.

Here’s a series of video tutorials that show how to create the simple, yet powerful microlearning template. Check out the last tutorial on how to quickly edit the text. It’s a neat way to leverage the translation feature to do the heavy lifting.

How to Create the Animated Card

We want the card to animate onto the screen and pause. And we want to click on the card to see the other side (of the card, not the spirit world).

Click here to view the tutorial.

  • The first step is to create a card.
  • Add an entrance and exit animation.
  • Add a selected state to the card to create the click and reveal feature.
  • Add a trigger to the card that pauses the timeline when the entrance animation completes.

When you preview, the card should animate in and pause. You can click on the card to select or deselect it.

How to Edit the Normal & Selected States

We want the selected state to have an animated object that comes on and off the screen when the card is selected and deselected.

Click here to view the tutorial.

  • Select the card and double click inside the state you want to edit.
  • Add placeholder text in the normal state.
  • Add a shape to the selected state and add placeholder text to the shape.
  • Add entrance and exit animations to the shape in the selected state.

When you preview and click on the card, it will trigger the entrance animation of the selected state. And when you click on it again, it should trigger the exit animation.

How to Bring a Card On & Off the Screen

When the card animates on the screen it will pause. This allows us to “flip the card” by clicking on the card. When we’re done looking at the card, we want it to exit the screen and trigger a new card.

Click here to view the tutorial.

  • Create a button with a trigger to resume the timeline.
  • Duplicate the card and position it on the timeline after the first card. Repeat as necessary.

When you preview the microlearning interaction, the card enters and pauses. Clicking the button causes the timeline to resume which triggers the exit animation of the first card and the entrance animation of the next card.

How to Edit the Content on the Cards

Clicking into the states of the various cards can be tedious. Here’s an easy way to edit the text for each card.

Click here to view the tutorial.

  • Go to File>Translate>Export to export the text from the course.
  • Edit the text in the document and save it.
  • Go to File>Translate>Import to import the text into the cards.
  • Preview the microlearning interaction to verify that the text alignment is correct.

Importing the text should work well and as long as you don’t add too many characters you shouldn’t have to do any editing.

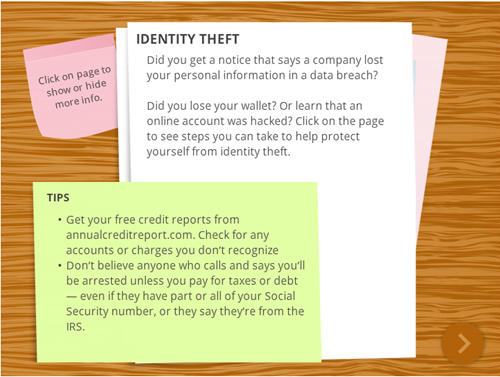
Here’s another free microlearning template for you to deconstruct and see how it was built.

Events

Free E-Learning Resources

Want to learn more? Check out these articles and free resources in the community.

Here’s a great job board for e-learning, instructional design, and training jobs

Participate in the weekly e-learning challenges to sharpen your skills

Get your free PowerPoint templates and free graphics & stock images.

Lots of cool e-learning examples to check out and find inspiration.

Getting Started? This e-learning 101 series and the free e-books will help.


Free Microlearning Template

January 17th, 2017

free microlearning template

Here’s a free microlearning template I created for a workshop on interactive e-learning. The template uses the popular overhead desktop theme. I’m using the interaction as a simple microlearning module. But it could also be a quick knowledge check like this one. It just depends on how you want to use it for your own course.

Example of Free Microlearning Template

Here’s an example of the template in action.

free microlearning template

Click here to see the microlearning example.

How to Edit the Free Microlearning Template

What makes this microlearning template work is that it’s really easy to use and modify. The construction is really simple.

  • Create a card with selected states.
  • Add an entrance and exit animation to the card.
  • Create a trigger to pause the timeline when the card’s entrance animation completes.
  • Create a button to resume the timeline.

Want more cards? Just duplicate them and the triggers are duplicated, as well. You can create as many cards as you like. All you need to do is stagger them on the timeline.

Bonus tip:

  • The template starts with a single card. Since I don’t know how many cards will be in the final module, I created a cue point on the timeline. Look at the free file to see what is triggered by the cue point. If you add a bunch of cards, just drag the cue point to the end and all if its triggers move with it.
  • Here’s a tutorial post that shows how to create and edit your own microlearning interaction.

Events

Free E-Learning Resources

Want to learn more? Check out these articles and free resources in the community.

Here’s a great job board for e-learning, instructional design, and training jobs

Participate in the weekly e-learning challenges to sharpen your skills

Get your free PowerPoint templates and free graphics & stock images.

Lots of cool e-learning examples to check out and find inspiration.

Getting Started? This e-learning 101 series and the free e-books will help.


advanced e-learning courses

“I want to learn more advanced e-learning.”

As I conduct e-learning workshops around the world, this is probably one of the most frequent statements I hear. In many of the workshops, there’s a mix of people who are just getting started with e-learning and those who’ve been building courses for a while. So their expectations and experiences are very different.

On top of that, there’s a difference between advanced topics for using the Articulate software and advanced topics when it comes to instructional design and course construction outside of the software you’re using.

The challenge for me is discerning what “advanced” actually means. I’ll share some of my observations but I’m really more curious as to how you define advanced e-learning.

Here’s How I Define Advanced E-Learning

Since I work at Articulate, most of the workshops are focused on using the Articulate applications to build courses. And it’s a lot more interesting now that Articulate 360 gives you every application because it provides a lot of capability and options for how to approach the course content and construction.

basic or advanced e-learning courses

When it comes to software training, here’s how I look at e-learning skills:

  • Basic. Basic level training is learning to use the features as designed. For example, how triggers work is a basic task. You need a basic understanding of the feature so that you can use it to build interactions and functionality within the course.
  • Advanced. The next level of skills training is becoming competent with the advanced feature set like variables. In a sense, they’re just basic built-in features like the rest, but they are a bit more advanced in what they can offer because of the options and structure they provide. The key is you don’t need to know how to use them to build effective courses. However, when you do know how to use the variables features they make your courses more complex and efficient. You can build things like adaptive learning paths unique to each user.

Here is where I like to create a distinction between basic and advanced e-learning: it’s not about the features as much as becoming efficient and combining features to accomplish custom objectives.

  • Production efficiency. In most software applications, there are twenty ways to do the same thing. In that case, it doesn’t matter how you created the course as long as you get what you wanted. However, there are some production techniques that are more efficient than others. An advanced course developer is efficient and does the little things like adding titles to objects in the timeline. And she understands how to differentiate features and when to choose one over the other when they do similar things.
  • Compounding features. Features are created to do specific things and they usually have some constraints. Advanced course developers learn to accomplish their objectives by combining features and working around the constraints they may offer. In a sense, they create new features through production techniques. We usually call these best practices. And advanced developers have a tool chest full of best practices.

What’s missing?

advanced e-learning examples using JavaScript

  • Hacks. Building on the programming skills above, there are some people who have the programming skills to deconstruct the published output of the course and then hack it by adding their own code to modify how the published course functions. Again great skills to have, but they extend outside of the authoring software.

That’s just the software side of e-learning course production. It doesn’t cover what advanced skills are required to actually determine the appropriate content and activities to effectively teach new skills and concepts.

How Do You Define Advanced E-Learning?

So my question for you is two-fold. How do you define advanced e-learning skills when it comes to the software and then how would you define it when it comes to more general topics like instructional design?

Feel free to share your thoughts by adding them to the comments.

Events

Free E-Learning Resources

Want to learn more? Check out these articles and free resources in the community.

Here’s a great job board for e-learning, instructional design, and training jobs

Participate in the weekly e-learning challenges to sharpen your skills

Get your free PowerPoint templates and free graphics & stock images.

Lots of cool e-learning examples to check out and find inspiration.

Getting Started? This e-learning 101 series and the free e-books will help.


rapid e-learning

I’ve been reviewing some of my older blog posts to fix links and update some of the examples. After ten years, most of the posts are still relevant but some are obsolete like using clip art in PowerPoint. Going through ten years of blog posts brings up some interesting observations. For example, some of the media companies I referenced no longer exist. It’s a good reminder for us to not always jump on what’s hot until it’s really proven its worth.  In addition, the industry has changed quite a bit when I first started blogging.

In 2007, when Flash was king, I stated that the e-learning tools would evolve and become easier to use. You’d no longer need to learn specialized skills like Flash and ActionScript. This wasn’t a prediction of Flash’s demise. The key point was that it didn’t matter what underlying technology drove the content, the next generation course designer could build e-elearning with no programming skills required. This would be empowering and disruptive to our industry. And I think it’s fair to say, that is the case today.

Catching the Rapid E-Learning Bug

About 14 years ago, I saw the light. I consulted for a company that serviced non-profits. They needed help figuring out “this e-learning thing” and how to get their training online. One of their Flash programmers built a player that could dynamically load content. It worked but it was not easy to use. I was looking for something a lot easier that anyone could use, something more like PowerPoint. I searched for “PowerPoint and e-learning” and stumbled upon this Articulate company and Articulate Presenter. And it changed my life forever and my perspective on the industry.

articulate rapid e-learning PowerPoint

I couldn’t believe how easy it was to take what I built in PowerPoint and easily convert it to an e-learning course. Back then I even used a hidden notes panel to create a simple learning management system where a person searched their name and the courses they need to take showed up in the menu.

For me the big eye opener was that anyone could build courses. This was going to change the industry and take a lot of course construction away from programmers and put it in the hands of instructional designers. From that point on, anywhere I went I was touting this rapid e-learning stuff. Of course, most people immediately tuned out because they heard PowerPoint (which comes with its own baggage) or they were the Flash programmers (the equivalent to Swiss watch makers during the quartz revolution).

Eventually I prevailed and was able to bring the rapid e-elearning applications to a number of organizations. And at each, the teams that used those tools outperformed the Flash development teams.

Here’s one of my favorite stories. I won’t mention the e-learning company (because they’re really well known in our industry).

Shortly after getting hired at Articulate, I was at a big e-learning conference. Someone from one of the big well-known e-learning companies came by and asked if I knew someone who could take a bunch of courses off their hands. Some of their customers had PowerPoint slide decks and wanted to convert them into courses. Essentially she said that they built “real” e-learning and that this type of work was beneath them. None of their developers wanted to work on the courses.

I challenged her thinking and stated that the PowerPoint slides were just content and that any good course designer could convert the content into an effective and engaging course. Who cares how it’s built? And besides, this rapid e-elearning thing wasn’t a trend but the future of e-learning. She literally laughed at me and walked away. Today, they no longer employ Flash developers and the bulk of their courses are built using a rapid e-learning product.

How the E-Learning Industry Has Evolved

The industry is evolving and the tools are getting easier to use. And that’s not going to change. It started with simple PowerPoint-to-Flash conversions but today you can build some pretty complex interactions with no programming background. Here are a few things I see:

  • Most companies have some sort of investment in rapid e-learning. In fact, Articulate is in over 60,000 companies and most of those have replaced their Flash teams with Storyline developers.
  • Most of the Flash developers I know have shifted to Storyline. They do some customization using JavaScript and other hacks. But they’re still not doing a lot of custom programming because the software has made it easy to do.
  • Most of the complainers of rapid e-learning are e-learning companies who charge a lot for custom development. It hurts them to see you empowered to build your own courses. You know who they are because all of their blog posts complain about what’s wrong with e-learning. I see them as the elephant companies that are big and slow. But the reality is that most companies are looking for cheetahs and not elephants. If you’re an elephant, you’ll have plenty of time to look at your gorgeous mechanical watch.
  • There’s always a need for sound instructional design (which should be part of any course, rapid or not) and custom development. In fact, I think the advent of rapid e-learning has helped our industry grow which has created more opportunity for the custom developers and those who can help organizations build better e-learning and do more than push out bullet point screens.
  • Today, rapid e-learning has progressed beyond simple PowerPoint conversions. Essentially you have a choice between tools like Storyline that allow for custom development or form-based tools like Rise, where you assemble content and drop it into specific forms. Both form and freeform authoring are viable options to meet different needs.

What You Need to Do in 2017

  • Templates are powerful. They get dismissed, but you can build a template for anything and they don’t need to be those simple bullet point templates. They can include all sorts of pre-built interactivity. One of my favorite features in Storyline is to save any interaction as a template. Here’s an example of a simple interaction that could be a template for quick knowledge checks. It’s one slide and no layers. Adding a new card is just a matter of copying and pasting. Super easy to build and make into a template. And it’s a big time saver when you need this type of interaction. Make an investment to build a few interactive templates or download some of the free ones and then you always have a tool chest of interactive templates.
  • Build the right course for the right project. Not every course requires elaborate decision-making interactions. And at the same time, instructional design is more than slapping some content on a screen. Figure out which requires what and then spend your resources wisely. And remember most learning doesn’t happen in the course. Here are a couple of posts to know if you’re building the right course and separating information from performance courses.
  • Smaller courses are easier to consume (and create). There’s a trend towards microlearning as if it’s something new, but it’s not. It’s just that creating the content in smaller chunks is now more viable and the reality is people can only take in so much content. It’s easier to build smaller modules and then deliver them over spaced intervals. You’ll most likely see more impact and you’ll definitely be able to maintain and update the smaller modules more efficiently.
  • Understand the tools. Generally you have a choice between form and freeform applications. Form-based tools allow you to copy and paste content into pre-determined forms; or you build your content in a freeform environment. Both are great options but they each have different requirements. If you use a form, you’re mostly constrained to the form. If you don’t want those constraints, then use a freeform application, but understand you need to determine how things will look and work as opposed to just adding them to forms.
  • Focus on your development. Commit to a few e-learning challenges this year to build your skills and your professional network. Read some e-learning books and then apply what you learn to your courses. Build a portfolio to document your skills.
  • Share what you know and do. I am a big proponent of community and I know that many course developers are either by themselves or on small teams. The community provides a place to interact with and learn from your peers. It’s also a place to trade files and show examples. If you need more help figuring this out, read Share Your Work.

What are your plans for the 2017? Do you have any e-learning goals? How has the industry changed for you? What are you looking forward to?

Events

Free E-Learning Resources

Want to learn more? Check out these articles and free resources in the community.

Here’s a great job board for e-learning, instructional design, and training jobs

Participate in the weekly e-learning challenges to sharpen your skills

Get your free PowerPoint templates and free graphics & stock images.

Lots of cool e-learning examples to check out and find inspiration.

Getting Started? This e-learning 101 series and the free e-books will help.


free templates

Here’s a list of all of the free resources shared in this blog and a few bonuses. I hope you enjoy them and can use them in the upcoming year.

Free Bonus

Here are a few bonus items not included in previous posts:

Free Applications

Free Multimedia

Free E-Books

Free Templates

Events

Free E-Learning Resources

Want to learn more? Check out these articles and free resources in the community.

Here’s a great job board for e-learning, instructional design, and training jobs

Participate in the weekly e-learning challenges to sharpen your skills

Get your free PowerPoint templates and free graphics & stock images.

Lots of cool e-learning examples to check out and find inspiration.

Getting Started? This e-learning 101 series and the free e-books will help.


free e-learning PowerPoint template

I created a couple of simple quiz templates to use in a workshop and thought I’d share them here as well. One is created in Storyline and the other in PowerPoint. I also added a tutorial video for those who want to learn more about using the template for a simple quiz in Storyline.

Free Quiz Template: Storyline

You can download the free template here. It contains two slides. The first slide is a graphic slide that you can customize to meet your needs. And then once you’re done, do a Convert to Freeform and turn it into a quick quiz questions.

free Storyline template

In the video I show some ideas on how to customize it and apply a color scheme, as well as how to work with the feedback master.

Free Quiz Template: PowerPoint

The free quiz template in PowerPoint is pretty simple. If you want to edit the interactive part you need to do so at the slide master level. This is a good example of leveraging the slide master to make your interactive slides easier to manage and edit.

free PowerPoint quiz template

Hope you enjoy the templates. They’re great to practice using the software features. Feel free to use them as you wish.

Events

Free E-Learning Resources

Want to learn more? Check out these articles and free resources in the community.

Here’s a great job board for e-learning, instructional design, and training jobs

Participate in the weekly e-learning challenges to sharpen your skills

Get your free PowerPoint templates and free graphics & stock images.

Lots of cool e-learning examples to check out and find inspiration.

Getting Started? This e-learning 101 series and the free e-books will help.


accessories audio narration

In a previous post, we explored some inexpensive microphones for recording audio narration. However, sometimes having a microphone is not enough. There are other accessories that help put the microphone in the correct position and offer other assistance for recording the best quality audio.

In this post we’ll look at a few accessories to help get better audio quality when recording narration.

Use a Microphone Stand when Recording Audio Narration

It’s a good idea to invest in a microphone stand. It helps control placement of the audio. There are a few inexpensive options for microphone stands.

desktop microphone stand for audio narration

  • Some people use simple desktop stands. They’re OK but I find they often get in the way and chances are greater of accidentally bumping the stand and messing up your audio narration. This is especially important because most people just record audio and aren’t monitoring it at the same time. Thus you don’t realize that the audio has the bumping sound until you preview it.

microphone stand for audio narration

  • Depending on your room set up, a viable option is a stand up mic stand. This allows you to record standing or sitting down with lots of flexibility with how and where you position the microphone. I prefer the ones with the boom arm so that I can move it in position. With a desktop stand like above, people tend to lean down into the mic which may mean they move around more or don’t breathe properly while talking. People tend to talk better standing up and this stand lets you do so.

swing microphone stand for audio narration

One thing to keep in mind, you get what you pay for. The less expensive products are great if you’re not moving them around too much. But moving a lot, means they’re more apt to get banged up and break.

Use Audio Dampening to Get Better Quality Audio Narration

Sound waves tend to bounce around a lot. I work from a home office and the hardwood floors in the hallway act as a funnel, moving all the sound to my office. I dampen the sounds by putting a piece of carpet in front of the door and I hang a thick blanket over a rolling clothes rack I purchased from Ikea. It doesn’t look great, but it works well.

sound dampening for audio narration

You can look more polished with just a few accessories using different types of filters that sit between your microphone and the incoming audio wave. Sometimes all you need is a simple foam ball that sits on top of the microphone. Or a pop filter which helps catch your breath sounds.

Then there are all sorts of acoustic shields that clip onto the microphone or attach to the mic stand. I like this one that expands to create a larger barrier but folds into a nice portable package.

acoustic shield for audio narration

Some people I know use the portable sound boxes that are filled with foam. You can buy them at a decent price or make your own using some acoustic foam and a cardboard box. If you work in a cubicle, it already has some sound dampening. You could also put together a makeshift studio by assembling a few cubicle walls. A lot of companies have extras laying around or you can buy some at an old office supply store. The panels are top quality and do a great job.

preamp for audio narration

If you really want to get fancy you can buy a preamp to better control the audio going into your computer. I don’t use one, but David does and his audio quality is always nice and rich. It may seem extravagant to get a preamp, but consider this: your microphone takes in sound waves and outputs a signal. When you use a less expensive microphone you tend to get a lower signal (or low sensitivity). A preamp will boost the signal for better audio. This is important because you’ll never get better quality than what you record.

What I find amazing is how inexpensive and available these accessories are compared to a few years ago. All of the items are less than $100 and most are in the $20 range.

Which accessories do use? What tips do you have using them? Feel free to share in the comments section.

Events

Free E-Learning Resources

Want to learn more? Check out these articles and free resources in the community.

Here’s a great job board for e-learning, instructional design, and training jobs

Participate in the weekly e-learning challenges to sharpen your skills

Get your free PowerPoint templates and free graphics & stock images.

Lots of cool e-learning examples to check out and find inspiration.

Getting Started? This e-learning 101 series and the free e-books will help.


locked navigation e-learning

“How do I lock navigation?” is one of the first questions we get when showing people how to use our software. In fact it’s one of the questions we had to revisit in a recent Articulate Live webinar where people wanted to see the features used to lock navigation.

I understand the question and why it’s asked, but from an instructional perspective it’s one of the most frustrating questions to answer because locking navigation may inhibit learning and it’s a miserable experience for the person stuck in a boring course irrelevant to their needs.

Why Are We Asked to Lock Navigation?

There are a number of reasons why courses are locked. Most of the time the customer wants some assurance that the course taker isn’t just clicking the next button and skipping important information. Locking the navigation and forcing people to go through the course slide by slide is one way to guarantee that they’ve seen the slide.

But does being exposed to the content meet any real objectives? Doesn’t the content exist to promote some sort of decision-making or performance?

How to Move Past Locked Navigation

There are a number of ways to move past locking your course navigation. Here are a few ideas:

  • See the course in two parts. Part one = information required to make decisions. Part two = the types of decisions they need to make to show they know the information. Focus on how the course takers can demonstrate their understanding.
  • Step away from the solution. The elearning course is a solution to meet specific objectives. My guess is that the business objective isn’t to look at screens of information. Why does the course exist? Build it to meet those objectives and rest assured that locked navigation doesn’t meet them. Activities where they practice and demonstrate understanding is a better way to meet objectives.
  • Avoid linear courses. Most courses are linear, “A to Z” courses. They beg to be locked. If you open them up and make them more exploratory, this makes locking them less critical.
  • Create relevant content & context. People don’t normally make a habit of reading policies at work. But they routinely make decisions that hopefully align with the policies. Convert your content into real world activities where they use the information to make decisions. This requires them to know the information and prove it.
  • Lock the course at decision points. You probably can’t get past some form of locking. In that case, create decision points where the course taker demonstrates understanding of the content to move on. This allows you to give them freedom to explore content between the decision points.
  • Replace locking with rewards. Instead of forcing them through content, provide an incentive to collect information (or make good decisions with the information). This can be in the form of a dashboard where they collect badges to reward completion.
  • Chunk the course into smaller segments. Even with all of these tips, there’s a good chance you still have to create locked navigation. In those cases, chunk the course content into smaller segments. I like to call them coursels (course morsels). No one likes locked navigation, but it’s definitely a lot less frustrating when it’s a quicker experience.

What tips do you have for those who are stuck in the world of locked navigation?

Events

Free E-Learning Resources

Want to learn more? Check out these articles and free resources in the community.

Here’s a great job board for e-learning, instructional design, and training jobs

Participate in the weekly e-learning challenges to sharpen your skills

Get your free PowerPoint templates and free graphics & stock images.

Lots of cool e-learning examples to check out and find inspiration.

Getting Started? This e-learning 101 series and the free e-books will help.


3-ways-guide-learners

Inevitably you have to provide instructions on how to do something in the course. The question is when to provide them and at what level of detail. In this post we’ll explore three ways to guide the instruction process.

Provide Instructions Upfront

The most common way to provide instructions is to do it all up front. This is what I see in most of the courses I review. Generally you share what needs to happen and when. Depending on the complexity, you may provide some details and screen shots. The point though is that all of the instructions come up front and then the person continues through the course.

  • Pros: this is probably the easiest thing to do; the gate screen concept works for this approach. Some people add instructions and help reminders to the player for quick access.
  • Cons: they’re all up front and sometimes people aren’t quite clear on expectations until they’ve had some experience with the course or have made a few mistakes. They probably need more context before they even know what to do with the instructions.

Provide Instructions at the Point of Need

Get what you need as you need it. Why burden them with instructions at the front end of the course when they will most likely forget them anyway? It makes sense to delay instructions until the person needs them.

For example, you provide some context upfront and then have them go through the procedure. Walk them through it. You can also delay the instructions and if no action is taken, then provide instructions after it’s determined they’ve not acted (or possibly done something incorrectly).

  • Pros: you’re not overwhelming them with content, let them build context, and get what they need at time of need
  • Cons: it takes a little more work to build the mechanism to evaluate and time instructions; may be intrusive to the process for someone who gets it. Make sure to not lock the process.

Provide Instructions as Practice Activites

I like the Wii-type instructions where new tasks are presented with practice activities. This builds off of the progressive instructions in option two where the instructions are provided at time of need. However it does introduce the practice element. This allows a person to practice to a level of competence.

Here’s an example: “Address customer issues and input them into the system. Before you begin the scenarios you can practice and learn the proper input procedures. Do you want to practice? Yes or No?”

“Yes” moves them to a practice scenario with step-by-step guidance. “No” moves them into the challenge activity where they are timed and will get feedback later.

Essentially you say: “Here’s what you need to do. Do you want to practice before we get started? OK. Here is a practice opportunity. No? OK. Let’s proceed with the activity.”

  • Pros: instructions are just-in-time and in context with the course; disarms new learners and provides confidence; frees tenured learners to ignore.
  • Cons: the major con to this approach is the time it takes to build instructions that are effective and relevant. Probably requires working knowledge of variables to create an adaptive path.

So there you have it, three ways to guide your learners through the course. Which way do you prefer? What other options do you recommend?

Events

Free E-Learning Resources

Want to learn more? Check out these articles and free resources in the community.

Here’s a great job board for e-learning, instructional design, and training jobs

Participate in the weekly e-learning challenges to sharpen your skills

Get your free PowerPoint templates and free graphics & stock images.

Lots of cool e-learning examples to check out and find inspiration.

Getting Started? This e-learning 101 series and the free e-books will help.


best mics for audio narration

While I’ve covered audio recording tips and tricks in the past, one of the most frequent questions I’m still asked is about microphones. So today, I’ll show you the different mics I use and demo how they sound.

I’ll have to admit, I’m no audio pro and I’m also a bit less dogmatic about audio quality than some elearning developers. My main goal is to get decent sounding audio without a lot of post-production.

The reality is that most end users are hearing the audio through cheap headsets or small device speakers where everything sounds hollow. Also, if you record tutorial videos or do webinars, the audio compression mitigates some of the distinctions you hear in different qualities of audio.

With that said, here are a few thoughts and some recommendations based on the mics I use.

Simple Audio Recording Tips

Here are a few simple ground rules. You learn more by clicking on the links below.

  • You want to record the best audio quality you can initially. There are some things you can do to clean up the audio, but you can’t make bad audio good. If you can only do one thing, get crisp audio.
  • Try to eliminate background noise like air conditioners. Sometimes if I can’t get rid of the noise, I will play some music softly in the background–not Eminem, but something a little softer.
  • Don’t worry about being perfect. You can spend a lot of time finagling your audio only to have you end user listen to it through cheap headphones or speakers where everything sounds muffled and tinny.
  • You should learn a little about audio and some basic editing. You don’t need to be an audio engineer, but learning some recording techniques, how mics work, and how to do some post-editing will really come in handy.

Microphone Recommendations

There are a lot of good microphones out there and they’re not that expensive. I’d plan on spending from $100-$200 on a microphone. You should also invest in a pop screen, a stand, and perhaps some sort of barrier. Here are some of the microphones I use.

I created a quick demo in our new Rise application to show the different mics in use. You can view the link on your mobile devices and compare how they sound versus how they sound on a desktop. I noticed that my iPad which has one speaker masked the issues that I could hear on my desktop. I also noticed that with my iPhone, the ambient audio was more evident that elsewhere.

rise-course-microphones

Click here to view the microphone demo.

Desktop Microphones

  • Blue Yeti Pro. This is what I have in my home office. I like it because I can control the gain and the pickup pattern. This is a big plus. The pickup pattern helps eliminate unwanted sound entering the mic. The Pro costs about $230. But you can buy the Blue Yeti (which is also a good mic) for about $120 and it comes in a bunch of colors to placate the needs of easily distracted millennials.
  • Blue Raspberry. I’ll be doing a lot more recording on the road so I wanted to upgrade my microphone. I just purchased this microphone and will do an update after a few road trips.
  • Samson C03U and Samson C01U. I’ve used both of these mics and think they’re great a great value. Both mics are in the $80 range but for about $120, you get the microphone, a pop filter, and shock mount. Not a bad deal. I’d choose the C0U3 because it has better pick up patterns. I quit using the mics when I received the Blue Yeti Pro. If you’re on a budget the Samson mics are worth it.
  • Samson Go Mic. I love this little mic. At $40, it’s a great price and sounds good. The build quality is really solid and I’ve gotten lots of use out of it over the past few years.

The links to Amazon microphones may produce a slight commission.

Headset Microphones

I’m not a fan of headset microphones for recording narration because they tend to pick up a lot of breath sounds. However, they are relatively inexpensive and decent enough in output. But because they’re headset microphones you don’t get a lot of control over the pickup.

I do like to use headset microphones for recording tutorials and doing webinars because it allows me to operate hands free and not worry about moving around and away from the microphone. I also prefer wireless headsets over wired ones.

ModMic: I haven’t used this mic but I really like the idea. You attached the microphone to your headphones. Many of the headphone mics are uncomfortable so you can use your own headphone and attach the ModMic with a magnet (which means you can remove it).

modmic

Here are the three headset microphones I currently use:

  • Plantronics Audio 995. It’s wireless which gives me some range of motion. I don’t like having a bunch of cables running over my desk when I record. Having the wireless mic is nice if I have to record some audio narration from my subject matter experts.
  • Plantronics 478. This is similar to the one above but it has a USB cord. Both of those microphones have noise canceling features. Usually that means there’s one mic that records your audio and another smaller one that records ambient sound and cancels it out.
  • Logitech H800. I just got this one. I like it because it’s wireless and has a built in charger. I also like it’s portability for traveling.

One question you may ask is why I have so many microphones, especially headset mics. I travel a lot so I want good portable options and I like the choice of desktop and headset microphones. I do recommend getting a few extra headset mics, one for you and the others to share if you do recording with subject matter experts.

Previous Posts on Using Audio for Narration

Again, I’m not an audio pro and recording in a controlled recording environment. Instead I’m a one-man recording studio, in a home office, with a limited budget. I want good quality audio at an affordable price. From my experience most rapid elearning course authors are in the same boat.

Which microphones do you use and why? Feel free to share in the comments.

Events

Free E-Learning Resources

Want to learn more? Check out these articles and free resources in the community.

Here’s a great job board for e-learning, instructional design, and training jobs

Participate in the weekly e-learning challenges to sharpen your skills

Get your free PowerPoint templates and free graphics & stock images.

Lots of cool e-learning examples to check out and find inspiration.

Getting Started? This e-learning 101 series and the free e-books will help.


instructional design for new century

I have an older Sega Master System. I recall spending hours and hours playing on that thing. It was cool 25 years ago. Then it was lame. But now it’s cool again. I took it out of storage to show my kids.

What struck me were the instruction booklets that came with the games. They seem so archaic especially when I look at how my son learns the games. He downloads them and just starts playing. What’s changed?

Back Then

  • The expectation was to have instructions. How else would you learn?
  • Video game consoles were still relatively new, so it made sense to have booklets to help new customers learn.
  • The Internet didn’t exist (or at least not for me) so getting access to information wasn’t easy. Thus an instruction book made sense. I also didn’t have any friends who had the console to offer counsel.
  • It was an analog age, thus having analog content was the norm. The idea of a digital instruction guide made no sense unless you were Marty McFly.
  • An instructional designer on the training team convinced someone that people will never learn to play the games without clear instructions.

instructional design manual for Sega Master System

Today

  • Expectations have changed. Game players don’t expect detailed instructions. They just jump right in.
  • Instructions are provided just-in-time as you need them. I love the way it works with the Wii. Right before you do something new, they give you quick instructions and a practice option.
  • Game players are often connected to other game players and learn through their community of peers. They learn how to play and they learn the nuances and cheats, as well.
  • Who has time to read through manuals?
  • Game instruction is often predicated on simple, intuitive steps where the challenges increase with proficiency. Typically, the learning is chunked with the option to repeat when necessary. And you tend to pick up where you left off.

How does any of this relate to how we build courses today?

Most of the elearning courses I see aren’t overly complex. Yet they’re saddled with meaningless navigation instructions and all sorts of content irrelevant to the learner’s needs or the course’s learning objectives. In fact, the other day I was talking to a young man about the elearning industry and the career opportunities it presented. I showed him how the authoring tools work and then showed him a bunch of examples.

One of the first things he noticed was all of the navigation instructions and lead up to the course. And the other thing was all of the information. He asked how to move past it and when he got to the real action. Unfortunately, all of the examples were locked down and there was no action.

Here are a few tips I’d offer for today’s course builders:

instructional design starts with small bite-size courses

  • Keep the courses short. Shorter courses are more digestible. They keep people focused.
  • Break the content into single topics. This allows you to accomplish the first item above. And it provides freedom for the learner to get what they need.
  • Get rid of the navigation instructions. The course navigation design should be intuitive. If you need a course on navigating the course, something’s broken.
  • Provide just-in-time instructions. If you want the person to do something different or unique, then provide the instructions at the point when they’re needed. I like the way Rick added the instructions in his Hero Land module.

instructional design provides just-in-time contextual instructions

  • Replace instructions with exploration. Of course this works in context with the course’s objectives, but there are all sorts of mechanisms you can use to get the learner to pull in content, rather than you pushing it out.
  • Add activities where the person needs to collect information and then make decisions. That’s how you can leverage exploration.
  • Understand the learning happens. Just because we build a course doesn’t mean people learn. They’ll learn what they need. And often I suspect what we build interferes with their learning. This is usually the case when the branding folks and the legal department get involved with your projects.

instructional design knows that learning happens

  • Most of the learning happens outside of the course. Find ways to connect what you’re doing to what they do once they’ve completed the course.
  • Communities of practice trumps cumbersome manuals. In today’s world, part of training should include getting the community of practice connected to share tips and tricks and offer support.

Those are a few thoughts on what we can do to move our training forward. What tips do you have for today’s course builders? Add them in the comments section.

Events

Free E-Learning Resources

Want to learn more? Check out these articles and free resources in the community.

Here’s a great job board for e-learning, instructional design, and training jobs

Participate in the weekly e-learning challenges to sharpen your skills

Get your free PowerPoint templates and free graphics & stock images.

Lots of cool e-learning examples to check out and find inspiration.

Getting Started? This e-learning 101 series and the free e-books will help.


e-learning example

Reviewing elearning examples is a great way to learn. You find inspiration to prompt your own ideas and by deconstructing the courses, you learn to use your elearning software to create something similar.

Here are some really nice elearning examples that I’ve seen in the community recently. Check them out and then try to figure out how they were built.

E-Learning Example: Hero Land

e-learning example heroland

Click to view the elearning example.

Here’s a great module built by Richard Lee Hill. This is one of the slickest demos I’ve seen in a while and an excellent example of what you can create with the authoring tools. He combines some great gaming mechanics with learning more about Storyline.

Deconstruction questions for you:

  • How to move the character freely about the screen?
  • How to collect items and rewards and use those throughout the module?
  • How to create just-in-time instructions?
  • How are animations used? Characters? Backgrounds?

There’s a lot to learn by deconstructing this module. What I really like is that as you collect the eBits you have links to video tutorials that explain parts of how this was created. There’s also a bonus high five because he was able to work Goudy Stout into the module.

E-Learning Example: How to Drink and NOT Drive

e-learning example drink and drive

Click to view the elearning example.

The folks are 42 Design Square always do nice work. I’ve featured them a few times in the past. This course integrates some nice animations and audio effects. I also like the way they used the variable panel to select drinks and see the impact when driving.

Deconstruction questions for you:

  • How did they create the animation effects?
  • How would you create a similar panel in your courses?
  • How to integrate the drink dashboard with the breath analyzer meter?

Lots of good things happening in this demo. See if you can prototype some of what they’ve done.

E-Learning Example: Workplace of the Future

e-learning example workplace future

Click here to view the elearning example.

This example looks at the workplace of the future and was done by Learnnovators in collaboration with Clark Quinn. This style of course is a bit closer to what you might build at work and includes some good scenario-like activities.

Deconstruction questions for you:

  • How did they create the custom player features?
  • How did they create the resource page?
  • Can I template this structure for easy re-use?

There you go, three good examples to whet your appetite. The trick is to explore the modules and consider how they were built. And then try to build quick prototypes to see if you can figure it out.

If you have any questions don’t hesitate to connect with the course creators or jump in the community and ask.

Events

Free E-Learning Resources

Want to learn more? Check out these articles and free resources in the community.

Here’s a great job board for e-learning, instructional design, and training jobs

Participate in the weekly e-learning challenges to sharpen your skills

Get your free PowerPoint templates and free graphics & stock images.

Lots of cool e-learning examples to check out and find inspiration.

Getting Started? This e-learning 101 series and the free e-books will help.