The Rapid Elearning Blog

Archive for the ‘Multimedia’ Category


search free stock image sites

It seems like every day there’s a new site that offers free stock images. There are so many, that sometimes it’s a burden to process so many choices. Seriously, how many stock images are you really using?

In the past, I’ve save you some time by reviewing free stock images and curating them into contextual downloads. However, even that can be a bit much to manage. What you need is an easy way to search through all of those free stock image sites so you can find what you need when you need it.

The good news is that there are three such sites where searching and finding free stock images is possible.

Stock Up

search free stock images via Stock Up

Stock Up is courtesy of Site Builder Report. It’s a search engine that indexes free stock photo sites. I consider it the Lord of Rings site because it’s one site to rule them all. Because of this, it may be the only link you need since most of the free stock image sites that I listed in this post are already indexed there.

Stock Snap

search free stock images via Stock Snap

Stock Snap is similar to Stock Up because it’s a curated resource of free stock images that don’t require attribution There’s a lot of overlap.

Exposure

free stock images

Exposure another site that searches free stock image sites. They’re listed as free for commercial use.

You’ll notice that all of these sites pull from the same free stock images sites. As I mentioned before, you probably only need to use one of these sites since they all host the same free stock images. But it doesn’t hurt to have all three sites at your fingertips.

Events

Free E-Learning Resources

Want to learn more? Check out these articles and free resources in the community.

Here’s a great job board for e-learning, instructional design, and training jobs

Participate in the weekly e-learning challenges to sharpen your skills

Get your free PowerPoint templates and free graphics & stock images.

Lots of cool e-learning examples to check out and find inspiration.

Getting Started? This e-learning 101 series and the free e-books will help.


no audio narration for e-learning

Audio narration is part of multimedia and adds a lot of value to your elearning courses. However, there are times when it makes sense to NOT use audio in your courses.

Do Not Use Audio Narration When They Can’t Hear It

If those taking the course can’t hear the audio narration, then it makes sense not to include it. This probably seems obvious, but often we don’t get to meet those who take the courses so we’re not always aware of their audio limitations. In fact, many of the people I talk to get handed the course content with no access to the intended audience.

There are usually three main reasons why the person can’t hear the course:

  • Technology. Many access the elearning courses from computers that don’t support audio. The computers may not have sound cards or speakers. This is not as common as it used to be, but it’s still a good idea to ask your client if the end users will have access to computers that support audio and if they need headsets.
  • Environment. Some people access the online modules from shared computers in a production environment. Many of those systems don’t have audio output, and even if they did, the environment is too loud to hear it.
  • Hearing disabilities. You may have learners with hearing disabilities. In those cases, you’ll need to make modifications so that they can learn what needs to be learned. Some organizations already require accessible content. Even if it’s not required for your course, it’s a good idea to add closed caption text or some sort of transcript for those who may need it. Here’s a free e-book that discusses best practices for 508 and accessible content.

Do Not Use Audio Narration If You’re on a Tight Budget

Producing good audio narration takes time and doing it right costs money. You need to write, rehearse, and approve scripts that sound like real people talking. Here’s typically what happens:

  • Write the script.
  • Review the script with subject matter experts.
  • Re-write the script.
  • Review again.
  • Re-write the script.
  • Record audio narration and realize the script doesn’t sound right.
  • Re-write script.
  • Record audio narration.
  • Review final course and have upper-level manager tell you that they don’t like the audio and the legal team needs to make a few edits.
  • Rinse and repeat.

Seriously, producing audio narration takes time and adds many variables to the production process with a lot of extra meetings. If you don’t have the resources, it’s better to skip it than doing it wrong or wasting time.

Do Not Use Audio Narration If the Narrator is Not Professional

I have mixed feelings on this next point. There’s a lot to be said about the authentic voice of a real person. And the reality is that in many cases, it makes sense to record your own audio narration. However, there is a big difference between a good speaking voice and a professional narrator.

  • You want a voice actor. Someone once told me that you don’t want a professional narrator, instead you want a voice actor. And recording your subject matter expert who has a good speaking voice is not the same as the person you’d qualify as a voice actor.
  • You don’t need to spend a fortune. There are a lot of ways to hire good voice talent at reasonable cost. Fiverr and services like Voice123 are worth exploring. And you can even find some freelance elearning developers that can produce their own audio.

On the flip side, if you do record your own audio narration:

  • Get a good microphone. I have used the Samson C01U & C03U. Travel with the very portable GoMic, and currently use the Yeti Pro for most of my recording. They’re all good mics. You can get a decent microphone for about $75.  The links to Amazon mics may produce a slight commission.
  • Learn some of the basics with these tips and tricks.

In an ideal world you have a budget to create the best course possible. And this includes inserting great audio narration. Keep in mind that bad audio is the least tolerable form of multimedia. People will tolerate less than perfect image quality before they accept bad audio narration. If you can’t do it right, perhaps it’s best to not do it at all.

Events

Free E-Learning Resources

Want to learn more? Check out these articles and free resources in the community.

Here’s a great job board for e-learning, instructional design, and training jobs

Participate in the weekly e-learning challenges to sharpen your skills

Get your free PowerPoint templates and free graphics & stock images.

Lots of cool e-learning examples to check out and find inspiration.

Getting Started? This e-learning 101 series and the free e-books will help.


multimedia for e-learning blog post

Multimedia for elearning is something common to all of our courses. There’s only so much you can put on the screen. It’s either going to be text or some sort of multimedia like shapes, pictures, or video. In addition, you may have audio narration to complement what’s on the screen.

At some of our workshops we discuss inexpensive ways to acquire multimedia for elearning. We’ll reference some of the previous posts when we’ve discussed different ways to either get free multimedia for elearning or learn to create them yourselves:

However, sometimes you don’t have the time or skill to create your own assets. And all of those free media assets may not fit the real needs of your course design. That means you’ll have to find someone to build them for you.

Fiverr is a site that offers access to all sorts of multimedia and graphic artists for $5 a project. While the advertised costs are $5, most of the projects are limited in scope and the artists are looking for a way to market their skills and have up sells. If you plan it right, you can get multimedia for elearning at a reasonable price.

Here are a few examples I pulled together to give you some ideas. I have no affiliation with any of the artists and it’s possible they may have restrictions on what they will do. So you’ll want to connect with them personally.

Multimedia for E-Learning: Custom Illustrations

multimedia for e-learning inexpensive custom illustrations for e-learning

Proposed plan:

Many of the artists only do head and shoulder images. However, some do full body. They usually have a starting pay scale and range of add-ons. Even if the image goes from $5 to $50 per image, that’s a great deal for custom art work.

  • Storyboard your screens so you know exactly what characters and poses you need.
  • Create a shot sheet with a list of required characters.
  • Find some co-workers and take photos of the expressions and poses as a reference for your artist.

Artists shown: BroomvectorMariadesignsPunisher357

Multimedia for E-Learning: Audio Narration on a Budget

multimedia for e-learning voice over audio narration for e-learning courses

Proposed plan:

As can be seen in the image above, you can select voiceover talent by gender, accent, age, and more. There are a lot of really good voiceover artists on Fiverr. Most of them will do 75-100 words for $5.

This is close 75 words of text:

What would the world be like if the objects that surround us became less mysterious, if not only the bits but also the bolts became something into which we could peer? What if the black boxes that occupy our desks, our homes, our skies suddenly became transparent?

We asked more than a dozen open-minded technologists to explain how applying open source principles to physical devices is shaping the way we work and play.

That means you can get each slide recorded for about $5-15 per slide.

  • Write your narration script.
  • Get rid of half the words. You don’t need as much as you think you do.
  • Make sure it sounds like a human is reading it and not some corporate drone or lawyer (although they’ve been known to be human).
  • Get the final script approved before sending it out to be recorded to avoid do overs.

Multimedia for E-Learning: Video Actors & Presenters

multimedia for e-learning video presentations and green screen video for e-learning

Proposed plan:

Adding video to your elearning courses adds a lot of texture and personality. To me this is one of the best things available on Fiverr because creating video requires video production skills, audio narration, and great on-screen talent.

Many of the producers offer green screen recording so that adding the videos to your course screen is seamless. Although unless you can do the editing, you want to request that the video has a transparent background and not the green screen.

To manage costs and production, I’d only add video to a few strategic sections like the opening, summary of sections, and closing.

  • Storyboard the course to determine where you need video.
  • Develop some shot sheets of required video. Also determine if the person is on left or right of screen. A recording with a transparent background is ideal because you can nudge it into position.
  • Create narration script.

Artists Shown: TamerakSebski22Mjenning

Multimedia for E-Learning: Custom PowerPoint Templates

multimedia for e-learning powerpoint templates for e-learning

Proposed plan:

There are artists who will create infographics, templates, and presentations. Essentially any graphic file can find its way on your course screen. What’s the difference between a PowerPoint, web site, or elearning course screen? They all have the same elements.

  • Storyboard your screens
  • Define visual elements and content containers
  • Determine color scheme  and font style

Artists shown: Mint_IdeasBelieveable VideoDanukz

There are all sorts of other services offered on Fiverr that may add value to your courses. One of the benefits of the site is that you can dip your toes in the market and see how things go. You’ll get some inexpensive multimedia assets and can test the service and responsiveness of potential multimedia developers. As I stated earlier, I have no vested interest in the site or the artists. I just want to give you some ideas on how you might use it to your advantage.

If you do use the services on Fiverr, especially video, let me know. I’d love to see how it turns out.

Events

Free E-Learning Resources

Want to learn more? Check out these articles and free resources in the community.

Here’s a great job board for e-learning, instructional design, and training jobs

Participate in the weekly e-learning challenges to sharpen your skills

Get your free PowerPoint templates and free graphics & stock images.

Lots of cool e-learning examples to check out and find inspiration.

Getting Started? This e-learning 101 series and the free e-books will help.


free vector images online

Do a search for “free vector images” and you’ll find hundreds of sites that boast tens of thousands of free images. The problem is many of them are junk and not even worth your time. Besides, how many free vector images do you really need?

Websites that Offer Free Vector Images

As you may know, many of the sites that offer “free” resources only allow them to be used for personal use. That won’t work for your courses and presentations. To make things simple, I reviewed dozens of websites that claim they offer free vector images and narrowed them down to just a few. My criteria for listing the sites below is that they really are free for commercial use. [updated 3/17/2023]

Some of the sites may require credit or attribution. That’s OK. Here are some tips on how to provide attribution in commercial projects when you use free vector images.

Other Sources for Free Vector Images

Another good source for free vector images is from artist community sites or a graphic artist’s own page. Here are a few additional places to locate some good quality, free vector images:

free vector images via dribbble

  • Dribbble: mostly professional quality images
  • Deviant Art: miscellaneous artist site; it’s a mixed bag but there are a lot of free images
  • Snap2Objects: images created by Mauricio Duque
  • E-Learning Heroes: whatever you find in the community you are free to use for your elearning projects and presentations.
  • PageResource: if you sport a mullet and watch Full House, then this site has the perfect free clip art for you.

Editing Free Vector Images

Most of the free vector images are going to be in .AI or .EPS format. If they’re .PNG or .JPG they’re not vectors. Editing the images requires an illustration application like Illustrator or Inkscape (free). However, you can edit most free vector images that are in .EPS format using PowerPoint.

edit free vector images in PowerPoint

Here’s a post that explains how to edit free vector images in PowerPoint and a tutorial video. Unless you’re comfortable with the illustration apps, I’d look for .EPS files first and use PowerPoint.

So there you go, a complete list of sites that provide free vector images that you can freely use in your presentations and elearning courses.

Events

Free E-Learning Resources

Want to learn more? Check out these articles and free resources in the community.

Here’s a great job board for e-learning, instructional design, and training jobs

Participate in the weekly e-learning challenges to sharpen your skills

Get your free PowerPoint templates and free graphics & stock images.

Lots of cool e-learning examples to check out and find inspiration.

Getting Started? This e-learning 101 series and the free e-books will help.


Articulate Rapid E-Learning Blog - how to create illustrated characters in PowerPoint

PowerPoint is a versatile application. You can use it for all sorts of things from presentations to online training programs. In previous posts I’ve shown you how to customize clip art and create your own graphics.

Today’s tip comes courtesy of blog reader, Daniel Albarrán. He sent me an email stating that once he understood the versatility of PowerPoint it opened his eyes to all sorts of possibilities—one of them being the ability to create illustrated characters.

How to Create Illustrated Characters in PowerPoint

Here are some of the graphics he created in PowerPoint.

Articulate Rapid E-Learning Blog - examples of illustrated characters created in PowerPoint

Articulate Rapid E-Learning Blog - more examples of illustrated characters created in PowerPoint

As you can see, PowerPoint’s a capable application. Pretty cool, huh?

Tips When Creating Illustrated Characters in PowerPoint

Want to create your own illustrated characters? I created a couple of more tutorials with a few extra tips to add to what Daniel started. You can view the tutorials below.

Part 1: Working with PowerPoint’s curve shape.

Click here to watch the PowerPoint tutorial.

Part 2: Working with the custom shapes.

Click here to watch the PowerPoint tutorial.

Here’s a roundup of the PowerPoint tips:

  • Practice using the Curve tool so that you can control the curve and not create too many points. The fewer the points, the easier it is to edit.
  • Edit the shape. Right click on the shape to access the Edit Points feature. From there you can move the points and make adjustments and small tweaks.
  • Show & hide shapes using the Selection Pane.
  • Name the shapes in the Selection Pane for easier management of the image.
  • Use the Shape Union feature to merge the shapes. You can also group them if you want editing control in the future.
  • Right click to save the image. Select .png format to retain the transparency.
  • Don’t worry about being perfect. Also, the less detail the easier it is.
  • Practice, practice, practice. Once you get the hang of it, you’ll never want for the right image. Play around with the gradients and layered objects to create more texture and richness.

Articulate Rapid E-Learning Blog - an illustrated character created in PowerPoint

Here’s the character I created for the tutorials and the one Daniel shared with me. Feel free to look at how they were created.

Now it’s up to you. Do a practice character and see how it goes.

Events

Free E-Learning Resources

Want to learn more? Check out these articles and free resources in the community.

Here’s a great job board for e-learning, instructional design, and training jobs

Participate in the weekly e-learning challenges to sharpen your skills

Get your free PowerPoint templates and free graphics & stock images.

Lots of cool e-learning examples to check out and find inspiration.

Getting Started? This e-learning 101 series and the free e-books will help.


Articulate Rapid E-Learning Blog - create interactive stories with simple pictures and comic-book like panels

The other day I was doing a search for business meeting images and ran into this collage image. It kind of looks like a comic book layout. I played around with some ways to use this image in an elearning course.

Articulate Rapid E-Learning Blog - create an interactive story with this collage image

Here’s a quick demo of the image converted into an interactive slide. I just added some place holder content since the images are not contextual. But in your case, you’d create a collage where the images work together to tell a story.

Articulate Rapid E-Learning Blog - example of an interactive story to replace bullet points

Click here to view the interactive story demo.

Tips & Tricks for Creating an Interactive Story

Here are a few ideas on how you could approach this type of interaction:

  • Create a story. Many courses tend to be heavy on the information and light on relevant context. Rework your content and frame it like a mini story or scenario. In this case, it’s not about a long branched interaction. It’s more like a quick scenario where the course content is framed in a relevant context. People love stories so why not build a story around your information? Plus, the comic-book style layout is kind of popular.
  • Get rid of bullet points. A lot of elearning is linear and the screens are loaded with bullet points. Get rid of those bullet points! Why not use a panel for each bullet point? I’d use the large panel to represent the essential point of the slide. And the smaller panels would represent the bullet points or supporting information.
  • Feel free to take your own photos. You don’t need to be a pro to create your own stock photos. Besides many of the smart phones have those cool filters that convert your images and give them a pro feel. So outline a story and then storyboard the photos you’d need to support that story.
  • Create a few panel layouts so that you can rotate through your screens and make them visually a bit different. This post on comic book layouts will help come up with some ideas.

This is a simple technique but and an easy way to convert bullet point slides into something a bit more visually engaging. And with a little effort you can frame the information into something more story-like and interactive. It’s a step away from a content dump and a step into meaningful content.

What do you think? Would this work with any of your elearning courses?

Events

Free E-Learning Resources

Want to learn more? Check out these articles and free resources in the community.

Here’s a great job board for e-learning, instructional design, and training jobs

Participate in the weekly e-learning challenges to sharpen your skills

Get your free PowerPoint templates and free graphics & stock images.

Lots of cool e-learning examples to check out and find inspiration.

Getting Started? This e-learning 101 series and the free e-books will help.


The Rapid E-Learning Blog - 3 PowerPoint tutorials

I know it’s hard to believe, but apparently, there are many people who don’t like PowerPoint. Obviously, there are a lot of bad presentations created with PowerPoint, but it seems to me the blame rests on the shoulders of the presenter and not the tool. Besides, PowerPoint’s a versatile tool that’s used for more than bad presentations.

Personally, I think PowerPoint’s one of the single best multimedia applications. The secret is to look at PowerPoint in a different way. And once you do that you’ll see that it offers an assortment of capabilities.

I just returned from the Training 2012 Conference in Atlanta where I presented on some PowerPoint tips and tricks. For those of you who couldn’t attend, I’ve included links to PowerPoint resources that I’ve shared in previous sessions.

The Rapid E-Learning Blog - free PowerPoint resources and tutorials.

Recently, I was sharing how PowerPoint makes a good image editor. After the session, someone asked about this video where you learn to create a stickout effect that lets the image stick outside the box. It’s a basic cropping technique that allows you to open up the page and add more visual interest to the screen. The person wanted to know how to do that in PowerPoint.

The Rapid E-Learning Blog - the stickout cropping technique

I like this question for a few reasons. It lets me demonstrate how PowerPoint can be used to edit images. And it helps teach more about the features and capabilities of PowerPoint in general. Even if you don’t use PowerPoint to do this on a regular basis, practicing this technique is an excellent way to learn more about PowerPoint’s features.

So let’s look at a few ways to create the “stickout” effect in PowerPoint.

PowerPoint Tutorial 1

The Rapid E-Learning Blog - edit images in PowerPoint tutorial

Click here to view tutorial 1.

PowerPoint 2010 has a background removal feature. However, if you’re using older versions of PowerPoint you can still get the stickout effect. This tutorial shows how.

PowerPoint Tutorial 2

The Rapid E-Learning Blog - edit images in PowerPoint tutorial

Click here to view tutorial 2.

In this tutorial you learn to use PowerPoint 2010’s background removal feature to create the stickout effect.

PowerPoint Tutorial 3

The Rapid E-Learning Blog - edit images in PowerPoint tutorial

Click here to view tutorial3.

This tutorial combines the background removal feature with a duplicate image. Learning to work with layers and multiple images is definitely going to open possibilities when editing images in PowerPoint.

Consolidated PowerPoint Tutorials

I know some of you can’t access the YouTube tutorials at work, so I downloaded the video files and used them to test a drag and drop video player idea in Articulate Storyline. You drag the DVD icon to the orange box and it loads the video. The cool thing is that it only took a few minutes to build the functionality.

The Rapid E-Learning Blog - PowerPoint tutorial videos in Articulate Storyline drag and drop elearning

Click here to view the three PowerPoint tutorials.

You may never need to use this specific image editing technique in PowerPoint, but going through these tutorials will help you learn more about PowerPoint’s features and develop a greater appreciation for the application’s capabilities.

Events

Free E-Learning Resources

Want to learn more? Check out these articles and free resources in the community.

Here’s a great job board for e-learning, instructional design, and training jobs

Participate in the weekly e-learning challenges to sharpen your skills

Get your free PowerPoint templates and free graphics & stock images.

Lots of cool e-learning examples to check out and find inspiration.

Getting Started? This e-learning 101 series and the free e-books will help.


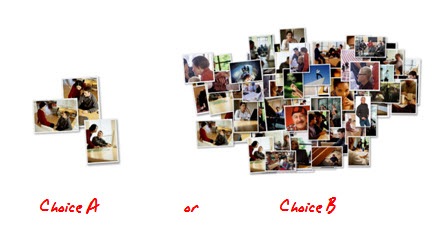
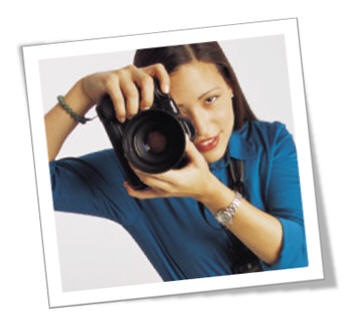
Going to a stock image site and looking for just the right pictures can be very time-consuming and a drain on your limited resources.  Why not create your own stock images?  If rapid elearning software makes everyone an instructional designer, then surely a digital camera makes us all photographers. 🙂

Obviously, this approach doesn’t work for everyone and taking good photos is an art in itself.  However, it is a cost effective approach and with some practice very viable.

Here are a few basic tips to get started.

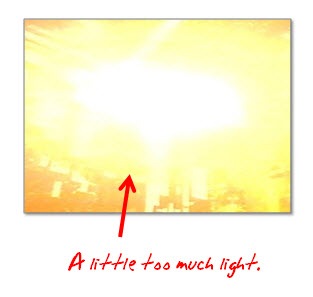
1. Flood the area with light.

A lot of images appear grainy because there’s not enough light.  A good rule of thumb is to flood the area with light.  You’ll want to use as much light as possible without actually vaporizing your subjects.  The more light you have, the better clarity you’ll get on the images.  You can control the stark shadows by diffusing the light which you can do by bouncing it off of the walls or ceiling.  Or just move the light source back a little.

The Rapid E-Learning Blog: subjects are vaporized by too much light

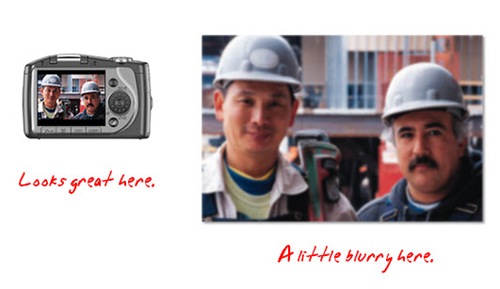
 2. Keep the image in focus.

The problem with a lot of digital cameras is that after you take the shot, it looks great on that tiny LCD screen.  However, when you get into the office to edit the photo you see that the image is a little out of focus.  Your best bet is to use a tripod (or at least rest the camera on a solid surface).

The Rapid E-Learning Blog: keep images crisp by using a tripod

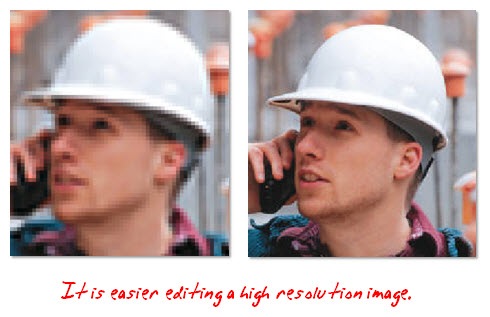
3. Use the best quality settings you can to get the best image quality.

I had a friend who would always use the lowest settings on his digital camera because he wanted to have room for as many photos as possible.  That made no sense.  He had room for something like 5000 photos.  If he had used the highest quality settings, he would have still been able to put a few hundred photos on the camera.

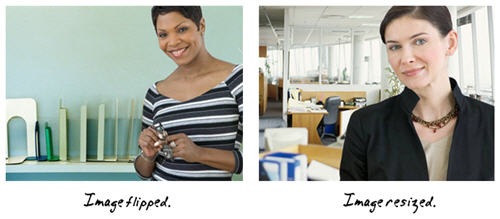
Here’s the deal.  You can’t make a bad image good (even if you send it to Sunday school).  So, you want the best quality possible from the get go.  You can always frame and resize the pictures later.  However, you won’t be able to make a low quality image better.

The Rapid E-Learning Blog: get the best resolution possible

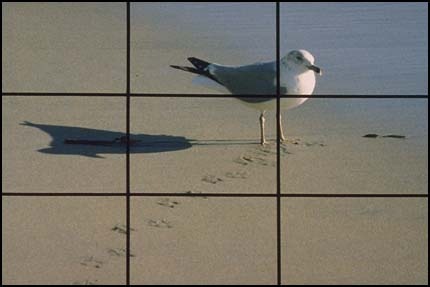
4. Remember the “rule of thirds.” 

Divide your image in thirds.  The best pictures will have the subject intersect two perpendicular lines.  You can find a quick explanation of the rule of thirds here.  My digital camera even has a grid feature to make this easier.  Yours might, too.

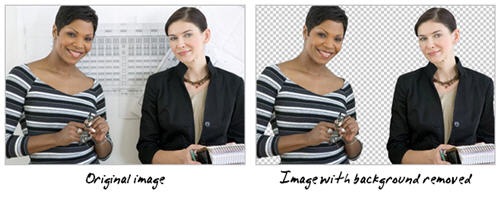
The good thing with editing software is that you can always crop your photos to better frame your subjects and make the pictures more interesting.  This is also why you want the best quality and highest resolution as a starting point.

The Rapid E-Learning Blog: follow the rules of thirds


5. Don’t take just one shot.

It used to annoy me when I’d send someone out to get a photo of a machine operator on the shop floor and he’d come back with just one picture.  It’s a digital camera, for crying out loud!  Take as many pictures as you possibly can.  It’s not film.  There are no development costs.  The more choices you have, the better off you’ll be.

The Rapid E-Learning Blog: take as many images as you need

6. Create visual interest.

Make the images interesting by shooting from multiple angles and distances.  Take one wide angle shot.  Get another that’s closer and tighter.  And, then do a close up, or even extreme close up.  Get down low.  Get up high.  Tilt the camera a little.  You don’t want all of your photos to look the same or be from the same angle.

Also, try to keep the people from looking at the camera.  You want things to look natural.

The Rapid E-Learning Blog: create visual interest

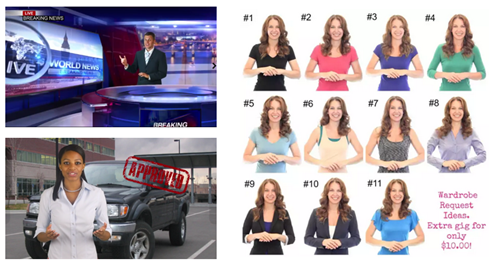
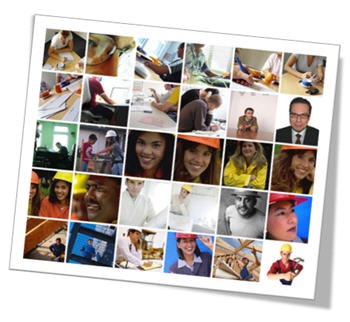
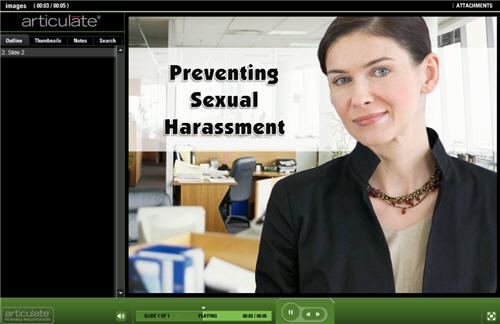
7. Use real employees to make the images authentic.

People like to see co-workers and themselves in the elearning courses.  Take advantage of this.  It’s also a way to build some interest in the course prior to roll out since the break room will be abuzz, eagerly anticipating the final product.

The Rapid E-Learning Blog: Jim the hero

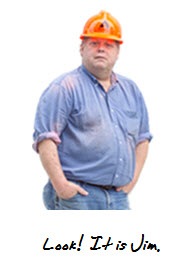
8. Don’t use real employees because they could be losers.

There’s nothing worse than having John Doe (or your state’s governor) in your ethics course and then find out two weeks later that he was fired for lying about his sales quotas or worse.

The Rapid E-Learning Blog: Jim the loser

Depending on your project, it might even be worth your while to hire a few people for a day and take as many photos as you can.  For example, get a bunch of people in a business casual setting and then shoot images of all sorts of conversations.  You can use the extras for future projects.

To keep costs down, I’ve done projects where I’ve had friends come in and we shot some quick photos.  This works as long as they’re not fugitives or have warrants for their arrest.   

9. Get signed releases.

You want to get signed releases to make sure all of your bases are covered.  Here’s a link to learn more about releases.  You probably want one for adults and one for minors.

The Rapid E-Learning Blog: get a signed release

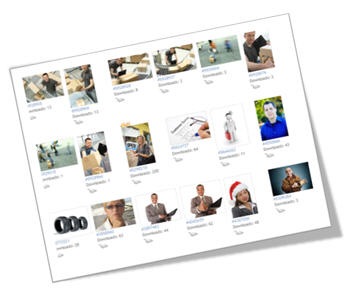
10. Share your photos.

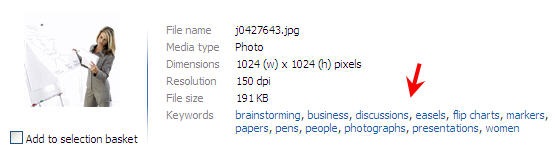
Everywhere I’ve worked, having the right type of images has been an issue.  Sometimes all you need is a guy in a hard hat, or someone who’s not in a suit.  These aren’t always easy to find.  And, it’s not always cost effective to buy one, either.

Why not share your photos?

I have a friend that has shared his photos on stock.xchng.  You can also join a user group on a site like Flickr and share your pictures using a Creative Commons license.

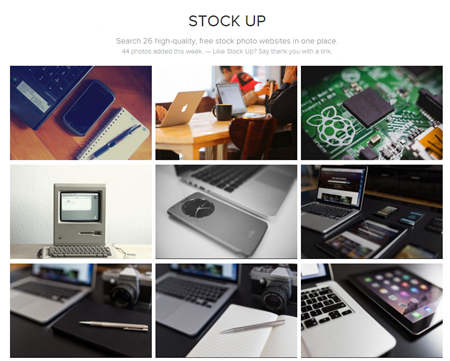
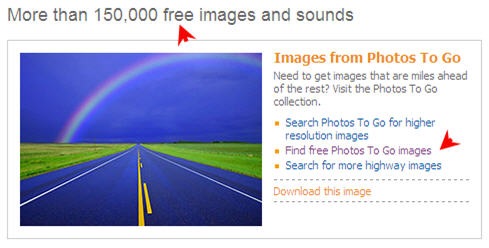
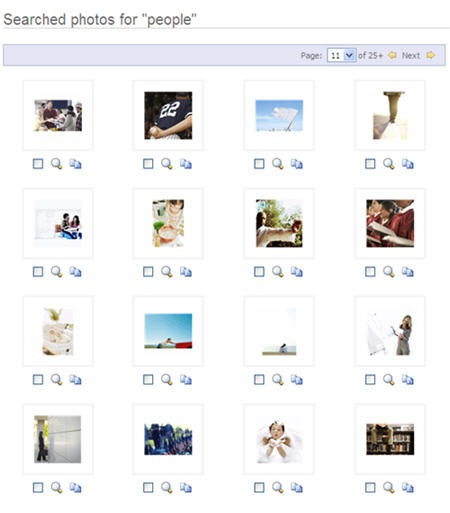
If you’re not inclined to shoot your own images, you can always find inexpensive stock photo subscriptions.

Shooting your own photos can save you a lot of time and money.  With a little practice, there’s no reason why you can’t learn to do a good job.  What are some other tips to help get the best image quality possible?  Feel free to share them with us by clicking on the comments section.

Events

Free E-Learning Resources

Want to learn more? Check out these articles and free resources in the community.

Here’s a great job board for e-learning, instructional design, and training jobs

Participate in the weekly e-learning challenges to sharpen your skills

Get your free PowerPoint templates and free graphics & stock images.

Lots of cool e-learning examples to check out and find inspiration.

Getting Started? This e-learning 101 series and the free e-books will help.


I once had a client who was adamant about never using “cartoons” (as she called all illustrations) in her elearning projects. For her, we either used pictures of real people or we didn’t use graphics at all.  This caused some problems for us because we didn’t have a lot of images of real people with which to work.  On top of that, we didn’t have a large budget that allowed us to buy want we needed.

This issue wasn’t new to me, and from what I gather from the emails I receive, it’s pretty common.  Over the years, I’ve learned to work with tight budgets and limited resources.  In a previous post, I shared how I use stock photos to create characters for my elearning courses.  Today, I share some tips and tricks on how to find free or inexpensive stock images.

Multi-task and put on your photographer’s hat.

Get a digital camera and take your own images.  With some practice and basic understanding of photography, this is a very viable option.  In addition, people like to see themselves and their friends in the courses.

The Rapid E-Learning Blog - woman with camera

I’ve also found that using this approach offers some side benefits.  As you recruit subjects for your photos, it’s a good way to show that a new training program is being developed.  You can leverage this as a way to get some buy-in for the project from your future learners.

At one place I worked they called us trainers the “upstairs people.”  Culturally they did not see us as part of them. The fact that some of the learners can help with the construction of the course goes a long way in them accepting it.  I’ve found this especially true in the production environments where the learning departments are separated from the day-to-day grind.

Obviously, shooting your own photos doesn’t work for everyone or all elearning projects.  However, it is a cost effective approach and with some practice very viable.  Besides, you can always use a graphics program to fix you bad photos later.  🙂

Find free images.

When it comes to working with limited resources, my mentor, Dr. Werner says, “Before you spend a dime, invest the time.”  With a little searching you’ll find that there are all sorts of places to get free images.  Here are some of my favorite options.

The Rapid E-Learning Blog - Miscellaneous stock images

  • Microsoft Office Online.  Microsoft offers quite a few really nice images.  For example, just do a search of “business people” to start.  If you’re like Bono and still can’t find what you’re looking for, then click around on the picture’s key words to get ideas for more images.
  • Stock.xchng.  This is a good blend of free images and links to relatively inexpensive stock images.  They even have some interesting tutorials for aspiring photographers and graphic artists.  You might find the tutorials relevant to editing your images.
  • Flickr.  There are many photo community sites like Flickr where people upload their photos for use based on the Creative Commons license.  Here’s a link to learn more about Flickr’s Creative Common agreements.  While the quality for these images is “hit or miss,” as you can see from the link, there are over 7 million images that are available by attribution, where all you have to do is give credit for the image.  Compfight is a great site that makes searching Flickr easier.

Free is good, especially if you have more time than money.  However, free also offers some challenges such as image quality and easy access to just the right images.  You also run the risk that eventually you run out of pictures and your sexual harasser also has to play the role of senior manager.  While this might work in some cases, this probably isn’t preferable.

Use inexpensive stock photo sites.

There are a number of inexpensive alternatives to the free sites.  Typically you can pre-buy credits and then just download images when you need them.  If I do an external client project, I’ll budget in the cost of stock images and go that route rather than the free alternatives.  It ends up saving time and you get better quality.  Plus, you avoid licensing and copyright issues.

The Rapid E-Learning Blog - Example from stock image site

The stock photo sites are generally easy to navigate and not only can you find the right images, you can usually find them as a series.  This comes in handy when you want an image of the same people in various poses or environments.  You can also download watermarked images to use while you’re building your course before you make the commitment to buy.

I’ll look for a certain style and then click on the photographer’s profile to find more from that photographer.  Sometimes you can also contact the photographers and have them shoot specific photos for you at a reduced price.  It just depends on how “starving” the artist is.

You can always find inexpensive stock photo subscriptions. In fact Graphic Stock (which has a good selection) regularly runs a $99/year subscription with unlimited downloads. They also have a video  and audio service that is reasonably priced.

Paid stock images typically are better quality and offer more choices.  The challenge with them can be the licensing and royalty agreements.  Make sure that you read the license before you download and use the images.

When you look for images, you can end up spending a lot of time.  Make sure you budget that time into your projects.  Sometimes, I’ll make a list of the images we need and let the client do the leg work.

Here are links to some additional sites that were recommended by blog readers.

This should help you get started with the next elearning course where you have to use more than clip art.  If you know of any good resources or have additional tips and tricks on getting access to free or low-cost stock images please share them with the community by clicking on the comments link.

Events

Free E-Learning Resources

Want to learn more? Check out these articles and free resources in the community.

Here’s a great job board for e-learning, instructional design, and training jobs

Participate in the weekly e-learning challenges to sharpen your skills

Get your free PowerPoint templates and free graphics & stock images.

Lots of cool e-learning examples to check out and find inspiration.

Getting Started? This e-learning 101 series and the free e-books will help.


At a recent conference, I was showing people how to build interactive scenarios using illustrated clip art characters.  Someone asked how I would build a scenario with people from photos because some people don’t like using the illustrations.

Essentially, you can do the same thing with people in photos that you can with illustrated clip art people.  However, photos present a few challenges.  The first is finding the right images.  And the second is pulling the people out of the background.  The good news is that you can find a lot of images in the package that comes with Microsoft Office.

In addition, there are a number of resources online where you can buy PC quality images for about $1 each.

Find Your Photos

If you’re using PowerPoint to build your courses, you have access to Microsoft’s online resources.  There are a number of images that you can use. You can always find inexpensive stock photo subscriptions. In fact Graphic Stock (which has a good selection) regularly runs a $99/year subscription with unlimited downloads. They also have a video  and audio service that is reasonably priced. I’ve found that in most cases, the lower resolution images work since I’m only using the images online and not for print.

The Rapid E-Learning Blog - search for images on Microsoft Online

I start by doing a search for “people.”  Since I’m going to separate the people from the background, I’m not concerned about the backgrounds or context of the images as much as I am about getting the right type of person.

The Rapid E-Learning Blog - example of image search

When I find an image that’s interesting, I’ll look at its properties to find similar images using the keywords.  To do so, just click on the image and look at the words that are used to tag it.

The Rapid E-Learning Blog - using keywords when doing an image search

Pull People out of the Photos

Finding the photos is pretty easy.  Here’s the part that is a little trickier.  It requires that you use an image editor to separate the people from the background.  There are a number of ways you can do this.  Some applications like Photoshop have ways to easily extract images.  At the least, you can use an erase tool.

Here are some tutorials on how to do this.  Even if you don’t have the same software as the tutorials, you’ll get the essence of the process.  If you have some good tips or tricks that will help others, feel free to share them in the comments section.

You’ll need to set the background to transparent so that you can put the image on top of another image.  I prefer to save the image as a .PNG file to preserve the image quality and the background transparency.

When I look for images, I don’t really care much about the original photo and what’s in it, as long as I have good images of the types of people I need for my screen.

The image below is of two women that appear to be in an architectural context.  I don’t care.  All I want is the women.  I cut both of them out and can use them in different contexts.  And, I don’t need to use them together.  So, in this case, the single photo gives me two people.

 The Rapid E-Learning Blog - cutting people out of the images for use in an elearning course

Put them on Backgrounds

Once you separate the people from the original image, you have the freedom to combine them with any background.  You can do a search for the types of background photos you need.  For example, do a search for “factory” or “office” to get some interesting images.

In the example below, the two women from the image above are now characters for a scenario that plays itself out in an office environment.

 The Rapid E-Learning Blog - example of images used in elearning course

As you can see, with a new background the images represent something completely different.  To change them up a little, you’ll notice that I just flipped the first woman and scooted her a little off screen.  For the second woman, I increased the size of the image and hid the books she’s holding.  It seems to change her posture a little.  Add the images to your elearning course and you’re on your way to building a custom scenario.

The Rapid E-Learning Blog - modified image used in elearning course demo

While this approach does take a little practice, once you master it, you’ll have all sorts of characters to use in your courses.  Keep in mind that this technique isn’t limited to scenarios.  I use it all the time to create just the right images.  Sometimes I have the right person but the wrong background.  I’ll quickly cut out the person and then find a background that better fits my needs.

I will say that one of my pet peeves with stock images is that it seems all of the people are posed and staring at the camera.  This can present some challenges when trying to build scenarios where the characters are interacting.

I’d love to have a stock site that sorts the people by groups like the clip art styles and where the characters look more candid rather than smiling at the camera like a virtual Stepford wife.  If you know of one, let me know.  Also, if you have some practical tips or ideas, feel free to share them with the rest of us in the comments section.

Events

Free E-Learning Resources

Want to learn more? Check out these articles and free resources in the community.

Here’s a great job board for e-learning, instructional design, and training jobs

Participate in the weekly e-learning challenges to sharpen your skills

Get your free PowerPoint templates and free graphics & stock images.

Lots of cool e-learning examples to check out and find inspiration.

Getting Started? This e-learning 101 series and the free e-books will help.


chatter.jpg

In a recent post, Clark Quinn reminded us that “dialogue is the most powerful learning technology on earth.

In his excellent book, Informal Learning, Jay Cross discusses the value of conversation as part of our learning process because we all come from unique backgrounds and levels of expertise. This allows us to “draw different implications from [the facts] and engage in new trains of thought.”

One challenge for us in the elearning community is to introduce real conversation into our elearning courses.

In my last post, we looked at the communication process. One of my points was that while we assume that the learners understand the information we share, the reality is that they only understand it from their own context and experience and potentially misunderstand what we are trying to teach.

This proved itself true in the feedback I got from the last post. I used the terms “open and closed loop” to describe the communication process. However, Carl Azar was quick to point out that what I described is the opposite of how those words are used in the engineering community. Thus, my use of “open and closed loop” introduced some confusion.

Because of the comments section, Carl was able to engage me in conversation and offer information that transformed my understanding. This is an excellent example of how dialogue with others enhances our learning experience.

This interaction with Carl and some of the other readers made me think of ways that I could add real conversation to the learning process while using rapid elearning software. Over the next few posts, I’ll introduce some ideas that you might be able to use in your next elearning course to connect the learners and instigate real conversation.

Typically, elearning is designed with independent learning in mind. Thus, we build a course and then have the learner sit in front of the computer and click through the screens. Instead of approaching the elearning this way, why not build the course as a multi learner process? There a few ways to design this type of learning experience.

Have the learners go through a course together rather than by themselves.

Design the elearning course so that two or more learners can participate in it together. Here are two ways where this might work well.

  • This approach could be part of a team building process where teammates sit at a computer together and view the course at the same time. To instigate productive conversation, create discussion questions and case studies for them to review and discuss.
  • Another possibility is to deliver the elearning course in conjunction with a facilitated session. This allows you to deliver a consistent and controlled message with the structured course content, and then have a break out session where learners can dialogue with each other.

Create an online chat for group discussion.

Creating an online chat is fairly easy to do today. There are many good chat tools available and quite a few of them are free. In addition, many organizations have chat capabilities as part of their technology infrastructure so that you can use an internal chat tool and not have security or access issues.

Here are a couple of ways that you can you use chat to introduce group conversation in your elearning course.

  • Create a time where all of the learners take the course together and then participate in a group chat (synchronous). This is especially useful if you have learners in remote locations.
  • Instigate chat conversation that is not dependent on a particular time (asynchronous). Many chat programs keep all conversations and maintain the chat as an ongoing transcript so that the information can always be accessed and reviewed by future learners.

Schedule a time where the content expert is available online to answer live questions.

At Articulate, we offer a daily demo, where potential buyers have a live conversation with our sales staff to learn more about our products. Why not use your chat tools to do something similar? Here’s how it could work.

  • Have an official time where the learners have live chat access to a subject matter expert to help them and answer questions.
  • Instead of a planned activity, just give the learners access to the subject matter expert via chat. The expert is available to answer questions, yet doesn’t have to engage learners unless a question is asked. Below is an image that demonstrates this. I added a Meebo widget to my web page. The learners can see if I am online and ask me questions.

meebolive.jpg

Chat Creates a Dynamic Learning Experience

I created a quick demo to show you how you can use a rapid elearning tool and include the chat feature as part of your learning experience. In my demo, I used Articulate Presenter’s ability to insert web objects. With Presenter, I can insert a web page from my internal network, the Internet, or from my local drive.

Because I can insert web objects, I can augment my elearning content with a web-base chat page. In addition, I can do this with limited technical skills because adding the web object is just a matter of copying and pasting the correct link.

For this demo, I used some of the free chat services available online to give you some ideas about how to use the features in a rapid elearning environment. If you’re looking at the blog post from your organization’s Internet connection, you might not be able to see the chat tools because many organization’s block them.

chat2.jpg

The benefit to adding chat to your elearning course is that you introduce real dialogue. It’s a great way to stimulate thinking and get past just content delivery. It’s also an excellent way to build better social connection between the learners especially if they are on the same team.

In the next few posts, we’ll look at ways to incorporate other forms of media into the design of your rapid elearning courses.

Events

Free E-Learning Resources

Want to learn more? Check out these articles and free resources in the community.

Here’s a great job board for e-learning, instructional design, and training jobs

Participate in the weekly e-learning challenges to sharpen your skills

Get your free PowerPoint templates and free graphics & stock images.

Lots of cool e-learning examples to check out and find inspiration.

Getting Started? This e-learning 101 series and the free e-books will help.


PowerPoint 101

If you follow Sweller’s cognitive load theory, then you understand that the graphics in your elearning course are very important and play a large role in its effectiveness. However, not having the right graphics is a challenge.

If you’re like me, you’re on a limited budget and you just can’t go buy custom graphics whenever you like. That means you’re probably stuck using the standard clip art that comes with PowerPoint.

After just a few projects you cycle through all of the good clip art and you’re forced to use the clowns and puppies. While your five-year-old child might like your choice of images, you’ll find that many in your organization are not particularly fond of clowns or puppies. If only you had known that before you started.

rapid elearning site safety demo PowerPoint

How Do I Get the Graphics I Need?

If you want custom graphics, you can hire someone (although you might want to read this before working with a graphic designer) or you can make them yourself. For the moment, I am assuming that you have no money and you want to make the graphics yourself.

In this case, I recommend two options: 1) create your own drawings or 2) modify existing clip art.

[Note: Microsoft stopped providing clip art but you can still use the same ideas by ungrouping vector images in PowerPoint.]

Option 1: Stick with your skills and draw your own graphics

Here’s a generic image that is easy to create.

rapid elearning stick figure

With minor tweaks, you can use the same image over and over again, each time telling a different story. As you can see below, it doesn’t take much to make the images mean different things.

rapid elearning conflict resolution demo

However, there is a very slight possibility that many in your organization will not appreciate your graphic art skills. In that case, I suggest trying the second option.

Option 2: Modify existing clip art

Here’s your challenge. You want an image of a lady presenting some information to her team. However, you cannot find the right image. In the following example, you’re going to learn to take two separate clip art images and combine them to make the image you need.

rapid elearning edit clip art demo PowerPoint

Become a clip art surgeon.
Without going into technical details, most clip art is a series of grouped images. That means you can ungroup the clip art and pull out or add the elements you need.

rapid elearning ungroup demo PowerPoint

Just right-click on the image and select ungroup. Sometimes, you have to do it twice. You should see something like this.

rapid elearning ungroup demo PowerPoint

Once you ungroup, you can pull out the things you don’t need. You can also add items to change the clip art and make it something new. In this case, we’re going to combine the two images and make it look like the woman is presenting to the group at the table.

[Note: Microsoft stopped providing clip art but you can still use the same ideas by ungrouping vector images in PowerPoint.]

  1. Ungroup the images.
  2. Start with the first image. Take out the elements you don’t want.
  3. Select the entire image and regroup it.
  4. Do the same for the next image.
  5. Combine the elements from image 1 with image 2 to make the desired image.
  6. Select the entire image and regroup it to make a single image.
  7. If you want to use the image elsewhere, go ahead and save it by right clicking on it and selecting “save image as” and choose the format you prefer. I recommend .emf because you’ll retain the image transparency and vector. However, you’ll see that there are many formats from which to choose.

great tips on rapid elearning PowerPoint

If you look at the image you’ll notice that I did a few things.

  • I took one of the people out of the team image. She was facing the wrong direction.
  • I flipped the team image so that it looked like they were facing the presenter.
  • The presenter’s shirt was white, so I changed the color.
  • I got rid of the backgrounds and the presenter’s table to make the image less cluttered.
  • I layered the presenter behind the table to give the image a little depth.
  • I changed the content on her flip chart, taking her from boring corporate drone to brilliant elearning consultant.

Now it’s your turn to practice doing this. Remember, the only limitation is your creativity. If your people need hard hats, find a hard hat image and add it to the clip art. If you need multiple ethnicities, change the hair and skin color. The possibilities are endless.

Here are three quick tips.

  • Create a work slide. I build a lot of my elearning courses in PowerPoint and publish with Articulate Presenter. I tend to create the images I need on the fly. Because of this, I like to use a blank slide as a work area. I’ll move the clip art to the slide, make it big and then take it apart. Once I am done, I copy and paste the image to the real slide. This way I don’t accidentally, mess up my content slides.
  • Control the clutter. The ungrouped elements that make up the image are layered. Sometimes, it’s not easy to get to what you want. What I do is make a series of duplicate images and delete what I don’t want. Then I pull the individual pieces together and regroup the image.
  • Create mini groupings. I find it easier to grab a part of the image and create a mini group rather than work on the whole image. This way you only have to work with a few mini groups rather than hundreds of little pieces.

By ungrouping and modifying existing clip art, you have the ability to make custom images to fit the needs of your elearning course. It’s inexpensive and, once you get a handle on it, pretty quick to do. In fact, outside of the original stick figures, I built all of the graphics for this post in PowerPoint. It only took about 5 minutes to build the presenter image for this demo.

rapid elearning before and after demo PowerPoint

I’m interested in seeing some before and after images. Feel free to send them my way. When I get enough, I’ll post them for others to see what can be done.

In the next post, we’ll look at how to use image styles so that you have consistent graphics to use throughout your elearning course.

Events

Free E-Learning Resources

Want to learn more? Check out these articles and free resources in the community.

Here’s a great job board for e-learning, instructional design, and training jobs

Participate in the weekly e-learning challenges to sharpen your skills

Get your free PowerPoint templates and free graphics & stock images.

Lots of cool e-learning examples to check out and find inspiration.

Getting Started? This e-learning 101 series and the free e-books will help.