Great tips! I did not know that a word.docx could be unzipped. Thanks!
How to Convert Storyline Courses to PowerPoint
August 4th, 2020
It never fails that after building an e-learning course in Storyline, someone asks if they can get a PowerPoint version of the course. There are many reasons for this request, such as using the content for face-to-face training, wanting a slide deck for subject matter experts, or creating a PDF handout out of the slides.
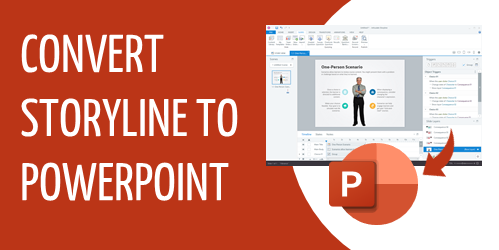
Today, we’ll look at a simple way to convert what you created in Storyline and make it a PowerPoint file.
PowerPoint and Storyline are Different Applications
Before we get started, let’s review a few key points when working with PowerPoint and Storyline.
- PowerPoint and Storyline may look similar, but they are two different applications made by two different companies so they’re not interchangeable files.
- PowerPoint is designed mostly for linear presentations. Storyline is designed for interactive e-learning.
- PowerPoint has some interactive features and things one can do to hack a certain level of interactivity, but it doesn’t have a lot of sophistication with things such as mouseovers, drag/drops, variables, etc. Thus going from Storyline to PowerPoint is a bit challenging if the original Storyline content is interactive.
- Storyline has an import PowerPoint feature to convert the PowerPoint slides to Storyline slides. PowerPoint doesn’t have an import Storyline feature.
The above seems obvious, but I bring this up because many people start with PowerPoint content, import it into Storyline, and then later want to export the Storyline content back into PowerPoint as if they are interchangeable applications and file types. They aren’t.
While there is no feature in PowerPoint to import Storyline, there are some simple things you can do to get your Storyline content into a PowerPoint file.
Tip #1: Start All Course Development in PowerPoint
My first tip assumes you know that you’ll need a PowerPoint version of the course.
If you know you need your content to be in both PowerPoint and Storyline, then plan your projects accordingly. PowerPoint doesn’t support all of the interactive features of Storyline, but in terms of what’s visible on the screen, it’s mostly the same: text, shapes, pictures, etc. With some planning, you can have your course content in both formats.
Here’s what I’d do:
- Build all your content in PowerPoint first (with forethought as to what you want to be interactive and specific to Storyline).
- Get final sign-off on the PowerPoint content since the content should be the same. The Storyline specific content is most likely more interactive.
- Import the approved content into Storyline.
- Make your interactive edits.
- Publish your Storyline course.
Using this approach, you end up with a PowerPoint file and interactive Storyline file. If you need to make edits, it should be for interactive features only since you got sign-off on the content while it was in PowerPoint.
Of course, this approach does requires that you plan it all up front, which doesn’t always happen (or the client makes last minute changes). I’d tell the client upfront that this is the production process and that edits after sign-off are outside the scope of the project.
Tip #2: Publish to Word & Extract Screenshots
Let’s suppose you already built a course in Storyline and now you need a PowerPoint version of the course. Like I mentioned above, PowerPoint can’t support the layers and interactions, however, most of what’s in the course is a screen with content that’s made up of text, pictures, and shapes.
The following tip lets you capture all of the content that displays onscreen. It is not going to capture your state changes and other interactivity. But it works for most cases and captures all of the slides and layers.
Click here to view the tutorial on YouTube.
Below are the basic steps, but watch the tutorial above for more detail:
- Once the course is complete, publish the Storyline course in Word. Select to publish layers and large images. This creates a Word doc with all of the slides and layers exposed.
- By default, Storyline saves to an older version of Word with the .doc extension. This is so people with older versions can open the file.
- Open the Word .doc and save as .docx. This will allow you to unzip the file and extract the images.
- Unzip the .docx file to extract the images. I use 7zip (a free application).
- Insert the images into a new PowerPoint album.
- Save the file and you’re all done.
The output using this method is a series of PowerPoint slides with each Storyline slide and layer captured. From there you can make simple edits or save as a PowerPoint or PDF file. In any case, you have your Storyline content in PowerPoint format.
Events
- Everyday. Check out the weekly training webinars to learn more about Rise, Storyline, and instructional design.
Free E-Learning Resources
 |
 |
 |
|
Want to learn more? Check out these articles and free resources in the community. |
Here’s a great job board for e-learning, instructional design, and training jobs |
Participate in the weekly e-learning challenges to sharpen your skills |
 |
 |
 |
|
Get your free PowerPoint templates and free graphics & stock images. |
Lots of cool e-learning examples to check out and find inspiration. |
Getting Started? This e-learning 101 series and the free e-books will help. |


0
comments