


I love this example in Rise. I was trying to work with the Flashcards block, and ran into an issue. It appears to allow only an image or text, but not both. How did you get both on the same card? Thanks!
How I Built This Interactive Scenario
March 27th, 2018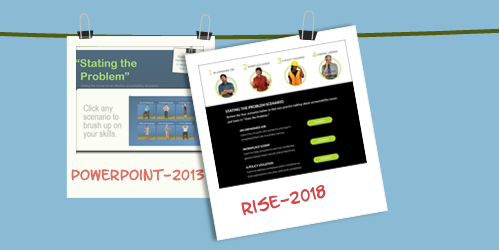
What happens when you convert an old PowerPoint course into a Rise course?
The other day I found an older interactive scenario that was built in PowerPoint. I wanted to see what it would take to rebuild something similar in Rise. This isn’t an uncommon situation for those who are trying to convert and update older courses with new technology.
Today, I’ll show what I did to convert the course and a few production tips that helped me.
The Original Interactive Scenario
Back in the day, this was a pretty cool example of what you could do with PowerPoint to create interactive scenarios. By design, PowerPoint is a linear presentation tool. However, with some creativity, one can create interactive content. And that’s exactly what Jeanette did.
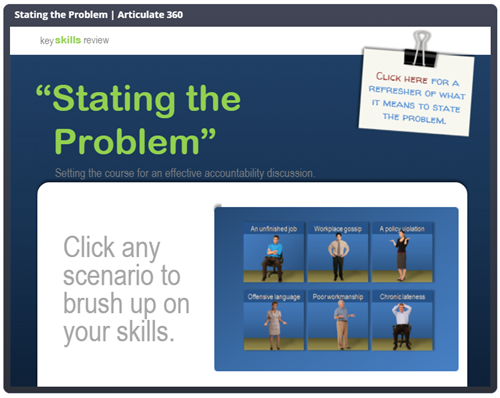
Click here to view the interactive scenario.
With that said, PowerPoint’s not the best authoring tool if you want to create interactive content. Once you add the interactive capabilities the slide count goes up quite a bit and it becomes a mess to manage. I highlighted this in the post on why PowerPoint isn’t the right tool for interactive e-learning.
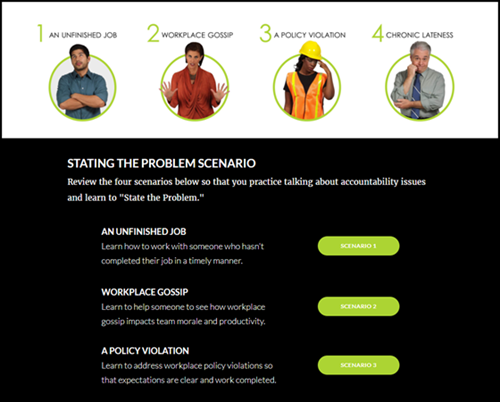
The New & Improved Interactive Scenario
We looked at different types of authoring tools in this post. PowerPoint and Rise offer two different types of authoring. PowerPoint is freeform with a blank screen that allows placement of objects. Whereas, Rise is form-based where you assemble content blocks and build the course that way. Freeform gives you more freedom in where you place content, but a tool like Rise offers a better mobile experience because it’s fully responsive. And as you see, it’s a lot easier to work with, as well.
Click here to view the interactive scenario.
Production Tips to Build the Interactive Scenario
I had three goals with this conversion:
- How long would it take to move content from PowerPoint to Rise?
- What are some production considerations?
- How to work around constraints?
Design the Interaction
The first thing is to determine how you want to design the interaction. When it comes to interactive scenarios, I always follow my 3C model of challenge, choice, and consequence. If I can click on something, then I can make it part of a 3C interaction.
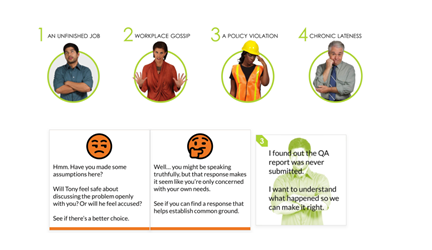
In this case, I used the Flashcards block as a way to show choices and consequences. The user is presented with a challenge and clicks on a card to get feedback. Since I’m not grading it, I can keep the other options available so that the learner can see what is shared if they had clicked something else. This gives them more control over the learning experience.
- Mission: identify the different interactive blocks that allow for 3C type interactivity. For starters, there are tabs and accordions. But those are obvious choices. Look for other interactive elements.
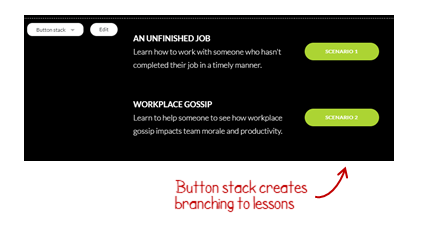
Build a Branched Scenario
Branched scenarios are possible in Rise with some considerations. Here are a few production tips:
- Build your branched interaction with the Button Stack block. The button stack lets you jumps from lesson to lesson.
- Don’t let them see what’s under the hood. Turn off the Sidebar view so that users don’t see the menu and how the course jumps around between lessons.
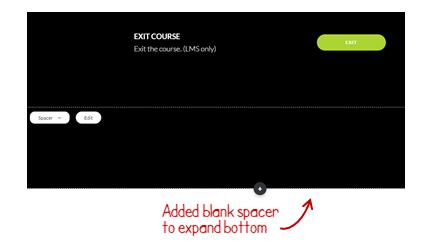
- Create a faux navigational cul-de-sac. Since Rise is designed to follow a lesson-to-lesson flow I want to prevent the learner from advancing past the end of a scenario or the button stack. To do so, I added a lot of padding on the bottom and an extra Spacer block as a buffer.
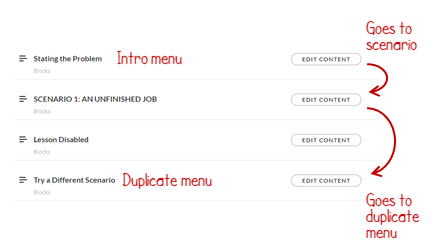
- Create duplicate menus to deal with revisits. The introductory lesson has some initial content and below it are the choices to view the scenarios. When they complete a scenario and come back to the other choices, I didn’t want all of that introductory content visible. I just want them to go to a list of other buttons. So I made a duplicate menu lesson with just the button menu. That’s where they end up after they complete a lesson. They never go back to the original introductory lesson.
- Control how much they see. This makes the content smaller to consume. You don’t need to show everything at once. Keep people from scrolling by adding an interactive Continue button. This holds all the content below it until the learner clicks on the button. In a sense, they are affirming that they are ready and when they click, they get more info.

- Play around with the imagery. Rise courses don’t need to look the same. You can insert images in all sorts of ways. An image doesn’t need to be a picture. It could be a white box that fills in an area to create more white space. Be creative in how you use the blocks. Also, don’t stick with the defaults. Play around with filling the blocks with color. The key is to learn to see them in a different way.
How long did it take?
Once I planned how to build the interaction, it only took about 15 minutes to copy and paste the content from PowerPoint to Rise. I used different images, so I had to create those. And I had to play around with ideas to see what worked best. All-in-all it took about 2 hours to build the module as it is.
The nice thing is that once I build an interactive lesson, I can save it as a template an re-use it again. And to add additional modules is just a matter of duplicating a single lesson. To do so in PowerPoint would require another 20+ slides per module.
As you can see, working with Rise is so much easier than working with PowerPoint.
Events
- Everyday. Check out the weekly training webinars to learn more about Rise, Storyline, and instructional design.
Free E-Learning Resources
 |
 |
 |
|
Want to learn more? Check out these articles and free resources in the community. |
Here’s a great job board for e-learning, instructional design, and training jobs |
Participate in the weekly e-learning challenges to sharpen your skills |
 |
 |
 |
|
Get your free PowerPoint templates and free graphics & stock images. |
Lots of cool e-learning examples to check out and find inspiration. |
Getting Started? This e-learning 101 series and the free e-books will help. |
You might also like:
8 responses to “How I Built This Interactive Scenario”
Great post Tom. Perfect timing too,I’ve been struggling with a way to convey some content in Rise and your use of the button stack block really connected and helped me break through my creative block!
Neat! Could you share how you created the continue reading button interaction. I like that!
It’s really impressive as you shared all the points verbally and graphically. Thanks for sharing this.
sounds interesting!
thatnkyou for posting this really useful


0
comments