Articulate 101: Create a Consistent Look with Presenter & Engage
This article applies to Engage 1. Engage ’09 includes a built-in Color Scheme Editor.
This is the 20th post in the Articulate 101 series. It was written by Articulate Customer Support Engineer David Moxon.
When inserting an Engage interaction into PowerPoint and then publishing with Articulate Presenter, there are a number of tips you can follow to create a consistent look between the two applications. First have a look at this demo presentation by Kineo:
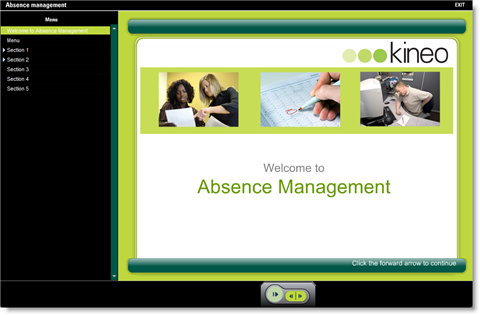
You can see from the presentation and the screenshots above and below that the authors have kept a consistent look between the PowerPoint slides, the Articulate Player, and the Engage interactions:
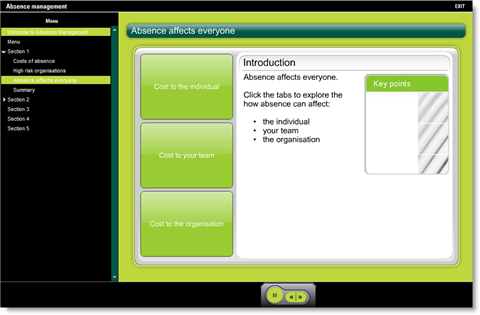
In particular, they have:
- Used the same color background in the PowerPoint slide and in the Engage interaction (as well as in the Quizmaker quiz).
- Used two colors from the Engage and PowerPoint slides in the Articulate Player itself.
- Copied the form of the Engage menu bar into the PowerPoint slide. In the above example, the menu bar has been inserted at the top and at the bottom of the slide, but you could equally choose to insert a menu bar just at the top — or, as we will see later, use and adapt a screenshot of the entire Engage player.
Combined together, this makes for a harmonious-looking course.
So let’s try and make another template and have Engage fit in with the Articulate Player like in the above example.
Tutorial: Creating Your Own Consistent Look with Presenter & Engage
Choosing Colors
To simplify things, we are going to make one basic master slide that we shall use for all of our PowerPoint slides. I am going to choose a shade of blue for the background. I need to make a note of the RGB code for the color as I will need it later to use this same color in my Articulate player and Engage interaction. To get the RGB code in PowerPoint 2007, right-click on the background and select “Format Background.” Click on “Color” then “More colors.” The RGB color code I am going to use is: Red 79; Green 129: Blue 189:

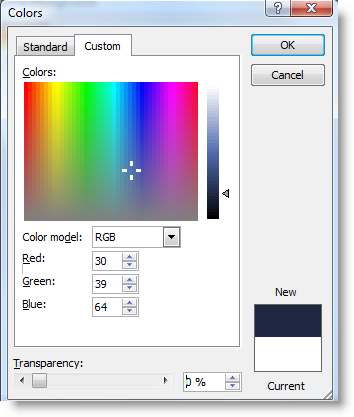
While we are selecting colors, let us select a darker one to go with this lighter blue — RGB color code: Red 30; Green 39: Blue 64:
Of course, it doesn’t really matter how you choose your colors to begin with so long as you are happy with them. You can create them in PowerPoint, or in the Articulate Presenter Player Template Builder, or in an external application. Tom Kuhlman recommended using Pixie in his recent article Articulate 101: How To Create Custom Color Schemes in PowerPoint. Once you have decided on your colors, you need to make sure you use them throughout.
Obtaining the Hexadecimal Values
Before we go any further, let us also take note of the hexadecimal values of these same colors as we will need them when we come to design our Engage color scheme.
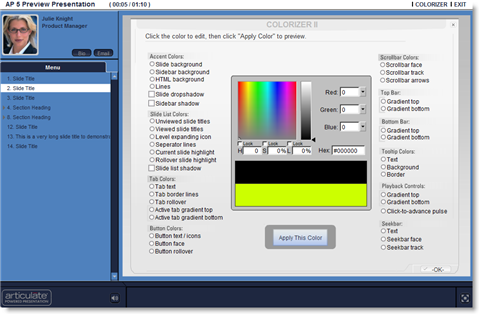
Again, you can do this via an external application or you can get the values via the Player Template Builder in Articulate Presenter:
- Create a new presentation and call it Engage Presentation Blue.ppt (or .pptx).
- Open up the Player Template Builder.
- Click on the “Colors” tab.
- Select “Edit Color Schemes.”
- Now enter the RGB code we chose before for our light color: Red 79; Green 129: Blue 189: As you enter them, you will notice that the hexadecimal number also completes. For this color, it is #4F81BD. Copy this number.
Building Our Player
While we have this hexadecimal number, let us begin building the player:
- Select “Slide background” with your mouse and paste the number you copied into the hexadecimal box.
- Hit “Enter” in your keyboard.
- Then click on “Apply this color”.
- Do the same for the following areas of the player:
Current slide highlight
Rollover slide highlight
Separator lines
Scrollbar Face
We now need to do the same for the dark color we chose above:
- Enter the dark RGB color codes: Red 30; Green 39: Blue 64: This gives us a hexadecimal value of #1E2740.
- Copy this and then select “Unviewed slide titles” and paste this into the hexadecimal field, hit “Enter” and then “Apply this color.”
- Do the same for for the following areas of the template:
Viewed slide titles
Active tab gradient top
Active tab gradient bottom
Button face
Scrollbar track
Bottom bar gradient top
Bottom bar gradient bottom - Finally, change the following to white (#FFFFFF):
Current slide highlight
Rollover slide highlight
Tab text
Top bar gradient top
Top bar gradient bottom
Obviously, you can change these as you wish. However, they are some of the settings of the demo you will see later.
Creating a Custom Color Scheme in Engage
Let us go on now to make our Engage color scheme based on these two colors.
While Engage has a number of color schemes to choose from from within the application, you can actually make your own by editing the XML files here:
Program Files -> Articulate -> Articulate Engagge -> schemes
Dave Mozealous wrote an article called Creating Custom Engage Color Schemes on his blog with a demo presentation explaining how you can change the color schemes.
I am going to take a copy of the default.xml file and call it Engage Presenter Blue.xml. Let us open that file and edit a couple of the lines to give it the colors we want. You can open and edit the XML file with Notepad. If you are using Windows Vista, you may need to run Notepad as an administrator first (right-click on “Notepad” in the Programs menu and select “Run as an administrator.”)
- Change the scheme name to Engage Presenter Blue.
- Then change the “bg” hexadecimal color to our shade of lighter blue, which we noted before as “0x4F81BD.” This will be the background to our Engage interactions and should merge into the background of our PowerPoint file.
- Change the “headerbar” color to “0x1E2740.” This will make the header bar our darker shade of blue we chose earlier.
- Change the “activenavbutton” color to “0x4F81BD” (our lighter shade of blue) and the line “activenavbuttonb” to “0x000000,” which is black.
- Change the “navhover” color to “0x4F81BD.”
- Change the “navhoverb” color to “0x000000.”
- Change the “tophover” color to “0x4F81BD.”
- Change the “tophoverb” color to “0x000000.”
Obviously you can make the changes you want. As you save your file in Notepad, you can preview your color selection in Engage by previewing an interaction (making sure that you have chosen your custom color scheme from within the application).
Save and close the XML file and open Engage. (When you’re making your custom scheme, you can have an interaction open in Engage and preview it as you change the XML values to see how your interaction will look.)
Using the Engage Template to Create a PowerPoint Slide Master
We are getting close to finishing our overall look to our presentation. Let us look at a little trick to get our Engage slides fully consistent with our PowerPoint slides:
- Create a new Tab interaction.
- Remove the title in the menu bar so that it is blank.
- Open the Interaction Properties in Engage and remove the volume control.
- Select “Presentation” playback (also in the Interaction Properties).
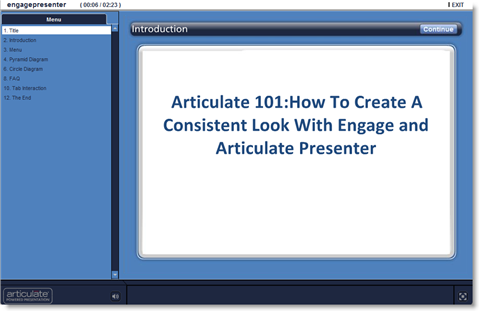
- Publish the interaction to Articulate Presenter by selecting the PowerPoint file we created earlier: Engage Presentation Blue.ppt (or .pptx).
- Publish the PowerPoint file in Articulate Presenter.
You should see something like this in the slide area:
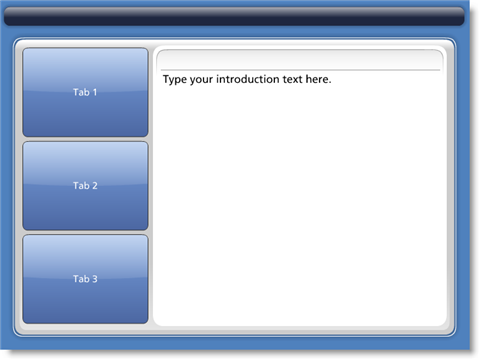
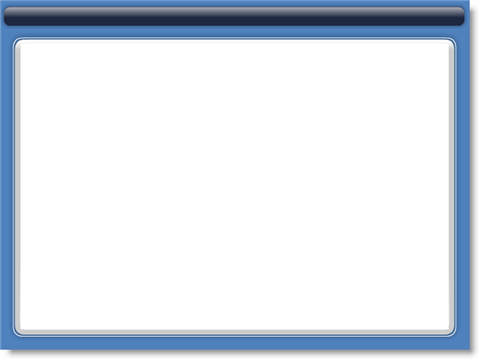
Take a screenshot of this published version and then edit to remove the Tabs in the center of the slide as well as the text, leaving something like this:
You can use the above image as the basis for your PowerPoint slide. You could, of course, prepare this screenshot from a preview of the interaction in Engage, but if we do it from PowerPoint we can also take a screenshot of the “Next Button,” which could be useful for our Master Slides and will add to consistency:
- Go back to PowerPoint.
- Click on the “Properties” button on the Engage slide in our presentation.
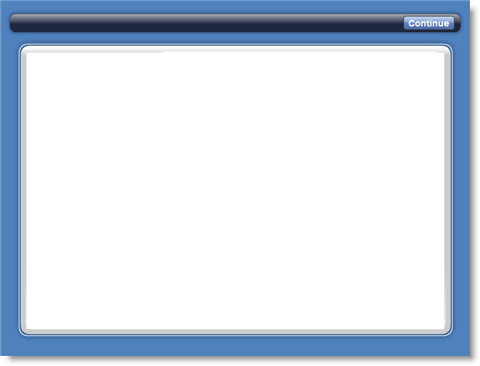
- Change the “Completion Button Label” to “Continue.”
- Publish the presentation again in Articulate Presenter and this time take a screenshot of the Engage interaction with the “Continue” button showing.
- Edit the image to leave you something like this:
Creating the Master Slide in PowerPoint
Note the “Continue” button at the top right of the screen above. We can place a hyperlink or hotspot over this button in PowerPoint so that it will link to another slide.
Go back to PowerPoint, edit a Master slide and insert this same image as the background for your Master slide. You can stretch, if necessary, to fit the whole area of the slide.
Alternatively, take a screenshot of just the top of the Engage screen like this:

You can then use this bar to create master slides or slides that look like your Engage interactions. Use the colors that we chose at the beginning for your background.
The following demo shows a variety of Engage interactions inserted into a PowerPoint presentation and published with Articulate Presenter, using the color schemes we chose above:
Subscribe to the blog via email or RSS feed to make sure you don’t miss out on tomorrow’s tip.

14 responses to “Articulate 101: Create a Consistent Look with Presenter & Engage”
Very nice tutorial, I am definitely going to do this for my next project. Getting the colors right in Engage was a bit of guesswork, especially the topbar. Lots of gold to be found this month in the Articulate blogs 🙂
Hwllo
Verry happy with this tool ( Engane v 12.xx) Like with all good things they make you to want “more”. Is it possible to combine your standard templates. So, can I combine timeline template with the circle template of somwehing like that
Regards
hans de cocq
You can combine all the templates providing you use the same custom scheme you created and perhaps change the default colors for the circle template and others. Equally, you can take screenshots of all the templates and incorporate them into Presenter with necessary edits. You can even embed the circle template within the timeline template so that they both appear in the same slide but that is another story…
[…] Create a Consistent Look with Presenter & Engage […]
If one wants to understand using a combination of the Articulate tools(engage and quizmaker) and Powerpoint, this article is helpful. Thanks for sharing this.
regards
rT
[…] the Kineo & Clive: 60-Minute Masters for SMEs showed us recently (which I also highlighted as part of the Articulate 101 series), there are a number of ways to make our presentations look […]
Isn`t it strange that you have to adapt your whole powerpoint layout to the engage / quizmaker layout just because you want to insert 2 or 3 slides created with engage… Why can`t it be the other way round?
Hi can i know how did you edit out the tabs and enlarge the white space? coz i tried cropping but the outcome is not nice like the one shown above. Thanks=)
[…] color schemes. Sure it came with some nice ones. And, if I wanted to, I could edit an XML file and create my own scheme. While this wasn’t hard to do, it just didn’t seem like it fit the ease of authoring […]
[…] which allows you to really make all three appear great together. Last year, I was asked to write an article on how to make Engage and Presenter appear consistent together. Much of what is said also applies to Studio ‘09 but now there is a better method […]
Is there a way to move the interaction navigation bar from the top of the timeline interaction to the bottom?
This was very helpful. We had actually created a template in PPT based off the articulate format but using a JPEG is much simpler! Thank you for the informative blogs!
Laurel Silk
VP Instructional Design
Do no exist other way to customize the Engage layout? That is an incredible limitation that make a layout course inconsistent using only one engage interaction.
I must be doing something wrong…. I saved my xml coor scheme…. but I do not see it pop up in the choices on Engage to select… please help!
Comments are closed on this post. Need more help? Post your question in the E-Learning Heroes Discussions.