The Rapid Elearning Blog

Archive for November, 2016


3-ways-guide-learners

Inevitably you have to provide instructions on how to do something in the course. The question is when to provide them and at what level of detail. In this post we’ll explore three ways to guide the instruction process.

Provide Instructions Upfront

The most common way to provide instructions is to do it all up front. This is what I see in most of the courses I review. Generally you share what needs to happen and when. Depending on the complexity, you may provide some details and screen shots. The point though is that all of the instructions come up front and then the person continues through the course.

  • Pros: this is probably the easiest thing to do; the gate screen concept works for this approach. Some people add instructions and help reminders to the player for quick access.
  • Cons: they’re all up front and sometimes people aren’t quite clear on expectations until they’ve had some experience with the course or have made a few mistakes. They probably need more context before they even know what to do with the instructions.

Provide Instructions at the Point of Need

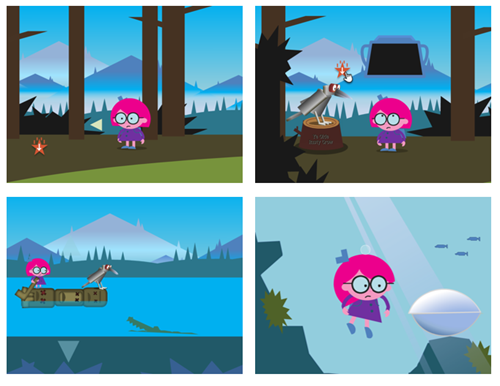
Get what you need as you need it. Why burden them with instructions at the front end of the course when they will most likely forget them anyway? It makes sense to delay instructions until the person needs them.

For example, you provide some context upfront and then have them go through the procedure. Walk them through it. You can also delay the instructions and if no action is taken, then provide instructions after it’s determined they’ve not acted (or possibly done something incorrectly).

  • Pros: you’re not overwhelming them with content, let them build context, and get what they need at time of need
  • Cons: it takes a little more work to build the mechanism to evaluate and time instructions; may be intrusive to the process for someone who gets it. Make sure to not lock the process.

Provide Instructions as Practice Activites

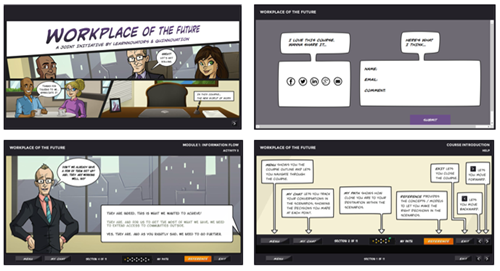
I like the Wii-type instructions where new tasks are presented with practice activities. This builds off of the progressive instructions in option two where the instructions are provided at time of need. However it does introduce the practice element. This allows a person to practice to a level of competence.

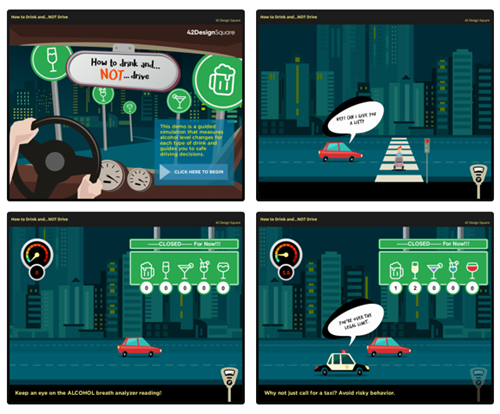
Here’s an example: “Address customer issues and input them into the system. Before you begin the scenarios you can practice and learn the proper input procedures. Do you want to practice? Yes or No?”

“Yes” moves them to a practice scenario with step-by-step guidance. “No” moves them into the challenge activity where they are timed and will get feedback later.

Essentially you say: “Here’s what you need to do. Do you want to practice before we get started? OK. Here is a practice opportunity. No? OK. Let’s proceed with the activity.”

  • Pros: instructions are just-in-time and in context with the course; disarms new learners and provides confidence; frees tenured learners to ignore.
  • Cons: the major con to this approach is the time it takes to build instructions that are effective and relevant. Probably requires working knowledge of variables to create an adaptive path.

So there you have it, three ways to guide your learners through the course. Which way do you prefer? What other options do you recommend?

Events

Free E-Learning Resources

Want to learn more? Check out these articles and free resources in the community.

Here’s a great job board for e-learning, instructional design, and training jobs

Participate in the weekly e-learning challenges to sharpen your skills

Get your free PowerPoint templates and free graphics & stock images.

Lots of cool e-learning examples to check out and find inspiration.

Getting Started? This e-learning 101 series and the free e-books will help.


best mics for audio narration

While I’ve covered audio recording tips and tricks in the past, one of the most frequent questions I’m still asked is about microphones. So today, I’ll show you the different mics I use and demo how they sound.

I’ll have to admit, I’m no audio pro and I’m also a bit less dogmatic about audio quality than some elearning developers. My main goal is to get decent sounding audio without a lot of post-production.

The reality is that most end users are hearing the audio through cheap headsets or small device speakers where everything sounds hollow. Also, if you record tutorial videos or do webinars, the audio compression mitigates some of the distinctions you hear in different qualities of audio.

With that said, here are a few thoughts and some recommendations based on the mics I use.

Simple Audio Recording Tips

Here are a few simple ground rules. You learn more by clicking on the links below.

  • You want to record the best audio quality you can initially. There are some things you can do to clean up the audio, but you can’t make bad audio good. If you can only do one thing, get crisp audio.
  • Try to eliminate background noise like air conditioners. Sometimes if I can’t get rid of the noise, I will play some music softly in the background–not Eminem, but something a little softer.
  • Don’t worry about being perfect. You can spend a lot of time finagling your audio only to have you end user listen to it through cheap headphones or speakers where everything sounds muffled and tinny.
  • You should learn a little about audio and some basic editing. You don’t need to be an audio engineer, but learning some recording techniques, how mics work, and how to do some post-editing will really come in handy.

Microphone Recommendations

There are a lot of good microphones out there and they’re not that expensive. I’d plan on spending from $100-$200 on a microphone. You should also invest in a pop screen, a stand, and perhaps some sort of barrier. Here are some of the microphones I use.

I created a quick demo in our new Rise application to show the different mics in use. You can view the link on your mobile devices and compare how they sound versus how they sound on a desktop. I noticed that my iPad which has one speaker masked the issues that I could hear on my desktop. I also noticed that with my iPhone, the ambient audio was more evident that elsewhere.

rise-course-microphones

Click here to view the microphone demo.

Desktop Microphones

  • Blue Yeti Pro. This is what I have in my home office. I like it because I can control the gain and the pickup pattern. This is a big plus. The pickup pattern helps eliminate unwanted sound entering the mic. The Pro costs about $230. But you can buy the Blue Yeti (which is also a good mic) for about $120 and it comes in a bunch of colors to placate the needs of easily distracted millennials.
  • Blue Raspberry. I’ll be doing a lot more recording on the road so I wanted to upgrade my microphone. I just purchased this microphone and will do an update after a few road trips.
  • Samson C03U and Samson C01U. I’ve used both of these mics and think they’re great a great value. Both mics are in the $80 range but for about $120, you get the microphone, a pop filter, and shock mount. Not a bad deal. I’d choose the C0U3 because it has better pick up patterns. I quit using the mics when I received the Blue Yeti Pro. If you’re on a budget the Samson mics are worth it.
  • Samson Go Mic. I love this little mic. At $40, it’s a great price and sounds good. The build quality is really solid and I’ve gotten lots of use out of it over the past few years.

The links to Amazon microphones may produce a slight commission.

Headset Microphones

I’m not a fan of headset microphones for recording narration because they tend to pick up a lot of breath sounds. However, they are relatively inexpensive and decent enough in output. But because they’re headset microphones you don’t get a lot of control over the pickup.

I do like to use headset microphones for recording tutorials and doing webinars because it allows me to operate hands free and not worry about moving around and away from the microphone. I also prefer wireless headsets over wired ones.

ModMic: I haven’t used this mic but I really like the idea. You attached the microphone to your headphones. Many of the headphone mics are uncomfortable so you can use your own headphone and attach the ModMic with a magnet (which means you can remove it).

modmic

Here are the three headset microphones I currently use:

  • Plantronics Audio 995. It’s wireless which gives me some range of motion. I don’t like having a bunch of cables running over my desk when I record. Having the wireless mic is nice if I have to record some audio narration from my subject matter experts.
  • Plantronics 478. This is similar to the one above but it has a USB cord. Both of those microphones have noise canceling features. Usually that means there’s one mic that records your audio and another smaller one that records ambient sound and cancels it out.
  • Logitech H800. I just got this one. I like it because it’s wireless and has a built in charger. I also like it’s portability for traveling.

One question you may ask is why I have so many microphones, especially headset mics. I travel a lot so I want good portable options and I like the choice of desktop and headset microphones. I do recommend getting a few extra headset mics, one for you and the others to share if you do recording with subject matter experts.

Previous Posts on Using Audio for Narration

Again, I’m not an audio pro and recording in a controlled recording environment. Instead I’m a one-man recording studio, in a home office, with a limited budget. I want good quality audio at an affordable price. From my experience most rapid elearning course authors are in the same boat.

Which microphones do you use and why? Feel free to share in the comments.

Events

Free E-Learning Resources

Want to learn more? Check out these articles and free resources in the community.

Here’s a great job board for e-learning, instructional design, and training jobs

Participate in the weekly e-learning challenges to sharpen your skills

Get your free PowerPoint templates and free graphics & stock images.

Lots of cool e-learning examples to check out and find inspiration.

Getting Started? This e-learning 101 series and the free e-books will help.


instructional design for new century

I have an older Sega Master System. I recall spending hours and hours playing on that thing. It was cool 25 years ago. Then it was lame. But now it’s cool again. I took it out of storage to show my kids.

What struck me were the instruction booklets that came with the games. They seem so archaic especially when I look at how my son learns the games. He downloads them and just starts playing. What’s changed?

Back Then

  • The expectation was to have instructions. How else would you learn?
  • Video game consoles were still relatively new, so it made sense to have booklets to help new customers learn.
  • The Internet didn’t exist (or at least not for me) so getting access to information wasn’t easy. Thus an instruction book made sense. I also didn’t have any friends who had the console to offer counsel.
  • It was an analog age, thus having analog content was the norm. The idea of a digital instruction guide made no sense unless you were Marty McFly.
  • An instructional designer on the training team convinced someone that people will never learn to play the games without clear instructions.

instructional design manual for Sega Master System

Today

  • Expectations have changed. Game players don’t expect detailed instructions. They just jump right in.
  • Instructions are provided just-in-time as you need them. I love the way it works with the Wii. Right before you do something new, they give you quick instructions and a practice option.
  • Game players are often connected to other game players and learn through their community of peers. They learn how to play and they learn the nuances and cheats, as well.
  • Who has time to read through manuals?
  • Game instruction is often predicated on simple, intuitive steps where the challenges increase with proficiency. Typically, the learning is chunked with the option to repeat when necessary. And you tend to pick up where you left off.

How does any of this relate to how we build courses today?

Most of the elearning courses I see aren’t overly complex. Yet they’re saddled with meaningless navigation instructions and all sorts of content irrelevant to the learner’s needs or the course’s learning objectives. In fact, the other day I was talking to a young man about the elearning industry and the career opportunities it presented. I showed him how the authoring tools work and then showed him a bunch of examples.

One of the first things he noticed was all of the navigation instructions and lead up to the course. And the other thing was all of the information. He asked how to move past it and when he got to the real action. Unfortunately, all of the examples were locked down and there was no action.

Here are a few tips I’d offer for today’s course builders:

instructional design starts with small bite-size courses

  • Keep the courses short. Shorter courses are more digestible. They keep people focused.
  • Break the content into single topics. This allows you to accomplish the first item above. And it provides freedom for the learner to get what they need.
  • Get rid of the navigation instructions. The course navigation design should be intuitive. If you need a course on navigating the course, something’s broken.
  • Provide just-in-time instructions. If you want the person to do something different or unique, then provide the instructions at the point when they’re needed. I like the way Rick added the instructions in his Hero Land module.

instructional design provides just-in-time contextual instructions

  • Replace instructions with exploration. Of course this works in context with the course’s objectives, but there are all sorts of mechanisms you can use to get the learner to pull in content, rather than you pushing it out.
  • Add activities where the person needs to collect information and then make decisions. That’s how you can leverage exploration.
  • Understand the learning happens. Just because we build a course doesn’t mean people learn. They’ll learn what they need. And often I suspect what we build interferes with their learning. This is usually the case when the branding folks and the legal department get involved with your projects.

instructional design knows that learning happens

  • Most of the learning happens outside of the course. Find ways to connect what you’re doing to what they do once they’ve completed the course.
  • Communities of practice trumps cumbersome manuals. In today’s world, part of training should include getting the community of practice connected to share tips and tricks and offer support.

Those are a few thoughts on what we can do to move our training forward. What tips do you have for today’s course builders? Add them in the comments section.

Events

Free E-Learning Resources

Want to learn more? Check out these articles and free resources in the community.

Here’s a great job board for e-learning, instructional design, and training jobs

Participate in the weekly e-learning challenges to sharpen your skills

Get your free PowerPoint templates and free graphics & stock images.

Lots of cool e-learning examples to check out and find inspiration.

Getting Started? This e-learning 101 series and the free e-books will help.


e-learning example

Reviewing elearning examples is a great way to learn. You find inspiration to prompt your own ideas and by deconstructing the courses, you learn to use your elearning software to create something similar.

Here are some really nice elearning examples that I’ve seen in the community recently. Check them out and then try to figure out how they were built.

E-Learning Example: Hero Land

e-learning example heroland

Click to view the elearning example.

Here’s a great module built by Richard Lee Hill. This is one of the slickest demos I’ve seen in a while and an excellent example of what you can create with the authoring tools. He combines some great gaming mechanics with learning more about Storyline.

Deconstruction questions for you:

  • How to move the character freely about the screen?
  • How to collect items and rewards and use those throughout the module?
  • How to create just-in-time instructions?
  • How are animations used? Characters? Backgrounds?

There’s a lot to learn by deconstructing this module. What I really like is that as you collect the eBits you have links to video tutorials that explain parts of how this was created. There’s also a bonus high five because he was able to work Goudy Stout into the module.

E-Learning Example: How to Drink and NOT Drive

e-learning example drink and drive

Click to view the elearning example.

The folks are 42 Design Square always do nice work. I’ve featured them a few times in the past. This course integrates some nice animations and audio effects. I also like the way they used the variable panel to select drinks and see the impact when driving.

Deconstruction questions for you:

  • How did they create the animation effects?
  • How would you create a similar panel in your courses?
  • How to integrate the drink dashboard with the breath analyzer meter?

Lots of good things happening in this demo. See if you can prototype some of what they’ve done.

E-Learning Example: Workplace of the Future

e-learning example workplace future

Click here to view the elearning example.

This example looks at the workplace of the future and was done by Learnnovators in collaboration with Clark Quinn. This style of course is a bit closer to what you might build at work and includes some good scenario-like activities.

Deconstruction questions for you:

  • How did they create the custom player features?
  • How did they create the resource page?
  • Can I template this structure for easy re-use?

There you go, three good examples to whet your appetite. The trick is to explore the modules and consider how they were built. And then try to build quick prototypes to see if you can figure it out.

If you have any questions don’t hesitate to connect with the course creators or jump in the community and ask.

Events

Free E-Learning Resources

Want to learn more? Check out these articles and free resources in the community.

Here’s a great job board for e-learning, instructional design, and training jobs

Participate in the weekly e-learning challenges to sharpen your skills

Get your free PowerPoint templates and free graphics & stock images.

Lots of cool e-learning examples to check out and find inspiration.

Getting Started? This e-learning 101 series and the free e-books will help.


free multimedia apps

We all love free tools to help us save time and resources so that we are more efficient building our elearning courses. Here are two free multimedia applications that I use quite a bit.

Color Picking with Color Cop

If you’re using Storyline that’s already easy to do because there’s a built in color picker. However, if you need to pick colors outside of your authoring tool, Color Cop is a good one to use.

free color picker

I use color pickers all the time. One way I integrate colors into my slides is by adding an image to my screen and then I pick colors from the image to create my buttons, background and accent colors. This way everything kind of look like it belongs together.

Create & Share Screenshots with ShareX

ShareX is a pretty slick application and I use it all the time to create quick screenshots and share them with team members and customers. I find it really useful to provide visual feedback when working on courses.

I use a keyboard shortcut to grab the screenshot and then it automatically uploads to my service of choice. I have use my Google Photos account, but images can be uploaded to all sorts of services, which can be seen in the image below.

free application

ShareX isn’t limited to just screenshots. In fact, it does quite a bit more (almost too much more). For example, you can color pick, edit images, and create animated .gifs. Here’s a screenshot of some of the other applications that are part of ShareX.

sharex

You can even create QR codes like this one below. Check it out and see where it goes.

common-challenges

So there you have it, two free multimedia applications that will come in handy for your elearning development. And if you want even more recommendations, check out this weekly challenge when community members shared some of their favorite tools.

Are there any free applications you use? Feel free to share in the comments below.

Events

Free E-Learning Resources

Want to learn more? Check out these articles and free resources in the community.

Here’s a great job board for e-learning, instructional design, and training jobs

Participate in the weekly e-learning challenges to sharpen your skills

Get your free PowerPoint templates and free graphics & stock images.

Lots of cool e-learning examples to check out and find inspiration.

Getting Started? This e-learning 101 series and the free e-books will help.