The Rapid Elearning Blog

Archive for the ‘Multimedia’ Category


25 Free Illustrated Characters

September 5th, 2023

25 free illustrated characters

Here’s a back-to-school special! As you may know, I’ve been playing around with AI and creating illustrated characters for e-learning. Each day I committed to releasing one character which you can find below. As a grand finale, I pulled together 25 illustrated characters for you to use.

25 Free Illustrated Characters

Here’s a batch of characters with some diversity. The file includes 25 characters with 100 poses. You can download them here.

25 free illustrated characters

Learn to Create Your Own Characters

I’ve outline what I do to create these characters. If you want to learn to create them for yourselves, check out the links below:

Download Free Illustrated Characters

Here is an assortment of free illustrated characters for you to download.

free illustrated characters

Events

Free E-Learning Resources

Want to learn more? Check out these articles and free resources in the community.

Here’s a great job board for e-learning, instructional design, and training jobs

Participate in the weekly e-learning challenges to sharpen your skills

Get your free PowerPoint templates and free graphics & stock images.

Lots of cool e-learning examples to check out and find inspiration.

Getting Started? This e-learning 101 series and the free e-books will help.


create and edit AI illustrated characters

There’s a lot of promise to artificial intelligence (AI) for image generation. However, as it currently works it’s not as simple as prompting an image and getting something perfect to download and use. AI can generate a lot of nice results quickly. However, using the images for production work can be a challenge.

My key objective is to create viable (not necessarily perfect) characters that I can use in online training programs or PowerPoint presentations. I am not a professional illustrator or Photoshop pro, so I want some steps that are simple and not too time consuming.

Here are some previous posts where we looked at some ideas:

I’ve been playing around with some AI image generators to get a better feel for how they work and how I can use them when I create e-learning courses. I narrowed it down to a few basic steps that seem to work for me:

  • Create the character(s) using prompts in AI
  • Edit it to fix artefacts
  • Crop to isolate the character
  • Upscale for better quality
  • Remove background
  • Convert to vector

The Reality of Working with AI Illustrated Characters

AI generates a lot of weirdness with illustrated characters between the twisted hands, distorted faces, missing eyes, odd poses, and missing limbs and fingers. I don’t always find the same issue with photographic characters probably because there are more models from which to learn.

Consistency is the other issue. Getting one good character isn’t too hard but getting that same character in multiple poses is a challenge. Or getting different characters with the same style. It takes a little practice and willingness to settle for close enough.

Quick Microlearning Course for Creating AI Illustrated Characters

I used Rise 360 to put together a simple course that shows the process I go through to create the free illustrated characters I’ve been sharing. You’ll notice that my editing skills in Photoshop are basic, so hopefully you’ll be inspired to try creating characters yourself.

free microlearning course how to create AI illustrated characters

Click here to view the course.

I also added a quick survey if you want to share character ideas with me. I’ll use the results to test things out.

Events

Free E-Learning Resources

Want to learn more? Check out these articles and free resources in the community.

Here’s a great job board for e-learning, instructional design, and training jobs

Participate in the weekly e-learning challenges to sharpen your skills

Get your free PowerPoint templates and free graphics & stock images.

Lots of cool e-learning examples to check out and find inspiration.

Getting Started? This e-learning 101 series and the free e-books will help.


how to quickly create illustrated characters with AI

I see the promise of AI generated assets for e-learning. I’m not an illustrator. I have limited Photoshop skills. Because of this, my options for custom illustrations are slim. However, with AI I can find a balance of creating viable illustrated characters with minimal skills.

In previous posts we looked at:

Today, I’ll show some of the basic steps I use to create the illustrated characters I’ve shared in LinkedIn recently. In these three tutorials, I’ll give an overview on how to create simple, viable illustrated characters using AI. I am working with a few objectives: quick, simple, and minimal editing. I am willing to live with some imperfections.

Getting Started with AI Tip

I am using Midjourney to create my AI illustrations. You can use whatever you want. The process is very similar regardless of application. I will add that not all tools offer the same quality. For example, here are two images using the same text prompt. The good example on the right comes from Midjourney. The other from one of the many of the tools that are out there trying to make money quickly from the AI gold rush. Buyer beware!

AI comparison

Step 1: How to Create a Character

I only cover the basics in the tutorials below and show some differences when you change the settings, but the secret with AI prompting is knowing how to adjust parameters such as style, seeding, and quality. The more you use those parameters the better control you have over your results. I will add that I find using fewer words is better.

There are a lot of videos on YouTube and elsewhere on getting consistent characters. I’m not going to get into the weeds on this. Here is a useful source for Midjourney users: John Walter: he has a good series on creating a consistent character.

  • Set up your prompt. I use character, action, style, and white background (so I can clean the image up after I download it).
  • Make parameter selections for style, etc.
  • Once you have a character style you like, change the character descriptions. This is where you can mitigate the bias that is built-into the AI model.

The video below walks through some of these tips, and we look at options in terms of unique styles and characters.

Click here to view the video tutorial on YouTube.

Step 2: Create a Quick Character Set from a Single Panel

This is easy and will give you five characters that are similar.

  • Generate a character.
  • Select a character to upscale.
  • Do another version (minimal variance) which will provide four more similar characters.
  • Download the characters and clean them up.

Click here to view the video tutorial on YouTube.

Step 3: Create a Character with Multiple Poses

A prompt with multiple poses will give you the same character but slightly different. You can play around with the number of poses, but three poses are a sweet spot. At a minimum you get three similar characters. Assuming the iterative characters are similar enough, you end up with fifteen similar characters.

  • Generate a character and include the number of poses.
  • Select a character panel to upscale.
  • Do another version (minimal variance) which will provide four more similar characters.
  • Download the characters and clean them up.

Click here to view the video tutorial on YouTube.

Step 4: Don’t Expect Perfection

This approach isn’t a perfect way to create characters. It’s a quick way to create good enough characters. My goal is to create viable characters quickly. So, I am willing to live with some imperfections.

  • The hands and faces are problematic. That’s OK. With multiple characters you’ll get enough parts you can mix and match to get some good characters.
  • You don’t need to use every character you get.
  • Once you edit the characters, you will fix some of the issues that AI instigates. I’ll cover that in the next post.

Hopefully, these tips help and be sure to download the free characters in the community.

Events

Free E-Learning Resources

Want to learn more? Check out these articles and free resources in the community.

Here’s a great job board for e-learning, instructional design, and training jobs

Participate in the weekly e-learning challenges to sharpen your skills

Get your free PowerPoint templates and free graphics & stock images.

Lots of cool e-learning examples to check out and find inspiration.

Getting Started? This e-learning 101 series and the free e-books will help.


create AI illustrations

I’ve been messing around with different generative AI apps, just like many of you. I’m trying to figure out how I can use them in my job and also get really good at using the various AI tools. Because I create online courses, I’ve been working on making my own illustrations that work well.

In a previous post, I shared some tips based on things I’ve learning using AI. I am using Midjourney for my examples, but there are a lot of tools out there for your initial experimentation.

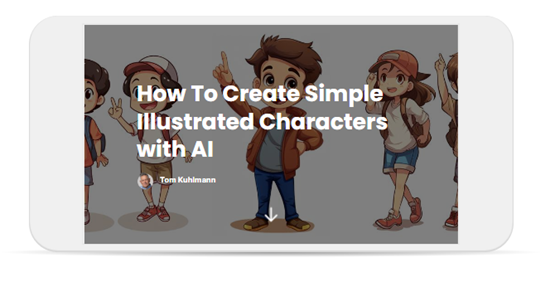
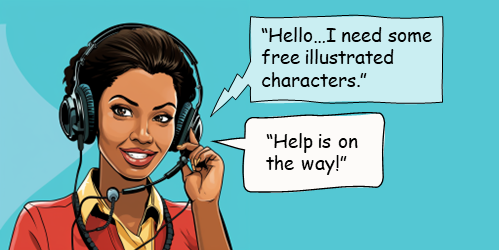
Here are some tips I’ve picked up and how I make those free illustrated characters that I share on LinkedIn.

It Starts with Prompts

The secret to getting the right images is based on the prompting. The challenge with AI is that you never know what you’ll get and when you get something that you really like, you may not get it again.

  • I start simple and don’t try to overstate or be too descriptive initially. And then I work from there.
  • I also look at what images people share in the AI community and when I find something I like, I try their prompts to see what I get.
  • For prompts, I mostly use a character, an action, and then the style. Depending on what I need, I may add a location or something to provide more visual context.

The Character

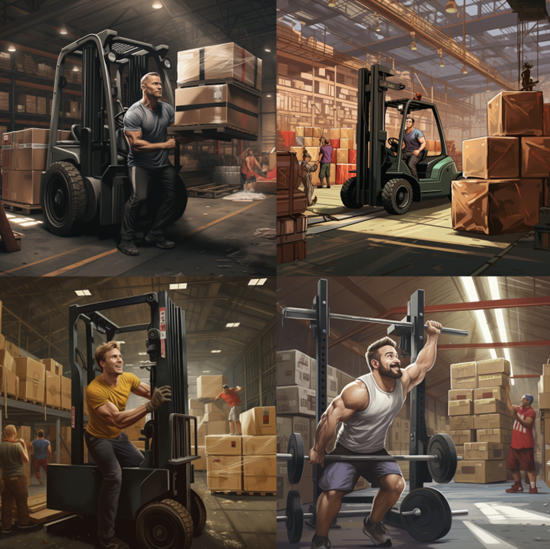
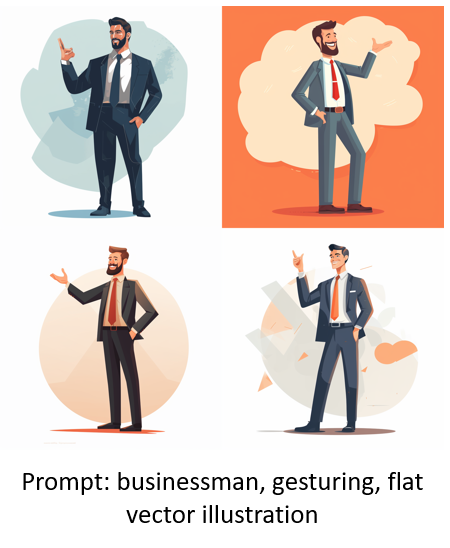
There is a lot of bias built into the AI language models. For example, if I type in businessman, 99% of the time it will be a white businessman in a suit. Why white? Why a suit? That’s something you need to account for as you create characters.

Regardless of the bias, I start with something generic like businessman. That usually gives me a white guy in a suit. But that’s OK to start. Once I get the right look, I modify the descriptor. Some tips to get better initial characters:

  • Instead of just “businessman,” use an age to see what you get. I find 40-year-old is a good addition.
  • It doesn’t matter what you get, the main point is to see if you can come up with something consistent.
  • There are a lot of good videos now on how to write prompts. The more you practice and play around, the better you get.
  • At some point, I call it good and move on. My goal is to find a simple way to get a good enough image. Playing around in AI for hours (or days…which will happen) is fun, but not something I can afford to do for long.

As you can see in the images below, you get some pretty decent initial images to start. I can work with these.
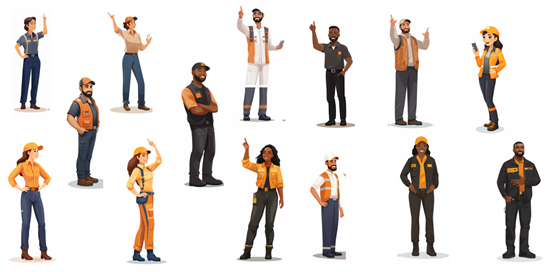
AI businessman prompt


The Action

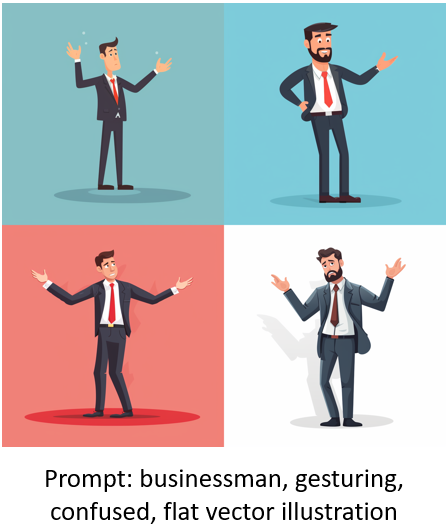
Describing the action is where you get the pose you want and can use. I keep it simple.

  • I like to insert “gesturing” as part of the prompt. It gives me more varied arm positions.
  • Add an emotion or state-of-being such as “confused” or “angry.”
  • I also change the pose and may use “arms crossed” or “hands on hips.”
  • Play around and see what you get.

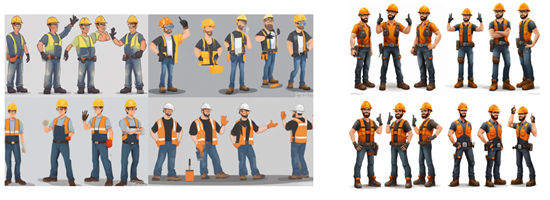
You’ll notice how the images change based on a few simple words.

confused AI businessman prompt

angry AI businessman

businessman AI arms crossed illustration

AI illustration hands on hips

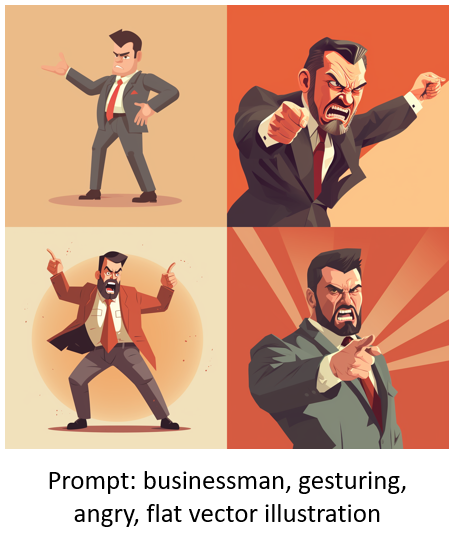
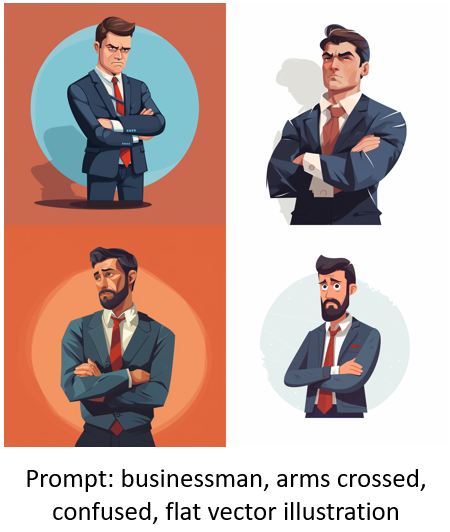
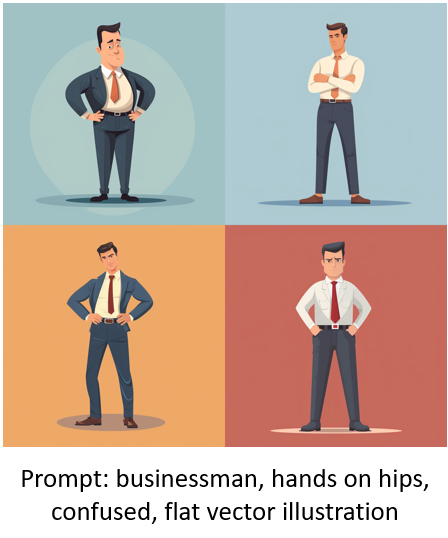
As you review the images above, you’ll notice that the styles change quite a bit. You’ll also notice that you may not get the pose you expect. For example, “hands on hips” includes arms crossed. “Arms crossed” aren’t full body poses. That’s something you have to live with.

As you practice and get to know how to write prompts you will be able to design more consistent styles.

The Style

As mentioned above, getting a consistent style can be tough. A lot of it will come down to how you write prompts and the feel you get for them as you practice.

  • For illustrated characters, I want a similar style and no background so it’s easy to clean up.
  • My default prompt style is “flat vector illustration” because that works well for a lot of e-learning course design.
  • It also works consistently most of the time. And even if the illustrated characters aren’t the same, they often are close enough to use together.
  • I do play around with unique style descriptions. For example, I will state “in the style of [add descriptor].”

AI prompt description with different style

AI prompt description with different style Burton

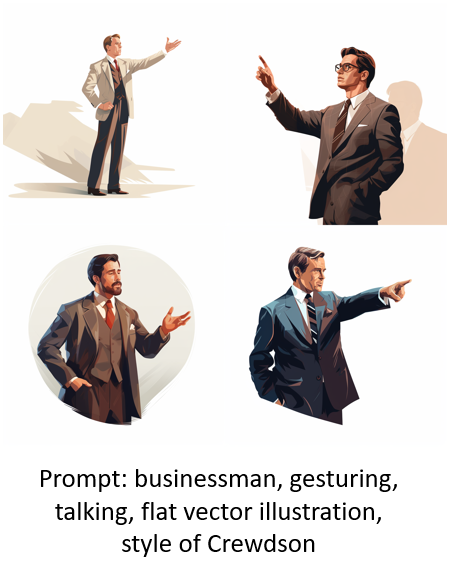
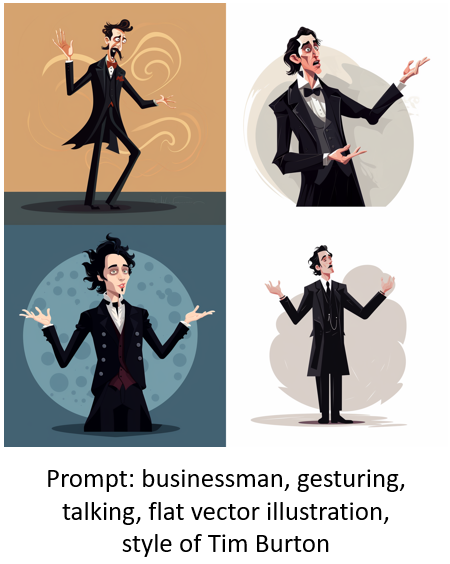
As you review the images above, you’ll notice that adding a style description to the “flat vector illustration” starts to provide a more specific style that gets closer to consistency.

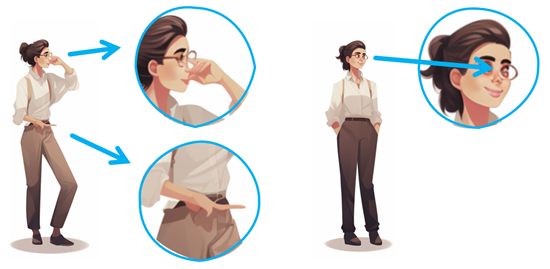
Bonus Style Tip: Getting Rid of the Background

The AI image is just the starting point. Often you may have to do some edits to hands, faces, etc. One of the main things is getting a transparent background so that I can place the image where I want it.

To get as clean a background as possible, I add the prompt: “white background.” That works 90% of the time. The image below is the same “hands on hips” prompt as above with the addition of “white background” in the prompt.

AI illustration white background

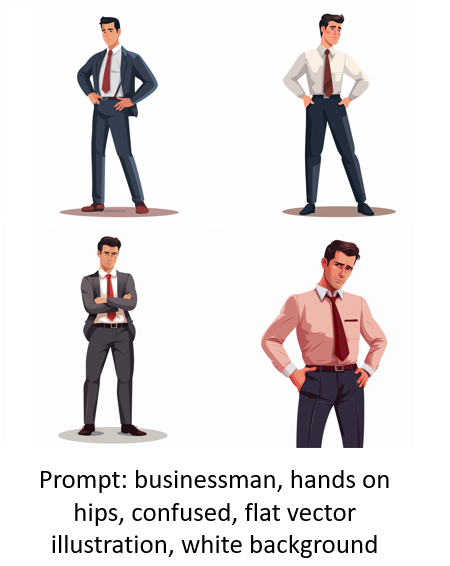
Overcoming Bias with AI

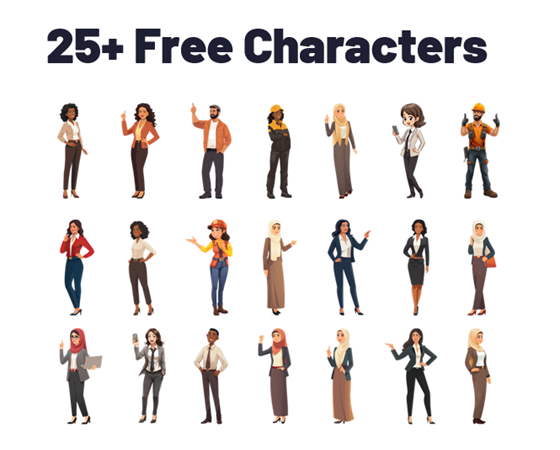
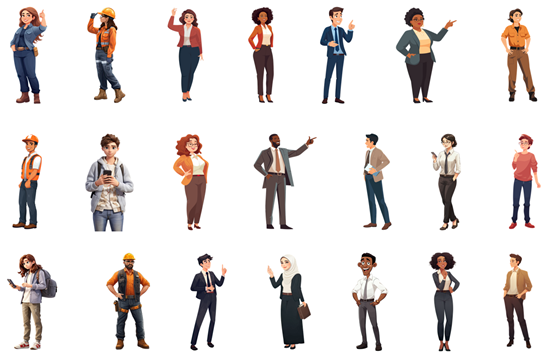
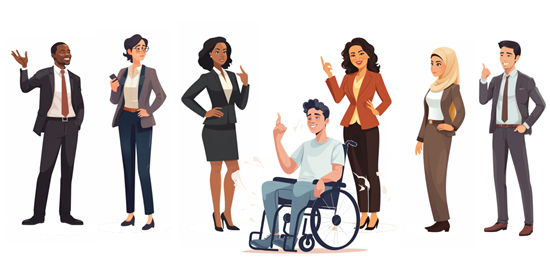
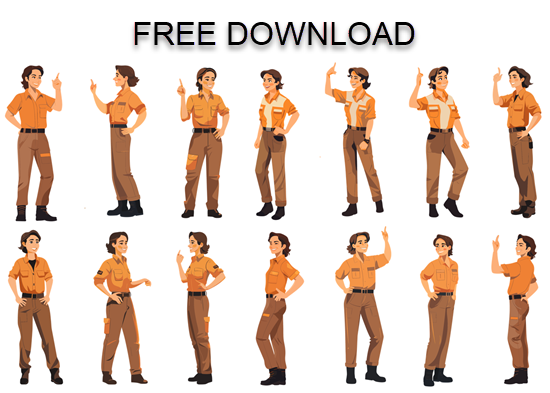
As I noted above, there’s built-in bias which can include things like gender and race, but also style of clothes. You can mitigate some of that by changing the descriptor. Once I get an image style I like, I will start to add additional descriptions to get more diverse characters. In no time at all, I have a diverse set of characters from which to build.

diverse AI illustrated characters

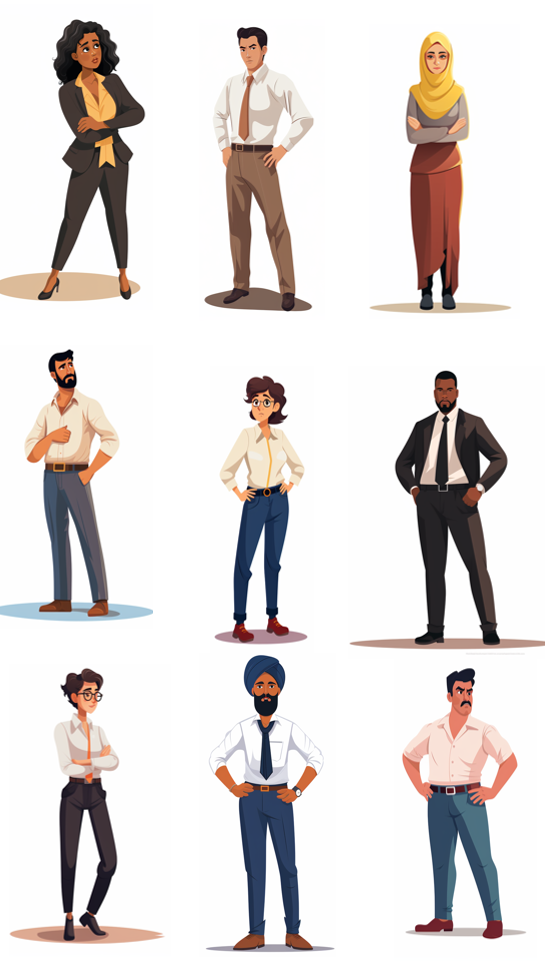
One thing to consider is your own bias. For example, I may look for a specific image and then assume that it works because of how “I see” that character and what it should represent.

Those are some of the basic tips to get started creating your own characters with AI. In a follow up post, I’ll share my secret sauce and what I do to speed things up and how I edit the characters.

Don’t forget to download the characters I’ve already added. I’ll be adding more, so keep your eyes peeled.

Events

Free E-Learning Resources

Want to learn more? Check out these articles and free resources in the community.

Here’s a great job board for e-learning, instructional design, and training jobs

Participate in the weekly e-learning challenges to sharpen your skills

Get your free PowerPoint templates and free graphics & stock images.

Lots of cool e-learning examples to check out and find inspiration.

Getting Started? This e-learning 101 series and the free e-books will help.


AI for e-learning free illustration

Like many of you, I’ve been playing around with AI to generate images. There is a certain magic to it all. Add a text prompt and in a few minutes you’re presented with mostly viable images. On the surface, it’s all really cool. Many of us use stock images. This works OK, but the problem with stock images is that they are stock and very generic. Trying to find specific images to meet the needs of our courses isn’t always easy.

And that’s where the promise of AI images comes in. Need a specific image? Type in a descriptive prompt and you’ll get exactly what you want, when you want it. However, it doesn’t really work that way.

For my experimentation, I’m using Midjourney.

This prompt: 40 year old person lifting a box in a warehouse, forklift in the background, in the style of Crewsdon, became the image below. Looks nice, but obviously it’s not very usable.

AI images for e-learning

Challenges with AI Imagery

Currently, there are a number of challenges leveraging AI to create the images you really need for your e-learning courses. Here are a few:

  • It’s a time tiger. Playing around with image creation is undeniably fun. I mean, who wouldn’t get lost in the endless possibilities? But here’s the catch – it requires a lot of experimenting with prompts and tweaking the images until they meet our expectations.
  • Consistency is key, but it’s not always easy to achieve. You might get a fantastic image, but getting multiple versions of it with the same style and character can be a real challenge. And that brings us back to the previous point about spending too much time tinkering with the image generators. Honestly, I have no clue how all the magic happens. I’ll get three similar images and then AI throws in some random, nonsensical creation. It’s like the AI took a swig of whiskey and got a bit too creative!
  • Let’s talk about those weird artifacts. AI seems to struggle with hands and poses. Sometimes you’ll get a hand with the perfect perspective, other times you’ll get a hand on the wrong arm or with missing or extra fingers. Heck, sometimes you’ll even get extra arms or missing legs! It can definitely be a bit of a mixed bag.
  • Another challenge lies in the built-in biases of AI. For example, female images often lean towards exaggerated sexuality. And there can also be biases related to race and gender. These things will be corrected over time as the technology evolves. When creating images, it’s important for us to be aware of these biases and use prompts to help mitigate them.

Tips Creating AI Images

With all that said, over time, as the technology evolves, many of these challenges will be resolved. In the meantime, here are some tips that have helped me as I try to get the right images:

  • Find inspiration in the work of others. If you come across an image style that you love, try to find the prompt that was used to create it. Then, run your own tests with similar prompts and see what you get. If the results are pleasing to your creative eye, make note of that prompt for future reference.

AI for e-learning text prompt

  • Keep things simple. I’ve found that using straightforward prompts yields better results. Start with stating the object you want, provide some context, add a description, and specify the style you’re aiming for. Once you find something you like, just change one variable. For instance, if you’ve got a fantastic illustrated character and your prompt was “Asian woman,” try using the exact same prompt but switch it up to “Asian man,” “black man,” “black woman,” “Hispanic man,” and so on. The image below shows the results. For the most part, all of these characters could work in the same course.

AI for e-learning multiple characters

  • Create a handy list of different industries, environments, characters, and situations that you frequently need imagery for. Then, when you get a good result, simply swap out those elements. You’ll be amazed at how quickly you can generate a wealth of viable assets. I tried this approach recently while working on warehouse characters, and in just an hour, I had created 24 folders with 15 unique characters in each. That’s a whopping 360 characters in no time at all!

AI images for e-learning warehouse workers

  • Familiarize yourself with the AI tool you choose to work with. Each tool has its own quirks and nuances. The more you experiment and play around with it, the better you’ll understand what to expect. Remember, the secret lies in the art of prompting. When you get a good grasp of how prompts work within your chosen tool, you’ll gain more control and achieve better results.
  • The AI-generated image you receive is just the starting point. If you intend to use AI in this way for your e-learning image assets, consider it as a means to create a general style and character types. You can then take that AI image and collaborate with an illustrator to craft custom imagery that perfectly suits your needs. It’s a brilliant way to scope out exactly what you require before diving into the final artwork creation.
  • There’s work involved when working with AI-generated images. It’s not a simple process of just creating something and downloading it. You’ll encounter various artifacts and oddities within the images you receive. At first glance, they might seem fantastic, but upon closer inspection, you might notice weird eyes, distorted faces, missing fingers, or even an excess of limbs. Sure, you can still use these images, but you’ll have to live with the artifacts, and they might not give off the most professional vibe.

AI foe e-learning weird artifacts

With that said…

I am definitely not an AI wizard. But, I had this idea to explore how we can create awesome images in a jiffy, without having to do a bunch of editing. And guess what? I think I’ve found a happy medium! In my next post, I’ll share some tips that even non-AI gurus like us can use.

But hold on, before we dive into all that, let’s start with a bang!

Introducing Sarah, our superstar for today. You can download this illustrated character absolutely FREE. I’ve cleaned up these images, upscaled them, and even added transparent backgrounds. They are good to go and ready for action. So, what are you waiting for? Get your hands on this incredible character download and get creative.

Oh, and just a heads up, there’s more to come. Stay tuned for some fantastic characters that I’ve whipped up while practicing to use AI. They’re perfect for spicing up your e-learning courses.

AI for e-learning free download

Hope you enjoy.

Events

Free E-Learning Resources

Want to learn more? Check out these articles and free resources in the community.

Here’s a great job board for e-learning, instructional design, and training jobs

Participate in the weekly e-learning challenges to sharpen your skills

Get your free PowerPoint templates and free graphics & stock images.

Lots of cool e-learning examples to check out and find inspiration.

Getting Started? This e-learning 101 series and the free e-books will help.


360 images AI

There are a lot of really cool things you can do with 360° images in e-learning. You can see some examples here.

However, I’ve chatted with a lot of people and the single biggest challenge for them is getting usable images.

In most cases, 360° image interactions are exploratory and based on real-world context. In those case, stock imagery doesn’t work. This requires that the course author have a camera or other means to craft the images. However, it doesn’t mean you can’t create an interaction using stock 360° images.

Here is a cool site that creates stock 360° images using AI. The steps are simple:

  • Add a prompt and the site creates the imagery.
  • Download the image.
  • Insert into your course.
  • Build the interaction.

Here’s a simple example where I used the AI generated images and inserted them into Storyline 360.

AI generated office tour

Click to view the example.

And here’s an example, recently shared in the community by Julie Bigot for the challenge we had on using AI in e-learning.

example AI demo

Click here to view the example.

Working with AI

A few key tips working with AI:

  • The power is in the prompt. There’s a lot of trial an error in figuring out how to get the right imagery. Although, now AI can also help you craft the right prompts for your images.
  • Craft a prompt and then use it to create complimentary spaces. In the examples below, I kept the prompt simple: modern business office. The first image produced a very distinct black and white office.

AI office

  • I wanted similar looking rooms that may look like they were part of the same office so I appended “modern business office” with other words such as meeting room and cafeteria. Surprisingly, as you can see from the images below, the rooms are very similar and usable. Normally, the prompts have to be more descriptive.

AI office

AI office

AI office

  • Sometimes you may get artifacts in the 360° images. You’ll notice my image below had some gibberish text on the wall. Those can be edited in an image editor. Here’s a tutorial that explains some options.

360° image needs editing

If you need to create 360° images for your e-learning interaction, this is a cool site to explore. Hope it helps.

Events

Free E-Learning Resources

Want to learn more? Check out these articles and free resources in the community.

Here’s a great job board for e-learning, instructional design, and training jobs

Participate in the weekly e-learning challenges to sharpen your skills

Get your free PowerPoint templates and free graphics & stock images.

Lots of cool e-learning examples to check out and find inspiration.

Getting Started? This e-learning 101 series and the free e-books will help.


Extract text from images for e-learning

Copying text from images comes in handy especially when updating old e-learning courses. Sometimes you may not have the source file and have to work for older published content. In those cases, do a screen grab of the course and then extract the text from the image. Then copy and paste the text into the application you use to build your e-learning courses.

How to Copy Text from Images

You may already have some applications that can extract the image. Here are a couple of common ones:

If you don’t have either of those applications, that’s OK. I recommend using Microsoft PowerToys. It’s free and easy to use.

How to Copy Text from Images with Microsoft PowerToys

The steps for this are pretty simple. No need to do screen shots.

  • Install Microsoft PowerToys.
  • Locate the text you want to extract.
  • Press Windows+Shift+T to activate the Text Extractor.
  • Select the text.
  • Paste into a document.

Here’s a quick video to show the process.

Click here to view the tutorial on YouTube.

As you can see, it’s pretty simple to copy and paste the text. So if you run into an issue where you have old courses but not the original source file, keep this tip in mind.

Events

Free E-Learning Resources

Want to learn more? Check out these articles and free resources in the community.

Here’s a great job board for e-learning, instructional design, and training jobs

Participate in the weekly e-learning challenges to sharpen your skills

Get your free PowerPoint templates and free graphics & stock images.

Lots of cool e-learning examples to check out and find inspiration.

Getting Started? This e-learning 101 series and the free e-books will help.


presentation tips

I do a lot of presentations live and online. I also record a ton of tutorials. During those presentations I’m usually showing how to do something and attendees need to see the mouse movement and where it’s at. Here are a few simple tips to highlight your mouse when presenting or recording your tutorial.

Here’s a video tutorial that walks through the tips below if you want more detail.


Click here to view the tutorial on YouTube.

Make the Mouse Pointer Extra Large

change mouse pointer size

In a presentation or tutorial you are trying to direct the viewer’s eye. This is especially true for software demos where it’s easy to lose track of what’s going on and where the mouse is moving, more so if the viewer isn’t familiar with the user interface.

Go into the mouse properties and change the mouse point to extra large.

Use Keyboard Shortcut to Show Mouse Location

I use this quite a bit. In the Pointer Options of the mouse properties, set the mouse to show location when pressing the control key. Whenever you move the mouse to somewhere else, press the control key and you can direct the viewer to that part of the screen.

highlight mouse pointer location

Create a Spotlight Effect to Show Mouse Location

Microsoft PowerToys are little applications that add more functionality to Windows. In a previous post, we looked at how to install a simple color picker. That’s not all that comes with the PowerToys. There are three mouse related features that could come in handy. In fact, I use the spotlight effect instead of the control button feature above.

mouse pointer spotlight

Install PowerToys and then select the mouse features you want to enable. Play around with the settings and see what works best for you.

Highlight Onscreen Left and Right Clicks

If you want to show where the mouse is when you click, set the left and right click to different colors and as you click it’s easy to see where the mouse is and you’re doing. Press Windows+Shift+H and that activates the mouse click highlighter.

mouse click highlighter

Highlight the Mouse Click with Crosshairs

Press Control+Alt+P and that activates the crosshairs. Personally, I don’t find this one as useful, but it is an option. I’m kind curious who would use this type of highlighter and when. Feel free to share in the comments.

mouse crosshairs

The PowerToys are nice. I use the spotlight effect all the time. It looks elegant and easy on the eyes. I always found the mouse options with the control click circles to be a bit old looking and kind of herky jerky.

Hope these tips come in handy when you do your next webinar, presentation, or screencast tutorial.

Events

Free E-Learning Resources

Want to learn more? Check out these articles and free resources in the community.

Here’s a great job board for e-learning, instructional design, and training jobs

Participate in the weekly e-learning challenges to sharpen your skills

Get your free PowerPoint templates and free graphics & stock images.

Lots of cool e-learning examples to check out and find inspiration.

Getting Started? This e-learning 101 series and the free e-books will help.


color picker for e-learning

I’ve written about the Microsoft PowerToys in the past. They come with some handy applications. There’s an application that allows you to preview .SVG files. This is more important today than it was even a year ago as more and more courses are using .SVG. There’s also a feature to rename your files. This comes in handy if you want to convert a folder of images to match a project’s title.

I was looking at the updated PowerToys and thought I’d highlight the new color picker and how it has real practical value.

Color Picker for E-Learning

I use a color picker multiple times during the day. Many apps like Storyline and PowerPoint have color picking tools. However, they tend to be confined to working in the application. There are browser extensions for color picking websites. I use them sometimes when I work in Rise 360. I also use Color Cop (another free app).

However…

I think I’ve been able to consolidate all of my color picking needs in a single tool via the Color Picker in PowerToys. Three things I really like:

  • It’s simple and elegant.
  • I can pick colors from anywhere on my computer without being constrained by an app or browser.
  • I can edit the colors or get quick derivatives. For example, I could pick a fill color and use one of the derivatives for a border.

color picker for e-learning

Select Windows+Shift+C and it opens the color picker. From there you can pick any color. Using your mouse wheel to zoom in. And once you’re in the editor, you get the hex code and a range of tones within the color as an easy way to create a secondary color derivative.

Here’s a quick tutorial to show a little more detail.

Click to view the tutorial on YouTube.

If you need a color picker, you can’t beat the PowerToys. It works great and its price can’t be beat. 🙂

Events

Free E-Learning Resources

Want to learn more? Check out these articles and free resources in the community.

Here’s a great job board for e-learning, instructional design, and training jobs

Participate in the weekly e-learning challenges to sharpen your skills

Get your free PowerPoint templates and free graphics & stock images.

Lots of cool e-learning examples to check out and find inspiration.

Getting Started? This e-learning 101 series and the free e-books will help.


download images from website

Visually branding your e-learning courses is a common requirement. A great way to figure out how to brand the course is by mimicking what’s available publicly from the organization’s website (and intranet).

These sites tend to have all sorts of media assets that are already vetted to fit the organization’s brand and often work well for e-learning content. The challenge is how to get access to those assets.

Connect with the Marketing Team

Before you spend time scraping your sites for images, connect with the marketing (or web) team. In the past, I’ve found that the marketing team usually had access to more media assets than other teams.  Connect with that team (or the team that manages the website) and share what you want to do. Often, they can provide some guidance and give you access to the resources available to them.

Be prepared to dialogue about compliance to the company’s branding requirements. 🙂

Download Images from the Website

One option is to locate an image on the website, right-click and save to a folder.

media assets e-learning

That’s an easy and effective way. However, it’s also a bit cumbersome. And sometimes the sites are set up to not allow this.

Download Images via the Browser’s Site Inspection

Another way to access the images on your site is via the browser’s ability to inspect the site.

  • Right-click on the page and select inspect
  • Click on the Sources tab
  • Locate the media in one of the folders
  • Access the source file and save it to your folder

e-learning inspect source

Download Images by Extracting from Your Website

I covered this in a previous post, you can use a browser extension or this website to extract images. Basically, they isolate and just show the images on the site. I like using the Image Extractor site because I can do a batch download of images which saves some time.

download media

As with anything like this, be sure to properly credit sources.

Events

Free E-Learning Resources

Want to learn more? Check out these articles and free resources in the community.

Here’s a great job board for e-learning, instructional design, and training jobs

Participate in the weekly e-learning challenges to sharpen your skills

Get your free PowerPoint templates and free graphics & stock images.

Lots of cool e-learning examples to check out and find inspiration.

Getting Started? This e-learning 101 series and the free e-books will help.


How to View Old Flash Courses

February 15th, 2022

view swf flash files

The death of Flash has created a mess for many e-learning developers who have to look for things in older e-learning courses that were published in Flash.

I run into that a lot in the community and with some of my old demos on this blog. It sure is a pain. Not being able to see the file makes it a challenge to recall what was in it or to even know what to look for to update it and republish.

The good news is that I found this thread in the community recently where Sarah shared a link to a Flash player that may help you view old courses. Below is a quick tutorial on how to use it.

Click to view the tutorial.

There’s no guarantee that these links will work forever, I’d download them now, so you have a copy.

Hope that helps those who need to view older Flash courses.

Events

Free E-Learning Resources

Want to learn more? Check out these articles and free resources in the community.

Here’s a great job board for e-learning, instructional design, and training jobs

Participate in the weekly e-learning challenges to sharpen your skills

Get your free PowerPoint templates and free graphics & stock images.

Lots of cool e-learning examples to check out and find inspiration.

Getting Started? This e-learning 101 series and the free e-books will help.


Articulate Rapid E-Learning Blog - build better elearning courses

Are you tired of building the same courses over and over again? Sure, you may get to build a hundred courses, but they’re the same course built a hundred times. The result is that many of the courses look the same and they don’t provide the opportunity to expand your course design skills.

Today I’d like to offer a few tips on how you can get out of the hundred course rut.

Build Better E-Learning by Making Time to Do Something Different

Many organizations allow their employees to have some free time to hack together ideas or work on other types of projects. I spoke to one e-learning manager that lets his employees spend a few days each month on personal projects. His rationale is that it gives them “time to unwind and play around with ideas.”

Articulate Rapid E-Learning Blog - build better elearning courses by doing something new

Most organizations won’t make time for you to “mess around with ideas” so you need to find ways to get the time. We often used team meeting time to brainstorm ideas.

For example, one challenge was how to navigate a course if all you could do was drag and drop objects and couldn’t click anywhere on the screen. Another was to produce 100 analogies we could apply to our training programs: climbing stairs, climbing mountains, going down a road, entering a building’s lobby, etc. We then used some of the ideas as models for our course designs.

The main point in the activity was to think about things in a unique way and to prototype ideas. They may not always be used, but they will help develop your skills.

Build Better E-Learning Through Inspiration

As you know, I am a big fan of the weekly e-learning challenges because they do exactly what I’m talking about above. They’re a springboard to play with ideas. We present simple challenges to help nudge you a bit. They’re not intended to be big courses or even all that elaborate. Some people put together complete ideas and some just build quick prototypes. The main goal is to get you to try something different than what you normally do at work. Through that process you find innovative ideas and production techniques.

Articulate Rapid E-Learning Blog - build better elearning courses by finding inspiration

Even if you don’t participate in the weekly challenges, I still encourage you to look at what’s being done. They’re a great source of inspiration. You may pick up some neat ideas that can be applied in your own e-learning courses. All the participants get the same instructions, but the results are always different. It’s nice to see diverse ideas.

Build Better E-Learning Through Mimicry & Iteration

All the Articulate community managers do an excellent job building courses. However, if I were to look at the demos they build without knowing who built them, odds are that I’d be able to match the course author to the course because we all tend to have our own style.

That means our course screens tend to look similar. The layouts, colors, fonts, and object sizes all tend to be the same. That’s not a bad thing. But building the same type of course a hundred times the same way can cause some creative fatigue.

By stepping away from our own style and attempting to mimic the work of others we become better course designers. I recommend collecting e-learning courses, multimedia examples, or visual design ideas that you find inspiring and then setting some time to practice recreating them.

  • Step 1: Try to replicate what the content creator did. This helps you figure out what they did and how you’d do the same thing with your authoring tools. Don’t worry about copyright or anything like that. This isn’t for public consumption. Instead it’s for your personal development.
  • Step 2: Once you have decent replication, start to iterate. Pretend that a client told you they wanted this project redone. What would you do? From there you’ll be able to transform the idea that inspired you to something that’s uniquely yours. And most likely it’ll look a lot different than what you would have done on your own. I usually look for color themes, font pairings, and visual design ideas like how shapes and lines are used. I’ll create a few different layouts based on the original design.

Articulate Rapid E-Learning Blog - build better elearning courses practicing new techniques

Here are some of the places I go to find inspiration:

  • E-Learning Examples: a good collection of all sorts of e-learning and interactive multimedia examples that could inspire course design ideas.
  • Articulate demos: the e-learning challenges have produced over 1000 different examples. You can find a complete list here. But we also feature a few of the more popular ones and other demos in our examples section.
  • News multimedia: with every major news event there’s usually some multimedia composed to explain it. USA Today and NY Times (links to examples) usually have some good demos.
  • Museums: many of the large museums have interactive tours and demos. Here’s one from the Smithsonian on how to build a sod house (requires flash) and an interactive tour of the Louvre.
  • Design sites: I’m not a graphic artist but I can glean ideas from those who are. I like to look at some of the portfolios on sites like Dribbble. I often get ideas on layouts, colors, and UI.

If you don’t want to get stuck building the same course over and over again, challenge yourself to find inspiration in the work of your peers. Make some time to connect with others and if you have time, join one of the weekly challenges. I’d love to see what you do.

How do you find inspiration for your e-learning projects?

Events

Free E-Learning Resources

Want to learn more? Check out these articles and free resources in the community.

Here’s a great job board for e-learning, instructional design, and training jobs

Participate in the weekly e-learning challenges to sharpen your skills

Get your free PowerPoint templates and free graphics & stock images.

Lots of cool e-learning examples to check out and find inspiration.

Getting Started? This e-learning 101 series and the free e-books will help.