The Rapid Elearning Blog

Archive for September, 2008


In an operating room, when the surgeon asks for a scalpel, it’s right there.  The same can be said for any vocation.  When you’re doing a job, you tend to be faster and more proficient when you have the tools right by you, rather than spending a lot of time looking for them.

There are some simple things you can do to improve your production process.   A lot of it has to do with organizing your assets, like clip art, images, and other graphics.  In this post, I’ll show you a few techniques that I use to make my production easier.

As you’re working in PowerPoint, you move objects on and off the slide.  You change fonts, align shapes, and experiment with different colors and layouts.  When you make these types of edits on your real slides, you can run into problems.  It’s easy to accidentally mess things up which cause you to spend more time fixing mistakes. That’s why I use the following techniques.

Move Objects Off Screen

Your actual slide area is only so big.  The good thing is that you’re not limited to working in just the slide area.  You can always move objects from the main slide off to the side.  When you publish your course, you won’t be able to see those objects that are not in the slide area.
The Rapid E-Learning Blog: objects off to the side of slide

So, when you want quick access to some objects or pictures, just load them on the slide and move them off to the side.

Create a Staging Area

I like to create an extra slide (or two) that I put next to the slide I am working on.  I use it as a staging area.  This allows me to work in the staging area and not mess up my real slide.  This really comes in handy because working with layers in PowerPoint can be a challenge.

For example, if I need to ungroup an object:

  • I’ll create a new slide.
  • Move the object there.
  • Make my edits.
  • Move the edited object to my real slide. 
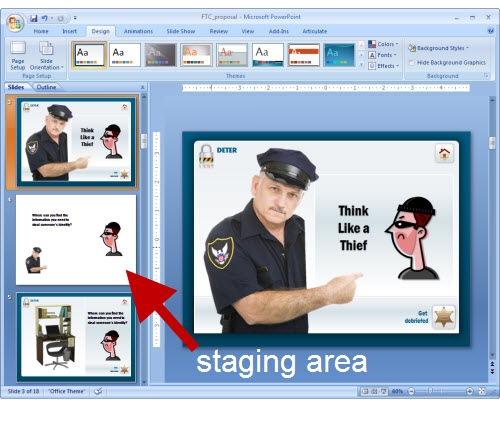
The Rapid E-Learning Blog: blank slide as a staging area

Using the extra slide as a staging area gives you the freedom to work without messing up the real slides.  It’s not unusual for me to have multiple blank slides that I use to work on my graphics and animations.  They’re just temporary slides, so when I am done, I just delete them….OR

Hide Your Slides

Because PowerPoint lets you hide your slides, you can create as many extra slides as you like without deleting them.  When you publish your slides, the hidden slides are not published.

  • Select your slide(s)
  • Right click and select "hide slide" from the menu.
  • Hidden slides will be faded out and there is a slash line through the slide number.
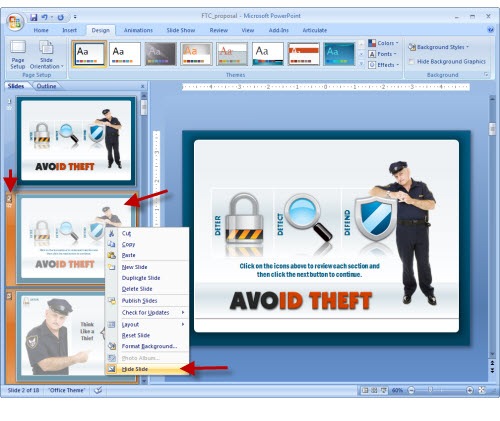
The Rapid E-Learning Blo: hidden slides

The benefit to hiding slides is that you can create as many extra slides as you like.  You can us slides to create an instant access library.  For example, put all of your clip art and graphics on a series of easy-to-access slides.  Then hide them.  You have access to the slides when you need them and they never show up in your published course.  That saves you the time of doing a bunch of inserting of pictures and graphics.

This is also a good way to pass those assets on to someone else.  All of your graphics and images can be stored on extra slides within the project. 

Another benefit to the hidden slide feature is that you can have multiple versions of the same course.  For example, suppose you have a course for production workers and one for their supervisors.  Essentially, the courses are the same; however there are some differences that are covered in extra slides.  Don’t create two courses.  Instead, hide and unhide the slides you need and then publish the two courses from the same PowerPoint file.

Here’s a quick tutorial to show you how what I covered in today’s post works.

The Rapid E-Learning Blog: hide slides tutorial

Click here to view the tutorial.

Using these simple tricks will help you save time and manage your project assets.  By creating hidden slides with all of your graphics, you never have to worry about losing them or messing up your real slides.  Develop the habit of using staging area slides and the hide slide feature and you’ll find that your production process becomes a little faster.

Events

Free E-Learning Resources

Want to learn more? Check out these articles and free resources in the community.

Here’s a great job board for e-learning, instructional design, and training jobs

Participate in the weekly e-learning challenges to sharpen your skills

Get your free PowerPoint templates and free graphics & stock images.

Lots of cool e-learning examples to check out and find inspiration.

Getting Started? This e-learning 101 series and the free e-books will help.


If you’re like me, when you use PowerPoint to build your rapid elearning courses, you end up doing a lot of copying and pasting of objects.  Or you seem to be inserting the same images over and over again. Well, here’s a tip that’s going to save you time and make your life a whole lot easier.  Your family will love you, coffee will taste better in the morning, and "three little birds will line up on your door step, singin’ sweet songs of melodies pure and true."

Understand the Clipboard

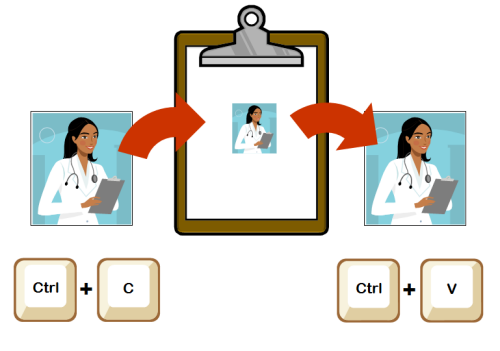
When you copy an object, it gets loaded into a clipboard.  The clipboard is a temporary area that holds the copied information.  This allows you to go to a different location and paste the clipboard object.

The Rapid E-Learning Blog: copy and paste functions

Use the Clipboard as a Temporary Library of Objects

Most people already know how to copy and paste objects on the screen.  In fact, my guess is that it is one of the most frequently used features in PowerPoint during the production process. 

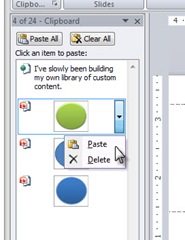
What most people don’t know is that the clipboard can hold up to 24 items.  This comes in handy because you can preload it with all sorts of content.  Then when you need it, open the clipboard and paste it on the slide. 

The steps are real simple:

  • Click on and copy your object: CTRL+C.  This loads it into your clipboard.

The Rapid E-Learning Blog: control + c to copy

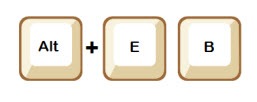
  • Open your clipboard. You can find the clipboard by pressing ALT+E, then B.

The Rapid E-Learning Blog: alt + E and then B to open the clipboard

  • The clipboard is open and shows you all of the objects that are loaded in it.  When you need one, click on it and it will paste onto screen.  It’s as simple as that.

The Rapid E-Learning Blog: clipboard

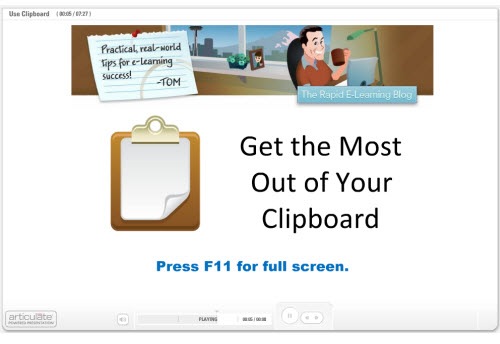
Check out the Tutorial

The Rapid E-Learning Blog: clipboard tutorial

Click here to view the tutorial.

If you find that you’re always copying and pasting the same stuff, this is a time saving tip.  To really get a sense of how ii works, just watch this quick tutorial that I put together.  It gives you an idea of how using the clipboard can make production a lot faster.

Feel free to share any tips and tricks that you use by clicking on the comments section.

Events

Free E-Learning Resources

Want to learn more? Check out these articles and free resources in the community.

Here’s a great job board for e-learning, instructional design, and training jobs

Participate in the weekly e-learning challenges to sharpen your skills

Get your free PowerPoint templates and free graphics & stock images.

Lots of cool e-learning examples to check out and find inspiration.

Getting Started? This e-learning 101 series and the free e-books will help.


I’ve gotten a lot of emails about my last post on creating simple puzzle animations in PowerPoint.  Based on some of the questions in the emails, I thought it would be good to go over some simple tips and tricks that I’ve learned over the years.  They help make working with PowerPoint more productive.

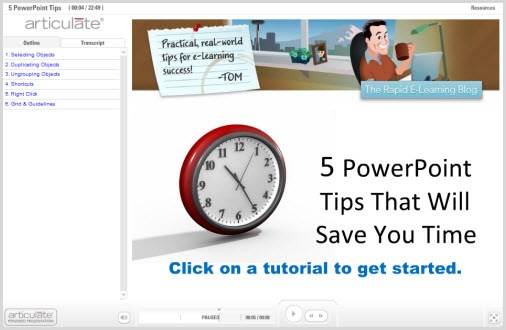
Review the tips below and then watch the tutorial for more detailed information.

The Rapid E-Learning Blog: 5 PowerPoint Tips tutorial

Click here to view the PowerPoint tips tutorial.

The tutorials are a little more detailed than the post so they take a little more time.  The link above takes you to the entire tutorial.  If you want to see individual parts of the tutorial, click the links below:

1. How to select objects on the screen

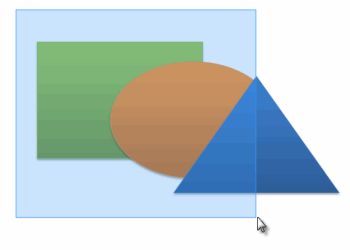
  • Click and drag the mouse to select objects on the screen.  Only those items that you drag over completely are selected.  So, you can avoid selecting objects by not dragging over the entire image.  This works really well when trying to group and ungroup clip art.
  • Select and unselect objects by holding down the shift key and clicking on them.  I’ll drag the mouse over a bunch of objects to capture them all, then the ones I want to remove, I just SHIFT+click on them.

The Rapid E-Learning Blog: selecting objects

2. How to duplicate objects and slides

  • You can quickly duplicate objects and slides, by placing your mouse over an object.  Press the CTRL key and you’ll see the mouse with a "+" sign.  Then click and drag the object where you want it to be.  You can do the same for slides in the viewer modes.  Just CTRL click and drag the slides.
  • Another option is to select a slide or object and press CTRL+D.  That duplicates the object.

The Rapid E-Learning Blog:  duplicating objects

3. Leverage grouping and ungrouping of objects

  • Right click on objects to group and ungroup or use shortcuts:
    • PowerPoint 2007: CTRL+G (group) CTRL+SHIFT+G (ungroup)
    • PowerPoint 2003: CTRL+SHIFT+G and CTRL+SHIFT+H
  • I’ve slowly been building my own library of custom content.  I’ve developed the habit of converting my grouped objects into vector images and then reinserting them in the slide.  This way I can easily use them elsewhere.  By saving them as vector images, I’m also able to ungroup and edit them inside PowerPoint.

4. Keyboard shortcuts & right clicking

There are a bunch of keyboard shortcuts that you can use to make your production process faster.  The options for PowerPoint 2003 and 2007 are a little different. 

There are some basic shortcuts that I use all the time for copying and pasting.  I also do a lot of grouping and duplicating.  I can’t go through every shortcut in this post.  However, if you review the links below you can see what they are.  You might even find features that you didn’t know existed.

Here are links for the two:

The Rapid E-Learning Blog: alt tags

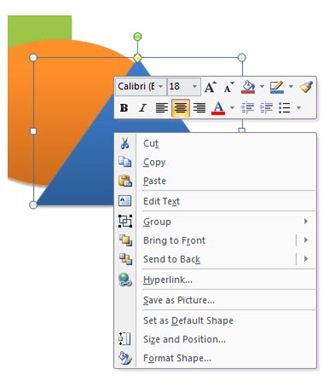
In addition to learning some keyboard shortcuts, get used to right clicking on objects.  That will always open a context sensitive menu that reveals options and features available to you based on what you right clicked.  It will save you a lot of time looking for menu items.

The Rapid E-Learning Blog: right click menu

I love PowerPoint 2007 and think it really helps make PowerPoint a better tool to author elearning.  I’m going to do a post on my observations in the near term.  However, if you’re between PowerPoint 2003 and 2007, I found this quick reference guide on the Computerworld site with a good comparison of the keyboard shortcuts for both products.

5. Use the grid and guides to help align objects

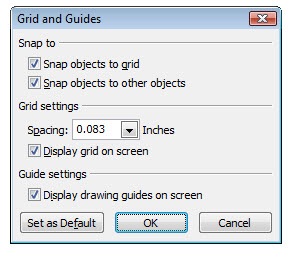
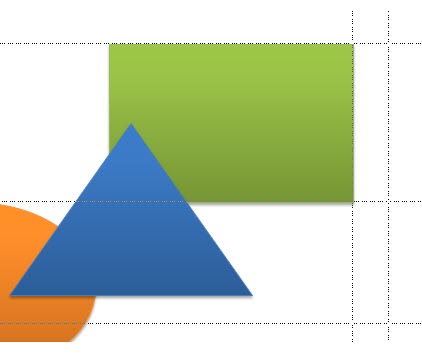
Using PowerPoint’s grid and guides will help you keep objects aligned.  As you can see, the menu lets you modify the grid spacing, snapping of objects, and drawing guides.

The Rapid E-Learning Blog: grid menu   The Rapid E-Learning Blog: grid lines

I use the drawing guides on every project.  They help me align my objects across screens.  Duplicating them is the same as duplicating anything else in PowerPoint.  Select the guide, hit CTRL, and then drag the guide where you want it.

The Rapid E-Learning Blog: drawing guides 


PowerPoint is a very effective tool to build elearning courses.  The better you get at using some of PowerPoint’s features, the more effective you’ll become when building your courses.  Hopefully, these tips and tricks will help you become a little faster at what you do.

If you have some tips and tricks you’d like to share, just add them to the comments section.  Also, feel free to share these with others. 

Events

Free E-Learning Resources

Want to learn more? Check out these articles and free resources in the community.

Here’s a great job board for e-learning, instructional design, and training jobs

Participate in the weekly e-learning challenges to sharpen your skills

Get your free PowerPoint templates and free graphics & stock images.

Lots of cool e-learning examples to check out and find inspiration.

Getting Started? This e-learning 101 series and the free e-books will help.


I’ve gotten a lot of emails asking for a quick way to build puzzle animations.  Usually the requests are to build them with no additional software or advanced graphics skills.  They also added the words famous to all of us in the rapid elearning world…no time and no budget.

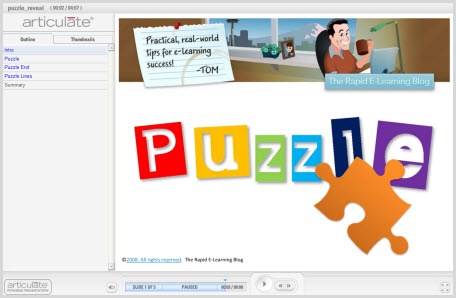
Building a puzzle animation is simple and only takes a few minutes.  I built a quick demo of how this could be done just using PowerPoint.  Click on the link to see the published version and then learn how I did it by reading the rest of the post. 

The Rapid E-Learning Blog: puzzle demo

Click here to view the puzzle demo.

Build a Puzzle

When building animations, the key is to trick the mind into thinking that what it sees is what it sees.  In this case, we want it to look like puzzle pieces are added to the screen to build an image. 

Instead of building individual pieces and adding them to the screen, what we really do is hide the complete image underneath the entire puzzle.  As we remove the puzzle pieces, part of the image is revealed.  This creates the illusion that we’re building a puzzle, piece by piece. 

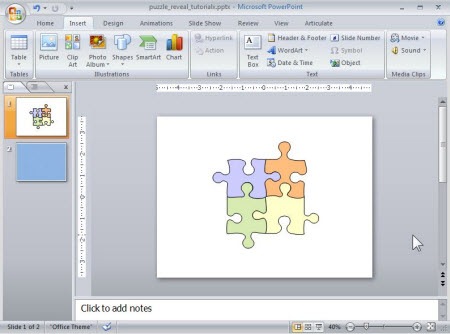
To create this effect, you’ll need a clip art image of a puzzle that can be ungrouped and modified in PowerPoint.  A quick search of PowerPoint’s clip art will give you one. 

  • Ungroup the puzzle clip art and change the fill color to match the background color of the slide.
  • Place the image that you want to reveal underneath the puzzle image.
  • Duplicate the slide and then remove a puzzle piece from the clip art.
  • Continue to do this until the entire image is revealed.

Here’s a tutorial to show you how I built it. 

The Rapid E-Learning Blog: puzzle animation tutorial

Click here to view the puzzle tutorial (9 min).

That’s it.  Pretty simple, huh?  In essence you’re just creating a hole that peeks into the layer beneath.  So you’re really not limited to just the puzzle shapes.  You can use it to create the illusion of images that are cut or sized to the screen area.  So instead of actually editing the image, you just modify the “hole” that you place on top of it.

This is a quick and simple way to create a puzzle without having to do a lot of editing of your graphics.  If you have some tips or tricks, feel free to share them in the comments section.  Also, if you have some questions about other tips and tricks like this, feel free to send them my way.  I’ll see about doing some simple tutorials.

Events

Free E-Learning Resources

Want to learn more? Check out these articles and free resources in the community.

Here’s a great job board for e-learning, instructional design, and training jobs

Participate in the weekly e-learning challenges to sharpen your skills

Get your free PowerPoint templates and free graphics & stock images.

Lots of cool e-learning examples to check out and find inspiration.

Getting Started? This e-learning 101 series and the free e-books will help.


A while back my wife’s computer crashed.  So I did a search online, found the information I needed, and then learned to do the repair.  While I was going through the pages of content, at no time did I complain about the lack of interactivity or the fact that the content wasn’t media-rich.  In fact, the only thing that concerned me was finding the right information to solve the problem.

I found the information I needed and applied it to my problem.  Because of this, I learned to solve the problem and build on my existing knowledge of how to fix laptops.  This seems to come in a lot handier now that I have a Vista-based PC. 🙂

One of the dilemmas we face when we create elearning courses is that those taking the course aren’t always compelled by an immediate need to learn like I was with my wife’s laptop.  They’re usually taking the course because it’s compulsory–either their employer requires it, they need some sort of certification, or it’s part of an educational program. 

This doesn’t mean the course is useless or irrelevant.  It just means that the reason for taking it might not be to meet an immediate learning need.  And because of that, it becomes more challenging to help people learn from the information the course presents. 

This is when a scenario or problem-based course comes in handy.  By presenting the right type of situation, you can get the learner to think and make decisions which helps them process the course content and make it part of their knowledge. 

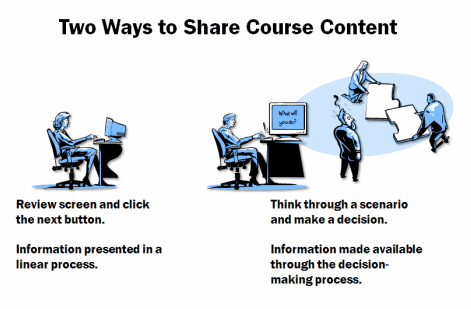
A traditional course would be like the computer manufacturer giving me a handbook with all of the information on how to repair a computer.  A scenario-based course would be like a real situation where I actually need to make the choices that are part of repairing a computer.  Both approaches give me the course content.  But instead of just reviewing it, I’m presented with a problem and then use the information to solve it.  But, I think you’d agree that actually solving the problem becomes a better learning experience than just seeing the information.

 The Rapid E-Learning Blog: Two ways to share course content

When you build your next course, instead of just presenting information, figure out how the learner will use it and then build scenarios around it.  Here are three questions I ask to help me think through, and then build, my scenarios.

What situations require the learner to know this information?

Step away from just giving them information and build a scenario.  There’s a reason that the course content is important to the learner.  Creates a circumstance where the learner gets to use the knowledge that you hope the course creates.  The benefit to this is that for an experienced learner, you’re going to help them confirm what they already know.  And for a novice learner, you’ll be able to help them learn.

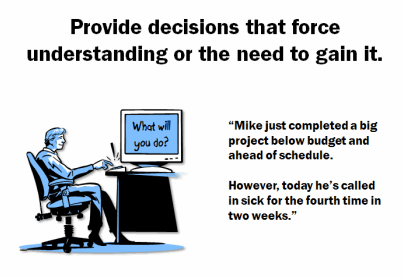
The Rapid E-Learning Blog: Provide decisions that force understanding

I once had to build a course on environmental training for the managers of production facilities.  The client opted to do a series of information-based modules.  While the modules satisfied the need to get the information out to the managers, they did little to help the learner integrate the information in their daily practice. 

To remedy this, instead of information modules, we could have presented a scenario where a government inspector comes to the site and issues a $1 million fine because of the high level of emissions.  The manager has to create a report for the CEO that details why his site was fined $1 million and then what actions he needs to take to ensure compliance with the laws and reduce emissions. 

What choices could they be expected to make in that circumstance?

Once you’ve determined your circumstance, you need to figure out what types of choices a person would make.  This is where the subject matter expert can lend a hand.  They could share different experiences and possible outcomes.

You want to make the choices real and not so obvious.  The last thing you want to do is offer one solid choice and two choices that are easy to weed out.  Life isn’t like that.  Instead it’s usually a matter of making some decisions and then dealing with issues that come from those decisions.

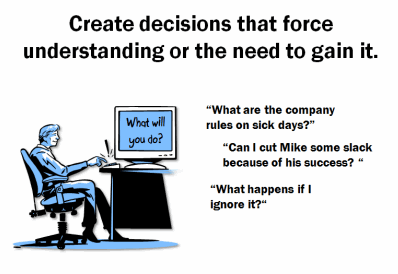
The Rapid E-Learning Blog: Create decisions that force understanding or the need to gain it.

Keep in mind that you don’t have to always have a right and wrong choice.  You can throw in choices that are somewhat right and somewhat wrong and force the learner to pick from the best of the choices.  You’ll be able to address the nuances in the feedback.  Also, by not always having the right choices, you’ll be able to create other situations that spin off of the bad part of the choice.

For example, in the environmental training, these could be the choices:

  • Contact the CEO immediately to notify her of the fine.
  • Research the issue, and then contact your regional manager to discuss the next steps.
  • Take corrective action so that the problem is fixed and then create a report for the CEO.

They’re all viable options and none of the choices seem obviously right or wrong.  This makes you stop and think through the potential outcomes.  And that’s what you want to have happen.

What are the consequences of those choices?

Each choice produces a consequence that generates feedback.  This is where you can introduce some of the specific course content that they’d normally just get in the “click and read” course.

You could make very direct statements such as, “That’s not a good choice because the current law requires….”  This allows you to share some of the course content.  Then a follow up step could be to meet with the manager or some other situation that allows you share even more info. 

Or you can make it flow more like real life.  Instead of stating that “this choice is right or wrong” you just have a follow up situation that produces some more choices.

Let’s look at the environmental training again. 

  • If you contact the CEO, this could delay getting the issue fixed while her team reviews options.  In the mean time, the inspector comes back to check up on your site. 
  • By researching the problem, you’re able to find out what needs to happen and can discuss with your manager.  In the mean time the local news has broken the story and your company stock is down.  You’re CEO isn’t happy.
  • Fixing the problem is good.  However, your manager and CEO are upset that they didn’t hear about the problem first.

This type of tension is what produces the learning.  As I think through these options, my first thought is to know exactly what the company expects me to do. 

You want a healthy level of uncertainty, but not make it seem so difficult that you’re not motivated to learn how to overcome it.  Uncertainty feeds into the learner’s curiosity.  I addressed some of this in an earlier post about leveraging tension and curiosity in your elearning courses.

The Rapid E-Learning Blog: Create a process to get the information needed to solve the problem.

Whenever you attempt a scenario-driven approach, the immediate concern from your client or subject matter expert will be about how they can ensure that the information they want to share makes its way into the course.  Here are a few ways to do this:

  • Share some information as you set the stage for the decision-making.  A question could be stated like this:  “In 1979, the EPA passed this law, which states….”  That gives the learner some information and then sets the stage for the scenario. 
  • Provide information as part of the feedback.  You could be very direct with the feedback: “That is not correct.  The current law states that….”  Or, you could have the learner do some research and then answer a follow up scenario or question.  “Go to the company web site and look at the current requirements.”
  • Create some help lines.  For example, you could just add links to additional information.  If you use Engage, you could build an FAQ or similar type of interaction as a drop down tab.  Here’s an example of how that could work. 
  • Create help assistants.  This is similar to the first approach.  Only in this case, instead of an impersonal help resource, create a virtual character than can provide the information.  For example, the glossary interaction that you see in the example I provided could just as easily be a link to Susan, the Human Resources Manager.  If you add an image or video and some audio, it makes the help seem much more personal.
  • Create a virtual guide.  The guide takes you through the course with the understanding that at any time you need additional information, you click on the guide for tips and clues.

Information by itself is meaningless.  It only holds value if the learner knows what to do with it.  You want to know how the learner will use the information and then build your scenarios around that.

These three questions provide a simple structure for scenarios.  They help you convert information that might normally be presented in a standard linear format and put it in a context that is more like the learner’s real world.  The more you can make the decisions relevant to the learner’s world, the more likely they’ll be engaged with the course and actually meet your learning objectives.

What are some techniques you use to convert your course content to relevant learning scenarios?  Please share them in the comments section.

Events

Free E-Learning Resources

Want to learn more? Check out these articles and free resources in the community.

Here’s a great job board for e-learning, instructional design, and training jobs

Participate in the weekly e-learning challenges to sharpen your skills

Get your free PowerPoint templates and free graphics & stock images.

Lots of cool e-learning examples to check out and find inspiration.

Getting Started? This e-learning 101 series and the free e-books will help.