The Rapid Elearning Blog

Archive for the ‘Book’ Category


no audio narration for e-learning

Audio narration is part of multimedia and adds a lot of value to your elearning courses. However, there are times when it makes sense to NOT use audio in your courses.

Do Not Use Audio Narration When They Can’t Hear It

If those taking the course can’t hear the audio narration, then it makes sense not to include it. This probably seems obvious, but often we don’t get to meet those who take the courses so we’re not always aware of their audio limitations. In fact, many of the people I talk to get handed the course content with no access to the intended audience.

There are usually three main reasons why the person can’t hear the course:

  • Technology. Many access the elearning courses from computers that don’t support audio. The computers may not have sound cards or speakers. This is not as common as it used to be, but it’s still a good idea to ask your client if the end users will have access to computers that support audio and if they need headsets.
  • Environment. Some people access the online modules from shared computers in a production environment. Many of those systems don’t have audio output, and even if they did, the environment is too loud to hear it.
  • Hearing disabilities. You may have learners with hearing disabilities. In those cases, you’ll need to make modifications so that they can learn what needs to be learned. Some organizations already require accessible content. Even if it’s not required for your course, it’s a good idea to add closed caption text or some sort of transcript for those who may need it. Here’s a free e-book that discusses best practices for 508 and accessible content.

Do Not Use Audio Narration If You’re on a Tight Budget

Producing good audio narration takes time and doing it right costs money. You need to write, rehearse, and approve scripts that sound like real people talking. Here’s typically what happens:

  • Write the script.
  • Review the script with subject matter experts.
  • Re-write the script.
  • Review again.
  • Re-write the script.
  • Record audio narration and realize the script doesn’t sound right.
  • Re-write script.
  • Record audio narration.
  • Review final course and have upper-level manager tell you that they don’t like the audio and the legal team needs to make a few edits.
  • Rinse and repeat.

Seriously, producing audio narration takes time and adds many variables to the production process with a lot of extra meetings. If you don’t have the resources, it’s better to skip it than doing it wrong or wasting time.

Do Not Use Audio Narration If the Narrator is Not Professional

I have mixed feelings on this next point. There’s a lot to be said about the authentic voice of a real person. And the reality is that in many cases, it makes sense to record your own audio narration. However, there is a big difference between a good speaking voice and a professional narrator.

  • You want a voice actor. Someone once told me that you don’t want a professional narrator, instead you want a voice actor. And recording your subject matter expert who has a good speaking voice is not the same as the person you’d qualify as a voice actor.
  • You don’t need to spend a fortune. There are a lot of ways to hire good voice talent at reasonable cost. Fiverr and services like Voice123 are worth exploring. And you can even find some freelance elearning developers that can produce their own audio.

On the flip side, if you do record your own audio narration:

  • Get a good microphone. I have used the Samson C01U & C03U. Travel with the very portable GoMic, and currently use the Yeti Pro for most of my recording. They’re all good mics. You can get a decent microphone for about $75.  The links to Amazon mics may produce a slight commission.
  • Learn some of the basics with these tips and tricks.

In an ideal world you have a budget to create the best course possible. And this includes inserting great audio narration. Keep in mind that bad audio is the least tolerable form of multimedia. People will tolerate less than perfect image quality before they accept bad audio narration. If you can’t do it right, perhaps it’s best to not do it at all.

Events

Free E-Learning Resources

Want to learn more? Check out these articles and free resources in the community.

Here’s a great job board for e-learning, instructional design, and training jobs

Participate in the weekly e-learning challenges to sharpen your skills

Get your free PowerPoint templates and free graphics & stock images.

Lots of cool e-learning examples to check out and find inspiration.

Getting Started? This e-learning 101 series and the free e-books will help.


e-learning characters add interest and context

When designing the visuals for an elearning course there are only so many things that fit on the screen and one of the most important of those things is a character. Here’s why.

E-Learning Characters Initiate Engagement

Adding the right image initiates engagement because it draws the learner’s attention, communicates the general topic, and can generate a visceral reaction. Review the images below. What response do they elicit? What do you think the courses are about? Are they serious? Funny? Do they seem interesting?

e-learning characters for online training

Suppose you can only put one image on your screen, what would it be?

Many of the courses I see use bland, corporate branded templates coupled with generic stock images. The imagery is boring and does nothing to engage the initial interest. That can all change when coupling the right characters with good content.

Simple Ways to Use E-Learning Characters

Obviously this is a challenge because most of us aren’t illustrators nor have access to graphic designers who can create custom characters for us. If that’s true for you, here are a few simple solutions:

  • Choose characters that map to the context of your course. You may be stuck with generic stock photos, but choose the ones that align to your course content. For example, if you’re creating a medical course, select medically-themed characters. Also, instead of cut-out characters, select a character in a contextual background. Seems obvious, but it’s the first step.

medical e-learning characters

  • Select a consistent visual style. You’ll notice in the first image above that the characters range from photographic to illustrated vectors. Find a style that works and use it consistently. If you use photos, select the same type with similar backgrounds. If you use vectors, use the same style. Or flip it. If you always use photos, try illustrations.  And you may be able to edit them to meet your specific needs.
  • Shoot your own photos. At least two of the images above are not stock photos. Here’s a post with tips when shooting your own stock photos.
  • Don’t use humans. Characters can be animals, icons, etc.
  • Try some that are more dramatic or in your face images. Humor and drama go a long way to initiate engagement.

funny e-learning characters

Additional resources:

  • If you need some examples of how people have used characters in elearning courses, check out this weekly elearning challenge.
  • These two books discuss characters/avatars in course design. Some people call them pedagogical agents. Those are the people I tend to avoid. In either case, these two books discuss how they may add value to your courses: E-Learning and the Science of Instruction and The Gamification of Learning and Instruction. 

Characters add context. Medical characters say it’s a medical course. People in suits suggest something more corporate. Someone dressed as a clown probably means executive training. See how that works? Adding the right character is a step in the right direction for your visual design.

Step away from bland, generic templates. Find ways to add characters to your screens. It’s one of the easiest ways to engage your learners visually.

Events

Free E-Learning Resources

Want to learn more? Check out these articles and free resources in the community.

Here’s a great job board for e-learning, instructional design, and training jobs

Participate in the weekly e-learning challenges to sharpen your skills

Get your free PowerPoint templates and free graphics & stock images.

Lots of cool e-learning examples to check out and find inspiration.

Getting Started? This e-learning 101 series and the free e-books will help.


draw custom characters

In previous posts we discussed how visual thinking helps us focus on core concepts and teaches us to communicate those with graphics and other visual elements. We also looked at ways to practice developing your visual thinking skills so that you can effectively apply them to your course design.

In today’s post we’ll look at how to create custom characters that you can use in your visual thinking activities and course design.

The Case for Hand Drawn Custom Characters

You don’t have to be an artist to create custom characters. In fact, there’s a lot of value in hand drawn characters because they add personality and stand in contrast to the more typical (and often sterile) characters used in a lot of elearning courses. It’s just a matter of learning a few production techniques and then taking some time to practice.

Here are some examples of hand drawn characters I found online. You’ll notice that they’re relatively simple and that’s the key. Unless you’re really skilled, keep them simple. I think you’ll agree that the characters below are something most of us can create.

custom characters found in online search

I like the custom characters below created by Ella Zheng. They’re clean and based on a few simple shapes. And they work well with the other icons in her examples.

custom characters built with simple shapes

I could see something like these characters and icons working in an elearning course. And for you, they’re easy enough to build in PowerPoint because they’re simple combinations of some basic shapes. This is something we discussed in the post on creating your own pictograph characters.

create custom characters in PowerPoint

 Step 1: Decide on a Style for Hand Drawn Custom Characters

Start with a simple stick person. There are a number of ways to create them. You can go with straight lines, thick/bent lines, filled in shapes, square or oval bodies, or just trace over pictures. Below are a few ideas I played with. I like the first one which is a head and lines for legs and arms with no body. It’s easy to create and has a distinct style.

examples of hand-drawn custom characters

Once you develop a style, practice creating that character over and over again so you feel comfortable creating the custom character when you need it. What makes a simple character like this work is the expression and pose. We’ll look at both below.

Step 2: Identify Some Common Facial Expressions for Your Custom Characters

Identify a few facial expressions and practice drawing them. Look at what others have done for inspiration. I like this guy’s approach below, draw some circles and practice the expressions.

custom characters with different facial expressions

Articulate’s illustrated characters have twelve common expressions. That’s probably all you need for expressions. Practice by recreating those twelve expressions with your own custom characters.

12 simple expressions for your custom characters

And here’s a good example from blogger, Chinie Hidalgo Diaz, who’s created a distinct look for her characters. As you can see the style of drawing isn’t overly complex. And the water color brush is an easy effect to apply using some of the mobile drawing apps or other graphics editors. These would work great in a comic-panel style course. She also offers some of her own tips on creating facial expressions.

example of custom characters

She focuses on two key areas: the mouth and brows. Start with her expressionless face and then practice drawing mouths and brows to create simple expressions.

Here are some other examples that require a little more practice. And finally, here’s a site that has all sorts of drawing tips for those who really want to push their skills.

As far as the expressions, I’d probably build the expressions as images that I can copy and paste into faces. That means I only have to work on them once and then just pick and choose what I need later.

Step 3: Create Common Poses for Your Custom Character

Poses are a bit more challenging. The easiest way to practice is to find common poses and then apply those to your custom character style. I’d start by copying what you see so that you get a good feel for the pose and then draw your character in the poses you prefer. This is also a good reason to keep the custom character’s detail limited. It’s easier to create a pose for a stick figure than it is a character in an outfit.

poses for your custom characters

Here’s a good tutorial on drawing characters with poses.  And ScrawlerMauler shows some of his practice poses.

Here are some people who sell stick figure characters if you’re inclined to buy some. You can also find inspiration in how they pose their characters and try your hand at creating the same pose with your custom characters.

Here are some free stick figure downloads in various poses:

free custom characters to download

What are some poses to practice? Here are a few ideas:

  • Sitting
  • Pointing
  • Talking
  • Surprised
  • Angry
  • Holding a paper
  • Thinking
  • Interacting with someone else

I quickly drew the images for this presentation on how rapid elearning is so simple that even a monkey can do it.  As you can see, nothing fancy, but they work.

hand drawn custom characters and images

If you want to learn more, Dan Roam released a great how-to workbook that shows how to create the images for visual thinking.  You may also be interested in Beyond Words: A Guide to Drawing Out Ideas.  You can learn some simple drawing techniques that can be applied to your elearning courses (and wow your peers as you doodle during those boring staff meetings).

The goal in all of this is recognize that for some of your courses and presentations you can create your own illustrated graphics. This also works well when combined with visual thinking skills. And learning to create your own may help speed up your production and lend itself to courses with more personality.

Have you ever applied hand drawn images to your courses? If so, how did they turn out?

Events

Free E-Learning Resources

Want to learn more? Check out these articles and free resources in the community.

Here’s a great job board for e-learning, instructional design, and training jobs

Participate in the weekly e-learning challenges to sharpen your skills

Get your free PowerPoint templates and free graphics & stock images.

Lots of cool e-learning examples to check out and find inspiration.

Getting Started? This e-learning 101 series and the free e-books will help.


Articulate Rapid E-learning Blog - pre-assessment scenario

Organizations operate at the speed of business and don’t like to waste time or money. That’s especially true when it comes to pulling people away from their daily tasks. And this is something that happens every time a person is asked to complete an e-learning course. So it’s important to create the most cost-effective process possible and still meet the organization’s goals.

One way to make e-learning courses cost-effective is by sorting your learners and then pushing them to a successful learning path. Some who take the courses are more experienced and don’t need the same course that the new person does. And the new person probably needs a lot more context and content.

Understand Your Learners Before Building a Pre-Assessment Scenario

People come to the courses with varying levels of experience, skills, and understanding. In an ideal world, you can craft an adaptive learning process where everyone gets a unique learning experience, but that’s usually not an option. Most of the time, you have to create one course that meets the needs of everyone.

  • Experienced learners already have a lot of contexts. And often the e-learning courses act more like a certification process than new learning experience. So, in that sense, let them prove what they know and move on to completion.
  • New learners are new and don’t have a record of accomplishment of experience. Often, they don’t know what they don’t know. Some may know more than others. And some may think they already know the content.

Let Learners Test Out Instead of Using a Pre-Assessment Scenario

A common option is to let learners test out by successfully completing a pre-test. Present an assessment upfront. If they pass it, they go to the end and are done. If they don’t pass it, they go to the beginning and take the course. This is a viable model and works great for simple compliance training where an annual course completion certificate is the main objective.

Articulate Rapid E-Learning Blog - pre-assessment scenarios let you test out

However, many of those pre-assessment tests are very basic and what do they really prove? They may prove the person knows the content, but it doesn’t mean that they know how to apply it. Or it may prove that they’re good guessers. In either case, they generally don’t prove understanding, especially in a performance environment.

Create a Pre-Assessment Scenario

Functionally a pre-assessment scenario is the same as a pre-test. The goal is to sort the learners and move the experienced and novice learners down different paths. However, the core difference is that the assessment scenario attempts to assess deeper understanding of the content and its proper application.

Pre-tests typically ask a series of multiple-choice questions. And again, this is fine for a simple end-of-year certification. However, if the course is more performance-based, then the scenario allows you to stage an event that lets the learner demonstrate that they can meet the performance requirements by successfully navigating the pre-assessment scenario.

Articulate Rapid E-Learning Blog - pre-assessment scenario flow

A couple of additional benefits is that a pre-assessment scenario helps remind the experienced person of what they need to do and for the new person it helps expose deficient understanding and the types of situations they may encounter in the real world. The pre-assessment scenarios also help cement the objectives for the course. When a person isn’t successful, they’re more apt to pay attention to the course content since they’ve already been proven to lack some of the expected understanding.

A few production tips:

  • Keep it short. Instead of big, long scenarios which take more time to produce, create a series of quick hit scenarios.
  • This is a pre-assessment. So don’t feel obligated to do much to set up or support the assessment with resource content. If they can demonstrate their understanding, they can pass the pre-assessment. If they can’t, well, that’s why you created the course.
  • Create templates. You can create interactive scenario templates and reuse them for quicker production.

Pre-tests are a great way to efficiently and effectively move learners through the training process. However, they are limited in what they can assess. Switching to a real-world pre-assessment scenario provides a better way to assess understanding and application of the training content. It also lets those who don’t pass understand why they need to take the course.

Events

Free E-Learning Resources

Want to learn more? Check out these articles and free resources in the community.

Here’s a great job board for e-learning, instructional design, and training jobs

Participate in the weekly e-learning challenges to sharpen your skills

Get your free PowerPoint templates and free graphics & stock images.

Lots of cool e-learning examples to check out and find inspiration.

Getting Started? This e-learning 101 series and the free e-books will help.


Articulate Rapid E-Learning Blog - record audio narration tips & tricks

Many of you are course designers thrown into the role of elearning developer. And part of developing elearning is recording audio narration. Unfortunately most of us aren’t audio engineers.

In fact, we tend to have limited audio capabilities. For example, most of us have relatively inexpensive microphones, no dedicated recording environment, and limited technical skills. On top of that, we’re pressed for time and need to get the audio recorded quickly.

Audio Narration Setup

In this week’s challenge David asked people to share their audio set up and a few tips on recording audio narration. This is a good challenge because it’s a great way for people to show the different ways they record audio narration.

You’ll see that some have more polished setups and others work with strict limitations like a simple headset microphone and a noisy office cubicle. Check out what’s been shared thus far. You’ll find some really good tips.

Here’s my take on the challenge and a few quick tips.

Home Office Audio Narration

Generally I try to work with the same restrictions that many of you have, so I don’t have an overly fancy audio set up at home where I work. I started with a Samson C01U which was relatively inexpensive and worked fine for what I needed. But I was able to trade up as we brought on more community team members. I gave my Samson to Nicole and upgraded to a Samson C03U. I ended up giving that microphone to Nicola (our German Community Manager) and took David’s Yeti Pro that he was not using. The links to Amazon mics may produce a slight commission.

The secret there is to hire people so you can handoff the old stuff and upgrade your own equipment.

Articulate Rapid E-Learning Blog - audio narration home office setup

I also traded my Wacom tablet to David for the O.C. White Boom which you can see in the picture above. I like the boom because it’s easy for me to swing the microphone in and out of the way when I don’t need it. You can buy a boom for about $200, but I’ve seen some good examples of people converting lamp stands. That might make a nice weekend project.

Articulate Rapid E-Learning Blog - make your own mic stand for audio narration

You’ll notice that I don’t have any sound dampening or a pop filter. I recently moved and my new office room has a little echo. I also use a portable air conditioner. That does impact the recording quality. I can turn off the AC which is fine when it’s not too hot. But if it does get hot, I’m just replacing the steady hum of the AC with the sound of sweat dripping off my bare chest. Either way, it requires some post edit.

Mobile Office Audio Narration

When I’m on the road I may have to record a quick tutorial or do a webinar. I try to travel light and don’t want to bring a bunch of audio equipment so I have a lightweight Samson Go Mic. I really like it. I also bring a cheap Plantronics headset mic because I use it to show the differences between a headset and desktop microphone.

Articulate Rapid E-Learning Blog - audio narration mobile office setup

When I do record, I find the hotel room is usually fine. In fact, they are usually sound proofed so I don’t get a lot of echo and outside sound.

Audio Narration Tips & Tricks

I recorded a test with the three microphones I use. I recorded them at the same time in the same environment and I didn’t use any filters or sound dampening. The microphones were just plugged in and I recorded. This gives you a pretty good sense of the audio quality without any fancy setup or post production.

Articulate Rapid E-Learning Blog - compare microphones for audio narration

Click here to view the microphone comparison.

  • Your best audio is the audio you record first. You can do some post production to enhance the audio, but you can’t make bad audio good. So work on getting a clear sound with little ambient noise.
  • Get your mouth as close to the microphone as you can without pushing the audio levels too high. I usually put the microphone next to my mouth so I am not breathing into it.
  • Record about 30 seconds of no narration. This lets you record the ambient sound and then filter that sound out. You can do that with many of the audio editing tools.
  • Find a way to dampen the sound. Cubicle walls are good for this. Perhaps you can find a few extras to use. I’ve seen people put small boxes around their mics and then put foam in the box. I’ve also seen people record with a blanket over their heads. Perhaps there’s a market for an audio narration burka.
  • Cover distracting ambient noise with a soundtrack. Sometimes you can’t easily hide the AC or other ambient noise. In those cases try adding an audio soundtrack like some soft music to the background. You don’t want it too loud, just slightly perceptible. Make sure you have rights to the audio used. Also it’s better to use music than a song with lyrics.
  • Don’t stress about it. Most people who listen to your courses are listening through those crappy headphones that their employer provides or some basic computer speakers. They’re definitely not in a Hollywood studio with THX sound. As long as you get good crisp narration, that’s probably OK for many of your co
    urses. So relax.

Audio Narration Resources

Here are some additional tips to help with recording your audio narration:

Do you have some tips and tricks? Why not jump into the challenge?

Events

Free E-Learning Resources

Want to learn more? Check out these articles and free resources in the community.

Here’s a great job board for e-learning, instructional design, and training jobs

Participate in the weekly e-learning challenges to sharpen your skills

Get your free PowerPoint templates and free graphics & stock images.

Lots of cool e-learning examples to check out and find inspiration.

Getting Started? This e-learning 101 series and the free e-books will help.


Articulate Rapid E-Learning Blog - summer reading for online training book

It’s almost summer time and what’s better than laying in a hammock reading a book on how to build online training? Not much, I’m sure.

I’m always asked about books to read to get better at building online training courses. Here are a few books I’ve mentioned at recent workshops and below that a list of books I’ve mentioned in previous posts.

New Online Training Book Recommendations

Here are a few books I haven’t mentioned before that I think work for those just getting started:

Articulate Rapid E-Learning Blog - online training book recommendations

Online Training Books: Getting Started

The links to Amazon books may produce a slight commission.

Learning the Articulate Software

Blog Posts with Online Training Book Recommendations

I’ve mentioned a few books in previous posts. They cover a broad range of topics because today’s course designer needs to understand instructional, visual, and interaction design.

Online Training Book Recommendations

Here’s a list of the books mentioned above in case you don’t want to go digging through the previous posts:

Course & Instructional Design

Working on Projects with Clients

Visual & Presentation Design

User Design

PowerPoint

You can also finds a pretty long list of other books in the elearning community. Enjoy your summer reading!

Events

Free E-Learning Resources

Want to learn more? Check out these articles and free resources in the community.

Here’s a great job board for e-learning, instructional design, and training jobs

Participate in the weekly e-learning challenges to sharpen your skills

Get your free PowerPoint templates and free graphics & stock images.

Lots of cool e-learning examples to check out and find inspiration.

Getting Started? This e-learning 101 series and the free e-books will help.


Articulate Rapid E-Learning Blog - How to fail at elearning

In today’s world, elearning is an important part of learning and training employees. Some organizations use it exclusively and some blend it with other learning activities.

There are a lot of things you can do to create successful elearning, but here are some guaranteed ways to make sure that you don’t succeed and waste a lot of time and money in the process.

Build Courses Irrelevant to the Learner’s Needs

One the biggest complaints I hear from people who have to take elearning courses at work is that the course is completely irrelevant to their needs. This usually happens for a few reasons:

  • Shotgun approach to compliance training. We know the drill. The organization has a bunch of courses you need to take by the end of the year. It doesn’t matter if you’re already ethical or not a sexual harasser. You still need to take those courses regardless of your needs. And when you do have a need, the course isn’t tailored to it. It’s a one-size-fits-all approach that is largely irrelevant and not suited to your real needs.
  • Too much focus on information. If you want to learn to use your elearning software, I’ll show you some tutorials. Want to be a better instructional designer? Here are some good books. Want to learn more about elearning? Go to this conference. As an industry we’re good at pushing information out. But information is only part of the learning process.
  • No required action. Information is good, but real learning happens when that information is applied in a context relevant to the learner’s needs. Build courses that let people practice what they’re learning. And then give them the appropriate feedback.

Build Courses That Waste Time

I always divide my courses into two buckets: information or performance. I start by asking the client what they expect the learner to do after completing the course. In many cases, they don’t really have an expected outcome. If that’s the case, then I try to talk them out of building a course that accomplishes nothing.

Articulate Rapid E-Learning Blog - two types of elearning courses

However, that’s not always going to work. The client’s often still want a course (for other reasons). And a lot of compliance training doesn’t seek to change performance as much as certify understanding, where the only goal is to get a check mark next to your name at the end of the year.

If that’s what the client wants, then I’ll build the best course at the lowest possible cost. They’ll tend to be simple, linear courses that the person can get in and out of quickly. No need to waste even more time. If the client has clear performance-based objectives then I’ll build the course appropriate to meeting the client’s needs. Those types of courses tend to take more time and require more effort.

Here’s where we end up wasting a lot of time:

  • Build elaborate information-based courses. All the organization needs is a check mark at the end of the year, yet the elearning person builds a complex interactive scenario that provides no more value but takes more time to build and more time for the user to complete.
  • Build simple information-based courses when you’re really trying to change performance. On top of that, most of the information is already available to the learner in other places.

On one hand the course is overbuilt for a simple objective. And on the other, when we really need to help someone learn, the course is too simple.

The key is to understand the expectations and objectives so that you can build the best course and not waste your limited resources.

Build a Course That Looks Like Crap

When I was a kid, we’d go to the horse stable and shovel a truck load of horse manure. My dad would mix it with the compost so that we could have a fertile garden. When it comes to visual design in elearning, there are two types of crap.

The good kind of CRAP is from the acronym popularized by designer, Robin Williams.

  • Contrast: elements that aren’t the same stand out which enhances communication and makes it easier to see relationships between the various onscreen elements
  • Repetition: repeating onscreen elements and design helps define relationships, maintain consistency and cohesion
  • Alignment: when onscreen elements are aligned they’re connected together; how things are spaced allows for better comprehension and communication
  • Proximity: how close objects are to one another conveys meaning and relationship; the more they are apart indicates they’re different

This is the good stuff and critical to communication. Think of it like the compost for fertile development of course design. Then there’s the other type of crap. I won’t go into a bunch of details but we know it when we see it.

Articulate Rapid E-Learning Blog - visual design elements for elearning courses

We always say, “You can’t judge a book (or DVD) by its cover.” But you can entice people with a good cover. It engages their interest and can help set expectations. The same can be said for elearning design. Even if you’re building a basic course, you can still make it look good. Apply sound visual design techniques to build a look that matches your course context.

The reason we tend “not to judge the book by the cover” is because over time we’ve learned that most great looking covers make a promise that isn’t kept in the content. This happens with elearning, too. A good looking course will only get you so far. That’s why the first two points are important.

So if you want to fail, build irrelevant courses that waste time and look like crap. However, you can avoid failure by understanding the organization’s objectives, your learner’s needs, and building a great looking course that is appropriate to its learning objectives.

What are some of things we do to fail at course design and how would you correct it? Share your thoughts here.

Events

Free E-Learning Resources

Want to learn more? Check out these articles and free resources in the community.

Here’s a great job board for e-learning, instructional design, and training jobs

Participate in the weekly e-learning challenges to sharpen your skills

Get your free PowerPoint templates and free graphics & stock images.

Lots of cool e-learning examples to check out and find inspiration.

Getting Started? This e-learning 101 series and the free e-books will help.


Articulate Rapid E-Learning Blog - more than a dozen bonus tips & tricks to build better elearning

Whenever I do a workshop some extra things come to mind which has me throw in a number of “bonus tips.” At a recent workshop someone told me that I have so many bonus tips that I should do a workshop on my bonus tips.

So today I am sharing a few “bonus” tips based on recent questions and interactions with the blog readers.

Articulate Rapid E-Learning Blog - how to search the internet

“Hey, how’d you search that site so fast?”

Well, there’s this company, Google, you may not have heard of them but they do a great job with search. Most of us tend to open a Google page and do a general search.

But there are more efficient ways to search. For example, it’s easy to limit a search to a specific domain. All you have to do is type in your search term and include site: with the domain you want to search.

Let’s say you wanted to search for some microphone recommendations in the Articulate community. It would look like this: recommend microphones site:community.articulate.com

Articulate Rapid E-Learning Blog - google search results for domain

Of course, I don’t really search that way since I discovered the Search the Current Site extension for Chrome. Here’s the link for Firefox.

This is a tool I use every day because it lets me search sites without typing in the extra info. As you can see in the image below, I can search just through my blog or the entire Articulate.com domain.

Articulate Rapid E-Learning Blog - search for elearning tips

Bonus tip: If you’re looking for microphone recommendations, I’ve had good success with the Samson mics. I use a C03U in my home office and Go Mic when I travel. I also like the Snowball from Blue Microphones. All are good choices for simple recording and they’re relatively inexpensive.

Articulate Rapid E-Learning Blog - free elearning template that is flat UI desktop

In a recent post I shared some ideas on how to do a course makeover on older courses. In that post I shared a free elearning template based on the interactive notebook tabs. I also shared a makeover of the overhead desktop. But that was only an image and not a template.

Articulate Rapid E-Learning Blog - example of flat UI free template in PowerPoint

A lot of people asked about the image and requested a template version of the flat desktop so here it is, just for you. Below is a quick published version if you want to see it in action.

Articulate Rapid E-Learning Blog - example of a flat UI interactive elearning course

Click here to see the desktop template in action.

Articulate Rapid E-Learning Blog - how to become an instructional designer

“If I can only read one book to learn more about building better courses, what would it be?”

There are a lot of really good elearning books out there. We started a list of books in the community where you can find more titles.

From my experience, many of the people doing this stuff are relatively new and don’t have very deep technical skills. So in that sense, learning to use the software better is always going to help.

Articulate Rapid E-Learning Blog - design for how people learn

However, if I was forced to pick a single book, it would be Design for How People Learn. I recommend this one all the time. It’s an easy read and Julie Dirksen does a great job helping people think through the learning process. If you’re just getting started and need to think like an instructional designer, this book will help you learn about learning.

Bonus tip: With the release of Articulate Replay, I’m anticipating that I’ll do more tutorials with my webcam. Not only is this good motivation to lose weight (and shave and move beyond old t-shirts and sweats) it has me thinking about how to set up my home office for video.

David shared this set up which includes a simple light kit, backdrop stand, and material for green screen. I recall my first low-end light kit a few years ago was close to $1000. Mike also shared a great way to get better webcam lighting for $15. Wistia also has some great tips on a DIY video studio. Is that a bonus, bonus tip?

The product links to Amazon may produce a slight commission.

Articulate Rapid E-Learning Blog - internet tip when using Google Chrome

I was showing someone my Springpad notebooks and someone asked why the web site I was using didn’t look like a browser window.

The community team at Articulate uses a lot of browser-based applications like Trello and Yammer. Instead of having to access them via the browser I set them up so they work like single applications.

Articulate Rapid E-Learning Blog - google chrome versus save as application

Look at the image above. Notice that the browser features are gone? And since it’s treated like an application I can add it to my tool bar for quick access.

Articulate Rapid E-Learning Blog - toolbar with google chrome applications

I use Chrome. If you do, too, this is how to create the application from the website. Go to Tools and select Create Shortcut Application. Then decide where you want to put it. As I said earlier, I like the quick access to the applications without all of the clutter I normally have in my browser.

Articulate Rapid E-Learning Blog - how to create application shortcuts in Google chrome

Bonus tip: Trello is a cool application for simple project management. My team uses it daily. If you’re looking for a solution, give it a try. Mike even featured Trello in his quick Replay demo so you get a peek at how it looks.

So there you go, a smorgasbord of bonus tips & tricks to help in your course design. Do you have any bonus tips to share?

Events

Free E-Learning Resources

Want to learn more? Check out these articles and free resources in the community.

Here’s a great job board for e-learning, instructional design, and training jobs

Participate in the weekly e-learning challenges to sharpen your skills

Get your free PowerPoint templates and free graphics & stock images.

Lots of cool e-learning examples to check out and find inspiration.

Getting Started? This e-learning 101 series and the free e-books will help.


Articulate Rapid E-Learning Blog - how to manage emails for online training programs

Email is a reality for many of us. Often it’s a pain to manage and odds are that managing your emails plays a large part in managing your online training programs.

During a recent elearning workshop, someone brought up emails and asked how I managed mine. As can be expected I get quite a few between the blog and elearning community and sometimes it’s difficult to stay on top of them.

In an earlier post we looked at ways to communicate better with our subject matter experts when using email. Today I’ll share my strategy for managing my email inbox. Perhaps there’s something that will help you, too.

Create a Simple Way to Sort Emails

To me one of the biggest problems is that my inbox fills so rapidly that I lose track of what’s there and what I need to do. Years ago, when I got fewer emails I was able to use my inbox to manage my action items. But today that doesn’t work.

My goal is to limit how often I touch a particular email so I quickly review my inbox and then sort emails to their appropriate category.

This starts with four basic categories:

  • Read and delete. I review the email and determine if it needs any further action. If there’s no action required or need to archive the email, I delete it. There’s no reason to keep it around to clutter up my inbox and distract me when I come back in.
  • Forward to someone else. I get a lot of technical support questions. Fortunately I have four community managers who can help with these. So I divvy up those requests and forward to one of my community managers. This way the person who needs help isn’t waiting on me to respond. I also have some email responses set up with relevant links so that when I get technical questions I have quick access to the resources they need.
  • Move to “Answer this” folder. If I can’t quickly forward the email to someone else (or the email requires a more detailed response) I move it to my “Answer this” folder. I’ll get to it later during the time designated to answer emails.
  • Move to “Do this” folder. This is my highest priority folder. It contains emails related to projects or known deadlines. They are the things I need to do right away. So this is the first folder I go through to make sure that I am on top of things.

This simple sorting process has cut my time with emails significantly.

Set a Specific Time to Review Emails

I take about 30 minutes at the beginning of the day where I quickly sort new emails. I can do a quick review of what’s there and also stay abreast of any immediate concerns.

Articulate Rapid E-Learning Blog - example of a calendar schedule for managing email and the inbox

Later in the day, I set about 90 minutes or so (sometimes it takes a lot longer) to answer emails. I try to knock off the “to do” emails first, and then get to the “answer this” emails. This helps me stay on track with those things that have deadlines or due dates.

Before I set a specific time to answer emails I’d do it on the fly or in the time I had between meetings and projects. The problem was that I was less productive and there would always be things in the emails that pulled me away from more important tasks. Today I just let the emails sit until my designated time.

Turn off the Spigot

I get lots emails from blog readers and the community. I can control some of that by the channels I offer for self-service like the tutorials in the community and quick access to other resources.

I also get notifications from all sorts of social media sites and services like Twitter, Facebook, and LinkedIn. Most of that stuff is noise and will consume time; and even if they don’t consume a lot time, they are still the types of little distractions that can pull you out of the zone and not allow good concentration on completing tasks.

To counter this I turn off the notifications and visit the social media sites based on a schedule. Just like I have a set time for email and real projects, I have a set time to review social media alerts and other information. This has been a massive help to getting things done.

Articulate Rapid E-Learning Blog - hootsuite is a good tool to manage social media alerts

Here are some tools I use to manage my emails and other alerts:

  • Quick Steps in Outlook 2010 is your friend. I have a bunch of Quick Steps that let me filter and respond to emails in seconds. That is one of the biggest helps to me the past couple of years. I can also assign categories so it’s much easier to review the emails.
  • Find a social media tool. I’ve tried a few and settled on Hootsuite . It lets me manage my social media alerts and filters. For the most part it gives me a single point of contact for all of those sites. There are other good tools out there like TweetDeck. Find one and learn to use it.
  • Guide your time management. I have an iPad and use the 30/30 app. I set a specific time to work on a task and the app helps me stay focused. I’ve also been trying to get my kids to use it for their school work. I’ll let you know how that goes in a couple of years.

Articulate Rapid E-Learning Blog - good resources to help manage email and the inbox - hamster revolution and getting things done

Over the years I’ve read some good books on time management that have helped. I like the Hamster Revolution and the stuff I’ve read on Getting Things Done. Personally I’ve found that the key is to develop a good simple strategy and then work at sticking with it.  And the strategy that works best for me is one that is intuitive and works without requiring a whole new personality. The links to Amazon books may produce a slight commission.

I’m no expert on email management and I’m sure there are hundreds of great resources available online. But the tips above have helped me thus far and perhaps they’ll help you, too especially when working on elearning projects.

What do you do to manage your emails? I’d love to know.

Events

Free E-Learning Resources

Want to learn more? Check out these articles and free resources in the community.

Here’s a great job board for e-learning, instructional design, and training jobs

Participate in the weekly e-learning challenges to sharpen your skills

Get your free PowerPoint templates and free graphics & stock images.

Lots of cool e-learning examples to check out and find inspiration.

Getting Started? This e-learning 101 series and the free e-books will help.


Articulate Rapid E-Learning Blog - How to create your own graphics and illustrations in PowerPoint

Despite all of the whining about PowerPoint, I find it an effective application for much of my online training and graphic design work. There aren’t many applications more diverse. And it’s what I highlighted in this post on why PowerPoint doesn’t suck.

In that post I shared how I use PowerPoint to create my own illustrations and used the deconstructed sandwich graphic below as an example.

Articulate Rapid E-Learning Blog - create custom graphics in PowerPoint for online traininig

I had a few people email and ask how I created the image. So today’s post is a tutorial on creating illustrations for your online training courses.

How to Build Illustrations in PowerPoint

In my elearning workshops I share ideas on creating a starting template for your online courses. I like to use the sandwich graphic as we discuss deconstructing the core parts of a course. I saw a similar graphic online and decided to try my hand at creating it myself in PowerPoint.

Below is a tutorial that shows how I built the sandwich illustration. Here are the general steps:

  • To create the bread shape, I combined two shapes in PowerPoint. I filled it with a bread-like color and made the outline color brown for the crust.
  • The meat and cheese are just regular shapes filled with the appropriate color.
  • The lettuce is a hand-drawn shape. It didn’t look right filled with green, so I filled it with an image of lettuce.
  • Then I applied a rotation effect to all of the shapes to give them that 3D look.

You can get more detail from the tutorial below.

Articulate Rapid E-Learning Blog - how to create custom illustrations and graphics in PowerPoint for elearning design

Click here to view the tutorial.

Forget the Sandwich! These Tips Are Meant to Teach You More About PowerPoint

When I share these PowerPoint illustration tips I don’t expect that every blog reader is going to go out and find ways to use the sandwich graphic for elearning. Instead, my goal is to get you to rethink PowerPoint and see it’s capabilities in a new light. And I hope to inspire you to practice some of these tutorials in order to learn more about PowerPoint’s features.

You may never need to build a sandwich illustration, but you’ll definitely benefit from practicing the techniques so that when you need a custom graphic you have the skill to try building one yourself.

Articulate Rapid E-Learning Blog - how people learn

It’s a point that Julie Dirksen makes in her excellent book, Design for How People Learn. She referenced the blog post where I share how to create the envelope illustration in PowerPoint. In the book she says that just following the tutorial to learn to build the illustration isn’t enough because the goal isn’t to build that particular illustration. Instead it’s to learn to build illustrations using PowerPoint. And that won’t happen when you build a single icon. It requires more than step-by-step instructions.

Articulate Rapid E-Learning Blog - example of a graphic created for a practice elearning tutorial

The same goes for the sandwich illustration. The goal isn’t to build the sandwich illustration. Hopefully you’ll learn to appreciate the capabilities of PowerPoint, see the illustrations as distinct shapes, and then practice building your own as you need them.

With enough practice you’ll feel confident to build (or at least attempt it) the illustrations and graphics you need. If you do create a custom illustration, be sure to share it with us. I’d love to see what you create.

Events

Free E-Learning Resources

Want to learn more? Check out these articles and free resources in the community.

Here’s a great job board for e-learning, instructional design, and training jobs

Participate in the weekly e-learning challenges to sharpen your skills

Get your free PowerPoint templates and free graphics & stock images.

Lots of cool e-learning examples to check out and find inspiration.

Getting Started? This e-learning 101 series and the free e-books will help.


Articulate Rapid E-Learning Blog - Government creates bad PowerPoint via Edward Tufte

It may come as a surprise to you, but there are many people who think that PowerPoint sucks. I know; I know. I was surprised, as well.

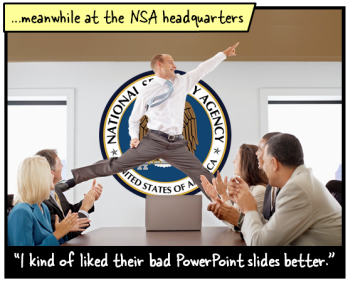
The other day Mashable featured some Edward Tufte tweets where he blasted the slides from a secret government surveillance program. Of course, his criticism of the slides is spot on. In fact, many of the issues he raises in the tweets and in his books are similar to the issues we face when building elearning courses.

Articulate Rapid E-Learning Blog - powerpoint sucks is what the critics say

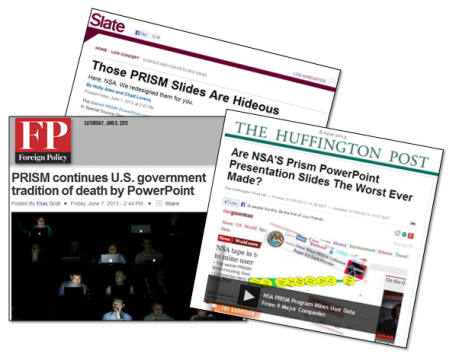
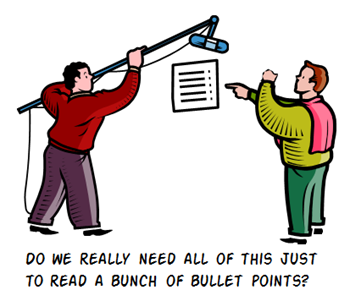
However, as if on cue out came the horde of conformist PowerPoint critics. Above is a sampling of some titles. While I don’t disagree with the criticism of the government’s PowerPoint slides, the fact is that PowerPoint is only an application. And the criticism is really about the way the presenters organized and presented their content. As a side note, there used to be a day when journalists were actually dedicated to exposing government tyranny rather than merely exposing how they presented it in meetings. But that’s a different blog post.

While it’s true that PowerPoint has been used to create horrific presentations, it’s getting a bad rap. Personally I find PowerPoint to be one of the most powerful and diverse applications I use. So with that said, I’d like to offer seven reasons why PowerPoint doesn’t suck and may be one of the best applications you own.

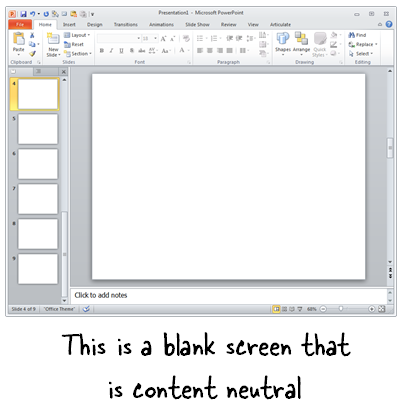
PowerPoint’s a Blank Screen

PowerPoint is a blank screen. So what you have on it is determined by you. That’s why I always advocate being intentional with your design. There’s nothing on the screen that’s there by accident.

One simple tip is to refrain from using the default templates. If you need a template, create one yourself that meets the needs of your project and don’t rely on a template that has no context.

Articulate Rapid E-Learning Blog - a blank PowerPoint slide

Use PowerPoint to Create & Edit Your Graphics

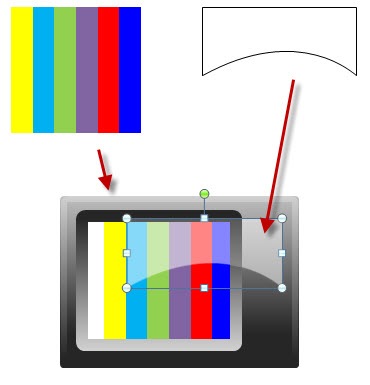
PowerPoint has a lot of features that when combined allows you to create your own graphics. And since it starts with a blank slide, you’re not constrained by any templates or pre-determined schemes.

Articulate Rapid E-Learning Blog - how to create your own graphics in PowerPoint

Once you create your own graphics, right-click on the object and save as an image. I prefer to use .png because this maintains the image quality and any background transparency. Once you’ve save the object as an image, you can use it anywhere.

Related posts:

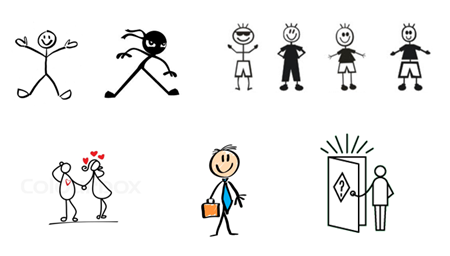
Use PowerPoint to Create Illustrations

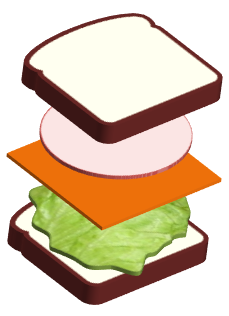
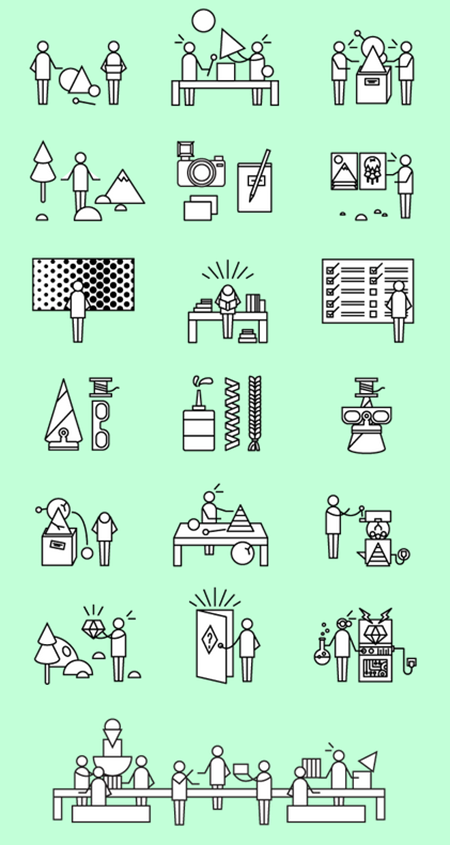
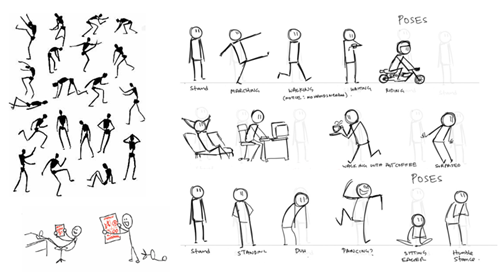
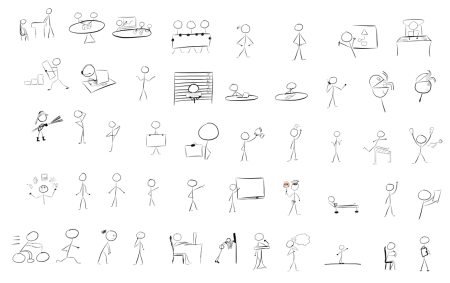
PowerPoint has many of the types of features you’d find in advanced illustration tools like Illustrator or the open source Inkscape. To be successful you have to think of PowerPoint not as a presentation tool, but instead a blank canvas. And then learn to use the features that allow you to manipulate and create your own shapes.

Articulate Rapid E-Learning Blog - use PowerPoint to create simple illustrations

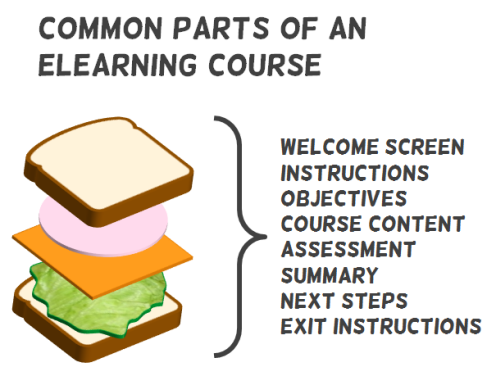
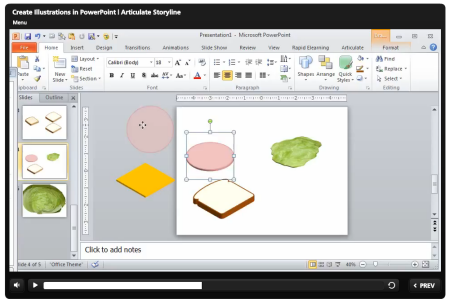
I look for illustration tutorials and see what it takes to recreate them in PowerPoint. In fact, for a recent workshop file, I needed an illustration that looked like a stacked sandwich. So I created this in PowerPoint. It only took a few minutes.

Articulate Rapid E-Learning Blog - use PowerPoint to create custom illustrations

Related posts:

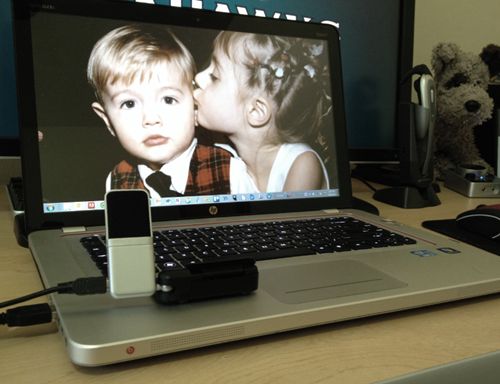
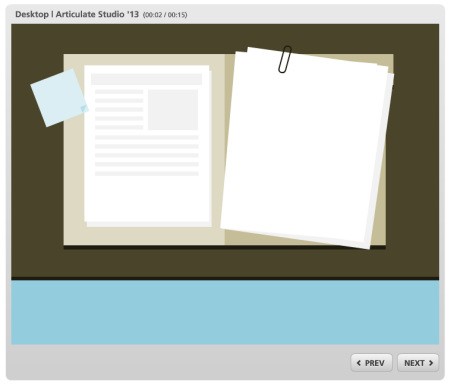
Use PowerPoint to Create Videos

Starting with PowerPoint 2010, whatever you create in PowerPoint can be saved as video. PowerPoint 2010 saves as .wmv and needs to be converted to .mp4 for playback on most devices. I usually use Handbrake for the conversion because it’s free. But the newer versions of PowerPoint can save to .wmv or .mp4. Now you don’t need to do the conversion in a separate application.

Articulate Rapid E-Learning Blog - how to use PowerPoint to create videos

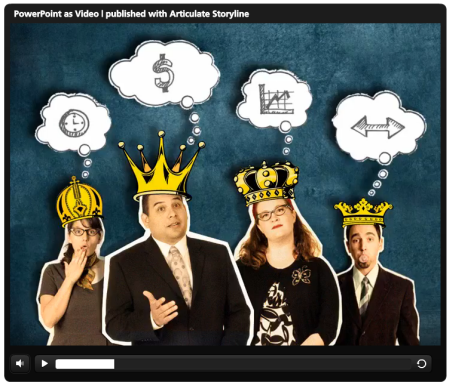
Click to view the PowerPoint converted to video demo.

To show you how good it can look, above is the Duarte sample presentation template that comes with PowerPoint 2010. I saved it as a .wmv and then inserted the video into Articulate Storyline so I had a custom player. As you can see, it looks really nice and all of the transitions and timed animations work. In fact, if I saw this without knowing it was done in PowerPoint, I’d assume it was created in something like Flash or a more sophisticated video application. By the way, by converting the video in Storyline from .wmv to .mp4, the file size went from 165 MB to about 11 MB.

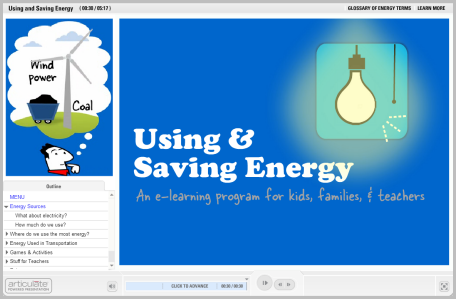
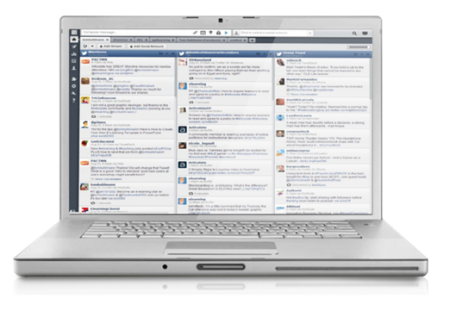
Here’s an example of how we created some videos in PowerPoint and then inserted them into our rapid elearning courses.

  • Video sidebar to introduce course: In this video, we used the sidebar to introduce the course topics. The video was created in PowerPoint and then inserted into the presenter panel.
  • Video inserted on slide and in the sidebar: This is a demo we used to show that once you’ve created the videos in PowerPoint, you can insert them into your rapid elearning cour
    ses. Both videos (sidebar and main slide) were created in PowerPoint.

Articulate Rapid E-Learning Blog - example of a PowerPoint video in rapid elearning course

Click here to view the PowerPoint video demo.

Considering how easy it is to use the features in PowerPoint and with it’s advanced animations, I find it to be a pretty powerful application for creating video content. It’s definitely a lot more powerful than most of the simple video editors.

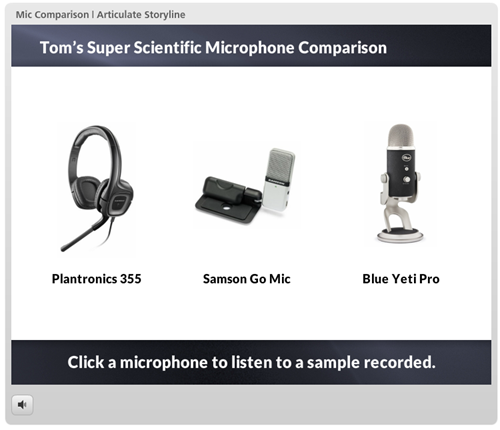
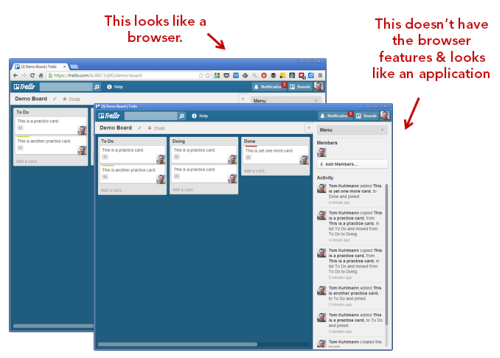
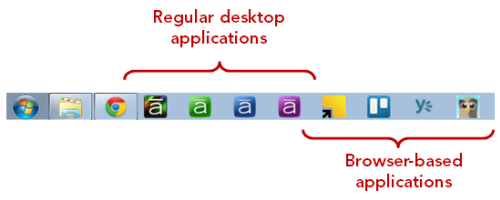
Use PowerPoint to Create Online Training

A few years back, building interactive elearning was a challenge because it required some advanced programming skill and expertise. However, that changed with the advent of rapid elearning. Essentially those applications like Articulate Presenter converted the PowerPoint slides into Flash files. Thus, you were able to create your own Flash content without requiring Flash programming skills.

Articulate Rapid E-Learning Blog - elearning examples created in PowerPoint

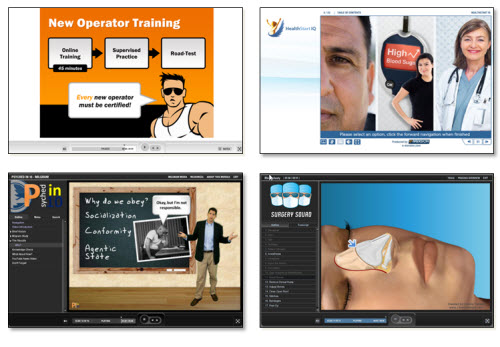
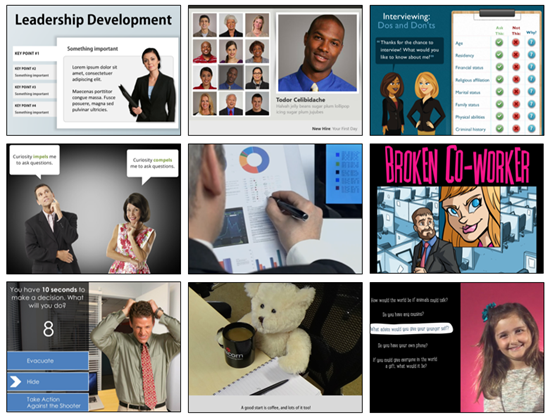
Examples of PowerPoint-based Online Training

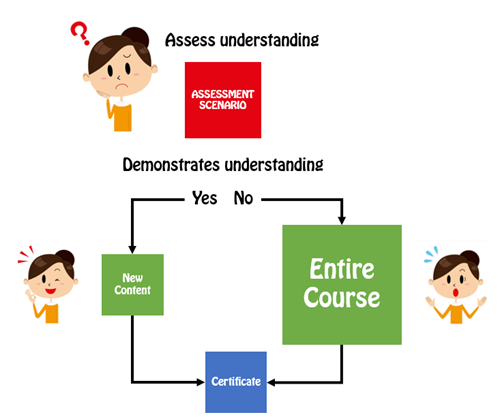
Now that we’re entering the second phase of rapid development we see tools like Storyline that import the PowerPoint content. They retain many of its features and allow for much more sophisticated interactivity—something that PowerPoint-based elearning always lacked. However, in either case PowerPoint plays a key role in the development of online training.

I will add that using PowerPoint to create elearning doesn’t mean that the course created with PowerPoint is good. Good course design still requires sound instructional design. However, if you do need to create online content then PowerPoint is a viable solution. And that’s the main point.

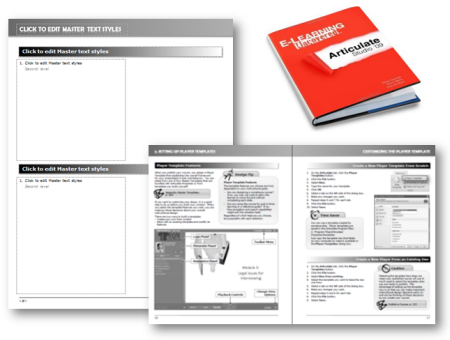
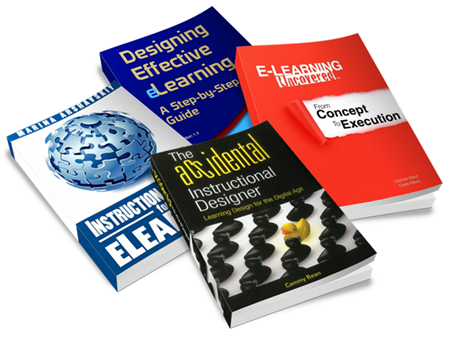
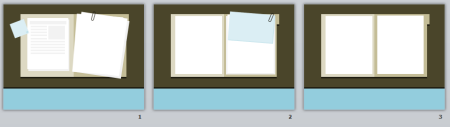
Use PowerPoint to Create Print Books and eBooks

Whatever you create in PowerPoint can be exported to a .PDF and subsequently converted to an ebook format if needed. That’s easy enough to do. However, you can also use PowerPoint in a way similar to what you’d do in an application designed to create real books. Because of the blank canvas and freeform environment, content can be placed anywhere you like. That means you can use PowerPoint to create your book’s layouts and pages.

In fact, the book E-Learning Uncovered: Articulate Studio was initially created in PowerPoint. As you can see in the image below, they created some layouts and a template to produce the book; from there they sent it to the printer. It’s probably not ideal to print a book using PowerPoint, but if you don’t have the skills to use InDesign or some other book publishing application, then it is a viable solution. And it goes back to my main point about PowerPoint’s diversity.

Articulate Rapid E-Learning Blog - books created in PowerPoint


Use PowerPoint to Create Mobile Learning

I was at a mobile learning conference recently and almost all of the content-providers who were selling mobile training had some sort of video-based solution.  This makes sense because video is a lot easier than HTML5, especially since HTML5 is still somewhat of a moving target. And in a lot of ways video for mobile learning is probably a better solution than more traditional, interactive elearning.

  • Video-based mobile learning: As I noted above, you can create videos with PowerPoint. In fact, here’s a direct link of the Duarte video. Access the link from your tablet or smart phone and see how it looks.
  • Print-based mobile learning: Because PowerPoint exports to PDF and PDF can be somewhat interactive, you can create interactive PDFs that work for your mobile devices. Here’s an example of a PDF for the iPhone and one for the iPad. All you need to do is modify the slide size to get the right aspect ratio. Paul Clothier shows how to do it for the iPhone demo.

Learn More About PowerPoint

Check out these tutorials if you want to learn more about PowerPoint and how get the most out of it:

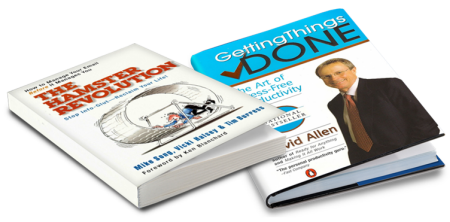
Going back to the original argument, PowerPoint is a powerful application. The trick is learning to use it effectively. The tutorials and free resources above should help. But’s definitely worth learning to build better presentations. Below are some books and recommended resources to help you get started.

Articulate Rapid E-Learning Blog - recommended PowerPoint books

  • Non-Designer’s Design Book: If there is only one book to buy, it’s this one.  You’ll learn all of the basics about typography and visual design.
  • Beyond Bullet Points: Great tips to help organize your content whether presentation or rapid elearning.
  • Better the Bullet Points. Practical tips on using PowerPoint.
  • Slide:ology: Great book on visual design concepts and how to craft better presentations.  They have some good examples of branded templates that do work.
  • Presentation Zen: This book is very similar to slide:ology and will help you learn to communicate better with your slides.  I haven’t read it yet, but his new book is supposed to be good.
  • Back of the Napkin: Great book on organizing ideas and visual communication.
  • Various PowerPoint books: Tufte is a critic of the poor use of PowerPoint.  He offers a lot of good information on how to present complex data.  There are also all sorts of good how-to PowerPoint books.

The links to Amazon books may produce a slight commission.

So there you have it. For all of the criticism and belly aching about PowerPoint, it is still a very powerful and easy to use application. It just depends on how it’s used. And of course, if you spend all your time monitoring innocent citizens then odds are you won’t have time to build good presentations.

What tips would you offer the government to get better use of PowerPoint?

Events

Free E-Learning Resources

Want to learn more? Check out these articles and free resources in the community.

Here’s a great job board for e-learning, instructional design, and training jobs

Participate in the weekly e-learning challenges to sharpen your skills

Get your free PowerPoint templates and free graphics & stock images.

Lots of cool e-learning examples to check out and find inspiration.

Getting Started? This e-learning 101 series and the free e-books will help.


Articulate Rapid E-Learning Blog - 3 ways to improve your elearning design skills

I get lots of questions about improving skills and becoming better at elearning. Usually people ask about good school programs and book recommendations.

Going to school is an option and it may be a good one. However, it’s not always the best option if you really want to learn to build better courses. We debated whether or not you need an instructional design degree to be successful in elearning. Be sure to read through the comments. There are some good pro and con opinions.

If you’re interested in getting a formal education, Tess Farley compiled a list of schools that offer degrees and certificates. I can’t speak to which ones are the best, but if you did attend one of the programs listed feel free to add your two cents in that thread’s comments section.

Reading books is another way to learn about elearning. And there are plenty that will help. In fact, here’s a good list of elearning and training books we compiled in the elearning community. And you’re not limited to reading books; there are plenty of blogs and websites that offer good help, too.

However, just like in an interactive elearning course, the best opportunity to learn is when you get to reflect on and apply all of this new information. So the key question is how can I apply the things I am learning?

Apply what you’re learning to your elearning courses.

Suppose you read Ruth Clark’s new book on scenario-based elearning (an Amazon referral link). It’s a good book that covers a lot of ground on building scenario-based elearning. Reading the book is the first step. For the next step apply what you’ve learned from the book to one of your courses.

Articulate Rapid E-Learning Blog - Ruth Clark Scenarion-based elearning

Look over one of your existing courses and then reframe it in the context of what you’ve learned. How would you change that old course? Is it static? What would it take to convert a linear course to one that’s more interactive and incorporates ideas from the book? Even if you don’t get to change the course, the process of reading and reflecting will help.

Practice, practice, and when you have more time, add some practice.

Being good at something means you have to commit the time to practice. If you don’t commit time to practice when it comes time to execute you won’t know how to do what you want to do.

Practice helps you think through ideas and then learn to actually build them with the tools. If you don’t practice building out the ideas, when it comes time to work on the project you may not have time to practice the techniques and process to actually make it work.

Also, some of our ideas are often ill-conceived or not ready for prime time. Practice lets you get the ideas out and the refine them so that they are viable. No client wants to hear about your whacky scenario idea, especially if you haven’t thought it through. Practice lets you think it through.

Articulate Rapid E-learning Blog - practice building interactive online training courses

When you do commit time to practice, don’t build out big demos. Just play around with bite-sized ideas. This way you get them done and feel successful. It’s also easier to iterate on smaller elearning modules.

Focus on diverse demos and activities.

I look over lots of demos and portfolios. A common element is that the person will show twenty courses, but all twenty look exactly the same. All that I know from the person is that they can assemble the same type of course. What I don’t know is the diversity or breadth of skills.

So when you practice building your online training courses, focus on different things. For example, make a list of ten types of tab interactions. Then build them out. When it comes time to use that type of interaction in your courses, you’ll have the technical skills and some ideas. Or if you’re like Montse Anderson, you may even have used the practice to build some good starter elearning templates.

Articulate Rapid E-Learning Blog - three ways to build elearning interactions

Here’s an idea. In an earlier post we looked at the three core screen interactions. They are click, mouseover, and drag. Build a simple module. Make all interactions on the module click-based. Then rework it. Instead of clicking, you’re limited to drag interactivity. This will help you learn to use your elearning software and by reframing the interaction, make you think about some things in a new way.

There are a lot more ways to improve your elearning design skills. But these three are a good start. Find a book, read it and apply the new ideas. Commit some time to practicing your craft. And then build a portfolio of diverse demos and activities.

If you do those things you’ll increase your skills and find that your courses become more interactive and engaging.

What do you do to build your skills?

Events

Free E-Learning Resources

Want to learn more? Check out these articles and free resources in the community.

Here’s a great job board for e-learning, instructional design, and training jobs

Participate in the weekly e-learning challenges to sharpen your skills

Get your free PowerPoint templates and free graphics & stock images.

Lots of cool e-learning examples to check out and find inspiration.

Getting Started? This e-learning 101 series and the free e-books will help.