The Rapid Elearning Blog

Archive for the ‘E-learning Examples’ Category


drag and drop interaction essentials

There are three main ways to interact with the course: click, mouseover, and drag. While click-based interactions are the most prominent, a good drag and drop interaction is usually more engaging. In fact, anytime I feature a drag-based interaction in a blog post, I’m always asked how it was created.

Drag and drops are engaging, they let the user “touch the screen” or lean into the course a bit, and they’re novel because they’re not used as often as the other types. With that said, here is everything you need to know about drag & drop interactions from previous posts:

essentials of drag and drop interaction

So there you have it, everything you need to know to get started building effective and engaging drag and drop interactions for e-learning. And if you want to learn to build them, check out these tutorials and take part in these drag and drop challenge activities: challenge #16 and challenge #21.

Is there anything you’d suggest when building drag and drop interactions?

Events

Free E-Learning Resources

Want to learn more? Check out these articles and free resources in the community.

Here’s a great job board for e-learning, instructional design, and training jobs

Participate in the weekly e-learning challenges to sharpen your skills

Get your free PowerPoint templates and free graphics & stock images.

Lots of cool e-learning examples to check out and find inspiration.

Getting Started? This e-learning 101 series and the free e-books will help.


free text-to-speech narration

Previously we looked at how to create free text-to-speech narration using a free application. The audio quality is decent enough for those who need the text-to-speech audio. Today we’ll look at a free (or inexpensive) way to create your text-to-speech narration that’s just as easy and hardly costs anything, if at all.

If you’re using Storyline, then you have access to text-to-speech as a feature inside the software. Here’s more information on how to use Storyline’s text-to-speech. If you want to create the audio outside of Storyline or for other purposes, this post will help.

Earlier I showed how to create an Amazon S3 account as a way to share your courses. The first 5 GB is free and after that, it’s very inexpensive. If you use a site like Wix for your e-learning portfolio, Amazon S3 is an easy way to add URL links to your courses since those sites don’t allow uploading course content.

Once you have an Amazon S3 account, you have access to Polly, a service where you can create free text-to-speech narration. And the voice quality is very good, much better than the default SAPI voices you get with your computer.

Here’s an example of a few narration files I downloaded from Polly.

text-to-speech Amazon S3 Polly demo

Click here to view the text-to-speech examples.

As you can hear, the audio quality is decent and makes the robot voices tolerable. And odds are you won’t go past the initial free allocation.

How to Create Free Text-to-Speech Narration in Amazon S3 Polly

Creating the narration is really simple. First, you’ll need an Amazon S3 account. Here’s a link that shows how to get one.

Don’t worry about the prices, they’re nominal. You get a cushion of free space and after that, you pay $4.00 per million characters. That’s about 23 hours of audio. To put it in perspective, if you narrated “A Christmas Carol” by Charles Dickens, it would cost about 66 cents.

demo os Amazon S3 Polly text-to-speech

Basic Steps

  • From the Amazon S3 console, select Polly.
  • Insert your narration script.
  • Select a language.
  • Select a voice.
  • Preview and download the audio file.

It’s all pretty simple. Once you have the audio file, you can do some post-production editing (if necessary) and then insert into your course. Easy as that.

So there you have it, one free application where you can create text-to-speech narration and this inexpensive (or free) solution via Amazon that should meet most of your free text-to-speech needs.

If you use Polly, feel free to share your feedback.

Events

Free E-Learning Resources

Want to learn more? Check out these articles and free resources in the community.

Here’s a great job board for e-learning, instructional design, and training jobs

Participate in the weekly e-learning challenges to sharpen your skills

Get your free PowerPoint templates and free graphics & stock images.

Lots of cool e-learning examples to check out and find inspiration.

Getting Started? This e-learning 101 series and the free e-books will help.


gamified e-learning gamification

I hear a lot of people ask about gamifying their e-learning courses. And the examples they show are usually simple games modeled after shows like Jeopardy or Wheel of Fortune. Those are fine and have their places in e-learning, especially for quick knowledge checks. But they’re not the same as gamification.

In today’s post, I’ll share a few simple things to help get your brain muscles going.

What Do You Need to Know?

When it comes to building the courses in an authoring tool, you basically need to know how to use variables. Variables allow you to track and evaluate the user to provide relevant feedback, scoring, tokens, and all the other things that make up gamified e-learning courses. And once you know how to work with variables, you can build all sorts of things.

gamified e-learning

Here are some resources to learn more about variables:

Learn More About Gamification

You can do a search and read all sorts about gamification especially now that it’s also a buzzword. Essentially you are taking game concepts and applying them to a non-game context. As you play games, ask what about the game is compelling and what similar element could work in your next e-learning course.

I think the greater challenge in building gamified courses is less in constructing the mechanics and more in building a narrative that integrates gaming psychology. Building things in the authoring tools is relatively easy compared to understanding what to build.

Here are three good books on gamification.

gamification books

The links to Amazon books may produce a slight commission.

What Can You Build in Your E-Learning Course?

When it comes to authoring the courses outside of a management system where you can track multiple users and build things like leaderboards, you’re confined to simple game elements such as:

  • Timers
  • Personalization
  • Progress meters
  • Tokens
  • Rewards management
  • Scoring
  • Autonomous navigation

You can make some very compelling courses that instructive and engaging. However, there’s a lot more to gamification than these simple elements above. How do you motivate learners and create the right tension between boredom and failure? Make sure you invest the right resources and develop a good strategy. Otherwise, your gamified course will transform from game to gimmick.

If you’re not quite sure where to get started, check out some of the cool examples in the community. They’ll give an idea of some of what you can do with the authoring tools. Here are three nice examples:

gamification example 1

Click here to view gamified e-learning course.

gamification-example-2

Click here to view gamified e-learning course.

gamification example 3

Click here to view gamified e-learning course.

And there’s nothing wrong with starting simple. If all you need is a Jeopardy-style quiz, then download this free file. It’s a great way to work with a context you know. But make a commitment to learn more about variables and start to add some of those gaming elements above to your courses.

Have you built any gamified e-learning? If so, share a link in the comments.

Events

Free E-Learning Resources

Want to learn more? Check out these articles and free resources in the community.

Here’s a great job board for e-learning, instructional design, and training jobs

Participate in the weekly e-learning challenges to sharpen your skills

Get your free PowerPoint templates and free graphics & stock images.

Lots of cool e-learning examples to check out and find inspiration.

Getting Started? This e-learning 101 series and the free e-books will help.


hotspot

Hotspots are commonly used in e-learning course design. They’re invisible, yet functional. Today, we’ll explore some common use cases for the hotspot in your online training.

Invisible Button Hotspots

The most common use for the hotspot is the invisible button. Essentially it allows the developer to add an interactive choice on top of another object. This can really speed up production. For example, the image below starts with a single image of a world map. By adding separate hotspots over each continent there’s no need to create separate images with links. This really comes in handy when you start with a single image and don’t have the means to break it into smaller components.

hotspot interaction

Example Screen Space with Interactive Hotspots

The hotspot can also be used as a means to expand real estate via a mouseover interaction. A click interaction requires a click to activate and then an additional click to deactivate. Whereas a mouseover interaction is a bit smoother. Mouseover the hotspot to reveal content, mouse away to have it disappear.

mouseover hotspot

In the example above, I added access to additional content using a mouseover hotspot. This is content that doesn’t need to be persistent but does need to be available. The mouseover or hover interaction assigned to the hotspot is a great way to expand screen real estate with fluid precision.

Invisible Barrier Hotspot

The two examples above are pretty common and what you’d normally expect for hotspots since the hotspot is usually defined as an invisible button or interaction. However, the hotspot is also good as a barrier to avoid interactions. Think of it like plastic wrap over a piece of cake. You can see the cake, but you can’t touch it because the wrap is covering it.

Here’s a recent example where I used the hotspot as a barrier. In this anatomy interaction, each part of the digestive system is actually a slider connected to the main slider. It’s a great effect to move the pieces in and out of the body using a single slider. However, I only want the user to interact with the main slider, so I placed a hotspot over the body image and the other sliders. The hotspot serves as a barrier and prevents the user from interacting with what’s underneath.

Check out the two examples below to see the difference.

Example with No Hotspot Barrier

no hotspot barrier

Click here to view the demo of no hotspot barrier.

The first demo above has no hotspot barrier which means any of the other sliders are active. Grab one of the body parts and see what happens. It’s not as elegant.

Example with a Hotspot Barrier

hotspot barrier

Click here to view the demo of hotspot barrier.

The second interaction has a hotspot barrier over the body parts which prevents the user from interacting with anything other than the main slider. This makes for a much better user experience and a more elegant interaction.

So there you have it. You can use hotspots to trigger all sorts of interactions or you can use them as a persistent invisible barrier that prevents an interaction.

Events

Free E-Learning Resources

Want to learn more? Check out these articles and free resources in the community.

Here’s a great job board for e-learning, instructional design, and training jobs

Participate in the weekly e-learning challenges to sharpen your skills

Get your free PowerPoint templates and free graphics & stock images.

Lots of cool e-learning examples to check out and find inspiration.

Getting Started? This e-learning 101 series and the free e-books will help.


free microlearning template

Earlier I shared this free microlearning template. It is easy to use and edit. However, I did receive some questions on how it was created and how to add additional cards. So in today’s post I’ll share a few tips so you can make your own template and edit the one I shared.

Here’s a series of video tutorials that show how to create the simple, yet powerful microlearning template. Check out the last tutorial on how to quickly edit the text. It’s a neat way to leverage the translation feature to do the heavy lifting.

How to Create the Animated Card

We want the card to animate onto the screen and pause. And we want to click on the card to see the other side (of the card, not the spirit world).

Click here to view the tutorial.

  • The first step is to create a card.
  • Add an entrance and exit animation.
  • Add a selected state to the card to create the click and reveal feature.
  • Add a trigger to the card that pauses the timeline when the entrance animation completes.

When you preview, the card should animate in and pause. You can click on the card to select or deselect it.

How to Edit the Normal & Selected States

We want the selected state to have an animated object that comes on and off the screen when the card is selected and deselected.

Click here to view the tutorial.

  • Select the card and double click inside the state you want to edit.
  • Add placeholder text in the normal state.
  • Add a shape to the selected state and add placeholder text to the shape.
  • Add entrance and exit animations to the shape in the selected state.

When you preview and click on the card, it will trigger the entrance animation of the selected state. And when you click on it again, it should trigger the exit animation.

How to Bring a Card On & Off the Screen

When the card animates on the screen it will pause. This allows us to “flip the card” by clicking on the card. When we’re done looking at the card, we want it to exit the screen and trigger a new card.

Click here to view the tutorial.

  • Create a button with a trigger to resume the timeline.
  • Duplicate the card and position it on the timeline after the first card. Repeat as necessary.

When you preview the microlearning interaction, the card enters and pauses. Clicking the button causes the timeline to resume which triggers the exit animation of the first card and the entrance animation of the next card.

How to Edit the Content on the Cards

Clicking into the states of the various cards can be tedious. Here’s an easy way to edit the text for each card.

Click here to view the tutorial.

  • Go to File>Translate>Export to export the text from the course.
  • Edit the text in the document and save it.
  • Go to File>Translate>Import to import the text into the cards.
  • Preview the microlearning interaction to verify that the text alignment is correct.

Importing the text should work well and as long as you don’t add too many characters you shouldn’t have to do any editing.

Here’s another free microlearning template for you to deconstruct and see how it was built.

Events

Free E-Learning Resources

Want to learn more? Check out these articles and free resources in the community.

Here’s a great job board for e-learning, instructional design, and training jobs

Participate in the weekly e-learning challenges to sharpen your skills

Get your free PowerPoint templates and free graphics & stock images.

Lots of cool e-learning examples to check out and find inspiration.

Getting Started? This e-learning 101 series and the free e-books will help.


Free Microlearning Template

January 17th, 2017

free microlearning template

Here’s a free microlearning template I created for a workshop on interactive e-learning. The template uses the popular overhead desktop theme. I’m using the interaction as a simple microlearning module. But it could also be a quick knowledge check like this one. It just depends on how you want to use it for your own course.

Example of Free Microlearning Template

Here’s an example of the template in action.

free microlearning template

Click here to see the microlearning example.

How to Edit the Free Microlearning Template

What makes this microlearning template work is that it’s really easy to use and modify. The construction is really simple.

  • Create a card with selected states.
  • Add an entrance and exit animation to the card.
  • Create a trigger to pause the timeline when the card’s entrance animation completes.
  • Create a button to resume the timeline.

Want more cards? Just duplicate them and the triggers are duplicated, as well. You can create as many cards as you like. All you need to do is stagger them on the timeline.

Bonus tip:

  • The template starts with a single card. Since I don’t know how many cards will be in the final module, I created a cue point on the timeline. Look at the free file to see what is triggered by the cue point. If you add a bunch of cards, just drag the cue point to the end and all if its triggers move with it.
  • Here’s a tutorial post that shows how to create and edit your own microlearning interaction.

Events

Free E-Learning Resources

Want to learn more? Check out these articles and free resources in the community.

Here’s a great job board for e-learning, instructional design, and training jobs

Participate in the weekly e-learning challenges to sharpen your skills

Get your free PowerPoint templates and free graphics & stock images.

Lots of cool e-learning examples to check out and find inspiration.

Getting Started? This e-learning 101 series and the free e-books will help.


best mics for audio narration

While I’ve covered audio recording tips and tricks in the past, one of the most frequent questions I’m still asked is about microphones. So today, I’ll show you the different mics I use and demo how they sound.

I’ll have to admit, I’m no audio pro and I’m also a bit less dogmatic about audio quality than some elearning developers. My main goal is to get decent sounding audio without a lot of post-production.

The reality is that most end users are hearing the audio through cheap headsets or small device speakers where everything sounds hollow. Also, if you record tutorial videos or do webinars, the audio compression mitigates some of the distinctions you hear in different qualities of audio.

With that said, here are a few thoughts and some recommendations based on the mics I use.

Simple Audio Recording Tips

Here are a few simple ground rules. You learn more by clicking on the links below.

  • You want to record the best audio quality you can initially. There are some things you can do to clean up the audio, but you can’t make bad audio good. If you can only do one thing, get crisp audio.
  • Try to eliminate background noise like air conditioners. Sometimes if I can’t get rid of the noise, I will play some music softly in the background–not Eminem, but something a little softer.
  • Don’t worry about being perfect. You can spend a lot of time finagling your audio only to have you end user listen to it through cheap headphones or speakers where everything sounds muffled and tinny.
  • You should learn a little about audio and some basic editing. You don’t need to be an audio engineer, but learning some recording techniques, how mics work, and how to do some post-editing will really come in handy.

Microphone Recommendations

There are a lot of good microphones out there and they’re not that expensive. I’d plan on spending from $100-$200 on a microphone. You should also invest in a pop screen, a stand, and perhaps some sort of barrier. Here are some of the microphones I use.

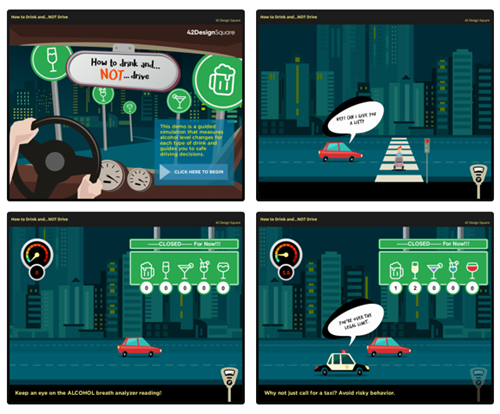
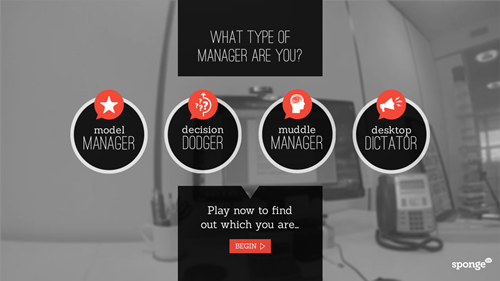
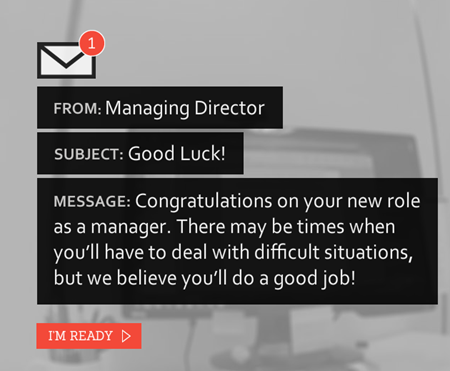
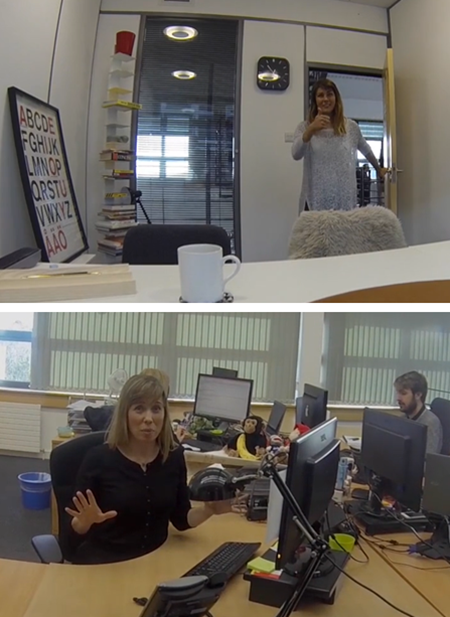
I created a quick demo in our new Rise application to show the different mics in use. You can view the link on your mobile devices and compare how they sound versus how they sound on a desktop. I noticed that my iPad which has one speaker masked the issues that I could hear on my desktop. I also noticed that with my iPhone, the ambient audio was more evident that elsewhere.

rise-course-microphones

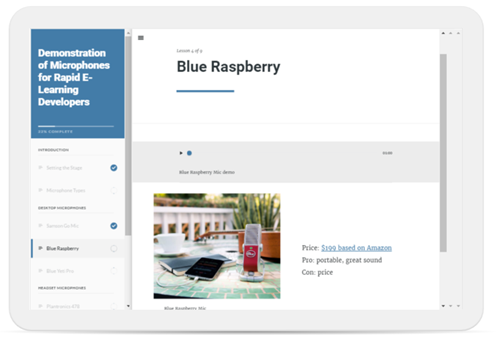
Click here to view the microphone demo.

Desktop Microphones

  • Blue Yeti Pro. This is what I have in my home office. I like it because I can control the gain and the pickup pattern. This is a big plus. The pickup pattern helps eliminate unwanted sound entering the mic. The Pro costs about $230. But you can buy the Blue Yeti (which is also a good mic) for about $120 and it comes in a bunch of colors to placate the needs of easily distracted millennials.
  • Blue Raspberry. I’ll be doing a lot more recording on the road so I wanted to upgrade my microphone. I just purchased this microphone and will do an update after a few road trips.
  • Samson C03U and Samson C01U. I’ve used both of these mics and think they’re great a great value. Both mics are in the $80 range but for about $120, you get the microphone, a pop filter, and shock mount. Not a bad deal. I’d choose the C0U3 because it has better pick up patterns. I quit using the mics when I received the Blue Yeti Pro. If you’re on a budget the Samson mics are worth it.
  • Samson Go Mic. I love this little mic. At $40, it’s a great price and sounds good. The build quality is really solid and I’ve gotten lots of use out of it over the past few years.

The links to Amazon microphones may produce a slight commission.

Headset Microphones

I’m not a fan of headset microphones for recording narration because they tend to pick up a lot of breath sounds. However, they are relatively inexpensive and decent enough in output. But because they’re headset microphones you don’t get a lot of control over the pickup.

I do like to use headset microphones for recording tutorials and doing webinars because it allows me to operate hands free and not worry about moving around and away from the microphone. I also prefer wireless headsets over wired ones.

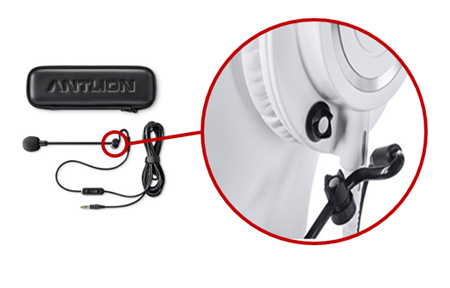
ModMic: I haven’t used this mic but I really like the idea. You attached the microphone to your headphones. Many of the headphone mics are uncomfortable so you can use your own headphone and attach the ModMic with a magnet (which means you can remove it).

modmic

Here are the three headset microphones I currently use:

  • Plantronics Audio 995. It’s wireless which gives me some range of motion. I don’t like having a bunch of cables running over my desk when I record. Having the wireless mic is nice if I have to record some audio narration from my subject matter experts.
  • Plantronics 478. This is similar to the one above but it has a USB cord. Both of those microphones have noise canceling features. Usually that means there’s one mic that records your audio and another smaller one that records ambient sound and cancels it out.
  • Logitech H800. I just got this one. I like it because it’s wireless and has a built in charger. I also like it’s portability for traveling.

One question you may ask is why I have so many microphones, especially headset mics. I travel a lot so I want good portable options and I like the choice of desktop and headset microphones. I do recommend getting a few extra headset mics, one for you and the others to share if you do recording with subject matter experts.

Previous Posts on Using Audio for Narration

Again, I’m not an audio pro and recording in a controlled recording environment. Instead I’m a one-man recording studio, in a home office, with a limited budget. I want good quality audio at an affordable price. From my experience most rapid elearning course authors are in the same boat.

Which microphones do you use and why? Feel free to share in the comments.

Events

Free E-Learning Resources

Want to learn more? Check out these articles and free resources in the community.

Here’s a great job board for e-learning, instructional design, and training jobs

Participate in the weekly e-learning challenges to sharpen your skills

Get your free PowerPoint templates and free graphics & stock images.

Lots of cool e-learning examples to check out and find inspiration.

Getting Started? This e-learning 101 series and the free e-books will help.


e-learning example

Reviewing elearning examples is a great way to learn. You find inspiration to prompt your own ideas and by deconstructing the courses, you learn to use your elearning software to create something similar.

Here are some really nice elearning examples that I’ve seen in the community recently. Check them out and then try to figure out how they were built.

E-Learning Example: Hero Land

e-learning example heroland

Click to view the elearning example.

Here’s a great module built by Richard Lee Hill. This is one of the slickest demos I’ve seen in a while and an excellent example of what you can create with the authoring tools. He combines some great gaming mechanics with learning more about Storyline.

Deconstruction questions for you:

  • How to move the character freely about the screen?
  • How to collect items and rewards and use those throughout the module?
  • How to create just-in-time instructions?
  • How are animations used? Characters? Backgrounds?

There’s a lot to learn by deconstructing this module. What I really like is that as you collect the eBits you have links to video tutorials that explain parts of how this was created. There’s also a bonus high five because he was able to work Goudy Stout into the module.

E-Learning Example: How to Drink and NOT Drive

e-learning example drink and drive

Click to view the elearning example.

The folks are 42 Design Square always do nice work. I’ve featured them a few times in the past. This course integrates some nice animations and audio effects. I also like the way they used the variable panel to select drinks and see the impact when driving.

Deconstruction questions for you:

  • How did they create the animation effects?
  • How would you create a similar panel in your courses?
  • How to integrate the drink dashboard with the breath analyzer meter?

Lots of good things happening in this demo. See if you can prototype some of what they’ve done.

E-Learning Example: Workplace of the Future

e-learning example workplace future

Click here to view the elearning example.

This example looks at the workplace of the future and was done by Learnnovators in collaboration with Clark Quinn. This style of course is a bit closer to what you might build at work and includes some good scenario-like activities.

Deconstruction questions for you:

  • How did they create the custom player features?
  • How did they create the resource page?
  • Can I template this structure for easy re-use?

There you go, three good examples to whet your appetite. The trick is to explore the modules and consider how they were built. And then try to build quick prototypes to see if you can figure it out.

If you have any questions don’t hesitate to connect with the course creators or jump in the community and ask.

Events

Free E-Learning Resources

Want to learn more? Check out these articles and free resources in the community.

Here’s a great job board for e-learning, instructional design, and training jobs

Participate in the weekly e-learning challenges to sharpen your skills

Get your free PowerPoint templates and free graphics & stock images.

Lots of cool e-learning examples to check out and find inspiration.

Getting Started? This e-learning 101 series and the free e-books will help.


free flip card interaction

A great way to learn to use the elearning software you have is to create small interactions. As I’ve noted before, at work you may end up building one hundred courses, but the reality is you just build the same course one hundred times. That’s one of the reasons I like and promote the weekly elearning challenges. They provide a mechanism to quickly build prototypes to play around with ideas and learn new production techniques.

A recent challenge was to create a note card interaction. There are some pretty cool submissions so be sure to check them out in the comments. I happened to be working on a note card interaction for a workshop and submitted it to the challenge above. Here’s the interaction:

free flip card interaction

View the notecard interaction in action.

Here are a few things that I highlight in the workshop activity. I also created a quick tutorial that explains the file and how it’s constructed.

  • View tutorial to learn how to create and customize the free flip card interaction
  • Download file for the free flip card interaction

Create Content You Can Use More Than Once

One of my goals when creating any interaction is to design it so it’s easily re-purposed. Ideally, I want it to become a template. In the case of the note cards, I designed them so that I can quickly copy and paste to create additional cards. Then I just need to swap out the content in the card.

In addition, once the interaction is complete it can be saved as a template file where it will always be at your fingertips and available for use in other courses.

Learn to Leverage the Features

For this free flip card interaction I created the cards with a Selected State.  In essence, the Selected State of an object is like a light switch that can be turned on and off. This is perfect for a note card interaction. Click on it to get information. Click on it again to go back.

Using a Selected State also makes it easier to build a reusable template for copying and pasting. Often, we use layers to show or hide content. That means every time I want to duplicate a card, I also have to duplicate a corresponding layer. With a Selected State, I only need to duplicate the object because it automatically duplicates the state. That saves a lot of time creating the interaction and adding additional cards.

Find Inspiration from Others

Josh Stoner does really nice work. At a recent Articulate workshop he showed how to build this drag and drop interaction that gave the appearance of swiping cards left and right. It’s a slick interaction. I used his design to inspire my note cards.

free flip card interaction

What I like about this free flip card interaction is that it allows the user to interact with the screen and this is a key part of building interactive content. I also like that it’s a novel interaction when compared to how most elearning content looks. While the cards kind of serve as flashcards in these examples, they could just as easily be bullet point slides converted to cards. Even if all you have is linear content, you make it a bit more engaging because of the novelty and interactive component. Keep in mind: it doesn’t make it a better learning experience, but it does make it a more engaging interactive experience.

To sum it all up:

  • Develop the practice of building prototypes. If you need some structure or calendar, participate in the weekly challenges. You don’t need to do them every week, maybe once a month or every couple of months is fine.
  • Get more life out of the features. This comes with practice (see above) and connecting with more experienced users who have developed some good best practices and creative techniques.
  • Find a source of inspiration. Make it a habit to look for good multimedia examples and then try to recreate them in your software. It’s a great way to learn to use the tools in a new way and also to see your projects and the potential interactions they offer.
  • Free download. Here’s a link to the flip card interaction. I’ll leave it to you to download and deconstruct to learn more. If you need help, watch the tutorial.

Events

Free E-Learning Resources

Want to learn more? Check out these articles and free resources in the community.

Here’s a great job board for e-learning, instructional design, and training jobs

Participate in the weekly e-learning challenges to sharpen your skills

Get your free PowerPoint templates and free graphics & stock images.

Lots of cool e-learning examples to check out and find inspiration.

Getting Started? This e-learning 101 series and the free e-books will help.


dropbox

You need to stop sharing your elearning courses and portfolios using Dropbox’s public folder. Effective October 3, 2016, Dropbox is disabling the feature to render HTML pages. It’s one that many have been using to share their courses and elearning portfolios. This is similar to the action Google took last month to disable webpage sharing via the Google Docs service.

If you’re a Dropbox user you probably already received an email from Dropbox alerting you to this change. If not, I’m here to alert you today.

dropbox

Why Should I Care?

Many people in the elearning community currently share their courses via Dropbox. In fact, we have close to 4,000 weekly challenge entries in our weekly elearning challenges; and at least 20% are shared via Google Drive or Dropbox. Maybe more.

It’s a bummer that the service is being discontinued. But the bigger bummer is that all of that content shared by the community will no longer work. That means if you shared a demo in previous challenges (or if you were using Dropbox as a free way to feature your portfolio of courses) all of those links will be broken.

What Are The Alternatives?

In a previous post, I shared a few alternatives. I’ll share them here again.

  Click here to view the YouTube video.

  • Use Amazon S3 or a competing service. Here’s how to set up the Amazon S3 service. That’s what I use.
  • Buy your own domain and manage it yourself. A domain name and hosting may cost about $50/year. That’s not expensive at all.
  • Can you upload your course? A lot of people use Wix and Weebly type services for their portfolios. They are good services for websites, but sharing files isn’t easy. You need a place to host the courses files and create a link. Those website services often don’t have a file/folder upload feature. Something to keep in mind.
  • Be careful of free services. Odds are they’ll be gone or remove the free part of the service and you’ll be in the same place you are today.

Personally, I think it’s worthwhile to create a custom domain and manage the demos and courses that way. It doesn’t cost that much and then you have complete control over your brand and you’re not at the whim of those free services that may or may not be available at a future date.

What do you recommend?

Events

Free E-Learning Resources

Want to learn more? Check out these articles and free resources in the community.

Here’s a great job board for e-learning, instructional design, and training jobs

Participate in the weekly e-learning challenges to sharpen your skills

Get your free PowerPoint templates and free graphics & stock images.

Lots of cool e-learning examples to check out and find inspiration.

Getting Started? This e-learning 101 series and the free e-books will help.


interactive video example

Earlier I shared a nice example of a gamified elearning course. Today I’d like to share a really neat example of an interactive video scenario. This example comes via the fine folks at SpongeUk who do some really cool work and said I can share it.

View the Interactive Video Example

interactive video

Click here to view the video interaction.

What I Like About This Interactive Video

  • I like the real life decision-making that they use. The situation is relevant, the choices are legitimate, and the consequences of the choice leads to more choices. It has a game-like feel to it and the timer adds a sense of urgency.
  • I really like the way they did the email treatment. It’s a clean design and novel. And overall their visual design has a simple elegance.

interactive video email

  • There’s something about video that’s much more engaging than reading slides of content. Setting up a quick video shoot like this doesn’t take long and the scripted dialogue is short enough to keep the home grown talent in check. My guess is they kept it simple and used a head-mounted GoPro camera (or a smart phone) to create the first person perspective. And it doesn’t sound like they used any special mics. Besides, you can’t go wrong with monkeys and bananas.

interactive video Go Pro

  • Despite how much we try to complicate things, interactive scenarios are essentially glorified multiple choice questions. I like the 3C model for scenarios: give the learner a challenge (what to do with employee), provide viable choices, and the choice produces a consequence (which could be immediate feedback or another challenge).

interactive video decision

  • I also like the way they pulled the feedback together to identify what type of manager you are and tips on how to be better.

interactive video feedback

  • Finally, I get a lot of questions about how to do this or that in elearning. Often people start by showing me examples of popular multimedia content they find online. I believe that was the case with this example. If I recall, it’s not a real project but a quick prototype based off of this popular Deloitte recruitment video.

Kudos to the folks at SpongeUK. They did a great job showing how Storyline can be used to create interactive scenarios that use video. They also did a great job reinterpreting the interactive video and creating something uniquely theirs. And as a bonus, once you build the foundation for this type of interactive, you can save it as a template and re-use it for other courses.

What did you like best about this example?

Events

Free E-Learning Resources

Want to learn more? Check out these articles and free resources in the community.

Here’s a great job board for e-learning, instructional design, and training jobs

Participate in the weekly e-learning challenges to sharpen your skills

Get your free PowerPoint templates and free graphics & stock images.

Lots of cool e-learning examples to check out and find inspiration.

Getting Started? This e-learning 101 series and the free e-books will help.


gamified e-learning example

At a recent conference I ran into Ken Haas and John Kostrey who work for Sodexo. They were showcasing a nice gamified course they built as part of the training program for facility management. What I like about the course is that it’s more than the typical linear, click-and-read course. They used a lot of the core building blocks for interactive elearning.

The course is part of a blended program where it’s combined with live facilitated training. Check out the course below.

Gamified E-Learning Example

gamified e-learning example

Click here to view the course.

Key Points of Gamified E-Learning Example

Here is a list of a few of the things that stood out to me.

  • This a good performance-based demo that allows the learner to explore and make educated guesses. They’ll easily figure out what’s right and wrong. And they get more specific feedback later in the course.
  • They also provide some distractors and incorrect choices that may appear to be initially correct. This forces the learner to focus on their specific task rather than merely identify issues out of context.

gamified e-learning example gate screen

  • Use of gate screen to provide starting instructions. The gate screen stops the learners to orient them on what they need to do.

gamified e-learning example menu

  • Created custom navigation rather than use the default player.
  • Timer based interactivity to create a sense of urgency.
  • Progress indicators.
  • Point system.

gamified e-learning example contextual menu

  • Contextual map to show where you are in context to what you see.
  • “I give up” is an option. However, the learner doesn’t get the points, but they do get the information.

gamified e-learning example summary

  • Summary allows you to go back to review what you may have missed.
  • The course also included a leader board so that others in the organization could have a friendly competition. They used a JavaScript trigger to send the player data to a MySQL database.

Go through the course and see how you do. One of the best ways to build better elearning is by looking at different examples, deconstruct them, and then apply what you learn to your own courses. What do you like about this elearning example?

Events

Free E-Learning Resources

Want to learn more? Check out these articles and free resources in the community.

Here’s a great job board for e-learning, instructional design, and training jobs

Participate in the weekly e-learning challenges to sharpen your skills

Get your free PowerPoint templates and free graphics & stock images.

Lots of cool e-learning examples to check out and find inspiration.

Getting Started? This e-learning 101 series and the free e-books will help.