


Thanks, Tom. Always nice to have yet another way to use a slider. btw, nice animations on the blog post!
Three Ways to Use Hotspots in Your E-Learning Courses
March 21st, 2017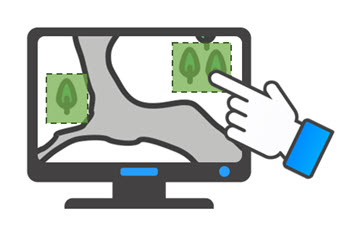
Hotspots are commonly used in e-learning course design. They’re invisible, yet functional. Today, we’ll explore some common use cases for the hotspot in your online training.
Invisible Button Hotspots
The most common use for the hotspot is the invisible button. Essentially it allows the developer to add an interactive choice on top of another object. This can really speed up production. For example, the image below starts with a single image of a world map. By adding separate hotspots over each continent there’s no need to create separate images with links. This really comes in handy when you start with a single image and don’t have the means to break it into smaller components.
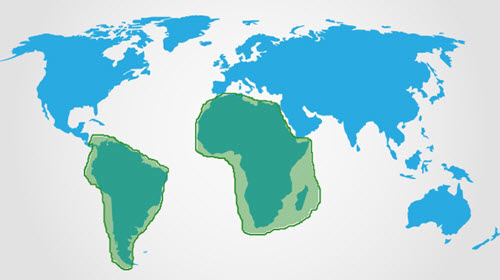
Example Screen Space with Interactive Hotspots
The hotspot can also be used as a means to expand real estate via a mouseover interaction. A click interaction requires a click to activate and then an additional click to deactivate. Whereas a mouseover interaction is a bit smoother. Mouseover the hotspot to reveal content, mouse away to have it disappear.
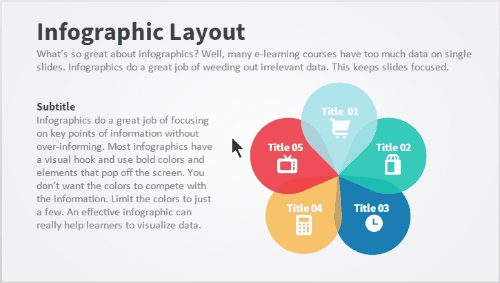
In the example above, I added access to additional content using a mouseover hotspot. This is content that doesn’t need to be persistent but does need to be available. The mouseover or hover interaction assigned to the hotspot is a great way to expand screen real estate with fluid precision.
Invisible Barrier Hotspot
The two examples above are pretty common and what you’d normally expect for hotspots since the hotspot is usually defined as an invisible button or interaction. However, the hotspot is also good as a barrier to avoid interactions. Think of it like plastic wrap over a piece of cake. You can see the cake, but you can’t touch it because the wrap is covering it.
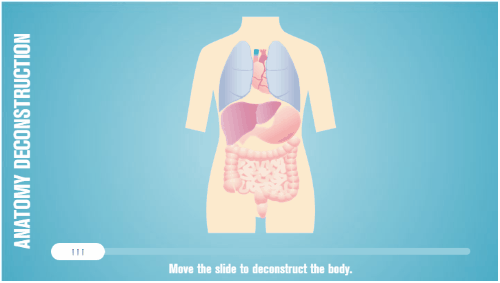
Here’s a recent example where I used the hotspot as a barrier. In this anatomy interaction, each part of the digestive system is actually a slider connected to the main slider. It’s a great effect to move the pieces in and out of the body using a single slider. However, I only want the user to interact with the main slider, so I placed a hotspot over the body image and the other sliders. The hotspot serves as a barrier and prevents the user from interacting with what’s underneath.
Check out the two examples below to see the difference.
Example with No Hotspot Barrier

Click here to view the demo of no hotspot barrier.
The first demo above has no hotspot barrier which means any of the other sliders are active. Grab one of the body parts and see what happens. It’s not as elegant.
Example with a Hotspot Barrier
Click here to view the demo of hotspot barrier.
The second interaction has a hotspot barrier over the body parts which prevents the user from interacting with anything other than the main slider. This makes for a much better user experience and a more elegant interaction.
So there you have it. You can use hotspots to trigger all sorts of interactions or you can use them as a persistent invisible barrier that prevents an interaction.
Events
- Everyday. Check out the weekly training webinars to learn more about Rise, Storyline, and instructional design.
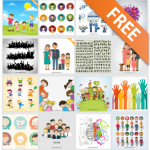
Free E-Learning Resources
 |
 |
 |
|
Want to learn more? Check out these articles and free resources in the community. |
Here’s a great job board for e-learning, instructional design, and training jobs |
Participate in the weekly e-learning challenges to sharpen your skills |
 |
 |
 |
|
Get your free PowerPoint templates and free graphics & stock images. |
Lots of cool e-learning examples to check out and find inspiration. |
Getting Started? This e-learning 101 series and the free e-books will help. |
8 responses to “Three Ways to Use Hotspots in Your E-Learning Courses”
Hi Tom,
This is great. The infographic mouseover hotspot is really nice! Question – do you always need to include some directions on the slide (“Mouse over image to learn more”, etc.) so users know they need to interact with a slide?
Tom, could you please expand on the reasons one would use a hotspot for the infographic mouseover instead of a hover state, if using Storyline 2? If it streamlines or allows other capabilities to be fully used, I’d appreciate knowing that, too.
Nice article for who are learning online.
Thank you for sharing this information !
I often use hotspots to disable the clicking, as you show in the last example.
However, there are times, when you want the user to be able to click once the slide finishes. For those instances I go with a shape that has the transparency all the way up to 100 % and then I hide the object with a trigger once the timeline ends (I would prefer to use a hotspot, but you cannot control the states with a trigger). I prefer this way, so I don’t have to worry about adjusting the timeline of the hotspot if the slide has any adjustments in the future.


0
comments