The Rapid Elearning Blog

Archive for the ‘E-learning’ Category


free text to speech narration

Occasionally, I get questions on free text-to-speech applications. While there are a number of free text-to-speech applications out there, many have character limits or don’t allow for commercial use. I’m not sure how many people have personal use cases for text-to-speech, but if you do, there are plenty of options. Another challenge is that many blogs in our industry create linkbait lists of text-to-speech applications, but for the most part, those lists are worthless.

Today we’ll look at a really good solution if you need a free text-to-speech application.

Why Use Text-to-Speech?

Despite the mechanical voice quality, there are some viable use cases for text-to-speech in e-learning (outside of accessibility issues):

  • For example, text-to-speech makes sense if you send a script out for professional narration. Use text-to-speech to create placeholder content for your reviewers so that you can get the voiceover script approved before sending it out for professional recording. This will save on the cost of do-overs.
  • Another good use case is the training content changes often. It is time-consuming to continually update and record narration. Text-to-speech applications make that easy. And because the content is somewhat disposable, people will most likely tolerate the mechanical voice.
  • Often we have international developers where English (or other languages) isn’t the first language. They can produce the courses and insert audio narration generated by text-to-speech applications.

A word of caution, though: most text-to-speech doesn’t sound that great. It’s been getting better over the years, but the mechanical voices can be grating and hard to sit through for long form content. That’s something to keep in mind. It’s bad enough to sit through most of the e-learning people experience today, let alone having it narrated by a robot.

With all that said, here’s how to use this text-to-speech application that is free and available for commercial use.

Balabolka: Free Text-to-Speech Application

I’ve reviewed most of the free applications and find that Balabolka offers the best benefit for text-to-speech narration. Here are some of the benefits and things you can do with it:

  • It’s free. Although, I do recommend that if you get value out of the free software it is a nice gesture to support the developer with a donation.
  • Run it via USB. No need to install it. You can run the software from a  USB drive.
  • It uses the SAPI voices that are already installed on your computer. In most cases the sound fine. You can also add additional voices. I added the new mobile voices from Microsoft and they work for my needs. There are other services where you can buy more natural sounding voices. But you’ll have to do your own research on how to set those up.
  • Insert your entire narration script and output either a single audio file or split the narration into multiple audio files.
  • Leverage the Google text-to-speech service for an additional voice. Output as an audio file.

Balabolka Text-to-Speech Examples

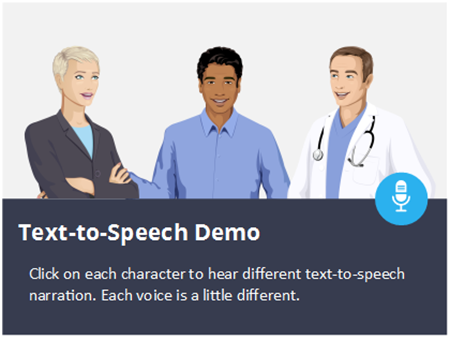
Below is a link to an example module where I converted some text from a blog post into text-to-speech audio. I created a few different examples so you can hear the quality of the voices and how they sound in the context of an e-learning demo.

text to speech narration

Click here to view the text-to-speech demo.

Balabolka Text-to-Speech Tutorials

Here’s a quick video tutorial where I walk through the basics of text-to-speech conversion:

  • Insert text and output audio
  • Create multiple audio files from one script
  • Batch convert audio from a script

Click here to view YouTube video.

If you’re looking for a free alternative for text-to-speech narration, then this solution should work for your courses.

Events

Free E-Learning Resources

Want to learn more? Check out these articles and free resources in the community.

Here’s a great job board for e-learning, instructional design, and training jobs

Participate in the weekly e-learning challenges to sharpen your skills

Get your free PowerPoint templates and free graphics & stock images.

Lots of cool e-learning examples to check out and find inspiration.

Getting Started? This e-learning 101 series and the free e-books will help.


e-learning professional portfolio

As an e-learning developer, it’s important to document your work experience and skills. One way to do this is with a professional work portfolio.

In previous posts, we discovered why you need a portfolio as part of your professional development. And we even looked at one community member who does a great job demonstrating her skills by showcasing her e-learning modules in her portfolio. Today, we’ll look at a few things to consider when creating a professional portfolio.

Most people I meet don’t maintain a portfolio. So before we get started, I’ll give you two good reasons why you need to actively maintain a portfolio.

Most likely you don’t own the e-learning software to create courses. Let’s suppose you lose your job. Now you’re scrambling to find a new job which means you need to pull together a portfolio. Oh no! You don’t have access to the courses you built and you don’t have access to the software to rebuild them.

When I posted a job for instructional designers, one requirement was to see the applicant’s portfolio. More than 80% of the people told me they didn’t have one and that they were interested in the job, but needed to create a portfolio. Which was fine.

You know what happened, though? I reviewed those applicants who did have works samples ready-to-go and they ended up getting interviews. By the time others sent me their portfolios, we were already into the second round of interviews of those who had them to start.

Your Portfolio Shows Your Work

show your work in your e-learning portfolio

The main point of the portfolio is to show your work. It’s easy to talk about what you can do, but in a multimedia industry (that’s mostly visual) it’s important to show what you can do.

Ideally, you can show real projects, but as we know that’s not always possible. In those cases, you either have to create dummy versions of the courses or build your own modules. I prefer the “build your own” route. This way you can build demos that are more interesting than the typical type courses you may be forced to build at work.

What’s in the Professional Portfolio?

what's in your e-learning portfolio

The portfolio is intended to highlight your skills and experience. It’s not supposed to be an exhaustive inventory.

  • Keep it short. No one likes to look at 800-slide courses where every screen looks the same. Find a few interesting (and interactive) parts of the course and show those. Or build some modules from the weekly e-learning challenges. That’s what many in our community do. They’re short and relatively easy to build. And perfect for a portfolio project.
  • Looks matter more than instructional design. It is a visual medium so make your visuals strong. Stay away from defaults and add some custom elements. Add some novel interactivity to catch their attention.
  • Identify common types of courses and build some modules for your portfolio. Here are a few: drag and drop interactions, decision-making scenarios, software tutorials, and custom navigation. This will give you a diversity of projects.

How to Organize the Portfolio Content

how to organize e-elearning portfolio

Ultimately, e-learning is a solution. What was the problem and how did the course help? There are four things you should outline in your portfolio:

  • Who was the client?
  • What was the need?
  • What did you do?
  • What was the result?

This can be listed as bullet points like above or just a simple statement, such as: At ACME we introduced a new processing machine and needed to train 5,000 employees. The onboarding course I created taught them XYZ and we had all employees trained in 2 weeks and saved a gazillion dollars.

Key point: no one wants to read the War & Peace version of your course. Keep it simple and provide just enough information.

Your Portfolio Builds Your Brand

Create_portfolio_10

Your peers are all over the Internet posting articles, sharing their work, and connecting with others. You can do the same with your portfolio.

  • Use it to build your brand. There are quite a few I’ve known over the years who I’ve seen grow their personal brand to the point where they’re now recognized experts. For example, it was fun to see Jackie Van Nice at the recent Learning Solutions Conference get mobbed by people who recognized her work in the community.
  • Share your work. A great way to build your brand and expand the reach of your portfolio is to share your work. Build simple templates and give them away. Show your work and then share the source files when possible. To the person who values that source file, you’re an expert. Montse Anderson does a great job sharing her nice-looking templates.
  • Build your network of peers. Many people make the mistake of just pushing their content out. The best networkers know how to pull people in. It’s important to connect with others. But it has to be real. No one wants to feel like they being played, sold to, or sucked into some sort of multi-level marketing scheme.
  • Altruism is the first step. Share freely with no strings tied. Just know you’re helping someone (perhaps thousands). Share as you learn. I love the way Melissa Milloway is always experimenting and then shows what she does. There’s a humility in her approach that works and pulls people in because it’s authentic and not just some salesy thing. You understand her learning journey and feel like you’re part of it.

There are many reasons to have an e-learning portfolio. It’s a good way to stimulate and document your own learning. But most importantly, it’s a great way build your industry expertise and show what you can do. You never know when the next opportunity presents itself, but you want to be ready when it does.

Do you have a portfolio you’d like to share? If so, share it via the comments.

Events

Free E-Learning Resources

Want to learn more? Check out these articles and free resources in the community.

Here’s a great job board for e-learning, instructional design, and training jobs

Participate in the weekly e-learning challenges to sharpen your skills

Get your free PowerPoint templates and free graphics & stock images.

Lots of cool e-learning examples to check out and find inspiration.

Getting Started? This e-learning 101 series and the free e-books will help.


e-learning portfolio

Having a portfolio is really important, especially in today’s world of digital technology. It’s a great way to document your skills, experience, and qualifications.

Recently, I gave a presentation on why you should maintain a work portfolio, here’s part of the presentation where we’ll focus on your personal development.

What is a Portfolio?

what is a portfolio

A portfolio does three main things:

  • It showcases your skills
  • Documents your experience
  • Demonstrates your qualifications

Whenever I hire an instructional designer, I’m more inclined to review their portfolio rather than a resume that documents their experience and education. An instructional design degree is great (maybe) but to me, the proof is in the pudding. And without a portfolio how can you show your work and skills?

Common Objections for Not Maintaining a Portfolio

common objections to not having a portfolio

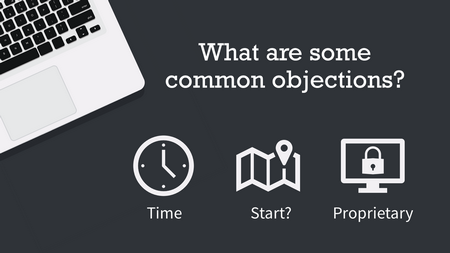
For most people, the big challenge is finding or making the time. It’s easy to know you need a portfolio but not as easy to actually sit down and get one pulled together.

Another big concern is what to do when your work projects are all proprietary and can’t be shown. Three suggestions that may work:

  • Replace all proprietary content with lorem ipsum or placeholder content
  • Capture a few discrete screenshots and explain what you did rather
  • Rebuild the interesting part of the course and use your own content

How to Document Your Learning with Your Portfolio

maintain a portfolio to document your learning

Most likely you’re reading blog posts, articles, and books. Perhaps you’re taking some classes online or watching self-learning videos on YouTube.

Portfolios are a great way to document what you learn and collect your experiences. I recommend adding a blog to your portfolio and then doing a quick write up of your learning experiences.

  • Watched a great video? What made it great? “Five Things I Learned Watching XYZ.”
  • Reading an e-learning book? Write a few thoughts at the end of each chapter. Same thing when you read an article or blog post. “Recently I read this article by Tom Kuhlmann and he said…Here are three things I think about that.”

You’re not writing for others, just for yourself. But you should use a voice as if you’re explaining it to others. Over time, those little blog posts add up and they add heft to your portfolio when you are ready to show it.

Use Your Portfolio to Build Skills

use a portfolio to build your skills

Don’t get stuck in a rut. You may build a hundred courses at work, but odds are you’re building one course a hundred times, rather than a hundred different courses. This is true for many of the people I meet.

Use your portfolio as a way to practice. We run the weekly e-learning challenges to help you practice new things or play around with ideas you don’t get to try on real projects. Make it a goal to take on one of those challenges.

  • Start small, maybe do one a quarter.
  • Share what you created.
  • Solicit feedback.
  • Write about what you did and learned.

Use a Portfolio to Match Your Skills to Industry Needs

Create_portfolio_06

Align your skills with industry needs. If you build e-learning courses then there are all sorts of skills required:

  • Project management
  • Instructional design
  • Visual and graphic design
  • Authoring skills in software like Storyline

How are you documenting your current skills and those that need refinement?

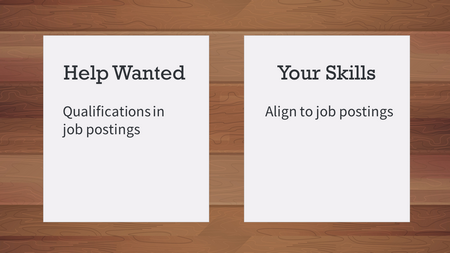
Years ago I decided to transition to from media production to training. I went online and reviewed all of the training-related job postings and then I created a two-column list. On one side, I listed all desired qualifications and on the other, my corresponding experience. Needless to say, there was a big gap between what companies wanted and the skills I had.

So I went out and acquired the skills by volunteering or participating in projects. Then I created a portfolio to document what I was learning and the types of projects on which I worked.

This was a great way to guide my personal development and when it did come time to look for work, I had line item descriptions that I could quickly paste into my resume.

Managing a portfolio takes time, but the benefits are tremendous. I’ve found that it keeps me engaged in my work and the industry that is changing rapidly. Now’s a good time to start one.

Keep it simple and focus on just yourself. Don’t worry about getting likes or views. The main thing is to develop a process and habit to nudge your personal development and use your portfolio to document it.

Do you maintain a portfolio? Share your thoughts and link in the comments.

Events

Free E-Learning Resources

Want to learn more? Check out these articles and free resources in the community.

Here’s a great job board for e-learning, instructional design, and training jobs

Participate in the weekly e-learning challenges to sharpen your skills

Get your free PowerPoint templates and free graphics & stock images.

Lots of cool e-learning examples to check out and find inspiration.

Getting Started? This e-learning 101 series and the free e-books will help.


subject matter expert e-learning

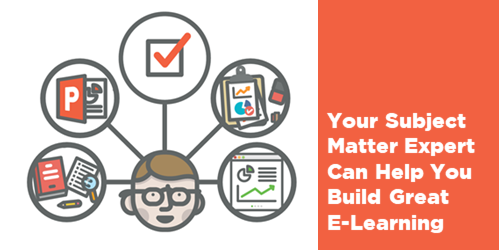
Subject matter experts play a key role in the success of our courses. This is part three of the series on how to work with subject matter experts based on tips shared by your peers.

First, we discussed how to set expectations and then we looked at how to manage the relationship with your subject matter experts. Today we’ll explore how to get them to help you build great e-learning courses.

Working with Their Subject Matter

  • Ask the subject matter experts to explain things to you in layman terms, as if you have no knowledge about the subject.
  • During the information gathering phase – everything is in. Never say “no” at this stage.
  • Listen and gather as much information as you can before stating what you can or cannot do in the course. You don’t want them to self-edit and possibly neglect critical information.
  • Keep content within the confines of the training objectives.
  • Don’t enter into design, theme, look-and-feel discussions until the raw content is decided upon as it distracts subject matter expert from giving you the information you require.
  • Don’t rely on your subject matter experts giving you the information you need – ask the right questions. Later compose answers and then let them review and make edits.
  • Separate “need to know” versus “nice to know” information and performance-based tasks.
  • If you work with several subject matter expert on the same subject, but with different expertise, let them review and structure each other’s work. That way, they look from a distance at the content, and the overlap between their comments will highlight the most important content.
  • Ask subject matter expert to separate what’s essentials from stuff that can be found elsewhere via other resources. Those can be referenced in the course.
  • If you’re the subject matter expert and the developer, be prepared to be creative, start afresh and don’t be too protective of your course material.
  • If the list of content requirements from your subject matter expert is unwieldy, ask them for the top 3 or 4 things they want the learner to take away from the course. It can help focus on the most important stuff.
  • Don’t expect them to change their content the first time you see it. Take it. Go away. Read it and make notes. Then come back with questions that help them think about the learning experience.

convert PowerPoint into e-elearning subject matter experts

Help Them Think Like an Instructional Designer

  • Help the subject matter expert understand the basics of instructional design. There’s no need to share a firehose of info when all they need is a small sip. Share a few e-learning examples and perhaps a few simple articles on how to build good e-learning.
  • New learners don’t need to know everything that the subject matter expert knows.  A subject matter expert expertise comes from years of industry experience, but the average 20-minute e-learning course is not intended to provide an encyclopedic knowledge of the subject.
  • Offer ideas to show how to transform their knowledge into great interactive content.
  • Help the “expert” to identify the key intentions of the learning activity with the goal of getting them to strip their material down to the bare essentials. And then build up.
  • Keep the end learner in mind. If you don’t understand it, they won’t.
  • Get them to focus on performance goals and not course information. What are people supposed to do?  Use their knowledge to discover work-based scenarios to bring the key learning points to life.
  • Bounce off the information you get from your subject matter expert with your potential learner group.
  • Ask subject matter expert to put themselves in the learner’s shoes (to help them recognize that you might not need to cram all that detail into the course).
  • Remind the subject matter expert to focus on actions – instead of telling us what new learners should know, tell us what actions they should be able to take.

How do you work with your subject matter experts to make sure you get the right content? Share your comments here.

Storyline 0

David Charney does a great job showing his original copy of Storyline 0 from the early 80’s which is great to compare to the newly released Storyline 3.

Events

Free E-Learning Resources

Want to learn more? Check out these articles and free resources in the community.

Here’s a great job board for e-learning, instructional design, and training jobs

Participate in the weekly e-learning challenges to sharpen your skills

Get your free PowerPoint templates and free graphics & stock images.

Lots of cool e-learning examples to check out and find inspiration.

Getting Started? This e-learning 101 series and the free e-books will help.


gamified e-learning gamification

I hear a lot of people ask about gamifying their e-learning courses. And the examples they show are usually simple games modeled after shows like Jeopardy or Wheel of Fortune. Those are fine and have their places in e-learning, especially for quick knowledge checks. But they’re not the same as gamification.

In today’s post, I’ll share a few simple things to help get your brain muscles going.

What Do You Need to Know?

When it comes to building the courses in an authoring tool, you basically need to know how to use variables. Variables allow you to track and evaluate the user to provide relevant feedback, scoring, tokens, and all the other things that make up gamified e-learning courses. And once you know how to work with variables, you can build all sorts of things.

gamified e-learning

Here are some resources to learn more about variables:

Learn More About Gamification

You can do a search and read all sorts about gamification especially now that it’s also a buzzword. Essentially you are taking game concepts and applying them to a non-game context. As you play games, ask what about the game is compelling and what similar element could work in your next e-learning course.

I think the greater challenge in building gamified courses is less in constructing the mechanics and more in building a narrative that integrates gaming psychology. Building things in the authoring tools is relatively easy compared to understanding what to build.

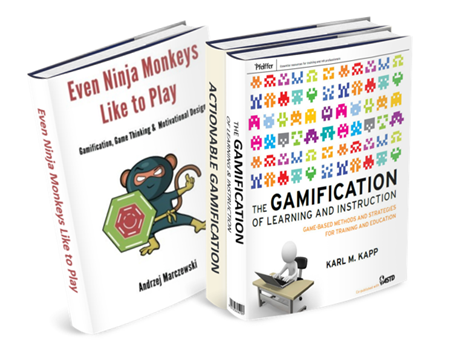
Here are three good books on gamification.

gamification books

The links to Amazon books may produce a slight commission.

What Can You Build in Your E-Learning Course?

When it comes to authoring the courses outside of a management system where you can track multiple users and build things like leaderboards, you’re confined to simple game elements such as:

  • Timers
  • Personalization
  • Progress meters
  • Tokens
  • Rewards management
  • Scoring
  • Autonomous navigation

You can make some very compelling courses that instructive and engaging. However, there’s a lot more to gamification than these simple elements above. How do you motivate learners and create the right tension between boredom and failure? Make sure you invest the right resources and develop a good strategy. Otherwise, your gamified course will transform from game to gimmick.

If you’re not quite sure where to get started, check out some of the cool examples in the community. They’ll give an idea of some of what you can do with the authoring tools. Here are three nice examples:

gamification example 1

Click here to view gamified e-learning course.

gamification-example-2

Click here to view gamified e-learning course.

gamification example 3

Click here to view gamified e-learning course.

And there’s nothing wrong with starting simple. If all you need is a Jeopardy-style quiz, then download this free file. It’s a great way to work with a context you know. But make a commitment to learn more about variables and start to add some of those gaming elements above to your courses.

Have you built any gamified e-learning? If so, share a link in the comments.

Events

Free E-Learning Resources

Want to learn more? Check out these articles and free resources in the community.

Here’s a great job board for e-learning, instructional design, and training jobs

Participate in the weekly e-learning challenges to sharpen your skills

Get your free PowerPoint templates and free graphics & stock images.

Lots of cool e-learning examples to check out and find inspiration.

Getting Started? This e-learning 101 series and the free e-books will help.


hotspot

Hotspots are commonly used in e-learning course design. They’re invisible, yet functional. Today, we’ll explore some common use cases for the hotspot in your online training.

Invisible Button Hotspots

The most common use for the hotspot is the invisible button. Essentially it allows the developer to add an interactive choice on top of another object. This can really speed up production. For example, the image below starts with a single image of a world map. By adding separate hotspots over each continent there’s no need to create separate images with links. This really comes in handy when you start with a single image and don’t have the means to break it into smaller components.

hotspot interaction

Example Screen Space with Interactive Hotspots

The hotspot can also be used as a means to expand real estate via a mouseover interaction. A click interaction requires a click to activate and then an additional click to deactivate. Whereas a mouseover interaction is a bit smoother. Mouseover the hotspot to reveal content, mouse away to have it disappear.

mouseover hotspot

In the example above, I added access to additional content using a mouseover hotspot. This is content that doesn’t need to be persistent but does need to be available. The mouseover or hover interaction assigned to the hotspot is a great way to expand screen real estate with fluid precision.

Invisible Barrier Hotspot

The two examples above are pretty common and what you’d normally expect for hotspots since the hotspot is usually defined as an invisible button or interaction. However, the hotspot is also good as a barrier to avoid interactions. Think of it like plastic wrap over a piece of cake. You can see the cake, but you can’t touch it because the wrap is covering it.

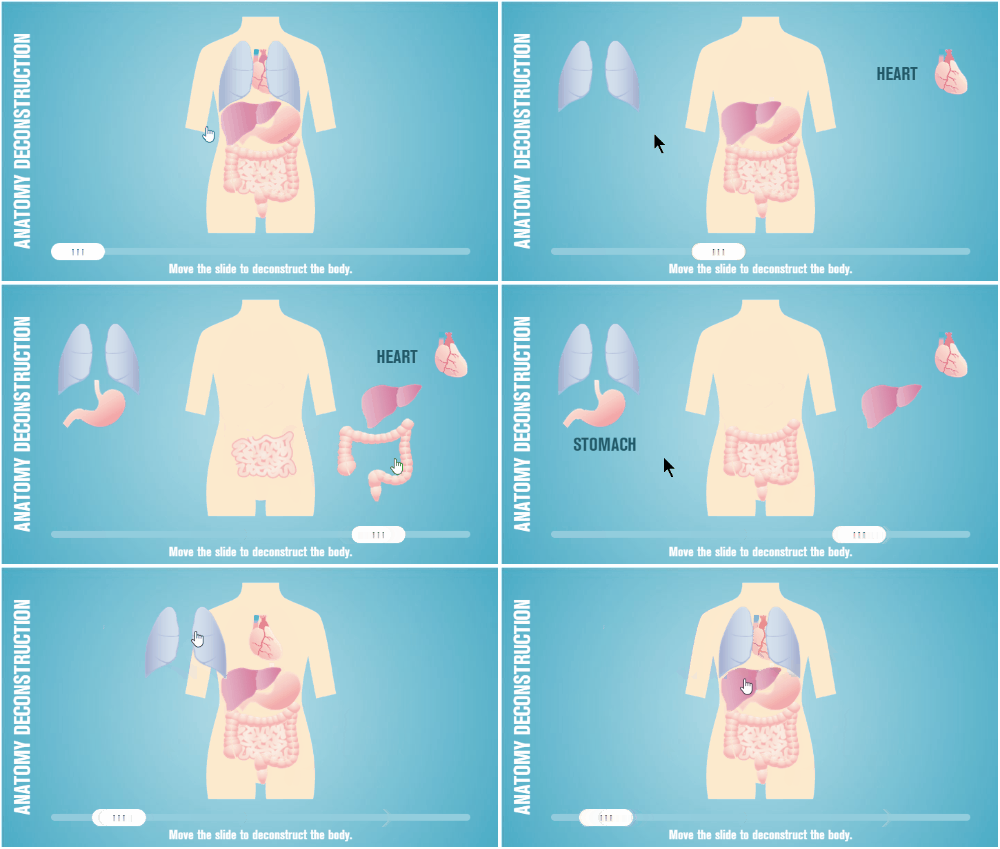
Here’s a recent example where I used the hotspot as a barrier. In this anatomy interaction, each part of the digestive system is actually a slider connected to the main slider. It’s a great effect to move the pieces in and out of the body using a single slider. However, I only want the user to interact with the main slider, so I placed a hotspot over the body image and the other sliders. The hotspot serves as a barrier and prevents the user from interacting with what’s underneath.

Check out the two examples below to see the difference.

Example with No Hotspot Barrier

no hotspot barrier

Click here to view the demo of no hotspot barrier.

The first demo above has no hotspot barrier which means any of the other sliders are active. Grab one of the body parts and see what happens. It’s not as elegant.

Example with a Hotspot Barrier

hotspot barrier

Click here to view the demo of hotspot barrier.

The second interaction has a hotspot barrier over the body parts which prevents the user from interacting with anything other than the main slider. This makes for a much better user experience and a more elegant interaction.

So there you have it. You can use hotspots to trigger all sorts of interactions or you can use them as a persistent invisible barrier that prevents an interaction.

Events

Free E-Learning Resources

Want to learn more? Check out these articles and free resources in the community.

Here’s a great job board for e-learning, instructional design, and training jobs

Participate in the weekly e-learning challenges to sharpen your skills

Get your free PowerPoint templates and free graphics & stock images.

Lots of cool e-learning examples to check out and find inspiration.

Getting Started? This e-learning 101 series and the free e-books will help.


free fonts

In an earlier post, we looked at how to convert dingbat and wingding fonts into vector images that you can use in your e-learning courses and presentations. They’re great for creating icons or bullet lists.

Not that you know how to convert the fonts into vector images, you need some fonts to use.

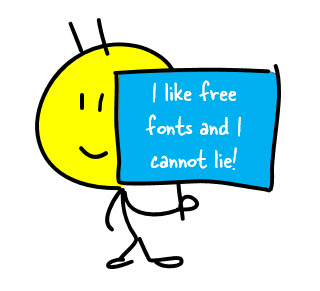
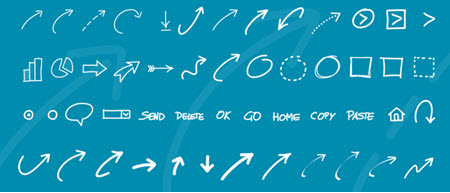
I reviewed a bunch of the free fonts and tried to sort to the those that are free for commercial use. If you want to search on your own, look for facefonts, dingbats, or wingdings. They tend to produce good results. Also, most of the free font sites have an assortment of these fonts.

As always when using free resources, confirm the licensing agreement and provide proper attribution. And it’s still good practice to give the owner props.

Free Faces & Character Fonts

free font icon

Free Icon Fonts

free font icons 2

Free Shape & Arrow Fonts

free fonts arrows

Are there certain fonts like these you like to use?

Events

Free E-Learning Resources

Want to learn more? Check out these articles and free resources in the community.

Here’s a great job board for e-learning, instructional design, and training jobs

Participate in the weekly e-learning challenges to sharpen your skills

Get your free PowerPoint templates and free graphics & stock images.

Lots of cool e-learning examples to check out and find inspiration.

Getting Started? This e-learning 101 series and the free e-books will help.


e-learning screencast webinar tutorials

If you create software training then odds are you show a lot of keyboard shortcuts. If that’s the case you’ll like today’s tip where I share a simple tool that makes it really easy to display the keyboard shortcuts on-screen.

How to Display Keyboard Shortcuts during Screencast Tutorials

Meet Carnac the Magnificent. It’s a keyboard utility that displays keyboard shortcuts as they are used during your demos. This is perfect for webinars and screencast tutorials. It’s also great for live presentations where people in the back of the room can’t always hear or see what’s going on.

Here’s a quick tutorial where I show how it works and how it would look in your software training.

Click here to view the Youtube video.

  • You can download Carnac here. Read more about it here.
  • Once you download the file, double-click to install it.
  • You’ll see the purple Carnac icon in your system tray.

Once it’s active in your system tray and you use a keyboard shortcut, you’ll see the shortcut displayed on the screen as in the image below.

screencast tutorials example

How to Customize the Keyboard Shortcut Display for Screencast Tutorials

You can modify how the keyboard shortcuts display.

  • Double-click on the Carnac icon and it opens a setting window.
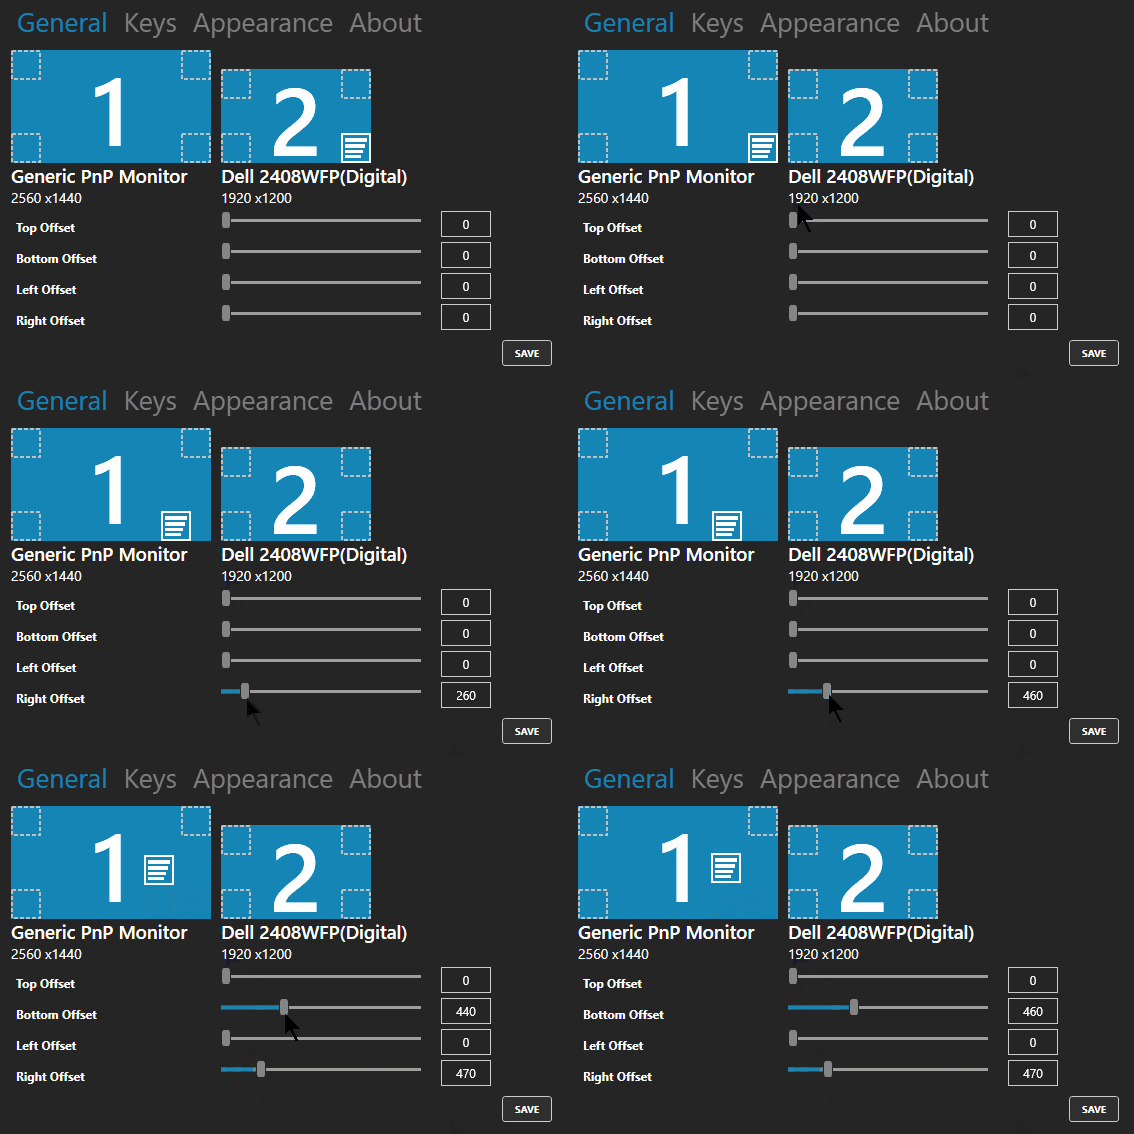
  • You’ll see the option to select monitors and where the object is displayed. You start by selecting the screen and then adjust how much you want to offset it.

screencast tutorials set properties

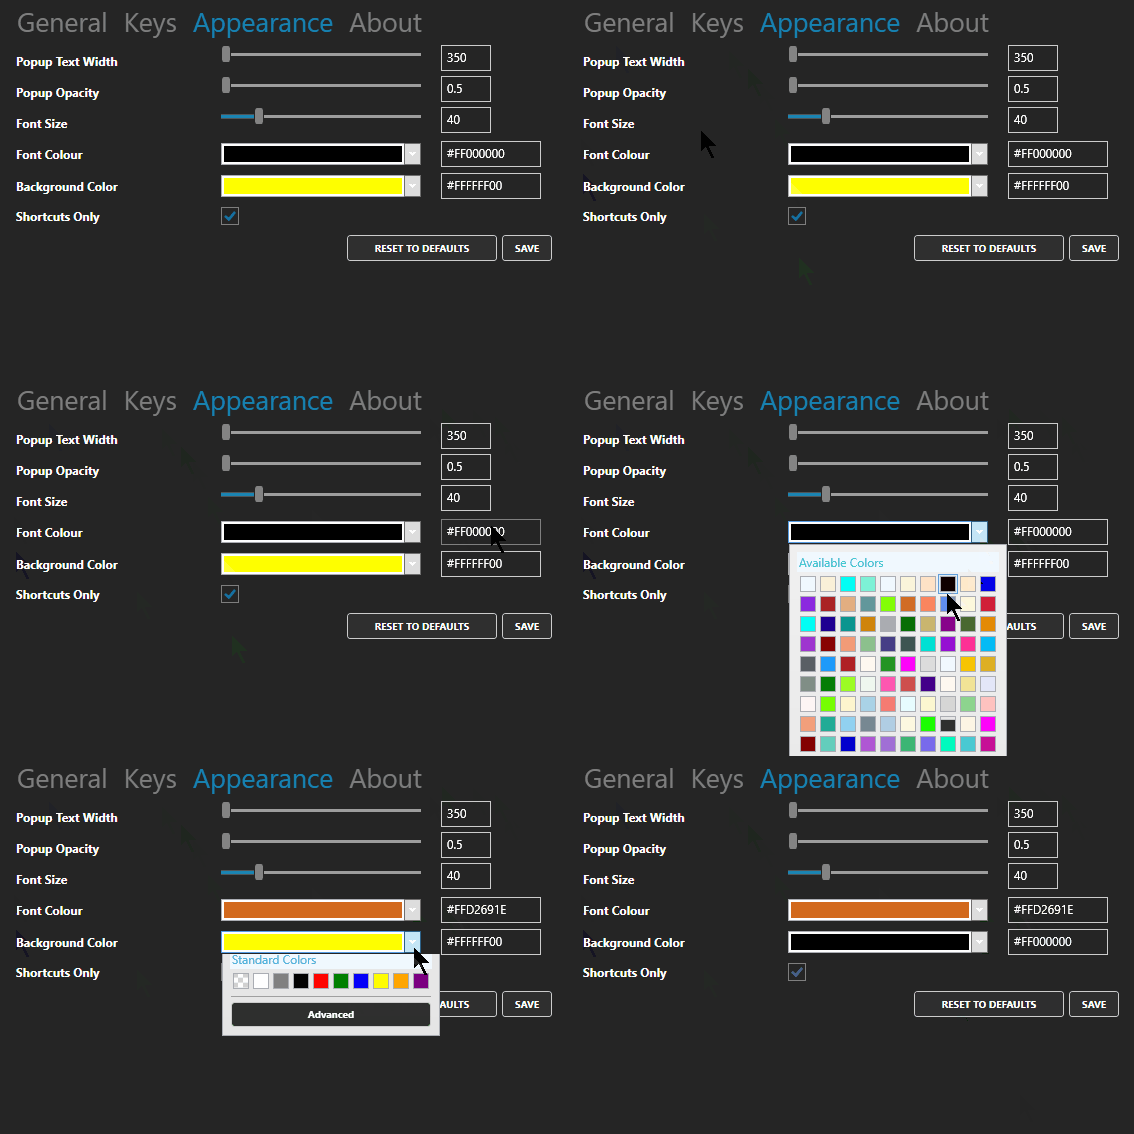
  • You can also change the appearance of what’s displayed. This includes the width, font size, and color. I couldn’t get the sliders to work, but manually entering the values did work for me. Save your changes.

screencast tutorials change appearance

It’s a fairly easy to use and it’s free. But you get what you pay for, so if you need help, you’re stuck. But I’ve found it works fine and as expected.  If you need a way to display keyboard shortcuts, then this solution should work for you.

Events

Free E-Learning Resources

Want to learn more? Check out these articles and free resources in the community.

Here’s a great job board for e-learning, instructional design, and training jobs

Participate in the weekly e-learning challenges to sharpen your skills

Get your free PowerPoint templates and free graphics & stock images.

Lots of cool e-learning examples to check out and find inspiration.

Getting Started? This e-learning 101 series and the free e-books will help.


character templates for e-learning

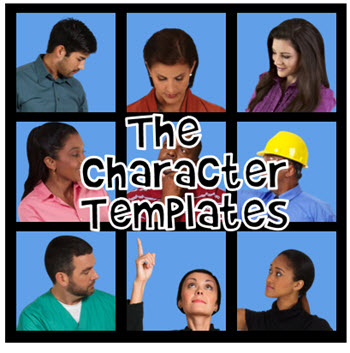
Looking for just the right images is one of the most time-consuming activities we have when building our courses. It’s easy to get distracted and waste a lot of time. It’s gotten a lot easier over the years now that the software comes with professional templates and thousands of character poses.

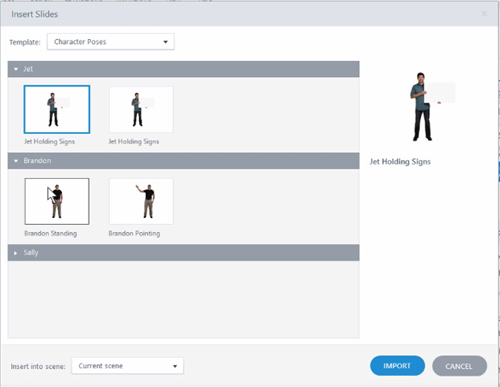
As I build courses, I often use the same characters and a few common poses. Which means I don’t need to always search through all of the poses available. And I suspect many of you do the same. So today, I’m going to show you a simple tip to help speed up your production. It’s all based on assembling your own character templates. I walk through the steps below, but the video provides more detailed instructions.

Click here to view the video.

Create E-Learning Character Sets

Even if you have hundreds of characters, odds are you use the same handful over and over again. Here’s how to create some simple pre-built character sets that make it easy to use characters and repeat poses.

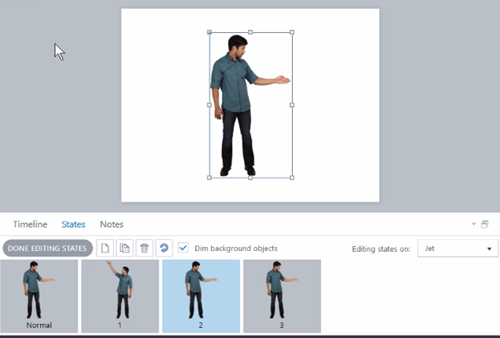
e-learning characters sets

  • Select a character and insert it on the slide.
  • Create multiple states of the character. This trick works if you only insert a handful of frequently used or common poses. Otherwise, it defeats the purpose of the template.
  • Name the slide the same as the character or descriptive of the type of poses. For example, you may insert only sign-holding poses. In that case, the slide could be titled, Brandon-Holding-Signs.

Create E-Learning Character Set Templates

e-learning characters templates using sets

  • Once you have a slide with the character, save it as a template. This creates a template you can insert into your course. That’s it. Whenever you want to use that character, insert the slide and then copy and paste the character where you need it. Then set the initial state.
  • Ideally, you maintain one character template so it’s easier to manage. In that case, import the new character slide into the main character template file. And keep adding to it as you create custom character sets. This way it’s much easier to view and manage.
  • Bonus tip: you can do the same thing for custom interactions by saving them in a single interaction template.

Save Time Using E-Learning Characters

Now that you have some pre-built character poses, you’ll save some time in your production. When you need one of those characters, insert it from the template and then copy and paste the character into your slide.

The character will always include those starting states. You can set an initial state and use triggers to dynamically change it if you like. Another benefit is sharing the template with your team.

And you’re not limited to just the characters that come with the software. You can also do this with your own characters and the photos you take. Or you can do it for background images. Perhaps you want a template of production images, inside a warehouse, or the cubicle farm in the office. The process is the same.

The software already comes with characters so searching and inserting characters is easy enough. This tip works great if you use a few common poses and don’t want to spend time searching. Set up the templates and you have a good starting point.

Assuming that you want to create some character templates like this, what groups would you create? Talking poses? Sign holders?

Events

Free E-Learning Resources

Want to learn more? Check out these articles and free resources in the community.

Here’s a great job board for e-learning, instructional design, and training jobs

Participate in the weekly e-learning challenges to sharpen your skills

Get your free PowerPoint templates and free graphics & stock images.

Lots of cool e-learning examples to check out and find inspiration.

Getting Started? This e-learning 101 series and the free e-books will help.


subject matter experts relationship

This is part two of the series on working with subject matter experts when building e-learning courses. In the previous post, we looked at how to set expectations and some simple project management tips. I also shared a link to the free e-book, Essential Guide to Working with Subject Matter Experts.

Today, we’ll look at what it takes to build a good working relationship with your subject matter experts. I always take a short term and long term view. In the short term, I want to make sure that the project moves forward successfully. And the subject matter expert plays a critical role.

In the long term, it’s all about networking and building relationship within the organization. The more you know and the more people you know, the more valuable you’ll be to the organization. And you never know when you’ll need that person’s help on future projects. A good relationship proves valuable.

subject matter experts are your friends

When asked about working with subject matter experts, here’s what your fellow e-learning developers shared:

  • They are called subject matter expert for a reason – don’t be patronizing because without them we wouldn’t be doing this.
  • Be respectful of their time, especially if they’re not working on the project and only providing assistance.
  • Help them save time. You can do this by reducing their workload. Do some research and pre-work that helps them not have to provide all of the content.
  • Show that you care. They won’t care what you know until they know that you care.
  • Be nice. If that doesn’t work, then bribe with chocolate!
  • Make them feel important. They tend to have big egos. [Tom’s note: not all of them suffer from big egos unless you’re working with doctors and lawyers. 🙂 ]
  • The subject matter experts have a lot of knowledge to impart. They will be keen to ensure that the students have access to that.
  • Keep a poker face when you hear things you do not like or cannot do. Just listen and record. You can fix things later.
  • We may use the same words but they don’t always mean the same things. Make sure that terminology is understood by both developer and subject matter expert.
  • Define your role to them in concise, clear terms so it is less threatening for them (especially when it is time to cut out “nice to know info”).
  • Be ready for them not to recognize your skill set.
  • Praise, praise and more praise for their cooperation, input, and feedback.
  • Get their buy-in at every stage of the process (if they’re involved in that level of detail).
  • Face to face is better than an email sometimes.
  •  This is a different style of learning.
  • Let their managers know how much they’re contributing.

What do you do to manage the relationship with your subject matter experts?

Events

Free E-Learning Resources

Want to learn more? Check out these articles and free resources in the community.

Here’s a great job board for e-learning, instructional design, and training jobs

Participate in the weekly e-learning challenges to sharpen your skills

Get your free PowerPoint templates and free graphics & stock images.

Lots of cool e-learning examples to check out and find inspiration.

Getting Started? This e-learning 101 series and the free e-books will help.


instructional design tips e-learning tips

During a recent interview, someone asked about what I’ve learned over the years. It’s a question I get asked a lot by new designers. One point I always make is to not worry about what’s under the hood. Just worry about getting the output you need. All of the other stuff you’ll get as you gain experience and have to make edits.

However, here are a few key points I shared in the interview.

It’s Not Rocket Science

I know this statement irks some instructional designers, but come on, what we’re doing isn’t rocket science unless of course you’re working for NASA or some other space agency. Learning is innate to humans and while we may not all know how to build the best courses, we probably can do a decent enough job to get started. Besides, I’ve seen plenty of bad courses from people who have their fancy degrees (and some have even written books).

instructional design degree e-learning tips

So take a chill pill. Don’t worry about knowing everything about instructional design. Get that first course built. Focus on meeting some tangible objectives and you’ll be on your way. Odds are it won’t be the worst course our industry’s ever seen.

A Course is a Course Unless it’s Not a Course

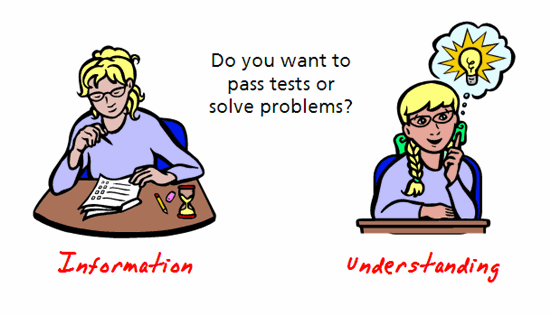
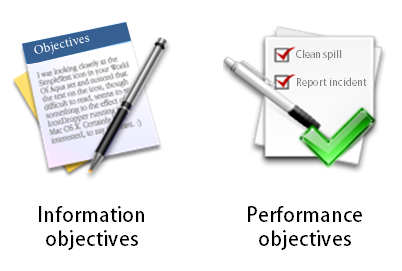
Not everything we call a course is a course. Sometimes, they’re just more like awareness campaigns, like learning about a new company policy. Some courses do have larger performance expectations but practicing the performance happens outside of the course. And then sometimes courses are heavily focused on performance where real-world decisions can be baked into the course design. The key is knowing what

The key is knowing what type of course you’re building. This way you can commit the appropriate resources. No need to build an elaborate scenario when you all you need is a few screens and perhaps a quick quiz. At the same time, you don’t want to build a click-and-read course when the person needs to learn how to make good decisions. That type of course probably requires some sort of decision-making challenge.

e-learning tips sort by performance vs information

Looks Matter More Than Instruction

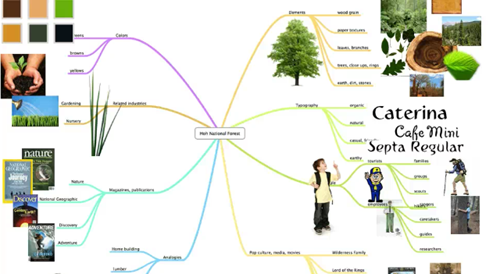
For all of our talk about building good courses, often the ones that get the most play are the ones that look good. And this makes sense because e-learning is a mostly visual medium. People are drawn to things that look good. It’s the initial stage of engagement. On top of that good visual design is a key part of communicating ideas.

e-learning tips design map

In either case, you get more traction when courses look good and are visually connected to the context of the course. This is something to keep in mind, especially when building a portfolio.

Maintain a Portfolio

It’s important to maintain a project portfolio. This is always easier to say than to do because it does take time. It’s a record of what you’ve done and it’s a way to promote your expertise.

Here’s a common dilemma: a person gets laid off and needs to start applying for jobs. Lo and behold, all of the projects are locked behind a firewall and the person has nothing to show. On top of that, the person also doesn’t own the software to build new demos for a portfolio.

Focus on the Action

Many of the courses I see are mostly information dumps. Step away from the information and focus on the action. What are they supposed to do? How do they demonstrate that they know how to do it in the real world? What activities can you build in your course that mimic those real-world decisions and actions?

e-learning tips three step process

What content do you need to support learning to make those decisions? Build your courses using a backward design approach. Focus on the measurable action and build towards the information that supports it. This is better than a linear information dump. The book, Understanding By Design, is a good place to start.

Sometimes an Information Dump is All You Need

The reality is that a lot of courses are only awareness campaigns or they exist to meet some compliance requirement. In those cases, it makes sense to keep the course simple so that people can get what they need and then get back to work. When I meet with a client I always try to sort courses by their performance requirement. If there are no clear requirements, then it falls in the information bucket which means I spend less time building the course.

e-learning tips information vs performance

Five Meals a Day is Better Than One Big One

I’m not one to focus much on diet (unless it consists of donuts). However, I do see a lot of headlines that extol the virtue of smaller meals spread over time. The same can be said for e-learning. Building a big course takes time, requires more deliberation, and can’t easily be changed.

e-learning tips spaced e-learning microlearning

Often it’s better to build smaller modules and then space the content over time. The smaller modules are easier to build and deliver. They can also be modified much more quickly. And there’s a lot of good research that shows learning spaced over time is very effective.

What Do You Wish You Knew?

I’m leaving this section blank and asking you what’s the one thing you wish you knew when first getting started. Share your thoughts in the comments section.

instructional design tip you provide e-learning tips

Events

Free E-Learning Resources

Want to learn more? Check out these articles and free resources in the community.

Here’s a great job board for e-learning, instructional design, and training jobs

Participate in the weekly e-learning challenges to sharpen your skills

Get your free PowerPoint templates and free graphics & stock images.

Lots of cool e-learning examples to check out and find inspiration.

Getting Started? This e-learning 101 series and the free e-books will help.


subject matter expert tips

At a recent workshop, we had participants share their tips on working with subject matter experts. As expected they shared some really good tips that are practical and will help move your training courses forward.

Since there was a ton of tips I broke them into a series of posts. Today we’ll look at how to manage the relationship with your subject matter experts.

Establish Expectations with Your Subject Matter Experts

tips when working with subject matter experts in e-learning

  • If you can, research your subject matter expert just like you would any other client.
  • Define clearly the communication plan with your subject matter experts. Follow the 5Ws: who, what, where, when and wherefore.
  • Make sure the development process is clearly defined and understood and then define the role of your subject matter expert and how much you expect.
  • Explain the importance of the project you are working on because a lot of times they think whatever you’re working on isn’t necessary.
  • Give clear instructions to subject matter experts as to how you want their information and content submitted to you. This includes any templates, instructions for recording and submitting audio. This helps avoid issues later, especially where there is a minimum of communication and interaction with the subject matter expert due to time and cost constraints.
  • Don’t be concerned if initial meeting is the dreaded information dump. You can always refine from this big list. Sometimes it’s good to just get them to dump everything so you know what they’re thinking.

Simple Project Management Tips When Working with Subject Matter Experts

subject matter expert tips for e-learning

  • Set up a kickoff meeting in which you: declare timelines, set expectations, define the specific roles during which phases and expected outcomes and deliverables.
  • Come up with a service level agreement. And then make sure you get the requirements signed off after each phase to avoid last minute surprises. This also helps keep the project in scope.
  • Get buy-in as soon as possible during analysis and information gathering.
  • Schedule and hold regular progress check-in meetings.
  • Record and document your meetings and then send out so that everyone can see what was discussed and expectations moving forward.
  • Meetings should have agendas with action items. No action items, then no meeting.
  • Don’t miss your own deadlines!!!
  • Document what you have agreed on and refer to that for your milestones and check-ins.
  • Ensure you and your subject matter expert track changes, and ask them to be as specific as possible with their comments and feedback. e.g. writing “Clarification is needed here” isn’t good enough!

free e-book working with subject matter experts

Be sure to check out this free e-book, Essential Guide to Working with Subject Matter Experts. You can find it in the E-Learning Heroes community.

Events

Free E-Learning Resources

Want to learn more? Check out these articles and free resources in the community.

Here’s a great job board for e-learning, instructional design, and training jobs

Participate in the weekly e-learning challenges to sharpen your skills

Get your free PowerPoint templates and free graphics & stock images.

Lots of cool e-learning examples to check out and find inspiration.

Getting Started? This e-learning 101 series and the free e-books will help.