The Rapid Elearning Blog

Archive for the ‘E-learning’ Category


time_money

Unless you work for the Count of Monte Cristo, you most likely have limited resources to build your e-learning courses.  Here are three techniques I’ve used that will make your e-learning development go faster and cost less.

Don’t Create an E-Learning Course

Clients typically think every problem can be solved through training.  Sometimes the best value you bring is that of a gatekeeper.  If you can avoid creating a course, do so.

Your job is to help your clients make the right decisions by assessing their needs and advising them on the best course of action.  By avoiding unnecessary e-learning projects, you free your resources to work on those that bring real value.

Use Kuhlmann’s E-Learning Hierarchy

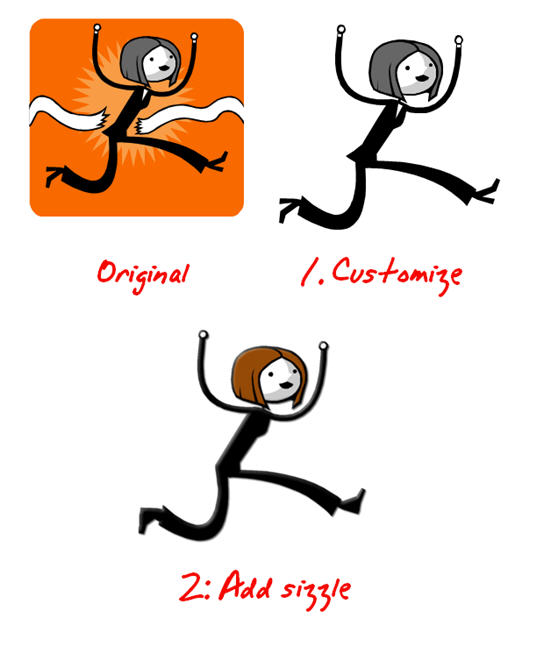
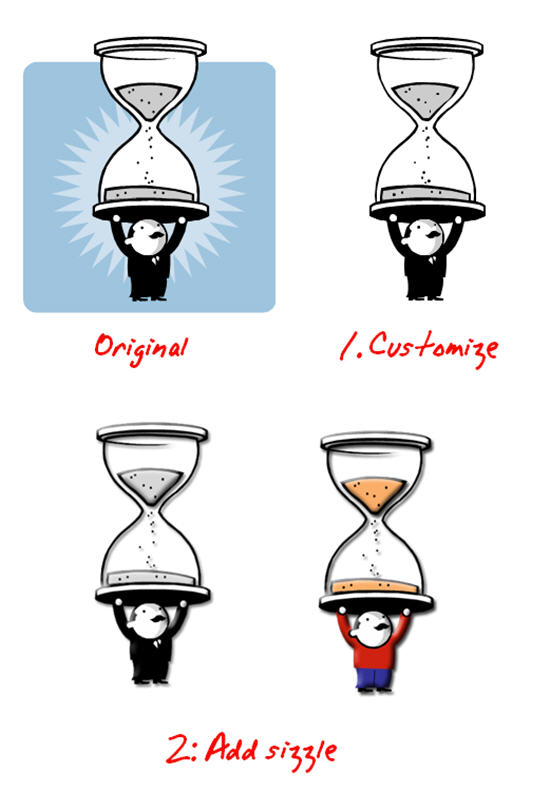
I use a three-tiered approach for e-learning design.  I start by automating as much of the production process as I can and freeing up my more expensive developers to work on projects that best utilize their skills.

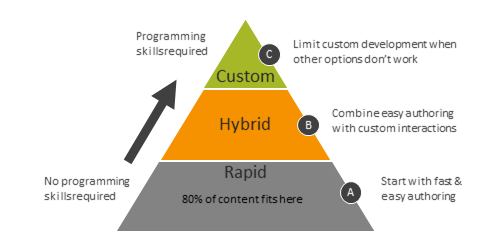
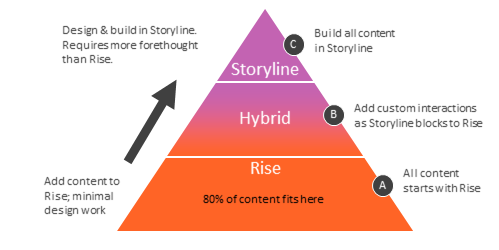
  1. Make rapid e-learning the default approach unless you need more. This allows you to meet your objectives without committing more expensive resources to the project.
  2. Build custom e-learning pieces that you can drop into your rapid e-learning course.  Rapid e-learning software is very flexible and allows you to add custom content such as web objects or iframes.  This hybrid approach allows you to build the pieces you need and still leverage the benefits of quicker production using the rapid e-learning software.
  3. Commit your multimedia resources to custom development.  If you follow the first two steps, then you can free up your resources to build custom content.  It doesn’t make sense to pay a skilled multimedia programmer to build something that you can do with a rapid e-learning tool.  Instead, push as much work to the rapid development side as you can and get your expensive developers to work on those projects that require custom development and best utilize their skills.

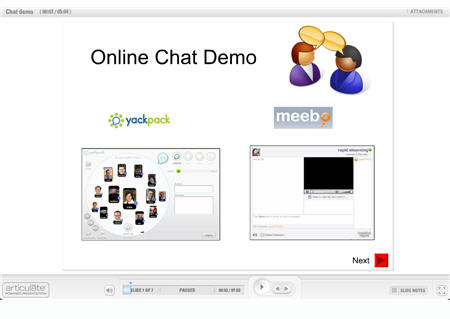
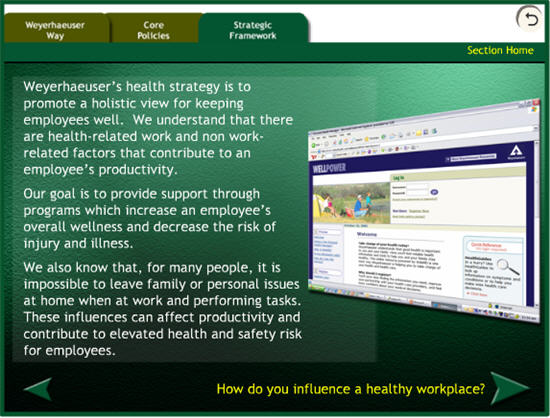
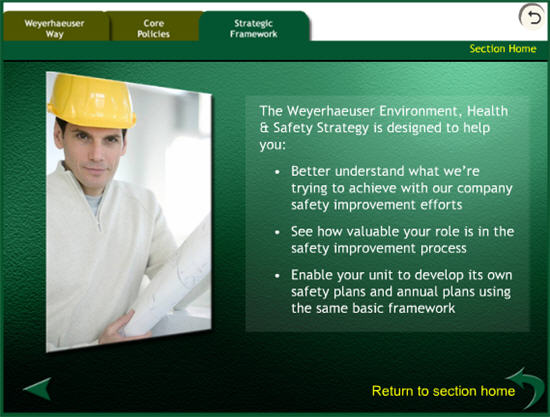
Incorporate External Content Resources

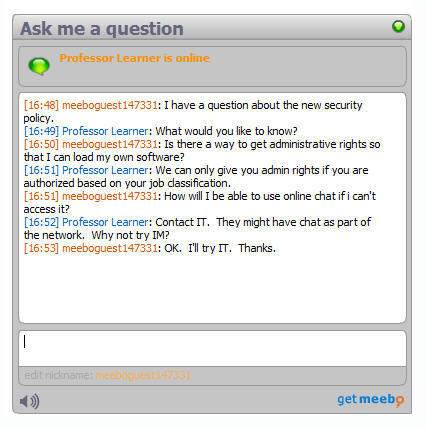
Most of the e-learning is focused on delivery of information.  And most of these courses use content that is already available elsewhere, like the organization’s intranet.  Instead of just regurgitating content, do this.  Build your course to teach the learner how to find the content outside of the course.

If you do this, you won’t need to cover everything in the course.  This allows you to create learner independence and means you must build less content.  It also helps with maintaining the course as the content changes.

In addition, many step-by-step courses only require a brief overview and then some cheat sheets or simple tips that the learners can use at their workplaces.  Why build a time-consuming course, when you might be able to provide a less expensive document that serves the same purpose?

The key to your success is investing your time and resources where you get the most value.  Following these tips helps you do that.

Events

Free E-Learning Resources

Want to learn more? Check out these articles and free resources in the community.

Here’s a great job board for e-learning, instructional design, and training jobs

Participate in the weekly e-learning challenges to sharpen your skills

Get your free PowerPoint templates and free graphics & stock images.

Lots of cool e-learning examples to check out and find inspiration.

Getting Started? This e-learning 101 series and the free e-books will help.


performance vs information

Information isn’t the same as understanding. Many e-learning courses are designed to just share information. In some cases, that’s fine. But, there are many e-learning courses that are performance-based and in those cases we need to change how the learner thinks and acts rather than just regurgitate facts.

One evening I was working late and we had a fire drill. Everyone did what we learned to do in our safety course and we made our way to the exit. However, the exit was a sliding door that shut down during the drill.

Since the training didn’t provide information on how to open the sliding door once power was lost, we just sat there waiting for someone to come by and open the door for us. What struck me was that no one really knew what to do once we were presented with a challenge that wasn’t part of our training.

This was a reminder that there’s a difference between passing a site safety course (information) and really knowing what to do in the event of an emergency (understanding).

tests1.gif

The safety course was typical of many e-learning courses. They’re designed to share information, but don’t usually go beyond that. Information sharing doesn’t work for courses where the learner is expected to take action or complete tasks. In those cases, the e-learning course needs to be designed to go beyond the facts and move towards creating new levels of understanding.

How Do I Create Understanding?

When we teach others we’re not looking for them to just know information. Instead, we want them to use information in context to make good decisions.

The challenge when creating e-learning courses is knowing how to build an environment where the learner can process the information and place it in the appropriate context and through that demonstrate greater levels of understanding. This all starts with some fundamental ideas around course design.

1. Establish clear learning objectives.

For the e-learning course to be successful, you need to establish clear learning objectives. This seems obvious. However, I’ve been involved in enough training programs to know that that’s not always the case.

Without clear objectives, you’ll have problems reaching your goals and you’ll probably not engage the learner. Like the old saying goes, “If you don’t know where you’re going, most likely you’ll have no problems getting there.”

2. Determine what evidence proves understanding.

Once you establish the learning objectives, you need to determine how you’ll know they’ve been met. What evidence proves that the learner is able to meet the goals?

This goes beyond just creating a multiple choice quiz. What you really need to shoot for is evidence that demonstrates understanding not just how to do something but why.

3. Build the course to provide information AND create a learning experience.

Once I determine the right type of evidence to prove the learner’s understanding, I can build the experiences into my course that helps the learner get to the desired level of understanding.

I want to measure the learner’s grasp of the facts and I want to put the learner in a situation where she can use the facts and apply them to the nuances of real life decisions. This helps me see that not only does she get the information but that she is able to use the facts in an appropriate manner to make performance-based decisions.

4. Create the ability for learners to reflect on the information.

E-learning courses are good at sharing facts and information. The goal is to help the learner pull all of the information together and make good decisions. A step in the direction of creating real understanding is to help the learner reflect on the new information.

So often we share information and then move on assuming that the learner understands why the information is important. By reflecting on the information, you put the learner in a position to take abstract and disconnected facts and place them in an appropriate context. Here are some ideas on how to build reflection as part of the learning process:

  • Ask questions to hook the learners and get them to think about the information in a context that is important to them.
  • Have the learner’s review scenarios or case studies so that they can take the information out of the course and put it into the real world.
  • Create some sort of learning journal where the learners have to think about the course’s information and write out their thoughts. This helps them personalize the information and make it more than just a bunch of facts.

5. Create a way for learners to explore.

The other day I was out walking and I saw a skateboarder practice jumping in the air with the board. In the time I observed him, he must have jumped unsuccessfully at least twenty times. What intrigued me was that each time he jumped, somewhere in his brain he was making minor adjustments to his technique that will allow him to eventually become proficient at jumping.

How does this translate to e-learning? To get a learner beyond rote facts means that you have to create a place where the learner can make those “minor adjustments.” Learners need the ability to explore, to have a place of “what if’s” to see cause and effect.

  • Take a cue from Google. Free up the course navigation and give the learners the ability to click around and explore like they would online or if using a search engine. Present a challenge and have them look for an answer rather than just giving them the information.
  • Create scenario-based branches that allow the learner to make a choice and get feedback specific to the choice made.
  • Build an environment where the learners can modify variables to see the cause and effect of their decisions. Create interactive visual models where the learner can play around with “what if” scenarios.

To create an e-learning course that empowers the learner to make good decisions means that you have to create an environment where the learner gets important information and has time to reflect on its meaning and where it fits in the learner’s world.

Events

Free E-Learning Resources

Want to learn more? Check out these articles and free resources in the community.

Here’s a great job board for e-learning, instructional design, and training jobs

Participate in the weekly e-learning challenges to sharpen your skills

Get your free PowerPoint templates and free graphics & stock images.

Lots of cool e-learning examples to check out and find inspiration.

Getting Started? This e-learning 101 series and the free e-books will help.


chatter.jpg

In a recent post, Clark Quinn reminded us that “dialogue is the most powerful learning technology on earth.

In his excellent book, Informal Learning, Jay Cross discusses the value of conversation as part of our learning process because we all come from unique backgrounds and levels of expertise. This allows us to “draw different implications from [the facts] and engage in new trains of thought.”

One challenge for us in the elearning community is to introduce real conversation into our elearning courses.

In my last post, we looked at the communication process. One of my points was that while we assume that the learners understand the information we share, the reality is that they only understand it from their own context and experience and potentially misunderstand what we are trying to teach.

This proved itself true in the feedback I got from the last post. I used the terms “open and closed loop” to describe the communication process. However, Carl Azar was quick to point out that what I described is the opposite of how those words are used in the engineering community. Thus, my use of “open and closed loop” introduced some confusion.

Because of the comments section, Carl was able to engage me in conversation and offer information that transformed my understanding. This is an excellent example of how dialogue with others enhances our learning experience.

This interaction with Carl and some of the other readers made me think of ways that I could add real conversation to the learning process while using rapid elearning software. Over the next few posts, I’ll introduce some ideas that you might be able to use in your next elearning course to connect the learners and instigate real conversation.

Typically, elearning is designed with independent learning in mind. Thus, we build a course and then have the learner sit in front of the computer and click through the screens. Instead of approaching the elearning this way, why not build the course as a multi learner process? There a few ways to design this type of learning experience.

Have the learners go through a course together rather than by themselves.

Design the elearning course so that two or more learners can participate in it together. Here are two ways where this might work well.

  • This approach could be part of a team building process where teammates sit at a computer together and view the course at the same time. To instigate productive conversation, create discussion questions and case studies for them to review and discuss.
  • Another possibility is to deliver the elearning course in conjunction with a facilitated session. This allows you to deliver a consistent and controlled message with the structured course content, and then have a break out session where learners can dialogue with each other.

Create an online chat for group discussion.

Creating an online chat is fairly easy to do today. There are many good chat tools available and quite a few of them are free. In addition, many organizations have chat capabilities as part of their technology infrastructure so that you can use an internal chat tool and not have security or access issues.

Here are a couple of ways that you can you use chat to introduce group conversation in your elearning course.

  • Create a time where all of the learners take the course together and then participate in a group chat (synchronous). This is especially useful if you have learners in remote locations.
  • Instigate chat conversation that is not dependent on a particular time (asynchronous). Many chat programs keep all conversations and maintain the chat as an ongoing transcript so that the information can always be accessed and reviewed by future learners.

Schedule a time where the content expert is available online to answer live questions.

At Articulate, we offer a daily demo, where potential buyers have a live conversation with our sales staff to learn more about our products. Why not use your chat tools to do something similar? Here’s how it could work.

  • Have an official time where the learners have live chat access to a subject matter expert to help them and answer questions.
  • Instead of a planned activity, just give the learners access to the subject matter expert via chat. The expert is available to answer questions, yet doesn’t have to engage learners unless a question is asked. Below is an image that demonstrates this. I added a Meebo widget to my web page. The learners can see if I am online and ask me questions.

meebolive.jpg

Chat Creates a Dynamic Learning Experience

I created a quick demo to show you how you can use a rapid elearning tool and include the chat feature as part of your learning experience. In my demo, I used Articulate Presenter’s ability to insert web objects. With Presenter, I can insert a web page from my internal network, the Internet, or from my local drive.

Because I can insert web objects, I can augment my elearning content with a web-base chat page. In addition, I can do this with limited technical skills because adding the web object is just a matter of copying and pasting the correct link.

For this demo, I used some of the free chat services available online to give you some ideas about how to use the features in a rapid elearning environment. If you’re looking at the blog post from your organization’s Internet connection, you might not be able to see the chat tools because many organization’s block them.

chat2.jpg

The benefit to adding chat to your elearning course is that you introduce real dialogue. It’s a great way to stimulate thinking and get past just content delivery. It’s also an excellent way to build better social connection between the learners especially if they are on the same team.

In the next few posts, we’ll look at ways to incorporate other forms of media into the design of your rapid elearning courses.

Events

Free E-Learning Resources

Want to learn more? Check out these articles and free resources in the community.

Here’s a great job board for e-learning, instructional design, and training jobs

Participate in the weekly e-learning challenges to sharpen your skills

Get your free PowerPoint templates and free graphics & stock images.

Lots of cool e-learning examples to check out and find inspiration.

Getting Started? This e-learning 101 series and the free e-books will help.


online communication process header

Years ago, I was enrolled in a course on video production. Each week we were given assignments to do. At the end of the week, the whole class would sit down and we’d review our projects.

One of the objectives was to have the other students share what they got out of the video before they knew what I intended to communicate. It was always eye opening to see how others perceived what I produced. Often what the audience got from the video was not what I had intended.

Through that process, I learned that it’s not enough to just put information together and assume that somehow the viewer would understand what I meant. Instead, it was my job to design my video in a way that allowed me to communicate my message to the viewer. The same principle holds true for elearning.

Online Communication Starts with Understanding the Communication Process

Clear communication is critical when you design your elearning course because what you present isn’t always received by the learner the way you intend it. If your learners aren’t getting what you intend for them to get, then most likely you won’t meet your learning objectives.

Here’s a simple illustration of what happens as learners go through an elearning course.

The first image below represents a screen from an elearning course on auto maintenance.

online communication example image

The second image shows how three different learners process the information. Notice that while they all get the same information, they each perceive it in a different way.

online communication example image 2

There are a number of reasons why the learners perceive information in different ways. Some come into the course with various levels of experience and expertise. There can be cultural or environmental differences. It also depends on the learner’s level of commitment to the course.

While you cannot control all of the perception issues, there are ways that you can remedy some of the confusion. Much of it is based on understanding the communication process and how that impacts learning. To get started, let’s look at what happens when we communicate.

The image below represents a basic communication process.

basic online communication process

  1. It all starts with a message. The message has to go from one person to the next.
  2. The first person (transmitter) encodes the message into a signal that can be transmitted and received by the second person (receiver).
  3. The message is transmitted.
  4. Once the message is received, it is decoded.
  5. Then the receiver responds to the message. This process repeats itself, back and forth.

To make it less technical, think of how we communicate in various languages. Suppose you have two people. One speaks German, the other Spanish. In order for them to communicate, they need to find a common language. A common language allows them to use words that they can communicate and understand (encoding and decoding).

How Does This Relate to the E-Learning & Online Communication?

Before we look at the elearning process, let’s see how this relates to traditional learning. In a classroom environment, you are actively communicating. That means the facilitator is continually giving and receiving information. This happens during conversation and by reading body language and other communication cues. Because of this you can assess the learner’s understanding and your ability to communicate the lesson and then make any adjustments on the fly.

The communication process is a open where you are in a constant state of give and take.

open online communication

The elearning process is a little different because you do not have a way to alter the course content to enable better communication of your content. It is closed process. In an elearning environment you deliver content and the learner is dependent on processing it. Since the learner has no way to communicate with you, you do not know if the learner is “getting it.” Because of this, you have to build a way to assess the learner’s understanding and provide meaningful feedback.

closed online communication

From my experience, this is where many elearning courses fall down. Typically, they are focused on content delivery and have limited opportunities to assess the learner’s understanding and provide the right type of feedback.

Looking at the communication process model above and applying it to elearning development, we see three opportunities.

challenges to online communication

  • Determine how you will prepare the material so that the learner can make sense of it (encoding). In a figurative sense, you are “trying to speak” to the learner. The course needs to be in a “language that the learner speaks.” In the “healthy car” example above, an assessment could easily clear up the confusion. If the next screen had the learner simulate changing the engine oil, the first two learners would have altered their understanding.
  • Determine what obstacles exist that might prevent proper understanding (decoding). The better you know the learner, the better your course can be designed. A large part of effective communication in elearning is through establishing context. Going back to the “healthy car” example, if the screen had an image of the engine rather than the car, most likely the initial perception would have been correct because you are building a context for the information with the visual cue.
  • Determine the best ways to engage the learner (transmission). People learn best when the content is relevant to the learner. I see the transmission process as one of engagement. How are you engaging the learners and creating a conduit for them to receive the information? The course needs to be motivating, effective, and interesting. A lot of this comes as a result of it being relevant. Relevance is one of the best motivators.

Effective communication is important for success. The more active you are in considering the communication challenges in your course, the better you can design the learning experience. In the following posts, we’ll look at how to create effective courses.

I’m interested in hearing of some of the communication challenges you’ve had and what you’ve done to overcome them.

Events

Free E-Learning Resources

Want to learn more? Check out these articles and free resources in the community.

Here’s a great job board for e-learning, instructional design, and training jobs

Participate in the weekly e-learning challenges to sharpen your skills

Get your free PowerPoint templates and free graphics & stock images.

Lots of cool e-learning examples to check out and find inspiration.

Getting Started? This e-learning 101 series and the free e-books will help.


volunteer.gif

One of my first goals upon launching The Rapid E-Learning Blog was to understand how you define rapid elearning. You responded and we ended up with over 200 definitions.

I sealed the definitions in a tamper-proof envelope and took them to our crack team of etymologists. We ran an exhaustive battery of tests to determine the best definitions. From those tests, I was able to present five from which to choose.

final_survey

350×20_white.gif

After 3 weeks, the votes are in and the winning definition is from Bradley Mersereau.

Rapid E-Learning is the ability to produce, deliver and quantify quality interactive material to learners in a timely and cost effective manner.

Congratulations, Bradley! You receive a complimentary copy of Articulate Engage. Thank you to all who participated and voted.

Clear Communication is Critical to Effective Learning

The contest revealed that while we use the same words, we don’t necessarily say the same thing. There’s a context to our understanding that is buried beneath the words we use, and this context is not always evident. This is only magnified as we cross borders and train people from various countries and cultures.

It’s important that we don’t assume that our learners understand what we mean.

  • Build context for your e-learning course. Avoid presenting content without context. You’ll have more success if your learners are starting on the same page. Lay a foundation for understanding and then build on it.
  • Design the course to test the learner’s assumptions. You can build context if you can determine what the learner already knows. Do this by starting with some decision-making interactions.
  • Create clarity with a glossary. Sometimes it’s just good to have a glossary or some sort of resource where you can define specific terms or acronyms. It’s a lot easier than trying to explain everything. You can easily create one with a tool like Engage and then drop it into your course. Perhaps Bradley will lend a hand.

Learning is a Complex Process

The learning process is a lot like the diversity of the definitions. Things are not always black or white. Often there’s not a right or wrong answer, and sometimes people just have personal preferences that influence how they learn.

Many times, we approach training as a list of policies, procedures and metrics. Because of this, we design screen after screen of content as a “one size fits all” approach to learning. Unfortunately, rapid authoring can contribute to this.

Rapid e-learning tools are great because you can create and modify content quickly. The tools are also getting better at allowing you to create interactive content. The challenge is knowing how to leverage the rapid authoring technology so that the e-learning course you build is part of the real learning process and not just a required task.

  • Understand your learner. This is needs analysis 101. Don’t just create content in a vacuum. Find out how your learner uses the information in the course. Then build a course that works in that context.
  • E-learning can be more that individual learning. There’s no reason why you can’t leverage the technology to create a different e-learning environment. Why does it have to be one person behind one computer? Let’s get creative!
  • Combine the e-learning course with real world practice. There are many ways to build a learning process where the learner gets content online and practices using it in the real world.

There’s a Whole Community Waiting to Help You

I have enjoyed the emails and new blogs that I’ve received these past few weeks from e-learning developers all over the world.

Most of what we know comes from others and that’s why it’s important to be connected. There’s power in community. And as we engage each other we become better at what we do.

  • Take advantage of the great resources that are available to you at no cost. The Internet has opened the doors to all types of information that wasn’t readily available just a few years ago. There’s information and help for almost everything.
  • Connect with others in our industry. There are a lot of good e-learning blogs. You can connect with people from all over the world and tap into work experience, knowledge, and resources that are not always available to you in your work environment, especially if you work in a small organization.
  • Let your voice be heard. Create a blog or wiki. Share your thoughts and actively contribute to our industry.

We never stop learning. It’s just part of who we are.

Events

Free E-Learning Resources

Want to learn more? Check out these articles and free resources in the community.

Here’s a great job board for e-learning, instructional design, and training jobs

Participate in the weekly e-learning challenges to sharpen your skills

Get your free PowerPoint templates and free graphics & stock images.

Lots of cool e-learning examples to check out and find inspiration.

Getting Started? This e-learning 101 series and the free e-books will help.


sizzle.gif

You’re building an elearning course and have assembled several images that contribute to the course’s learning objectives. You’ve created some custom graphics, gathered some relevant photography, and even created a consistent look. But something’s lacking. Your images are feeling a bit dull and flat. You know they can look better, but you’re just not sure how to make them pop.

Today, we’ll look at three sure-fire ways to move your graphics up a notch and really add some sizzle!

Make Sure You Have the Right Tools

The first thing you’ll need is a graphics editing program. I usually use Photoshop or Fireworks. The good news for those on a limited budget is that there are a number of free alternatives. I’ve listed some of them at the end of this post.

While I use Photoshop, the techniques that I cover are independent of the application you use. Most of them have similar features to do what I am suggesting. If you want more advanced help for your graphics application, just do a search online. You’ll find all types of good information and resources.

Make Them Pop Off the Screen

Today, I’m going to give you some simple tips that are fairly easy to learn. The secret to all three of these tips is to make the images pop off the screen. You do this by creating depth. It makes the image more interesting and offers creative ways that you can present the information in your courses.

Technique #1: Instead of the whole picture, just use cut outs

  • Find an image you like and cut out the parts you want.
  • The first step is to cut the image from the background. Many of the graphics programs have easy-to-use processes to help you do this. Learn how to do this with Photoshop.
  • When you edit the image, make sure to leave the background transparent. A transparent background allows you to overlap other images and blend with the screen background.

Here are before and after images.

Before example PowerPoint

before.gif

after example PowerPoint

after.gif

As you can see, I cut the guy out of the original picture (which was a little boring). By doing this, I got rid of a lot of the distracting clutter, like the whiteboard and all of the lines and angles running back and forth. Those lines cause the learner to look all over the place. The cut out image looks nicer and I have control over what the user sees.

Another advantage of removing the background and clutter is that I can put the character anywhere I want. He can be in an office, a warehouse, or even on a lifeboat pleading not to be thrown to the sharks.

diverse examples PowerPoint

Technique #2: Modify the image using effects

Notice how the two right-most images of the lady below seem to have more depth? All I did was add a drop shadow.

customized images in PowerPoint

Here is clip art I modified. First, I created a custom version using the tips from the previous post. Then, I added a bevel and drop shadow to give the image more dimension and pull it from the screen.

example of edited images in PowerPoint

The technique to do this is fairly easy to learn. Here’s what I did for the clip art:

  • Create the clip art image you want in PowerPoint using the tips from this post.
  • Copy the image and paste it in a photo editing program.
  • Apply a slight drop shadow to create some separation from the screen.
  • Add an inner bevel to give the image a little depth.

You can also do some edits to the shape of the image. In the picture below, I used the eraser and brush tools to get rid of the business suit and changed the shape of the feet. This makes the image more generic and allows it to be used on screens that are less business-focused.

another example of edited images in PowerPoint

Here’s another example. In the first image, I just added a bevel and shadow. In the second image, I also changed his attire and added some color. By getting rid of the black suit, I created an image that I can use in a variety of screens.

ways to make your image look different in PowerPoint

It really doesn’t matter what types of modifications you do. The key is that you know you can take the clip art into another program, like Photoshop, and make changes that will jazz up your image and give it some polish.

Technique #3: Add depth by changing the image’s perspective

Another simple technique to add complexity to your graphics and make them a little more interesting is to change their perspective. Most graphics applications have a feature to do this. For example, in Photoshop it’s called “perspective.”

Here are a couple of screen shots from a training project where we didn’t use flat images. Instead, we changed the image perspective to add some depth and make the screen a little more interesting.

different example

ehs3.jpg

350×20_white.gif

In this post you discovered simple image modifications that can really dress up your elearning courses. The good news is that you don’t have to be an expert to do them because they don’t require advanced editing skills. However, these techniques do produce nice results. If you do know your way around a program like Photoshop, then that’s a bonus because there are a lot of creative things you can do.

If you have your own blog, do like Zaid did. He linked to this series and showed some before and after images. It’s also a great way to share your own tips and tricks.

zaid.jpg

For those of you on a limited budget, here are a few cost effective alternatives to programs like Photoshop:

Events

Free E-Learning Resources

Want to learn more? Check out these articles and free resources in the community.

Here’s a great job board for e-learning, instructional design, and training jobs

Participate in the weekly e-learning challenges to sharpen your skills

Get your free PowerPoint templates and free graphics & stock images.

Lots of cool e-learning examples to check out and find inspiration.

Getting Started? This e-learning 101 series and the free e-books will help.


customize free vector images and clip art with PowerPoint

My kids love stickers. They plaster dozens of random ones on a page and proudly give me their new work of art. This approach to graphic design is fine for your family, but you don’t want your elearning courses to look like cluttered and random creations developed by sticker-happy children.

Get Rid of the Clutter

In this post, you’ll discover how to use your clip art to create images that are consistent and look like they belong together. Let’s get started by looking at the image below.

The Rapid E-Learning Blog: cluttered example PowerPoint

My guess is that you’ve seen this type of screen before. This elearning course looks kind of sloppy and unprofessional. It’s a cluttered design and the images don’t look like they belong together. This is not want you want for your course.

You want your screens to be less cluttered and have a consistent look and feel.

When you’re on a budget and have limited access to graphic resources, you need to be creative. If you’re forced to use clip art, odds are that you don’t have enough or the right ones. In the previous post, Little Known Ways to Create Your Own Graphics Using PowerPoint, we looked at ways to easily take Microsoft Office clip art and create your own images.

Now, let’s apply those techniques to create a consistent look for an entire elearning course.

Ungroup Free Vector Images

Microsoft stopped providing clip art but you can still use the same ideas by ungrouping vector images in PowerPoint.

Here’s what to do:

  • Download all of the images to an open PowerPoint file.
  • I like to spread the images out over a series of slides so that I can easily see them. I can fit quite a few on one slide.
  • Save the file. This way you always know what style it is and you can easily access all of the images to edit them.
  • Once you have the images saved, use the technique that I described in the previous post and create custom images.

Here are some additional tips:

  • Don’t be afraid to play around and see what happens.
  • You can change heads (or other body parts) on the characters.
  • If you need a specific ethnicity, change the skin color or eye shape.
  • Modify the clothes. You can change the colors or get rid of the “business look” by taking out the ties and white shirts.

Before & After Examples

I’ve included some before and after examples to whet your appetite. By applying my surgical expertise, these two images become a visual metaphor for chasing profits.

The Rapid E-Learning Blog: before and after example PowerPoint

The image below demonstrates what we learned from the previous post. I ungrouped the image, took out what I didn’t need, and changed the color of her outfit. She went from being a soldier to a happy college student.

The Rapid E-Learning Blog: before and after example PowerPoint

There’s no reason why you can’t mix and match body parts or facial expression to get the exact pose or look you want. All you need is a blank face, and you can drop any expression you want onto it.

In fact, I’ll go through all of the images from a style group, pull out the facial expressions, and put them on a blank slide. This way I have quick access to the expressions I need.

Here’s a quick way to create images for your next pirate rehabilitation course.

The Rapid E-Learning Blog: before and after example PowerPoint

The Rapid E-Learning Blog: before and after example PowerPoint

The image below is a combination of the same style. I changed the map reader from male to female using the hair and body shape from the original female image.

The Rapid E-Learning Blog: before and after example PowerPoint

When you use the same style, it is easy to create images that meet your specific needs and look like they belong together. I
t’ll make your project look that much more polished and professional.

Here is a quick makeover of the first image above. I modified the images and then I cleaned the screen up a little. This is a simple example. Combine this technique with some of the presentation concepts popular in books like Beyond Bullet Points and you can really create a powerful and effective elearning course.

The Rapid E-Learning Blog: example of elearning course with consistent clip art styles and free vector images PowerPoint

I look forward to seeing what you’re able to do. Next time, we’ll look at some simple ways to jazz up the images with a photo editing program.

Events

Free E-Learning Resources

Want to learn more? Check out these articles and free resources in the community.

Here’s a great job board for e-learning, instructional design, and training jobs

Participate in the weekly e-learning challenges to sharpen your skills

Get your free PowerPoint templates and free graphics & stock images.

Lots of cool e-learning examples to check out and find inspiration.

Getting Started? This e-learning 101 series and the free e-books will help.


PowerPoint 101

If you follow Sweller’s cognitive load theory, then you understand that the graphics in your elearning course are very important and play a large role in its effectiveness. However, not having the right graphics is a challenge.

If you’re like me, you’re on a limited budget and you just can’t go buy custom graphics whenever you like. That means you’re probably stuck using the standard clip art that comes with PowerPoint.

After just a few projects you cycle through all of the good clip art and you’re forced to use the clowns and puppies. While your five-year-old child might like your choice of images, you’ll find that many in your organization are not particularly fond of clowns or puppies. If only you had known that before you started.

rapid elearning site safety demo PowerPoint

How Do I Get the Graphics I Need?

If you want custom graphics, you can hire someone (although you might want to read this before working with a graphic designer) or you can make them yourself. For the moment, I am assuming that you have no money and you want to make the graphics yourself.

In this case, I recommend two options: 1) create your own drawings or 2) modify existing clip art.

[Note: Microsoft stopped providing clip art but you can still use the same ideas by ungrouping vector images in PowerPoint.]

Option 1: Stick with your skills and draw your own graphics

Here’s a generic image that is easy to create.

rapid elearning stick figure

With minor tweaks, you can use the same image over and over again, each time telling a different story. As you can see below, it doesn’t take much to make the images mean different things.

rapid elearning conflict resolution demo

However, there is a very slight possibility that many in your organization will not appreciate your graphic art skills. In that case, I suggest trying the second option.

Option 2: Modify existing clip art

Here’s your challenge. You want an image of a lady presenting some information to her team. However, you cannot find the right image. In the following example, you’re going to learn to take two separate clip art images and combine them to make the image you need.

rapid elearning edit clip art demo PowerPoint

Become a clip art surgeon.
Without going into technical details, most clip art is a series of grouped images. That means you can ungroup the clip art and pull out or add the elements you need.

rapid elearning ungroup demo PowerPoint

Just right-click on the image and select ungroup. Sometimes, you have to do it twice. You should see something like this.

rapid elearning ungroup demo PowerPoint

Once you ungroup, you can pull out the things you don’t need. You can also add items to change the clip art and make it something new. In this case, we’re going to combine the two images and make it look like the woman is presenting to the group at the table.

[Note: Microsoft stopped providing clip art but you can still use the same ideas by ungrouping vector images in PowerPoint.]

  1. Ungroup the images.
  2. Start with the first image. Take out the elements you don’t want.
  3. Select the entire image and regroup it.
  4. Do the same for the next image.
  5. Combine the elements from image 1 with image 2 to make the desired image.
  6. Select the entire image and regroup it to make a single image.
  7. If you want to use the image elsewhere, go ahead and save it by right clicking on it and selecting “save image as” and choose the format you prefer. I recommend .emf because you’ll retain the image transparency and vector. However, you’ll see that there are many formats from which to choose.

great tips on rapid elearning PowerPoint

If you look at the image you’ll notice that I did a few things.

  • I took one of the people out of the team image. She was facing the wrong direction.
  • I flipped the team image so that it looked like they were facing the presenter.
  • The presenter’s shirt was white, so I changed the color.
  • I got rid of the backgrounds and the presenter’s table to make the image less cluttered.
  • I layered the presenter behind the table to give the image a little depth.
  • I changed the content on her flip chart, taking her from boring corporate drone to brilliant elearning consultant.

Now it’s your turn to practice doing this. Remember, the only limitation is your creativity. If your people need hard hats, find a hard hat image and add it to the clip art. If you need multiple ethnicities, change the hair and skin color. The possibilities are endless.

Here are three quick tips.

  • Create a work slide. I build a lot of my elearning courses in PowerPoint and publish with Articulate Presenter. I tend to create the images I need on the fly. Because of this, I like to use a blank slide as a work area. I’ll move the clip art to the slide, make it big and then take it apart. Once I am done, I copy and paste the image to the real slide. This way I don’t accidentally, mess up my content slides.
  • Control the clutter. The ungrouped elements that make up the image are layered. Sometimes, it’s not easy to get to what you want. What I do is make a series of duplicate images and delete what I don’t want. Then I pull the individual pieces together and regroup the image.
  • Create mini groupings. I find it easier to grab a part of the image and create a mini group rather than work on the whole image. This way you only have to work with a few mini groups rather than hundreds of little pieces.

By ungrouping and modifying existing clip art, you have the ability to make custom images to fit the needs of your elearning course. It’s inexpensive and, once you get a handle on it, pretty quick to do. In fact, outside of the original stick figures, I built all of the graphics for this post in PowerPoint. It only took about 5 minutes to build the presenter image for this demo.

rapid elearning before and after demo PowerPoint

I’m interested in seeing some before and after images. Feel free to send them my way. When I get enough, I’ll post them for others to see what can be done.

In the next post, we’ll look at how to use image styles so that you have consistent graphics to use throughout your elearning course.

Events

Free E-Learning Resources

Want to learn more? Check out these articles and free resources in the community.

Here’s a great job board for e-learning, instructional design, and training jobs

Participate in the weekly e-learning challenges to sharpen your skills

Get your free PowerPoint templates and free graphics & stock images.

Lots of cool e-learning examples to check out and find inspiration.

Getting Started? This e-learning 101 series and the free e-books will help.


how do you define rapid e-learning

Last week, I posted the question, “How do you define rapid e-learning?” The community responded and today we have over 200 definitions. We even got one from former U.S. Vice-President, Al Gore, who claimed to have “invented rapid e-learning.” I suspect that one’s not real.

What I really enjoyed about reading these definitions is that they were submitted by e-learning professionals from all over the world. In a recent post, marketing guru, David Meerman Scott, discussed how the Internet has allowed communication to come full circle, giving us a virtual town square where we can have “communication that is personal and authentic.”

Something like this wasn’t possible just a few years ago. The Internet allows us to connect and build our own virtual town square where we are able to share our ideas and best practices. It’s something we see in the e-learning community where people answer questions, share ideas, and their project files.

It is interesting to read the definitions of rapid e-learning and see the diversity of opinion. While there are many similarities in the definitions they do cover a broad spectrum. Some focused on the technology and cost, while others focused on the learner. There are even a few who challenged the effectiveness of rapid e-learning. How is it possible that there can be so many definitions?

Clear communication is essential for the e-learning industry that is focused on teaching others.

Trying to define rapid e-learning makes this challenge clear. It is evident that while we use the same words, we might not mean the same things. This is compounded when you consider the many nationalities and cultures that make up the town square.

In the book, BusinessThink, the authors discuss “complex equivalents.” They say that as we present our ideas we use words that have encoded meaning. Like an iceberg, the words float on top, yet below the surface lurk multiple meanings and interpretations that require further exploration and clarification if communication is to be real.

abstract equivalents one word many meanings definitions

I found this to be true with our definitions of rapid e-learning. One person might define it as “the technology used to create inexpensive training” while another definition might be “the ability to create training on-the-fly to meet very immediate needs.” They both are valid, yet mean two different things.

What Is the Definition of Rapid E-Learning?

I am sure that this contest will not settle the definition of rapid e-learning. However, I know it has contributed to the conversation in our virtual town square.

Now for the task at hand…

We had over 200 submissions and I needed to pare that down to 5 for our poll. Here’s what I did: to trim the definitions to a manageable number, I read through them a few times. I did this to identify the most common definitions. From there I trimmed the list down to those that used the fewest words. The remaining definitions were very similar although they each had unique nuances. To come up with the final five I took it to the lab and ran it through my trusted definition analyzer.

Here are the final five. Click on the survey link to cast your vote. I’ll keep the polls open until the end of the week. [Editor’s note: voting is closed]

Events

Free E-Learning Resources

Want to learn more? Check out these articles and free resources in the community.

Here’s a great job board for e-learning, instructional design, and training jobs

Participate in the weekly e-learning challenges to sharpen your skills

Get your free PowerPoint templates and free graphics & stock images.

Lots of cool e-learning examples to check out and find inspiration.

Getting Started? This e-learning 101 series and the free e-books will help.


questions to ask when building e-learning courses

Many times you get projects where the customer has already determined what she wants. If the customer’s right, this is good and saves a lot of time. However, if the customer’s wrong, then you have a problem. You’ll waste time and money, and probably not meet anyone’s goals. Make sure your customer gets what she really wants versus what she think she wants.

At the beginning of the project, your job is to help your client identify the training objectives and then determine the appropriate means to achieve them. The better you do this, the more value you bring. Sometimes the right solution means no e-learning. Sometimes it means a simple e-learning course. Other times it means a more advanced course.

One Way to Determine the Right Solution is to Ask the Right Questions

Good questions help raise awareness. By asking the right questions, you help your customers identify their real needs. You also help set expectations.

Who is in charge of the e-learning course?

It’s important to get to this right away. You need to know who is paying for the project. Who is the final authority? There’s nothing worse than spending weeks designing a course, have it ready to roll out, and then have someone say, “Now let’s take it to Bob so he can review it.” If your project depends on Bob’s approval, then you need to know what Bob wants before you spend a lot of time developing the course.

What are the business objectives and how will this e-learning help you meet them?

This question helps you get to the meat of the matter. Training isn’t always the solution to the problem. “What do you want to do; and, will this training help you do it?” The answer to this question also helps establish some metrics for the training. For example, the customer says, “I want to increase production.” Assuming that training is the right solution, you can measure the effectiveness of your training by the increase in production.

What do you expect people to do that’s different than what they do today?

This feeds off the last question and gives you a sense of what you’ll need to do with the e-learning course. If the learner has to use some software in a different manner, you can build an e-learning course to do so. Or, if the learner needs to learn a new sales technique, then you build your training to meet the desired change in behavior. Surprisingly, a lot of e-learning offers good information but has no expectation of changed behavior.

When is the e-learning course needed?

It’s important to know the time lines up front. If the project needs to be done in two weeks, then the approach you take is different than a project where you have six months. The good thing with rapid e-learning tools is that you can use them for quick projects and still produce an effective e-learning course.

What do you know about the person who will take the e-learning course?

It’s important to get a sense of the people who are actually going to use the course. You want to know why this training is important to them and how it will change their jobs. If possible, schedule some time to meet with the end users of the course. It’s always a good idea to get them involved in the course design so that you build a course that meets real needs.

What do you know about the course content?

From where will the course content come? Who are the subject matter experts? What type of access will you have to them? Who will approve the final content? You need to know where the content is going to come from and who will provide it. There’s a big difference between you getting content from a subject matter expert and you having to do research and create it yourself…or have it funnel through a committee for approval.

What are some of the technology issues?

Do the learners have access to computers? Will they be able to hear any audio? Where will the e-learning course go? Do you need to track the course? How much multimedia can your network handle? There are many considerations when you deliver an e-learning course. It’s important to bring those out at the beginning of the project so that you can deal with any technical issues up front.

As a habit, it’s a good idea to make a list of basic questions to ask when you start a project. This way you’ll know you’re covering the bases. These questions are a start.

What questions would you ask?

Events

Free E-Learning Resources

Want to learn more? Check out these articles and free resources in the community.

Here’s a great job board for e-learning, instructional design, and training jobs

Participate in the weekly e-learning challenges to sharpen your skills

Get your free PowerPoint templates and free graphics & stock images.

Lots of cool e-learning examples to check out and find inspiration.

Getting Started? This e-learning 101 series and the free e-books will help.


define rapid e-learning

Note: the contest has concluded. You can learn more about rapid e-learning:

After I released The Insider’s Guide to Becoming a Rapid E-Learning Pro last week, more than 6,000 people downloaded the e-book in just the first 24 hours! Suffice it to say, it shows there’s a ton of interest in rapid e-learning.

But what exactly is “rapid e-learning?” Is it the software? Is it the process? Is it based on who creates it? I know what a lot of the industry experts think, but I’m interested in what you have to say. Here’s your chance to help define rapid e-learning and also receive some fame and fortune.

How Do You Define Rapid E-learning?

Here’s how this mini-contest will work:

  1. Type your definition of “Rapid E-Learning” in the comments of this post. Keep it simple. No long explanations…just the definition itself.
  2. I’ll pull out the top submissions and conduct a poll for you to vote on your favorite.
  3. Based on your votes, we’ll have the winning definition.

So no reason to wait.

Events

Free E-Learning Resources

Want to learn more? Check out these articles and free resources in the community.

Here’s a great job board for e-learning, instructional design, and training jobs

Participate in the weekly e-learning challenges to sharpen your skills

Get your free PowerPoint templates and free graphics & stock images.

Lots of cool e-learning examples to check out and find inspiration.

Getting Started? This e-learning 101 series and the free e-books will help.


relevant e-learning courses

Earlier today, I got an email about a baby moose that was born in someone’s front yard. As I looked over the email, I noticed that the ads on the side were pushing baby showers and buying cute baby outfits.

By design these ads create relevant links based on the text of the email. In this case the links were not relevant and completely out of the context of the email I was reading. I don’t need cute baby outfits. So I just ignored the ads. That’s what happens when you just create ads oblivious to the needs of a real person.

There’s a lesson in here for those of us who design e-learning. Want your learners to learn? Then create relevant content. If not they’ll ignore what they see in the course. It all goes back to a point I was making in the last post about understanding the learner’s needs. To have the most impact, the course needs to be relevant to the learner. 

Don’t get caught trying to sell baby gifts to someone reading about a moose.

Three Ways to Make Your E-Learning Content Relevant

1. Spend time with the learners in their environment.

A while back, I worked on a course for machine operators in a production environment. Much of the job was loading and unloading a high-speed machine. After spending a few days on the floor talking to the machine operators, I found that the machine intimidated many of the new users. It was extremely large, fast, and noisy. On top of that, the new users were continually reminded of how expensive it was and to not mess up anything. This affected their performance.

I learned a lot talking to and observing the machine operators. Because of the time spent with them, we built the core part of the training around preventive maintenance on the machine. Before they learned to operate the machine, they learned to take it apart, clean it, and put it back together. By the time they started working on the machine, they were no longer intimidated. As a result we ended up cutting a 90-day training process down to less than 2 weeks.

2. Be a bridge between the content owner and the learner.

Typically, courses are built around the needs of the organization or content owner. Many times this happens oblivious to the learner’s needs. Part of your role is to blend the organization’s needs with the learner’s needs.

It’s important to get the learners involved in the development and design of the user training. Learners are able to build a context for the information. New learners are especially valuable because they can share recent experiences and insights while they are still fresh.

3. Put the content in context.

In face-to-face sessions, you can get a lot of mileage when you step away from a lecture format and allow people to work through scenario-based challenges. It keeps the information meaningful and the learners are motivated to learn.

You can do something similar with e-learning. Page after page of content is equal to an online lecture. Change things up. Create branched scenarios and real-world interactions where the learner gets to practice using the information in a way that is relevant to the real-world environment.

You don’t want your learners to tune out and discount the important courses that you build. If you get them involved and keep the content relevant, you’ll have engaged learners.

What are some things you do to keep your elearning courses relevant?

By the way, here’s that moose. Although, I opted not to throw a baby shower or buy it a new outfit.

does a moose need e-learning

Events

Free E-Learning Resources

Want to learn more? Check out these articles and free resources in the community.

Here’s a great job board for e-learning, instructional design, and training jobs

Participate in the weekly e-learning challenges to sharpen your skills

Get your free PowerPoint templates and free graphics & stock images.

Lots of cool e-learning examples to check out and find inspiration.

Getting Started? This e-learning 101 series and the free e-books will help.