The Rapid Elearning Blog

Archive for the ‘Free Downloads’ Category


Articulate Rapid E-learning Blog - free people icons

Free people icons are great when they’re truly free to use for commercial courses. And who doesn’t like them, especially now that Microsoft no longer offers free clip art?

Here’s a list of some free icons. I only link to the ones that are free for commercial use. That means you can use them for your work and not spend time looking at free icons that you can’t use.

Kameleon Free People Icons

Articulate Rapid E-learning Blog - free people icons example 1

Nice flat people icons. Free for commercial use and the site also includes additional icons. Download them individually from iconfinder as .PNG files.

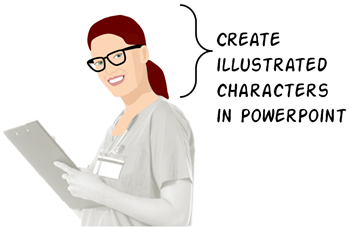
Customizable Free People Icons

free people icons for e-learning

Trina Rimmer shares some free icons that can be easily customized because she built them in PowerPoint. Click here to get the free PowerPoint template.

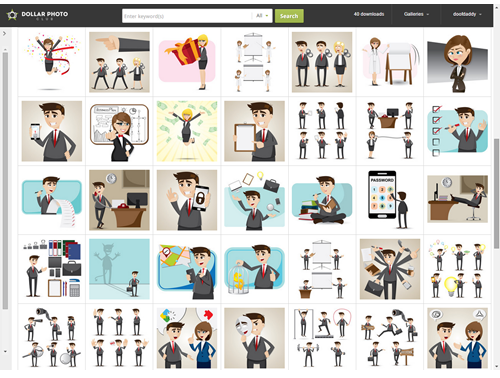
Large Boss Free People Icons

Good mix of characters. Also includes the elusive Satan avatar which is critical for totally serious feedback in compliance training. Free for commercial use; attribution required.

Articulate Rapid E-learning Blog - free people icons example 3

Flatflow Free People Icons

Nice flat icons with actual faces (not sure why there are so many blank-faced icons). Free for commercial use; attribution not required but appreciated. Here’s a direct link to the designer’s site.

Articulate Rapid E-learning Blog - free people icons example 4

Vista Free People Icons

Good assortment of occupations. Free for commercial use, attribution required.

Articulate Rapid E-learning Blog - free people icons example 5

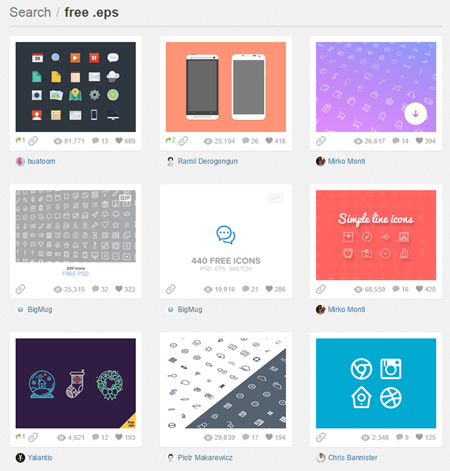
Creative Tail Free People Icons

Another nice collection of flat people icons. Free for commercial user via CC 4.0

Articulate Rapid E-learning Blog - free people icons example 2

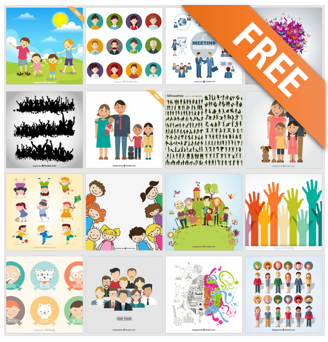
Kids Set Free People Icons

These are informal, cartoony icons. Free for commercial use under GPL license.

Articulate Rapid E-learning Blog - free people icons example 6

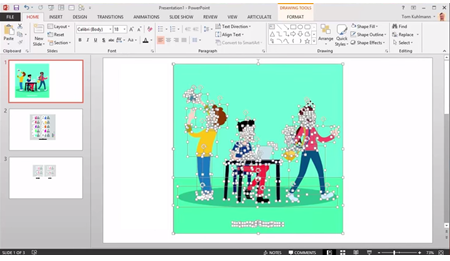
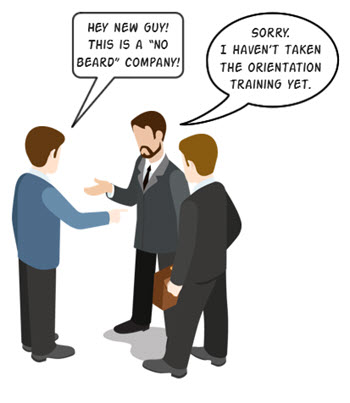
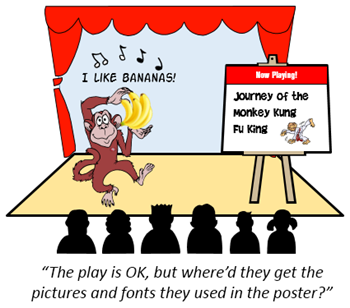
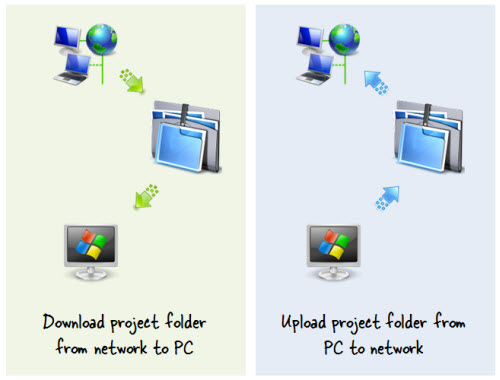
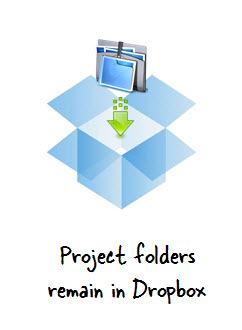
Need ideas on how to use the free icons? Here’s an example from a presentation I did a few years ago where I used the Kids Set icons above.

Articulate Rapid E-learning Blog - free people icons used in presentations

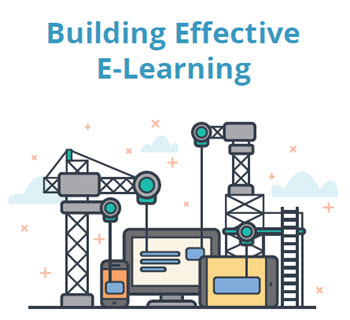
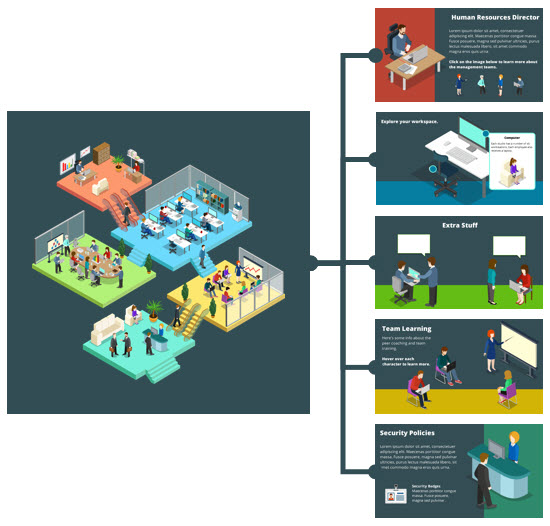
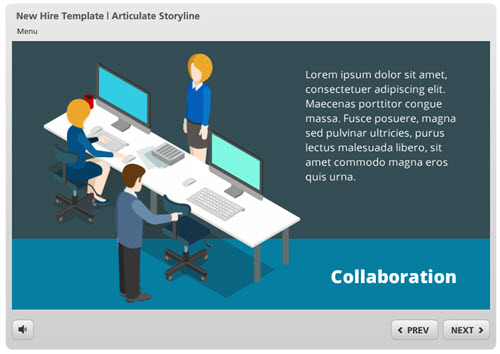
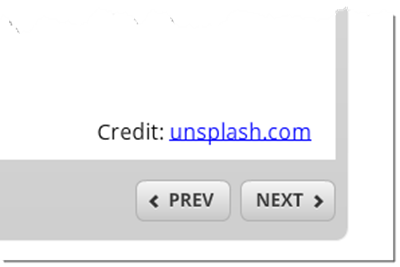
And here’s an example from a recent blog post where I gave away a free elearning template made with free icons. You can download the free Storyline or PowerPoint template files.

Articulate Rapid E-learning Blog - free people icons used in online training courses

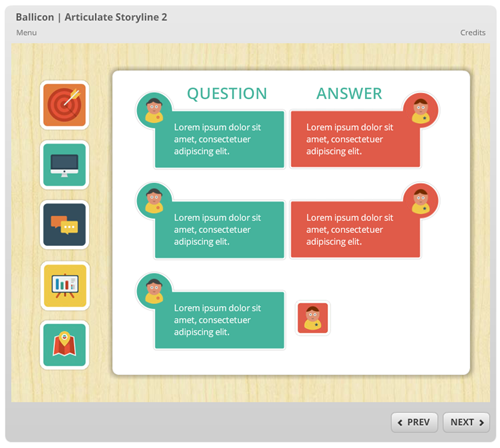
Click here to view the free template in action.

As you can see, there are all sorts of ways to use the people icons. They can be used as avatars, buttons, or characters in your courses.

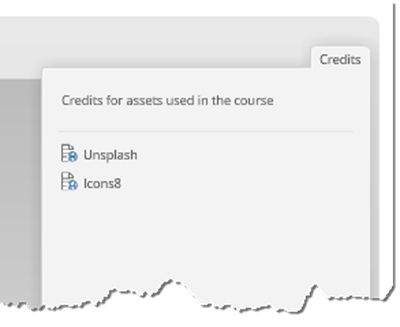
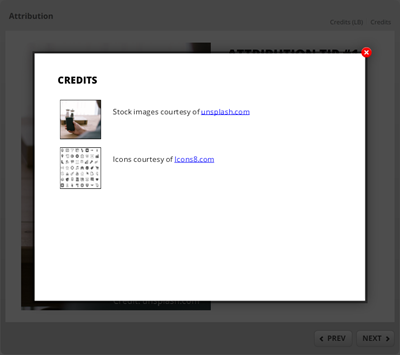
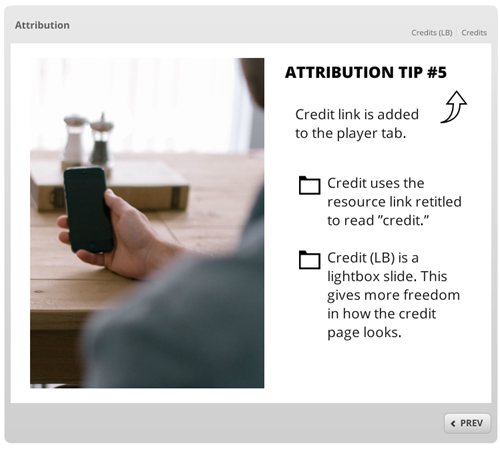
Some of the free icons do require attribution. If so, here’s a post that shows how to properly attribute the free people icons and give their creators proper recognition. Even if they don’t require attribution, it’s a good practice to still give them credit.

As you can see there are quite a few ways you can leverage the free people icons. Which icon set do you like best? Any ideas on how you’d use them?

Events

Free E-Learning Resources

Want to learn more? Check out these articles and free resources in the community.

Here’s a great job board for e-learning, instructional design, and training jobs

Participate in the weekly e-learning challenges to sharpen your skills

Get your free PowerPoint templates and free graphics & stock images.

Lots of cool e-learning examples to check out and find inspiration.

Getting Started? This e-learning 101 series and the free e-books will help.


free vector images online

Do a search for “free vector images” and you’ll find hundreds of sites that boast tens of thousands of free images. The problem is many of them are junk and not even worth your time. Besides, how many free vector images do you really need?

Websites that Offer Free Vector Images

As you may know, many of the sites that offer “free” resources only allow them to be used for personal use. That won’t work for your courses and presentations. To make things simple, I reviewed dozens of websites that claim they offer free vector images and narrowed them down to just a few. My criteria for listing the sites below is that they really are free for commercial use. [updated 3/17/2023]

Some of the sites may require credit or attribution. That’s OK. Here are some tips on how to provide attribution in commercial projects when you use free vector images.

Other Sources for Free Vector Images

Another good source for free vector images is from artist community sites or a graphic artist’s own page. Here are a few additional places to locate some good quality, free vector images:

free vector images via dribbble

  • Dribbble: mostly professional quality images
  • Deviant Art: miscellaneous artist site; it’s a mixed bag but there are a lot of free images
  • Snap2Objects: images created by Mauricio Duque
  • E-Learning Heroes: whatever you find in the community you are free to use for your elearning projects and presentations.
  • PageResource: if you sport a mullet and watch Full House, then this site has the perfect free clip art for you.

Editing Free Vector Images

Most of the free vector images are going to be in .AI or .EPS format. If they’re .PNG or .JPG they’re not vectors. Editing the images requires an illustration application like Illustrator or Inkscape (free). However, you can edit most free vector images that are in .EPS format using PowerPoint.

edit free vector images in PowerPoint

Here’s a post that explains how to edit free vector images in PowerPoint and a tutorial video. Unless you’re comfortable with the illustration apps, I’d look for .EPS files first and use PowerPoint.

So there you go, a complete list of sites that provide free vector images that you can freely use in your presentations and elearning courses.

Events

Free E-Learning Resources

Want to learn more? Check out these articles and free resources in the community.

Here’s a great job board for e-learning, instructional design, and training jobs

Participate in the weekly e-learning challenges to sharpen your skills

Get your free PowerPoint templates and free graphics & stock images.

Lots of cool e-learning examples to check out and find inspiration.

Getting Started? This e-learning 101 series and the free e-books will help.


edit free vector images in PowerPoint header

EDITOR’S NOTE:

Unfortunately this is no longer possible in PowerPoint. However, here’s a post where you can learn to edit EPS files for free.


In this post we’ll explore how to edit free vector images in PowerPoint. You’ll be able to use them in your presentations and online training courses.

There are hundreds of sites to download free vector images that can be used for your presentations and online training courses. The challenge is that to edit most of the free vector images requires an illustration application like Illustrator or Inkscape (free). However, if you get them in .EPS format you may be able to edit the free vector images in PowerPoint.

Formats to Edit Free Vector Images

Vector images are not like bitmap images that are based on pixels. Vector images use a mathematical formula to draw the images onscreen. That’s why they always look nice and crisp when scaled.

Generally speaking they’re made up of a bunch of shapes that when combined represent the image. Because of this, they can be ungrouped and the individual shapes can be edited.

edit free vector images as .EPS in PowerPoint

Whether you purchase the vector images or get them for free, they are typically in one of two formats: .AI or .EPS and can be edited in an illustration program. If the free vector image is in .EPS format you may be able to edit it in PowerPoint.

How to Edit Free Vector Images in PowerPoint

This process works the same way as if you were ungrouping clip art in PowerPoint. Here’s how:

  • Locate a vector image in .EPS format and insert it on the PowerPoint slide. You’ll notice that initially it may look a bit jagged. That’s OK, it’ll change when we do the next step.
  • Ungroup the .EPS file. Right-click on the image and select “Ungroup.” Vector images are often made up of multiple groups of shapes so you may have to ungroup the groups a few times.
  • Edit the image as if it were any other shape in PowerPoint. Change colors, position, etc.
  • Group the image when you’re done editing it. Select it, right-click, and select “Group.” That’s it.

Bonus Tips to Edit Free Vector Images

  • Speed up your grouping and ungrouping using keyboard shortcuts in PowerPoint. CTRL+G groups selected shapes and CTRL+Shift+G ungroups them.
  • Save the image to use in other applications like Storyline or elsewhere. Right-click and select “Save As Picture.” I usually save as .PNG. I also save the PowerPoint file in case I want to make additional changes down the road.

Potential Issues If You Edit Free Vector Images

For the most part, ungrouping .EPS files in PowerPoint works well. However, it does break down if the shapes are made of gradients and not solid colors. The image below shows the before and after of an ungrouped file in PowerPoint. Ungrouping that image creates about 8500 individual shapes. In that case it’s probably not worth messing with it.

edit free vector images but some EPS files may not work

Also, some of the colors and shapes may change, too. Compare the before and after images below. You’ll notice that the original colors were softer and the lines a bit thinner.

edit free vector images before and after

Here’s a video tutorial that shows how to edit free vector images in PowerPoint. I also add a few extra production tips.

Click here to watch the video tutorial at YouTube.

Microsoft may have gotten rid of clip art for PowerPoint, but there’s no reason why you can’t edit free vector images and get what you need for your presentations and elearning courses. It just takes a little bit of practice.

Events

Free E-Learning Resources

Want to learn more? Check out these articles and free resources in the community.

Here’s a great job board for e-learning, instructional design, and training jobs

Participate in the weekly e-learning challenges to sharpen your skills

Get your free PowerPoint templates and free graphics & stock images.

Lots of cool e-learning examples to check out and find inspiration.

Getting Started? This e-learning 101 series and the free e-books will help.


free closed captioning software for online training and elearning

In this post we’ll explore a few simple ways to create free closed captioning text for your online training courses. We’ll work off of the assumption that you want closed captioning to sync with your audio narration or an inserted video on your slides.

What is Closed Captioning Text?

Generally speaking, closed captioning text accompanies the audio or video narration in your online training courses. It’s used to help those who are deaf and can’t hear the audio follow along with the course’s narration. However, some people prefer to turn off all audio and read the text (or perhaps they don’t have speakers or headphones) so it’s not just an issue of accessibility.

Alternatives to Closed Captioning?

There are different ways to make the course transcript available to the end user. A common approach is to display a full transcript. It gets added to slide and allows the learner to disregard the audio and just read the transcript.

Many of the elearning applications like Articulate Storyline have a transcript or notes feature that allows for this. The transcript can be part of the player or the course designer could add a transcript feature to the actual slide. The image below shows the transcript on the side in the player.

closed captioning transcript in player

This approach works great since most people can read faster than the narrator talks. This is also a viable solution if the slide is mostly static and there isn’t a lot of synced animations or content going on and off the screen. However, it’s not ideal if you want the transcript to sync with the flow of the narration.

How to Create Free Closed Captioning

Let’s say you do want closed captioning in your online training and you want the text synchronized to the audio narration. There are two key components: the first is that you’ll need to create a closed captioning file that has timing and text notations; and the next is using that file to create the actual captions in your elearning software.

Today, I’ll show how to create the free closed captioning file and in a follow up post, I’ll show how to use it in Articulate Storyline. If you have a different authoring application, you’ll have to learn more from that vendor. But in a general sense the steps are probably similar.

The image below shows a simple closed captioning file. You can see that each caption is indicated by a number and a time range.

closed captioning for online training and elearning .SRT file format

For example, line 2 runs from 5 seconds to 7 seconds with “The first thing we do is create the person…” text onscreen. At the 7 second mark, line 3 is displayed.

There are all sorts of file formats for closed captioning text. You can learn more in this article and at the YouTube site. I like to keep things simple, so we’ll focus on the .SRT files and how to get them. By the way, you can open .SRT files in notepad for easy viewing or editing.

Here are a few ways to create the free closed captioning for your online training courses.

YouTube for Free Closed Captioning

YouTube creates closed captioning when you upload a video. After it’s uploaded it will extract the text and create the timing of the captions. Here’s a great video tutorial that shows how to create free closed captioning in YouTube.

closed captioning for online training via youtube

Here’s a quick overview of creating free closed captioning of your own transcript:

  • Listen to the video and insert the text.
  • You can always rewind 5 seconds to repeat it.
  • Once complete, select “Actions” and download the file in .SRT format.

Microsoft’s Free Closed Captioning Text Maker

Note: No longer available.

Microsoft offers a simple HTML5-based free closed captioning text maker. It’s on one of their experimental sites so I’m not sure how long it’ll be around; it may end up like Jimmy Hoffa and the screen beans. However, while it’s available, it’s easy enough to use and a good alternative if you have a video link and don’t want to upload your video to YouTube.

free HTML5 closed captioning text

Here are the basic steps to create free closed captioning text:

  • Add a video URL.
  • Play the video and add your text.
  • Caption list displays closed captioning details.
  • Select the WebVTT format. It’s not .SRT, but it’s the same info. You can copy and paste into a text document.

Aegisub Free Closed Captioning Creator

Aegisub is free software to create or modify subtitles and free closed captioning text. It’s a lot more feature-rich than the first two options. And because of that it has a little learning curve.

However, I’m no expert and I was able to insert a video and type in my text with no problems and without a lot of messing around. Most of those features are outside of what we want anyway. We just want a file that gives us the timing and text for the closed captioning so we can add it to our online training courses.

free closed captioning for online training

Adding your closed captioning text is generally straightforward:

  • Insert a video and play it.
  • Add text and press “Enter.”
  • The caption timing displays at the bottom. To export, go to “File” and export and save as .SRT which you can open in Notepad.

So there you have it—three solutions to get free closed captioning for your online training. All of the solutions will generate a file that includes the timing of the closed captions and the text that displays. Once you have those you can use them in your online training software to display the closed captions.

I’ll show how to add closed captions to an Articulate Storyline course in a follow up post.

Events

Free E-Learning Resources

Want to learn more? Check out these articles and free resources in the community.

Here’s a great job board for e-learning, instructional design, and training jobs

Participate in the weekly e-learning challenges to sharpen your skills

Get your free PowerPoint templates and free graphics & stock images.

Lots of cool e-learning examples to check out and find inspiration.

Getting Started? This e-learning 101 series and the free e-books will help.


Articulate Rapid E-Learning Blog - free clip art no longer

A few months ago I wrote a post on Microsoft getting rid of free clip art. For those with a budget that probably wasn’t that big of a deal. But there are many who relied on the free assets that Microsoft provided, especially since they didn’t include just clip art.

Losing free clip art isn’t all bad news. There is some good news in all of this. A lot of the clip art was lame and negatively impacted many online courses and presentations. Not having it means we’ll need to get better at our design and learn a few new skills.

How to Find Free Clip Art

Articulate Rapid E-Learning Blog - free clip art search

Most online searches for “free clip art” produces very limited results and most of them are worse quality than the stuff Microsoft dumped. However, you may find some things you need. Here are a couple of free clip art sites:

Another option that I’ve mentioned before is to scavenge clip art images from older graphics programs. For example, often bookstores, office supply stores or computer stores will have discount bins where they sell out-of-date software. I look for multimedia creation software like greeting card makers. They usually have all sorts of assets. Be sure to read the EULA, though.

Switch from Free Clip Art to Free Vector Illustrations

If you change your search term from “free clip art” to “free vector images or illustrations” things change for the better. There are a lot more free images available and they’re more up-to-date in terms of visual style.

The challenge with free vector illustrations is how to edit them. Free clip art was easy because in PowerPoint you could always right-click and ungroup them for easy editing. That’s not the case with most of the free vector illustrations. You’ll need to use a software application to edit them.

Customizing Free Vector Illustrations

Most of the free vector illustrations include a bitmap output such as .png. That’s great for inserting them in your courses, but they’re not vector files and can only be edited like regular images. In that case you’ll need to learn to use an image editing program. If you don’t already own one, Paint.net is free and Photoshop Elements is inexpensive and more than enough to handle basic editing tasks.

Articulate Rapid E-Learning Blog - free vector illustration software

The vector file formats are usually .AI or .EPS. Those need to be edited in a more complex application than PowerPoint. There are a few options out there, but for the most part it’s going to be Adobe Illustrator (which costs money) or Inkskape (a free opensource alternative).  The challenge is that they’re not necessarily intuitive applications so you’ll need to make an investment in learning how to use them.

I know very little about Illustrator, but I was able to fumble around and open an .EPS file and save the individual elements as .PNG graphics that I used for this free elearning template I shared a few weeks ago. With a little practice, basic editing is possible.

Inexpensive Alternatives to Free Clip Art & Vector Illustrations

Since I no longer have access to free clip art I had to make an investment in an image library. There are a plenty of options out there like iStock and ShutterStock, and most of them are fine.

Articulate Rapid E-Learning Blog - inexpensive stock images

But this does mean, I’ll have to learn more about working with vector images and get a bit faster editing regular images, as well. It’s on my schedule.

Create Your Own Images

There’s no reason you can’t create your own images. Here are a few ideas from previous posts:

Articulate Rapid E-Learning Blog - illustrated character

If you’re interested, I’ll be in San Francisco presenting a workshop on how to create your own assets for your elearning courses. In it you’ll learn all sorts of practical tips and tricks.

Your Next Steps

  • Locate a good source for course images, whether free or not.
  • Learn to edit the images and illustrations.
  • Ask for a graphics budget to either create the images or hire someone more skilled to do it.
  • Take advantage of the free assets in the elearning community.

Elearning was a lot easier when everything was wrapped in the PowerPoint blanket. But that world is changing and we’ll need to change with it.

Events

Free E-Learning Resources

Want to learn more? Check out these articles and free resources in the community.

Here’s a great job board for e-learning, instructional design, and training jobs

Participate in the weekly e-learning challenges to sharpen your skills

Get your free PowerPoint templates and free graphics & stock images.

Lots of cool e-learning examples to check out and find inspiration.

Getting Started? This e-learning 101 series and the free e-books will help.


build effective e-learning with this free e-book

I’m not sure you noticed but we just updated the Insider’s Guide to Becoming a Rapid E-Learning Pro. The first edition of the free e-book was released in 2007, and as you can imagine a lot has changed in our industry. This new addition addresses some of those changes and offers more practical tips and tricks.

How Has E-Learning Changed?

In 2007, most of the options for creating interactive elearning required Flash. If you wanted to build courses, you were required to either learn Flash or hire a Flash programmer. That meant a lot of organizations were shut out of building their own elearning courses.

But along came the PowerPoint-to-Flash products. They enabled people to create their content in PowerPoint and convert it to the Flash. Essentially, each slide was converted to a Flash movie. Thus the non-programmer was empowered to create Flash-based courses at a fraction of the cost. They weren’t perfect, but they definitely were viable. I imagine that many of you seasoned elearning developers cut your teeth in a PowerPoint-based product.

PowerPoint e-learning and free e-book

These tools didn’t get their start in 2007. Articulate Presenter was around well before eHelp (one of the leading companies) was purchased by Macromedia that was purchased by Adobe. In fact, eHelp licensed Articulate Presenter for their own RoboPresenter product. So while all of this happened in the early 2000’s, rapid elearning and PowerPoint-based authoring didn’t really start to take off until around 2008 or so.

Today things are different. PowerPoint’s not as important to elearning because there are more advanced elearning applications like Storyline that let you do all sorts of things with PowerPoint ease and a host of form-based tools (like Engage) that only require copy and paste editing.

And we won’t even get started on the state of Flash. While it’s still viable, I don’t know many people working with it anymore and I think it’s been almost four years since someone’s asked me a Flash question.

As you can see, the industry has changed over the past seven years and the free e-book, Insider’s Guide to Becoming a Rapid E-Learning Pro, has been updated to reflect that change.

What’s New in the Free E-Book?

When I wrote the first e-book I wanted to help people who were just transitioning to the elearning industry. Many of them had limited experience and were mostly working by themselves (or on small teams) and with limited resources. Today, things are a bit different.

free e-book for e-learning developers

The industry continues to grow. That means there’s an ongoing influx of new elearning developers mixed with the first generation of rapid elearning pros, who’ve mostly moved past PowerPoint-based authoring. The free e-book reflects this transition. Here are some of the key topics I’ve updated:

  • Tips and tricks on managing your success. Building a course is one thing, being successful doing it is another.
  • Learn to be a proactive partner to the organization. Don’t be an order-taker; learn to understand the organization’s needs and help them meet their objectives.
  • Understand the types of tools on the market. Many organizations make the mistake of creating a checklist of features to compare tools. But they disregard the types of tools on the market. The e-book discusses the pros and cons of the different types of products without looking at any one specific vendor.
  • Create interactive elearning courses. In 2007, if you were working with PowerPoint, your options were limited. Today, that’s not the case.
  • Save time and money by creating reusable content. One of my favorite features in Storyline is being able to build an interaction and then saving it as a template. This speeds up my production time and after a few projects, I end up with a tool chest of reusable content. You’ll learn a bit more on creating reusable content.

How Do You Get the Free E-Book?

free e-book for e-learning

Getting the free e-book is super easy. If you’re a current blog subscriber, the e-book is linked at the bottom of each post. That means all you need to do is scroll down and click on the download link. If you’re not a blog subscriber, you can get the free e-book here.

Download the free e-book and let me know what you think.

Events

Free E-Learning Resources

Want to learn more? Check out these articles and free resources in the community.

Here’s a great job board for e-learning, instructional design, and training jobs

Participate in the weekly e-learning challenges to sharpen your skills

Get your free PowerPoint templates and free graphics & stock images.

Lots of cool e-learning examples to check out and find inspiration.

Getting Started? This e-learning 101 series and the free e-books will help.


Articulate Rapid E-Learning Blog - free onboarding and employee orientation

I’m working on some practice content for an upcoming workshop and decided to share the template that is part of the workshop activities. It starts with a main image that has five distinct sections. Each section links to a series of slides with a few different layouts.

Articulate Rapid E-Learning Blog - free onboarding and employee orientation template

Because the main image looks like an organizational overview, I think the template works great for a new hire orientation module. But you’re free to do with it as you wish.

In the template you’ll also find some extra slides with the people images and some props that I gleaned from the main image. Feel free to copy and paste them to create your own slides and scenarios.

Articulate Rapid E-Learning Blog - free onboarding and employee orientation template assets

Here’s a quick mock-up I created using the new hire orientation template so you can see some of the layouts and perhaps get some ideas of how to add interactive elements to make the modules more interactive and engaging.

See the New Hire Orientation Template in Action

Articulate Rapid E-Learning Blog - free onboarding and employee orientation template example

Click here to view the elearning example.

Download the Free New Hire Orientation Template

Click here to download the new hire orientation template.

If you use the template let me know. I’d love to see what you create.

Events

Free E-Learning Resources

Want to learn more? Check out these articles and free resources in the community.

Here’s a great job board for e-learning, instructional design, and training jobs

Participate in the weekly e-learning challenges to sharpen your skills

Get your free PowerPoint templates and free graphics & stock images.

Lots of cool e-learning examples to check out and find inspiration.

Getting Started? This e-learning 101 series and the free e-books will help.


Articulate Rapid E-Learning Blog - share elearning courses

To share elearning courses via a learning management system or Articulate Online is common. However, sometimes getting access to an LMS isn’t easy, especially if you want to share elearning courses that are quick prototypes or demos to solicit opinions. You definitely don’t want to fill out requisitions and wait for your LMS administrator to send you a link.

There are also many of you who participate in the weekly elearning challenges and need an easy way to upload your demos. Below are a number of solutions that work if you need to share elearning courses. Here are the five options we’ll review:

  • Tempshare
  • Amazon S3
  • Custom Domain
  • Dropbox [UPDATE 9/5/2016: Dropbox is disabling this feature effective 10/3/2016]
  • Google Drive [UPDATE 9/1/2015: Google is deprecating this feature and it will no longer work after Aug 2016.]

Here’s a quick tip before we get started: most of the solutions give you long links with a lot of gibberish. They look confusing and may break when sharing via email. In that case, it makes sense to use a URL shortener to get a shorter link. Google offers a link shortener, bit.ly is a popular one (and you can customize the link), and if you use Cloudberry (referenced below) there’s a link shortening option when you grab the web URL.

Share E-Learning Courses via Articulate Tempshare

This free solution only works if you use Articulate Storyline or Studio ‘13. It’s an easy way to upload your course and quickly get a link to share. Tempshare provides a temporary link and it only lasts about 10 days so it’s not a permanent solution.

  • Publish your Articulate course.
  • Create a .zip file of the published course.
  • Drag the .zip file to the Tempshare site. The course is uploaded and you’ll get a temporary URL good for a few days.

Articulate Rapid E-Learning Blog - share elearning courses using Articulate Tempshare

  • Share the link. Again the link isn’t permanent and it can’t be overwritten. If you make changes, you’ll need to repeat the process.

I like Tempshare for its simplicity especially because I don’t have to open up other apps and load the course on a different site or LMS and then mess around to get the link. It’s just a simple drag and drop and then paste the link.

Share E-Learning Courses with Amazon S3

Amazon S3 is a better solution than Dropbox and Google Drive because the files will play as intended. It’s the method I prefer and the one I use to host the content I share for this blog and in the elearning community.

Amazon S3 is a fee-based service but provides a free tier that consists of 5 GB of storage. That is probably more than enough for the courses you share. Even if you did pay, the storage is so inexpensive that I’d be surprised if you exceeded one dollar
per year.

What you need to do:

  • Check out this post for more detail: How to Share Course with Amazon S3.
  • Download and install Cloudberry Explorer (freeware). Drag and drop your files from the desktop folder to Cloudberry and they’ll get uploaded to your online folder. There are other applications that work, so if you don’t want Cloudberry do a search and find one you do prefer.
  • Create an Amazon S3 account. You need an account. Since it’s a fee-based service, you’ll need to provide real information so they can authenticate the account. You’ll also need to provide a credit card number. Again, you probably won’t exceed the free tier and if you do the charges are going to be miniscule.
  • Locate your access key. Amazon S3 provides an access key. You’ll find that under security credentials. You’ll need those to add your account to Cloudberry.

  • Connect your Amazon S3 to Cloudberry. Once connected you’ll be able to create folders and move your course files into them. It’s as simple as dragging them over.
  • Get your web URL. Once the files are uploaded to Amazon S3, right click on the .html file and get the web URL to share.
  • Shorten the link. You can shorten the link inside of Cloudberry or use your own preferred method.

Amazon S3 also lets you control viewing permissions and set expiration dates. It does take a few steps to get the account set up, but in the long term it’s a better solution than Google Drive and Dropbox, especially if they make changes to how files are shared.

Share E-Learning Courses on Your Own Domain

If you’re doing professional work or building a portfolio, then this is probably the best option because it’s a solution directly tied to your brand.

  • Get a domain name. The first step is to get your own domain. There are plenty of web services to do that and the cost is relatively low for a domain and hosting. A simple hosting plan may only cost $5-$10/month.
  • Create a site. You’ll need to create a site. WordPress is probably the easiest solution. Most of the service providers have WordPress and other tools already loaded so it won’t take much to get up and running. Be careful of site builder solutions since they typically don’t offer an easy way to upload and store your course files.
  • Load the courses on your site. I use FileZilla (freeware) which lets me easily upload and manage my content. You can still use Amazon S3 (like I do for the blog here) and add the URL to your website text.
  • Share your link. One of the benefits of using your own domain is that the link is always tied to your site and a great way to get people to look at what you do.

Share E-Learning Courses with Dropbox

[UPDATE 9/5/16 Dropbox is removing this feature effective 10/3/16.]

Dropbox is a great product and makes sharing files super easy. There are two ways to share your published courses for viewing in Dropbox.

Share Your Folder

This first method assumes the person you’re sharing with has a Dropbox account.

  • Put your course files in a folder and share the folder.
  • The end user gets the folder downloaded to their Dropbox account and can access the published folder from their computer. They just need to double click on the .html file to launch the course.

This is fine if the person has a Dropbox account. If they don’t have one, they can open an account. But that may not be an ideal solution or option for some.

Share a Public Link

This solution is similar to the Google Drive version because all you need to do is share a URL link. However it requires a “public” folder and only works for those who have a Dropbox account prior to October 4, 2012 or those who have a Pro account.

  • Place your published course folder in the Dropbox public folder.
  • Right click on the .html file and select copy the public link. This will give you a URL you can share.

  • Shorten the link as mentioned above for a cleaner link.

WARNING: For the most part Google Drive and Dropbox do a decent job of sharing published course files. However, they’re not designed to deliver elearning courses and often the load time is slow or you may have some issues with the content playing the way it should. That’s something to keep in mind because if this is for client work, you want to give the best experience possible and you may not get that with Google drive and Dropbox.

Share E-Learning Courses with Google Drive

[UPDATE: Read this before using Google Drive. Google is removing this feature.]

If you have Google Drive then you can upload and share elearning courses in no time at all. Mike does a great job explaining how to share your courses in Google Drive. The basic steps are:

  • Change the launch file in your published course to index.html. For example, in Storyline you get a story.html. I duplicate it and change the duplicate to index.html.
  • Create a folder in Google Drive and make it public.
  • Add your published course folder to the public Google Drive folder you created. The folder gives you a long list of characters. Copy those.
  • Add the copied characters to this URL http://googledrive.com/host/
  • Share the link for others to see.

There you have it—five four easy ways to share your elearning courses. Again, I think for the money and performance, the Amazon S3 option is probably best. What do you do to share your elearning courses (assuming you don’t upload to an LMS)?

Events

Free E-Learning Resources

Want to learn more? Check out these articles and free resources in the community.

Here’s a great job board for e-learning, instructional design, and training jobs

Participate in the weekly e-learning challenges to sharpen your skills

Get your free PowerPoint templates and free graphics & stock images.

Lots of cool e-learning examples to check out and find inspiration.

Getting Started? This e-learning 101 series and the free e-books will help.


Articulate Rapid E-Learning Blog - free stick images

If you do a search online you’ll find all sorts of free assets like free stock images, icons, fonts and other media that work perfectly for your elearning courses. But often you find that free isn’t really free. Instead, free is free with strings attached.

One of my pet peeves is people who give away free assets and then only allow them to be used for personal use. I guess there’s a big demand for free stock images and free fonts for family use. While it’s the asset creator’s prerogative to attach strings, personally I find it kind of lame. Either it’s free or not. Why work to get eyes on your product and then create that sort of friction? However, if that’s the stipulation then we need to stick by it and respect the desires of the content authors. Mostly likely those resources won’t work for your project.

Another issue is that the free content comes with attribution requirements. That’s much better than free for personal use only. But it still creates some friction because the attribution requirement may conflict with your project.

How to give proper credit to the creator of the assets and still maintain a professional looking course is a challenge. Here are a few ways to attribute content to the asset creator.

Add Attribution Credits to the Image or Slide

  • Credits on the image. This is the easiest, but doesn’t always look good.
  • Credits as a caption. This is also easy and easy to template. It also creates consistency, but still can be a bit distracting.

Articulate Rapid E-Learning Blog - add attribution links to the image

The two options above are fine for school projects, but don’t look very professional. They also only allow for text descriptions and URLs. But no hyperlink to the creator’s site.

  • Mouseover credits as the person moves the mouse over the image the credits appear. They can be over the image or as a caption box and you can link to the site.
  • Add credits and links at the bottom of the screen. This works but may look a bit busy and not many clients want to see a bunch of outside content in their course screens.

Articulate Rapid E-Learning Blog - add attribution links to the screen

Add Attribution Credits to the Course Player Tabs

  • Use the player’s resource tab. Change the resource tab to read “credits” and then add links to the sites. This is really easy and looks nice.

Articulate Rapid E-Learning Blog - add attribution links to the resource tab

  • Use Engage to create an “About” player tab. Add information about the organization and course developers. An additional section could be attribution for free resources with a link back.
  • Lightbox slides on player tabs. Create a custom slide and insert it using the lightbox feature. This lets you make it look any way you want and add any type of information and links back to the site.

Articulate Rapid E-Learning Blog - add attribution links as a lightbox slide

Personally I like the resource tab and lightbox options. The resource tab is simple and the lightbox means I can make the credit page look anyway I want. Icons8 allows this for their free content. You can find it in their licensing. And I’m sure most of the others would, too.

If you’re not sure, ask the source of the free content. I’ve found that often they’re happy that people are getting use out of the free assets and appreciate that I’ve even bothered asking. Often they’ve given me permission to use their assets. It doesn’t hurt to ask.

Here’s a published version of the different ways to attribute the free resources if you want to see them in action.

Articulate Rapid E-Learning Blog - add attribution links example course

Click here to view the attribution demo course.

What do you do when you get free assets that require attribution? How have you attributed free content in your elearning courses?

Events

Free E-Learning Resources

Want to learn more? Check out these articles and free resources in the community.

Here’s a great job board for e-learning, instructional design, and training jobs

Participate in the weekly e-learning challenges to sharpen your skills

Get your free PowerPoint templates and free graphics & stock images.

Lots of cool e-learning examples to check out and find inspiration.

Getting Started? This e-learning 101 series and the free e-books will help.


Articulate Rapid E-Learning Blog - create free callouts in PowerPoint

In an earlier post I shared over 100 free callouts for you to use with your online training courses. Who doesn’t like free?

There are plenty of free callouts from which to choose. However sometimes the free ones just don’t work and you’ll need to create your own. So today I am going to show you how to create your own callouts.

How to Create Your Own Free Callouts in PowerPoint

One of my favorite features in PowerPoint 2010 is combining shapes. In fact, I have it as a tab in my PowerPoint ribbon so I always have quick access to that feature. Being able to create shapes in PowerPoint means I can create my own callouts. Here’s how:

  • What is a callout? The callout is made of the body where we add text. And then it has the tail that points in the direction of the talking character. So it’s basically just two shapes. We’ll combine those in PowerPoint.

Articulate Rapid E-Learning Blog - the anatomy of a callout

  • Add a shape to the slide. I like rounded rectangles because they’re a bit more organic. Ovals are nice, too.
  • Add a tail shape. I like to use the lightning bolt. Some people use the crescent or triangles. It really doesn’t matter as long as you can get the look you want.
  • Position the callout so that it aligns with the speaker. This is where creating your own comes in handy. You can position the body and tail before creating the final shape.

Articulate Rapid E-Learning Blog - example of a callout in PowerPoint

  • Combine shapes in PowerPoint to create a single shape.
  • Edit points to create more customization. If you want to get fancy, use the Bezier curve. Right click on the shape and select edit points to access this feature.

Articulate Rapid E-Learning Blog - edit points in PowerPoint shapes

Tutorial: How to Create Callouts in PowerPoint

Here’s a quick video to show how to create your own callouts using PowerPoint.

Click here to view the video.

Tutorial: How to Create a Callout Template

This tutorial shows you how to create a template for callouts that you can use to quickly change the shape of the callouts you create.

Click here to view the tutorial.

A Dozen Free Callouts

To help you out, I created a few callouts. But I encourage you to create your own.

Articulate Rapid E-Learning Blog - free callout graphics

Click here to download the free callout graphics.

Take advantage of the free downloads. But also learn to build your own callouts. That way you’ll always have what you need when you need it.

If you do create some and want to share them, send me an email and I’ll make them available to the rest of the community.

Events

Free E-Learning Resources

Want to learn more? Check out these articles and free resources in the community.

Here’s a great job board for e-learning, instructional design, and training jobs

Participate in the weekly e-learning challenges to sharpen your skills

Get your free PowerPoint templates and free graphics & stock images.

Lots of cool e-learning examples to check out and find inspiration.

Getting Started? This e-learning 101 series and the free e-books will help.


Articulate Rapid E-Learning Blog - hundreds of free PowerPoint tips and tricks

I’ve been doing this PowerPoint stuff for so long that I often think the tips I share are common knowledge and everyone knows them. But every time I do a workshop, I’m reminded that what may be old to me is often new to others.

Over the years I’ve shared all sorts of PowerPoint tips and tricks. But with the blog approaching 100,000 subscribers that means there’s a lot of people who probably didn’t see many of the previous PowerPoint posts.

So in today’s post, I’ve included a list with every single PowerPoint tip shared in the blog up to this point. They include tips on creating custom graphics, assembly of interactive elearning, and getting more out PowerPoint’s features.

If you’re looking for a good resource on PowerPoint tips, this is a post worth bookmarking.

Tips on Creating Rapid E-Learning Courses in PowerPoint

Building an elearning course with PowerPoint is not the same as building a presentation. Many of the production techniques are different. This list of posts offers some good tips on building your rapid elearning courses in PowerPoint.

Articulate Rapid E-Learning Blog - PowerPoint and rapid elearning rocks, especially with Articulate Studio

Use PowerPoint for Graphic & Visual Design

PowerPoint is a versatile application that lets you build your own graphics and illustrations. This list of posts walks through all sorts of graphic design and illustration tips.

Articulate Rapid E-Learning Blog - a bunch of tutorials on creating graphics in PowerPoint

Get More Out of PowerPoint Using These Tips

Most of us probably use a small fraction of PowerPoint’s features. However, it is a very capable application. And onc
e you understand what you can do with it, it’s like having a brand new tool. The following posts dig through various PowerPoint features so that you can build rapid elearning courses and get more out of PowerPoint’s capabilities.

Articulate Rapid E-Learning Blog - free tutorials that show how to get more out of PowerPoint's features

Never-ending PowerPoint Tips

The elearning community is active in sharing tips and tricks. Many in the community create how-to tutorials in Screenr. We try to capture all of the PowerPoint tutorials we find in the community.

This link is updated every time we bookmark a new PowerPoint tutorial.

So there you have it, a career’s worth of PowerPoint tips and tricks. Of all of the PowerPoint tips I’ve shared, which is your favorite or is the most eye-opening? I’d love to know. Share it via the comments link.

Events

Free E-Learning Resources

Want to learn more? Check out these articles and free resources in the community.

Here’s a great job board for e-learning, instructional design, and training jobs

Participate in the weekly e-learning challenges to sharpen your skills

Get your free PowerPoint templates and free graphics & stock images.

Lots of cool e-learning examples to check out and find inspiration.

Getting Started? This e-learning 101 series and the free e-books will help.


Articulate Rapid E-Learning Blog - easy way to back up files to the network drive

In today’s post we’ll look at two free applications you can use to synchronize your files between your computer and a network drive or Dropbox folder.

Saving to a Network Drive

Many of you keep your elearning project files on a network drive. But working with multimedia projects from the network drive isn’t always ideal. That means you’re copying files from your network to the desktop. And ideally, you move them back over when you’re done.

Articulate Rapid E-Learning Blog - move files from the local desktop drive to your network drive

It sure would be nice if there was an easy way to make sure that the files on your desktop are sync’d to your network drive.

Working with Dropbox

Dropbox is great for syncing folders between computers. I use it all the time. But you can only sync from a folder within your Dropbox folder. So that means your project folders have to be in your Dropbox folder.

Articulate Rapid E-Learning Blog - sync your folders so they're added to your Dropbox folder

I prefer to manage my files outside of Dropbox. But I do like using Dropbox to sync my files between computers. I also prefer working outside of Dropbox when I am editing my project files. I don’t want to run the risk that Dropbox’s active syncing interferes with my multimedia production.

It would be great to have a solution that lets me work on my projects outside of Dropbox and then automatically move them to Dropbox so I have access to them on my other computers.

The good news is that there’s an easy and inexpensive way to make sure to backup your network drive or a Dropbox folder. Here’s how.

Microsoft SyncToy

SyncToy is a free application from Microsoft. You select a “Left” and “Right” folder to sync. And then you determine how and when you want to sync them.

Articulate Rapid E-Learning Blog - sync two folders using Microsoft SyncToy

The left folder is what’s active on my desktop and I sync that folder to the right folder which would be either the network or Dropbox folder.

Here’s a tutorial that shows how to set up and sync two folders using Microsoft SyncToy.

  • View the SyncToy tutorial [updated March 2022].
  • Download SyncToy [Microsoft discontinued SyncToy, but the application is available to download here].

To sync the folders, open SyncToy and select “Run.” Of course, that requires you remembering to do so, but that’s where the next step comes in.

Task Scheduler

Your PC comes with a task scheduler. It’s in the Systems Tools folder. With Task Scheduler, you schedule tasks (funny how those names work) to run at specific times.

Articulate Rapid E-Learning Blog - task scheduler is in your accessories folder

In this case, we want to create a task that opens and runs SyncToy so that the left and right folders are sync’d automatically. I schedule the task to run around 7:00 PM when I am mostly done with work and usually not at my desk.

Articulate Rapid E-Learning Blog - how to set up task schedule to run SyncToy

You can learn more about Task Scheduler here. There are a lot more options, but for this post I kept it really simple.

  • View the Task Scheduler tutorial [updated March 2022]
  • Access Task Scheduler from windows: Start > Accessories folder > System Tools folder

Let’s review the process:

  • Create a folder on your PC for elearning projects.
  • Create a folder on your network (or Dropbox) that will sync with your PC folder.
  • Use SyncToy to synchronize the two folders.
  • Automate syncing the two folders using Task Scheduler to run SyncToy at a scheduled time.

That’s about it. It’s an easy process and great way to make sure that what you have on your PC is sync’d with your network files and Dropbox. It sure beats having to manually copy things back and forth.

Events

Free E-Learning Resources

Want to learn more? Check out these articles and free resources in the community.

Here’s a great job board for e-learning, instructional design, and training jobs

Participate in the weekly e-learning challenges to sharpen your skills

Get your free PowerPoint templates and free graphics & stock images.

Lots of cool e-learning examples to check out and find inspiration.

Getting Started? This e-learning 101 series and the free e-books will help.