The Rapid Elearning Blog

Archive for the ‘Multimedia’ Category


free PowerPoint template

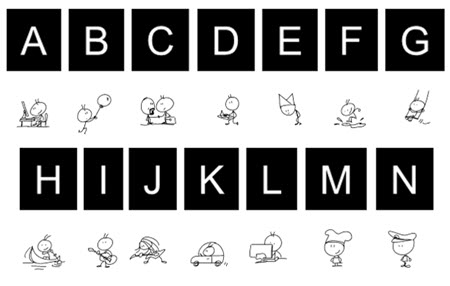
There are tons of free dingbat fonts available for download. And they’re great to use for your training and e-learning courses. Here’s what you already know:

Great! But what about managing those fonts and quickly previewing the icons and images you can use? It’s a pain to review them one-by-one.

Here’s an easy way to manage all of those free fonts and preview the ones you want to use to create graphic and icon files for your courses and presentation.

Free PowerPoint Template

free powerpoint template icons

You can download the PowerPoint template here. I made a simple video to show how to use it. Essentially you select the font characters and apply the dingbat font to see the correlation between the keystroke and what it produces.

Here are the basic steps:

  • Create a slide for the font characters. I like to create a single slide for each wingding font.
  • Select the characters (watch the video to see how you only select the letters you want to change).
  • Apply the wingding font to the selected characters.
  • This gives you a single screen with all of the characters and corresponding keystroke.
  • If you want to save the slide, type in the name of the font for quick reference.

Click here to view the video.

As a bonus (and slightly different approach) Taylor at Nuts & Bolts Speed Training offers his free font cutter solution and a number of icons.

What do you do to manage and preview those wingding type fonts?

Events

Free E-Learning Resources

Want to learn more? Check out these articles and free resources in the community.

Here’s a great job board for e-learning, instructional design, and training jobs

Participate in the weekly e-learning challenges to sharpen your skills

Get your free PowerPoint templates and free graphics & stock images.

Lots of cool e-learning examples to check out and find inspiration.

Getting Started? This e-learning 101 series and the free e-books will help.


free text-to-speech narration

Previously we looked at how to create free text-to-speech narration using a free application. The audio quality is decent enough for those who need the text-to-speech audio. Today we’ll look at a free (or inexpensive) way to create your text-to-speech narration that’s just as easy and hardly costs anything, if at all.

If you’re using Storyline, then you have access to text-to-speech as a feature inside the software. Here’s more information on how to use Storyline’s text-to-speech. If you want to create the audio outside of Storyline or for other purposes, this post will help.

Earlier I showed how to create an Amazon S3 account as a way to share your courses. The first 5 GB is free and after that, it’s very inexpensive. If you use a site like Wix for your e-learning portfolio, Amazon S3 is an easy way to add URL links to your courses since those sites don’t allow uploading course content.

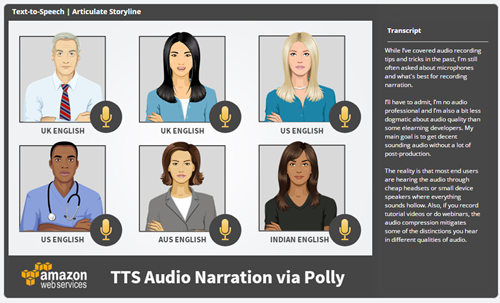
Once you have an Amazon S3 account, you have access to Polly, a service where you can create free text-to-speech narration. And the voice quality is very good, much better than the default SAPI voices you get with your computer.

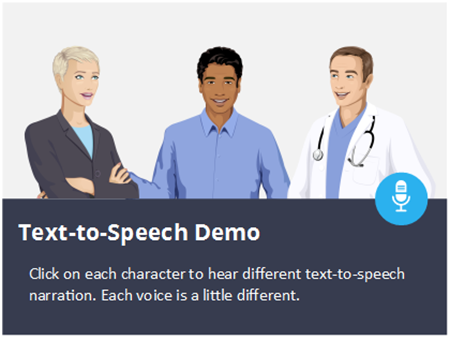
Here’s an example of a few narration files I downloaded from Polly.

text-to-speech Amazon S3 Polly demo

Click here to view the text-to-speech examples.

As you can hear, the audio quality is decent and makes the robot voices tolerable. And odds are you won’t go past the initial free allocation.

How to Create Free Text-to-Speech Narration in Amazon S3 Polly

Creating the narration is really simple. First, you’ll need an Amazon S3 account. Here’s a link that shows how to get one.

Don’t worry about the prices, they’re nominal. You get a cushion of free space and after that, you pay $4.00 per million characters. That’s about 23 hours of audio. To put it in perspective, if you narrated “A Christmas Carol” by Charles Dickens, it would cost about 66 cents.

demo os Amazon S3 Polly text-to-speech

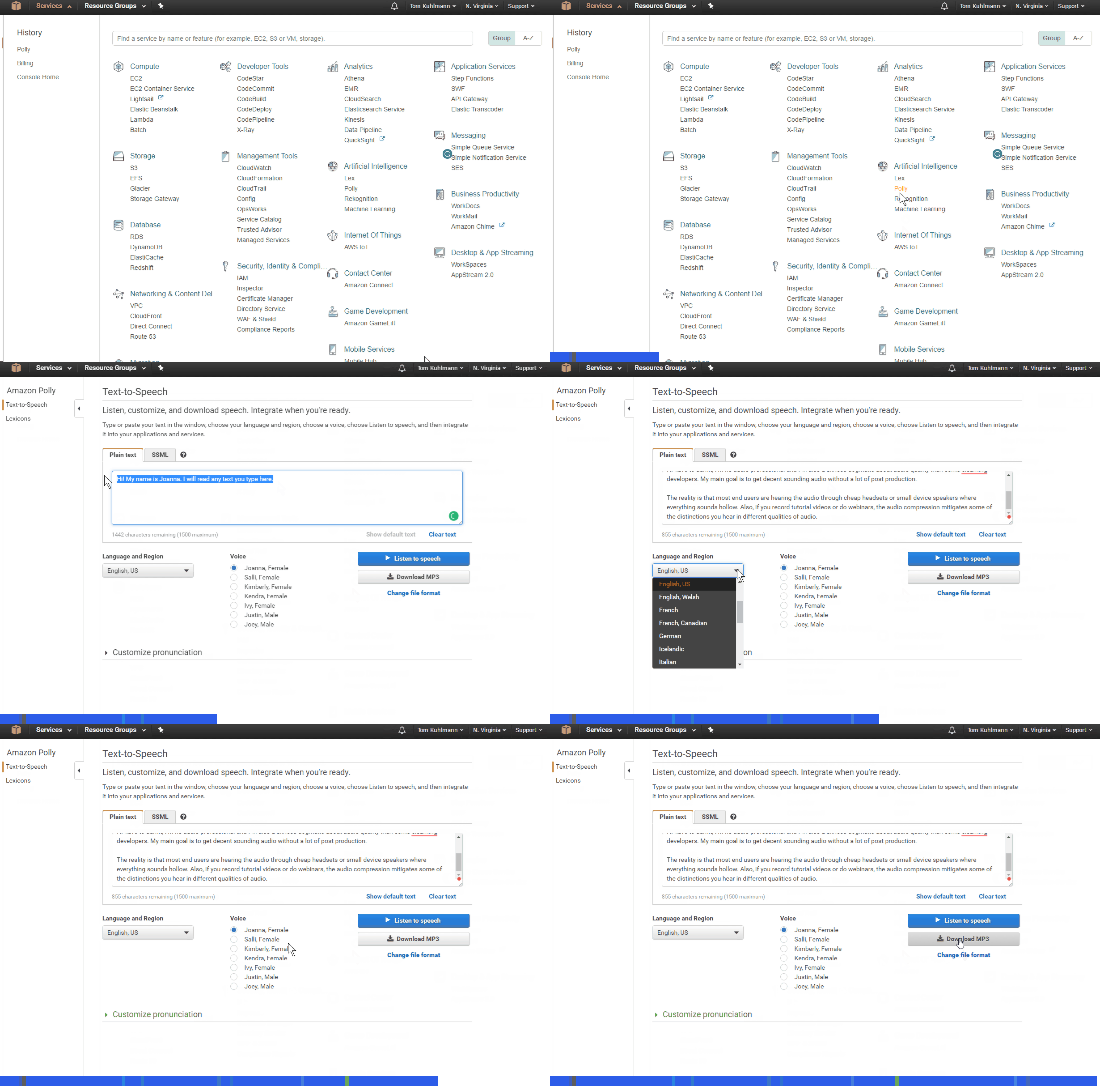
Basic Steps

  • From the Amazon S3 console, select Polly.
  • Insert your narration script.
  • Select a language.
  • Select a voice.
  • Preview and download the audio file.

It’s all pretty simple. Once you have the audio file, you can do some post-production editing (if necessary) and then insert into your course. Easy as that.

So there you have it, one free application where you can create text-to-speech narration and this inexpensive (or free) solution via Amazon that should meet most of your free text-to-speech needs.

If you use Polly, feel free to share your feedback.

Events

Free E-Learning Resources

Want to learn more? Check out these articles and free resources in the community.

Here’s a great job board for e-learning, instructional design, and training jobs

Participate in the weekly e-learning challenges to sharpen your skills

Get your free PowerPoint templates and free graphics & stock images.

Lots of cool e-learning examples to check out and find inspiration.

Getting Started? This e-learning 101 series and the free e-books will help.


free web page creator and print web page as PDF

Here are two really cool applications. The first is an easy way to create quick, disposable web pages using your email. And the other is a way to save web pages as PDF for later reference.

Create Free Web Pages

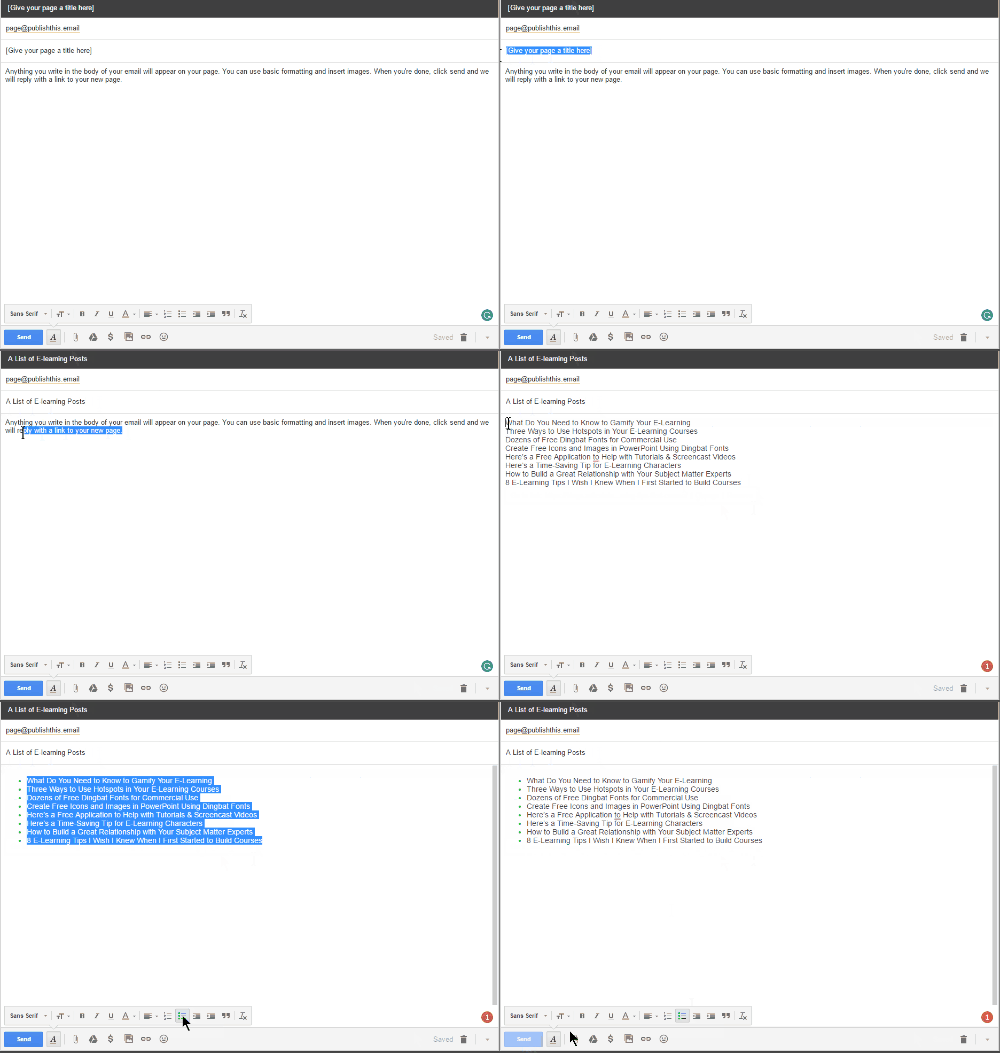
Publishthis.email lets you create quick and simple web pages. Basically, you put the content into an email, send it to a specified email address (which you can find on their site), and they send you a link back with a web page.

The animation below shows how simple it is, and here’s a link to a webpage I created.

free web page creator

This a neat solution that comes in handy for a few things. I use it for workshops if I have a list of links and resources and want to quickly pull together a shareable link. It’s also a great way to put together a quick shareable portfolio. Add a few images and links and you’re all set.

Save Web Pages as PDF

Often people ask me how they can print off blog posts. Well here’s an easy way. Add the Print Friendly & PDF extension to your browser.

When you find a page you want to save, click on the extension and the page is loaded. You do have the option to clean out some of the content you don’t need or want to see.

For example, in the image below, I removed the header and gratuitous images to clean it all up for the PDF. And here’s the PDF version of the page I saved.

free print web page as PDF

This is an easy way to save content for later access. Here are a couple of things to keep in mind, though:

  • honor the copyright of the author
  • don’t violate the spirit in which the content is available to you

Can you think of any use cases for a simple web page creation?

Events

Free E-Learning Resources

Want to learn more? Check out these articles and free resources in the community.

Here’s a great job board for e-learning, instructional design, and training jobs

Participate in the weekly e-learning challenges to sharpen your skills

Get your free PowerPoint templates and free graphics & stock images.

Lots of cool e-learning examples to check out and find inspiration.

Getting Started? This e-learning 101 series and the free e-books will help.


free text to speech narration

Occasionally, I get questions on free text-to-speech applications. While there are a number of free text-to-speech applications out there, many have character limits or don’t allow for commercial use. I’m not sure how many people have personal use cases for text-to-speech, but if you do, there are plenty of options. Another challenge is that many blogs in our industry create linkbait lists of text-to-speech applications, but for the most part, those lists are worthless.

Today we’ll look at a really good solution if you need a free text-to-speech application.

Why Use Text-to-Speech?

Despite the mechanical voice quality, there are some viable use cases for text-to-speech in e-learning (outside of accessibility issues):

  • For example, text-to-speech makes sense if you send a script out for professional narration. Use text-to-speech to create placeholder content for your reviewers so that you can get the voiceover script approved before sending it out for professional recording. This will save on the cost of do-overs.
  • Another good use case is the training content changes often. It is time-consuming to continually update and record narration. Text-to-speech applications make that easy. And because the content is somewhat disposable, people will most likely tolerate the mechanical voice.
  • Often we have international developers where English (or other languages) isn’t the first language. They can produce the courses and insert audio narration generated by text-to-speech applications.

A word of caution, though: most text-to-speech doesn’t sound that great. It’s been getting better over the years, but the mechanical voices can be grating and hard to sit through for long form content. That’s something to keep in mind. It’s bad enough to sit through most of the e-learning people experience today, let alone having it narrated by a robot.

With all that said, here’s how to use this text-to-speech application that is free and available for commercial use.

Balabolka: Free Text-to-Speech Application

I’ve reviewed most of the free applications and find that Balabolka offers the best benefit for text-to-speech narration. Here are some of the benefits and things you can do with it:

  • It’s free. Although, I do recommend that if you get value out of the free software it is a nice gesture to support the developer with a donation.
  • Run it via USB. No need to install it. You can run the software from a  USB drive.
  • It uses the SAPI voices that are already installed on your computer. In most cases the sound fine. You can also add additional voices. I added the new mobile voices from Microsoft and they work for my needs. There are other services where you can buy more natural sounding voices. But you’ll have to do your own research on how to set those up.
  • Insert your entire narration script and output either a single audio file or split the narration into multiple audio files.
  • Leverage the Google text-to-speech service for an additional voice. Output as an audio file.

Balabolka Text-to-Speech Examples

Below is a link to an example module where I converted some text from a blog post into text-to-speech audio. I created a few different examples so you can hear the quality of the voices and how they sound in the context of an e-learning demo.

text to speech narration

Click here to view the text-to-speech demo.

Balabolka Text-to-Speech Tutorials

Here’s a quick video tutorial where I walk through the basics of text-to-speech conversion:

  • Insert text and output audio
  • Create multiple audio files from one script
  • Batch convert audio from a script

Click here to view YouTube video.

If you’re looking for a free alternative for text-to-speech narration, then this solution should work for your courses.

Events

Free E-Learning Resources

Want to learn more? Check out these articles and free resources in the community.

Here’s a great job board for e-learning, instructional design, and training jobs

Participate in the weekly e-learning challenges to sharpen your skills

Get your free PowerPoint templates and free graphics & stock images.

Lots of cool e-learning examples to check out and find inspiration.

Getting Started? This e-learning 101 series and the free e-books will help.


simple-tips

Here are two simple tips to help save time and frustration as you work through the day. One shows how to autosave files so you don’t need to worry about losing your work. And the other lets you see which tabs and extensions in Chrome are eating up all your RAM and processing power.

How to Autosave Your Files

The first thing I learned when working with multimedia was to save my work and save all the time. It’s inevitable that an application freezes or the system shuts down and work is lost. At all the workshops I always state how important it is to save work. And with all that said, I don’t know how many times I’ve lost work not following my own advice.

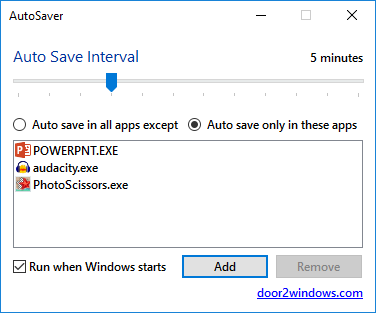
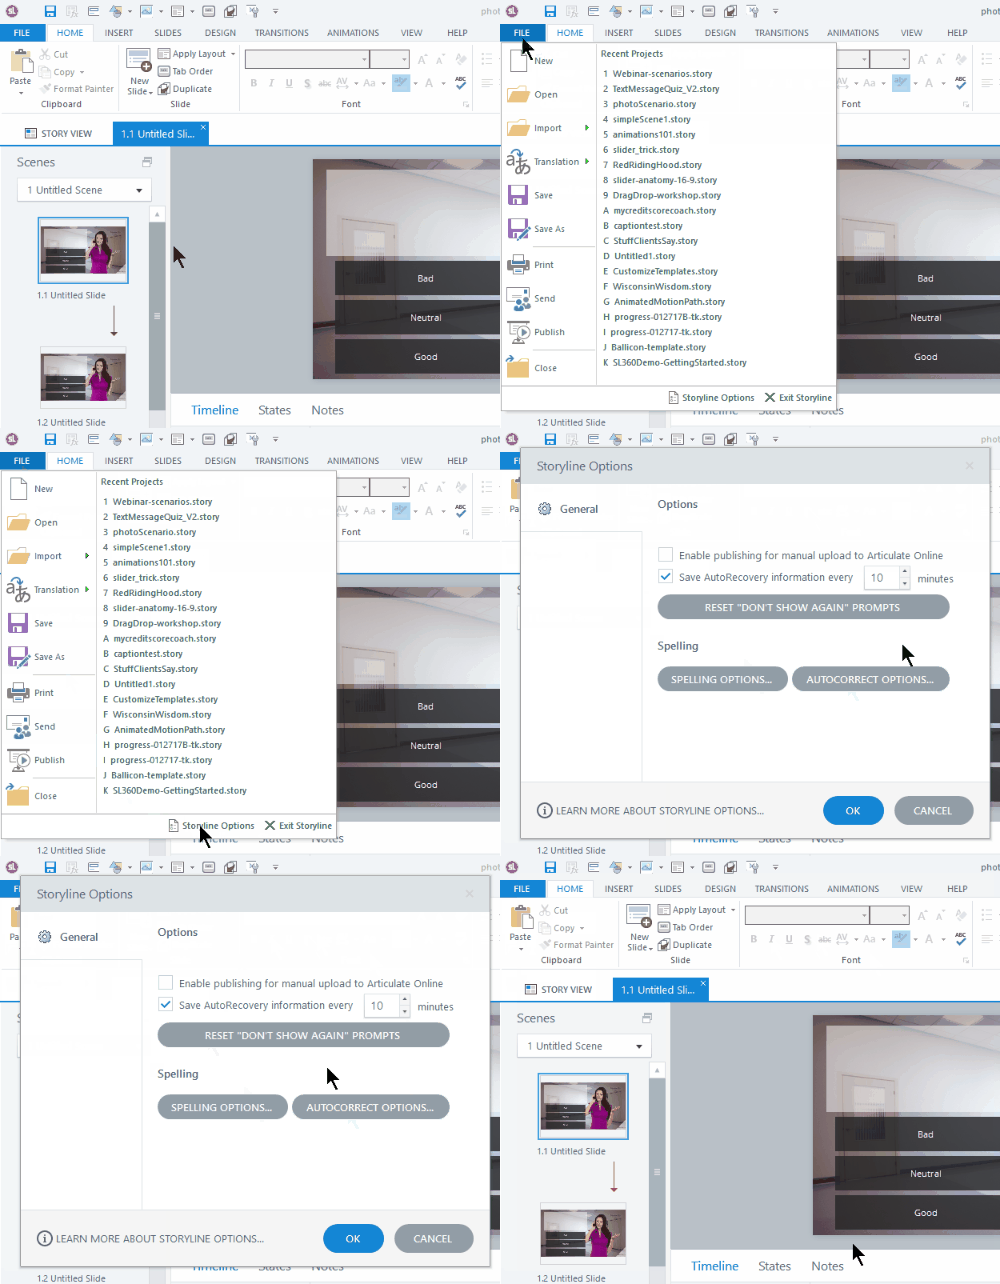
AutoSaver is a free application that autosaves files. This is super handy if you forget to save your work as you go. You can download it here. Basically, you select your apps and then at what frequency you want to save. Or you can set it to autosave every app with some exceptions. Pretty simple.

Of course, if you use Storyline, you don’t really need this because there’s an AutoRecovery feature built into Articulate Storyline.

auto recover Storyline

What’s Consuming Your RAM?

Often I find my system gets a bit sluggish and when I look at my task manager I see that my browser is consuming most of the memory in my system. That’s because I have all sorts of extensions added to my browser.

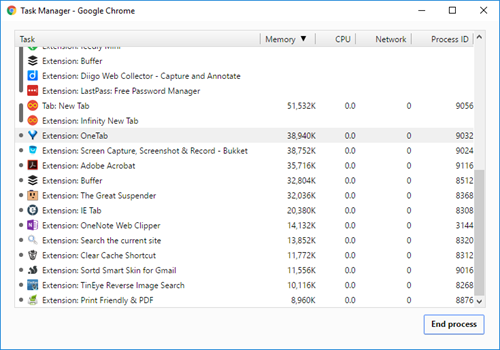
Ever wonder which tabs or extensions are consuming the most of your memory? Well, if you use Chrome, just hit SHIFT+ESC and you’ll see. This displays a list of extensions and tabs. I was surprised to see an extension I rarely use, eating up the bulk of my memory, so I just deleted it.

chrome-task-manager

I don’t know about you, but the AutoSaver has saved helped me quite a few times. And cleaning up memory can help speed up your computer. What simple tips or hacks like this do you use to save time?

Events

Free E-Learning Resources

Want to learn more? Check out these articles and free resources in the community.

Here’s a great job board for e-learning, instructional design, and training jobs

Participate in the weekly e-learning challenges to sharpen your skills

Get your free PowerPoint templates and free graphics & stock images.

Lots of cool e-learning examples to check out and find inspiration.

Getting Started? This e-learning 101 series and the free e-books will help.


free stock images for e-learning

Apparently, the internet can’t get enough of free stock images as it seems there are new sites popping up every day. Truth be told, many of the sites aren’t very good and most of the images probably don’t have a good context for e-learning design.

Free Stock Images for E-Learning Resources

I’ve already shared some resources for free stock images in previous posts, as well as a few sites that seem to curate most of the free stock images. This saves a bunch of time because you don’t need to visit every single free stock image site.

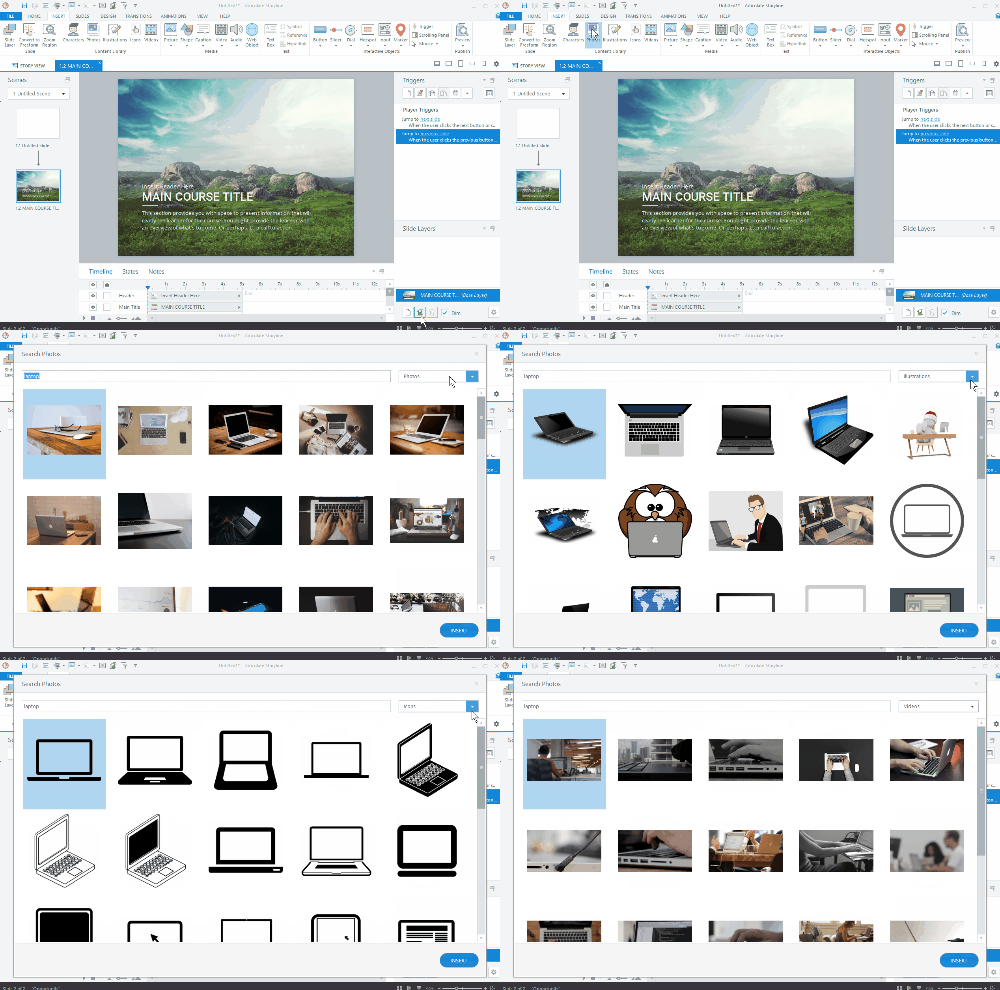
And of course, if you have Articulate 360, then there’s already an assortment of e-learning templates, character packs, and all sorts of stock images, illustrations, icons, and videos.

Articulate Storyline 360 stock images

More Free Stock Images for E-Learning

But if you need more free stock images for e-learning courses, here’s another new resource and the image quality is really great. The images are part of the Burst site, courtesy of Stopify and under Creative Commons Zero, which means you can do with them what you want and they don’t require attribution for commercial projects. But, it’s still good form to credit the source of the content and give them their props, if you can.

free stock images for e-learning

To make things a bit easier and less time consuming for you, I curated the office, business, and computer stock images. This should save you having to go through all of the images yourself. You can download the free stock images here. And of course, you can go to the source site and check out all of the other available images.

I always like the images of people meeting and working on computers. Which images do you like best? Feel free to share your thoughts via the comments.

Events

Free E-Learning Resources

Want to learn more? Check out these articles and free resources in the community.

Here’s a great job board for e-learning, instructional design, and training jobs

Participate in the weekly e-learning challenges to sharpen your skills

Get your free PowerPoint templates and free graphics & stock images.

Lots of cool e-learning examples to check out and find inspiration.

Getting Started? This e-learning 101 series and the free e-books will help.


free fonts

In an earlier post, we looked at how to convert dingbat and wingding fonts into vector images that you can use in your e-learning courses and presentations. They’re great for creating icons or bullet lists.

Not that you know how to convert the fonts into vector images, you need some fonts to use.

I reviewed a bunch of the free fonts and tried to sort to the those that are free for commercial use. If you want to search on your own, look for facefonts, dingbats, or wingdings. They tend to produce good results. Also, most of the free font sites have an assortment of these fonts.

As always when using free resources, confirm the licensing agreement and provide proper attribution. And it’s still good practice to give the owner props.

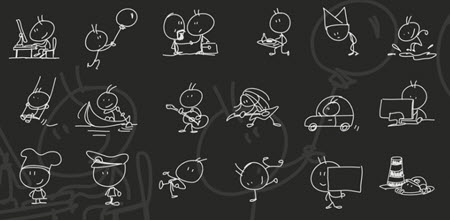
Free Faces & Character Fonts

free font icon

Free Icon Fonts

free font icons 2

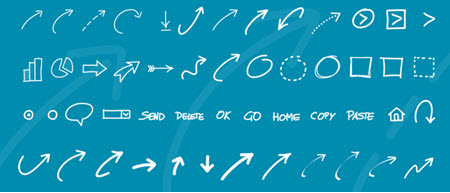
Free Shape & Arrow Fonts

free fonts arrows

Are there certain fonts like these you like to use?

Events

Free E-Learning Resources

Want to learn more? Check out these articles and free resources in the community.

Here’s a great job board for e-learning, instructional design, and training jobs

Participate in the weekly e-learning challenges to sharpen your skills

Get your free PowerPoint templates and free graphics & stock images.

Lots of cool e-learning examples to check out and find inspiration.

Getting Started? This e-learning 101 series and the free e-books will help.


e-learning screencast webinar tutorials

If you create software training then odds are you show a lot of keyboard shortcuts. If that’s the case you’ll like today’s tip where I share a simple tool that makes it really easy to display the keyboard shortcuts on-screen.

How to Display Keyboard Shortcuts during Screencast Tutorials

Meet Carnac the Magnificent. It’s a keyboard utility that displays keyboard shortcuts as they are used during your demos. This is perfect for webinars and screencast tutorials. It’s also great for live presentations where people in the back of the room can’t always hear or see what’s going on.

Here’s a quick tutorial where I show how it works and how it would look in your software training.

Click here to view the Youtube video.

  • You can download Carnac here. Read more about it here.
  • Once you download the file, double-click to install it.
  • You’ll see the purple Carnac icon in your system tray.

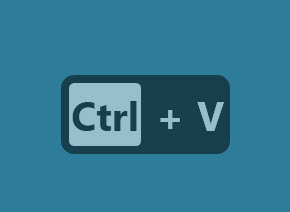
Once it’s active in your system tray and you use a keyboard shortcut, you’ll see the shortcut displayed on the screen as in the image below.

screencast tutorials example

How to Customize the Keyboard Shortcut Display for Screencast Tutorials

You can modify how the keyboard shortcuts display.

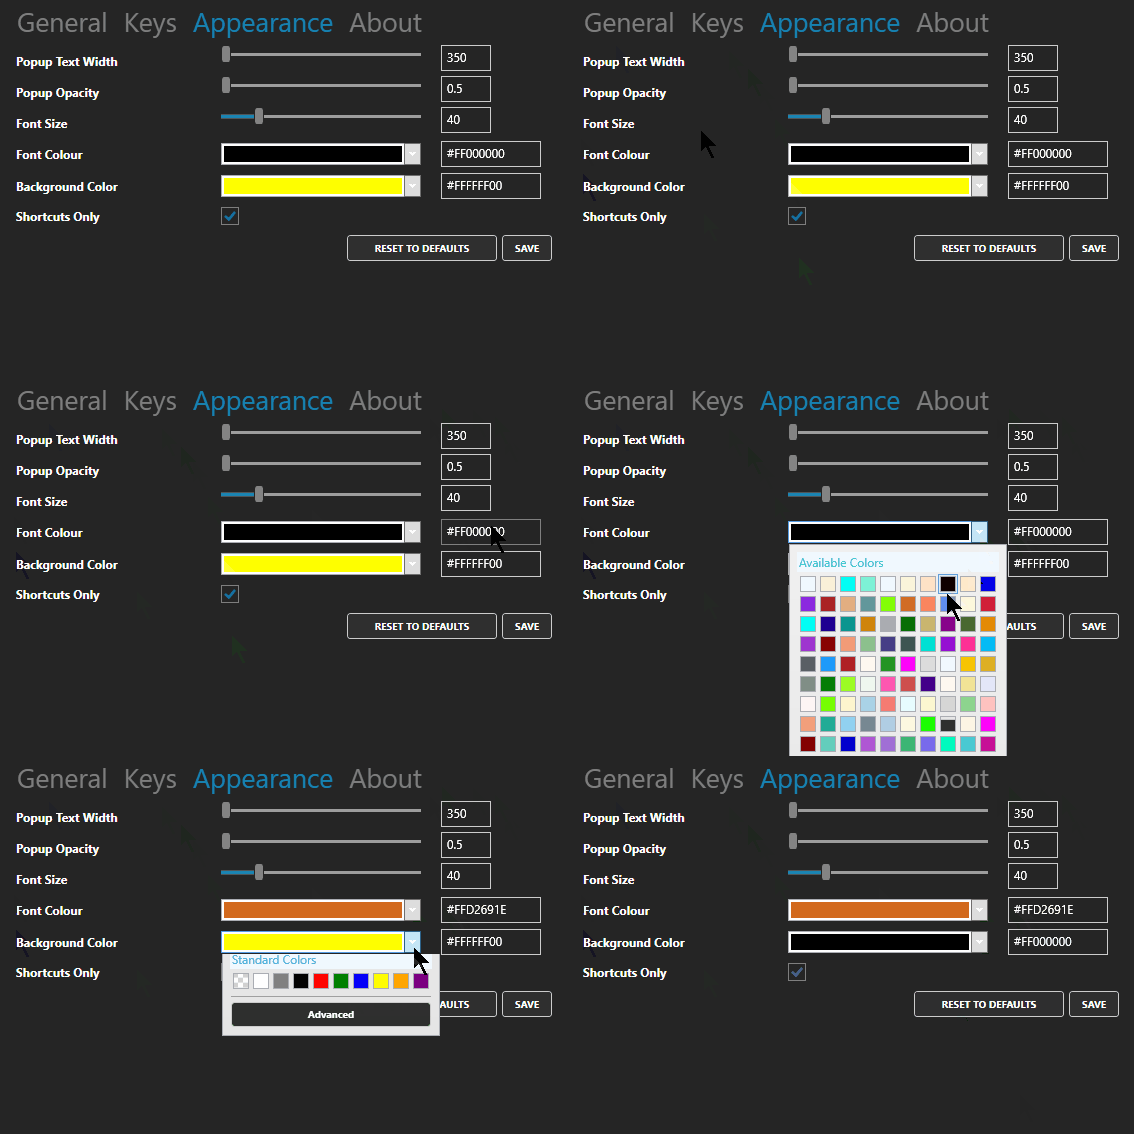
  • Double-click on the Carnac icon and it opens a setting window.
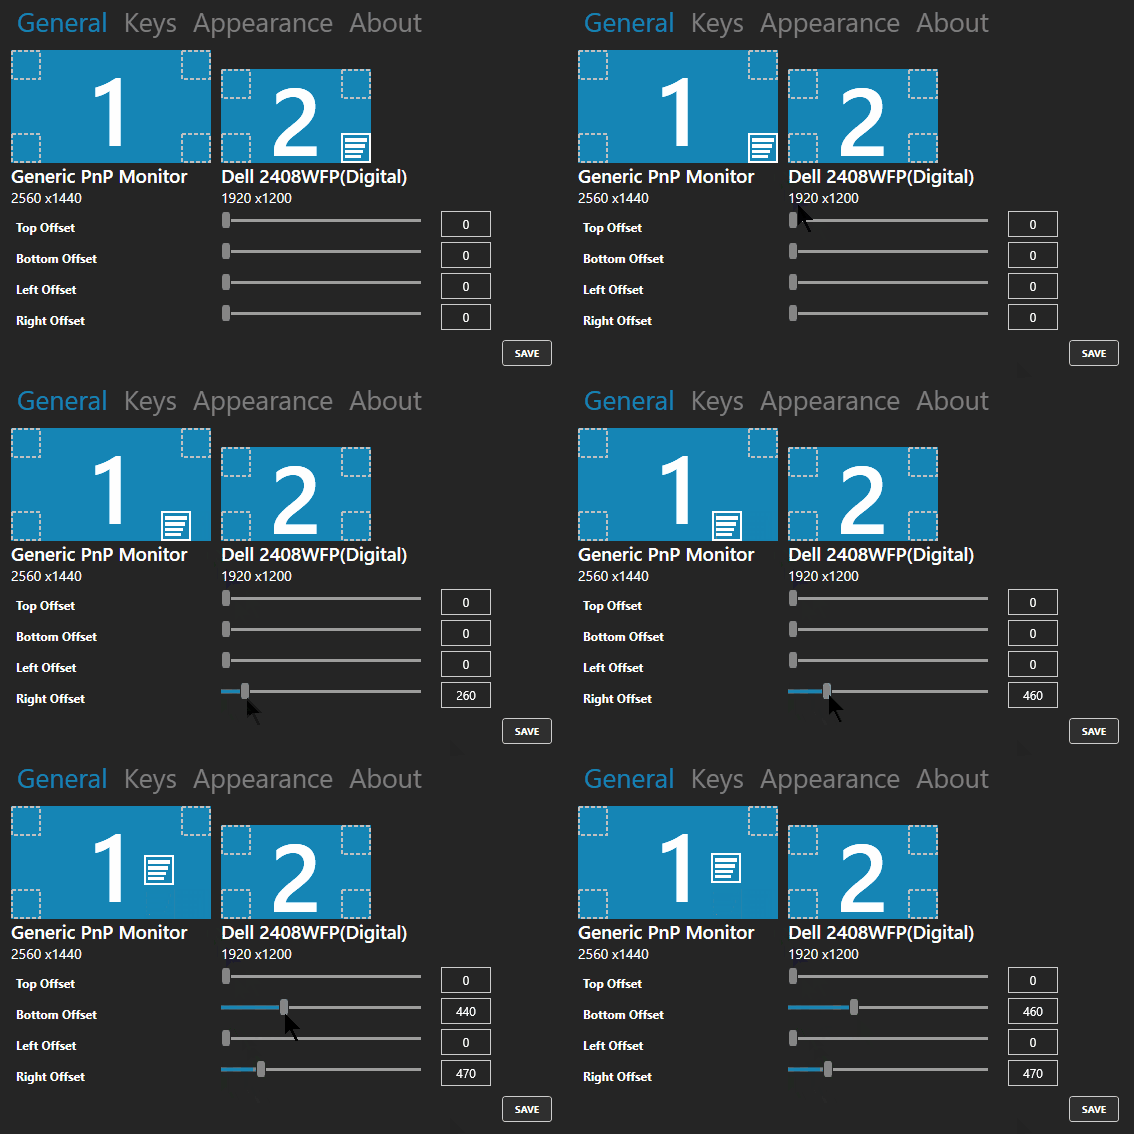
  • You’ll see the option to select monitors and where the object is displayed. You start by selecting the screen and then adjust how much you want to offset it.

screencast tutorials set properties

  • You can also change the appearance of what’s displayed. This includes the width, font size, and color. I couldn’t get the sliders to work, but manually entering the values did work for me. Save your changes.

screencast tutorials change appearance

It’s a fairly easy to use and it’s free. But you get what you pay for, so if you need help, you’re stuck. But I’ve found it works fine and as expected.  If you need a way to display keyboard shortcuts, then this solution should work for you.

Events

Free E-Learning Resources

Want to learn more? Check out these articles and free resources in the community.

Here’s a great job board for e-learning, instructional design, and training jobs

Participate in the weekly e-learning challenges to sharpen your skills

Get your free PowerPoint templates and free graphics & stock images.

Lots of cool e-learning examples to check out and find inspiration.

Getting Started? This e-learning 101 series and the free e-books will help.


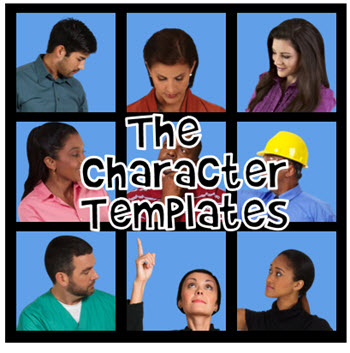
character templates for e-learning

Looking for just the right images is one of the most time-consuming activities we have when building our courses. It’s easy to get distracted and waste a lot of time. It’s gotten a lot easier over the years now that the software comes with professional templates and thousands of character poses.

As I build courses, I often use the same characters and a few common poses. Which means I don’t need to always search through all of the poses available. And I suspect many of you do the same. So today, I’m going to show you a simple tip to help speed up your production. It’s all based on assembling your own character templates. I walk through the steps below, but the video provides more detailed instructions.

Click here to view the video.

Create E-Learning Character Sets

Even if you have hundreds of characters, odds are you use the same handful over and over again. Here’s how to create some simple pre-built character sets that make it easy to use characters and repeat poses.

e-learning characters sets

  • Select a character and insert it on the slide.
  • Create multiple states of the character. This trick works if you only insert a handful of frequently used or common poses. Otherwise, it defeats the purpose of the template.
  • Name the slide the same as the character or descriptive of the type of poses. For example, you may insert only sign-holding poses. In that case, the slide could be titled, Brandon-Holding-Signs.

Create E-Learning Character Set Templates

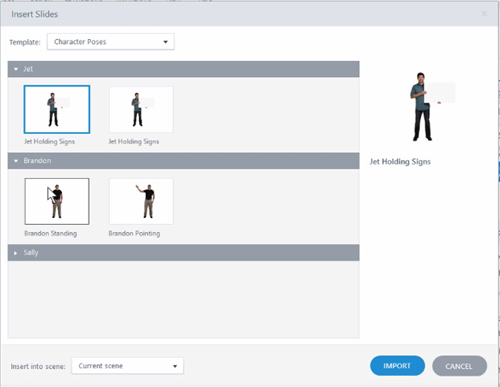
e-learning characters templates using sets

  • Once you have a slide with the character, save it as a template. This creates a template you can insert into your course. That’s it. Whenever you want to use that character, insert the slide and then copy and paste the character where you need it. Then set the initial state.
  • Ideally, you maintain one character template so it’s easier to manage. In that case, import the new character slide into the main character template file. And keep adding to it as you create custom character sets. This way it’s much easier to view and manage.
  • Bonus tip: you can do the same thing for custom interactions by saving them in a single interaction template.

Save Time Using E-Learning Characters

Now that you have some pre-built character poses, you’ll save some time in your production. When you need one of those characters, insert it from the template and then copy and paste the character into your slide.

The character will always include those starting states. You can set an initial state and use triggers to dynamically change it if you like. Another benefit is sharing the template with your team.

And you’re not limited to just the characters that come with the software. You can also do this with your own characters and the photos you take. Or you can do it for background images. Perhaps you want a template of production images, inside a warehouse, or the cubicle farm in the office. The process is the same.

The software already comes with characters so searching and inserting characters is easy enough. This tip works great if you use a few common poses and don’t want to spend time searching. Set up the templates and you have a good starting point.

Assuming that you want to create some character templates like this, what groups would you create? Talking poses? Sign holders?

Events

Free E-Learning Resources

Want to learn more? Check out these articles and free resources in the community.

Here’s a great job board for e-learning, instructional design, and training jobs

Participate in the weekly e-learning challenges to sharpen your skills

Get your free PowerPoint templates and free graphics & stock images.

Lots of cool e-learning examples to check out and find inspiration.

Getting Started? This e-learning 101 series and the free e-books will help.


accessories audio narration

In a previous post, we explored some inexpensive microphones for recording audio narration. However, sometimes having a microphone is not enough. There are other accessories that help put the microphone in the correct position and offer other assistance for recording the best quality audio.

In this post we’ll look at a few accessories to help get better audio quality when recording narration.

Use a Microphone Stand when Recording Audio Narration

It’s a good idea to invest in a microphone stand. It helps control placement of the audio. There are a few inexpensive options for microphone stands.

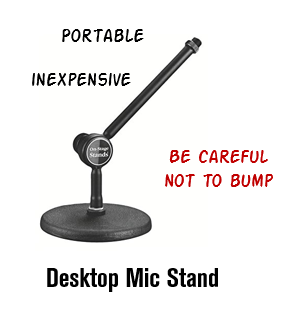
desktop microphone stand for audio narration

  • Some people use simple desktop stands. They’re OK but I find they often get in the way and chances are greater of accidentally bumping the stand and messing up your audio narration. This is especially important because most people just record audio and aren’t monitoring it at the same time. Thus you don’t realize that the audio has the bumping sound until you preview it.

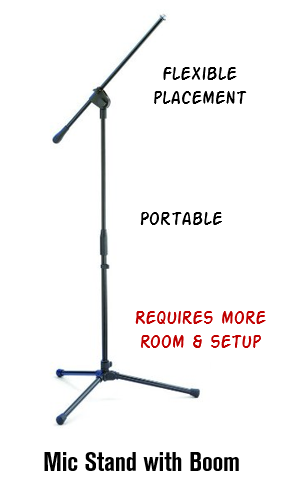
microphone stand for audio narration

  • Depending on your room set up, a viable option is a stand up mic stand. This allows you to record standing or sitting down with lots of flexibility with how and where you position the microphone. I prefer the ones with the boom arm so that I can move it in position. With a desktop stand like above, people tend to lean down into the mic which may mean they move around more or don’t breathe properly while talking. People tend to talk better standing up and this stand lets you do so.

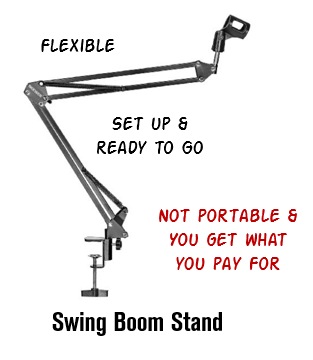
swing microphone stand for audio narration

One thing to keep in mind, you get what you pay for. The less expensive products are great if you’re not moving them around too much. But moving a lot, means they’re more apt to get banged up and break.

Use Audio Dampening to Get Better Quality Audio Narration

Sound waves tend to bounce around a lot. I work from a home office and the hardwood floors in the hallway act as a funnel, moving all the sound to my office. I dampen the sounds by putting a piece of carpet in front of the door and I hang a thick blanket over a rolling clothes rack I purchased from Ikea. It doesn’t look great, but it works well.

sound dampening for audio narration

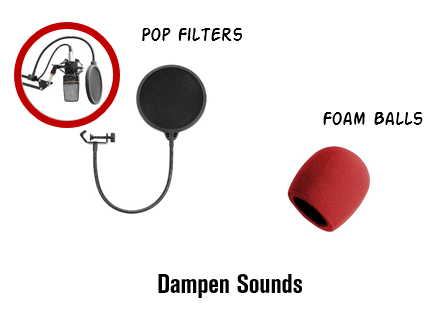
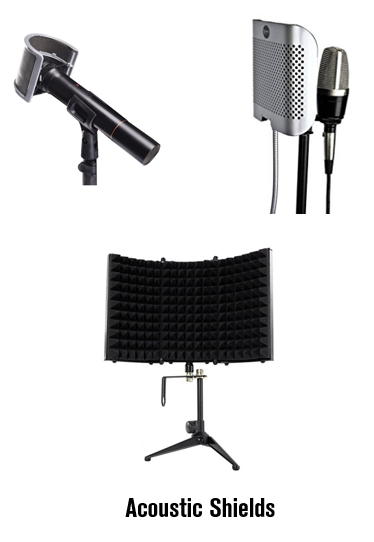
You can look more polished with just a few accessories using different types of filters that sit between your microphone and the incoming audio wave. Sometimes all you need is a simple foam ball that sits on top of the microphone. Or a pop filter which helps catch your breath sounds.

Then there are all sorts of acoustic shields that clip onto the microphone or attach to the mic stand. I like this one that expands to create a larger barrier but folds into a nice portable package.

acoustic shield for audio narration

Some people I know use the portable sound boxes that are filled with foam. You can buy them at a decent price or make your own using some acoustic foam and a cardboard box. If you work in a cubicle, it already has some sound dampening. You could also put together a makeshift studio by assembling a few cubicle walls. A lot of companies have extras laying around or you can buy some at an old office supply store. The panels are top quality and do a great job.

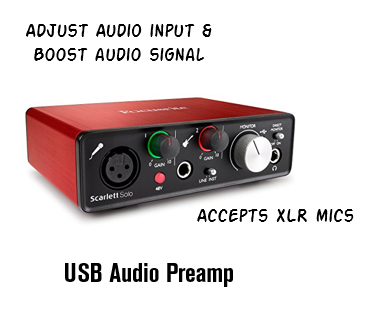
preamp for audio narration

If you really want to get fancy you can buy a preamp to better control the audio going into your computer. I don’t use one, but David does and his audio quality is always nice and rich. It may seem extravagant to get a preamp, but consider this: your microphone takes in sound waves and outputs a signal. When you use a less expensive microphone you tend to get a lower signal (or low sensitivity). A preamp will boost the signal for better audio. This is important because you’ll never get better quality than what you record.

What I find amazing is how inexpensive and available these accessories are compared to a few years ago. All of the items are less than $100 and most are in the $20 range.

Which accessories do use? What tips do you have using them? Feel free to share in the comments section.

Events

Free E-Learning Resources

Want to learn more? Check out these articles and free resources in the community.

Here’s a great job board for e-learning, instructional design, and training jobs

Participate in the weekly e-learning challenges to sharpen your skills

Get your free PowerPoint templates and free graphics & stock images.

Lots of cool e-learning examples to check out and find inspiration.

Getting Started? This e-learning 101 series and the free e-books will help.


best mics for audio narration

While I’ve covered audio recording tips and tricks in the past, one of the most frequent questions I’m still asked is about microphones. So today, I’ll show you the different mics I use and demo how they sound.

I’ll have to admit, I’m no audio pro and I’m also a bit less dogmatic about audio quality than some elearning developers. My main goal is to get decent sounding audio without a lot of post-production.

The reality is that most end users are hearing the audio through cheap headsets or small device speakers where everything sounds hollow. Also, if you record tutorial videos or do webinars, the audio compression mitigates some of the distinctions you hear in different qualities of audio.

With that said, here are a few thoughts and some recommendations based on the mics I use.

Simple Audio Recording Tips

Here are a few simple ground rules. You learn more by clicking on the links below.

  • You want to record the best audio quality you can initially. There are some things you can do to clean up the audio, but you can’t make bad audio good. If you can only do one thing, get crisp audio.
  • Try to eliminate background noise like air conditioners. Sometimes if I can’t get rid of the noise, I will play some music softly in the background–not Eminem, but something a little softer.
  • Don’t worry about being perfect. You can spend a lot of time finagling your audio only to have you end user listen to it through cheap headphones or speakers where everything sounds muffled and tinny.
  • You should learn a little about audio and some basic editing. You don’t need to be an audio engineer, but learning some recording techniques, how mics work, and how to do some post-editing will really come in handy.

Microphone Recommendations

There are a lot of good microphones out there and they’re not that expensive. I’d plan on spending from $100-$200 on a microphone. You should also invest in a pop screen, a stand, and perhaps some sort of barrier. Here are some of the microphones I use.

I created a quick demo in our new Rise application to show the different mics in use. You can view the link on your mobile devices and compare how they sound versus how they sound on a desktop. I noticed that my iPad which has one speaker masked the issues that I could hear on my desktop. I also noticed that with my iPhone, the ambient audio was more evident that elsewhere.
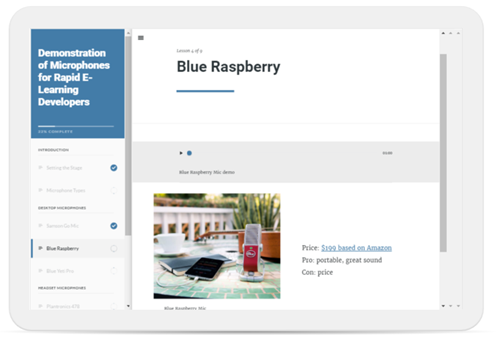
rise-course-microphones

Click here to view the microphone demo.

Desktop Microphones

  • Blue Yeti Pro. This is what I have in my home office. I like it because I can control the gain and the pickup pattern. This is a big plus. The pickup pattern helps eliminate unwanted sound entering the mic. The Pro costs about $230. But you can buy the Blue Yeti (which is also a good mic) for about $120 and it comes in a bunch of colors to placate the needs of easily distracted millennials.
  • Blue Raspberry. I’ll be doing a lot more recording on the road so I wanted to upgrade my microphone. I just purchased this microphone and will do an update after a few road trips.
  • Samson C03U and Samson C01U. I’ve used both of these mics and think they’re great a great value. Both mics are in the $80 range but for about $120, you get the microphone, a pop filter, and shock mount. Not a bad deal. I’d choose the C0U3 because it has better pick up patterns. I quit using the mics when I received the Blue Yeti Pro. If you’re on a budget the Samson mics are worth it.
  • Samson Go Mic. I love this little mic. At $40, it’s a great price and sounds good. The build quality is really solid and I’ve gotten lots of use out of it over the past few years.

The links to Amazon microphones may produce a slight commission.

Headset Microphones

I’m not a fan of headset microphones for recording narration because they tend to pick up a lot of breath sounds. However, they are relatively inexpensive and decent enough in output. But because they’re headset microphones you don’t get a lot of control over the pickup.

I do like to use headset microphones for recording tutorials and doing webinars because it allows me to operate hands free and not worry about moving around and away from the microphone. I also prefer wireless headsets over wired ones.

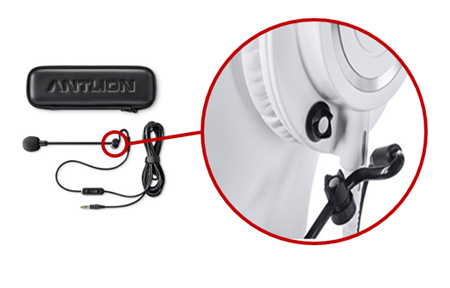
ModMic: I haven’t used this mic but I really like the idea. You attached the microphone to your headphones. Many of the headphone mics are uncomfortable so you can use your own headphone and attach the ModMic with a magnet (which means you can remove it).
modmic

Here are the three headset microphones I currently use:

  • Plantronics Audio 995. It’s wireless which gives me some range of motion. I don’t like having a bunch of cables running over my desk when I record. Having the wireless mic is nice if I have to record some audio narration from my subject matter experts.
  • Plantronics 478. This is similar to the one above but it has a USB cord. Both of those microphones have noise canceling features. Usually that means there’s one mic that records your audio and another smaller one that records ambient sound and cancels it out.
  • Logitech H800. I just got this one. I like it because it’s wireless and has a built in charger. I also like it’s portability for traveling.

One question you may ask is why I have so many microphones, especially headset mics. I travel a lot so I want good portable options and I like the choice of desktop and headset microphones. I do recommend getting a few extra headset mics, one for you and the others to share if you do recording with subject matter experts.

Previous Posts on Using Audio for Narration

Again, I’m not an audio pro and recording in a controlled recording environment. Instead I’m a one-man recording studio, in a home office, with a limited budget. I want good quality audio at an affordable price. From my experience most rapid elearning course authors are in the same boat.

Which microphones do you use and why? Feel free to share in the comments.

Events

Free E-Learning Resources

Want to learn more? Check out these articles and free resources in the community.

Here’s a great job board for e-learning, instructional design, and training jobs

Participate in the weekly e-learning challenges to sharpen your skills

Get your free PowerPoint templates and free graphics & stock images.

Lots of cool e-learning examples to check out and find inspiration.

Getting Started? This e-learning 101 series and the free e-books will help.


free multimedia apps

We all love free tools to help us save time and resources so that we are more efficient building our elearning courses. Here are two free multimedia applications that I use quite a bit.

Color Picking with Color Cop

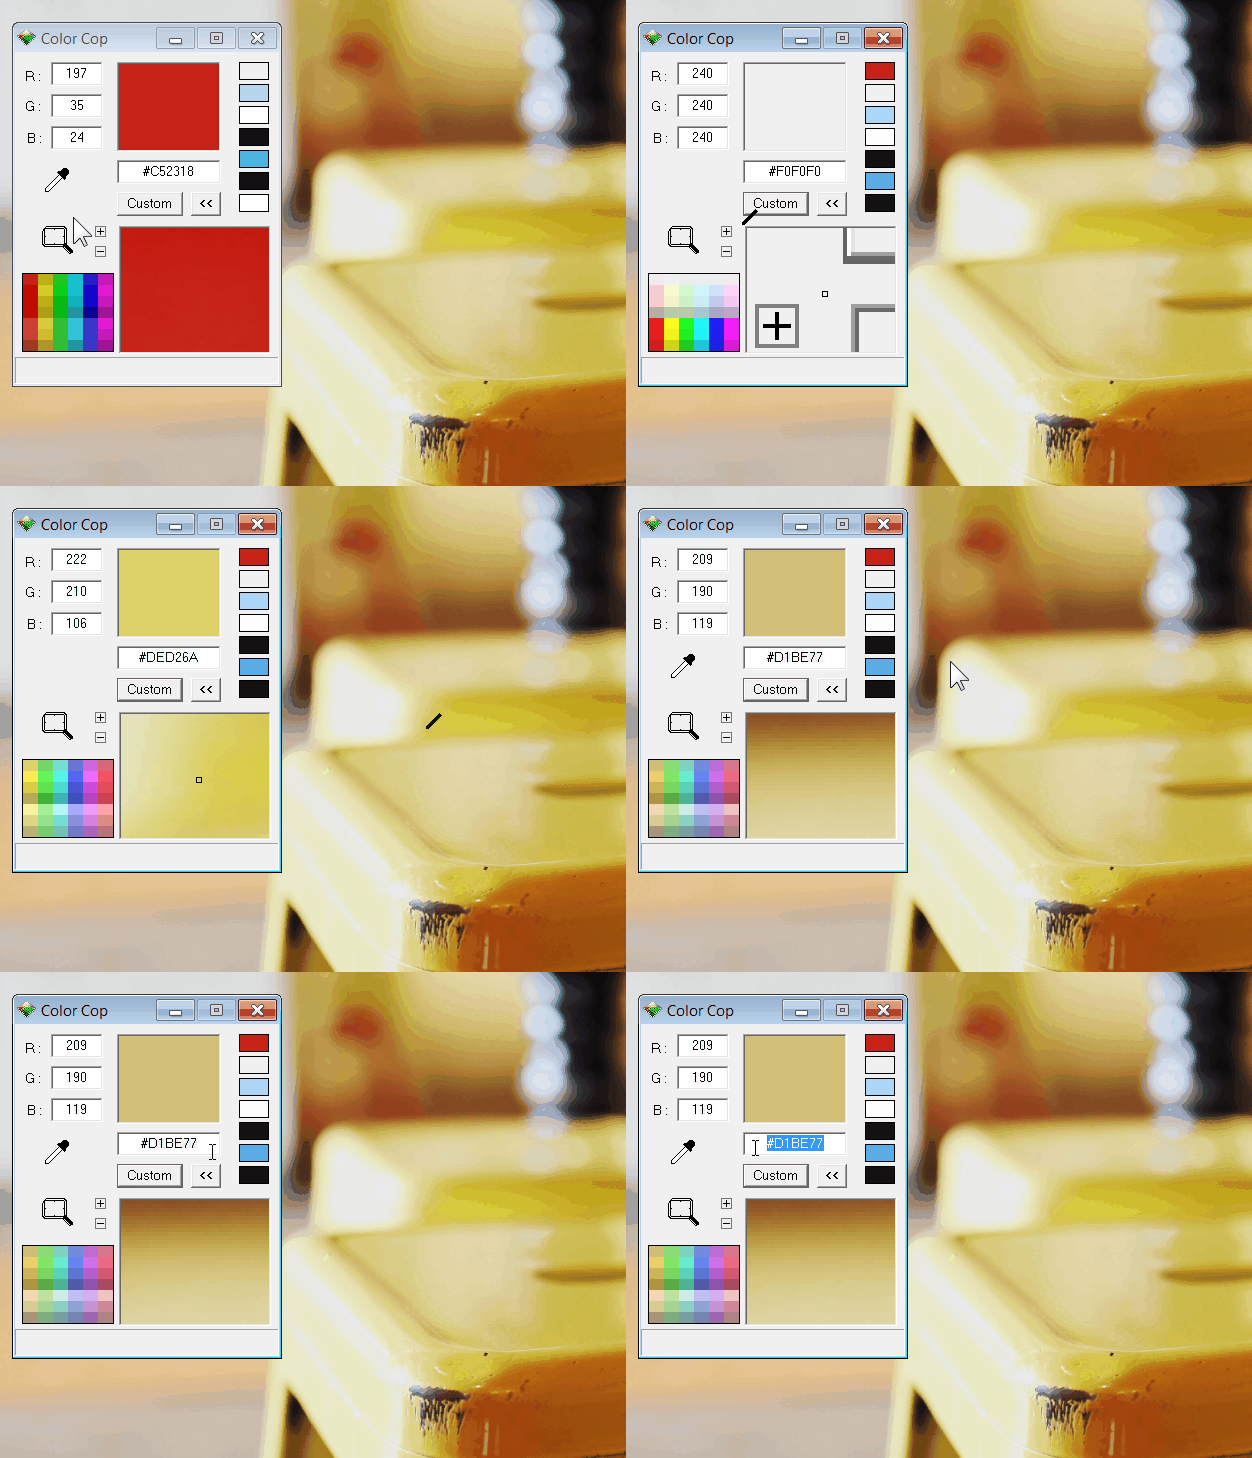
If you’re using Storyline that’s already easy to do because there’s a built in color picker. However, if you need to pick colors outside of your authoring tool, Color Cop is a good one to use.

free color picker

I use color pickers all the time. One way I integrate colors into my slides is by adding an image to my screen and then I pick colors from the image to create my buttons, background and accent colors. This way everything kind of look like it belongs together.

Create & Share Screenshots with ShareX

ShareX is a pretty slick application and I use it all the time to create quick screenshots and share them with team members and customers. I find it really useful to provide visual feedback when working on courses.

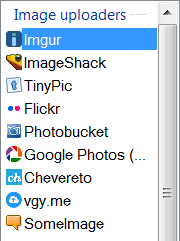
I use a keyboard shortcut to grab the screenshot and then it automatically uploads to my service of choice. I have use my Google Photos account, but images can be uploaded to all sorts of services, which can be seen in the image below.

free application

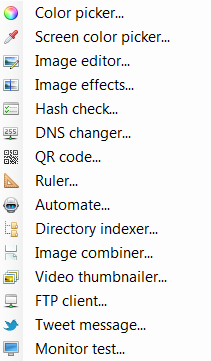
ShareX isn’t limited to just screenshots. In fact, it does quite a bit more (almost too much more). For example, you can color pick, edit images, and create animated .gifs. Here’s a screenshot of some of the other applications that are part of ShareX.

sharex

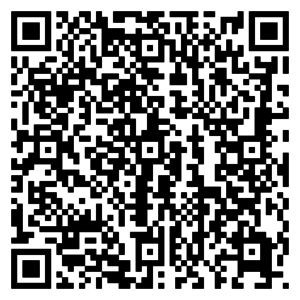
You can even create QR codes like this one below. Check it out and see where it goes.

common-challenges

So there you have it, two free multimedia applications that will come in handy for your elearning development. And if you want even more recommendations, check out this weekly challenge when community members shared some of their favorite tools.

Are there any free applications you use? Feel free to share in the comments below.

Events

Free E-Learning Resources

Want to learn more? Check out these articles and free resources in the community.
Here’s a great job board for e-learning, instructional design, and training jobs

Participate in the weekly e-learning challenges to sharpen your skills
Get your free PowerPoint templates and free graphics & stock images.

Lots of cool e-learning examples to check out and find inspiration.

Getting Started? This e-learning 101 series and the free e-books will help.