The Rapid Elearning Blog

Archive for the ‘PowerPoint’ Category


free icons PowerPoint

In the e-learning community, a number of people shared free icons and shapes. There’s a lot of variety from which to choose. And they’re great for your courses, so make sure to take advantage of all of those free resources.

Looking at the free icons reminded me of simple trick we show in our PowerPoint workshops. It’s one I’ve shared in the past when I showed how to create custom shapes in PowerPoint, but today I’m adding a bit more detail.

Convert Dingbat Fonts to Free Vector Images

There are two video tutorials below. The first one jumps right into the basics of doing the conversion of the dingbat font to a vector shape and the second one adds a little more detail and context for those not familiar with the feature.

View tutorial video  (short version)

Here are the basic steps. You can watch the video for more detail and nuance. You’ll need PowerPoint 2013 or newer.

  • Install a dingbat font or use wingdings (which should already be installed).
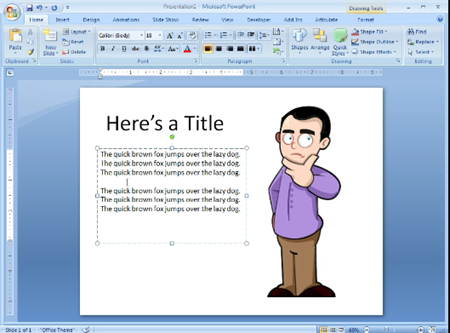
  • Add a character on the slide.
  • Duplicate it so you have two objects.
  • Select both and then go to Format > Merge Shapes > Fragment. This converts the font into a bunch of vector shapes. Again, you’ll need PowerPoint 2013 or newer for this.
  • At that point, you can edit and customize the vector as you desire.
  • When done, select all of the shapes and group them. Ctrl+G is the shortcut.
  • Right click and Save as image. I like to save as .PNG to preserve the transparency.

Here is a long form version of the video above with a more detail and context.

View tutorial video (detailed version)

This is super easy tip and a great way to take advantage of all of the wingdings and other symbol-type fonts available to you.

Events

Free E-Learning Resources

Want to learn more? Check out these articles and free resources in the community.

Here’s a great job board for e-learning, instructional design, and training jobs

Participate in the weekly e-learning challenges to sharpen your skills

Get your free PowerPoint templates and free graphics & stock images.

Lots of cool e-learning examples to check out and find inspiration.

Getting Started? This e-learning 101 series and the free e-books will help.


free e-learning PowerPoint template

I created a couple of simple quiz templates to use in a workshop and thought I’d share them here as well. One is created in Storyline and the other in PowerPoint. I also added a tutorial video for those who want to learn more about using the template for a simple quiz in Storyline.

Free Quiz Template: Storyline

You can download the free template here. It contains two slides. The first slide is a graphic slide that you can customize to meet your needs. And then once you’re done, do a Convert to Freeform and turn it into a quick quiz questions.

free Storyline template

In the video I show some ideas on how to customize it and apply a color scheme, as well as how to work with the feedback master.

Free Quiz Template: PowerPoint

The free quiz template in PowerPoint is pretty simple. If you want to edit the interactive part you need to do so at the slide master level. This is a good example of leveraging the slide master to make your interactive slides easier to manage and edit.

free PowerPoint quiz template

Hope you enjoy the templates. They’re great to practice using the software features. Feel free to use them as you wish.

Events

Free E-Learning Resources

Want to learn more? Check out these articles and free resources in the community.

Here’s a great job board for e-learning, instructional design, and training jobs

Participate in the weekly e-learning challenges to sharpen your skills

Get your free PowerPoint templates and free graphics & stock images.

Lots of cool e-learning examples to check out and find inspiration.

Getting Started? This e-learning 101 series and the free e-books will help.


powerpoint tips tutorials

When we started this blog in 2007, PowerPoint-based elearning was all the rage, and for good reason. It was a great entry point for people just getting started, especially when the alternative was custom Flash programming that required programming skills and resources.

Today, the elearning market is different and PowerPoint elearning isn’t as important (or relevant) as it was ten years ago. It’s something I shared in this blog post on why PowerPoint isn’t the right tool for interactive elearning. With tools like Storyline, you get PowerPoint ease-of-authoring with a lot more capability and you still don’t need to learn any programming.

But that doesn’t mean PowerPoint’s obsolete. It just means that a lot of the tutorials shared over the past ten years are not as relevant as they were when they were first published, such as working with clip art (which is now defunct).

I did look through many of the older posts and here’s an updated list of PowerPoint tutorials that still come in handy if you build elearning courses  with PowerPoint; or if you want to become a PowerPoint guru and learn things like how to use it to create graphics and illustrations.

There are some really good PowerPoint tips and tricks in that list. Even if you can’t go through them all, make sure to bookmark them for quick reference.

What’s your favorite PowerPoint tip learned via these blog posts over the years? Feel free to share them via the comments.

Events

Free E-Learning Resources

Want to learn more? Check out these articles and free resources in the community.

Here’s a great job board for e-learning, instructional design, and training jobs

Participate in the weekly e-learning challenges to sharpen your skills

Get your free PowerPoint templates and free graphics & stock images.

Lots of cool e-learning examples to check out and find inspiration.

Getting Started? This e-learning 101 series and the free e-books will help.


lorem ipsum

Adding placeholder text is one of those tasks that we do a lot when building our course screen layouts or templates. It helps us make sure things are looking right before we spent too much time building out the real content.

In today’s post I’ll share three easy ways to add placeholder text to your elearning courses.

Use the Built-in Lorem Ipsum Generator

PowerPoint, Articulate Studio, and Storyline offer built-in lorem ipsum generators so that it’s really easy to add some placeholder content. Here are the steps:

  • Add a text box
  • Type in =lorem() 
  • Hit enter

That will create a good amount of random placeholder text. However, it may be more than you need. That’s OK because you have some flexibility.

lorem ipsum

You can add numbers inside the parenthesis to control how many paragraphs and sentences are presented. For example, =lorem(2,1) will give you two paragraphs with one sentence each.

Here’s a tutorial that shows how to create random text in PowerPoint. The process is exactly the same in Storyline, but you use lorem instead of rand.

Use an Online Lorem Ipsum Generator

There are a lot of online lorem ipsum generators. Just do a search and you’ll find more than you need. I like the ones where you can generate placeholder text in other languages, too. This is another good one because you can set word count and choose Kafka text which is perfect for bureaucratic, compliance training. It may even be possible to use nothing but Kafka for your real training and have no one notice.

If all you need is lorem ipsum text, then the built-in tools are fine. Why go to a website to find something you already get in the elearning applications? However, some people don’t like the lorem ipsum text and want real readable text. Or they don’t like the fact that the lorem ipsum text doesn’t get past the spellchecker.

lorem ipsum

That’s OK, too, because there are sites that create random text that is also legible. And some of them are funny. Here are a few:

Use a Lorem Ipsum Browser Extension

Why go to a website to get your placeholder text? Why not just grab some from right within your browser? There are a number of browser extensions that offer quick lorem ipsum text. Just click on the extension and copy and paste your placeholder text.

lorem ipsum

Here are a few that I’ve used in Chrome. I’m sure that the other browsers have something similar.

As you can see, there are more than enough ways to generate fake text and with the amount you need for your slides. And of course, make sure that you let your subject matter expert know it’s fake text so that they don’t ask why you localized the course before getting final approval.

Events

Free E-Learning Resources

Want to learn more? Check out these articles and free resources in the community.

Here’s a great job board for e-learning, instructional design, and training jobs

Participate in the weekly e-learning challenges to sharpen your skills

Get your free PowerPoint templates and free graphics & stock images.

Lots of cool e-learning examples to check out and find inspiration.

Getting Started? This e-learning 101 series and the free e-books will help.


PowerPoint template PowerPoint tips

One of my favorite ways to learn is by deconstructing what others do. It allows me to find new ways to do things. And even though I’ve been doing this stuff for a while, there’s always something to learn.

A couple of weeks ago, Creative Markets, gave away this PowerPoint template. Looks like it’s no longer free. It’s a nice template with a lot of useful layouts.

powerpoint template PowerPoint tips

But there were two things that I really liked about the template and how they approached their production. So in today’s post we’ll look at what they did and learn to apply it to your own templates.

I created a PowerPoint tutorial that goes through both tips in more detail.

PowerPoint Tip: Use Pattern Fills for Image Placeholders

In PowerPoint, we can create all sorts of master slide layouts and add a whole host of placeholders. One type is the image placeholder.

Since the placeholder is designed to hold an image, when you don’t insert an image on the slide, it may end up looking like a big empty spot. And this could be confusing because people may anticipate that an object is going to be there and when it doesn’t show, they may think something is broken.

PowerPoint tip pattern fill PowerPoint tips

What I like about this template by Dublin Design is that they filled the image placeholders with a pattern fill. If you add an image, the pattern is replaced with the image. However, if you choose to not add an image, the pattern becomes a subtle part of the slide design. Very clever.

PowerPoint Tip: Use Merge Shapes Feature to Create Custom Image Fills

This is the tip that really caught my eye. They created a fill shape that was very unique and adds a lot more pizzazz to the design. It also helps you see the image placeholders in a new way.

Created editable shapes

When you insert an image placeholder it’s rectangular. However, if you right-click you’ll notice that you cannot edit its points. To change this, go to Edit Shape and select the rectangle shape. Now when you right click, the placeholder acts more like a regular shape and you have the option to modify the edit points and make the shape anything you want it to be.

Merge shapes to create unique placeholders

Starting with PowerPoint 2010, there are some merge shapes features. In PowerPoint 2010, you’ll need to add them to your ribbon toolbar. In PowerPoint 2013, they’re under the Drawing Tools’ Format ribbon.

PowerPoint tip: custom fill shape PowerPoint tips

Create an image placeholder on the master slide layout. Then insert a different shape. Use the Merge Shapes feature to create unique image placeholders.

Again, here’s a PowerPoint tutorial that walks through the steps in more detail.

There you have it, two cool PowerPoint tips to help you the next time you build an elearning template in PowerPoint.

Events

Free E-Learning Resources

Want to learn more? Check out these articles and free resources in the community.

Here’s a great job board for e-learning, instructional design, and training jobs

Participate in the weekly e-learning challenges to sharpen your skills

Get your free PowerPoint templates and free graphics & stock images.

Lots of cool e-learning examples to check out and find inspiration.

Getting Started? This e-learning 101 series and the free e-books will help.


free PowerPoint template

When I review vector images, I like to review the other images from the same artist. This way when I need to build a module or template, I can find assets drawn in the same style. This lets me deconstruct the vector illustration and use the parts to create illustrations that meet my own need. And remember, if you don’t have an illustration app, as long as you can get .EPS vector files, you can edit them in PowerPoint.

example of vector illustration

The other day I ran across this series of vector images that would work in an elearning course. Here are some things that work for an elearning template:

  • Avatar: the circled avatar is a common design treatment.
  • Progress meter: using variables allows you to combine various levels of feedback or progress. The meters could also be some sort of slider interaction.
  • Circled content: these are nice buckets that could easily be used as a start screen or menu structure. They also could be replacements for bullet point content.
  • Header bar: again, another common design treatment.

Most of the elements are pretty simple to create. The challenge is creating the circle avatar effect using your own images. Fortunately, it’s easy to do.

PowerPoint Tutorials

I’ve included a couple of tutorials to show how to create the circle avatar effect and how to work with connectors. This will work in Storyline or PowerPoint.

And to make things easier, here’s a free template. All you need to do is add your own content and characters.

Free PowerPoint & E-Learning Templates

free e-learning and PowerPoint template

Click here to see an example.

I created a few simple layouts to help you get started. You’ll need to create the circle avatar effect using one the tutorials above. The template is also connected to the design color themes and font themes for easy editing.

The layouts are just a starting point. If you want to add interactive elements like I did in the Storyline demo above, you’ll need to make your own tweaks. I’ll include the demo file in the same download for you to see what I did.

Free Downloads

Hope you enjoy the free templates and tutorials.

Events

Free E-Learning Resources

Want to learn more? Check out these articles and free resources in the community.

Here’s a great job board for e-learning, instructional design, and training jobs

Participate in the weekly e-learning challenges to sharpen your skills

Get your free PowerPoint templates and free graphics & stock images.

Lots of cool e-learning examples to check out and find inspiration.

Getting Started? This e-learning 101 series and the free e-books will help.


powerpoint illustrations

In this post we’ll look at an easy way to customize illustration in PowerPoint, since it’s a tool most of us have and it’s easy to do.

Most illustrations are vector images that are saved in a format such as. EPS or .AI that allows you to edit them. However, what happens when you have an illustration in a bitmap version such as .JPG or .PNG but you don’t have the source file to edit it?

This is an issue I run into quite a bit because I get some of my graphics from those low cost (or free) stock image sites and often they only provide a .PNG version of the file. In fact, I ran into this issue in a previous post on getting an elearning job. I’ll explain what I started with and how I made the modifications I needed.

Finding the Right Illustrations in PowerPoint & E-Learning

I found an illustration style that I liked. Then I clicked to see what else the illustrator created. This is a great way to find multiple images of the same style.

Illustrations in PowerPoint 1

Production Tips:

  • Stick with the same illustrator to have a consistent look.
  • Review all of the illustrations from the illustrator.
  • Don’t spend too much time trying to find the perfect illustration. Instead, identify elements of the illustration that you may extract to create your own custom illustration. For example, in the images above, the backgrounds would be perfect for elearning scenarios.

How to Edit Vector Illustrations in PowerPoint

Many of the illustrations you purchase will be in one of these formats: .EPS, .AI, .PNG, or .JPG. The first two are compiled illustrations which can be ungrouped and edited. Unfortunately, this may mean you need to learn how to work with an illustration app like Inkscape.

However, if that’s not something you feel comfortable doing, you can always edit .EPS vector images in PowerPoint. This is something I covered in this blog post on how to edit free vector illustrations. It’s not always perfect, but it works well most of the time.

Production Tips:

How to Edit Non-Vector Illustrations in PowerPoint

Here’s the real challenge. You have a great image, but all you have is the bitmap version or it (and you’re not that great of a graphic designer). How do you modify characters to meet your needs?

That’s exactly what I ran into with the blog post I mentioned earlier. All I had was the .PNG files. I liked the illustration style, but the images only had men in it and I wanted to add a female character. Here’s how I made the modifications. It’s pretty simple.

Here’s a video that walks through the production process in more detail.

Click here to view the video tutorial.

Illustrations in PowerPoint 2

The image above shows the before after versions. I didn’t need make significant edits.

  • I selected the easiest character to modify.
  • I changed the hairstyle by adding some ovals.
  • I used the color picker and matched the oval fill color with the hair.
  • I added a yellow oval to the ear lobe and color picked from the guy’s tie.

As you can see, the results are OK. The key is simplicity and not trying to add too much detail. I also, needed more room for text, so I added a white oval over the smaller chat bubble.

This next image was a little bit more involved. I modified the face and blouse using custom shapes.

Illustrations in PowerPoint 3

  • I added an oval for the hair.
  • I rounded the face a little using the curve tool and color picked from the wall to cover up the jaw line.
  • I added color to the lips and softened the color by making the shapes a bit transparent.
  • I used the curve tool to modify the blouse and filled with the blouse color.
  • You probably can’t see it, but I added some eye liner.

Again, watch the video above to see more detail on how to make the modifications. This isn’t a perfect solution, but when you’re stuck with bitmap images (and can’t easily edit them in a graphics tool) you can still meet your needs modifying the images in PowerPoint. The good thing is that these flat illustrations are easily covered with custom shapes and filled with matching colors.

Here’s a bonus challenge for you, assuming you only had the .PNG and could only work in PowerPoint, how would you change the skin tone?

Events

Free E-Learning Resources

Want to learn more? Check out these articles and free resources in the community.

Here’s a great job board for e-learning, instructional design, and training jobs

Participate in the weekly e-learning challenges to sharpen your skills

Get your free PowerPoint templates and free graphics & stock images.

Lots of cool e-learning examples to check out and find inspiration.

Getting Started? This e-learning 101 series and the free e-books will help.


variables for e-learning

Consistency is one of the most important parts of the course production process. And one way to maintain consistency is to determine your naming conventions. And this is especially true of variables for e-learning.

In a previous post, we looked at ways to manage and name your course files. And if you’re working inside an authoring tool like Storyline you want to name your objects and layers. You can also name your objects in PowerPoint using the selection pane.

variables for e-learning and consistent design

Following these steps will make your production process less frustrating especially if you put the project away for a period of time and revisit it later. Poor names and sloppy file management will really slow down your work flow and often introduces errors in the production.

And now for naming variables for e-learning….

How to Name Variables for E-Learning

I’ve been working on a series that covers the basics of using variables in elearning. And be sure to check out these examples and tutorials.

One of the most frequent questions for those getting started is why did you name the variable the way you did? I learned to name variables a certain way (without spaces) but there’s some latitude.

variables for e-learning naming e-learning variables

Don’t Use Spaces. 

Here’s the deal, you can name your variables anything you want. However, there are usually a few constraints. One of them is that you can’t use spaces. Which means your variable name can’t be Module 1 Complete. So instead of using spaces, you can use some of these tricks:

  • Use underscores to separate the words (Module1_Complete) or
  • Use capital letters to separate words (Module1Complete).

Be Descriptive. 

Name the variable so it’s specific and make sense. For example, if I am tracking completion of a module, which name is the most descriptive?

  • Variable = Complete1 or
  • Variable = Module1Complete

If you don’t use descriptive names and use lots of variables you’ll find it a challenge to quickly process what you see.

Shorter is Better. 

Be as descriptive as you can with the fewest letters possible.

What and when.

Some people use a What_When process. For example:

  • CountClicks is what do you do (Count) and when do you do it (on click).
  • Another example, Module1Complete_Exit indicates that the variable changes when the module is complete on exit.

The main point in all of this is to come up with a protocol that makes sense and apply it consistently. If you’re working with a team you’ll find this saves a lot of time and confusion, especially as you revisit projects and make updates.

What are some things you do to maintain consistency in the production process? How do you name variables for elearning? Feel free to share in the comments section.

Events

Free E-Learning Resources

Want to learn more? Check out these articles and free resources in the community.

Here’s a great job board for e-learning, instructional design, and training jobs

Participate in the weekly e-learning challenges to sharpen your skills

Get your free PowerPoint templates and free graphics & stock images.

Lots of cool e-learning examples to check out and find inspiration.

Getting Started? This e-learning 101 series and the free e-books will help.


free e-learning scenario

Here are some scenario background images that are great for your next interactive branched e-learning scenario course. These backgrounds go really well with the illustrated characters that come with the Articulate applications or those you may find at some of the free vector image sites.

branched e-learning scenario free images

I got the original backgrounds by ungrouping some old PowerPoint clip art (unfortunately no longer available). After ungrouping them, I made some modifications so they’d work with the branched e-learning scenarios. Of course, these images are relatively simple to make using basic shapes in PowerPoint or Storyline or by downloading some free vector images and making your own edits.

Be sure to check out these free office images for branched scenarios, too.

branched scenario

Breaking Down the Free Background Images

The image files are saved in the master slides as distinct layouts. To change from one background to the next, just go to the Home>Layout tab and select the layout you want to use. If you want to make edits to the backgrounds, you’ll need to do so from the master slide.

branched e-learning scenario example 1

Once you have a background layout selected, add one of the illustrated characters. I like to play around with different sizes and cropping. There are a lot of ways to display the characters so feel free to play around with different looks.

branched e-learning scenario insert character

The download file includes the template and the background images to be used with branched e-learning scenarios.

If you use the backgrounds, be sure to let me know how they work for you. Enjoy.

Events

Free E-Learning Resources

Want to learn more? Check out these articles and free resources in the community.

Here’s a great job board for e-learning, instructional design, and training jobs

Participate in the weekly e-learning challenges to sharpen your skills

Get your free PowerPoint templates and free graphics & stock images.

Lots of cool e-learning examples to check out and find inspiration.

Getting Started? This e-learning 101 series and the free e-books will help.


free apps

I like to play with new apps and test them to see how they help me be more productive or get better at building courses. Today I share three free apps that you may find to be time-savers or help be more productive.

Help with Google Docs

We use Google Docs here at Articulate. If you use Google Docs, then you know that when working on projects, you don’t just have one Google Doc. Instead, like dandelions they grow exponentially, and you end up with dozens of Google Docs. In fact, I was thinking about writing a follow up to the If You Give a Mouse a Cookie books based on giving someone a Google Doc, because chances are…

Here’s an easy way to add links to a Google Doc from other Google Docs.

Because we tend to have a lot of documents for each project it’s easy to lose sight of what’s there. Some people create a master document with links to all of the other docs. However, it’s a pain to dig around finding links and adding them to the master document.

However, if you use the Link Chooser add-on, it’s just a matter of quickly finding and adding a link right from the document. This creates a link and title for the link. Here are the steps:

  • From inside Google Docs, select Add-ons > Get add-ons and select “Link Chooser.
  • To add a link from a different document, go to Add-ons > Link Chooser > and then select the file or folder you want to link.

google docs tip

  • A link to the document will be added.

This is a great way to create a master document for your project with links to all supporting documents in Google Drive. There are all sorts of additional add-ons that will extend your Google Docs. Be sure to check them out.

For you Google Docs users, are there any extensions or add-ons you like to use?

Share Your PowerPoint Slides to Twitter & Facebook

I like to tweet some of my workshop presentations. I used to convert my slides to images and then tweet the images. However, Microsoft has a new app that lets you share your PowerPoint slides and files via Twitter and Facebook.

Get the Social Share app here, and it installs as a tab in PowerPoint.

Using Social Share via Twitter & Facebook

  • Select a PowerPoint slide and from the Social Share tab, do a screen capture of the slide.

share twitter via PowerPoint

Share tweet via PowerPoint

  • You can also send PowerPoint slides to Facebook as an image, album, or video.

Create Simple Explainer Videos and Whiteboard Courses

Here’s another cool app from Microsoft that is free and helpful. This is also great to have if you one of those 2-in-1 computers with a stylus.

  • Download the Snip app. It’s persistent on your desktop and easy to access.

snip via PowerPoint

  • Once you create a snip you can record audio to quickly explain an image or create a quick whiteboard video.
  • Save the video as .MP4 and insert into your elearning courses. Here’s a quick video test I made based on one of my PowerPoint slides on interactive elearning.

It’s a simple tool, but one that may come in handy for quick explanations. And it’s free.

Of the three tools the one I find the most useful is the Google links because I use Google Docs every day. Do you use any of these free apps? If so, how’s it going? If not, which one do you like best?

Events

Free E-Learning Resources

Want to learn more? Check out these articles and free resources in the community.

Here’s a great job board for e-learning, instructional design, and training jobs

Participate in the weekly e-learning challenges to sharpen your skills

Get your free PowerPoint templates and free graphics & stock images.

Lots of cool e-learning examples to check out and find inspiration.

Getting Started? This e-learning 101 series and the free e-books will help.


custom color scheme for e-learning

In a previous post I mentioned how to find color schemes using color schemers.  They’re great tools to help find the right color palette for your courses. Personally I find them valuable because I have slight color blindness. So having a system that keeps me in line really helps.

Use the Color Picker to Manually Create Color Schemes

Another way to create color schemes to manually pick colors from an image. In the tutorials I did for Storyline, I show how to use the color picker to pick colors from a background image.

custom color scheme for e-learning

With the color picker, I get colors that match colors from the image on the slides. Look at the image below. The tabs and side panel were color picked from the building on the right of the background image. I also added a colored, semi-transparent shape over the background to add some tinting and subdue the background a bit.

color picker

You’re not limited to Storyline, you can also do the same thing in PowerPoint.

Create Color Schemes from a Picture or Logo

Instead of creating a color scheme by manually picking colors, you can create one from the colors in an image. Upload an image and then let the color scheming site create a color palette for you.

  • Color Hunter: upload an image
  • Color Palette Generator: add an image URL to create the scheme
  • Kuler: upload an image or create custom themes using formulas; requires an account
  • Pictalous: upload an image and get advice from multiple sites
  • Colrd: upload an image and identify your image DNA

custom color scheme

Some of you have corporate style guides where the color information is provided. If you don’t have a formal style guide, you can upload a company-related image and have the color scheming site generate a usable palette.

As the image above shows, I uploaded a screen capture of my blog to pull together a color scheme. This is something you can do, too. You can use one of the following:

  • Company web site. Take a screenshot of your company website (or something else). Upload it to one of these sites and capture a color palette.
  • Company logo. Use the company logo to do the same thing.
  • Marketing collateral. You may have marketing or product material that you can use to pull a color palette.

Once you have a color palette, use it to create custom color themes in PowerPoint and Storyline.

As you can see, creating a custom color palette is pretty easy. And once you have one, you can customize your course to your heart’s content.

Events

Free E-Learning Resources

Want to learn more? Check out these articles and free resources in the community.

Here’s a great job board for e-learning, instructional design, and training jobs

Participate in the weekly e-learning challenges to sharpen your skills

Get your free PowerPoint templates and free graphics & stock images.

Lots of cool e-learning examples to check out and find inspiration.

Getting Started? This e-learning 101 series and the free e-books will help.


visual design e-learning

Let’s face it, we’re not all graphic designers and it can be a chore to get the right look for your slides. This is especially true if your slide is a little light on content leaving a lot of white space. And when this happens, we feel obligated to fill it with something like decorative clip art.

The following visual design tip is a great way to fill the space and maintain some context. It adds texture, looks nice, and is really easy to implement.

Examples of the Visual Design Tip

I’m not sure if there’s a formal name for this visual design tip but I like to call it the transparent echo technique. You’ll notice that the main image is repeated, like an echo. It’s still present but it’s softer and subtle. Here are some good examples of it in action.

visual design e-learning

As you can see the transparent echo technique works with objects, characters, and even illustrations. It’s a good visual design tip to have in your tool chest.

Step to Create the Transparent Echo Technique

Essentially you copy and paste the primary object and use it as a background image.

  • Duplicate the main image and place on the background.
  • Scale the background image up and crop it or move it a little off screen. There’s no right or wrong way to align it. Just do what looks good.
  • Subdue the image. There are a few ways to do this. You can make the image semi-transparent or use the recolor image feature in PowerPoint and Storyline. Another option is to cover the background with a white shape that is semi-transparent. That gives you an easy way to play adjust the level of transparency.

Here’s a video tutorial that walks through the process.

Click here to view YouTube video.

As you can see it’s pretty simple to implement and it’s repeatable with different images throughout the course. Thus you can have slides with different objects, but using the transparent echo technique allows the slides and visual design to remain consistent throughout the course. This technique works great for start screens and menus.

Here are some additional production tips and considerations:

  • Remove the color from the background image. I find that gray images blend better as they are made transparent.
  • Make sure to be consistent in the transparency setting if you use the effect on multiple slides.
  • Colorize the overlay shape. Pick a color from the main image and tint a semi-transparent shape that sits over the background image.
  • Cut out images work best. You can remove backgrounds from the image in a graphics editor or PowerPoint.
  • Play around with the scaling of the image and how it’s framed on the slide.
  • Use derivatives of the same image. Look at the doctor image above. Same character but different poses.

The transparent echo technique is an easy way to dress up slides without plastering it with clip art or decorative images. You maintain context and get a nice graphic with minimal effort. If you try your hand at it, I’d love to see what you do.

Events

Free E-Learning Resources

Want to learn more? Check out these articles and free resources in the community.

Here’s a great job board for e-learning, instructional design, and training jobs

Participate in the weekly e-learning challenges to sharpen your skills

Get your free PowerPoint templates and free graphics & stock images.

Lots of cool e-learning examples to check out and find inspiration.

Getting Started? This e-learning 101 series and the free e-books will help.