The Rapid Elearning Blog

Archive for the ‘Tutorials’ Category


PowerPoint animation tips

I’ve been reviewing a lot of the older PowerPoint tutorials that I’ve posted in the past. Most are still relevant, but a few have changed. In this post, we’ll do a refresh on the basics on PowerPoint animations.

PowerPoint Animation Basics

There are four types of animations in PowerPoint:

  • Entrance: object comes on to the slide
  • Exit: object leaves the slide
  • Emphasis: object remains in place, but animates to provide emphasis or become a focal point
  • Motion path: object follows a drawn path.
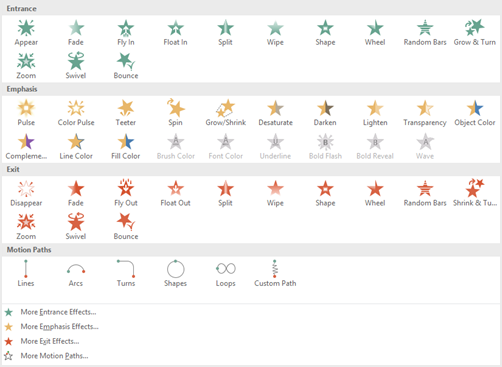
powerpoint animation panel

When selecting animations, keep in mind that there are additional animation choices at the bottom of the selection panel. And not all animations are supported when converted for e-learning. And one last tip, because you can animate doesn’t mean you should.

Triggering PowerPoint Animations

Animations are generally triggered by three things:

  • On click: object doesn’t animate until mouse click triggers the animation. This is what you need if you’re syncing animations with narration for your e-learning courses.
  • With previous: object animates with the previous animation. It also animates automatically if it’s the first object on the screen.
  • After previous: object animates after the previous animation.

When you select an animation and when it should start, you also have the option to set its duration and whether to delay or not. Once you understand how to time animations, you can compound them and create all sorts of effects.

You can also set triggers in PowerPoint to animate on other actions, such as clicking on a shape. These work great in PowerPoint by itself but are something I’d avoid when converting PowerPoint slides to an e-learning course.

PowerPoint Animation Pane

The PowerPoint animation pane gives you more control of the PowerPoint animations.

  • You can see the stacking order of animated objects.
  • How the objects are timed to the timeline.
  • Clicking on the drop down arrow exposes more advanced PowerPoint animation options such as start/stop effects and timing.
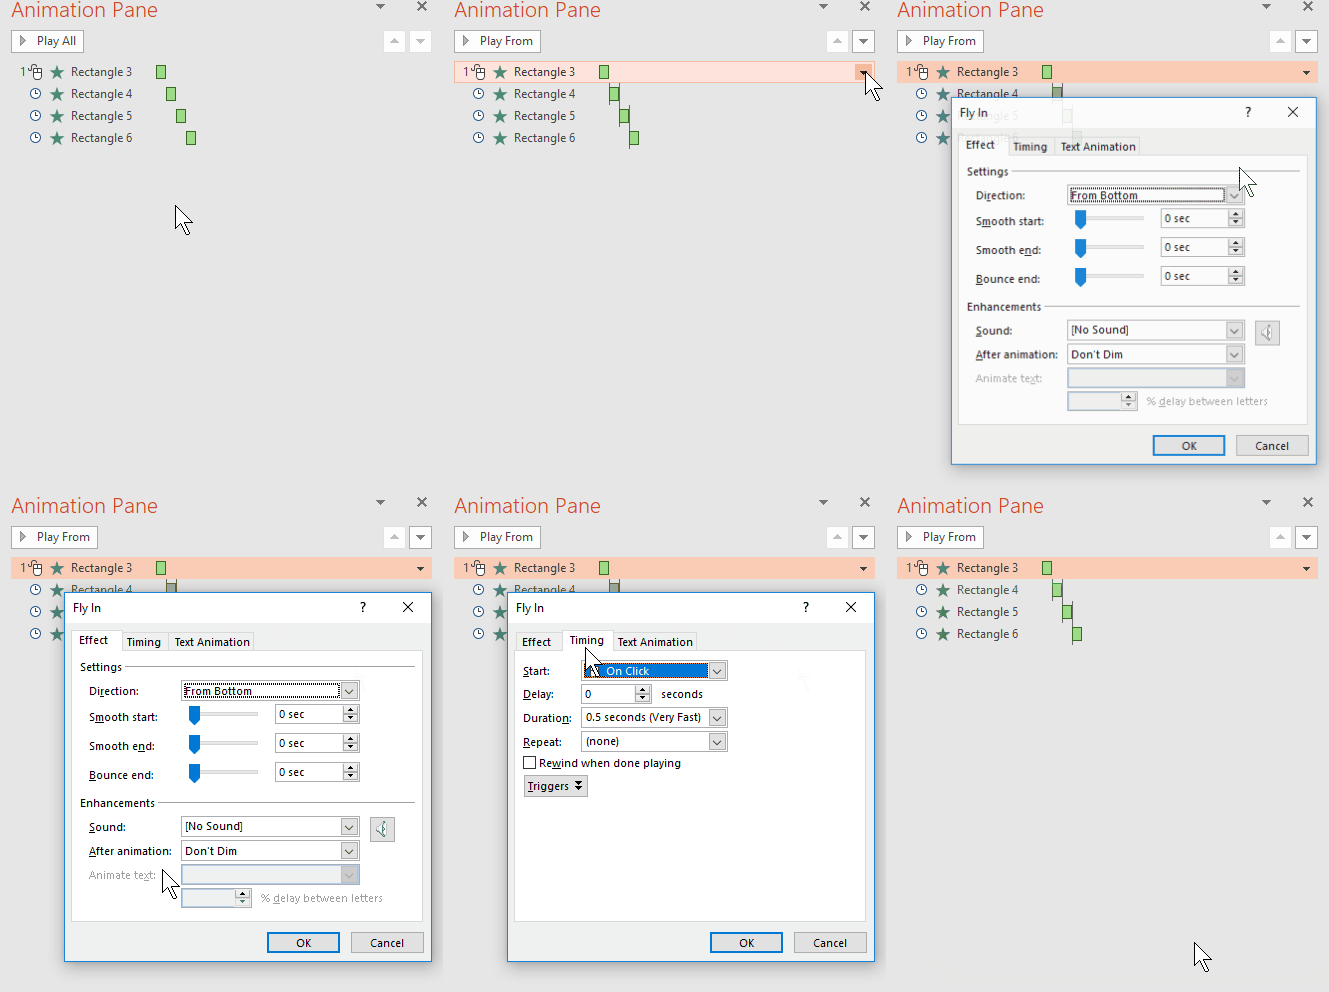
powerpoint-animation-panel

PowerPoint Animation Painter

You can add multiple animations to a single object. This allows you to create all sorts of complex animations. However, this can also be a time-consuming process. One production tip is to use the animation painter to copy animations from one object to another. This is especially useful if you need to repeat an animation on a different object.
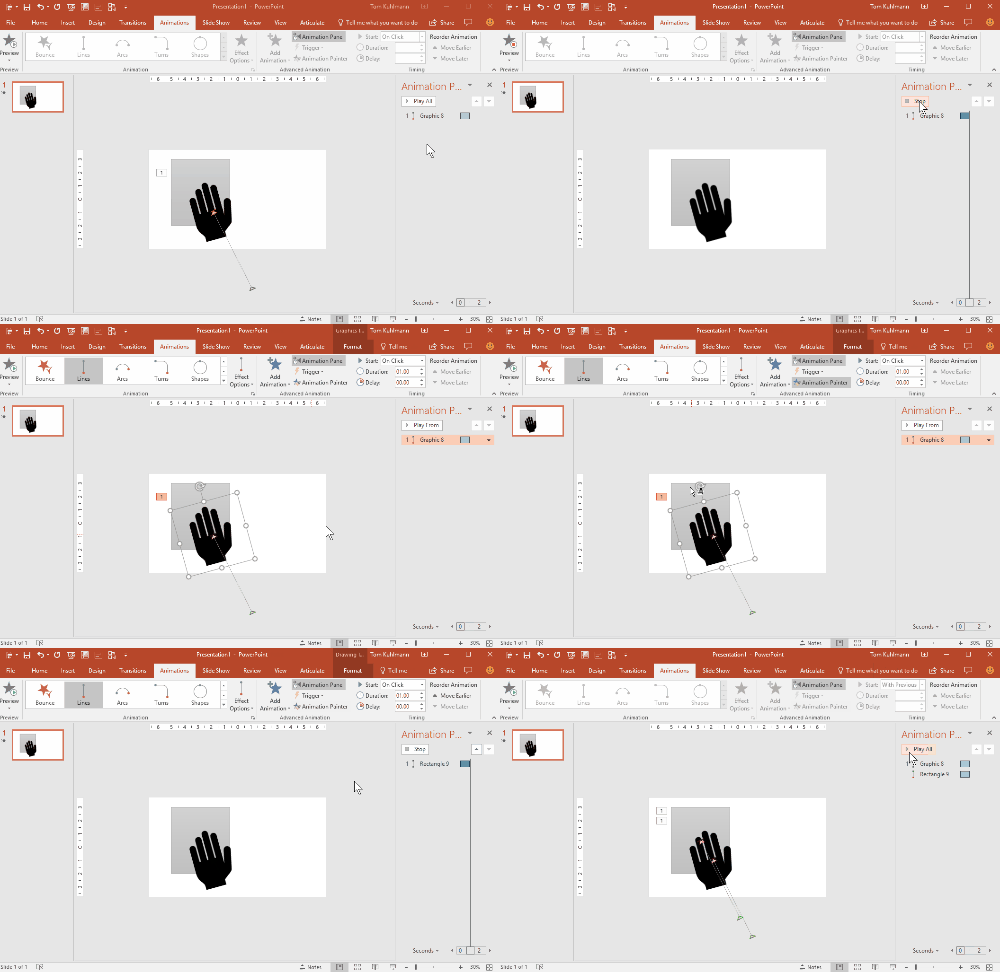
powerpoint animation painter

Here are a Couple of Bonus Tips

When using motion paths, select one of the pre-built motion paths rather than drawing your own. You’ll end up with fewer edit points which will make the animation along the path much smoother. If you do need to draw a custom path, use the curved shape tool and edit the points.
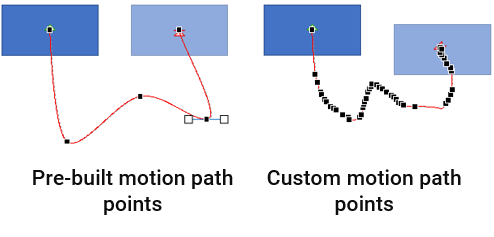
PowerPoint animation motion path edit points

Use the selection pane [Home>Select>Selection Pane] to edit the names of the objects on the slide. It makes it a lot easier to understand what’s happening in the animation pane.
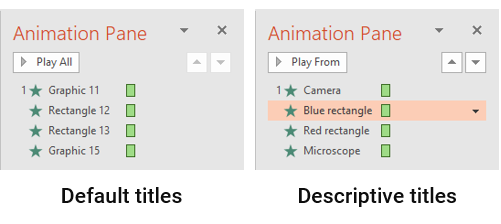
powerpooint animation selection pane

Here are some cool PowerPoint animation tutorials as well as a bunch more. They should spur all sorts of ideas.

Once you understand the basics of PowerPoint animations you’ll be able to create virtually anything you want and build e-learning courses in PowerPoint that won’t give away that they were created in PowerPoint.

Do you have any PowerPoint animation tips?

Events

Free E-Learning Resources

Want to learn more? Check out these articles and free resources in the community.

Here’s a great job board for e-learning, instructional design, and training jobs

Participate in the weekly e-learning challenges to sharpen your skills

Get your free PowerPoint templates and free graphics & stock images.

Lots of cool e-learning examples to check out and find inspiration.

Getting Started? This e-learning 101 series and the free e-books will help.


free PowerPoint template

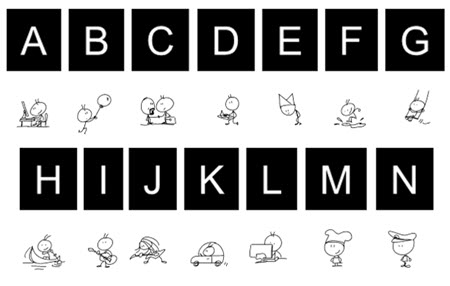
There are tons of free dingbat fonts available for download. And they’re great to use for your training and e-learning courses. Here’s what you already know:

Great! But what about managing those fonts and quickly previewing the icons and images you can use? It’s a pain to review them one-by-one.

Here’s an easy way to manage all of those free fonts and preview the ones you want to use to create graphic and icon files for your courses and presentation.

Free PowerPoint Template

free powerpoint template icons

You can download the PowerPoint template here. I made a simple video to show how to use it. Essentially you select the font characters and apply the dingbat font to see the correlation between the keystroke and what it produces.

Here are the basic steps:

  • Create a slide for the font characters. I like to create a single slide for each wingding font.
  • Select the characters (watch the video to see how you only select the letters you want to change).
  • Apply the wingding font to the selected characters.
  • This gives you a single screen with all of the characters and corresponding keystroke.
  • If you want to save the slide, type in the name of the font for quick reference.

Click here to view the video.

As a bonus (and slightly different approach) Taylor at Nuts & Bolts Speed Training offers his free font cutter solution and a number of icons.

What do you do to manage and preview those wingding type fonts?

Events

Free E-Learning Resources

Want to learn more? Check out these articles and free resources in the community.

Here’s a great job board for e-learning, instructional design, and training jobs

Participate in the weekly e-learning challenges to sharpen your skills

Get your free PowerPoint templates and free graphics & stock images.

Lots of cool e-learning examples to check out and find inspiration.

Getting Started? This e-learning 101 series and the free e-books will help.


Like many of you, I’m no graphic designer. I do have enough skill to get what I need or know enough to modify existing templates. The good thing is that today, it’s not that big of a deal because you get media assets like Articulate’s Content Library. So you have plenty of quality templates and stock images to help guide your design.

However, there are times when you may be stuck with a specific image and need to figure out how to create different (but matching) layouts without doing a bunch of edits in a different program. Here are some tips based on a presentation I gave recently on creating a professional portfolio. I had three images and used those to create different looks. And I did it all in PowerPoint.

I’ll show you what I look for and a few simple hacks to free up space and create different layouts.

Here’s a PowerPoint tutorial with more detail.

The tutorial below reviews what I’m sharing with more detail so that you can see how to choose and manipulate stock images for your courses and presentations.

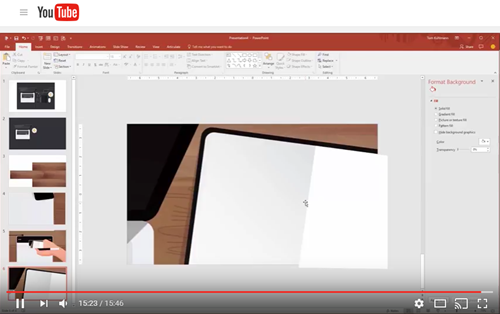
PowerPoint Hack tutorial

Click here to view the tutorial video.

  • How to create more whitespace and get rid of extra content.
  • How to create matching backgrounds.
  • How to create content areas.

PowerPoint Hack: Start with Matching Graphics

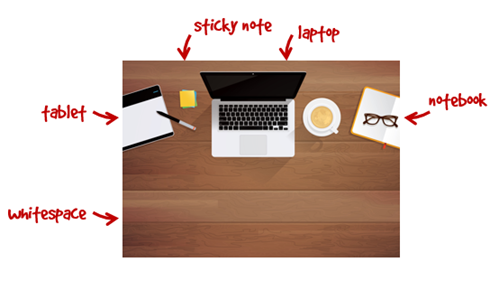
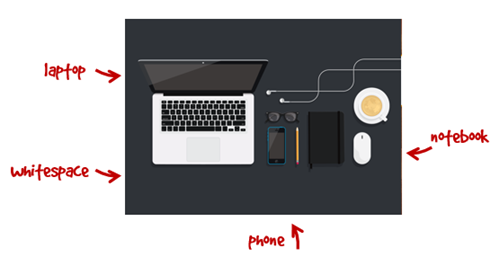
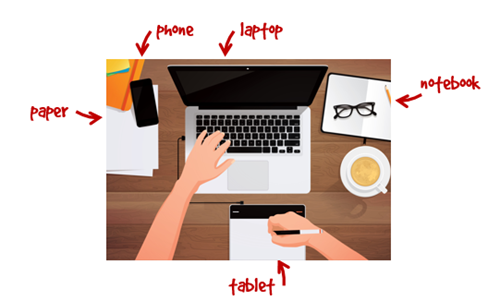
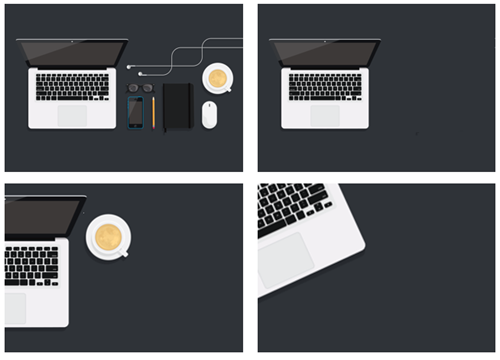
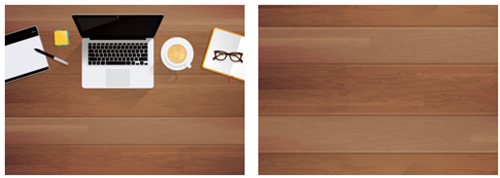
Whenever I find a stock image that works for my project, I try to find more from the same artist. And if that’s not possible, I try to find images that are very similar in style. This allows me to mix and match elements. In the case of my presentation, I started with these three images:

PowerPoint hack

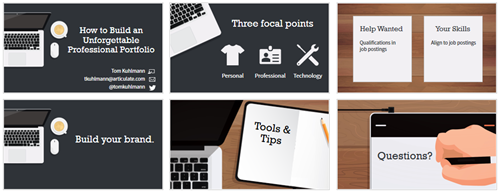
And with those three images, I was able to create various distinct slides.

PowerPoint hack various slides

PowerPoint Hack: Identify Content Buckets

By themselves, the stock images look fine and really don’t require any edits. However, when it comes to adding custom content, then the stock images have some constraints especially when it comes to adding content.

Identify places where you can add content (like images and text). If you start with a large enough stock image, you’ll be able to scale it and still maintain visual quality.

Here are a few areas from the images that can be modified to become content buckets.

powerpoint hack content area

PowerPoint Hack: Create Whitespace

After identifying places to put content, I look for ways to declutter the image and create more white space. There are a few ways to do that:

  • Cover up part of the stock image to get rid of clutter.
  • Zoom in and focus on clean flat areas.
  • Crop and reposition the image.
  • Create your own white space using image elements.

Here are just a few looks taken from a single image. In the first batch, I created three iterations of the one image.

PowerPoint hack custom layouts

And in the second, I replicated the background to give me enough whitespace and room to create my own matching images. In the presentation, I added a few white boxes to represent pages.

To learn more, watch the tutorial video. It provides the detailed step-by-step process.

The key point is that all of this is done right inside of PowerPoint and doesn’t require special skills or advanced features. What’s nice about this is that it only takes a few minutes and this approach provides an easy way to create professional quality layouts that are consistent in how they look.

Events

Free E-Learning Resources

Want to learn more? Check out these articles and free resources in the community.

Here’s a great job board for e-learning, instructional design, and training jobs

Participate in the weekly e-learning challenges to sharpen your skills

Get your free PowerPoint templates and free graphics & stock images.

Lots of cool e-learning examples to check out and find inspiration.

Getting Started? This e-learning 101 series and the free e-books will help.


free icons PowerPoint

In the e-learning community, a number of people shared free icons and shapes. There’s a lot of variety from which to choose. And they’re great for your courses, so make sure to take advantage of all of those free resources.

Looking at the free icons reminded me of simple trick we show in our PowerPoint workshops. It’s one I’ve shared in the past when I showed how to create custom shapes in PowerPoint, but today I’m adding a bit more detail.

Convert Dingbat Fonts to Free Vector Images

There are two video tutorials below. The first one jumps right into the basics of doing the conversion of the dingbat font to a vector shape and the second one adds a little more detail and context for those not familiar with the feature.

View tutorial video  (short version)

Here are the basic steps. You can watch the video for more detail and nuance. You’ll need PowerPoint 2013 or newer.

  • Install a dingbat font or use wingdings (which should already be installed).
  • Add a character on the slide.
  • Duplicate it so you have two objects.
  • Select both and then go to Format > Merge Shapes > Fragment. This converts the font into a bunch of vector shapes. Again, you’ll need PowerPoint 2013 or newer for this.
  • At that point, you can edit and customize the vector as you desire.
  • When done, select all of the shapes and group them. Ctrl+G is the shortcut.
  • Right click and Save as image. I like to save as .PNG to preserve the transparency.

Here is a long form version of the video above with a more detail and context.

View tutorial video (detailed version)

This is super easy tip and a great way to take advantage of all of the wingdings and other symbol-type fonts available to you.

Events

Free E-Learning Resources

Want to learn more? Check out these articles and free resources in the community.

Here’s a great job board for e-learning, instructional design, and training jobs

Participate in the weekly e-learning challenges to sharpen your skills

Get your free PowerPoint templates and free graphics & stock images.

Lots of cool e-learning examples to check out and find inspiration.

Getting Started? This e-learning 101 series and the free e-books will help.


e-learning screencast webinar tutorials

If you create software training then odds are you show a lot of keyboard shortcuts. If that’s the case you’ll like today’s tip where I share a simple tool that makes it really easy to display the keyboard shortcuts on-screen.

How to Display Keyboard Shortcuts during Screencast Tutorials

Meet Carnac the Magnificent. It’s a keyboard utility that displays keyboard shortcuts as they are used during your demos. This is perfect for webinars and screencast tutorials. It’s also great for live presentations where people in the back of the room can’t always hear or see what’s going on.

Here’s a quick tutorial where I show how it works and how it would look in your software training.

Click here to view the Youtube video.

  • You can download Carnac here. Read more about it here.
  • Once you download the file, double-click to install it.
  • You’ll see the purple Carnac icon in your system tray.

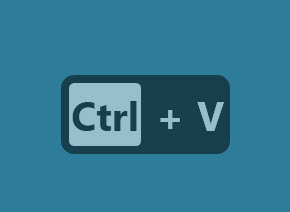
Once it’s active in your system tray and you use a keyboard shortcut, you’ll see the shortcut displayed on the screen as in the image below.

screencast tutorials example

How to Customize the Keyboard Shortcut Display for Screencast Tutorials

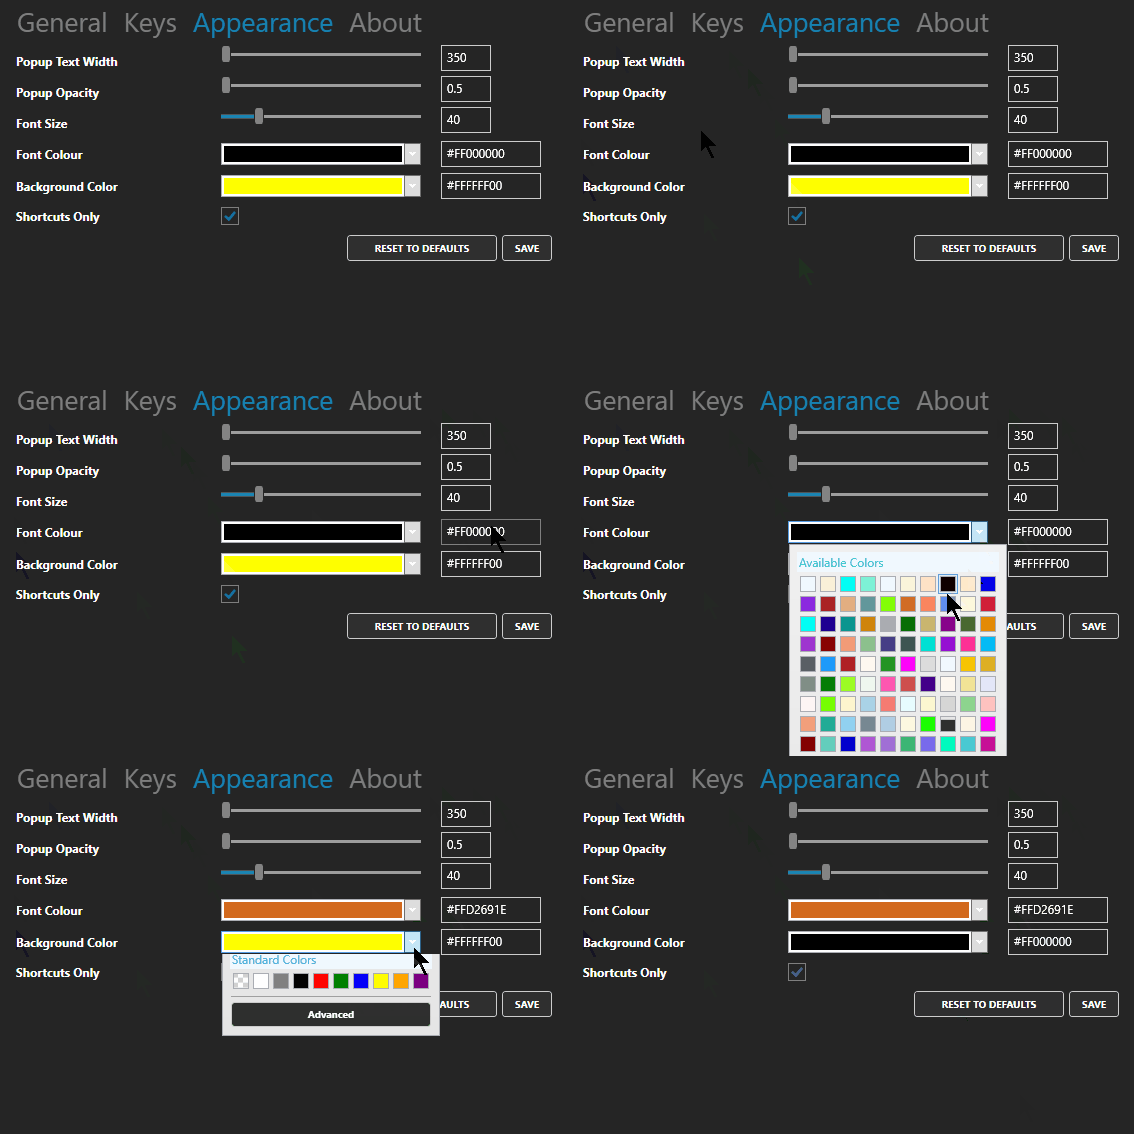
You can modify how the keyboard shortcuts display.

  • Double-click on the Carnac icon and it opens a setting window.
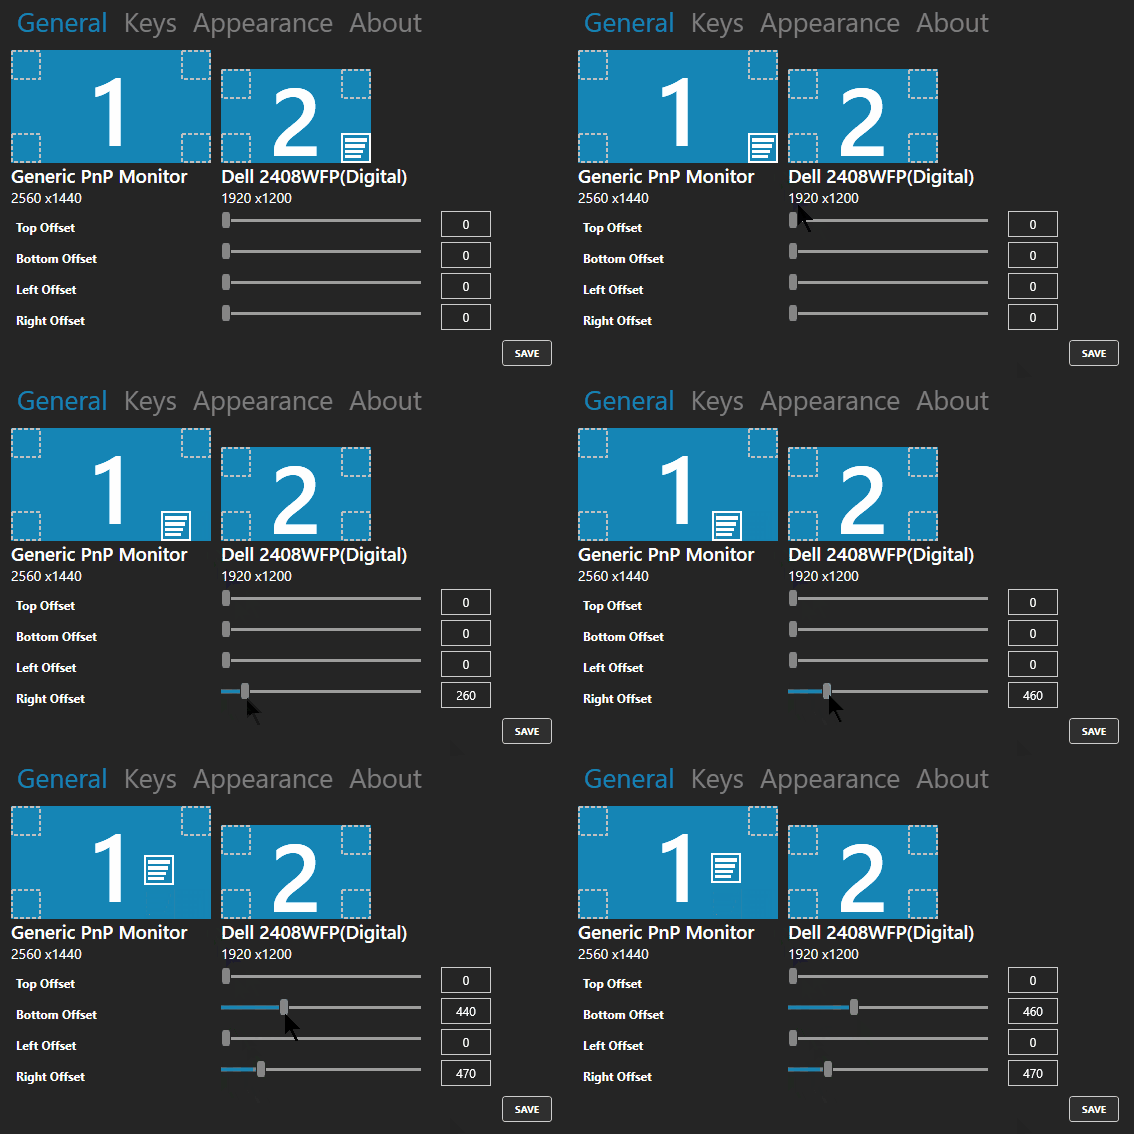
  • You’ll see the option to select monitors and where the object is displayed. You start by selecting the screen and then adjust how much you want to offset it.

screencast tutorials set properties

  • You can also change the appearance of what’s displayed. This includes the width, font size, and color. I couldn’t get the sliders to work, but manually entering the values did work for me. Save your changes.

screencast tutorials change appearance

It’s a fairly easy to use and it’s free. But you get what you pay for, so if you need help, you’re stuck. But I’ve found it works fine and as expected.  If you need a way to display keyboard shortcuts, then this solution should work for you.

Events

Free E-Learning Resources

Want to learn more? Check out these articles and free resources in the community.

Here’s a great job board for e-learning, instructional design, and training jobs

Participate in the weekly e-learning challenges to sharpen your skills

Get your free PowerPoint templates and free graphics & stock images.

Lots of cool e-learning examples to check out and find inspiration.

Getting Started? This e-learning 101 series and the free e-books will help.


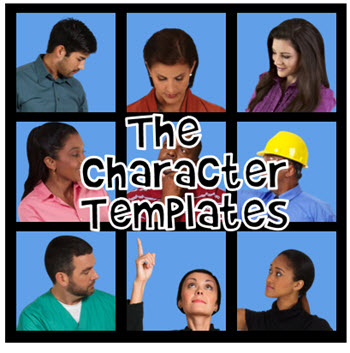
character templates for e-learning

Looking for just the right images is one of the most time-consuming activities we have when building our courses. It’s easy to get distracted and waste a lot of time. It’s gotten a lot easier over the years now that the software comes with professional templates and thousands of character poses.

As I build courses, I often use the same characters and a few common poses. Which means I don’t need to always search through all of the poses available. And I suspect many of you do the same. So today, I’m going to show you a simple tip to help speed up your production. It’s all based on assembling your own character templates. I walk through the steps below, but the video provides more detailed instructions.

Click here to view the video.

Create E-Learning Character Sets

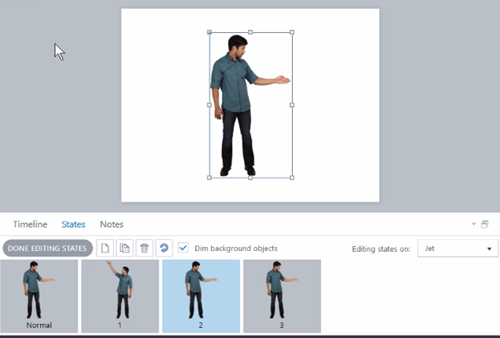
Even if you have hundreds of characters, odds are you use the same handful over and over again. Here’s how to create some simple pre-built character sets that make it easy to use characters and repeat poses.

e-learning characters sets

  • Select a character and insert it on the slide.
  • Create multiple states of the character. This trick works if you only insert a handful of frequently used or common poses. Otherwise, it defeats the purpose of the template.
  • Name the slide the same as the character or descriptive of the type of poses. For example, you may insert only sign-holding poses. In that case, the slide could be titled, Brandon-Holding-Signs.

Create E-Learning Character Set Templates

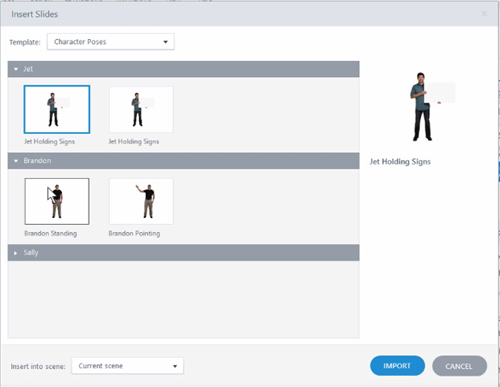
e-learning characters templates using sets

  • Once you have a slide with the character, save it as a template. This creates a template you can insert into your course. That’s it. Whenever you want to use that character, insert the slide and then copy and paste the character where you need it. Then set the initial state.
  • Ideally, you maintain one character template so it’s easier to manage. In that case, import the new character slide into the main character template file. And keep adding to it as you create custom character sets. This way it’s much easier to view and manage.
  • Bonus tip: you can do the same thing for custom interactions by saving them in a single interaction template.

Save Time Using E-Learning Characters

Now that you have some pre-built character poses, you’ll save some time in your production. When you need one of those characters, insert it from the template and then copy and paste the character into your slide.

The character will always include those starting states. You can set an initial state and use triggers to dynamically change it if you like. Another benefit is sharing the template with your team.

And you’re not limited to just the characters that come with the software. You can also do this with your own characters and the photos you take. Or you can do it for background images. Perhaps you want a template of production images, inside a warehouse, or the cubicle farm in the office. The process is the same.

The software already comes with characters so searching and inserting characters is easy enough. This tip works great if you use a few common poses and don’t want to spend time searching. Set up the templates and you have a good starting point.

Assuming that you want to create some character templates like this, what groups would you create? Talking poses? Sign holders?

Events

Free E-Learning Resources

Want to learn more? Check out these articles and free resources in the community.

Here’s a great job board for e-learning, instructional design, and training jobs

Participate in the weekly e-learning challenges to sharpen your skills

Get your free PowerPoint templates and free graphics & stock images.

Lots of cool e-learning examples to check out and find inspiration.

Getting Started? This e-learning 101 series and the free e-books will help.


free microlearning template

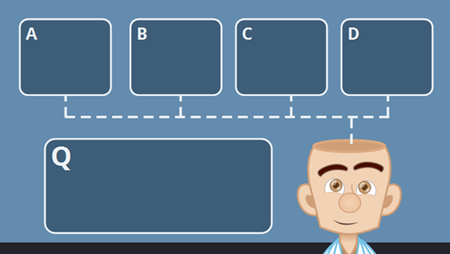
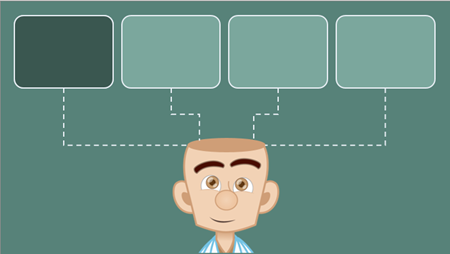
Earlier I shared this free microlearning template. It is easy to use and edit. However, I did receive some questions on how it was created and how to add additional cards. So in today’s post I’ll share a few tips so you can make your own template and edit the one I shared.

Here’s a series of video tutorials that show how to create the simple, yet powerful microlearning template. Check out the last tutorial on how to quickly edit the text. It’s a neat way to leverage the translation feature to do the heavy lifting.

How to Create the Animated Card

We want the card to animate onto the screen and pause. And we want to click on the card to see the other side (of the card, not the spirit world).

Click here to view the tutorial.

  • The first step is to create a card.
  • Add an entrance and exit animation.
  • Add a selected state to the card to create the click and reveal feature.
  • Add a trigger to the card that pauses the timeline when the entrance animation completes.

When you preview, the card should animate in and pause. You can click on the card to select or deselect it.

How to Edit the Normal & Selected States

We want the selected state to have an animated object that comes on and off the screen when the card is selected and deselected.

Click here to view the tutorial.

  • Select the card and double click inside the state you want to edit.
  • Add placeholder text in the normal state.
  • Add a shape to the selected state and add placeholder text to the shape.
  • Add entrance and exit animations to the shape in the selected state.

When you preview and click on the card, it will trigger the entrance animation of the selected state. And when you click on it again, it should trigger the exit animation.

How to Bring a Card On & Off the Screen

When the card animates on the screen it will pause. This allows us to “flip the card” by clicking on the card. When we’re done looking at the card, we want it to exit the screen and trigger a new card.

Click here to view the tutorial.

  • Create a button with a trigger to resume the timeline.
  • Duplicate the card and position it on the timeline after the first card. Repeat as necessary.

When you preview the microlearning interaction, the card enters and pauses. Clicking the button causes the timeline to resume which triggers the exit animation of the first card and the entrance animation of the next card.

How to Edit the Content on the Cards

Clicking into the states of the various cards can be tedious. Here’s an easy way to edit the text for each card.

Click here to view the tutorial.

  • Go to File>Translate>Export to export the text from the course.
  • Edit the text in the document and save it.
  • Go to File>Translate>Import to import the text into the cards.
  • Preview the microlearning interaction to verify that the text alignment is correct.

Importing the text should work well and as long as you don’t add too many characters you shouldn’t have to do any editing.

Here’s another free microlearning template for you to deconstruct and see how it was built.

Events

Free E-Learning Resources

Want to learn more? Check out these articles and free resources in the community.

Here’s a great job board for e-learning, instructional design, and training jobs

Participate in the weekly e-learning challenges to sharpen your skills

Get your free PowerPoint templates and free graphics & stock images.

Lots of cool e-learning examples to check out and find inspiration.

Getting Started? This e-learning 101 series and the free e-books will help.


free e-learning PowerPoint template

I created a couple of simple quiz templates to use in a workshop and thought I’d share them here as well. One is created in Storyline and the other in PowerPoint. I also added a tutorial video for those who want to learn more about using the template for a simple quiz in Storyline.

Free Quiz Template: Storyline

You can download the free template here. It contains two slides. The first slide is a graphic slide that you can customize to meet your needs. And then once you’re done, do a Convert to Freeform and turn it into a quick quiz questions.

free Storyline template

In the video I show some ideas on how to customize it and apply a color scheme, as well as how to work with the feedback master.

Free Quiz Template: PowerPoint

The free quiz template in PowerPoint is pretty simple. If you want to edit the interactive part you need to do so at the slide master level. This is a good example of leveraging the slide master to make your interactive slides easier to manage and edit.

free PowerPoint quiz template

Hope you enjoy the templates. They’re great to practice using the software features. Feel free to use them as you wish.

Events

Free E-Learning Resources

Want to learn more? Check out these articles and free resources in the community.

Here’s a great job board for e-learning, instructional design, and training jobs

Participate in the weekly e-learning challenges to sharpen your skills

Get your free PowerPoint templates and free graphics & stock images.

Lots of cool e-learning examples to check out and find inspiration.

Getting Started? This e-learning 101 series and the free e-books will help.


free flip card interaction

A great way to learn to use the elearning software you have is to create small interactions. As I’ve noted before, at work you may end up building one hundred courses, but the reality is you just build the same course one hundred times. That’s one of the reasons I like and promote the weekly elearning challenges. They provide a mechanism to quickly build prototypes to play around with ideas and learn new production techniques.

A recent challenge was to create a note card interaction. There are some pretty cool submissions so be sure to check them out in the comments. I happened to be working on a note card interaction for a workshop and submitted it to the challenge above. Here’s the interaction:

free flip card interaction

View the notecard interaction in action.

Here are a few things that I highlight in the workshop activity. I also created a quick tutorial that explains the file and how it’s constructed.

  • View tutorial to learn how to create and customize the free flip card interaction
  • Download file for the free flip card interaction

Create Content You Can Use More Than Once

One of my goals when creating any interaction is to design it so it’s easily re-purposed. Ideally, I want it to become a template. In the case of the note cards, I designed them so that I can quickly copy and paste to create additional cards. Then I just need to swap out the content in the card.

In addition, once the interaction is complete it can be saved as a template file where it will always be at your fingertips and available for use in other courses.

Learn to Leverage the Features

For this free flip card interaction I created the cards with a Selected State.  In essence, the Selected State of an object is like a light switch that can be turned on and off. This is perfect for a note card interaction. Click on it to get information. Click on it again to go back.

Using a Selected State also makes it easier to build a reusable template for copying and pasting. Often, we use layers to show or hide content. That means every time I want to duplicate a card, I also have to duplicate a corresponding layer. With a Selected State, I only need to duplicate the object because it automatically duplicates the state. That saves a lot of time creating the interaction and adding additional cards.

Find Inspiration from Others

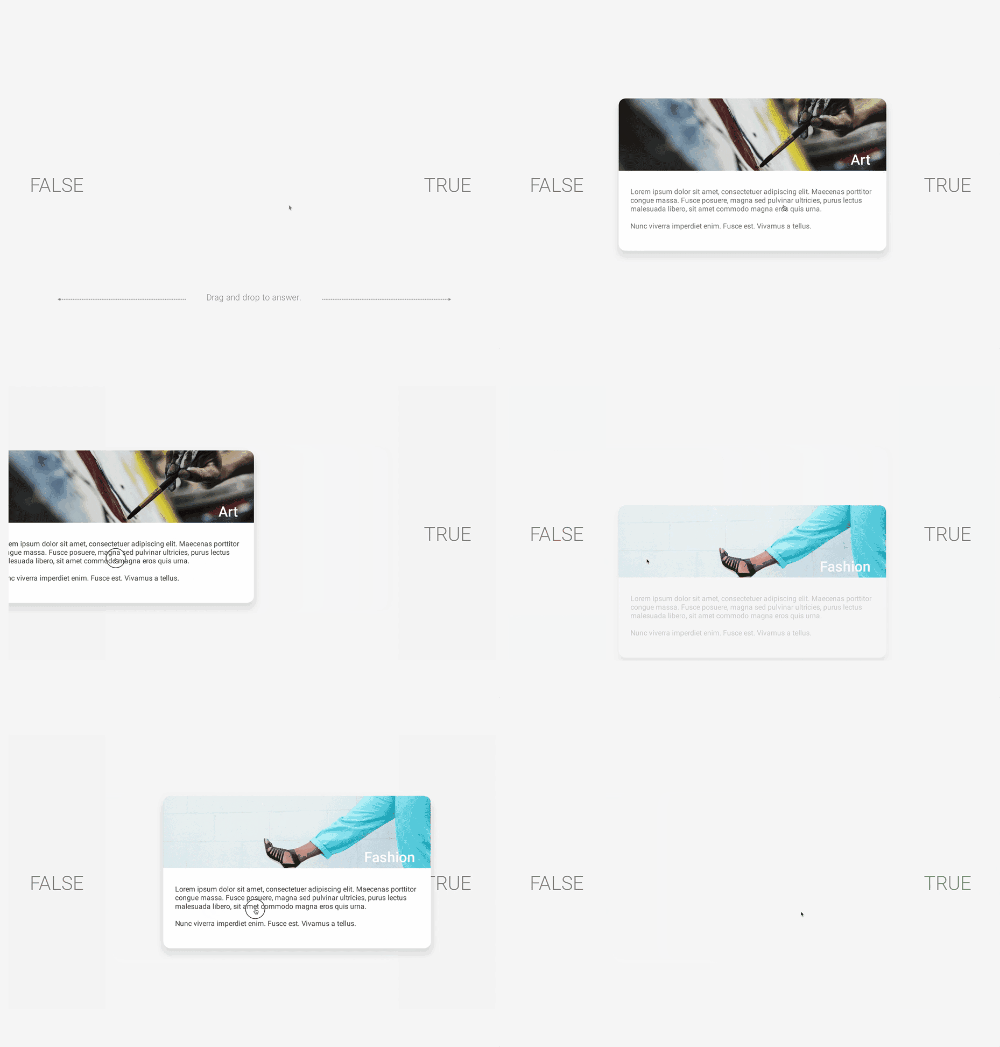
Josh Stoner does really nice work. At a recent Articulate workshop he showed how to build this drag and drop interaction that gave the appearance of swiping cards left and right. It’s a slick interaction. I used his design to inspire my note cards.

free flip card interaction

What I like about this free flip card interaction is that it allows the user to interact with the screen and this is a key part of building interactive content. I also like that it’s a novel interaction when compared to how most elearning content looks. While the cards kind of serve as flashcards in these examples, they could just as easily be bullet point slides converted to cards. Even if all you have is linear content, you make it a bit more engaging because of the novelty and interactive component. Keep in mind: it doesn’t make it a better learning experience, but it does make it a more engaging interactive experience.

To sum it all up:

  • Develop the practice of building prototypes. If you need some structure or calendar, participate in the weekly challenges. You don’t need to do them every week, maybe once a month or every couple of months is fine.
  • Get more life out of the features. This comes with practice (see above) and connecting with more experienced users who have developed some good best practices and creative techniques.
  • Find a source of inspiration. Make it a habit to look for good multimedia examples and then try to recreate them in your software. It’s a great way to learn to use the tools in a new way and also to see your projects and the potential interactions they offer.
  • Free download. Here’s a link to the flip card interaction. I’ll leave it to you to download and deconstruct to learn more. If you need help, watch the tutorial.

Events

Free E-Learning Resources

Want to learn more? Check out these articles and free resources in the community.

Here’s a great job board for e-learning, instructional design, and training jobs

Participate in the weekly e-learning challenges to sharpen your skills

Get your free PowerPoint templates and free graphics & stock images.

Lots of cool e-learning examples to check out and find inspiration.

Getting Started? This e-learning 101 series and the free e-books will help.


powerpoint tips tutorials

When we started this blog in 2007, PowerPoint-based elearning was all the rage, and for good reason. It was a great entry point for people just getting started, especially when the alternative was custom Flash programming that required programming skills and resources.

Today, the elearning market is different and PowerPoint elearning isn’t as important (or relevant) as it was ten years ago. It’s something I shared in this blog post on why PowerPoint isn’t the right tool for interactive elearning. With tools like Storyline, you get PowerPoint ease-of-authoring with a lot more capability and you still don’t need to learn any programming.

But that doesn’t mean PowerPoint’s obsolete. It just means that a lot of the tutorials shared over the past ten years are not as relevant as they were when they were first published, such as working with clip art (which is now defunct).

I did look through many of the older posts and here’s an updated list of PowerPoint tutorials that still come in handy if you build elearning courses  with PowerPoint; or if you want to become a PowerPoint guru and learn things like how to use it to create graphics and illustrations.

There are some really good PowerPoint tips and tricks in that list. Even if you can’t go through them all, make sure to bookmark them for quick reference.

What’s your favorite PowerPoint tip learned via these blog posts over the years? Feel free to share them via the comments.

Events

Free E-Learning Resources

Want to learn more? Check out these articles and free resources in the community.

Here’s a great job board for e-learning, instructional design, and training jobs

Participate in the weekly e-learning challenges to sharpen your skills

Get your free PowerPoint templates and free graphics & stock images.

Lots of cool e-learning examples to check out and find inspiration.

Getting Started? This e-learning 101 series and the free e-books will help.


PowerPoint template PowerPoint tips

One of my favorite ways to learn is by deconstructing what others do. It allows me to find new ways to do things. And even though I’ve been doing this stuff for a while, there’s always something to learn.

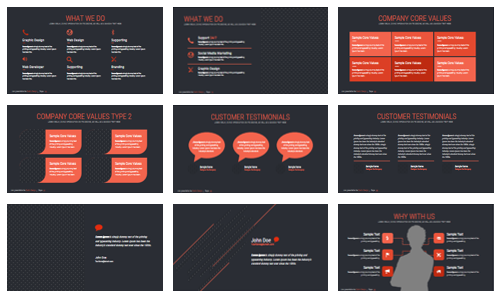
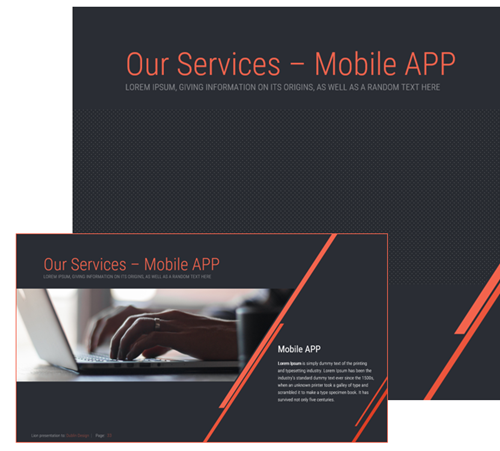
A couple of weeks ago, Creative Markets, gave away this PowerPoint template. Looks like it’s no longer free. It’s a nice template with a lot of useful layouts.

powerpoint template PowerPoint tips

But there were two things that I really liked about the template and how they approached their production. So in today’s post we’ll look at what they did and learn to apply it to your own templates.

I created a PowerPoint tutorial that goes through both tips in more detail.

PowerPoint Tip: Use Pattern Fills for Image Placeholders

In PowerPoint, we can create all sorts of master slide layouts and add a whole host of placeholders. One type is the image placeholder.

Since the placeholder is designed to hold an image, when you don’t insert an image on the slide, it may end up looking like a big empty spot. And this could be confusing because people may anticipate that an object is going to be there and when it doesn’t show, they may think something is broken.

PowerPoint tip pattern fill PowerPoint tips

What I like about this template by Dublin Design is that they filled the image placeholders with a pattern fill. If you add an image, the pattern is replaced with the image. However, if you choose to not add an image, the pattern becomes a subtle part of the slide design. Very clever.

PowerPoint Tip: Use Merge Shapes Feature to Create Custom Image Fills

This is the tip that really caught my eye. They created a fill shape that was very unique and adds a lot more pizzazz to the design. It also helps you see the image placeholders in a new way.

Created editable shapes

When you insert an image placeholder it’s rectangular. However, if you right-click you’ll notice that you cannot edit its points. To change this, go to Edit Shape and select the rectangle shape. Now when you right click, the placeholder acts more like a regular shape and you have the option to modify the edit points and make the shape anything you want it to be.

Merge shapes to create unique placeholders

Starting with PowerPoint 2010, there are some merge shapes features. In PowerPoint 2010, you’ll need to add them to your ribbon toolbar. In PowerPoint 2013, they’re under the Drawing Tools’ Format ribbon.

PowerPoint tip: custom fill shape PowerPoint tips

Create an image placeholder on the master slide layout. Then insert a different shape. Use the Merge Shapes feature to create unique image placeholders.

Again, here’s a PowerPoint tutorial that walks through the steps in more detail.

There you have it, two cool PowerPoint tips to help you the next time you build an elearning template in PowerPoint.

Events

Free E-Learning Resources

Want to learn more? Check out these articles and free resources in the community.

Here’s a great job board for e-learning, instructional design, and training jobs

Participate in the weekly e-learning challenges to sharpen your skills

Get your free PowerPoint templates and free graphics & stock images.

Lots of cool e-learning examples to check out and find inspiration.

Getting Started? This e-learning 101 series and the free e-books will help.


free PowerPoint template

When I review vector images, I like to review the other images from the same artist. This way when I need to build a module or template, I can find assets drawn in the same style. This lets me deconstruct the vector illustration and use the parts to create illustrations that meet my own need. And remember, if you don’t have an illustration app, as long as you can get .EPS vector files, you can edit them in PowerPoint.

example of vector illustration

The other day I ran across this series of vector images that would work in an elearning course. Here are some things that work for an elearning template:

  • Avatar: the circled avatar is a common design treatment.
  • Progress meter: using variables allows you to combine various levels of feedback or progress. The meters could also be some sort of slider interaction.
  • Circled content: these are nice buckets that could easily be used as a start screen or menu structure. They also could be replacements for bullet point content.
  • Header bar: again, another common design treatment.

Most of the elements are pretty simple to create. The challenge is creating the circle avatar effect using your own images. Fortunately, it’s easy to do.

PowerPoint Tutorials

I’ve included a couple of tutorials to show how to create the circle avatar effect and how to work with connectors. This will work in Storyline or PowerPoint.

And to make things easier, here’s a free template. All you need to do is add your own content and characters.

Free PowerPoint & E-Learning Templates

free e-learning and PowerPoint template

Click here to see an example.

I created a few simple layouts to help you get started. You’ll need to create the circle avatar effect using one the tutorials above. The template is also connected to the design color themes and font themes for easy editing.

The layouts are just a starting point. If you want to add interactive elements like I did in the Storyline demo above, you’ll need to make your own tweaks. I’ll include the demo file in the same download for you to see what I did.

Free Downloads

Hope you enjoy the free templates and tutorials.

Events

Free E-Learning Resources

Want to learn more? Check out these articles and free resources in the community.

Here’s a great job board for e-learning, instructional design, and training jobs

Participate in the weekly e-learning challenges to sharpen your skills

Get your free PowerPoint templates and free graphics & stock images.

Lots of cool e-learning examples to check out and find inspiration.

Getting Started? This e-learning 101 series and the free e-books will help.