
I’ve been reviewing a lot of the older PowerPoint tutorials that I’ve posted in the past. Most are still relevant, but a few have changed. In this post, we’ll do a refresh on the basics on PowerPoint animations.
PowerPoint Animation Basics
There are four types of animations in PowerPoint:
- Entrance: object comes on to the slide
- Exit: object leaves the slide
- Emphasis: object remains in place, but animates to provide emphasis or become a focal point
- Motion path: object follows a drawn path.
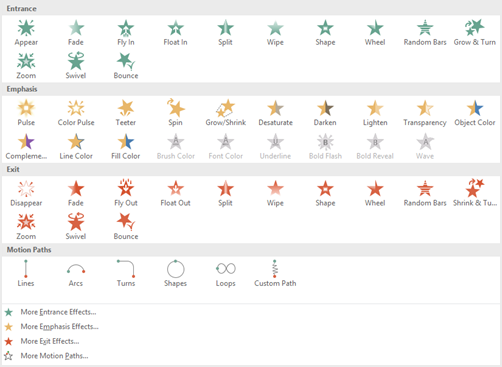
When selecting animations, keep in mind that there are additional animation choices at the bottom of the selection panel. And not all animations are supported when converted for e-learning. And one last tip, because you can animate doesn’t mean you should.
Triggering PowerPoint Animations
Animations are generally triggered by three things:
- On click: object doesn’t animate until mouse click triggers the animation. This is what you need if you’re syncing animations with narration for your e-learning courses.
- With previous: object animates with the previous animation. It also animates automatically if it’s the first object on the screen.
- After previous: object animates after the previous animation.
When you select an animation and when it should start, you also have the option to set its duration and whether to delay or not. Once you understand how to time animations, you can compound them and create all sorts of effects.
You can also set triggers in PowerPoint to animate on other actions, such as clicking on a shape. These work great in PowerPoint by itself but are something I’d avoid when converting PowerPoint slides to an e-learning course.
PowerPoint Animation Pane
The PowerPoint animation pane gives you more control of the PowerPoint animations.
- You can see the stacking order of animated objects.
- How the objects are timed to the timeline.
- Clicking on the drop down arrow exposes more advanced PowerPoint animation options such as start/stop effects and timing.
PowerPoint Animation Painter
You can add multiple animations to a single object. This allows you to create all sorts of complex animations. However, this can also be a time-consuming process. One production tip is to use the animation painter to copy animations from one object to another. This is especially useful if you need to repeat an animation on a different object.
Here are a Couple of Bonus Tips
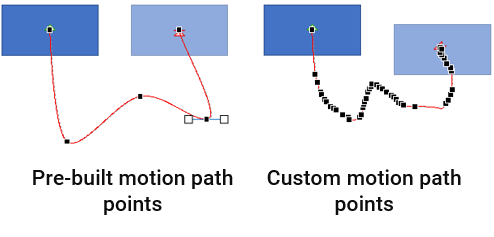
When using motion paths, select one of the pre-built motion paths rather than drawing your own. You’ll end up with fewer edit points which will make the animation along the path much smoother. If you do need to draw a custom path, use the curved shape tool and edit the points.
Use the selection pane [Home>Select>Selection Pane] to edit the names of the objects on the slide. It makes it a lot easier to understand what’s happening in the animation pane.

Here are some cool PowerPoint animation tutorials as well as a bunch more. They should spur all sorts of ideas.
Once you understand the basics of PowerPoint animations you’ll be able to create virtually anything you want and build e-learning courses in PowerPoint that won’t give away that they were created in PowerPoint.
Do you have any PowerPoint animation tips?
Events
Free E-Learning Resources


0
comments