25 More Free Display Graphics for Your E-Learning Courses
October 11th, 2011
In a previous post, I share 15 free display graphics that are commonly seen in elearning courses. In today’s post, I’m adding a few more.
The cool thing is that all of these are created in PowerPoint; so you can learn to build your own. The steps are simple. They’re generally just rectangles with some sort of fill. Then right-click on the graphic and save as an image.
Free Chalkboard and Whiteboards

I offered these in a post about a year ago where I showed how to create the display boards and included links to some free fonts that would work well with these displays.

If you’re going to use the chalkboards, be sure to download the free chalkboard assets to go with them.
Flipchart Display
Here are two versions of the flipchart display. One has legs the other doesn’t. The legs take up extra room, so I prefer the version with no legs because it gives you more screen space. But if you use a full body character, then the legs version makes sense.

- Download the flipchart graphics here.
Clipboard Display
The clipboard’s great for checklists or going over a linear flow of information. Make sure to download the hand-drawn boxes and check marks to go with the clipboard display.

- Download the clipboard graphic here.
- Checkmarks and x-marks
- Hand-drawn boxes
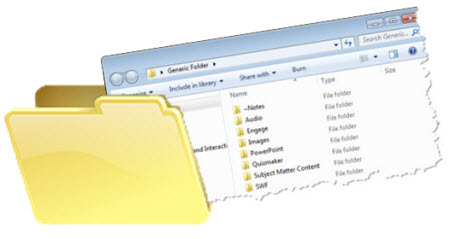
Personnel Folder
Take the folder that I shared in this post and combine it with the paper from the clipboard above to create a personnel folder for your compliance training.

- Download the personnel folder graphic here.
Bonus Displays
One of the things I love about the elearning community is the willingness to share. Recently, community member Efrat Maor shared a bunch of displays and free PowerPoint templates that she created. They’re pretty cool.

- Download the PowerPoint template here.
If you want the PowerPoint templates to make modifications to the graphics above, you’ll find them in the PowerPoint templates section here.
Hope you enjoy the free graphics and PowerPoint templates. Feel free to use them as you wish. And thanks to Efrat for sharing hers.
Tidbits:
- October 16-19: Las Vegas, NV (CUNA)—Experience Learning Live! I’ll be presenting on building communities and how to build elearning courses with limited resources.
- October 25: Houston – Elearning Symposium. David Anderson will share a ton of practical rapid elearning tips.
- November 1: Las Vegas, NV (Elearning Guild)—Devlearn. Doing a pre-conference workshop and presentation at the conference. Swing by the Articulate booth to say hi and check out some elearning goodness.
- November 4: San Diego, CA (ASTD)—Your Turn to Learn. David Anderson will be leading a couple of hands-on Articulate Workshops. You can also swing by the Articulate booth to check out what’s new.
- November 12: Los Angeles, CA (ISPI)—Articulate Workshop. Click here for the details. I believe they have a discount that runs through the end of the month. On November 11, I’ll be in town for a free Articulate jam session, still working on the details. I’ll post them to the blog as soon as I get them.
- November 14: Minneapolis, MN (ASTD)—Articulate Workshop: Build Interactive E-Learning…Rapidly. Click here for updates.
- December 8: Charlotte, NC (ASTD)—Rapid E-Learning Design. I’ll also be doing a free Articulate jam session while in town. Click here for details.
Events
- Everyday. Check out the weekly training webinars to learn more about Rise, Storyline, and instructional design.
Free E-Learning Resources
 |
 |
 |
|
Want to learn more? Check out these articles and free resources in the community. |
Here’s a great job board for e-learning, instructional design, and training jobs |
Participate in the weekly e-learning challenges to sharpen your skills |
 |
 |
 |
|
Get your free PowerPoint templates and free graphics & stock images. |
Lots of cool e-learning examples to check out and find inspiration. |
Getting Started? This e-learning 101 series and the free e-books will help. |


11
comments