The Rapid Elearning Blog

Archive for the ‘Visual Design’ Category


Create Free Emoji for E-Learning

February 19th, 2019

create free emojis

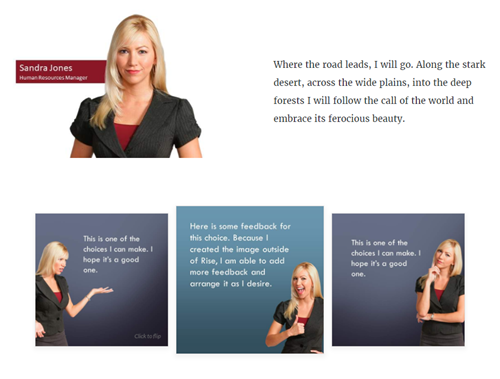
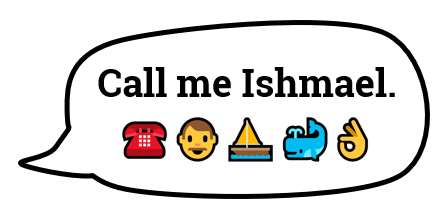
Most e-learning courses have some sort of positive and negative feedback. And often we use symbols like a check or X mark to indicate good or bad.

Why not use emojis?

In a previous post, I explained when to use emojis for e-learning and three ways to insert them into your courses.

free emojis

Create Free Emojis

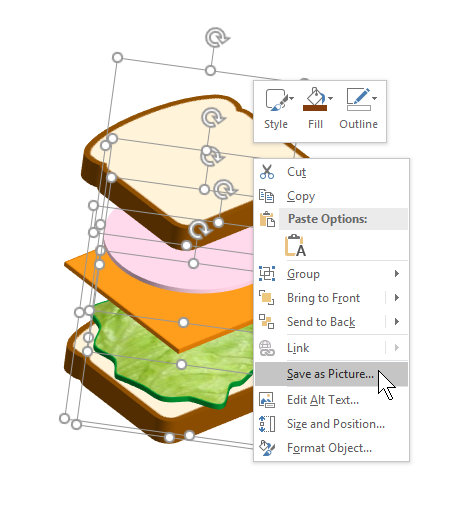
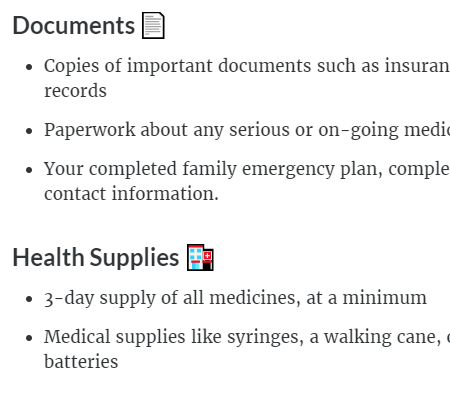
Here’s a site where you can create free custom emojis. The site is easy to use and you can create all sorts of fun emojis to provide feedback in your courses.

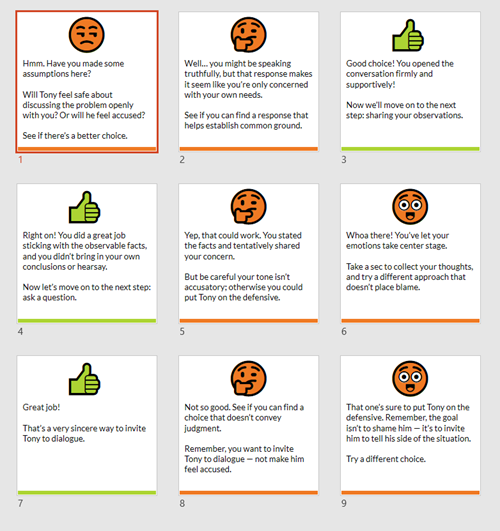
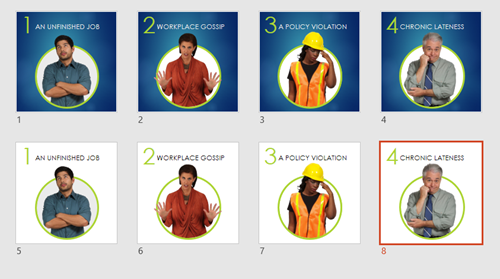
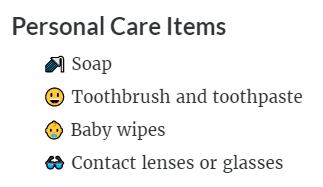
Here’s quick tutorial that shows how to use the free emoji site. And here are a couple of silly examples where I use the free emojis as a way to offer hints on a slide and as a way to provide right and wrong feedback.

free emoji

Click here to view the demo.

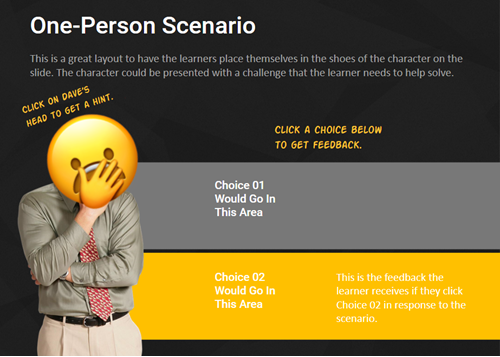
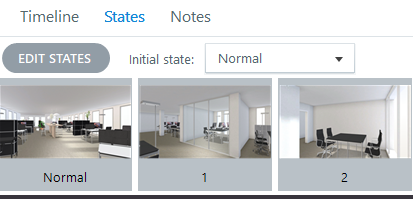
Of course the example above is silly, but you could find more creative and appropriate ways to use these free assets in your e-learning content, especially if working with a younger audience. Since the image files you get are the same dimensions, they’re perfect for buttons with various states.

If you did create some free emojis, how would you use them in your courses?

Events

Free E-Learning Resources

Want to learn more? Check out these articles and free resources in the community.

Here’s a great job board for e-learning, instructional design, and training jobs

Participate in the weekly e-learning challenges to sharpen your skills

Get your free PowerPoint templates and free graphics & stock images.

Lots of cool e-learning examples to check out and find inspiration.

Getting Started? This e-learning 101 series and the free e-books will help.


free images for interactive branched scenarios

Here are some free images for interactive scenarios. They go with the other free images I shared earlier. I use them for practice files in our e-learning workshops where we learn to build interactive, branched scenarios. They’re perfect for your scenario-based training and free to use.

These images are focused on hallways and such and a bit more generic with the white walls.

interactive branched scenario

As you can see below, they’re perfect for staging conversations and scenarios and they work great with both the photographic and illustrated characters that come with Articulate 360.

interactive branched scenarios

interactive branched scenario example

As noted in the previous post, one tip is to add all of the images to a single file and then you can dynamically switch the backgrounds as you need. Open the master slide and create a layout for each image. Save the file as a template and you’re all set. Here’s a tutorial that shows how to create templates for reusable interactive scenarios.

how to use interactive branched scenario images

Free Downloads

Events

Free E-Learning Resources

Want to learn more? Check out these articles and free resources in the community.

Here’s a great job board for e-learning, instructional design, and training jobs

Participate in the weekly e-learning challenges to sharpen your skills

Get your free PowerPoint templates and free graphics & stock images.

Lots of cool e-learning examples to check out and find inspiration.

Getting Started? This e-learning 101 series and the free e-books will help.


animated gif reasons to use for e-learning

At a recent workshop we discussed the popularity of working animated gifs and how they can be used in e-learning courses. Here are three reasons you can use them in your courses.

Animated Gifs for Novel Visual Design

E-learning courses are still mostly visual. And one part of engaging you learners is to create visually rich experiences. This doesn’t replace instructional design, but it does help make your course look more interesting and contributes to capture the person’s attention.

I love this example created by one of our community managers. She did a great job using animated .gifs to enrich the visuals in her Rise demo. How many animated .gifs do you count in her demo?

animated gif

Click to view the Rise demo.

Speaking of novelty, in the example below I added an animated gif to a slider that represents the module progress. At a certain point, the state of the slide thumb changes from one walking character to another.

animated gif demo

Animated Gifs to Add Humor

One reason animated gifs are so popular is they’re perfect for sharing funny things and memes. And they’re exaggerated with the looping animations. Why not leverage the humor that these offer and work them into your courses? A couple of considerations: many of the gifs probably violate some copyright laws and training isn’t supposed to be funny. Well, maybe it can be funny, but there’s a good chance that regardless of the content someone will complain. If you do use humor, you’ll really want to make sure that it’s appropriate to your audience.

animated demo


Animated Gifs to Show Procedural Steps

The two reasons above are less instructional. This next one fits better with instructional design and training. Use animated gifs to quickly show procedures or steps in a process. If you’re showing steps, it’s good to add some reference points because the content loops and people may not be clear where in the process the steps fall.

Here’s an animated gif that shows the root canal process.

root canal animated gif

Click here to view the animated gif (19 MB)

And here’s a prototype built in PowerPoint that demonstrates showing four steps.

animated gif powerpoint demo

Animated gifs work well for e-learning courses. If you use them in your courses currently, feel free to share ways that they’re used. In the meantime, check out these previous articles on creating animated gifs:

Events

Free E-Learning Resources

Want to learn more? Check out these articles and free resources in the community.

Here’s a great job board for e-learning, instructional design, and training jobs

Participate in the weekly e-learning challenges to sharpen your skills

Get your free PowerPoint templates and free graphics & stock images.

Lots of cool e-learning examples to check out and find inspiration.

Getting Started? This e-learning 101 series and the free e-books will help.


branched scenario tips

Developing the content and flow of an interactive branched scenarios is one thing. Creating the visual structure is another. In today’s post we’ll look at some key considerations when building scenarios and come up with a simple storyboarding process to help think through the scenario design and layouts.

Branched Scenarios: 3C Model

Years ago, I introduced the 3C model to build interactive scenarios: challenge, choices, and consequences. It’s a simple model to help think through the content requirements. It starts with challenging the learner’s understanding through some sort of contextual and real-world situation where decisions need to be made. Give them some choices to make. And the choices produce consequences.

3C model branched scenario

The consequences can be simple with immediate feedback or the 3C model can be compounded where each consequence produces another challenge and branches indefinitely. Of course, it’s hard enough to get your subject matter expert to give you ten good multiple-choice questions, let alone provide all of the content and nuance to build a complex branched interaction. I prefer a simple scenario structure.

Branched Scenarios: Visual Structure

A branched scenario starts with a blank screen. And from there, we add the scenario structure. But what exactly is it that we need and how do we design the screen layouts?

Let’s start with what needs to be on the screen. Here are a few of the main onscreen components that make up many branched scenarios:

  • Background: the background (or environment) is an easy way to establish context. I usually look for a single image that helps do that.
  • Characters: generally speaking there are actors in the scenario. Sometimes they can be implied and don’t need to be onscreen. For example, looking at an email or text message implies that someone in the scenario is viewing it. Or perhaps, the learner is the character. However, in many cases, the scenario actually features characters. Is it one or more? How do you show back and forth conversation?
  • Challenge: the screen consists of some text that presents the situation and challenge. That text needs to go somewhere. Does it go up, down, left or right? Is it there to start, or does it get exposed when the user does something like click a button?
  • Choices: once the challenge is presented, the learner has to make a decision. That usually means there’s an assortment of choices and then some sort of button (or other interaction) to make the selection. Where will that be on the screen?
  • Consequences: each choice usually includes some sort of feedback. It could be all of the feedback or perhaps an alert that the decision has created a new challenge. In either case, how is that displayed?

Branched Scenario: Simplify with a Storyboard

As you review the list above, it becomes apparent that there’s a lot to put on the screen. In workshops we usually create a blank slide and then a box to represent all of those things above. Then we play around with layouts to see what we can get onscreen. After that, we explore different ways to move the content offscreen and use triggered actions to expose the content.

There’s a lot that makes up the scenario layout. The image below represents some common scenario layouts.

branched scenario layout ideas

Of course, there are all sorts of ways to structure a scenario. Keep in mind not everything needs to go on one screen. You can use layers and lightboxes to expose additional content. Mouseover interactions are great to expand information without requiring that the person leave the current screen.

One way to get started is to create three blank slides: one for each part of the 3C model.

  • Challenge slide: set up the scenario by adding visual context and all the supporting text. You’re not writing War and Peace. Keep it short and get right to the point.
  • Choice slide: determine how many choices the person will have. Also determine if you will present ancillary options. For example, you may want some links to talk to team members or contact HR for more assistance. What will those look like, where will they be placed on the screen, and what does the content look like?
  • Consequence slide: what feedback needs to be displayed? Is it just text? Will there be a character?

branched scenario layouts

Once you have the three elements on separate slides, it’s easier to see what you have to expose during the scenario. From there you can begin to assemble the screen. Some people create cheats. For example, create a “folder” that can be placed on a different slide or layer. The folder is a good metaphor and fits a lot of contexts. It’s also a nice visual that can hold a lot of content. It allows you to get rid of character images, buttons and a lot of the other clutter that you have using a single slide.

In a previous post, I simplified the process by suggesting that you use a visual container. The container adds context and holds the text. That’s one option. But there are a lot more. The key is to determine what you need first using the three slides. And then from there play around with ideas on what to add to the screen and what to expose later and when to expose it.

Events

Free E-Learning Resources

Want to learn more? Check out these articles and free resources in the community.

Here’s a great job board for e-learning, instructional design, and training jobs

Participate in the weekly e-learning challenges to sharpen your skills

Get your free PowerPoint templates and free graphics & stock images.

Lots of cool e-learning examples to check out and find inspiration.

Getting Started? This e-learning 101 series and the free e-books will help.


interactive scenarios backgrounds

There’s a lot that goes into building interactive scenarios. Obviously content is king and critical to building a branched scenario that is both engaging and effective. One key part of the scenario construction is establishing context. The good thing is that a single image often suffices to establish the scenario context.

The free stock images I shared recently are perfect for building interactive scenarios and establishing visual context.

I’ve had a few questions on how to set up the slides using the scenario images, so I’ll show a couple of easy ways to use them.

Interactive Scenarios: Create Multiple Layouts

interactive scenarios

You can create as many layouts as you like in the master slide. Thus you can create a scenario slide with dozens of layouts and save it as a template. Anytime you want to build a scenario, start with the scenario template and it saves you from looking for the images and inserting them into the slides. Everything’s already there and ready to go.

Here’s a quick tutorial to show how that works.

Click to view the scenario tutorial.

Interactive Scenarios: Create Multiple States

interactive scenarios states

Another reusable option is to insert a background image and then establish a number of states for that image. You can set any state as the initial state and never have to access the other states. And if you want to be clever, you can use triggers to dynamically switch the background from one environment to another using a single image.

Here’s a quick tutorial that show how to set up the background states and dynamically change them with triggers.

Click to view the scenario tutorial.

There are advantages to each method:

  • Working from the master slide means that the background image can be applied universally to the layout and impact all of the slides that use the layout.
  • Working with image states on the slide level gives you more control over the background and how it’s used with triggers specific to that slide.
  • There’s no reason you couldn’t apply the image states to the layouts which would mean fewer layouts. The layouts can be swapped using triggers and variables.

Key Point: it’s easy to get lost in building complex scenarios which can consume a lot of production time. I always work from the perspective of keeping production simple and as reusable as possible. And with Storyline 360, you can share with your co-workers using the team slides feature.

Inserting the images into a file and saving it as a template will save you lots of time and means you won’t have to dig around looking for the images. They’ll always be right at your fingertips.

Events

Free E-Learning Resources

Want to learn more? Check out these articles and free resources in the community.

Here’s a great job board for e-learning, instructional design, and training jobs

Participate in the weekly e-learning challenges to sharpen your skills

Get your free PowerPoint templates and free graphics & stock images.

Lots of cool e-learning examples to check out and find inspiration.

Getting Started? This e-learning 101 series and the free e-books will help.


branched scenarios

A while back I shared some free illustrated backgrounds that you can use for your branched scenario courses in e-learning. Those worked great for the classic illustrated characters.

branched scenarios

I’ve been working on interactive scenarios for a few upcoming workshops and created some background images that we’ll use to build interactive branched scenarios. As you can see below, the backgrounds work well for the modern illustrated characters as well as with the photographic characters.

branched scenarios

The free download includes the original images as well as a folder with images cropped to 16:9 so they fit perfectly in 16×9 slides.

Bonus Tip for Branched Scenario Images

One way to use the images, is to create a course file and insert all of the backgrounds on different layouts in the master slide. This way you can have one starter file for those interactive scenarios and then dynamically select the layout when creating new slides. Here’s a tutorial that shows how to create templates for reusable interactive scenarios.

branched scenarios

Free Downloads

Here are links to download the backgrounds to use with your branched scenarios.

I hope you can use them in your courses and for your branched scenarios. If you do, let me know.

Events

Free E-Learning Resources

Want to learn more? Check out these articles and free resources in the community.

Here’s a great job board for e-learning, instructional design, and training jobs

Participate in the weekly e-learning challenges to sharpen your skills

Get your free PowerPoint templates and free graphics & stock images.

Lots of cool e-learning examples to check out and find inspiration.

Getting Started? This e-learning 101 series and the free e-books will help.


PowerPoint graphics

[UPDATE: this post is republished in the Tips & Tricks blog.]

In a recent post, I showed how I use PowerPoint to build the graphics for my Rise courses. I had a few questions on how to create the person sticking out of the circle image (apparently that is popular).  So today’s post shows how to do this. It’s pretty easy.

How to Create a 3D Pop-Out Graphic in PowerPoint

PowerPoint graphics Content Library

  • Insert a character and crop it until it is square.
  • Insert a circle.
  • The circle and image should be a similar size.
  • Crop the image to a circle shape.
  • Position the character over the circle.
  • Scale it up to suit your need for the overhanging image.
  • Duplicate the character.
  • Crop the first image to fit in the circle.
  • Crop the second image and place on top of the first image to cover.
  • Group together so you don’t accidentally nudge them out of place.

PowerPoint graphic steps

As you can see, it’s relatively simple to do. Then whatever you build in PowerPoint can be saved as an image. Either right-click it and save as .PNG or save the slide itself as .PNG.

Watch the tutorial below to get more of the specific detail. And here’s a bonus tutorial on how I created the 3D pop-out header image above.

Click here to view the YouTube tutorial.

Events

Free E-Learning Resources

Want to learn more? Check out these articles and free resources in the community.

Here’s a great job board for e-learning, instructional design, and training jobs

Participate in the weekly e-learning challenges to sharpen your skills

Get your free PowerPoint templates and free graphics & stock images.

Lots of cool e-learning examples to check out and find inspiration.

Getting Started? This e-learning 101 series and the free e-books will help.


PowerPoint graphics

In a previous post, I shared how I built an interactive scenario in Rise. I’ve gotten lots of emails asking how I built the graphics like the headers and the flashcard interactions for the interactive scenario. So in today’s post, I’m going to show you a simple way to build graphics for your Rise e-learning courses.

PowerPoint graphics headers for Rise blocks

PowerPoint graphics flashcard interaction

Understanding the Image Blocks in Rise

Rise offers a number of blocks that support inserted images (such as image, gallery, and some of the interactions). Most them work perfectly in one of two aspect ratios:

  • 1:1 (square)
  • 16:9 (rectangle)

There are a few blocks that have text overlay where the image is scaled. Those are mostly decorative images so we won’t worry about them.

Understanding PowerPoint Slides

PowerPoint is easy-to-use screen and with some practice, you can build almost any type of visual. Because of this, I build my simple graphics in PowerPoint and save the slides as images.

In PowerPoint, we need to do two things: set slide size and then whatever we build we export as an image.

  • Go to Design>Slide Size and modify the slide size.
  • To save the slide as an image, go to Save As and choose an image format. You can save a single slide or all slides. I usually save in PNG format.

Create PowerPoint Graphics to Use in Rise

Since there are two aspect ratios, I create two PowerPoint files for my Rise graphics. One is 1:1 and the other is 16:9. You can see the PowerPoint files I created for the scenario demo.

PowerPoint graphics example of file

PowerPoint is a freeform slide. I can build virtually anything I need quickly. In the interactive scenario, I created 1:1 images for the flashcards. One side of the flashcard has the question text and the other has the feedback.

I used the various image editing features in PowerPoint to colorize the graphics. I also used the emjoi features to create some simple feedback graphics. While it’s easy enough to build these graphics with other tools I just find PowerPoint to be easy and fast. However you’re not confined to PowerPoint, you can use the tool of your choice.

PowerPoint graphics flashcard questions

PowerPoint graphics flashcard answers

The images above are relatively simple. The images below required a bit more work. I had to build it so the character extends out of the frame. You can see that I created a couple of versions. I opted for the lighter version because it made the Rise screen seem more open with more white space.

PowerPoint graphics header image

When you’re all done building your slides, save the slides as images rather than a .pptx file. Then you’ll have a folder of images that work with your Rise courses.

Bonus PowerPoint Graphics Tip

With Articulate 360, you get Studio 360 that includes Presenter and works with PowerPoint. That means you have access to all of the Content Library characters and templates. So if you want the same Content Library characters in Rise, use PowerPoint slides to build the graphics like I did above.

Here’s another example I mocked up for the blog post using the same techniques.

PowerPoint graphics interactive scenario 2

So there you have it. In the first, post we looked at how to build the interactive scenario in Rise. And in this one, we reviewed how to use PowerPoint to quickly build the graphics you need.

Events

Free E-Learning Resources

Want to learn more? Check out these articles and free resources in the community.

Here’s a great job board for e-learning, instructional design, and training jobs

Participate in the weekly e-learning challenges to sharpen your skills

Get your free PowerPoint templates and free graphics & stock images.

Lots of cool e-learning examples to check out and find inspiration.

Getting Started? This e-learning 101 series and the free e-books will help.


Use PowerPoint to edit images

Over the years, I’ve posted hundreds of tutorials using PowerPoint. Some of them to be updated. Today I am going to cover five ways to use PowerPoint as an image editor. This is great for quick image editing or for those who don’t have other image editors on hand.

Save PowerPoint Content as an Image

Since we’re talking about PowerPoint as an image editor, the first tip is that whatever you create in PowerPoint can be saved as an image.

I usually group the objects so it’s one group. And then I right-click and save as picture. I like to save as a .PNG so that the transparent areas of the image are still transparent. If you save as .JPEG, the transparent areas will become white.

In the image below, I used PowerPoint to create the sandwich stack and then right-clicked to save as picture.

PowerPoint as illustrator

Create Custom-Sized PowerPoint Slides

You can make a PowerPoint slide any size you want. By default, they’re 16:9. That and 4:3 are the most common aspect ratios. However, by going to the Design Tab you can set the slides to any size. That means they can be tall and skinny or short and wide.

PowerPoint as illustrator slide size

Why would someone want to do that? Check out the tip below.

Export PowerPoint Slides as Images

PowerPoint slides can be saved as images. That means you can add whatever you want to a slide, layer content, etc and then save that slide as an image. I do this quite a bit when I need to quickly build graphics for my e-learning courses.

For example, the flashcard interaction in Rise is a 1:1 aspect ratio. So I make a PowerPoint slide that is 1:1 and add my content to the slide. It’s a great way to add titles and images to the flashcards to make them visually richer.

Once I’ve completed the slide, I save the PowerPoint slides as images and insert them into the Rise interaction.

PowerPoint as illustrator

The images above were all created in PowerPoint as slides and inserted into the Rise course. You can see an example of the PowerPoint slide images in this demo course.

Using PowerPoint slides to create images is easy and it gives me more control over the images I use in my e-learning courses.

How to Extend a Photo’s Background

Sometimes you have images where the object is centered which makes it challenging to place other content on the screen. An easy way to fix this is to cut a slice from the image and stretch it. This lets you move the main object over and get some empty space for text or other content.

PowerPoint as illustrator to extend images

I also use this technique to quickly build slide layouts which I showed in this previous blog post on how to create a template from a single image.

Create PowerPoint or e-learning template from image

How to Remove the Backgrounds of Images in PowerPoint

Since PowerPoint 2010, you can use PowerPoint to remove backgrounds from your images. For the most part, it works well. Select your image and the remove background. You can select areas to keep and areas to remove. Once you’ve removed the background, you can play around with softening the edges to get rid of any obvious jaggedness.

How to remove background in PowerPoint

As you can see, PowerPoint is a great tool for building simple illustrations or using it for quick graphics editing.

Events

Free E-Learning Resources

Want to learn more? Check out these articles and free resources in the community.

Here’s a great job board for e-learning, instructional design, and training jobs

Participate in the weekly e-learning challenges to sharpen your skills

Get your free PowerPoint templates and free graphics & stock images.

Lots of cool e-learning examples to check out and find inspiration.

Getting Started? This e-learning 101 series and the free e-books will help.


edit SVG in PowerPoint

The good news is that now you can edit SVG images in PowerPoint. And that’s a big deal because we’re starting to see more SVG images every day.

In fact, one of the sites where I buy images has the option to download SVG images. This is great because they can be edited and customized. However, to edit them requires knowing how to do so with an illustration program. Unless of course, you know how to use PowerPoint.

Insert & Edit SVG Image in PowerPoint

This first step is really easy. Insert a picture by using Insert>Pictures on the toolbar. Locate your SVG image and insert it. Voila! I will add, that I’ve had a few SVG files that didn’t work, but for the most part it’s been smooth sailing.

SVG PowerPoint

The next step is also very easy. What you’ll do is convert the SVG image into an object that can be edited in PowerPoint. The newest version of PowerPoint has a “Convert to Shape” feature. If you don’t see it in your version of PowerPoint, you’ll need to upgrade to the Office 365 version.

  • Select the image
  • In the format toolbar (or via right-click) select Convert to Shape. It will ask if you want to convert it.
  • Once it’s converted, you need to ungroup the image. Right-click, and select Ungroup.
  • Now the image is broken into multiple shapes where you can edit them as you wish.

convert and edit SVG in PowerPoint

Once the image is ungrouped you can edit it. For example, I removed the background content and just isolated the guy on the computer. now I can insert it anywhere I want. You can regroup the object and right-click to save as an image. I like to save as a PNG file so that the transparent part of the image remains transparent.

edit SVG in PowerPoint computer man

How to Edit SVG in PowerPoint Video Tutorial

Here’s a video tutorial where I show how to convert and edit an SVG in PowerPoint.

Click here to watch the YouTube tutorial.

As you can see, it’s super easy to edit SVG files in PowerPoint. That should open the doors to all sorts of possibilities as you find free SVG files at those various sites that offer free stock images.

Events

Free E-Learning Resources

Want to learn more? Check out these articles and free resources in the community.

Here’s a great job board for e-learning, instructional design, and training jobs

Participate in the weekly e-learning challenges to sharpen your skills

Get your free PowerPoint templates and free graphics & stock images.

Lots of cool e-learning examples to check out and find inspiration.

Getting Started? This e-learning 101 series and the free e-books will help.


insert emoji e-learning

In a previous post, we looked at when to use emojis in e-learning courses. There some good tips and comments in the post. Emojis add clever visual cues, but it is important to use them in a way that enhances the learning experience and doesn’t confuse it. So that’s always something to keep in mind.

The next question is how does one actually find and insert emojis. Today, I’ll show you three simple ways to add emojis to your e-learning courses.

Insert Emojis Using Keyboard Shortcuts

insert emoji keyboard e-learning

In Windows, you can add emojis using the keyboard shortcut [Windows Key + .]. And with a Mac, it’s [CTRL + CMD + Space]. I’m not sure what it is for Linux, but odds are you’re just sitting in a basement not communicating with people, so it’s probably not as critical.

I find that it can be a bit of a challenge when adding emojis via the Windows keyboard because I have to first activate the emoji screen and then start typing. But if nothing comes up while I type, I have to search; and it’s easy to accidentally add text and an emoji to what you’re typing on the screen.

Insert Emojis Using the Onscreen Windows Keyboard

insert emoji onscreen keyboard e-learning

I believe the Windows shortcut above was added in a recent version of Windows 10. If it doesn’t work for you, try accessing the touch keyboard. That’s been part of Windows for a while now.You can add it to the taskbar and then just click the icon to open the onscreen keyboard.

insert emoji with keyboard

Insert Emojis Using a Browser Extension

Each browser is going to work different (and have different options) so you’ll need to learn how to do this in a browser other than Chrome which is what I use. I added the “Emoji for Google Chrome” extension to my browser. Whenever I want to insert an emoji, I just have to click on the icon and search. I then select the emoji which gets added to the holding cell and from there I just copy and paste it.

insert emoji with Chrome browser extension e-learning

One thing to keep in mind is that the emojis will look different on different devices. For example, what you see in your browser may be different than what you see on a mobile device, which will look different than what you see in your document. They’ll still be emojis, but may not be as dynamic as the ones you inserted.

insert emojis look different

Do you have a different way of inserting emojis?

Events

Free E-Learning Resources

Want to learn more? Check out these articles and free resources in the community.

Here’s a great job board for e-learning, instructional design, and training jobs

Participate in the weekly e-learning challenges to sharpen your skills

Get your free PowerPoint templates and free graphics & stock images.

Lots of cool e-learning examples to check out and find inspiration.

Getting Started? This e-learning 101 series and the free e-books will help.


emoji for e-learning header

Emojis are the today’s hieroglyphics. I can imagine thousands of years from now as archaeologists try to reconstruct our culture. They’ll spend years collecting emoji messages and then additional years to decipher them. And after all of that time, they’ll come to learn that we worshiped the goddesses known as Kardashians.

It’s a frightening thought indeed, but one we can counteract in how we use emojis in our training programs.

What Are Emojis? 😕

The first emojis started in Japan. It literally stands for picture character. They’re often used to add emotional context to messages. Although, often they’re combined to communicate more than quick emotional cues. There’s even an emoji version of Moby Dick.

emoji moby dick for e-learning

You can learn more about emojis here:

Emojis for E-Learning Require Context to Communicate 💬

The emoji is a tiny graphic that can be used to reinforce a point, add some emotional context, or a visual bookmark. Be careful when using them to communicate ideas because you may not communicate what you really intend.

Emojis are ambiguous and open to all sorts of misunderstanding and the emojis will appear different based on the device.

If you follow any of the heated discussions around emojis you’ll notice that they comfortably sit in a nest of political correctness. This is something to keep in mind when you deal with gender, skin tones, and cultural differences. You don’t want the emoji to distract from your message.

Emoji for E-Learning Examples 💻

Here are a couple of examples of how I used emojis in a recent Rise training session. In the image below, I used the emoji as a visual cue to add some context to the title. It also makes scanning the screen easier because the emojis do add contrast. It’s a simple use where the emojis adds something to the screen but doesn’t conflict with the content and is less open to misinterpretation.

One challenge, though, is that there may not be an emoji that works for the topic at hand. Then you have to get creative. Which goes back to the warning about miscommunication and ensuring that your creative use of the emoji still communicates what you intend.

In the “Health Supplies” title, I couldn’t find a first aid kit emoji so I used the hospital. It’s not perfect but does work.

emoji e-learning

In the next example below, I used the emojis as bullet points. I like this as it adds a bit more visual interest and shows each point as distinct. But again, the same issue exists when it comes to finding the emojis that work with your content.

There was no emoji for soap or toothbrush. So I went with shower and smiley face with nice teeth (and I assume healthy gums). And there’s not a lot of options for baby wipes thus I selected the baby.

emoji e-learning

As you can see, given the right content and some thought, emojis can play a role in your e-learning course. I’m curious if you’ve used emojis in any of your courses. If so, how? And also, how was it received? Feel free to share in the comments.

Events

Free E-Learning Resources

Want to learn more? Check out these articles and free resources in the community.

Here’s a great job board for e-learning, instructional design, and training jobs

Participate in the weekly e-learning challenges to sharpen your skills

Get your free PowerPoint templates and free graphics & stock images.

Lots of cool e-learning examples to check out and find inspiration.

Getting Started? This e-learning 101 series and the free e-books will help.