Has this happened to you? You’re building an elearning course on site safety and need a woman in a hard hat? Yet when you search your clip art, all you can find is the same people you’ve used in your previous courses.
Now you’re left with the only clip art you haven’t used–a man in a Zoot suit and a Cardinal. You put them in your course and pray that no one notices the characters’ hats are not hard hats at all.

Building scenarios for your elearning courses is a good way to engage your learners and it helps place the course content in a real world context. However, when using clip art to build your scenarios you run into a couple of challenges. One is having enough characters and the other is having the right characters.
If you have the skills, you can draw your own characters. But most of us don’t have those skills, and even if we did, we don’t have the time. The next best step is to buy clip art packages. But eventually you run into the same issue with limited characters and you most likely don’t have the budget to keep buying more clip art. So what do you do?
Create Custom Clip Art
That’s easy. You can create your own characters. In a previous post, I explained how to create your own clip art. You start by inserting a clip art image and then you ungroup it. Once it’s ungrouped, you can modify the clip art by taking away or adding to it. When you’re done, you regroup it, and you’re all set with a custom image to meet your needs.
Today, I’m going to build on that technique and share how to create custom characters for use in your elearning courses and scenarios.
Start with Images in the Same Style
Go to the clip art available through PowerPoint and Microsoft Office Online. Do a search for "people." At this point, don’t worry about an exact image. Instead, look for clean styles that have a variety of people.
When you find an image you like, locate its style and then download all of the images from that style. What I usually look for is body parts, facial expressions, and items that I can use in my scenarios. I’m not really concerned if the image is an office worker or an Eskimo as long as there’s something in the image that I think I can use.
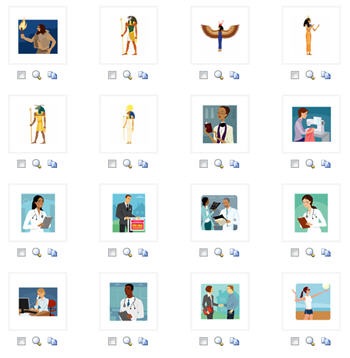
You’ll notice that in style 1280 above there are some images that are obviously good and some that appear to be useless, unless I’m doing a course on ancient Egypt. Regardless, I download them all. You never know what you’ll need and having the same style makes the custom images look like they belong together.
Save Your Clip Art in a PowerPoint File
Spread the clip art over a series of slides so that you can quickly scan the images. Then save the file as style1280.ppt. Now you have a basic repository of all images from that style. It’s easy to open that file and quickly scan the slides for the images you like.

Create a Library of Spare Parts
Once you have all of the clip art saved, start to take them apart. Separate the people from the backgrounds. You can have whole people, or do like the Jacobins, and take their heads off. This way you always have bodies to which you can easily add heads.
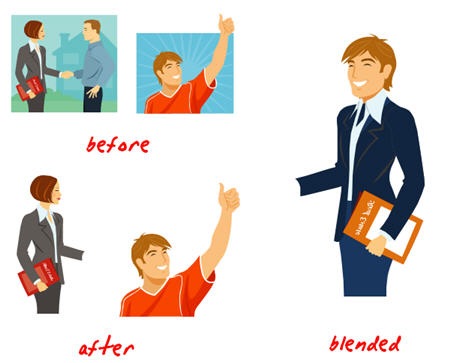
You can go as far as pulling body parts from the characters. Suppose you need a hand, just grab it from your hand slide. Or an arm that’s pointing up? Same thing. A slide with just heads is good because you can quickly grab a head and put it on a different body to create variations of the same character, as I did in the blended example above.
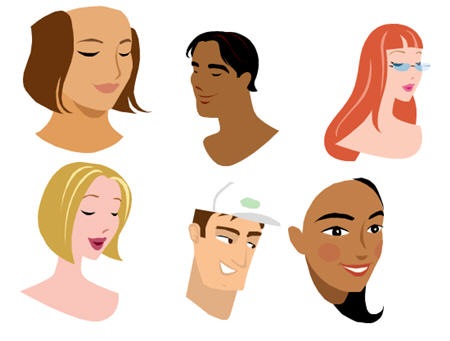
I do the same thing with facial elements such as the eyes, mouth, and nose. Then I can use them to create more expressive characters. As you’ll notice, style 1280 has characters that all look like they’re sleeping or have some sort of personality defect that prevents them from looking the other clip art in the eyes. I don’t want my clip art sleeping and not paying attention to what’s going on in the scenario. So I quickly add eyes.
Here are the basic steps:
- Find a character you like
- Remove the facial features to create a blank face
- Add the facial features
If you need more facial features than the style provides, find other clip art images that are more expressive, ungroup them, and just pull the features you need. They don’t always have to be from the same style since you’re only using a small part.

Create Your Characters
Using the approach above let’s you create hundreds of characters for your elearning courses. You’re no longer constrained by the clip art and you have the freedom to position them in ways that work for you perfectly for your scenarios. By having spare body parts, especially heads and facial expressions, you can create exactly what you need, when you need it.
In the image below, you can see a before and after example. By cleaning up the character and getting rid of the purse and newspaper, I’m able to create a multi-use character for my scenarios.
Here’s what I did with the character below:
- Added the facial expression from one of the faces above
- Repositioned the character’s head and arms
- Changed the color of the clothes
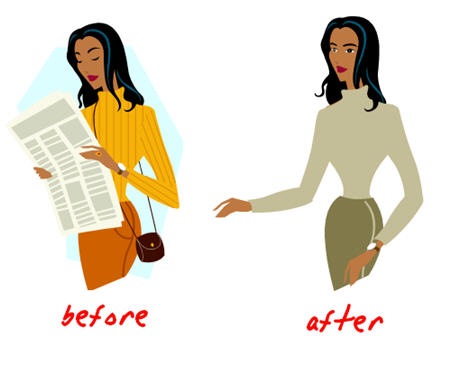
Now, if I am going to build a scenario and quickly need a character, I just copy and paste the woman from the slide into the scene.
In the example below, the lady’s arm position was changed. I also placed her head on another character’s body. This allows me to use the same character in a different scene on a different day. It’s like a virtual wardrobe, only without the cost or dry cleaning.

If you go through a clip art style and separate the characters, you can quickly create a character library for use in your elearning courses. As a best practice, take some time to pre-build characters for future courses.
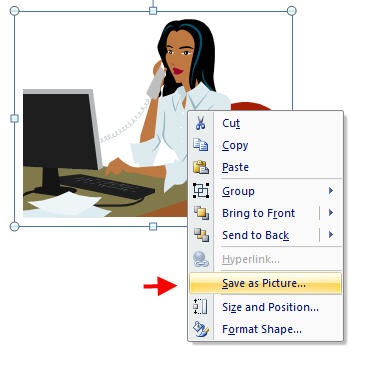
For example, with the lady above, I might name her Cynthia and then create a "Cynthia" folder. I’d make multiple versions of her on the PowerPoint slide. To save her as an image, just right click on her and select "Save as Picture." Over time, you’ll have a collection of clip art characters you can easily use in your courses.
While the techniques take a little practice, they are easy to do and it’s a quick process. Once you master them, you’ll never be at a loss when it comes to any characters you might need for role playing, case studies, or elearning scenarios.
If you have any ideas or would like to share some of your own experiments with the clip art, feel free to add your feedback to the comments section of the post.
Events
Free E-Learning Resources






0
comments