


Great article. It should be required reading for all e-learning designers!
E-learning is a mostly visual medium which means a lot of what we communicate in our courses comes through how they’re structured visually. The challenge is that graphic design and visual communication are their own fields and it’s hard enough to be a good instructional designer let alone a good graphic artist.
I get the privilege of reviewing a lot of courses and understand that many people struggle with the visual part of the course. So in this post, we’ll review some common visual design mistakes that are easily fixed. They won’t make you into a graphic artist, but they should help make your course design a little tighter.
Visual Design Mistake 1: Images are Scrunched & Not Scaled
This is one of the most common mistakes and easily fixed. An image is inserted and then to make it fit or move it, it gets moved from the top or side anchors on the bounding box. This scrunches the image and makes it look a little off.

The fix is to drag it from the corner to scale it and preserve its aspect ratio. It most apps, you hold the SHIFT key and drag to keep it locked while you scale it up or down.
Visual Design Mistake 2: Not Sure Where to Focus
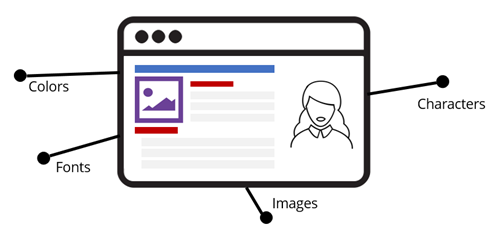
This is a general issue and I’ll address more specific fixes below. Essentially the eye moves across the screen in a pattern. Without a structured design, we tend to scan in a Z pattern. There are some things that disrupt the pattern like colors, size, whitespace, and an object’s relationship to another. That means we can help control eye movement. However, many times the course screens seem to just have a hodge-podge of things on it with lots of conflicting attempts to draw the eye’s attention.

Here are two good fixes:
- Learn more about basic design ideas like the CRAP (contrast, repetition, alignment, and proximity). I strongly recommend the book, The Non-Designer’s Design Book. It’s a must-have for the novice.
- Everything on the screen should be there for a reason. I call this intentional design. If doesn’t help meet your objective, it probably doesn’t need to be there.
Visual Design Mistake 3: Inconsistent Visual Style
Ever take a course where each slide or screen looks different than the other? This usually happens because the developer is building slide to slide. I see this all the time in workshops. What happens is that they make design decisions at the slide level as they work. This leads to spending too much time reviewing every font installed on the computer looking for just the right one. Or going a stock photo site and trying to come up with ideas.
Other elements of visual inconsistency are:
- Too many fonts with no rationale for switching from one to the other.
- Decorative images used to fill empty space rather than contributing to communication.
- Fitting all of the content on the screen so there’s no white space.
- NASCAR-like branding in the course.
Again, I’ll reference intentional design and the need to have a plan around what will and won’t be on the screen. One easy solution is to do some sort of design mapping like the one David Anderson shares. It helps you consider the visual elements of your courses and make design decisions before you start building. Once you’ve narrowed down your intent you should put together a simple style guide. You’ll save time and have visual consistency.
Visual Design Mistake 4: No Visual Hierarchy
This issue relates to the mistake above. If everything on the screen looks equal it’s hard to scan the content and even more difficult to figure out what fits where.
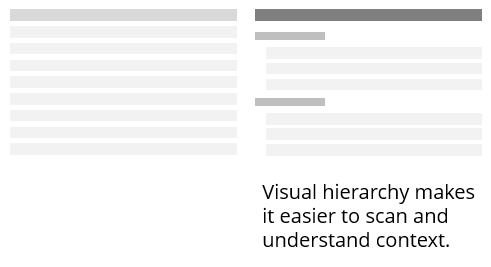
Having a visual hierarchy fixes this. It allows you to chunk content and makes it easier to discern context. The easiest thing is to create a simple style guide with headings, sub-headings, and body text.
Visual Design Mistake 5: Alignment Looks Sloppy & Out of Whack
There are some courses where the margins are all different widths and objects aren’t aligned properly. This makes the course look sloppy and a little out of balance or off kilter. It’s like walking into the room where the furniture doesn’t seem to be staged right and the pictures are crooked. You may not be a home decorator, but you definitely can tell when it doesn’t look right. The same goes with a visual design that is out of balance. It just doesn’t look right. And it may make it bit more challenging to understand the course content.

This is easy to fix:
- Have consistent margins.
- Align objects, left justified is the most common. If you switch the justification, have a reason why.
- Extra space between groups helps communicate that they’re grouped.
- A lot of people use a grid system to keep onscreen objects aligned.
Those are common design mistakes that easily fixed and they help you avoid the Curse of the Frankencourse. If you want to learn more check out the visual design tips in the e-learning community, download this free e-book, and join us at one of our Roadshow workshops.
What do you find to be common visual design mistakes?
Events
- Everyday. Check out the weekly training webinars to learn more about Rise, Storyline, and instructional design.
Free E-Learning Resources
 |
 |
 |
|
Want to learn more? Check out these articles and free resources in the community. |
Here’s a great job board for e-learning, instructional design, and training jobs |
Participate in the weekly e-learning challenges to sharpen your skills |
 |
 |
 |
|
Get your free PowerPoint templates and free graphics & stock images. |
Lots of cool e-learning examples to check out and find inspiration. |
Getting Started? This e-learning 101 series and the free e-books will help. |
You might also like:
3 responses to “Common Visual Design Mistakes That Ruin the Way Your Course Looks”
Feeling compelled to send this link to the entire staff at my company. I probably say each of these things to some colleague almost daily. Great post.
Fantastic. Especially appreciate the idea of designing with intention. I’ve shared this post with my team and encouraged them to read it. Thank you for such a brass tacks, useful piece!


0
comments