


Great tips, thank you. By the way, is it possible to create an interactive email?
E-Learning Tutorial: Easy Way to Make an Image Interactive
April 5th, 2016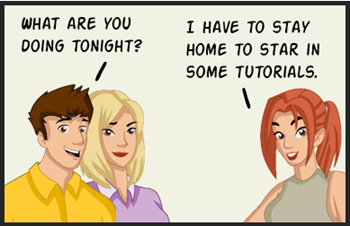
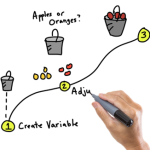
Here’s an easy way to turn a single image into an interactive image. This tip comes in handy if you use collage images for interactive stories or have a great illustration but no way to break it into separate pieces. That’s what I ran into with this recent demo I built for the blog post on simplifying variables for e-learning.
I had a great image of multiple characters, but all I had was a single .png file. I needed a separate image for each character to create my interaction. In my example, I wanted the individual people to have a hover effect. Since I couldn’t separate them into individual images, I used the crop tool to isolate the characters and create a simple interaction.
E-Learning Tutorial Step-By-Step
Learn more by following the steps of the e-learning tutorial below and then watch the video for more detail.
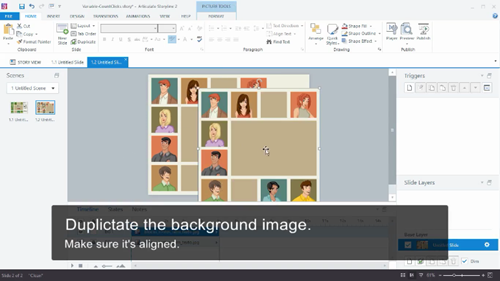
- Insert the image and duplicate it. Make sure the duplicate is on top of the original and perfectly aligned. I also recommend naming all of the assets you place in your slide. I like to lock the original image so I don’t accidentally nudge it out of place.
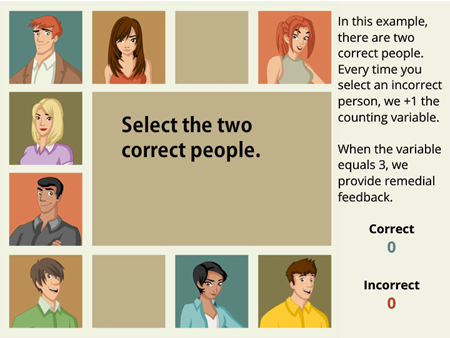
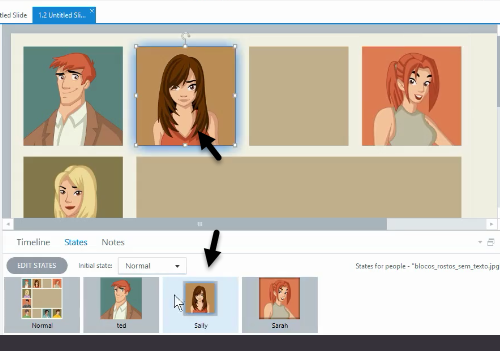
- Create a state for each character. Add a new state for each character on the duplicate image. Then crop each state to isolate the character. You’ll want to make the state visually different so that when you switch to a character state there’s some sort of contrast to the original. Some people like to add glows or resize the new state.
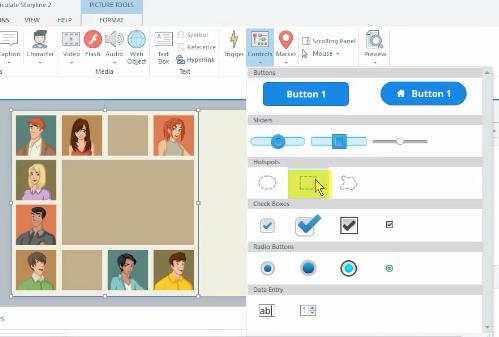
- Insert a hotspot over each character. Since you only have a single image, you’ll need multiple hotspots on top of it to simulate the interaction and change the large image to the isolated character states.
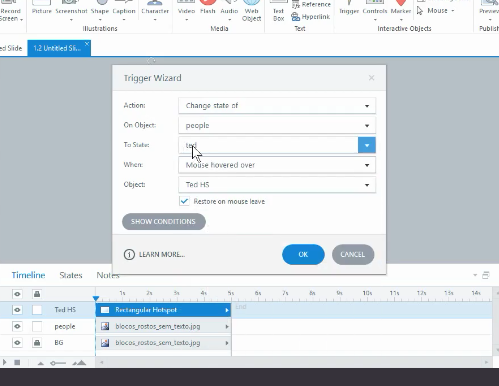
- Add a trigger to the hotspot. Each hotspot triggers a state change to a specific character. Add the first one, and then duplicate it to speed up production. For this demo, I’m using on mouseover, but you can use any action appropriate to your interaction.
Now you have an interactive image built from a single image. It didn’t require you to break the image into smaller pieces or manipulate an illustrated vector.
E-Learning Tutorial Video
Here’s a video that shows the steps in a bit more detail.
Click here to view the e-learning tutorial.
This is a great technique when you’re stuck using an image that you can’t edit. And as you can see, it doesn’t take long to convert the static image into something a bit more interactive.
Events
- Everyday. Check out the weekly training webinars to learn more about Rise, Storyline, and instructional design.
Free E-Learning Resources
 |
 |
 |
|
Want to learn more? Check out these articles and free resources in the community. |
Here’s a great job board for e-learning, instructional design, and training jobs |
Participate in the weekly e-learning challenges to sharpen your skills |
 |
 |
 |
|
Get your free PowerPoint templates and free graphics & stock images. |
Lots of cool e-learning examples to check out and find inspiration. |
Getting Started? This e-learning 101 series and the free e-books will help. |
You might also like:
7 responses to “E-Learning Tutorial: Easy Way to Make an Image Interactive”
You can click the same “correct” person twice and receive the “Good job” message. Perhaps a visited state is needed?
Interested to know how this is done!
thanks for sharing.
This is one of the finest practices when you are new and want to more interactive session.


0
comments