Ooooh, this is great and so useful! I’ve always had trouble with the automtic behavior of the tail of Powerpoint callouts (often the wrong position & width). I didn’t realize it was this easy to make custom callouts. Thanks!!
A Simple Way to Create Custom Callouts for Your Courses
November 5th, 2013
In an earlier post I shared over 100 free callouts for you to use with your online training courses. Who doesn’t like free?
There are plenty of free callouts from which to choose. However sometimes the free ones just don’t work and you’ll need to create your own. So today I am going to show you how to create your own callouts.
How to Create Your Own Free Callouts in PowerPoint
One of my favorite features in PowerPoint 2010 is combining shapes. In fact, I have it as a tab in my PowerPoint ribbon so I always have quick access to that feature. Being able to create shapes in PowerPoint means I can create my own callouts. Here’s how:
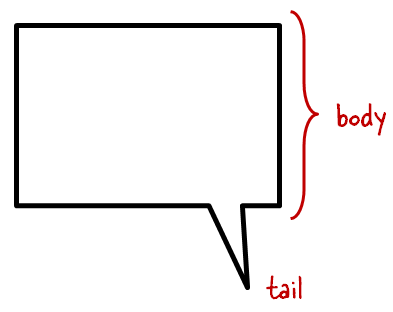
- What is a callout? The callout is made of the body where we add text. And then it has the tail that points in the direction of the talking character. So it’s basically just two shapes. We’ll combine those in PowerPoint.

- Add a shape to the slide. I like rounded rectangles because they’re a bit more organic. Ovals are nice, too.
- Add a tail shape. I like to use the lightning bolt. Some people use the crescent or triangles. It really doesn’t matter as long as you can get the look you want.
- Position the callout so that it aligns with the speaker. This is where creating your own comes in handy. You can position the body and tail before creating the final shape.

- Combine shapes in PowerPoint to create a single shape.
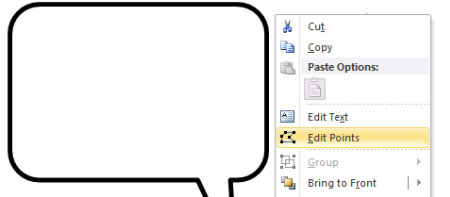
- Edit points to create more customization. If you want to get fancy, use the Bezier curve. Right click on the shape and select edit points to access this feature.

Tutorial: How to Create Callouts in PowerPoint
Here’s a quick video to show how to create your own callouts using PowerPoint.
Tutorial: How to Create a Callout Template
This tutorial shows you how to create a template for callouts that you can use to quickly change the shape of the callouts you create.
Click here to view the tutorial.
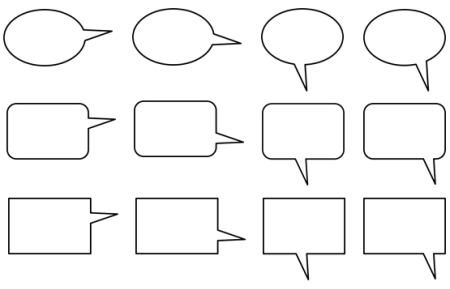
A Dozen Free Callouts
To help you out, I created a few callouts. But I encourage you to create your own.
Click here to download the free callout graphics.
Take advantage of the free downloads. But also learn to build your own callouts. That way you’ll always have what you need when you need it.
If you do create some and want to share them, send me an email and I’ll make them available to the rest of the community.
Events
- Everyday. Check out the weekly training webinars to learn more about Rise, Storyline, and instructional design.
Free E-Learning Resources
 |
 |
 |
|
Want to learn more? Check out these articles and free resources in the community. |
Here’s a great job board for e-learning, instructional design, and training jobs |
Participate in the weekly e-learning challenges to sharpen your skills |
 |
 |
 |
|
Get your free PowerPoint templates and free graphics & stock images. |
Lots of cool e-learning examples to check out and find inspiration. |
Getting Started? This e-learning 101 series and the free e-books will help. |
4 responses to “A Simple Way to Create Custom Callouts for Your Courses”
Great feature. I had trouble finding the shape union feature in PP 2010, so I had to look elsewhere to learn how to add it to my ribbon for access. I think that process would have been useful in the tutorial.
Tx, Tom, for this and for the tutorial you did a while back on combining shapes. After watching that one, I’d played with creating my own callouts. It’s very cool how easy it is, and easy to change color schemes.
Although I don’t like the limitations when repositioning the “tail”, I do like that in PPT and SL you can include text in the default callouts.
Do you think Articulate will make the default callouts more robust and flexible, or is that just an awful lot of work and “too big”, considering all the variations we consumers want


 Actually, I did add a link to the tutorial in the post.


0
comments