The Rapid Elearning Blog

Archive for the ‘Multimedia’ Category


free background music

I like to add background audio to my screencast tutorials. Like many of you, I don’t record in a profession sound studio. Often, I am recording in a home office and there’s always some ambient noise which I find distracting.

Background music can mask some of the ambient noise. Another benefit is that it helps set a pace and tone for the recording.

Free Background Music

There are a lot of “free” sites, but to tell you the truth most of them are useless.

Here are a couple of options that should provide most of the free background music you need. Like always, be sure to check the license and attribution requirements which can change.

free background music

  • YouTube Audio Library: requires a YouTube account so you have access to the studio; free for commercial use, no attribution search options. Lots of variety and easy to filter to find audio based on mood and duration. This is my go-to for tutorials.
  • Mixkit: free; no attribution. They have a good selection of music.

You can search the Internet for other sites, but for my money, either one of those two above are more than what you’ll need. And the price is right.

Events

Free E-Learning Resources

Want to learn more? Check out these articles and free resources in the community.

Here’s a great job board for e-learning, instructional design, and training jobs

Participate in the weekly e-learning challenges to sharpen your skills

Get your free PowerPoint templates and free graphics & stock images.

Lots of cool e-learning examples to check out and find inspiration.

Getting Started? This e-learning 101 series and the free e-books will help.


audio

Background audio is not as common as it once was in e-learning. It is a little old school. And often it is distracting. Also, with mobile technology (and some limitations playing multiple audio tracks) it may create some problems playing the way you intend it.

However, there are times where background audio makes sense.

For instance, I like to use background audio to establish some context. It makes sense to have some ambient audio in decision-making scenarios, for example. You can set a tone or create a more immersive experience for the learner.

In those cases, I like audio like the hustle and bustle of office workers and machines, or a busy street with traffic, or a coffee shop with lots of human activity. I prefer that over music tracks because it feels like you’re there.

I do like to use music tracks. One place where they work well is when I am doing quick screencast tutorials. Sometimes the audio was recorded in a less than ideal room with a little bit of ambient noise like my air conditioner. Adding a subtle background track covers the noise. And the right track with a good beat can set a tone and help move the tutorial along.

There are a lot of studies that also show that some types of music can influence how the brain processes information. Perhaps, a background audio track works for your course to help learners retain content. Not sure, but something to explore.

I will add that an audio track won’t make your boring course less boring. It’ll still be boring, but at least they can listen to something entertaining until they’re done.

Next time you’re meeting with learners as part of your analysis, listen to what their world sounds like. Is it possible to add that to your courses?

I know that there are many of you who will trot out the cognitive load arguments. That’s all good. However, I’d say there are thousands of other examples outside of e-learning, where multimedia effectively integrates audio into the experience. Look at advertising, gaming, and other entertainment industries for ideas.

I’d love to hear how you’re using audio in your courses. Got any tips and tricks? Feel free to share them by clicking on the comments link.

Events

Free E-Learning Resources

Want to learn more? Check out these articles and free resources in the community.

Here’s a great job board for e-learning, instructional design, and training jobs

Participate in the weekly e-learning challenges to sharpen your skills

Get your free PowerPoint templates and free graphics & stock images.

Lots of cool e-learning examples to check out and find inspiration.

Getting Started? This e-learning 101 series and the free e-books will help.


how to theme colors

When someone first starts to build an e-learning course, one of the first things I recommend is determining the colors they’ll use. And from there, create a template and assign the theme colors.

The benefits to theme colors is that they allow consistent use of colors throughout the course; and if one needs to change, it can be changed once, and that change is applied wherever the color is used.

The next recommendation is to determine how to use theme colors. This is often confusing because, you get six theme colors and five derivatives per color. However, there’s no rhyme or reason in terms of how they should be used. They’re just six boxes that can be filled with colors. You can use those boxes anyway you like.

theme colors

But that’s not how you should use them.

I recommend that you define a theme color structure and then use them consistently. This way, every time you build a course the theme colors are set up the same and you can easily swap them out when needed.

How to Set Up Theme Colors

Here are a few ideas that may work:

  • You get six theme colors. But you don’t really need to use all six.
  • Define how you do want to use the colors, whether it’s six or four or two.

theme colors

  • Use theme colors consistently in all templates you create.
  • Courses usually have a main color and an accent color. If you only used two colors, you’d have twelve to use because of the iterations. That may be all you need.
  • Most courses have some positive and negative feedback color, usually green and red. Use two of the theme colors for positive and negative feedback.

Here is one way you could define your theme colors:

theme color recommendation

  • Accent 1: base color. Usually this is your core brand color.
  • Accent 2: accent color. Most brands have an accent color. If you don’t have one, you can use a color theme site to create one. I typically will select a complementary color of the base color.
  • Accent 3: open. Why create a color you don’t need?
  • Accent 4: open.
  • Accent 5: positive color. Green pulled from the base color’s palette. Use this for quiz feedback or icons to show a good decision.
  • Accent 6: negative color. Red pulled from the base color’s palette. Use this for quiz feedback or icons to show a wrong decision.

For the two open colors, I may look through my organization’s web site and marketing collateral and see if there are other secondary colors used that I could add to the palette. Most of the times, two colors are all I need.

If every course is built with consistent use of theme colors, they can be swapped in seconds. This is a critical part of building and re-using interactions and templates. It’s a little more work upfront (which should be done anyway). But in the long-term it offers some time-saving benefits.

Do you have a strategy when using theme colors?

Events

Free E-Learning Resources

Want to learn more? Check out these articles and free resources in the community.

Here’s a great job board for e-learning, instructional design, and training jobs

Participate in the weekly e-learning challenges to sharpen your skills

Get your free PowerPoint templates and free graphics & stock images.

Lots of cool e-learning examples to check out and find inspiration.

Getting Started? This e-learning 101 series and the free e-books will help.


free illustrations for e-learning

Who doesn’t like free?

Recently, I shared these free resources: free animated gifs, free medical images, and free open doodles illustrations.

Today, I’m sharing more because you can never have enough of the free stuff.

One challenge with stock imagery is that it’s stock which means it’s mostly generic and doesn’t meet all needs. Another challenge unfortunately is that most stock imagery lacks diversity. Here’s a good start to fixing that problem.

The designers at blackillustrations.com provide a starter pack of illustrations that are free to use for commercial and personal projects.

free illustrations SVG

What’s included?

  • 50+ illustrations
  • Business images
  • Medical images
  • Multiple formats including PNG, SVG, and AI

They also have a really nice education pack available for $38 that could come in handy for your online training programs. But of course, that isn’t free.

free illustrations diversity

The pack is free, but as always, if you find them valuable you’re able to pay something for the developer’s time. And even though they don’t ask for attribution, it’s a nice gesture. Here’s a post on how to provide attribution in your courses.

Hope these help. If so, thank the developers and pass it on.

Events

Free E-Learning Resources

Want to learn more? Check out these articles and free resources in the community.

Here’s a great job board for e-learning, instructional design, and training jobs

Participate in the weekly e-learning challenges to sharpen your skills

Get your free PowerPoint templates and free graphics & stock images.

Lots of cool e-learning examples to check out and find inspiration.

Getting Started? This e-learning 101 series and the free e-books will help.


manage multimedia

When I’ve completed PowerPoint presentations or e-learning courses, I like to save all of the media assets I used in the presentations and courses and put them in a single location. During production I have multiple versions of the files, which is fine. But when it’s all over, I like a single place for all the media assets. It makes it easy to locate and not have to dig through all of the versions and duplicate files.

In today’s post, I’m going to show you a few simple tips to manage the media assetsin your PowerPoint presentations and e-learning courses.

It does require a couple of free tools which you can download here:

Use Storyline’s Media Library to Locate and Export Media Assets

If you’re using Storyline 360, the easiest way to locate your assets is via the Media Library. From there, you can select the ones you want and export them. Media Library filters by images, characters, audio, and video.

manage media assets e-learning media library Storyline

Steps to export the media:

  • Open the Media Library under the View tab.
  • Filter media by type.
  • Select the media files.
  • Select export and the media files will be saved to a folder of your choosing.

Here’s a quick tutorial on exporting the media files from your Storyline projects using the Media Library.

Click here to watch the tutorial on YouTube.

Use 7-ZIP to Extract the Media Files from PowerPoint & Storyline

7-Zip is a free application to compress and extract files. Both PowerPoint (.pptx) and Storyline (.story) use compressed file formats. Use 7-Zip to extract the file, locate the media in it, and then copy the media to a temporary folder.

manage media assets e-learning PowerPoint 7-zip

Steps to extract the media from PowerPoint or Storyline files:

  • Locate your file.
  • Right-click and select extract.
  • This creates a new folder with the file name.
  • Locate the media folder inside the extracted file folder. In PowerPoint it’s in the “ppt” folder and in Storyline it is in the “story” folder).
  • Copy and paste the folder to your archive location.

Here’s a quick tutorial that shows how to use 7-Zip to locate the media files in both PowerPoint presentations and Storyline files.

Click here it view the tutorial on YouTube.

Use Microsoft PowerToys to Rename All of Your Files to a Single Project Name

Recently, I shared how to use PowerToys to preview SVG files. Today, we’ll review how to quickly rename all of those media files you just dug out of PowerPoint or Storyline.

The steps are pretty simple:

  • Locate the folder with the assets.
  • Select the files you want to rename.
  • Right-click and select “PowerRename” and rename the files.

manage media assets e-learning PowerPoint Microsoft PowerToys Rename

If the titles are something like image1 and you want to rename all instances of “image” to Safety101, that’s going to be real easy. However, the PowerToys renaming is pretty powerful and with a few simple variables, you can do all sorts of things.

Check out the tutorial below where I go through the basics of renaming and how to change the name when all of the text is a bunch of gibberish or not easily found and replaced (which is probably more common).

Click here to watch the tutorial on YouTube.

I’ll admit, I am not always consistent with how I manage my media assets. Sometimes I keep them in a big media folder and sometimes I keep them in project-specific folder. Ultimately it doesn’t matter. When everything is done, I can follow the tips above and quickly have all of my media assets in one folder that I can share or archive.


Events

Free E-Learning Resources

Want to learn more? Check out these articles and free resources in the community.

Here’s a great job board for e-learning, instructional design, and training jobs

Participate in the weekly e-learning challenges to sharpen your skills

Get your free PowerPoint templates and free graphics & stock images.

Lots of cool e-learning examples to check out and find inspiration.

Getting Started? This e-learning 101 series and the free e-books will help.


animated gifs

Recently I shared some free animated gif resources: animated icons and backgrounds. If you’re using Rise or Rise.com it’s as simple as inserting an image. They’re great for novel attention-getters or simple instructional procedures.

free animated gif interaction

If you’re using Storyline 360, with triggers and state changes you can do a bit more to control how the animated gifs work in your course.

Animated gifs are great, but they do loop. Thus, when you insert them in the slide they just continue without end.

To make it more interactive, I like to insert a static image and then interact with the image to activate the animated gif.

animated gif

Click to view the example.

The demo above shows a few ideas:

  • Selected state is like an on/off toggle. Press on the image to toggle between the static version and animated gif.
  • Hover state allows you to mouse over the static image to reveal the animated gif and mouse away when you want to leave.
  • Down state is like the mouseover, but works by pressing down on the image to activate the gif, and releasing the mouse, stops it. I like this option the best.

Bonus idea: do the opposite and start with the looping animation and create an interaction where the animation stops when clicked.

  • Visited state indicates when an object has been clicked. Use the animated icons as markers and then insert the static image in the visited state. This provides a nice visual indication of what’s already been viewed.

View the tutorial on YouTube.

What’s cool about all of the choices above is that they’re super easy to build and don’t require any triggers. Sometimes the looping can be a bit distracting to start, so having an interactive option is nice. I like them because instead of a looping animation it allows the image to become interactive where the user can click to view it and activate the animation.

Events

Free E-Learning Resources

Want to learn more? Check out these articles and free resources in the community.

Here’s a great job board for e-learning, instructional design, and training jobs

Participate in the weekly e-learning challenges to sharpen your skills

Get your free PowerPoint templates and free graphics & stock images.

Lots of cool e-learning examples to check out and find inspiration.

Getting Started? This e-learning 101 series and the free e-books will help.


free animated gif header

Who doesn’t like free and animated .gifs? They’re great for e-learning courses. Use them to create novel attention-getting images, add some humor, or show instructional procedures.

Recently, the AppSumo site gave away free animated .gifs via Lordicon. The offer no longer exists, but the Lordicon site still has a pack for 50 free animated gifs. It’s actually 100 images because you get outline and solid options.

free animated gifs

These are great to use in your Rise 360 and Rise.com courses. Here’s an example course from one of our training webinars on how to create compliance training.

Use Free Animated Gifs As Header Graphics

free animated gif header graphic

Use Free Animated Gifs As Bullet Point Alternatives

alternative bullet points animated gif

Use Free Animated Gifs with E-Learning Interactions

free animated gif interaction

Bonus Idea

I sign up for sites like AppSumo (there are others, too) because often they have media-related offers that can be used in online course development. This Lordicon offer was free and they gave away 1000 animated gifs. They also recently had an offer for Depositphotos images at $.39 each. That’s a great deal. That’s one that seems to come around every few months.

Most of the offers on those sites are not relevant so I ignore them; but I do like it when I come across one of the low cost (or free) multimedia deals that I can use for my courses. It’s worth checking out.

Events

Free E-Learning Resources

Want to learn more? Check out these articles and free resources in the community.

Here’s a great job board for e-learning, instructional design, and training jobs

Participate in the weekly e-learning challenges to sharpen your skills

Get your free PowerPoint templates and free graphics & stock images.

Lots of cool e-learning examples to check out and find inspiration.

Getting Started? This e-learning 101 series and the free e-books will help.


preview SVG files

SVG is an image format that is becoming more common. The challenge is that it’s not always easy to preview the SVG images you have on your computer.

What is an SVG?

SVG stands for scalable vector graphics, which means that it doesn’t have a defined resolution. Instead it’s made up of data in an XML file. So it can be sized up or down without image degradation which keeps the images are crisp.

On the other hand, most images used in e-learning courses are bitmaps. They’re essentially a grid of pixels. For example, an image that is 500×500 is 500 pixels wide and 500 pixels high. When the images is scaled up the pixels increase in size which degrades the image as you see the pixel blocks. With an SVG image you won’t have that type of degradation which is why they’re popular.

How to Preview an SVG File

SVG example

The problem is that you can’t easily preview an SVG (as noted in the image above).

For example, when I download an SVG icon to my desktop, it looks like a web link. I can’t preview image without opening it in the browser. That doesn’t help if I have to click onto every link to preview the SVG files when I look for something specific.

Welcome Microsoft PowerToys! Install it and you’ll get an SVG previewer in the newly empowered File Explorer.

  • Download Microsoft PowerToys.
  • Open File Explorer and go to the View tab to enable the preview pane.
  • Select an SVG file and you’ll see a preview of the image.

preview SVG file

Now you can preview SVG files to your heart’s content.

Events

Free E-Learning Resources

Want to learn more? Check out these articles and free resources in the community.

Here’s a great job board for e-learning, instructional design, and training jobs

Participate in the weekly e-learning challenges to sharpen your skills

Get your free PowerPoint templates and free graphics & stock images.

Lots of cool e-learning examples to check out and find inspiration.

Getting Started? This e-learning 101 series and the free e-books will help.


free illustrations

Of course your e-learning software comes with a great assortment of e-learning templates and characters to use in your online training courses. But, really, who doesn’t like additional free illustrations to use in e-learning courses?

Recently, I shared a few free illustrations that can be modified for your online training. Hopefully, you found a use for them.

Free Illustrations for E-Learning

Here are a few more from Open Doodles. What I like about them is that they’re simple and they’d work great for an informal course or one where you want a more organic look and feel.

free illustrations

Modify the Free Illustrations

What’s nice about these illustrations is that you can modify them simply with a few clicks.

edit free illustrations

On the site, you’ll see the option to download the graphics, modify them or even download some compositions.

free illustration compositions

Ideas for Free Illustrations

Download the files as SVG and you can edit them. If you’re not sure how to use them, they offer a few examples that may give you some ideas.

I’d consider them to be good decorative images to either set a tone for your course or add some visual interest.

free illustrations ideas

Hope you enjoy. Be sure to give props to those made them available.

Events

Free E-Learning Resources

Want to learn more? Check out these articles and free resources in the community.

Here’s a great job board for e-learning, instructional design, and training jobs

Participate in the weekly e-learning challenges to sharpen your skills

Get your free PowerPoint templates and free graphics & stock images.

Lots of cool e-learning examples to check out and find inspiration.

Getting Started? This e-learning 101 series and the free e-books will help.


free illustrations

Rise 360 is a great application to create e-learning. It’s form-based so it’s easy to use. Pull all of your instructional content together. Then go into Rise 360, select from dozens of various content blocks, and add your content.

Super easy. No programming required and because of the way it works, it doesn’t require any design work.

But what do you do if you want some graphics or illustrations to go with your Rise 360 courses?

Check out these open source illustrations from unDraw.co. They look nice and they’re free to use for commercial projects. You can download PNG or SVG versions of the illustrations.

free illustrations

Here’s why I think these free illustrations work well with Rise 360.

  • In Rise 360, you set a core accent color.

free illustrations for Rise 360

  • In unDraw, you set an accent color.

free illustrations for unDraw

  • Use the same accent colors for the Rise 360 course and the unDraw illustrations and they look like they belong together.
  • The illustrations are editable if you use an SVG editor. And because they’re open source you can customize them to your hearts desire.

Here’s an example where I matched the accent color in Rise 360 with the free illustrations from unDraw.

free illustration example

If you need some quick, easy-to-use free illustrations to complement your Rise 360 courses, then give these a try.

Events

Free E-Learning Resources

Want to learn more? Check out these articles and free resources in the community.

Here’s a great job board for e-learning, instructional design, and training jobs

Participate in the weekly e-learning challenges to sharpen your skills

Get your free PowerPoint templates and free graphics & stock images.

Lots of cool e-learning examples to check out and find inspiration.

Getting Started? This e-learning 101 series and the free e-books will help.


how to export video for LMS

Recently, I did a webinar on transforming PowerPoint content into an interactive e-learning course. One of the tips is to save your PowerPoint file as a video. Here’s why I like that tip.

Save PowerPoint as Video

Assuming the PowerPoint slides look good and the content doesn’t need to be restructured, why spend a lot of time copy and pasting from PowerPoint into a different application? Save a lot of time by outputting your PowerPoint slideshow as a video.

All of your animations, narrations, inserted media, and slide transitions remain in a single file. If all you’re doing is sharing the content, this is an easy way to go. It’s one click to create the video.

Here’s an example from the Duarte group. They built this really dynamic presentation in PowerPoint that they shared in a previous version of PowerPoint. In includes animations, narration, slide transitions, and even other video. Here’s an example of the file as a video.

Click here to view the example on YouTube.

Assuming the slides are fine and you don’t need to rework your content, saving as video is a no brainer. The challenge is how to get the video into your LMS so you can track it as a course.

How to Get the Video Into Your LMS

Articulate 360 comes with a number of great authoring tools. It also comes with Review 360 where you can upload your courses and solicit feedback from your clients and subject matter experts.

Another nice feature is that you can upload a video into Review 360. And from there, export the video for LMS. This lets you set the LMS tracking options and how to measure completion.

upload video to LMS

You’ll get a .zip file with the video and all of the LMS required files so that you can load it on the LMS and treat the video like a trackable course. Super fast and super simple.

Click here to view the tutorial on YouTube.


Events

Free E-Learning Resources

Want to learn more? Check out these articles and free resources in the community.

Here’s a great job board for e-learning, instructional design, and training jobs

Participate in the weekly e-learning challenges to sharpen your skills

Get your free PowerPoint templates and free graphics & stock images.

Lots of cool e-learning examples to check out and find inspiration.

Getting Started? This e-learning 101 series and the free e-books will help.


low recording levels

If you find that you’re microphone audio levels are too low, here are some tips that may help.

I record a lot of demos and webinars. With that comes the quest to find decent quality audio. I have a boom arm on my desk that I can swing into action. On it I have a Blue Yeti microphone. Overall, I really like the quality of the sound and this set up works great for recording tutorials where I work from my main screen. I also like that the microphone has its own gain controls which resolves the issue I have below.

However, the challenge with the Blue Yeti is that I work from a home office and if people outside my office are yacking, then the mic picks up their chatter. I can usually work around it a bit. However, webinars are live and I have less real-time control.

For webinars I prefer to use a headset mic because they seem to do a better job blocking out background noise. I’ve used a Plantronics mic for years. It does a great job recording my voice and blocking out the other home office sound. However, the audio is a bit thin and sounds like I’m Lionel Richie on a phone, checking to see who’s home.

Because of this, I recently purchased a Beyerdynamic headset mic. It’s a bit higher end but it’s a great mic with a nice sound. However, it is an XLR mic which requires a different connection to my computer and a pre-amplifier.

And this is where the Windows 10 audio issue is exposed and fixed.

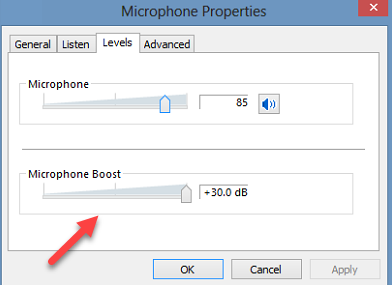
Where’s the Microphone Boost?

Like many Windows 10 users, the audio recording input signal is too low. Earlier versions of Windows had a way to boost the recording input, as seen in the image below. However, in recent versions, there’s no option.

audio recording input low

If you do not have the option to boost your audio input, one potential fix is to select the Advanced tab from the Microphone Properties window and deselect the option to “Allow application to take executive control of this device.” This works for some people.

The other option is to use a pre-amp. I have an older Focusrite Scarlett 2i2 which is generally simple to use and should work. However, I ran into an issue. The pre-amp has an input range of 1 to 10, but it only seemed to have an impact from about 8 to 10. I just wasn’t getting enough initial boost and the 8 to 10 range didn’t give me enough wiggle room. Since it’s a USB pre-amp, I figured that perhaps it just didn’t have enough juice for the phantom power and signal boost since it was pulling its power from the computer.

Focusrite Clarett pre-amp

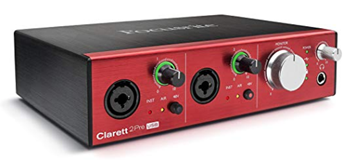
So I tested the Focusrite Clarett. It has its own power source and not pulling it from the computer via USB. However, I ran into the same issues. The range was limited to 8 to 10 with little room for adjustments. Both Focusrite devices are good devices and should work. In fact, on older versions of Windows, the Scarlett worked perfectly. However, with the latest version of Windows 10, I just can’t seem to boost the input levels and there no longer seems to be a way to do it from the drivers or the audio control panel.

So where’s the fix?

Install APO Equalizer. It’s an open source project on Source Forge that includes a pre-amp which will boost your incoming microphone signal. In addition, there are some other audio options to enhance your audio input and outputs.

APO eaulizer for low audio recording volume

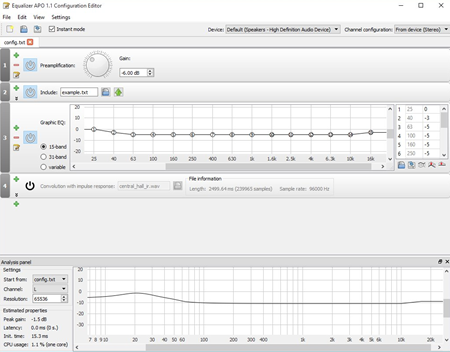
I’m no audio engineer or APO Equalizer pro. However, the installation is easy, and the setup is pretty simple. Don’t let all of the meters and lines make it seem complicated. Once it’s set, you really shouldn’t have to do much with it. Below are some resources to help you get set-up.

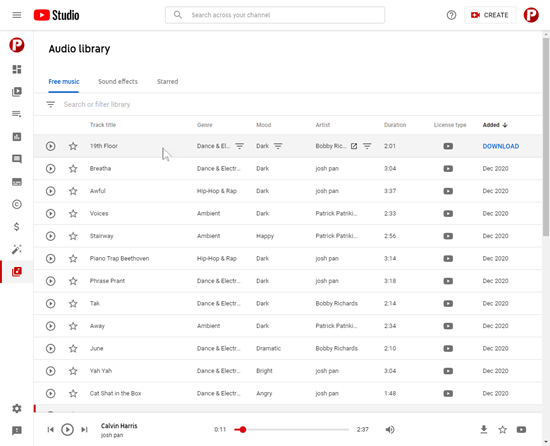
The YouTube tutorial above does a great job showing the basics. It’s probably worth learning a little more about some of the filters and how they can improve your audio input. In fact, many of us record in less than ideal circumstances where we may have background noises like air conditioners or computer fans. Some of those filters may help fix the issues.

If you have issues with low recording volumes, hopefully these tips help. If you have additional tips, feel free to share them in the comments section.

Events

Free E-Learning Resources

Want to learn more? Check out these articles and free resources in the community.

Here’s a great job board for e-learning, instructional design, and training jobs

Participate in the weekly e-learning challenges to sharpen your skills

Get your free PowerPoint templates and free graphics & stock images.

Lots of cool e-learning examples to check out and find inspiration.

Getting Started? This e-learning 101 series and the free e-books will help.