The Rapid Elearning Blog

Archive for the ‘Uncategorized’ Category


Articulate Rapid E-Learning Blog - create your own characters for online training

In this blog we’ve learned how to create custom characters with clip art. We’ve also learned to create our own illustrated characters in PowerPoint. And today, we’ll learn another way to create custom characters.

A few months ago, Mike Taylor, one of our community managers had a great post on how to create your own graphics for your online training courses. It was one of those posts so good that I want to make sure it didn’t slip through the cracks.

You can watch his tutorial below to see how easy it is to create custom characters using simple shapes.

Click here to view how to create custom characters.

Free Downloads

Here are some free downloads to help you get started:

  • Here’s the PowerPoint file that Mike used. You can use it to follow along with what he shows or deconstruct the images and build your own.
  • Here are the individual image files if you want to use the characters Mike created. I isolated the characters and saved them in the .png format. If you want to edit them, you’ll need to use Mike’s file. However, I recommend creating your own and working from those. This way you learn to make your own and you always have quick access to the starter characters.

Articulate Rapid E-Learning Blog - download these custom characters for online training

How Would You Use These Custom Characters?

These types of characters work great for safety training and for procedural training where you have to show step-by-step sequences. They’re easy to understand and easy to create. The key is to keep them simple.

Articulate Rapid E-Learning Blog - use custom characters to create online training

Can you use these characters? How would you use them in your own training? What characters and industries would you add?

Your next step is to watch the tutorial and practice building your own characters. This way when you need a custom character you can quickly make it. If you do create your own characters, please share with the rest of us so we can see what you did.

Events

Free E-Learning Resources

Want to learn more? Check out these articles and free resources in the community.

Here’s a great job board for e-learning, instructional design, and training jobs

Participate in the weekly e-learning challenges to sharpen your skills

Get your free PowerPoint templates and free graphics & stock images.

Lots of cool e-learning examples to check out and find inspiration.

Getting Started? This e-learning 101 series and the free e-books will help.


Articulate Rapid E-Learning Blog - drag and drop feedback

Interactive elearning is all the rage and building drag and drop interactions is getting easier than ever. Drag and drop interactions are great because they get the learners to interact with the screen objects and make decisions. The dragging of objects is also usually more engaging than the more common click interactions.

Here are some previous blog posts on drag and drop interactions for those less experienced:

Since many of you are just getting started with elearning and creating drag and drop interactions, I thought we’d review a few ways to provide feedback to the learners as they interact with the screen using drag and drop interactions.

The assumption is that they are making a decision which requires that they drag an object to a specific location (we call that a drop target). Once the object is dropped on the target, they get some sort of feedback acknowledging what they did. That feedback can be immediate or require an additional action, like a submit button.

Drag and Drop Feedback: Snap to Target

The snap-to-target mechanism lets the user quickly know that the object has been delivered to an acceptable target. The snap feature also helps keep objects on the screen aligned so that everything looks pretty.

Articulate Rapid E-Learning Blog - drag and drop feedback example 1

Click here to see the drag and drop example.

I like the snap-to-target option because it lets the person know that they moved the object to a proper location. If you don’t use a snap-to-target the learner may make a correct decision but not have the object aligned enough to the target to register the placement of the object.

Drag and Drop Feedback: Return to Original Location

Many drag and drop interactions are tied to the quizzing feature of the authoring tool. In that case they have some sort of submit button or way to indicate the choice and track the results and, in turn, provide feedback.

There are plenty of times where you may just want them to have the drag interaction but not require the quizzing feature. But you do want to give them correct/incorrect feedback. A simple solution is to only allow correct responses and have incorrect responses return to their starting point.

Articulate Rapid E-Learning Blog - drag and drop feedback example 2

Click here to see the drag and drop example.

I like this option because they are easy to build and are great for quick knowledge checks. They’re also great to add at the forefront of a topic. For example, let the learner make some decisions and then provide immediate feedback. It helps them see how much they know before you dig in deeper.

Drag and Drop Feedback: Add Feedback to the Object

When an object is dropped in the correct area, have it change the way it looks. A common state change is to add a check or X mark on correct/incorrect choices. However any type of visual cue works. The key is that you are letting people know what’s right and wrong as they make their decisions.

Articulate Rapid E-Learning Blog - drag and drop feedback example 3

Click here to see the drag and drop example.

I like this because of the visual indications of correct and incorrect. It’s an elegant solution. It’s also helpful to add color cues. For example, red = wrong and green = right. That’s a better cue than a single color.

Drag and Drop Feedback: Feedback Box or Layer

Feedback boxes serve as gate screens. They stop the interaction and allow you to provide feedback. It’s common to have them sit on top of the content which creates space to add more content without taking up the interaction screen’s real estate.

Some people use the default feedback boxes (like I did) and others use layers or lightbox slides. You can also customize the default feedback which opens the doors to all sorts of creative ideas. It doesn’t really matter which you use. They key is using a gate to halt the interaction and give the learner time to process what’s going on.

Articulate Rapid E-Learning Blog - drag and drop feedback example 4

Click here to see the drag and drop example.

I like gate screens because they do delay the course. Sometimes we get so used to clicking and dragging and seeing all sorts of new content that we don’t always process it or have enough time to do so.

A gate screen helps slow things down a bit and lets the person regroup. Because it slows things down, you want to be sure that you’re using it at the right point. There’s nothing worse than using a gate screen where it isn’t needed and requiring a bunch of extra clicks. Actually, there probably are worse things, like falling into a pond full of piranhas with a slab of bacon strapped to your back. But you get my meaning.

There are a lot of ways to provide feedback in your courses when using drag and drop interactions. Hopefully these four help with your next course design. Let me ask you, when would you choose one of the methods above over the others?

Events

Free E-Learning Resources

Want to learn more? Check out these articles and free resources in the community.

Here’s a great job board for e-learning, instructional design, and training jobs

Participate in the weekly e-learning challenges to sharpen your skills

Get your free PowerPoint templates and free graphics & stock images.

Lots of cool e-learning examples to check out and find inspiration.

Getting Started? This e-learning 101 series and the free e-books will help.


Articulate Rapid E-Learning Blog - instructional techniques for effective online training

Effective online training involves more than just sharing information. It also requires the learner practice and apply what you’ve taught them.

Despite our best efforts many online courses are still mostly linear. As I’ve mentioned before, that’s probably fine for those annual compliance courses that aren’t tied to specific performance objectives. But if you want to build courses that are effective and engaging you need to focus on sound instructional design and the activities required to learn and prove understanding.

Effective Online Training Starts with the Tell, Show, & Do Technique

A common approach to online course design is to Tell, Show, and Do. It makes sense because it covers the basics.

  • Tell them what they need to know or provide context that is critical to what they need to learn. For new learners, the context is important and helps them understand where the learning fits in the big picture. Telling also allows you to speed things along and make acquisition of the information faster.
  • Show them so they can see what they are to do. This lets them see the proper sequence of events and allows you to fill in any gaps or answer questions they may have. One thing to keep in mind with showing is to focus on the positive action. Sometimes we’ll show a negative action as an example of how not to doing something, but that could end up being what the learner learns.
  •  Do the task lets the learner practice doing what you just showed them. The goal is to get the learner to practice and then apply what they learned in a real-world context. The application of the new skills can be part of the “Do” process or as an added component. For example, when I first started out my manager used to say that the instructor did the Tell & Show and the learner did the Do & Apply.

Articulate Rapid E-Learning Blog - tell, show, do for effective online training

The Tell, Show, and Do model is a common instructional technique because it lets you build context and demonstrate the desired performance. And in the end the learner gets to practice applying what they learned. What’s also good about this technique is that it nudges you away from the linear, click & read model that is so prevalent with a lot of online training.

Tell, Show, Do, Practice & Review to Build Effective Online Training

When I was training junior level instructional designers I liked to say “Tell, show, do! Then practice and review!” because it rhymed and was an easy mantra to remember the essential steps required in the learning process. It covers everything from providing the core information to debriefing the learning experience which is more involved than the more common Tell, Show, and Do technique above.

  • Tell them what is going to be taught and why so that you can build context. This helps them see the relevance and how it fits in their world.
  • Show them what they are going to do so that they can see what’s expected and you can address common questions and concerns during the demonstration.
  • Do the task. Have the learners do it so they can get the initial hands-on experience and you can observe and give them the feedback to make sure they’re doing it right.
  • Practice the tasks. In the real work environment they may get limited touches on specific tasks. The learning environment is controlled so you can have them practice a lot more than normal to gain mastery. I like to let them practice on their own without a lot of oversight (assuming you provided appropriate feedback in the “Do” stage).
  • Review the practice activities and debrief. What did they learn? How comfortable are they doing them? Are they able to accomplish the learning objectives? What are the next steps?

Articulate Rapid E-Learning Blog - tell, show, do, practice, review for effective online training

I like this technique better than the first one because it includes the review and debriefing. This is also a great way to structure a peer coaching process when mentors or peer coaches do a lot of the training. It gets them to do more than just show how something is to be done.

Build Effective Online Training by Starting with an Activity

Instead of building context and showing them what to do, have them start by doing an activity first. I call it the HAT technique (because I needed three bullets).

  • Hands-on activity: Start with an activity. This gets them engaged and thinking through the instruction. They can play and test things out. It’s also a way for those more experienced to go through the training at a different pace than those less experienced.
  • Advice: You can provide feedback or advice during the activity as part of a guided process, or you can wait until they’re done to debrief what they did and learned. This helps fill any gaps and answer questions exposed during the activity.
  • Tell: Once they complete the activity and debrief you can build additional context with more detail.

Articulate Rapid E-Learning Blog - hands on, advice, tell for effective online training

This technique is effective and starts by engaging the learner. However one of the challenges with this approach is that it requires more time to think through and build effective learning activities. On top of that, many clients demand a more linear solution like the common Tell, Show, and Do technique. But by doing the activity first you get people engaged and constructing their own understanding sooner. It also helps them identify their own knowledge gaps which helps build context for the instruction you want to provide.

Regardless of the technique you use, the key is to get them doing something to practice and demonstrate what they know. This will help you move past the linear information sharing and towards more effective online training.

Events

Free E-Learning Resources

Want to learn more? Check out these articles and free resources in the community.

Here’s a great job board for e-learning, instructional design, and training jobs

Participate in the weekly e-learning challenges to sharpen your skills

Get your free PowerPoint templates and free graphics & stock images.

Lots of cool e-learning examples to check out and find inspiration.

Getting Started? This e-learning 101 series and the free e-books will help.


In a previous post I showed an easy way to convert your linear course to an interactive story. The essence of it is to reframe your content so that the information is aligned to a relevant scenario and then find the images to represent key points in the scenario.

The images are the visual cues; and the learner clicks on an image as a means to get the information. From there you can make it as simple or complex as you like from basic information to elaborate scenario.

Here’s the demo I used in the post.

Articulate Rapid E-Learning - how to create an interactive story template & free PowerPoint template

Click here to view the demo.

How I Created the Interactive Story

I received a lot of questions on how I built the demo used in the blog post. So I created a series of tutorials that walk through the steps. I also cleaned out the PowerPoint file and created a template for you to use if you like.

You can view the tutorial below and download the free PowerPoint template here.

Click here to view the interactive story tutorial.

How to Create Your Own Interactive Story

You’re free to use the free PowerPoint template above if you want. However, the images may not work for you so you’ll need to acquire your own to use in the collage. In that case you can do one of two things.

  • Create your own photo collage. Select some photos and stich them together to create a collage. There are some products on the market that will create a collage for you based on a selection of photos. Or you can add them to a PowerPoint screen and make it look like a collage.
  • Create a collage frame and add your content inside the frame. This is more like a comic style layout. You create the framework and then add the images to it.

I prefer the frame structure because it’s easier and once you have the frame built you can use it on other projects.

Take up the Challenge to Create an Interactive Story

David did a follow up elearning challenge in the community to go with the original blog post. The challenge activity is a great way to practice building this type of interaction and get some ideas from others. Here are some examples created by your peers.

You’ll notice that while the post may have centered on the photo collage, the participants in the challenge came up with a number of useful treatments that go beyond the challenge. I’m sure there’s something you can glean from them.

Articulate Rapid E-Learning - examples of interactive story templates and elearning examples and samples

Events

Free E-Learning Resources

Want to learn more? Check out these articles and free resources in the community.

Here’s a great job board for e-learning, instructional design, and training jobs

Participate in the weekly e-learning challenges to sharpen your skills

Get your free PowerPoint templates and free graphics & stock images.

Lots of cool e-learning examples to check out and find inspiration.

Getting Started? This e-learning 101 series and the free e-books will help.


Articulate Rapid E-Learning Blog - flip the course design

You’re the site safety manager and arrive at company headquarters to find the workplace in disarray. Tables are knocked over, the place is littered with documents, and your cubicle is covered in slime. And you can’t find anyone in the building.

Footage from the security cameras reveal that the site’s been overrun by aliens and all of the staff has been abducted. What do you do? How does the company’s disaster recovery plan handle alien abductions?

Create a Flipped Perspective

Goofy scenario? Perhaps. But here’s something to consider. Course content that is too close to the learner’s world may hamper the learning experience. Sometimes it makes sense to use a flipped perspective and create something novel that puts the learner in a situation different than the world in which they reside?

Articulate Rapid E-Learning Blog - create a flipped course

It’s important that the courses we build are relevant and meaningful. Often I’ll use real-world content to build out interactive scenarios. However, there are times when people get so caught up in the real-world training content that they lose sight of the course objectives. For example, I used to have a fake CPR demo to teach some software features and production tips. But every time I’d show the demo, I’d get complaints about the content in the CPR training (even after I said it’s just filler content and not a real course).

The objective wasn’t to teach CPR. That was just content I could use to teach course design. But because the CPR content was so similar to what they already knew, it interfered with the learning process.

And that’s the key point: if the situational content is too close to the real-world they may not be able to see past the content and focus on the real learning objectives. A flipped perspective gets the learner away from the details of their day-to-day routines. They aren’t distracted by those things they know and you can get them focused on learning what it is they need to know.

Tips on Flipped Perspective

Articulate Rapid E-Learning Blog - tips on how to create a flipped course

If you do change the content around, here are a few basic considerations:

  • Changing perspective exposes different opportunities. We tend to be myopic so seeing things from a different angle helps us move past our routines or presuppositions. This opens the doors to creative approaches we may not have considered with real-world content.
  • Make sure the tasks are relevant. The content or environment may be flipped, but the application of the learning should still be relevant and transferrable to what they need to do in real life. In the example above, alien abduction is a form of disaster, but the process for responding to a disaster is the same whether abduction, earthquake, or hurricane.
  • Create a clear way to assess their mastery of the desired skills and their level of understanding. Again, be clear about the learning objectives so that they are the focal point and you can measure them effectively.
  • Add a humorous or interesting perspective to the activities. In some of my workshops we train people how to shoplift as an approach to designing a course on how to prevent shoplifting. A novel approach like this allows for fun activities and great discussion. All of that makes the learning experience engaging. It’s also a way to get some nice watches from the local stores.

Alien abductions may not happen (or maybe they do); but if they did the process for disaster recovery is probably similar to that of other incidents. But what makes the abduction narrative work is that it’s different and forces the learner to think through the same content in a slightly different way.

So in your next course, look for ways to flip the perspective. Find a way to put the learning content in a world that’s different than the learners’. This gets them to think through the same tasks in a new way.

Events

Free E-Learning Resources

Want to learn more? Check out these articles and free resources in the community.

Here’s a great job board for e-learning, instructional design, and training jobs

Participate in the weekly e-learning challenges to sharpen your skills

Get your free PowerPoint templates and free graphics & stock images.

Lots of cool e-learning examples to check out and find inspiration.

Getting Started? This e-learning 101 series and the free e-books will help.


Articulate Rapid E-Learning Blog - summer reading for online training book

It’s almost summer time and what’s better than laying in a hammock reading a book on how to build online training? Not much, I’m sure.

I’m always asked about books to read to get better at building online training courses. Here are a few books I’ve mentioned at recent workshops and below that a list of books I’ve mentioned in previous posts.

New Online Training Book Recommendations

Here are a few books I haven’t mentioned before that I think work for those just getting started:

Articulate Rapid E-Learning Blog - online training book recommendations

Online Training Books: Getting Started

The links to Amazon books may produce a slight commission.

Learning the Articulate Software

Blog Posts with Online Training Book Recommendations

I’ve mentioned a few books in previous posts. They cover a broad range of topics because today’s course designer needs to understand instructional, visual, and interaction design.

Online Training Book Recommendations

Here’s a list of the books mentioned above in case you don’t want to go digging through the previous posts:

Course & Instructional Design

Working on Projects with Clients

Visual & Presentation Design

User Design

PowerPoint

You can also finds a pretty long list of other books in the elearning community. Enjoy your summer reading!

Events

Free E-Learning Resources

Want to learn more? Check out these articles and free resources in the community.

Here’s a great job board for e-learning, instructional design, and training jobs

Participate in the weekly e-learning challenges to sharpen your skills

Get your free PowerPoint templates and free graphics & stock images.

Lots of cool e-learning examples to check out and find inspiration.

Getting Started? This e-learning 101 series and the free e-books will help.


Articulate Rapid E-Learning Blog -  3 things every new instructional designer needs to know

Many of you are transitioning from traditional classroom training to developing online training. That means you need to learn new software and production techniques, as well as new ways to design your courses.

This transition can be a bit confusing and a source of stress. So today I’ll share a few of the tips I share at my workshops for new elearning developers.

It Takes Time to Be a Pro If You’re a New Instructional Designer

It would be great if we could just start building online training courses and know everything the first time we build a course. But that’s just not going to happen. It takes time. And that’s OK. You have to start somewhere.

There are things you can do make sure you’re moving in the right direction, but the first course you build is not going to be the best course you ever build. To tell you the truth, I cringe at some of my early stuff. At the time I thought it was great, but I look at it today and I can see that I was a bit limited in my understanding of how to build online training.

Articulate Rapid E-Learning Blog -  the essential of elearning course design

There are three essential elements to course design:

  • What content needs to be in the course to meet its objectives?
  • What will the course look like?
  • What is the user supposed to do with the content learned?

If you focus on those three, you’ll invest your time in the right areas.

Practice, Practice, Practice Helps the New Instructional Designer

I’ve mentioned this before on the blog, if you want to be good at your craft it takes practice. There’s no way around it. The challenge is getting enough practice so that when you design an elearning course you’re ready.

My son just started soccer. I told him that if he waits to be with his team, he’ll get limited touches on the ball. In a game or scrimmage he may only get the ball in 3-6 second chunks. At that rate, he’ll improve slowly. However, if he practices ball handling skills in the backyard, he’ll get hundreds of touches.

Articulate Rapid E-Learning Blog -  practice will make you a better course designer

Think of elearning practice the same way. On a real course, you get limited chances. So you have to break down the elements of course design into small chunks and then take the time practice those.

I like the elearning challenges that happen in the community each week. They’re designed to be small activities that are easy enough to do without a big time commitment. If you do them you’ll get more “touches” and when it comes time to build a real course you’ll have fleshed out some ideas and learned new production techniques.

There are Twenty Ways to Do Things If You’re a New Instructional Designer

One point of frustration I see with people who are just learning is that we want to know how to do everything right and we want to be really efficient doing it. Guess what? It won’t happen if you’re just getting started. If that stresses you out, “here’s a little song I wrote, you might want to sing it note for note…”

A point I make in the workshop is to not worry about what everything looks like under the hood. If the course works the way you intend it to and the end user is fine, then don’t worry about what it looks like in the source file?

Who cares if you aren’t the most efficient developer? The efficiency comes with experience, especially when you have to edit that mess of a file. But that’s OK because that’s how we learn. Often the expert shortcuts and efficient tips don’t make sense until we have some context anyway. So why stress it?

A great way to learn faster is to jump into the community and ask for help. When you show someone what you’re doing, you’ll get others with more experienced who will offer the tips and tricks that will make you more efficient. If you’re just getting started then being part of the community is a must.

Here’s the deal, we all have to start somewhere. Sometimes the process of getting started can be a bit frustrating. Understand that it’ll take time, create opportunities to practice, and don’t worry about being perfect. The more you do this stuff, the better you’ll become.

What tips do you have for the person just getting started?

Events

Free E-Learning Resources

Want to learn more? Check out these articles and free resources in the community.

Here’s a great job board for e-learning, instructional design, and training jobs

Participate in the weekly e-learning challenges to sharpen your skills

Get your free PowerPoint templates and free graphics & stock images.

Lots of cool e-learning examples to check out and find inspiration.

Getting Started? This e-learning 101 series and the free e-books will help.


Articulate Rapid E-Learning Blog - how to engage people with learning objectives that matter

Years ago I was taught that all courses had to have a bullet point objectives screen. In fact it was mandatory in most of my early projects. And I know from talking to many of you, that’s still the case in your own organizations.

In fact, in a recent workshop when I addressed this as an issue, someone quoted Robert Gagné’s second step of his nine steps of instruction: “Tell the learners the learning objective.” Her organization interpreted step two as literally detailing the objectives by listing them as a series of bullet points.

While there’s value in having a list that clearly describes learning objectives, often it’s a precursor to cookie cutter courses that are not very engaging or meaningful. But is there a way present the learning objectives that doesn’t require a bullet point list?

Essentially the goal is to have the learner understand the purpose of the course, why they’re taking it, and what they’ll learn. Bullet lists are an easy way to detail those things and probably work best for real simple courses. But my guess is that most people just click past the list to get to the course. What can you do to get them to understand the objectives and engage them at the same time?

Create Learning Objectives That Challenges the Learner

Challenge them upfront. The challenge could be some sort of assessment to gain understanding of their current skill level. But most important about the challenge is that it exposes what they don’t know. And this exposition lays the foundations for clarifying the objectives.

Here’s a video that’s been making its way around the internet. If you haven’t seen it, give it a look. It’s interactive and requires your full attention. As a warning, it’s in French. That’s not the bad part. Really. The English captions do drop the F bomb, so be warned. [Update: Unfortunately it seems the interaction has been removed] however, here’s a video of the intense game play.

Articulate Rapid E-Learning Blog - an example of learning objectives

Click here to view the video.

Imagine this was the beginning of an elearning course about water safety. Instead of creating a list of bullet points, a video like this offers an engaging and compelling reason to wear a life vest. The additional challenge of staying afloat also amplifies the point of getting tired quickly. After watching this you’d no doubt understand the purpose of the course.

Add Meaningful Emotional Impact to Your Learning Objectives

In a previous post on how to create interesting learning objectives I created a demo to show how I reworked an objectives screen for an emergency preparedness kit. My dilemma was that often we treat courses like this as a checklist item. We may get information but we don’t connect the information to us personally.

“Safety training…blah blah blah…emergency kit….blah blah blah…pass quiz, go back to work.”

In this particular case, instead of listing the objectives, I state some facts about survival during a disaster and tied it back to some family photos to imply a connection to your loved ones.

Articulate Rapid E-Learning Blog - another example of learning objectives that matter

Click here to view the elearning demo.

It’s still linear information, but it’s reframed to be more engaging and emotional. Plus since it’s not a bullet point list, it’s also probably novel. And novelty is a great way to pique a person’s interest.

Bullet point screens have their place. They are easy and are less open to interpretation than something like a dramatic video. However, they don’t need to be the defacto for the way you inform the learner of the course’s learning objectives.

In your next course, see what you can do to dump the bullet point list. How can you challenge the learner’s understanding or add some drama at the beginning of the course?

What are some things you’ve done to engage your learners and get away from the bullet point objectives list?

Events

Free E-Learning Resources

Want to learn more? Check out these articles and free resources in the community.

Here’s a great job board for e-learning, instructional design, and training jobs

Participate in the weekly e-learning challenges to sharpen your skills

Get your free PowerPoint templates and free graphics & stock images.

Lots of cool e-learning examples to check out and find inspiration.

Getting Started? This e-learning 101 series and the free e-books will help.


Articulate Rapid E-Learning Blog - drag and drop feedback for learning interactions

Drag and drop interactions are great to get the user interacting with the screen and the course content. In a previous post we explored the basic building blocks of drag and drop interactions.

In today’s post we’ll review some general tips to help build your next drag and drop interaction.

Provide Clear Instructions for the Learning Interaction

Many courses already come with some sort of navigation controls. For example, it’s common to have the previous and next controls on the bottom of the screen. Because the navigation is common, knowing what to do during the course is generally intuitive.

Occasionally the course may have an interaction where the learner is asked to interact with the screen. This interaction is not part of the common course navigation and probably not as intuitive.

If the learner is used to clicking a navigation button and you want them to do something different it’s important to provide clear and concise instructions. In the example screenshot below, it’s not quite clear what the person is supposed to do.

Articulate Rapid E-Learning Blog - how to create instructions for drag and drop learning interactions...the wrong way

In the following screenshot, the instructions provide more information on how the learner is to interact with the screen.

Articulate Rapid E-Learning Blog - how to create instructions for drag and drop learning interactions

If you repeat the same type of activity in your course then it’s probably not necessary to add specific instructions each time. Or perhaps the instructions can be delayed. For example, if nothing’s happened after 30 seconds, have the instructions appear.

Create a Ghost Image for Drag Objects in Your Learning Interaction

As the learner drags an object away it leaves an empty spot. Depending on the type of interaction this could look odd or the empty spot may look out of place.

Articulate Rapid E-Learning Blog - design tips when creating drag and drop learning interactions

As in the image below, I like to add a ghost or watermarked version of the dragged object. This fills the empty area and reminds the user from where the dragged object comes.

Articulate Rapid E-Learning Blog - design tips when creating drag and drop learning interactions

In this particular example, it’s probably not too bad because of the spacing and icon labels. However if you do build drag and drop interactions, then adding a ghost image is something to consider.

See it in action. Here’s an example of the points above.

Articulate Rapid E-Learning Blog - example of some design tips when creating drag and drop learning interactions

Click here to view the elearning example.

Create a Ghost Image for the Drop Target in Your Learning Interaction

Adding a ghost image to indicate the drop target can also be valuable. Many drag and drop interactions are used as assessments. But often they can be used as a means of navigation. And it’s an easy way to indicate progress during the interaction.

Check out the example below.

Articulate Rapid E-Learning Blog - example of a drag and drop learning interaction with watermark drop targets

Click here to view the learning interaction.

Drag and drop activities are great for learning interactions. They engage the user in a couple of ways. First, the user gets to do something onscreen. This helps keep them focused. Couple that with appropriate decision-making and you’ve got a nice learning interaction.

So if you’re just getting started, be sure to add clear instructions and a few visual nuances to create an effective learning interaction.

Events

Free E-Learning Resources

Want to learn more? Check out these articles and free resources in the community.

Here’s a great job board for e-learning, instructional design, and training jobs

Participate in the weekly e-learning challenges to sharpen your skills

Get your free PowerPoint templates and free graphics & stock images.

Lots of cool e-learning examples to check out and find inspiration.

Getting Started? This e-learning 101 series and the free e-books will help.


Articulate Rapid E-Learning Blog - Engaging e-learning courses can start with a case study

A few years back I worked for an organization that suffered through a number of workplace deaths. The company was fully committed to a safe work environment and already had sufficient training. However, they were concerned that people weren’t serious about the safety procedures which was the cause of the deaths.

So they put together some case studies where they told the story of how each death happened and how they could have been prevented. In all of the cases, the people disregarded the safety training and one person actually died right after giving a safety briefing and then ignored the precautions he just discussed.

To this day, I can recall many of the details and solutions that could have prevented the deaths because the way the cases were presented (and of course the emotional impact).

Here’s the point. Instead of building big interactive elearning courses to address the issue they created a series of case studies that were meaningful and real. Sometimes you don’t have time to build a big course. But at the same time you don’t want to get stuck with the typical click-and-read course. In those cases a case study is a great way to move past the information dump and create a meaningful course.

Engaging E-Learning Courses Are Relevant

A lot of elearning consists of mostly linear click-and-read courses. Those courses are fine for sharing information, but often they’re not very engaging or memorable. In fact, one of the things I’m asked most is how to get past the click-and-read course and make something more engaging.

My first rule of thumb is to make sure it’s relevant to the end user. If it’s not relevant, odds are you’ll resort to gimmicks to make it seem engaging.

For example, you may want to gamify it or build an interactive branched scenario. Those are all effective considerations when used appropriately. However those types of courses can also be frustrating if they are irrelevant and meaningless to the person taking the course.

So if you want to make engaging courses, first make sure that the content is relevant to the end user.

Engaging E-Learning Courses as Case Studies Take Less Time to Build

As we discussed earlier in the post on how to avoid boring courses one of the reasons why there are so many linear elearning courses is because they’re easy to build. With limited time, it’s a challenge to build an interactive and engaging course. It’s a lot easier to pull some information together and then publish it as a “course.”

But the reality is that those types of courses are more like electronic documents than they are courses. And that’s what we get—well documented (but less than engaging) elearning courses.

The good thing is that there’s a happy middle point—a way to transform the linear information dump into something more engaging without the time commitment to build a fully interactive course.

Engaging E-Learning Courses Can Start as a Case Study

If you don’t have time for a fully interactive course, and you don’t want to build an information dump, do the next best thing—transform your content from information dump into a meaningful case study.

Cases studies are still mostly linear (although you can make them interactive) but the content is framed in a way that provides context and meaning. Because of this, they get past the information dumping that plagues many courses.

A few considerations:

  • Find the relevant perspective. Courses don’t exist in a vacuum. Most compliance courses have some connection to the person’s day-to-day function. Find out what that is and then frame the content around that connection. A good place to learn more is by interviewing those who take the courses. Ask them when the information is important.
  • A case study is like a story. There are a lot of ways to tell a story. You can go from A to B to C. Or you can present it from a unique angle. The key is to tell a good story that is contextual to the person’s need. A common approach is the “day in the life of _____.”
  • Keep it simple. Don’t provide details that aren’t required. Not only does that take extra thinking to create but it could cause you to go on confusing tangents. Also, we’re not always the best story tellers so the simpler the better.
  • Flip the perspective. Tell the story from the perspective of the customer or someone other than the learner. Instead of telling the learner what they need to know. Show them how not knowing affects others.

If you’re stuck in a place where all you get to build is linear courses, on the next one try a case study. Pull your content into a story that is engaging and relevant to the end user.

A case study is still mostly linear, but I see it as a first step in an iterative process. It helps you move away from linear, click-and-read content to engaging and memorable content. The interactivity can happen later when you get more time, oversight, and technical skill. But in the mean time you are learning to reframe the information dump.

Have you used a case study approach to your courses? What’s worked for you?

Events

Free E-Learning Resources

Want to learn more? Check out these articles and free resources in the community.

Here’s a great job board for e-learning, instructional design, and training jobs

Participate in the weekly e-learning challenges to sharpen your skills

Get your free PowerPoint templates and free graphics & stock images.

Lots of cool e-learning examples to check out and find inspiration.

Getting Started? This e-learning 101 series and the free e-books will help.


Articulate Rapid E-Learning Blog - Seinfeld's George Castanza needs the missing Penske file

An essential ingredient for interactive and engaging elearning is to let the learner explore and collect information that assists in making decisions. A common design concept to facilitate exploration of content is the interactive desktop where the learner can select desktop objects to collect information.

Today I am offering a free elearning template designed that can be used to craft an interactive experience.

Design Ideas for the Free E-Learning Template

Here’s a flat desktop design I found a while back. It’s from the docTrackr site. I like the clean and simple design. It looks good and it’s really easy to build for someone with minimal design skills. They’ve changed their site since then but fortunately I kept a screen grab in my inspiration and ideas folder.

Articulate Rapid E-Learning Blog - free elearning template based on a flat desktop design

When I find a design I like, the first thing I do is try to replicate it. And then I try to add my own spin. This lets me learn to use the tools I have better and to think through the design structure and construction of the design elements.

Examples of the Free E-Learning Templates

As I mentioned above, the desktop illustration is a great way to present content collection. So I took the desktop idea and then made it interactive. Below are some examples of the templates in action.

The first one is made in PowerPoint and the second in Articulate Storyline.

Articulate Rapid E-Learning Blog - free elearning template built in PowerPoint

Click here to view the PowerPoint elearning example.

Here is the same interaction created in Articulate Storyline. Storyline offers more interactive capability so I included descriptions for each object, visited states, and a collection meter that triggers a completion response.

Articulate Rapid E-Learning Blog - free elearning template built in Articulate Storyline

Click here to view the Storyline elearning example.

Download the Free E-Learning Templates

Here are links to the free elearning template downloads:

Production Tips When Creating Your Own E-Learning Template

You are free to use the templates in your courses. However, I encourage you to create your own desktop designs. It’s a good way to practice and get better using your elearning applications.

If you do create your own templates or add content to the free elearning templates then here are a few tips to help design the illustration and the interactivity.

  • Keep it simple and don’t add too much detail to the objects. This makes production easy for you and the template will look clean.
  • Avoid clutter and allow for lots of white space to give your eyes a break.
  • Use clutter. So you want to ignore tip #2, that’s OK. Leverage clutter the same way you might for “I Spy” or one of those “Waldo” diagrams. This could work if it’s contextual but it could also be frustrating. Something to keep in mind.
  • Why be flat? The desktop used the classic floor-wall-baseboard technique. That helps center the eye and maintain a clean design.
  • After making a selection, where will the information show? You need a place to show the information. Another consideration is how will you show it? Will it be a click, drag, or hover?

If you create your own flat desktop, feel free to share it. I’d love to see what you do.

Events

Free E-Learning Resources

Want to learn more? Check out these articles and free resources in the community.

Here’s a great job board for e-learning, instructional design, and training jobs

Participate in the weekly e-learning challenges to sharpen your skills

Get your free PowerPoint templates and free graphics & stock images.

Lots of cool e-learning examples to check out and find inspiration.

Getting Started? This e-learning 101 series and the free e-books will help.


Articulate Rapid E-Learning Blog - what is instructional design

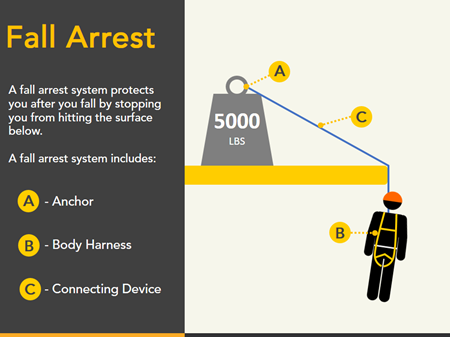
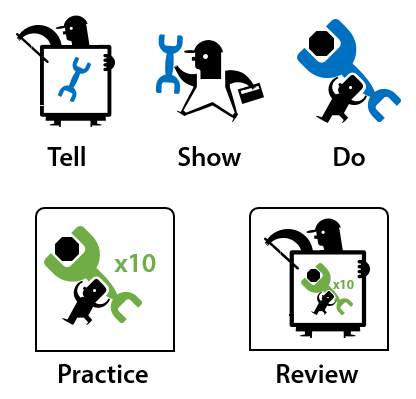
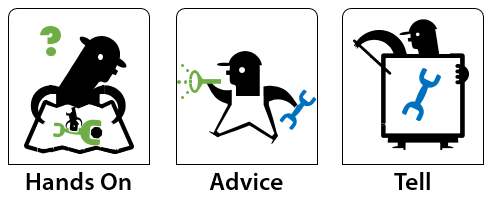
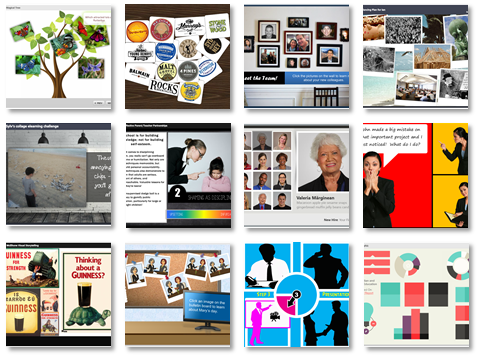
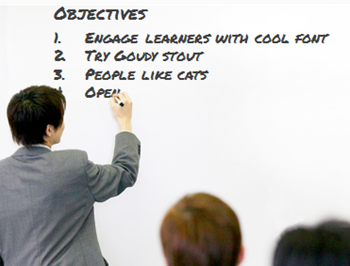
At the iDesignX conference in Australia I shared some tips on instructional design challenges. During my session, Blair Rorani from Ever Learning sketched his notes and then tweeted them during the session. They’re so cool I couldn’t just let them fade away.

So here are Blair’s sketches coupled with some quick notes from my presentation on instructional design challenges.

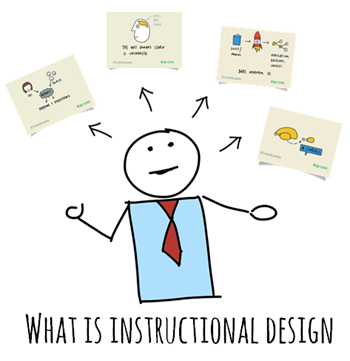
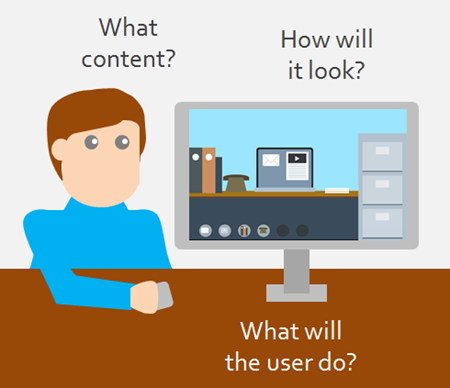
What is Instructional Design?

Instructional design is a loaded term and can mean many things depending on who’s doing the talking. In today’s elearning world an instructional designer tends to be synonymous with the person who builds elearning courses.

Articulate Rapid E-Learning Blog - what is an instructional designer and instructional design

In a general sense an instructional designer helps craft the appropriate learning experience whether they actually build the course or not. As the instructional designer, you want the learner to acquire information in a context that is relevant and have them make the types of decisions that are similar to what they’d do outside of the learning environment.

Know that Learning Happens Despite Instructional Design

When I used to train instructional designers I always started with “learning happens” as a reminder that people learn regardless of what we do. And in many cases, we could be interfering with how they’d learn if we don’t do it right.

Articulate Rapid E-Learning Blog - instructional designers know that learning happens and keeps that in mind during instructional design

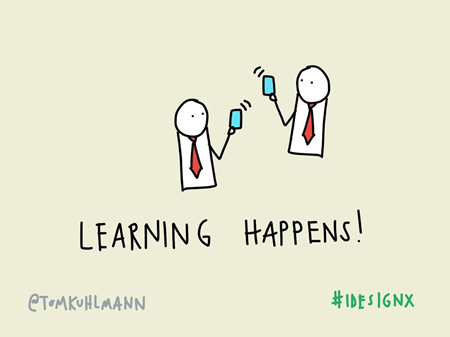
It’s important to keep this in mind as we design our courses. People aren’t just sitting around like empty pitchers of water waiting for us to fill them. They’re continually filling the pitcher themselves and we’re just one of the options they have as they learn.

Instructional Design Changes with Technology But….

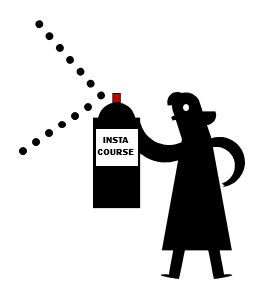
Our industry has evolved quite a bit. And every day there’s some new technology to assist with learning. This can cause quite a bit of anxiety as we are stuck building boring click-and-read PowerPoint courses and feel the world passing us by. How do we keep up with it all?

Twenty years ago, as a young videographer I felt the same way. Video was going from analog to digital and I thought I’d never keep up. The other thing I thought twenty years ago was that someone would realize how easy this PowerPoint stuff is and I’d be out of work.

Articulate Rapid E-Learning Blog - technology changes but has the brain when it comes to instructional design

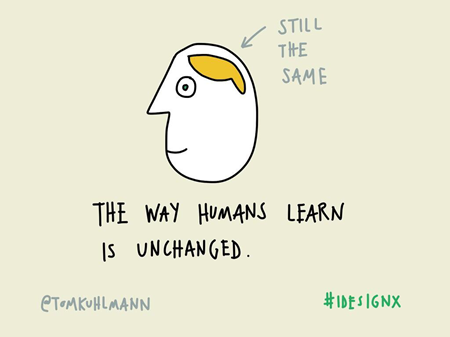
Guess what?!? Not that much has changed. After twenty-five years, PowerPoint is still a means of gainful employment. And while new technology has influenced the learning process, how people learn hasn’t changed much. Sure, we have all sorts of new ways to create, curate, access information and connect with people, but the innate way we learn isn’t much different. Generally speaking we get new information, process it, and make it part of our memory. We just have different ways to do that.

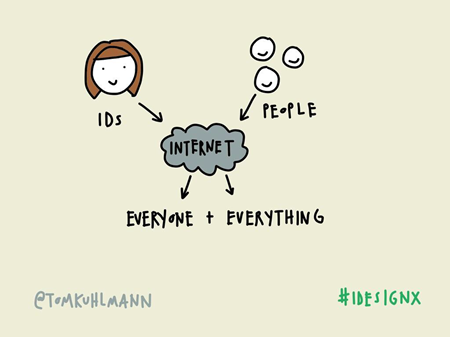
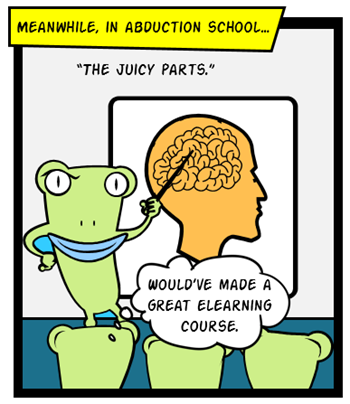
Instructional Design Faces New Challenges

Years ago, formal training created constraints and limited access to information. In a sense, instructional designers and trainers were firewalls to acquiring information. It wasn’t as easily available then as it is now. Today there are all sorts of access to expertise and the tools needed to learn.

For example, I needed to repair all of the locks in my home recently. In the past I was dependent on a trained lock smith to do the repairs. Today that’s not the case. I was able to go online and find some videos that showed me how to do what I needed to do. I was taught at my point of need.

Articulate Rapid E-Learning Blog - instructional designers face new challenges when doing instructional design

Am I now a lock smith? No. But I am trained to do what I needed to do and didn’t need to participate in a formal training program to learn it.

If a corporate training group wanted to teach me the same thing, I would have learned about the history of locks, types of locks, and how locks worked. I may have even been given the steps to make the repairs. And if I was lucky, I would have had some time to practice repairing the locks as part of the training. And it would have taken 90 days to get that training built.

The point is that we are no longer the gate keepers of information and training. Technology has empowered people to find information and connect with others to learn in all sorts of ways. Let’s embrace that and leverage this to craft more efficient and effective instructional design.

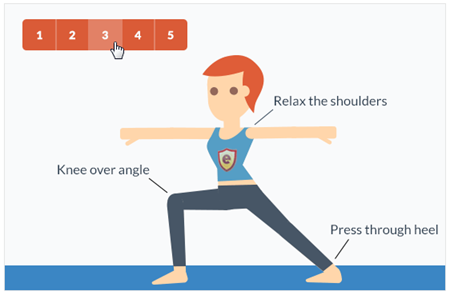
Instructional Design Embraces Bite-sized Learning

Building off the point above, instead of building large formal programs, try building smaller chunks of learning. I like to call them coursels, as in course morsels.

Articulate Rapid E-Learning Blog - instructional designers create bite-sized learning as part of instructional design

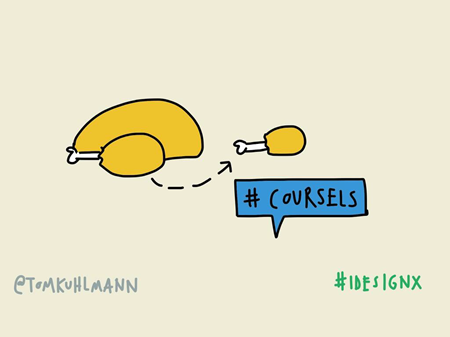
They’re smaller nuggets of learning that offer the flexibility larger programs don’t. They can be built faster and at lower cost. They’re great for those just-in-time training needs and easily shared. And they can be packaged into larger, more detailed training if needed.

Another advantage is that people tend to be more tolerant of lower quality if the coursel is relevant and helpful. They also tend to share the smaller nuggets more that large courses. So there’s a good chance the learning resources is passed around. The smaller nuggets are also effective for spacing the learning activities over time rather than having everything compressed into a single learning event.

And there you have it, the essence of my thoughts on instructional design. As I noted above, instructional design is loaded with lots of meaning and different definitions so there are many perspectives to consider. There’s obviously a lot more to it than what I shared and more to discuss regarding each topic on which I touched.

What are your thoughts on instructional design? What are you biggest challenges?

Events

Free E-Learning Resources

Want to learn more? Check out these articles and free resources in the community.

Here’s a great job board for e-learning, instructional design, and training jobs

Participate in the weekly e-learning challenges to sharpen your skills

Get your free PowerPoint templates and free graphics & stock images.

Lots of cool e-learning examples to check out and find inspiration.

Getting Started? This e-learning 101 series and the free e-books will help.