The Rapid Elearning Blog

The Rapid E-Learning Blog - how to save time using graphics in PowerPoint

PowerPoint’s Clip Organizer is one of those features in PowerPoint that’s been there for years and gets very little use.  However, it’s also one of the most powerful time-saving features in PowerPoint, especially if you work with a lot of custom graphics.

In today’s post, we’ll explore how to use the clip organizer.  This comes in handy if you download and customize lots of clip art.  Or if you take advantage of all of the free downloads available from the blog and community.

What is the Clip Organizer?

The clip organizer is one of those funny applications where the name pretty much tells you what it does.  It organizes clips.  Clips in this case can be vector illustrations (clip art), photos, videos, and audio files.

The Rapid E-Learning Blog - organize media clips in PowerPoint

You load your media assets into the clip organizer so that it’s easy to search for them when working on your elearning courses.  The clip organizer lets you modify keywords so that it’s really easy to find what you’re looking for.  Once you start using it, you’ll find that it saves a lot of time looking for the images in folders on your computer.

Prior to PowerPoint 2010, the clip organizer was located via link at the bottom of the insert clip art panel.  In PowerPoint 2010, it’s not there.  Instead, you have to click on the Windows Start icon, go to All Programs, and then locate the Microsoft Office folder.  Inside the folder, you’ll find and Microsoft Office Tools folder with the clip organizer inside.

The Rapid E-Learning Blog - how to locate the clip organizer in PowerPoint 2010

Here’s a quick tour of how to locate the clip organizer in various versions of PowerPoint.

Create Custom Clip Art & Add to the Clip Organizer

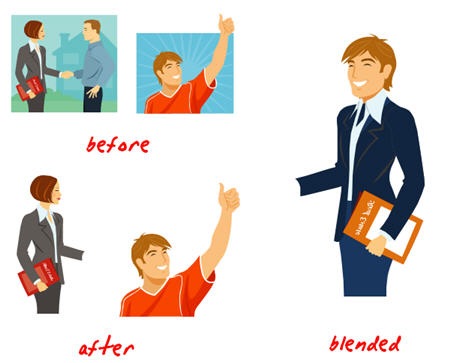
Find clip art characters you like.  Make modifications to them and then save as complete character sets.  I show you how to do this in the blog post on creating custom characters.
The Rapid E-Learning Blog - example of custom clip art

Over time you could end up with a big library of custom characters.  And the more images you have the more valuable the clip organizer becomes.  Here’s a quick tutorial that shows how that could work.

Click here to view the tutorial.

Manage All of the Free Stuff You Get From the Blog & Community

Over the past few years, I’ve given away a lot of free assets.  It’s easy to lose track of all of them.  You could always go to the community, do a search, and then download the files all over again.

The Rapid E-Learning Blog - examples of free graphics from the rapid elearning blog

Or you can download the files and then load them into the clip organizer.  This way, anytime you want a graphic, all you have to do is search for it and then insert it onto the slide.  Easy as that!

Here’s a tutorial that shows how to load the free blog and community assets into the clip organizer.

Click here to view the tutorial.

Make Searching Easier with PowerPoint’s Clip Organizer

The more stuff you add to the clip organizer, the more important it is to make the search process easier.  By default, when you load an image into the clip organizer it will create keywords based on the image title and the folders it’s in.

The Rapid E-Learning Blog - screenshot of PowerPoint's clip organizer

This is pretty cool, because if you keep your images inside project folders, the name of the project folder gets pulled into the keyword.  This is really handy because it’s a fast way to search for and reuse graphics from previous projects right inside of PowerPoint.

Here’s a quick tutorial that shows how easy it is to organize by keyword.  You can edit individual files or do batch edits all at once.

Click here to view the tutorial.

Tips:

  • Keep images grouped by project and just insert the project folders into the organizer.  Any time you need an image from a previous project, just do a single search for the project name.  It’s easy enough to scroll through the thumbnails.
  • Do batch keywording to save time rather than trying to keyword one image at a time.
  • Develop a consistent naming stru
    cture for folders with graphics.  This way when you import the images, the keywords will be set.  That means a lot less time managing that part of the process.
  • Test to see if it works on your network drive.  If it does, then you’ll be able to easily share your graphics with each other on the team.

Using the clip organizer requires a few extra steps so most people don’t use it.  But the reality is that if you build a lot of elearning courses then the clip organizer is your friend and a big time saver.

Develop the discipline of using the clip organizer and soon you’ll find it to be a time-saving feature.  If you currently use the clip organizer, what are some additional tips for the community?  Share them by clicking on the comments link.

Events

Free E-Learning Resources

Want to learn more? Check out these articles and free resources in the community.

Here’s a great job board for e-learning, instructional design, and training jobs

Participate in the weekly e-learning challenges to sharpen your skills

Get your free PowerPoint templates and free graphics & stock images.

Lots of cool e-learning examples to check out and find inspiration.

Getting Started? This e-learning 101 series and the free e-books will help.


30 responses to “Here’s a Simple Way to Save Time When Working with Graphics in PowerPoint”

As always Tom, you’re awesomeness comes through at just the right time! I’ve spent the past few days trying to decide between Picasa and MS Photo Gallery for storing, tagging, and accessing images. And the most obvious answer was right there under my nose.

Thanks for this blog post!

Mike

March 8th, 2011

Tom, as always, I’ve learned another useful trick to make my job easier! I’ve used your previous tips on customizing graphics many times and amazed my colleagues with my “expertise!” This, I’m sure, will be another magical time-saver, especially the easy way to add key words to multiple clips simultaneously. You are a real boon to the e-learning community. Thanks for all your wonderful blogs.

March 8th, 2011

Thank you so much Tom! I tried using the clip organizer in the past but just made a mess of things. I will try it again now with your great advice. Also, thanks for the chuckle regarding the “blended” clipart picture in your blog. 🙂

[…] Read more here: Here’s a Simple Way to Save Time When Working with Graphics in PowerPoint » The Rapid eLearning B… […]

March 8th, 2011

Can you explain how to share it on the network? Also, is there a way to back it up and transfer it to another computer if you get a new PC?
Thanks!

Thank you for all of this information. I am a student at Roosevelt University and just beginning to develop e-learning. This information started a bit over my head, but I love that you included graphics and tutorials to help me understand your points. As I begin creating custom characters, images, etc., this will be a big help!

March 8th, 2011

Thank you so much! It is so fun and helpful. Could you prompt me how to merge different PPT file in one?

March 8th, 2011

Tom . . . thanks for this tip. Was also curious about the fake text generator [=lorem()]. Does that only work in PPT 2010?

I know Articulate pays you, but Microsoft should too. Your insight and understandable tutorials make their products much more valuable and usable. Thank you.

@Pink Lady: I guess sharing them on a network works regardless of using the clip organizer. However, with the clip organizer, you can easily leverage all of the clips you may be sharing on the same drive. Just drag them into the clip organizer. Each person would have to do that individually.

March 8th, 2011

Whoops! Didn’t realize that you couldn’t move the original image files after you put them in the Clip Organizer. Still not sure how to share the same Clip Organizer on two different computers, as one is my normal, everyday PC and the other is the Super E-learning PC… Guess I will need to research it a bit more. Thank you for the intro to it!

@Pink Lady: connected with one the PPT MVPs. Here’s how to share clip organizers.

March 8th, 2011

Thank you! I’ll give it a try tomorrow. Unfortunately, I will probably need to move around and organize all of the images into a new shared folder on the network and will probably mess up the link to the files that I already imported into the Clip Organizer today. 🙁 But it’s all good if I can get it to work!

You could always try Picasa or Windows Gallery. I’ve used that in the past on a network.

March 9th, 2011

Tom . . . thanks for the random text Screenr!

Tom
How about a lowish cost session in the east bay, california. Perhaps in a residential area outside Oakland – inland for instructional designers who use your tool that don’t have anything else but your blog and ideas from your army of subscribers.We don’t have any other tools and we would love the benifit to have more examples and knowledge to stay current and viable in the workforce without having to work and have a full time school curriculum.
The reason why I write lowish cost is not because I think it is a lowish valued gem of knowledge, it is because of our state of economy. Plain and simple california is expensive…pretty please???

[…] Here’s a Simple Way to Save Time When Working with Graphics in PowerPoint […]

@MaryLea: if I’m in the area, I’ll do something. Connect with your local ASTD or other training/HR groups and have them contact me. I’m always open to doing a session.

March 18th, 2011

Anywhere we can get more clarification on Microsoft’s copyright protections with their clip art? Their policy online is, um, rather legal.

It looks like I can use it and edit it ANYWHERE, as long as we are not selling the actual clip art or using it to promote or sell a product??? If this is true, than standard in-house corporate trainers should be able to use it. Right???

@Angie: that’s how I read it.

[…] PowerPoint’s Clip Organizer is one of those features in PowerPoint that’s been there for years and gets very little use. However, it’s also one of the most powerful time-saving features in PowerPoint, especially if you work with a lot of custom graphics. In today’s post, we’ll explore how to use the clip organizer. This comes in handy if you download and customize lots of clip art . Here’s a Simple Way to Save Time When Working with Graphics in PowerPoint » The Rapid eLearning B… […]

[…] Roadmap to Better Rapid E-Learning 7 Simple Rapid E-Learning Tips & Free PowerPoint Template Here’s a Simple Way to Save Time When Working with Graphics in PowerPoint Here’s Why Contrast is an Essential Part of E-Learning Design The Truth About Rapid E-Learning […]

June 19th, 2012

TX for these great tips on Clip Organizer. I’ve been trying to better organize my media resources, and your suggestions for doing this with Clip Organizer look great, with what may be one caveat: can I browse and search Clip Organizer with other products, such as Storyline, or even when browsing for pictures from a blog? I can’t figure out how this may be done. Would there be a way to use Windows 7’s Libraries tool along with the Clip Organizer?
TIA!

It’s always dependent on how well you organize and name your clips. I think it’s easy to use Picasa or Windows Media Gallery, as well as Windows 7 search.

June 22nd, 2012

Tx for your reply. Just seeing it now. Yes, this is the conundrum. I’ve started using the Windows 7 library feature, but it appears you need a separate product for creating tags. Picasa does tags, as does Snagit, which I have and love. I’m going to need to come up with something…if clip organizer could be pulled into one of these, that would be perfect. But I see no way to do that.

That would make a great conference presentation: how to manage all of the assets on your system that you may use in multiple applications

[…] Here’s a Simple Way to Save Time When Working with Graphics in PowerPoint […]