The Rapid Elearning Blog

Archive for the ‘Audio’ Category


Articulate Rapid E-learning Blog - 7 free audio editors

Even though many e-learning applications have their own audio tools, I usually don’t use them. I may for quick projects, but generally, I like to keep my audio production separate from my e-learning course production. It provides more control over the audio files and dedicated audio editing software tends to have more features.

Here’s a list of some free audio editors that are more than sufficient for what you may need for most of your e-learning course production. And the price is right.

Of course, working with audio isn’t necessarily as easy as plugging in a microphone and recording narration. I include links to the free software’s learning community to help you if you have detailed questions.

Audacity

Audacity is the most popular of the free audio editors. It’s open source with lots of users so that means there’s a lot of help available online. You can do quick basic recording or use the more advanced features for better audio editing.
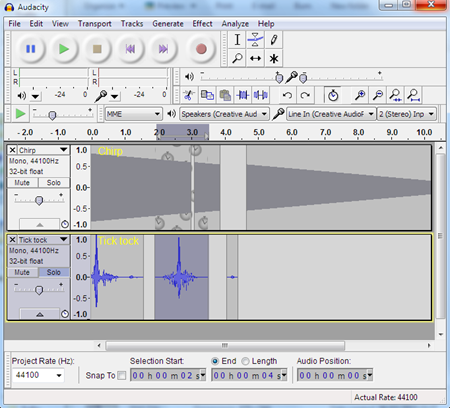
Articulate Rapid E-learning Blog - free audio editor recording audacity

Ocenaudio

The interface for this is familiar and pretty easy to use to get started. As they say, it’s “easy to use, fast and functional audio editor. It is the ideal software for people who need to edit and analyze audio files without complications.”
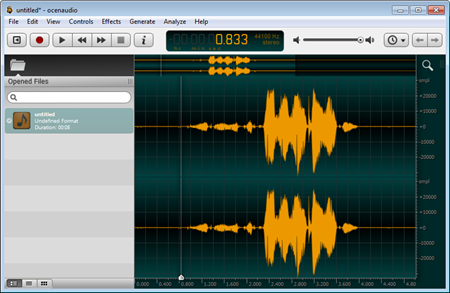
 Articulate Rapid E-learning Blog - free audio editor recording ocenaudio

Presonus Studio One (free).

There’s a free and pro version. This is a nice application and a bit more sophisticated than what most of us are used to using. However, once you learn to use it you’ll have a lot you can do.
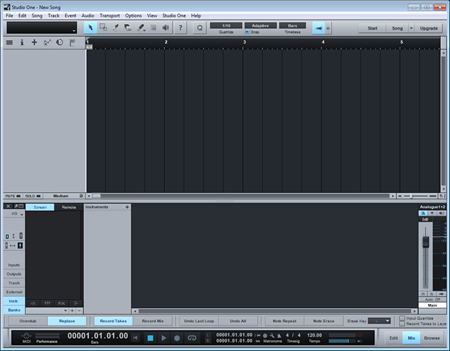
Articulate Rapid E-learning Blog - free audio editor recording presonus

TwistedWave (beta)

This is an online tool. The start page is a bit different than you might expect. To create a recording you click “new document.” This opens up an easy to use recording window. It is online and you can save to Google Drive.

I do like the ability to download and edit audio from Soundcloud.
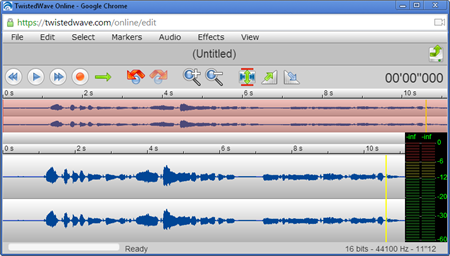
Articulate Rapid E-learning Blog - free audio editor recording twisted wave

Wavosaur

I just took a quick look at the free audio editor so I can’t speak to how easy it is to use. However, I know that there are a few blog readers who use it. Here’s how Wavosaur describes the tool: “a cool free sound editor, audio editor, wav editor software for editing, processing and recording sounds, wav and mp3 files. The program has no installer and doesn’t write in the registry. Use it as a free mp3 editor, for mastering, sound design.”
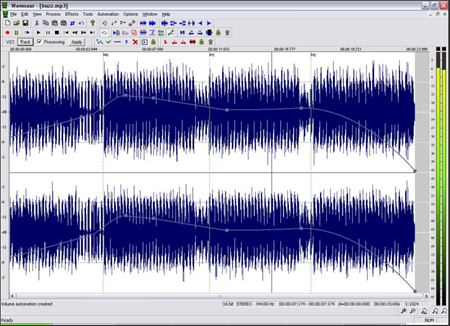
Articulate Rapid E-learning Blog - free audio editor recording wavosaur

WaveShop

This is another application I haven’t used yet, but was told about at a recent conference. It does bit perfect editing which apparently is important if you don’t want a corrupted dither; and who wants that?
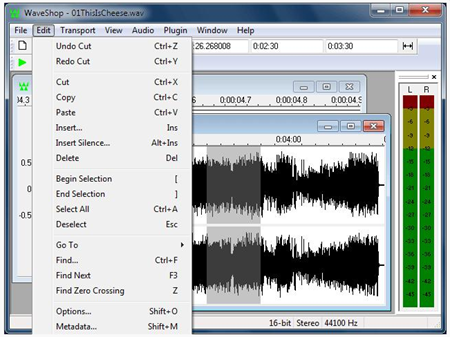
Articulate Rapid E-learning Blog - free audio editor recording waveshop

There are a lot more free audio editors out there, but these are the ones I’ve personally used hear the most about from blog readers. And they’re not tied to non-commercial or freemium business models. That means you’re free to use them for the courses you produce at work.

*image via commons.wikimedia.org

Events

Free E-Learning Resources

Want to learn more? Check out these articles and free resources in the community.

Here’s a great job board for e-learning, instructional design, and training jobs

Participate in the weekly e-learning challenges to sharpen your skills

Get your free PowerPoint templates and free graphics & stock images.

Lots of cool e-learning examples to check out and find inspiration.

Getting Started? This e-learning 101 series and the free e-books will help.


audio narration tips

In e-learning software like Storyline 360 and Rise 360 you can record (or import) audio narration into your courses. Since many e-learning developers tend to produce all media that belongs in the course, recording audio narration usually is one of those responsibilities. That means there are a lot of people that record audio narration who aren’t trained voice over talent.

If you have money and the time, using professional voice over talent makes sense. But most of us don’t have that luxury. So here are some tips to help you get started and get the best audio narration that you can get.

Audio Narration Script

  • Script approval. Narration (especially for non-professionals) can be time-consuming. You don’t want to do a lot of re-work. Get the script approved before you start any work on recording the narration. That will save a lot of time.
  • Text-to-speech. Use the text-to-speech feature to create demo narration for the review process. This way the subject matter experts and reviewers can hear the script and not just read it. And if you need to make changes, it’s just a matter of typing new text and not going through the process of recording new narration. Settle on a final, signed-off script.
  • Sound like a real person. Audio narration should sound like a real person. That means you need to move past the legalese and corporate way of saying things (assuming the legal department lets you). Write a script that sounds conversational and how you would talk and explain things in real life.

The Right Environment to Record Audio Narration

In an ideal world, you have a recording studio or one of those fancy whisper rooms. But odds are you have a cubicle or empty conference room.

  • Cubicles are good. The walls are designed to absorb sound. Unfortunately, in an open-air cubicle farm, you don’t get a lot of privacy and there’s a lot of background noise, so you’ll need to record when there aren’t many people around.
  • Minimize noise. Turn off office machines, fans, and air conditioners (if possible). Record about 15 seconds of ambient noise. Sometimes you can use that to create a filter and edit out the background noise when you do post-production. But the best option is to record the best quality you can. As a general rule, the best recording is the original recording.
  • Use sound buffers. Listen to the difference between using a sound box and not. There are several ways to buffer the sound coming into your mic. There are professional options with sound proof panels, mic boxes (you can make these with a fabric cube and foam wedge panels), and panels that connect to your mic. In my home office, I have a clothes rack and drape a thick blanket over it. Then I roll it behind me. Here’s an emergency option: the foambrero. If you have a budget, this recording booth looks interesting and seems very portable and easy to set up in a small office.
  • Headset mic. Sometimes you’re stuck in an office and cannot control the background noise, but a headset mic helps because it is unidirectional and will only record audio from one direction. This helps block out a lot of ambient noise.

Prepare Yourself to Record Audio Narration

  • Read the script aloud a few times. You’ll quickly identify areas where it doesn’t sound natural and when it doesn’t roll of the tongue right.
  • Record it first so you can hear it back. Just the act of recording often helps identity where it doesn’t sound right and where you flub over words and sentences.
  • Drink plenty of water. Hydration is key.
  • Don’t worry about being perfect. Remember, you’re not hiring a pro, so you’re not getting a pro.
  • Stand rather than sit. Standing helps you breath better and take in more air. The most important thing is to be comfortable and of course being able to reach your audio controls between takes.

The Right Tools to Record Audio Narration

I created a list of good audio accessories and mic recommendations that won’t break the bank. And there are plenty of affordable or DIY options like building a sound box or using an Ikea lamp as a mic boom. Regardless, here’s a general rundown of what you’ll need:

  • Good microphone: headset or desktop. I usually prefer a desktop mic, but a headset is much more mobile and the sound quality is decent.
  • Pop filter to remove those annoying mouth sounds and popping p’s.
  • Mic stand. I use a boom mic mounted to my desk. I like to swing it in and out of position. The Blue Compass is a nice-looking boom if you don’t want to make your own or break the bank.
  • Teleprompter (better than reading from a paper script). A lot of people use a second monitor or tablet.
  • Sound buffer to control ambient noise and get fuller sound quality.

How to Record Audio Narration

I won’t go into a lot of detail about recording because there are a lot of different applications. But I will narrow it down to a few basic tips.

  • Record in the authoring tool or outside? You can always record much of the audio narration with the e-learning software. That makes it super easy, especially if you’re doing all the work by yourself. Storyline 360 even has a simple audio editor for some post-production editing. However, I prefer to separate my multimedia production into distinct groups: video, audio, graphics, and course construction. I find it helps keep me focused on one thing and I can get it done right the first time. Because of this, I like to record my narration outside of the authoring tools. Then I can make any edits I need and upload the narration into the software. This works in both Storyline 360 and Rise 360.
  • Free audio editors. If you don’t have any money, Audacity is a free audio application that works fine for recording narration. Here’s a list of a few other free audio recording options. Levelator (although no longer supported) does a respectable job cleaning up your audio narration. There are also all sorts of apps you can use on your phones and tablets to record audio (iOS and Android).
  • How to save audio files. You can save as .MP3 or .WAV. Both should be fine. MP3 files will be much smaller and you won’t notice any degradation. It’s also a good idea to have a consistent naming strategy when you save your files. “Audio1.mp3” isn’t very good. However, “Safety101-Intro-Layer4.mp3” makes a lot more sense and you know where it goes in the course when you have to import it.

These are some good, basic getting started tips when recording audio narration. If you have some to share, feel free to add them to the comments.

Events

Free E-Learning Resources

Want to learn more? Check out these articles and free resources in the community.

Here’s a great job board for e-learning, instructional design, and training jobs

Participate in the weekly e-learning challenges to sharpen your skills

Get your free PowerPoint templates and free graphics & stock images.

Lots of cool e-learning examples to check out and find inspiration.

Getting Started? This e-learning 101 series and the free e-books will help.


closed aptions for e-learning

A guest post by Elizabeth Pawlicki, Training Program Manager, Articulate.

If you’re a Google Chrome 89+ user you now have access to Live Caption which is an accessibility feature that provides real-time captions for audio that plays through the browser.

This is a really excellent feature for audio that runs through your browser when viewing courses that have videos or narration, especially if the audio doesn’t have captions. Check it out below.

Initial Thoughts on Google Live Caption

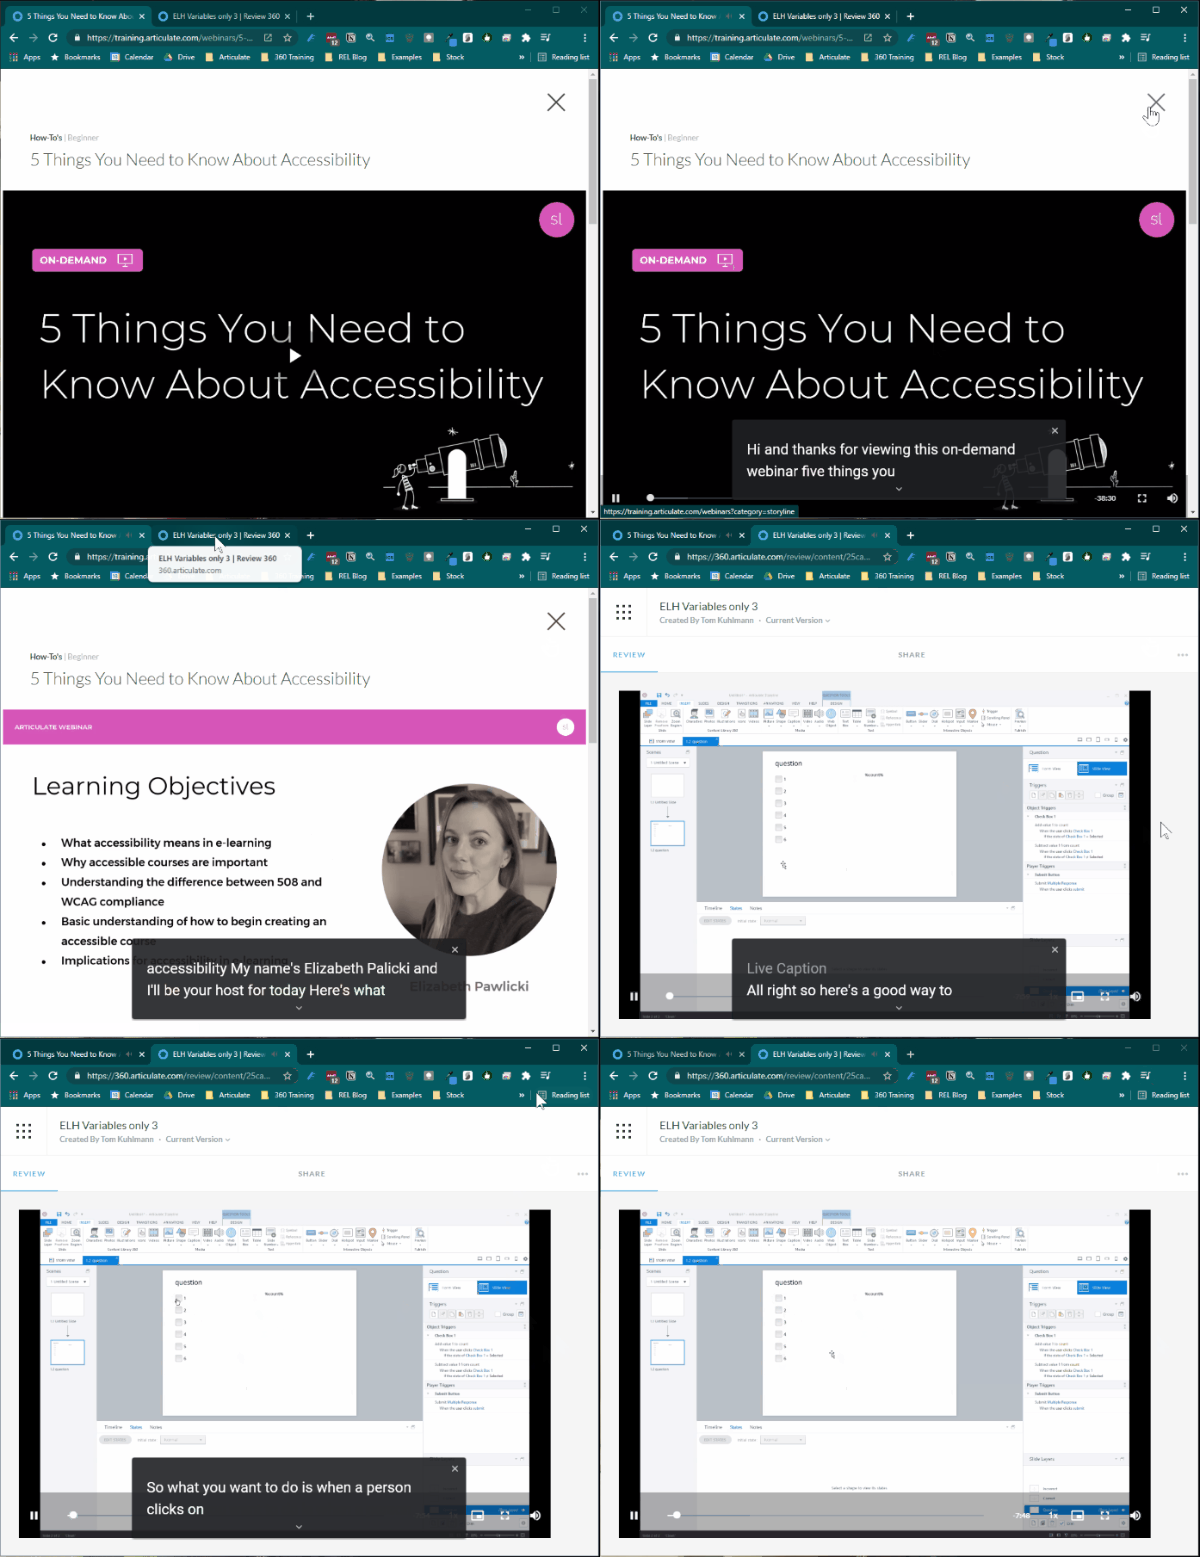
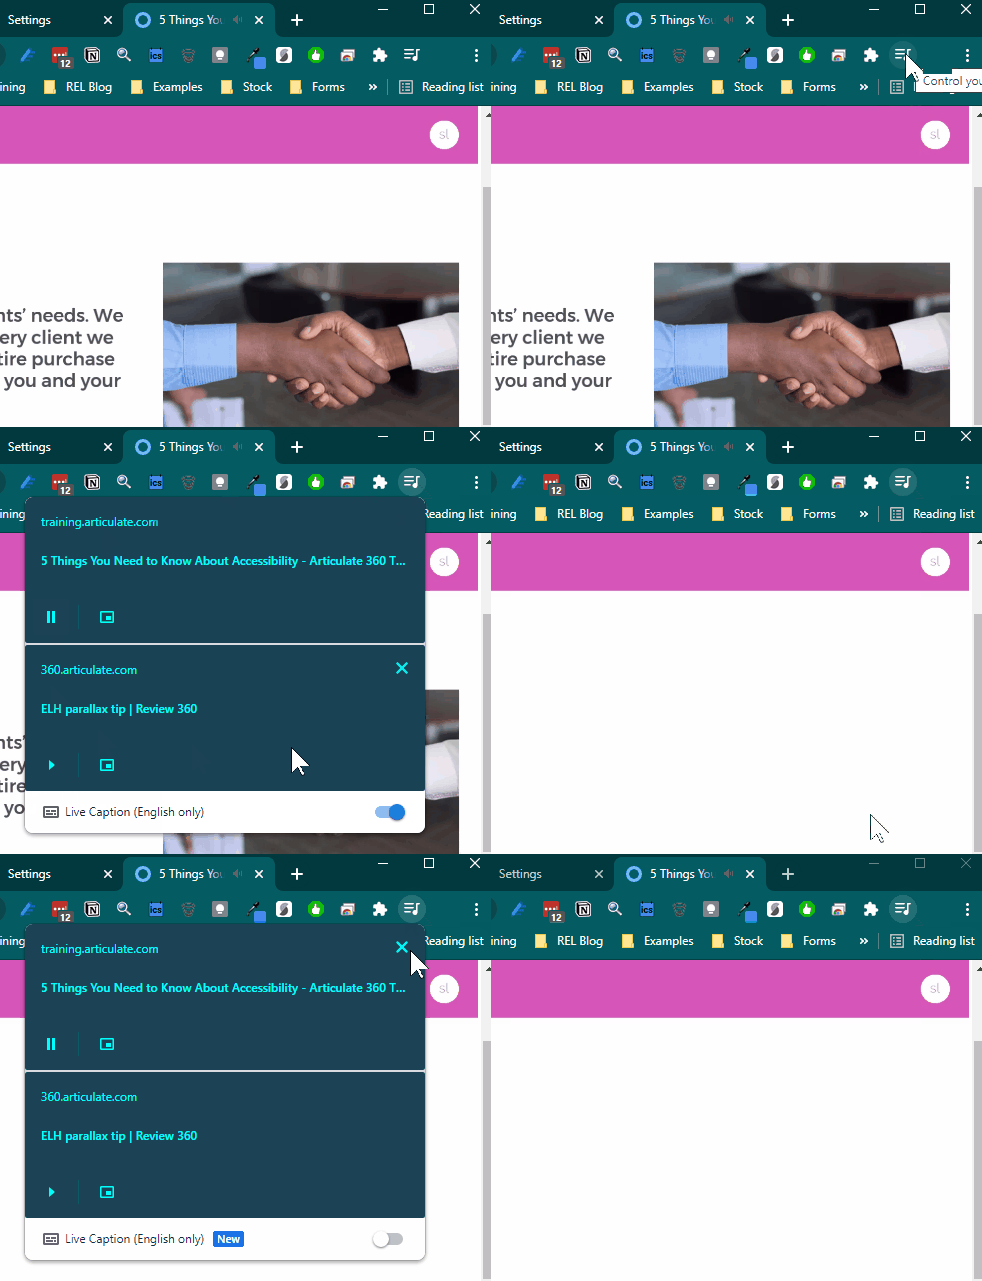
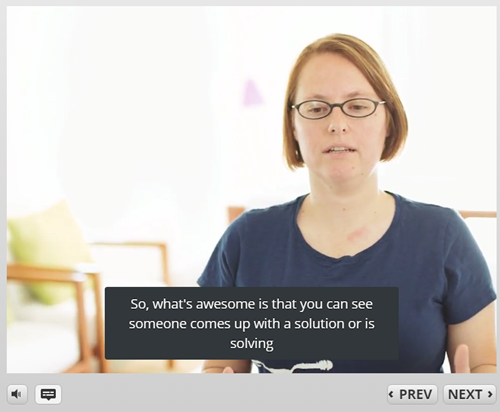
I tested the Live Captions on a few different e-learning products that had audio including courses in Storyline 360, Rise 360, and Review 360. The captions worked well, surprisingly well, as you can see in the image below.

Google Live Caption demo closed captions

I also like that even if you turn off the audio, the captions work. As a user I am no longer constrained by whether or not the audio I am consuming has closed captions built-in to the product. The browser does the heavy lifting.

This is a big step forward for those who require captioned audio. I look forward to how this feature evolves going forward.

How to Access Google Live Caption

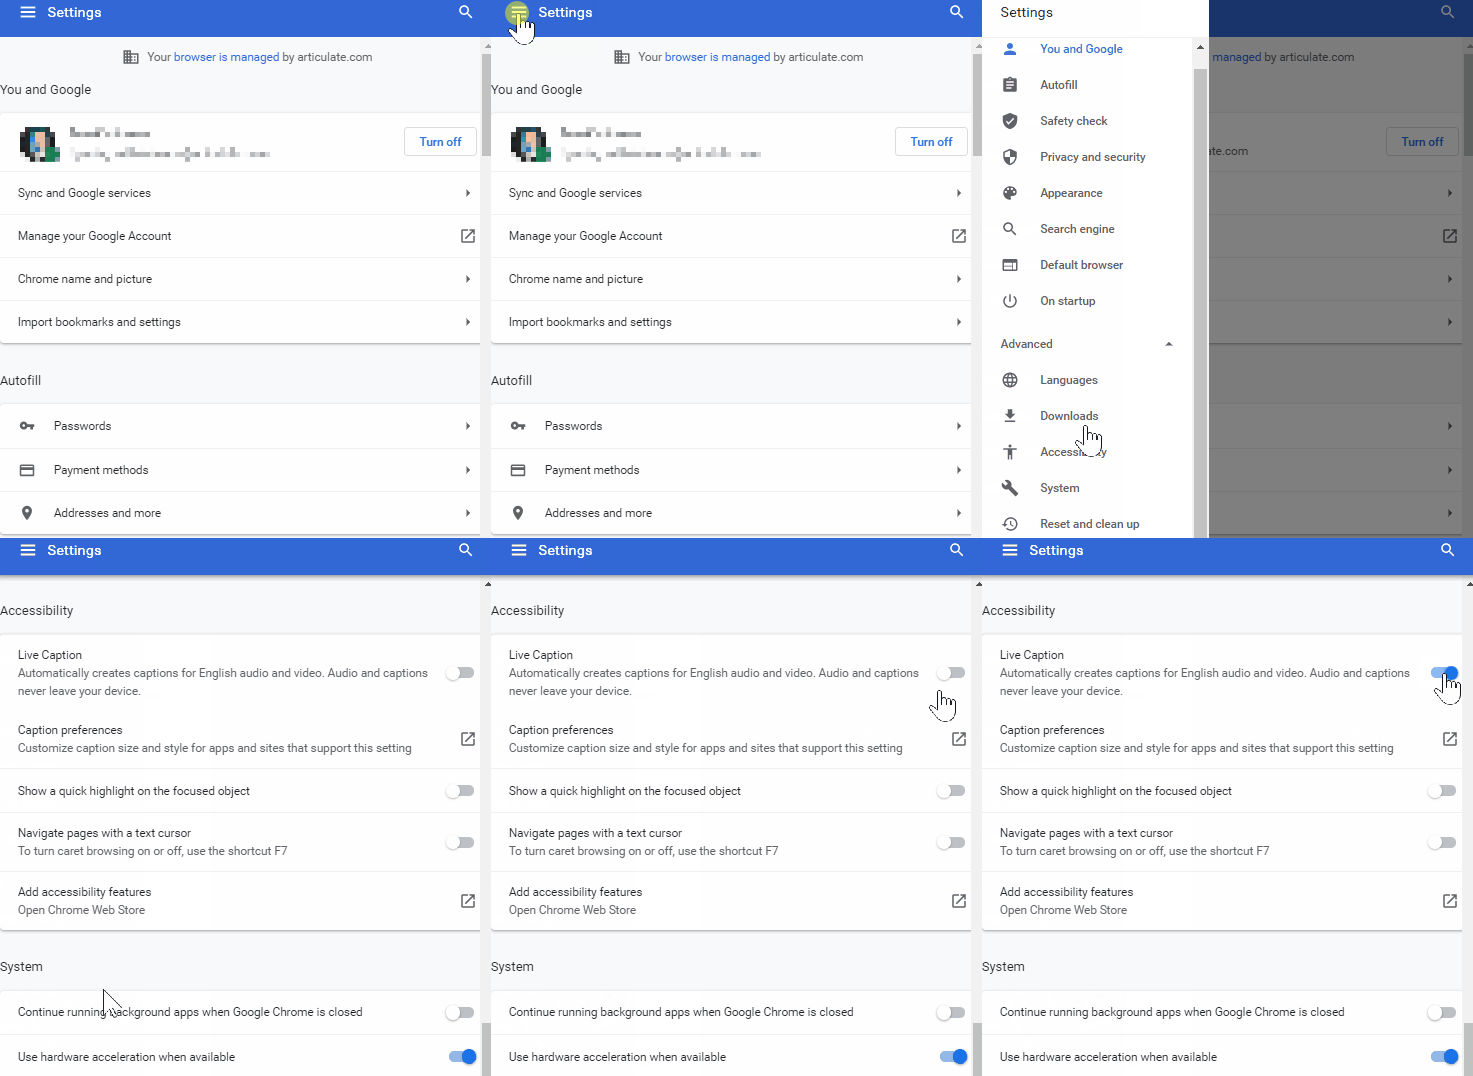
Google Live Caption closed captions

  • First, make sure you’re using Google Chrome 89 or higher.
  • Click the three dots on the top right.
  • Then go to Settings and select Advanced>Accessibility.
  • Click the toggle for Live Caption.

Once you have enabled Live Caption, you’ll see an option to toggle the captions on and off without going in and out of the settings.

Google Live Caption closed captions toggle

Key Considerations for Google Live Caption

  • This tip requires Google Chrome 89 or above. If you have learners who need captions and you can’t provide them in time, you at least have the option to recommend Chrome 89.
  • It’s a new feature so there are some limitations such as size, position, and language. However, I assume the feature will be enhanced and my guess is other browsers will play catch up.
  • From what I can tell the caption choices in Windows OS don’t seem to impact the captions displayed in the browser.

Google Live Caption is a step in the right direction and a great tool for those who need captions when they’re not provided.


Events

Free E-Learning Resources

Want to learn more? Check out these articles and free resources in the community.

Here’s a great job board for e-learning, instructional design, and training jobs

Participate in the weekly e-learning challenges to sharpen your skills

Get your free PowerPoint templates and free graphics & stock images.

Lots of cool e-learning examples to check out and find inspiration.

Getting Started? This e-learning 101 series and the free e-books will help.


multimedia

E-learning courses are mostly screens of content made up of media: text, shapes, illustrations, pictures, and video.

Adding those things to your course is simple, usually just a matter of inserting said media onto the screen. However, building a cohesive course is more than just inserting stuff on a screen. There are other considerations.

Design the Look of the E-Learning Course

What’s on a screen?

  • Fonts. They are more than the text you read; they’re also a graphic. Which fonts are you using in your course? Are they contextually aligned with your content?
  • Shapes. Shapes can have straight edges or rounded; they can have outlines or not. The shape can represent something elegant or informal.
  • Illustrations. There are all sorts of illustrative styles. One popular style today is the corporate Memphis look. Of course, there are many designers who find it to be barren.

And this brings us to a key consideration when working with multimedia: the bullet points above speak to some visual design requirements. Who will design what you need? What is the correct imagery and use of fonts and desired color schemes?

A challenge for many e-learning developers: having ideas about what you want and executing on those ideas is not the same. I see lots of good courses that are not designed well. The cause is usually that the e-learning developer lacks the technical skill to construct the right media.

Create Audio and Video Resources

There are similar considerations for other multimedia such audio and video.

Recording audio is easy and straightforward in most of the authoring tools. However, they don’t tend to have a lot of sophistication when it comes to editing or managing the audio.

For simple audio, recording from the authoring tool is fine. But for longer audio, there are considerations about how to record, who will record it, and how it’s all managed.

You can do it all in-house or DIY, but you do get what you pay for. I figure non-professional talent gives you presentation quality audio. It’s inexpensive, gets the job done, yet isn’t going to be perfect. But it’s not the same as pro-quality narration.

The good thing today is that there are many voice over artists and talent services where getting professional audio at a reasonable cost is viable.

Video is another one of those tricky issues. Today’s smart phones have better capabilities than I had doing professional video work 25 years ago. It’s easy to shoot video and edit it. But there is a significant difference between a DIY video and getting something done professionally. Or at a minimum, spending time on edits to get things to look right and not drag on.

The big question for any of the course’s multimedia is who is going to determine and design what you need? And then who is going to produce the media?

I throw this out because the course will look like something. And you’ll put something on the screen. And there’s a cost associated with it. Doing it yourself may cost less money but may impact the quality of what you produce.

Thus, at the beginning of the project time needs to be spent on the media requirements and production considerations. And then determine if there needs to be a budget to accommodate those requirements.

How do you determine those things when you start an e-learning project?

Events

Free E-Learning Resources

Want to learn more? Check out these articles and free resources in the community.

Here’s a great job board for e-learning, instructional design, and training jobs

Participate in the weekly e-learning challenges to sharpen your skills

Get your free PowerPoint templates and free graphics & stock images.

Lots of cool e-learning examples to check out and find inspiration.

Getting Started? This e-learning 101 series and the free e-books will help.


free background music

I like to add background audio to my screencast tutorials. Like many of you, I don’t record in a profession sound studio. Often, I am recording in a home office and there’s always some ambient noise which I find distracting.

Background music can mask some of the ambient noise. Another benefit is that it helps set a pace and tone for the recording.

Free Background Music

There are a lot of “free” sites, but to tell you the truth most of them are useless.

Here are a couple of options that should provide most of the free background music you need. Like always, be sure to check the license and attribution requirements which can change.

free background music

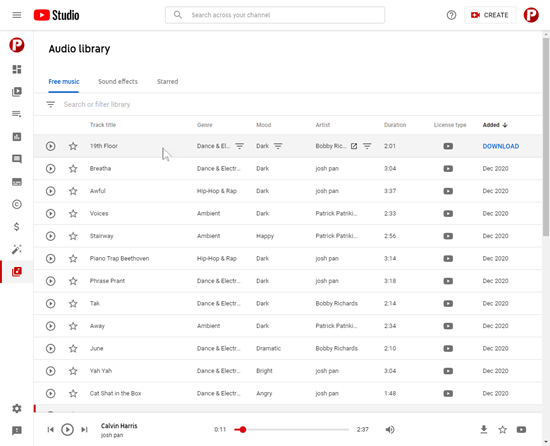
  • YouTube Audio Library: requires a YouTube account so you have access to the studio; free for commercial use, no attribution search options. Lots of variety and easy to filter to find audio based on mood and duration. This is my go-to for tutorials.
  • Mixkit: free; no attribution. They have a good selection of music.

You can search the Internet for other sites, but for my money, either one of those two above are more than what you’ll need. And the price is right.

Events

Free E-Learning Resources

Want to learn more? Check out these articles and free resources in the community.

Here’s a great job board for e-learning, instructional design, and training jobs

Participate in the weekly e-learning challenges to sharpen your skills

Get your free PowerPoint templates and free graphics & stock images.

Lots of cool e-learning examples to check out and find inspiration.

Getting Started? This e-learning 101 series and the free e-books will help.


audio

Background audio is not as common as it once was in e-learning. It is a little old school. And often it is distracting. Also, with mobile technology (and some limitations playing multiple audio tracks) it may create some problems playing the way you intend it.

However, there are times where background audio makes sense.

For instance, I like to use background audio to establish some context. It makes sense to have some ambient audio in decision-making scenarios, for example. You can set a tone or create a more immersive experience for the learner.

In those cases, I like audio like the hustle and bustle of office workers and machines, or a busy street with traffic, or a coffee shop with lots of human activity. I prefer that over music tracks because it feels like you’re there.

I do like to use music tracks. One place where they work well is when I am doing quick screencast tutorials. Sometimes the audio was recorded in a less than ideal room with a little bit of ambient noise like my air conditioner. Adding a subtle background track covers the noise. And the right track with a good beat can set a tone and help move the tutorial along.

There are a lot of studies that also show that some types of music can influence how the brain processes information. Perhaps, a background audio track works for your course to help learners retain content. Not sure, but something to explore.

I will add that an audio track won’t make your boring course less boring. It’ll still be boring, but at least they can listen to something entertaining until they’re done.

Next time you’re meeting with learners as part of your analysis, listen to what their world sounds like. Is it possible to add that to your courses?

I know that there are many of you who will trot out the cognitive load arguments. That’s all good. However, I’d say there are thousands of other examples outside of e-learning, where multimedia effectively integrates audio into the experience. Look at advertising, gaming, and other entertainment industries for ideas.

I’d love to hear how you’re using audio in your courses. Got any tips and tricks? Feel free to share them by clicking on the comments link.

Events

Free E-Learning Resources

Want to learn more? Check out these articles and free resources in the community.

Here’s a great job board for e-learning, instructional design, and training jobs

Participate in the weekly e-learning challenges to sharpen your skills

Get your free PowerPoint templates and free graphics & stock images.

Lots of cool e-learning examples to check out and find inspiration.

Getting Started? This e-learning 101 series and the free e-books will help.


low recording levels

If you find that you’re microphone audio levels are too low, here are some tips that may help.

I record a lot of demos and webinars. With that comes the quest to find decent quality audio. I have a boom arm on my desk that I can swing into action. On it I have a Blue Yeti microphone. Overall, I really like the quality of the sound and this set up works great for recording tutorials where I work from my main screen. I also like that the microphone has its own gain controls which resolves the issue I have below.

However, the challenge with the Blue Yeti is that I work from a home office and if people outside my office are yacking, then the mic picks up their chatter. I can usually work around it a bit. However, webinars are live and I have less real-time control.

For webinars I prefer to use a headset mic because they seem to do a better job blocking out background noise. I’ve used a Plantronics mic for years. It does a great job recording my voice and blocking out the other home office sound. However, the audio is a bit thin and sounds like I’m Lionel Richie on a phone, checking to see who’s home.

Because of this, I recently purchased a Beyerdynamic headset mic. It’s a bit higher end but it’s a great mic with a nice sound. However, it is an XLR mic which requires a different connection to my computer and a pre-amplifier.

And this is where the Windows 10 audio issue is exposed and fixed.

Where’s the Microphone Boost?

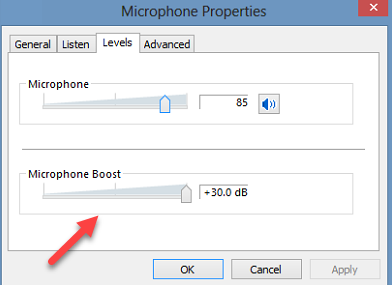
Like many Windows 10 users, the audio recording input signal is too low. Earlier versions of Windows had a way to boost the recording input, as seen in the image below. However, in recent versions, there’s no option.

audio recording input low

If you do not have the option to boost your audio input, one potential fix is to select the Advanced tab from the Microphone Properties window and deselect the option to “Allow application to take executive control of this device.” This works for some people.

The other option is to use a pre-amp. I have an older Focusrite Scarlett 2i2 which is generally simple to use and should work. However, I ran into an issue. The pre-amp has an input range of 1 to 10, but it only seemed to have an impact from about 8 to 10. I just wasn’t getting enough initial boost and the 8 to 10 range didn’t give me enough wiggle room. Since it’s a USB pre-amp, I figured that perhaps it just didn’t have enough juice for the phantom power and signal boost since it was pulling its power from the computer.

Focusrite Clarett pre-amp

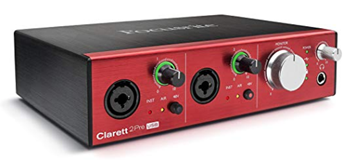
So I tested the Focusrite Clarett. It has its own power source and not pulling it from the computer via USB. However, I ran into the same issues. The range was limited to 8 to 10 with little room for adjustments. Both Focusrite devices are good devices and should work. In fact, on older versions of Windows, the Scarlett worked perfectly. However, with the latest version of Windows 10, I just can’t seem to boost the input levels and there no longer seems to be a way to do it from the drivers or the audio control panel.

So where’s the fix?

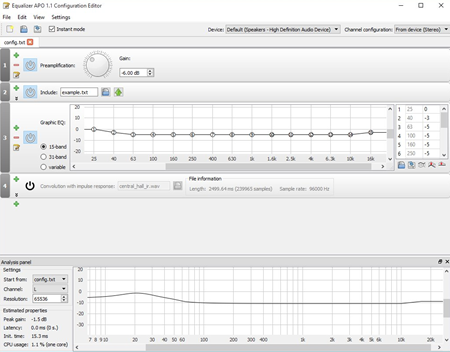
Install APO Equalizer. It’s an open source project on Source Forge that includes a pre-amp which will boost your incoming microphone signal. In addition, there are some other audio options to enhance your audio input and outputs.

APO eaulizer for low audio recording volume

I’m no audio engineer or APO Equalizer pro. However, the installation is easy, and the setup is pretty simple. Don’t let all of the meters and lines make it seem complicated. Once it’s set, you really shouldn’t have to do much with it. Below are some resources to help you get set-up.

The YouTube tutorial above does a great job showing the basics. It’s probably worth learning a little more about some of the filters and how they can improve your audio input. In fact, many of us record in less than ideal circumstances where we may have background noises like air conditioners or computer fans. Some of those filters may help fix the issues.

If you have issues with low recording volumes, hopefully these tips help. If you have additional tips, feel free to share them in the comments section.

Events

Free E-Learning Resources

Want to learn more? Check out these articles and free resources in the community.

Here’s a great job board for e-learning, instructional design, and training jobs

Participate in the weekly e-learning challenges to sharpen your skills

Get your free PowerPoint templates and free graphics & stock images.

Lots of cool e-learning examples to check out and find inspiration.

Getting Started? This e-learning 101 series and the free e-books will help.


transcribe text PowerPoint HTML5 Flash

I’ve been playing around with ideas to get old Flash course content into a new HTML5 course. There are tens of thousands of old Flash-based e-learning courses where people no longer have the source files. All they have are published versions of the course and need to convert to HTML5.

Grabbing the media like images, video, and audio is usually not as challenging. But moving all of the text can be a hassle.

In a previous post we discovered how to use screenshots and OCR to extract the text from the old course screens. Another way to get the text into your slide is by reading it out loud to transcribe it and insert into your slide. I like this approach because you it’s easy and you have to go through the content anyway. Reading it out loud may help you think through the tone and some script changes you’ll make in the new HTML5 course.

There are applications you can buy to do the recording and transcription, but I want to focus on tools you already have that won’t cost anything more.

Use PowerPoint to Transcribe Text for HTML5 E-Learning

transcribe text for e-learning with PowerPoint for HTML5 course

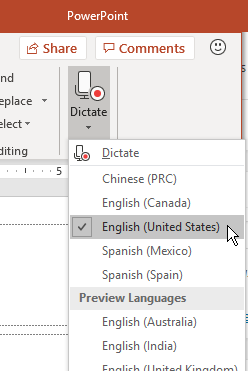
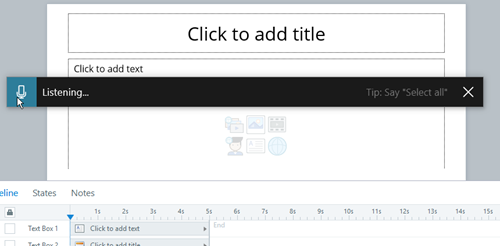
The new version of PowerPoint [this only works for Office 365 subscribers] has a dictate feature. All you do is press the button and start to read. PowerPoint transcribes the text and adds it to the slide. Then you make your edits. You can also send the file out to be verified and edited by others who use PowerPoint. Once it’s ready, import the slides into Storyline.

Use Google Docs to Transcribe Text for HTML5 E-Learning

transcribe text for e-learning with Google Docs for HTML5 course

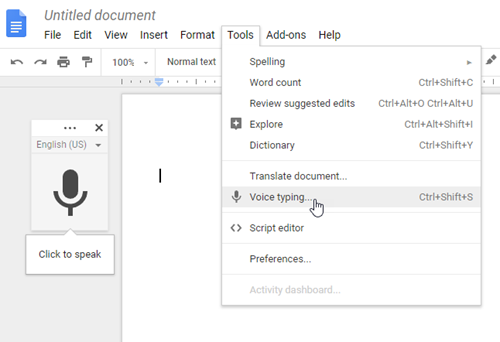
Some of you use Google Docs instead of Microsoft Office. In Google Docs, under the Tools tab, you’ll find a Voice Typing feature. Just press it and it starts to record. If I speak clearly, I find it to be very accurate. Once the text is on the page, send it around to be verified and approved. And then copy and paste it into your HTML 5 course.

Use Windows to Transcribe Text for HTML5 E-Learning

transcribe text for e-learning with Windows for HTML5 course

Microsoft Windows 10 has a transcription feature that works to transcribe text right into Storyline. Press Windows + h keys to open the narration window. Start talking and it will do the transcription. It’s not quite as fast or accurate as the solutions above, but it makes up for it by recording right into the Storyline slide or Rise lesson. If you’re using Windows 7, you can leverage the speech recognition feature.

So, there you have it, three easy ways to read the text from old Flash-based courses to get them into your new HTML5 course that you can update and edit as needed. Then publish it for HTML5 and you are all set.

Events

Free E-Learning Resources

Want to learn more? Check out these articles and free resources in the community.

Here’s a great job board for e-learning, instructional design, and training jobs

Participate in the weekly e-learning challenges to sharpen your skills

Get your free PowerPoint templates and free graphics & stock images.

Lots of cool e-learning examples to check out and find inspiration.

Getting Started? This e-learning 101 series and the free e-books will help.


gamified e-learning

The other day I got one of those marketing emails that I tend to delete without looking over. However, this one featured some ideas on gamification. And what got me most interested was looking at their examples. As we all know, gamification is a hot topic and it’s always neat to see how different groups build the gamified elements in their courses.

Ingenuiti put together a portfolio page with three different gamified examples. They use three micro games to teach and demonstrate some core gamification concepts.

I reviewed their modules and want to highlight a few production tips that not only work for gamified e-learning courses, but are just as useful in other contexts. For today’s post, I’ll focus on the first micro game.

Here’s a link to the video tutorial series.

Gamification Micro Game #1

gamified e-learning example

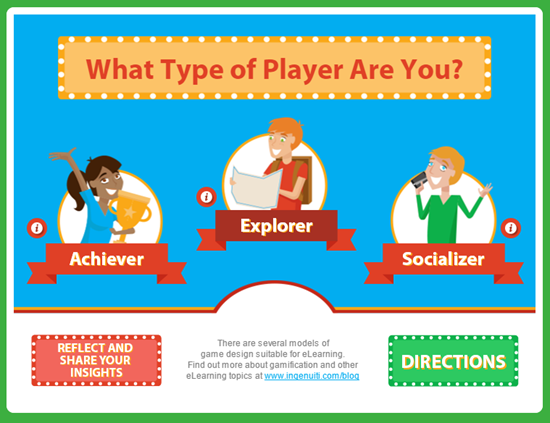
The first micro game focuses on three types of learning activities:

  • Simple Game: challenge the learners understanding in a common game format. It’s a great way to rehearse and recall information and do it in a fun way that is familiar to most people.
  • Explore Activity: have the learner explore the environment and collect information or rewards. I always consider exploration to be one of the core building blocks for interactive learning. Given the right context, exploration is a great way to engage and inspire critical thinking.
  • Simple Scenario: the learner observes an interaction, reflects on it, and then offers constructive input. Mimicking real-world type interactions is a good way to reinforce the learning experience. They do some clever things with the commenting, liking, and bookmarking.

There’s a lot going on in their modules. I isolated a few things that they did so that I can show some production tips and nuances of the software. Keep in mind, there’s always a few ways to do the same thing in software. So if you have different or even better ideas, feel free to share them in the comments.

Here are some videos that offer some real quick tutorials on how you can create similar effects and interactions in your own e-learning courses. I’m using Storyline because it’s easy to use, but you’re free to use the software of your choice, especially if you have plenty of time on your hands and not rushed to get things done. 🙂

E-Learning Tip #1: Gate Screens

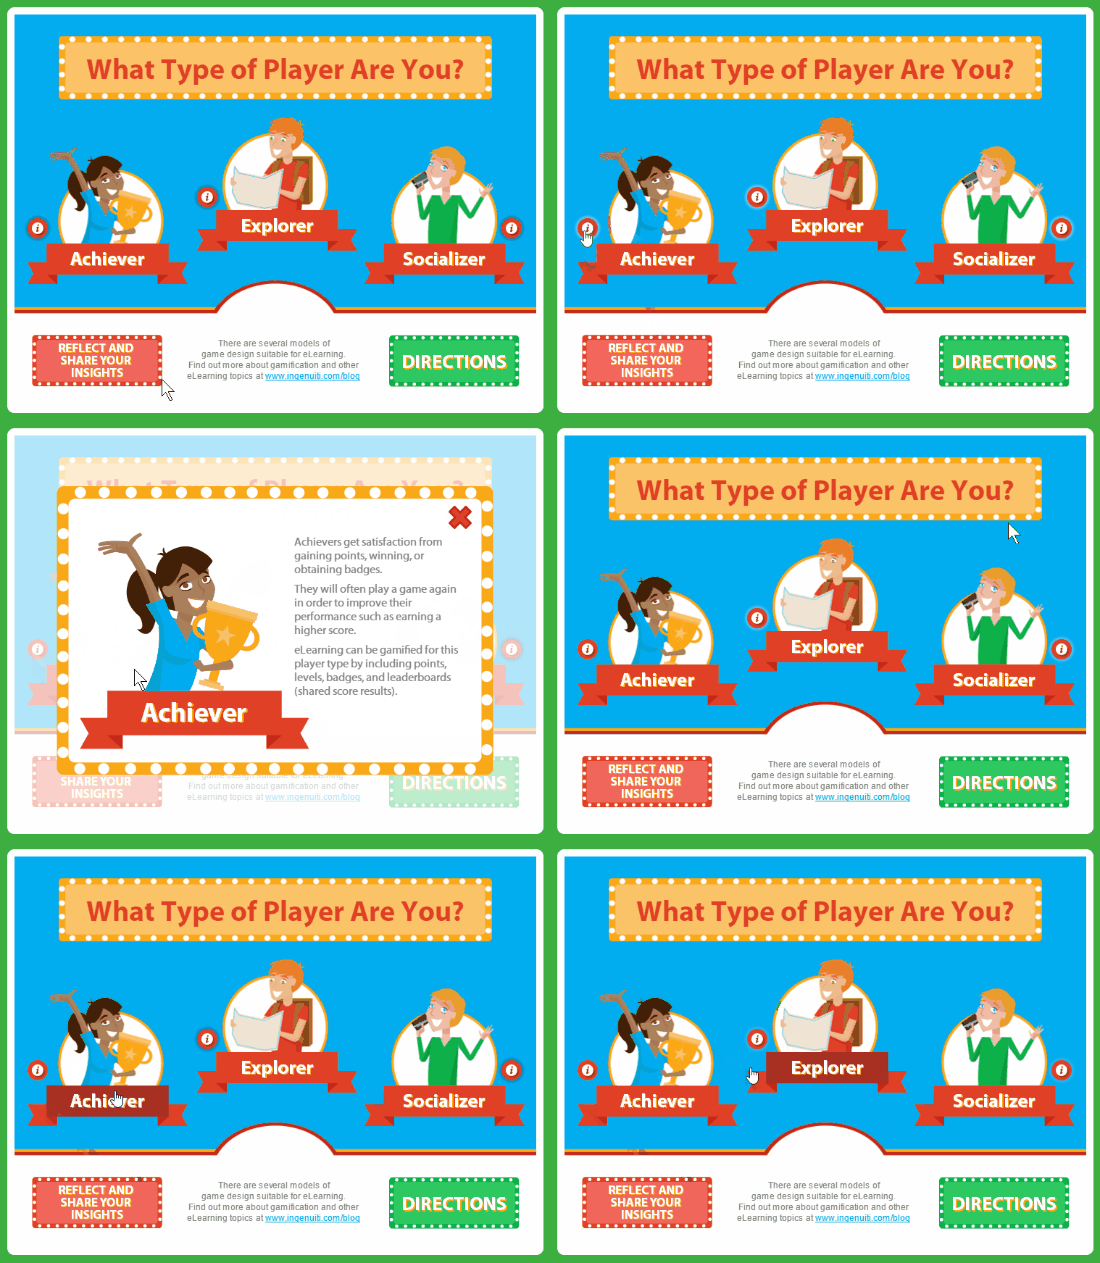
gamification example gate screen

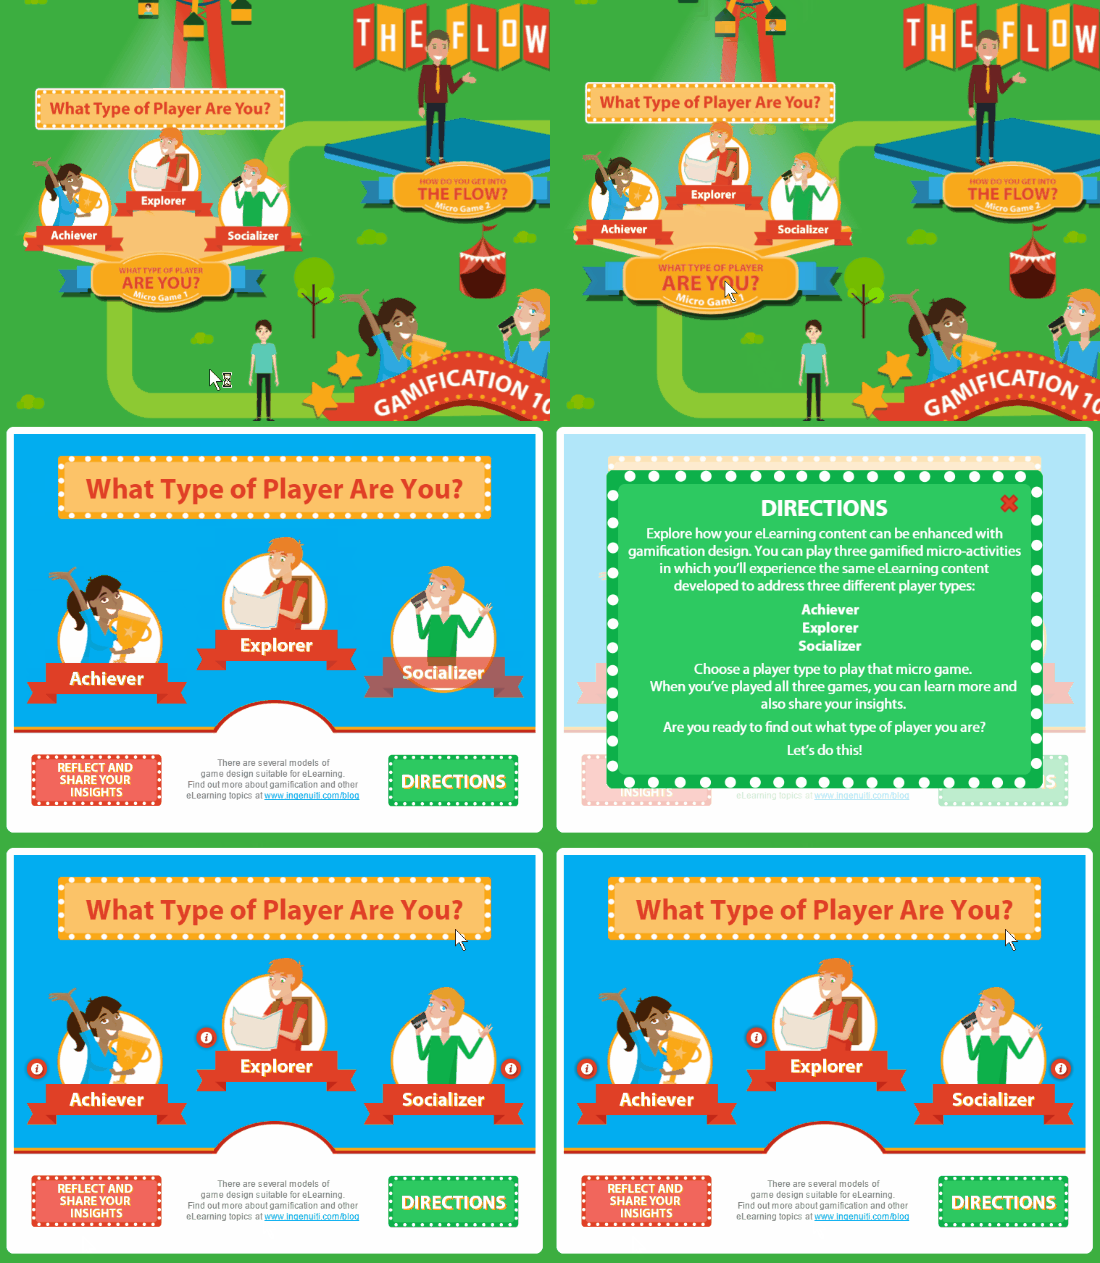
Many courses have starter pages with simple instructions. Also, it’s also a good idea to stop progress in the course when changing directions on types of interactivity or navigation. It helps set expectations and orients the user. I call those gate screens.

E-Learning Tip #2: Custom Markers with Animated Content Boxes

gamified e-learning example custom markers

In their demo, they used the marker feature but turned off the marker labels and had their own content appear. Also, after clicking the marker, the pulsing stops. When clicking the marker, the background fades and the content box animates in and out (upon leaving).

E-Learning Tip #3: Turn Audio On/Off

In a few places, they have running background audio which can be turned on or off. Normally, one oculd use the player volume control, but since the player isn’t present, custom controls need to be enabled.

E-Learning Tip #4: Simulated Posting of Chat Response

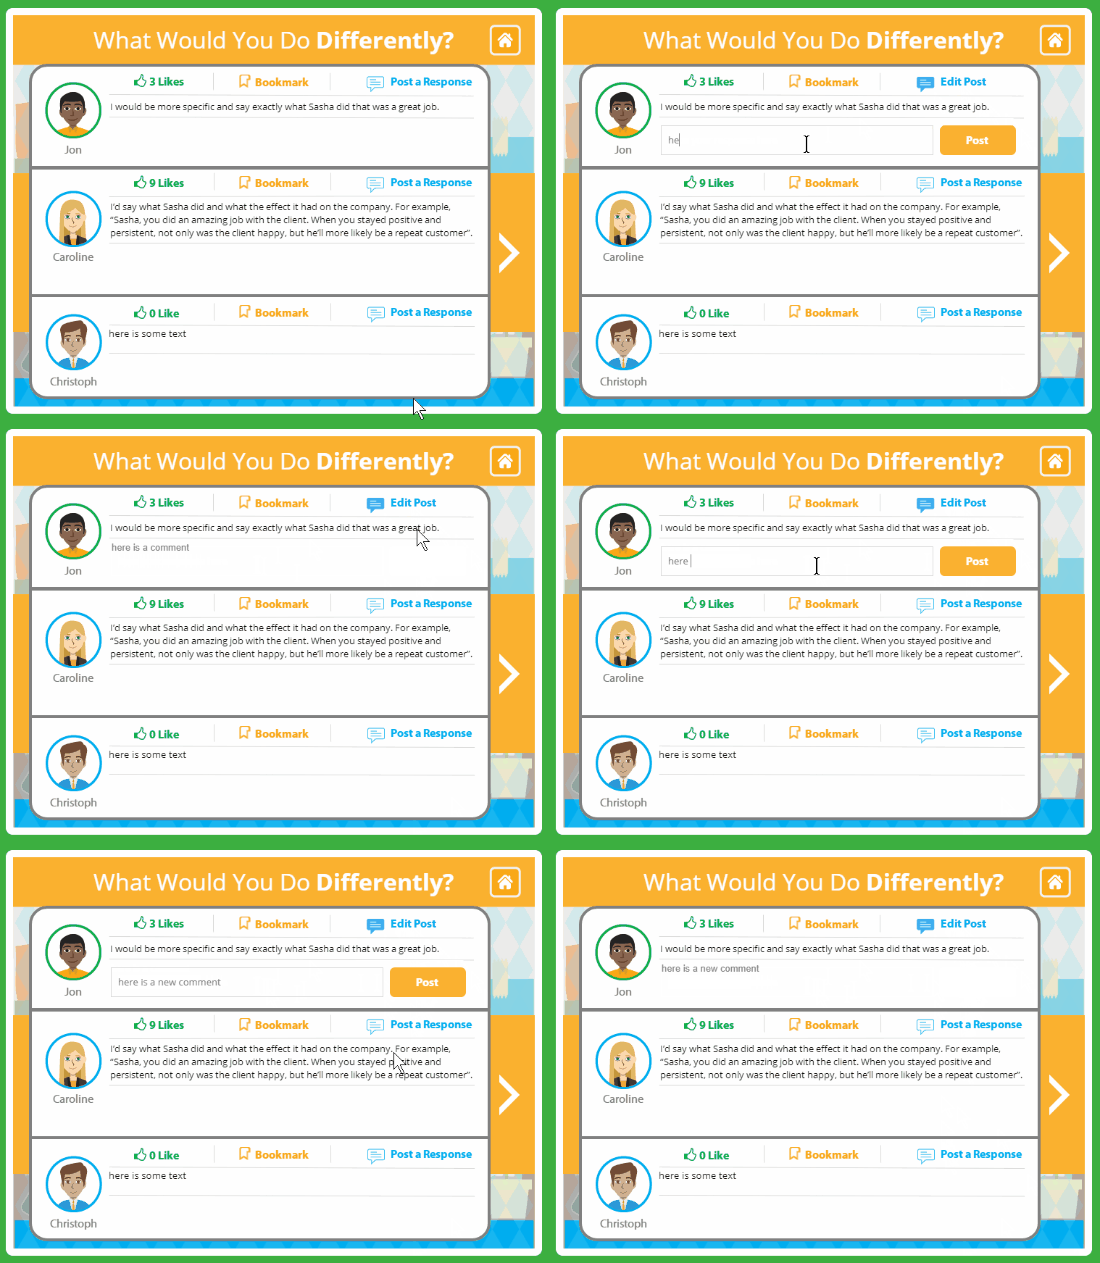
gamified e-learning example simulated conversation and text chat

I really like the way they build this mini scenario and the simulated chat. Have the user post a response to a chat. You notice that you can post and edit comments. As you do that, the other comments are disabled.

E-Learning Tip #6: Free Dragging Objects

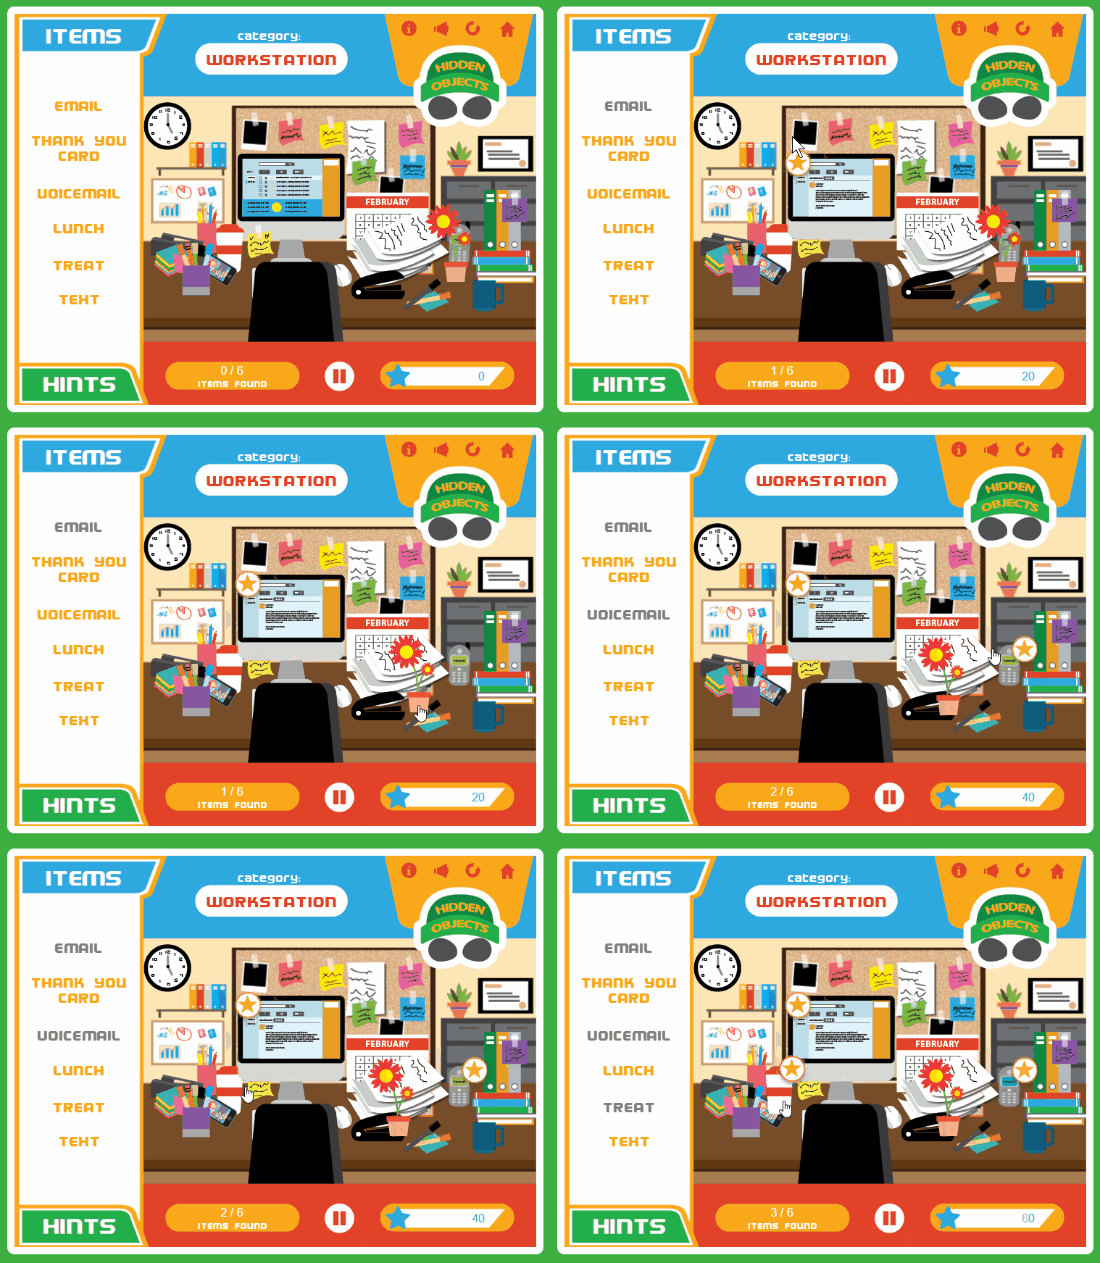
gamified e-learning example free dragging interaction

This exploration activity let’s the user drag objects and move them. Normally, dragging objects are associated with drag and drop activities. However, these are free moving objects with no specific interaction to them. They just let the user move objects freely out of the way to see what’s underneath.

E-Learning Tip #7: Changing State of Selected Objects

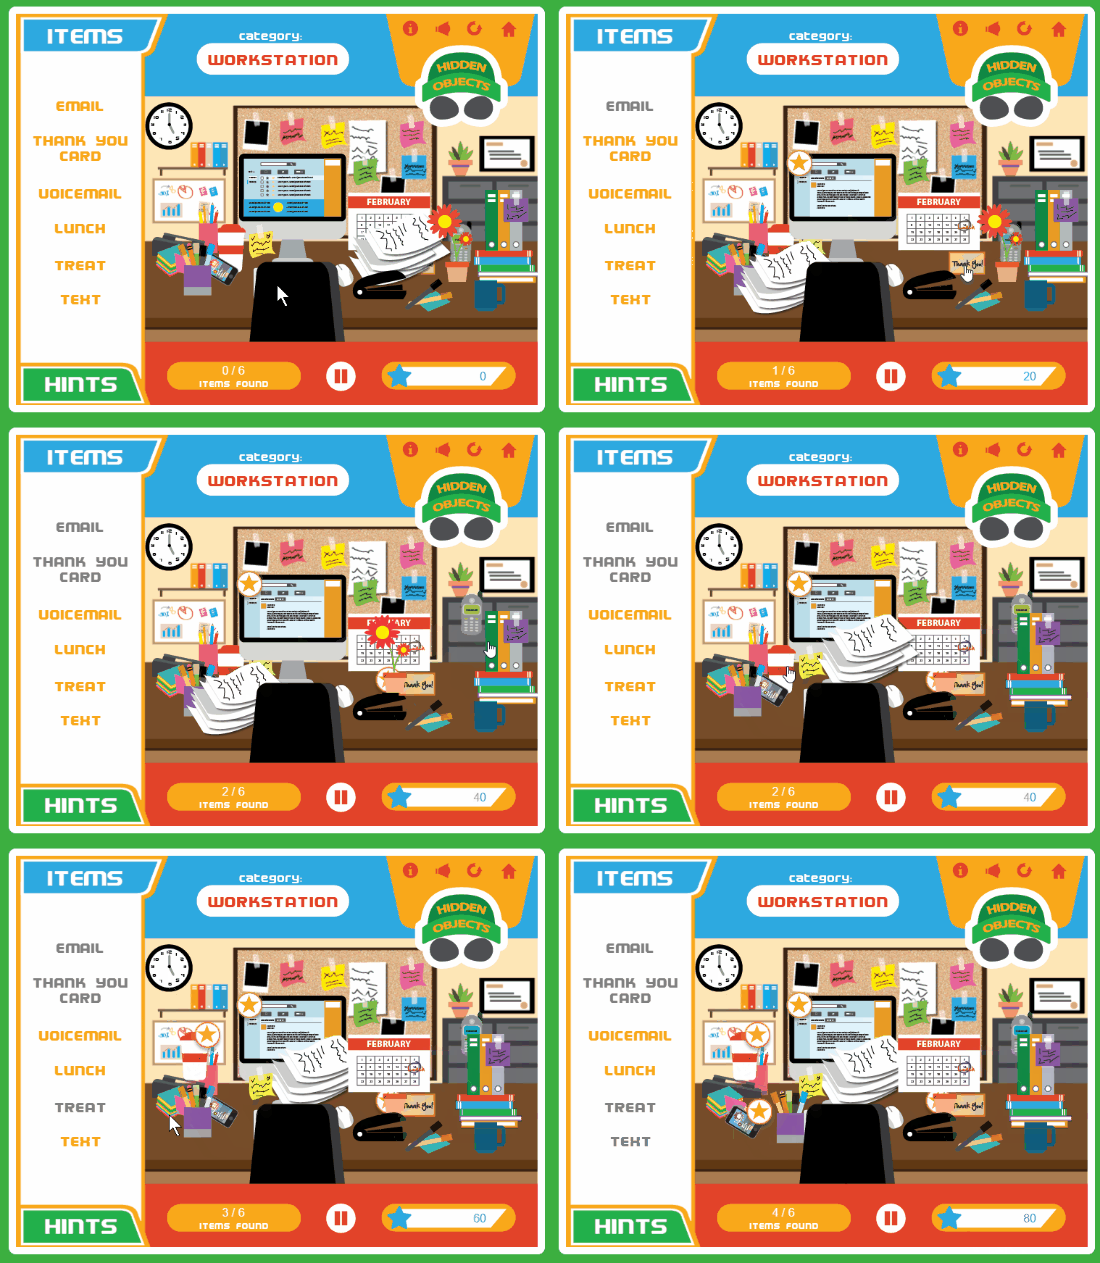
gamified e-learning example selected states

When a correct choice is made, the object displays a star to indicate it’s been selected correctly. You’ll also notice that the side panel indicates which objects are selected and which remain.

E-Learning Tip #8: Play Again Option

gamified e-learning example retry interaction

Let the user quit or play the game again. This resets the interaction to the initial state.

These are a few of the cool things the Ingenuiti developers did in their module. Whether you’re building a gamified e-learning course or something else, these production tips should come in handy.

Events

Free E-Learning Resources

Want to learn more? Check out these articles and free resources in the community.

Here’s a great job board for e-learning, instructional design, and training jobs

Participate in the weekly e-learning challenges to sharpen your skills

Get your free PowerPoint templates and free graphics & stock images.

Lots of cool e-learning examples to check out and find inspiration.

Getting Started? This e-learning 101 series and the free e-books will help.


closed captions

We’ve discussed closed captions in a previous post. We looked at how to create them with free software or online tools. And we also explored how to build closed captions using a single text variable.

Today, we’ll look at how the closed captions feature works in Articulate Storyline 360. You’ll find it a lot easier to use. Here are three video tutorials that go into more detail regarding the steps below.

TUTORIALS

How to Create & Edit Closed Caption Text

Here’s how to add captions to audio narration or videos in your course. You can do it right inside of the authoring tool.

  • Insert the video (or audio) file.
  • From the toolbar, select Add Captions.
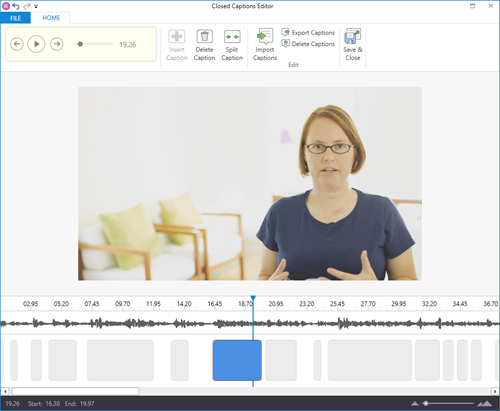
  • Storyline opens a caption editor where it analyzes the audio track and creates several placeholder caption boxes for you to insert text.
  • Select a caption box and start typing. Hit the return key to restart the caption box until you’re done. Hit the tab key to move to the next box.
  • Easy as that.

closed captions editor

TUTORIAL: Learn about creating and editing closed captions in Storyline 360.

Editing your captions is fairly straightforward. When you open the Closed Captions Editor, you see a timeline with the audio track and caption boxes.

  • You can extend or decrease the time of the caption.
  • Edit text.
  • Click and move the caption boxes.
  • Export the closed captions as a .VTT file, which is standard.

How to Import Closed Caption Text

Many people like to create their closed caption text in separate applications, export the .VTT (or another format), and import the text file into the authoring tool. That makes sense, especially if you have really long audio or video tracks.

Personally, I like to use Youtube to create my captions for long videos. I upload the video to Youtube and make sure it’s not public. Then, I take my text script and paste it into the field. Youtube does the rest. When it’s done, I can download a .VTT file to use in my e-learning course.

Here’s how it works in Storyline 360.

  • Insert a video or audio file into the slide.
  • Click on the video and in the ribbon, select Import to access your .VTT file.
  • Preview the slide and select the Captions button on the player.

closed captions example

TUTORIAL: Learn about importing closed captions.

How to Create a Closed Captions Button

By default, the course player has a captions button. To view captions during the course, click the captions button. That works great if you have the player and captions button enabled. However, some people prefer to diminish the player and want their own captions button on the slide to control when the captions display.

Here’s how to create a custom captions button:

  • Insert a button.
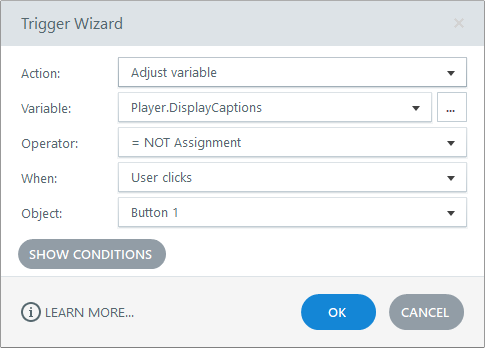
  • Add a trigger to the button to adjust the Player.Display.Captions variable.
  • The variable is like a True/False variable that can be either one or the other when clicked. Set the operator to =NOT Assignment.
  • When the button is clicked it toggles the variable value to what is not assigned to. Thus, clicking the button turns the captions or off.

closed captions variable

TUTORIAL: Learn about creating a custom closed captions button.

And that’s how you add closed captions to your e-learning courses. Pretty simple, huh?

Events

Free E-Learning Resources

Want to learn more? Check out these articles and free resources in the community.

Here’s a great job board for e-learning, instructional design, and training jobs

Participate in the weekly e-learning challenges to sharpen your skills

Get your free PowerPoint templates and free graphics & stock images.

Lots of cool e-learning examples to check out and find inspiration.

Getting Started? This e-learning 101 series and the free e-books will help.


free text to speech narration

Occasionally, I get questions on free text-to-speech applications. While there are a number of free text-to-speech applications out there, many have character limits or don’t allow for commercial use. I’m not sure how many people have personal use cases for text-to-speech, but if you do, there are plenty of options. Another challenge is that many blogs in our industry create linkbait lists of text-to-speech applications, but for the most part, those lists are worthless.

Today we’ll look at a really good solution if you need a free text-to-speech application.

Why Use Text-to-Speech?

Despite the mechanical voice quality, there are some viable use cases for text-to-speech in e-learning (outside of accessibility issues):

  • For example, text-to-speech makes sense if you send a script out for professional narration. Use text-to-speech to create placeholder content for your reviewers so that you can get the voiceover script approved before sending it out for professional recording. This will save on the cost of do-overs.
  • Another good use case is the training content changes often. It is time-consuming to continually update and record narration. Text-to-speech applications make that easy. And because the content is somewhat disposable, people will most likely tolerate the mechanical voice.
  • Often we have international developers where English (or other languages) isn’t the first language. They can produce the courses and insert audio narration generated by text-to-speech applications.

A word of caution, though: most text-to-speech doesn’t sound that great. It’s been getting better over the years, but the mechanical voices can be grating and hard to sit through for long form content. That’s something to keep in mind. It’s bad enough to sit through most of the e-learning people experience today, let alone having it narrated by a robot.

With all that said, here’s how to use this text-to-speech application that is free and available for commercial use.

Balabolka: Free Text-to-Speech Application

I’ve reviewed most of the free applications and find that Balabolka offers the best benefit for text-to-speech narration. Here are some of the benefits and things you can do with it:

  • It’s free. Although, I do recommend that if you get value out of the free software it is a nice gesture to support the developer with a donation.
  • Run it via USB. No need to install it. You can run the software from a  USB drive.
  • It uses the SAPI voices that are already installed on your computer. In most cases the sound fine. You can also add additional voices. I added the new mobile voices from Microsoft and they work for my needs. There are other services where you can buy more natural sounding voices. But you’ll have to do your own research on how to set those up.
  • Insert your entire narration script and output either a single audio file or split the narration into multiple audio files.
  • Leverage the Google text-to-speech service for an additional voice. Output as an audio file.

Balabolka Text-to-Speech Examples

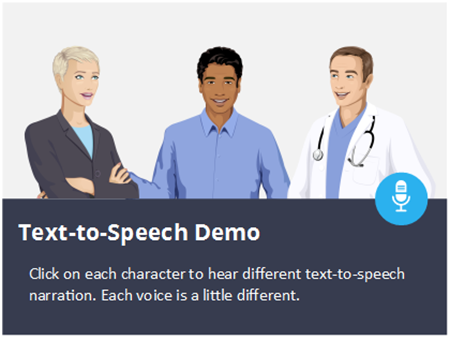
Below is a link to an example module where I converted some text from a blog post into text-to-speech audio. I created a few different examples so you can hear the quality of the voices and how they sound in the context of an e-learning demo.

text to speech narration

Click here to view the text-to-speech demo.

Balabolka Text-to-Speech Tutorials

Here’s a quick video tutorial where I walk through the basics of text-to-speech conversion:

  • Insert text and output audio
  • Create multiple audio files from one script
  • Batch convert audio from a script

Click here to view YouTube video.

If you’re looking for a free alternative for text-to-speech narration, then this solution should work for your courses.

Events

Free E-Learning Resources

Want to learn more? Check out these articles and free resources in the community.

Here’s a great job board for e-learning, instructional design, and training jobs

Participate in the weekly e-learning challenges to sharpen your skills

Get your free PowerPoint templates and free graphics & stock images.

Lots of cool e-learning examples to check out and find inspiration.

Getting Started? This e-learning 101 series and the free e-books will help.


accessories audio narration

In a previous post, we explored some inexpensive microphones for recording audio narration. However, sometimes having a microphone is not enough. There are other accessories that help put the microphone in the correct position and offer other assistance for recording the best quality audio.

In this post we’ll look at a few accessories to help get better audio quality when recording narration.

Use a Microphone Stand when Recording Audio Narration

It’s a good idea to invest in a microphone stand. It helps control placement of the audio. There are a few inexpensive options for microphone stands.

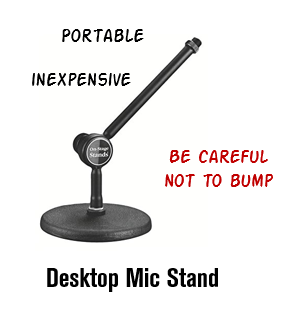
desktop microphone stand for audio narration

  • Some people use simple desktop stands. They’re OK but I find they often get in the way and chances are greater of accidentally bumping the stand and messing up your audio narration. This is especially important because most people just record audio and aren’t monitoring it at the same time. Thus you don’t realize that the audio has the bumping sound until you preview it.

microphone stand for audio narration

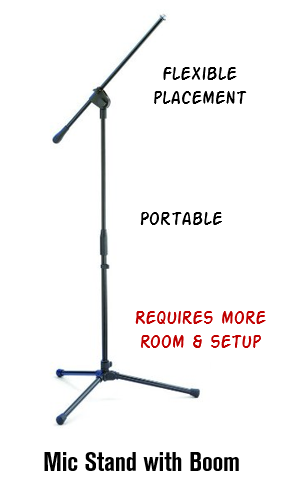
  • Depending on your room set up, a viable option is a stand up mic stand. This allows you to record standing or sitting down with lots of flexibility with how and where you position the microphone. I prefer the ones with the boom arm so that I can move it in position. With a desktop stand like above, people tend to lean down into the mic which may mean they move around more or don’t breathe properly while talking. People tend to talk better standing up and this stand lets you do so.

swing microphone stand for audio narration

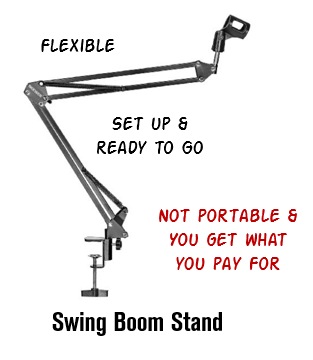
One thing to keep in mind, you get what you pay for. The less expensive products are great if you’re not moving them around too much. But moving a lot, means they’re more apt to get banged up and break.

Use Audio Dampening to Get Better Quality Audio Narration

Sound waves tend to bounce around a lot. I work from a home office and the hardwood floors in the hallway act as a funnel, moving all the sound to my office. I dampen the sounds by putting a piece of carpet in front of the door and I hang a thick blanket over a rolling clothes rack I purchased from Ikea. It doesn’t look great, but it works well.

sound dampening for audio narration

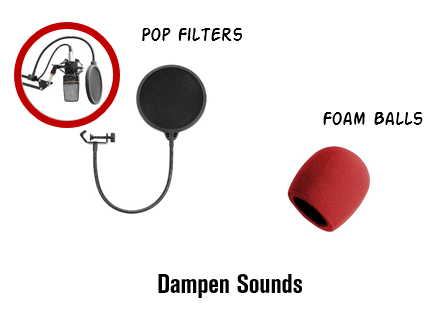
You can look more polished with just a few accessories using different types of filters that sit between your microphone and the incoming audio wave. Sometimes all you need is a simple foam ball that sits on top of the microphone. Or a pop filter which helps catch your breath sounds.

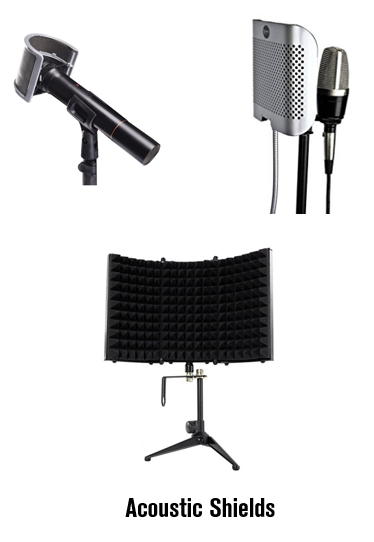
Then there are all sorts of acoustic shields that clip onto the microphone or attach to the mic stand. I like this one that expands to create a larger barrier but folds into a nice portable package.

acoustic shield for audio narration

Some people I know use the portable sound boxes that are filled with foam. You can buy them at a decent price or make your own using some acoustic foam and a cardboard box. If you work in a cubicle, it already has some sound dampening. You could also put together a makeshift studio by assembling a few cubicle walls. A lot of companies have extras laying around or you can buy some at an old office supply store. The panels are top quality and do a great job.

preamp for audio narration

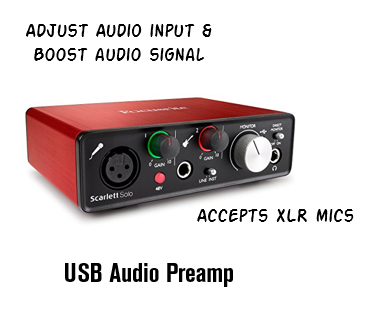
If you really want to get fancy you can buy a preamp to better control the audio going into your computer. I don’t use one, but David does and his audio quality is always nice and rich. It may seem extravagant to get a preamp, but consider this: your microphone takes in sound waves and outputs a signal. When you use a less expensive microphone you tend to get a lower signal (or low sensitivity). A preamp will boost the signal for better audio. This is important because you’ll never get better quality than what you record.

What I find amazing is how inexpensive and available these accessories are compared to a few years ago. All of the items are less than $100 and most are in the $20 range.

Which accessories do use? What tips do you have using them? Feel free to share in the comments section.

Events

Free E-Learning Resources

Want to learn more? Check out these articles and free resources in the community.

Here’s a great job board for e-learning, instructional design, and training jobs

Participate in the weekly e-learning challenges to sharpen your skills

Get your free PowerPoint templates and free graphics & stock images.

Lots of cool e-learning examples to check out and find inspiration.

Getting Started? This e-learning 101 series and the free e-books will help.