


If you want to make a very inexpensive teleprompter (under 5 dollars) here is one of the many videos of how to create one yourself.
How to Record Your Own Audio Narration
June 29th, 2021
In e-learning software like Storyline 360 and Rise 360 you can record (or import) audio narration into your courses. Since many e-learning developers tend to produce all media that belongs in the course, recording audio narration usually is one of those responsibilities. That means there are a lot of people that record audio narration who aren’t trained voice over talent.
If you have money and the time, using professional voice over talent makes sense. But most of us don’t have that luxury. So here are some tips to help you get started and get the best audio narration that you can get.
Audio Narration Script
- Script approval. Narration (especially for non-professionals) can be time-consuming. You don’t want to do a lot of re-work. Get the script approved before you start any work on recording the narration. That will save a lot of time.
- Text-to-speech. Use the text-to-speech feature to create demo narration for the review process. This way the subject matter experts and reviewers can hear the script and not just read it. And if you need to make changes, it’s just a matter of typing new text and not going through the process of recording new narration. Settle on a final, signed-off script.
- Sound like a real person. Audio narration should sound like a real person. That means you need to move past the legalese and corporate way of saying things (assuming the legal department lets you). Write a script that sounds conversational and how you would talk and explain things in real life.
The Right Environment to Record Audio Narration
In an ideal world, you have a recording studio or one of those fancy whisper rooms. But odds are you have a cubicle or empty conference room.
- Cubicles are good. The walls are designed to absorb sound. Unfortunately, in an open-air cubicle farm, you don’t get a lot of privacy and there’s a lot of background noise, so you’ll need to record when there aren’t many people around.
- Minimize noise. Turn off office machines, fans, and air conditioners (if possible). Record about 15 seconds of ambient noise. Sometimes you can use that to create a filter and edit out the background noise when you do post-production. But the best option is to record the best quality you can. As a general rule, the best recording is the original recording.
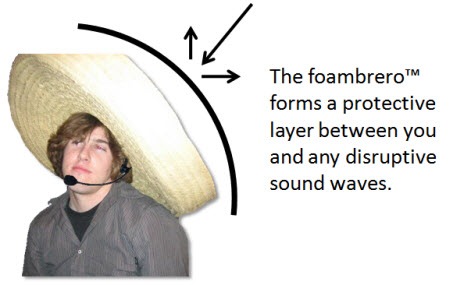
- Use sound buffers. Listen to the difference between using a sound box and not. There are several ways to buffer the sound coming into your mic. There are professional options with sound proof panels, mic boxes (you can make these with a fabric cube and foam wedge panels), and panels that connect to your mic. In my home office, I have a clothes rack and drape a thick blanket over it. Then I roll it behind me. Here’s an emergency option: the foambrero. If you have a budget, this recording booth looks interesting and seems very portable and easy to set up in a small office.
- Headset mic. Sometimes you’re stuck in an office and cannot control the background noise, but a headset mic helps because it is unidirectional and will only record audio from one direction. This helps block out a lot of ambient noise.
Prepare Yourself to Record Audio Narration
- Read the script aloud a few times. You’ll quickly identify areas where it doesn’t sound natural and when it doesn’t roll of the tongue right.
- Record it first so you can hear it back. Just the act of recording often helps identity where it doesn’t sound right and where you flub over words and sentences.
- Drink plenty of water. Hydration is key.
- Don’t worry about being perfect. Remember, you’re not hiring a pro, so you’re not getting a pro.
- Stand rather than sit. Standing helps you breath better and take in more air. The most important thing is to be comfortable and of course being able to reach your audio controls between takes.
The Right Tools to Record Audio Narration
I created a list of good audio accessories and mic recommendations that won’t break the bank. And there are plenty of affordable or DIY options like building a sound box or using an Ikea lamp as a mic boom. Regardless, here’s a general rundown of what you’ll need:
- Good microphone: headset or desktop. I usually prefer a desktop mic, but a headset is much more mobile and the sound quality is decent.
- Pop filter to remove those annoying mouth sounds and popping p’s.
- Mic stand. I use a boom mic mounted to my desk. I like to swing it in and out of position. The Blue Compass is a nice-looking boom if you don’t want to make your own or break the bank.
- Teleprompter (better than reading from a paper script). A lot of people use a second monitor or tablet.
- Sound buffer to control ambient noise and get fuller sound quality.
How to Record Audio Narration
I won’t go into a lot of detail about recording because there are a lot of different applications. But I will narrow it down to a few basic tips.
- Record in the authoring tool or outside? You can always record much of the audio narration with the e-learning software. That makes it super easy, especially if you’re doing all the work by yourself. Storyline 360 even has a simple audio editor for some post-production editing. However, I prefer to separate my multimedia production into distinct groups: video, audio, graphics, and course construction. I find it helps keep me focused on one thing and I can get it done right the first time. Because of this, I like to record my narration outside of the authoring tools. Then I can make any edits I need and upload the narration into the software. This works in both Storyline 360 and Rise 360.
- Free audio editors. If you don’t have any money, Audacity is a free audio application that works fine for recording narration. Here’s a list of a few other free audio recording options. Levelator (although no longer supported) does a respectable job cleaning up your audio narration. There are also all sorts of apps you can use on your phones and tablets to record audio (iOS and Android).
- How to save audio files. You can save as .MP3 or .WAV. Both should be fine. MP3 files will be much smaller and you won’t notice any degradation. It’s also a good idea to have a consistent naming strategy when you save your files. “Audio1.mp3” isn’t very good. However, “Safety101-Intro-Layer4.mp3” makes a lot more sense and you know where it goes in the course when you have to import it.
These are some good, basic getting started tips when recording audio narration. If you have some to share, feel free to add them to the comments.
Events
- Everyday. Check out the weekly training webinars to learn more about Rise, Storyline, and instructional design.
Free E-Learning Resources
 |
 |
 |
|
Want to learn more? Check out these articles and free resources in the community. |
Here’s a great job board for e-learning, instructional design, and training jobs |
Participate in the weekly e-learning challenges to sharpen your skills |
 |
 |
 |
|
Get your free PowerPoint templates and free graphics & stock images. |
Lots of cool e-learning examples to check out and find inspiration. |
Getting Started? This e-learning 101 series and the free e-books will help. |
You might also like:
4 responses to “How to Record Your Own Audio Narration”
I tried to take notes using Hypothesis but it seems that your site blocks its use. Disappointing.


0
comments