The Rapid Elearning Blog

Archive for the ‘Uncategorized’ Category


Articulate Rapid E-Learning Blog - 100 free callouts

If you build online training courses then odds are you’ll need some text callouts. In a previous post, I shared 45 free hand-drawn callouts. They’re great to use in your elearning courses, especially for interactive scenarios as in the simple example below.

Articulate Rapid E-Learning Blog - example of interactive callouts

Click here to view demo.

Someone emailed me the other day looking for some of the free callouts in the community so I thought I may as well create a single post with links to all of the free callouts currently available in the community.

100 Free Callouts & Text Bubbles

Below are links to the free callouts. You’re free to use them as you wish.

Hopefully you’ll find some use for the free assets.

Here’s a question. What do you call these? Sometimes I call them speech or text bubbles. Some people call them chat clouds. What do you call them?

Events

Free E-Learning Resources

Want to learn more? Check out these articles and free resources in the community.

Here’s a great job board for e-learning, instructional design, and training jobs

Participate in the weekly e-learning challenges to sharpen your skills

Get your free PowerPoint templates and free graphics & stock images.

Lots of cool e-learning examples to check out and find inspiration.

Getting Started? This e-learning 101 series and the free e-books will help.


Articulate Rapid E-Learning Blog - how to build effective online training

Many organizations are starting to really ramp up their online training programs. And that creates a lot of conversation about online training and what makes it effective.

In a previous post we looked at whether or not you’re building the right type of elearning. Today, I’d like to expand on it.

Where’s the Learning in Online Training?

We have a definition problem. Not everything we call “elearning” is about learning. We buy an “elearning” application to build our “courses” so we end up calling everything an elearning course. But the reality is that the elearning applications let us build interactive multimedia content that may or may not have the objective of learning.

For example, many of the courses I’ve had to build in the past were more about concepts and information. The information was important, but it wasn’t tied to an immediate or specific performance expectation. In that sense, the course I built was really more like a multimedia ebook than a course intended to train somebody.

On the other hand, I’ve also built courses that had very specific performance requirements. Those involved crafting real-world experiences and helping the learners make decisions similar to what was expected in the real world.

In both instances, we called it elearning. But the reality is that they weren’t the same. One was more like e-marketing or e-information and the other e-performance.

My remedy is to break the types of “courses” or multimedia content into one of two buckets. To me, the course is either content to support performance or it exists to change performance.

Performance Support:  These are mostly information courses that support performance requirements.

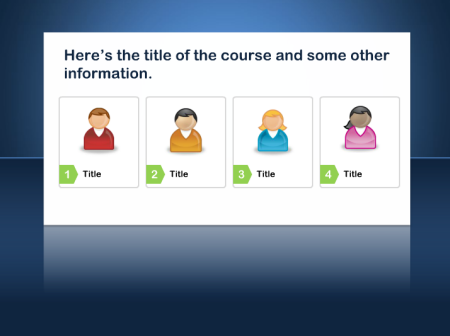
For example, the organization has an online training program that trains new managers on the organization’s bonus plan.

A performance support course goes over the specifics of the bonus plan. But it doesn’t really ask the learner to do much more than acquire the information. There may be a simple quiz at the end, but that doesn’t really measure much more than general knowledge. It doesn’t effectively measure the person’s understanding. That’s OK because in this type of course is more about sharing information than changing performance.

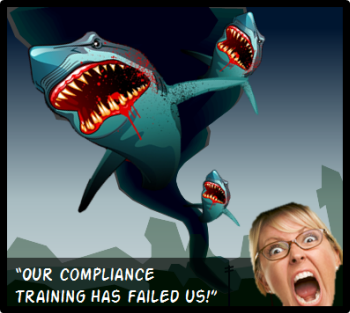
Many compliance courses and those created by subject matter experts fall into the performance support bucket. The information is important to the learning process, but it’s not always tied to actionable performance.

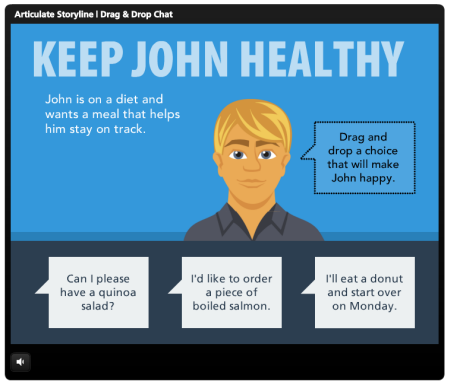
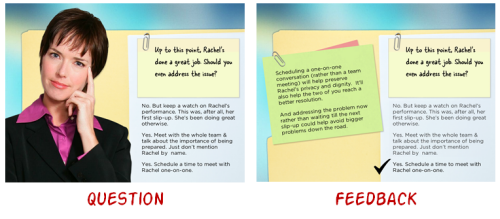
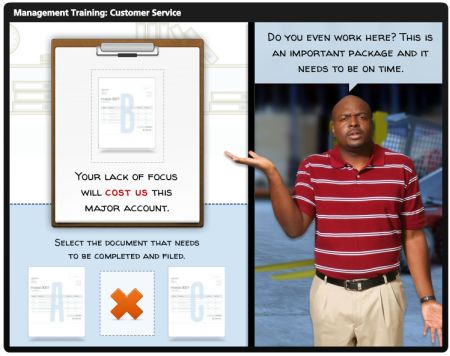
Performance. A performance course is actionable and asks the learner to assess a specific situation and make decisions that mirror the decisions required in the real world. This forces a consequence and the means to provide relevant feedback.

In the case of the bonus training program, a scenario where a manager has to assess the employees and determine who’s qualified for a bonus makes more sense than a bunch of information about the bonus program.

Understanding the type of course you build helps you determine whether it’s effective or not.

Online Training: Effective Performance Support

Performance support is mostly about the information and appropriate content. Here are some ways to determine its effectiveness:

  • The right content at the right time. I was in a store once and asked the sales person a question. He pulled out a tablet, looked over some material, and offered an answer. In that sense, he didn’t need to take a product training class to meet my needs. He just needed a means to get the information at the point he required it.
  • Able to easily find and access the content. A lot of online training is mostly existing content repackaged so it’s easier to find or understand. In that sense, performance support is about providing context to existing content and then bundling it to it’s easy to locate and use.
  • Efficient creation & distribution of the content. Even simple courses used to cost a lot to produce. That’s no longer the case. So the effectiveness of a performance support course could be evaluated by the cost to create and distribute the content compared to how it used to be done. Going from classroom to online training is one example.

Online Training: Effective Performance

Performance-based courses are designed to change performance or behaviors. The ultimate measure of effectiveness is how well the performance goals are met.

  • Content relevant to the user’s experience. You can impact performance when courses are meaningful and relevant to the learner’s needs.  
  • Mimics real-world decision-making and consequences. If you’re trying to get someone to do something a certain way, then you should design the learning experience to mimic what it is you desire.
  • Measurable impact. If the customer says they need to create a course to improve sales, and it was determined that the course is the means to accomplish it, then increased sales is your sign of effectiveness. If you didn’t increase sales, you didn’t meet your goals no matter how good the course appeared to be.

If you’re focused on changing behaviors, then a course that helps a person change behaviors makes sense. It’ll complement the expectations required in the real world. In that way, the course is effective if you can measure changed behavior.

On the other hand, if the course is merely a means to bring attention to some information, then the effectiveness is better measured at cost and time effectiveness coupled with access and use by the learners.

What are your thoughts?

Events

Free E-Learning Resources

Want to learn more? Check out these articles and free resources in the community.

Here’s a great job board for e-learning, instructional design, and training jobs

Participate in the weekly e-learning challenges to sharpen your skills

Get your free PowerPoint templates and free graphics & stock images.

Lots of cool e-learning examples to check out and find inspiration.

Getting Started? This e-learning 101 series and the free e-books will help.


Articulate Rapid E-Learning Blog - how to motivate adult learners

I was going to help my son build a computer game using Kodu. I like the app because it’s a simple way to introduce visual programming. I was prepared to sit down with him, watch some tutorials, and then practice. But he was already messing around with the application.

Impressed with what he had done I asked if he had already watched the tutorials. He told me he didn’t know what he was doing. He just started “clicking around” and was figuring it out.

Funny thing about the young ones, they have no problems jumping in and messing around. Adult learners aren’t always so willing to do that. It’s probably because we are so conditioned to avoid failure that it makes us guarded and reluctant to step out a bit.

Assuming you have to work with adult learners, what are some things to consider to keep them motivated and engage? Here are a few quick thoughts:

  • Don’t waste time. People don’t like wasting time. The courses they take should be meaningful and relevant to their needs. One of the bad things about elearning is that so many courses forced upon learners are pointless and offer little tangible value. Even if it’s a compliance course, there’s usually a way to frame it in a relevant context. Do that and you’ve taken the first step towards engaging them.
  • Account for existing understanding. Adult learners already have experience. Odds are that much of the content in your course the learners already know. Giving them an opportunity to demonstrate what they know is a good practice. Letting learners test out is another way to accommodate their needs.
  • Build on what people know. This ties into the point above. Don’t expect that you have to take every person through the course from A to Z. Some people may need that. Others may need to start at Q. So build a course that can assess their current knowledge and let them step in where appropriate.
  • Big Brother elearning sucks. Irrelevant compliance training is one thing. But if you are really interested in helping people learn, it may help to turn off the continual monitoring of progress and reporting to the LMS. Create a safe learning environment without tracking every time someone makes a wrong decision.
  • Provide practice activities. We are have lots of content and tend to be info-centric. The problem is that content works in tandem with context. So step away from the information dump and focus on how the information is used. Create real-world decision points and ways to access the information required to make good decisions.
  • Give meaningful feedback. Decisions produce consequences that are not always black and white. There are lots of nuances to what we do in daily life. Most elearning courses offer simple forms of feedback and sometimes too quickly. Consider how the consequences manifest in the real world and mimic that type of feedback. Sometimes it’s immediate, sometimes it compounds, and sometimes it’s delayed.
  • Allow the freedom to function. Adult learners like to look over the content and then assess where they see the value. They also like to move back and forth through the content. However, many courses lock navigation and don’t let people move around. Unlock the navigation and let them choose to learn what they need. Instead of locking the course at the slide level, create decision-making situations where they can prove their understanding and then move on.
  • Does it need to be in the LMS? The course you build is a great ongoing resource. But often the course is a take-once event and then locked behind the LMS. Make the course available for future access if it’s really tied to their performance expectations.
  • _________________________________ There’s a lot more that can be said about motivating and engaging those who take your online courses. What tips do you have for teaching adult learners?

Events

Free E-Learning Resources

Want to learn more? Check out these articles and free resources in the community.

Here’s a great job board for e-learning, instructional design, and training jobs

Participate in the weekly e-learning challenges to sharpen your skills

Get your free PowerPoint templates and free graphics & stock images.

Lots of cool e-learning examples to check out and find inspiration.

Getting Started? This e-learning 101 series and the free e-books will help.


Articulate Rapid E-learning Blog - free PowerPoint templates and e-learning examples & samples

The past few weeks I’ve gotten a number of questions regarding some of the blog posts, free templates, and elearning in general. So here are some quick answers to your frequently asked questions with a few free graphics and free templates for you to use in your own elearning courses.

How to Get Free Images

Question: In one of the posts where you offer a few elearning tips you had some images with kids and text. I’d like to use those in a course. Where did you get them?

Articulate Rapid E-learning Blog - example of free PowerPoint template and clip art

Those images are from clip art style 647. I downloaded the images and then created my own tags. Basically, I ungrouped the images, made some edits, and then added them to a rounded rectangle to create the tag.

  • Tutorial: Here’s a tutorial to show you how to create the custom graphics for your elearning.
  • Free PowerPoint template: To make it easy for you, I also created some empty tags. All you need to do is add your own text. I saved them as individual images and also in PowerPoint so you can edit them. Download the free PowerPoint file.
  • Free cartoon font: Sort through Google Web Fonts for free handwritten fonts. There are some that will work well with these tags. I like Happy Monkey.

Where Can I Find E-Learning Sample Courses?

Questions: At one of your workshops you showed some elearning examples. Can you provide the links?

I show quite a few examples based on the different topics during the workshops. For today, I’ll limit the examples to those where you can also download a free template so you can get maximum value.

When I was first getting started I loved looking at elearning examples to see what others were doing and to find some inspiration for my own projects. Hopefully these simple sample courses help and you can get some use from the free elearning templates.

E-Learning Example: Simple Scenario Interaction

This is an example of a simple scenario structure where you can ask a relevant question and then provide feedback. The template has a question screen and feedback screen. The idea with this is to get away from basic multiple choice questions. Instead, create a simple scenario that’s relevant to how the learner uses the content. Provide viable choices and then the appropriate level of feedback.

I like to use these simple scenarios because they are better than bullet points and standard linear slides. They also help frame the content so that it’s relevant to the learners. And they’re easy to build and reuse. They’re a good first step away from the standard bullet point screen.

Articulate Rapid E-learning Blog - example of free elearning template and e-learning samples

The elearning sample below was built in Storyline, but I also provide a PowerPoint version. In Storyline, each choice links to a single feedback layer. In PowerPoint, each choice links to a slide. You can download the free templates below and see how the sample course is built.

Articulate Rapid E-learning Blog - elearning course sample

Click here to view the elearning example.

What I like about this template is that if I switch the character I can go from one industry to the next without a lot of effort. In a rapid elearning world, this reusability sure comes in handy.

Articulate Rapid E-learning Blog - use an image to change the free elearning example course

E-Learning Example: Decision-making Template

This example is for a character-driven decision. The Storyline version is drag and drop. The PowerPoint is click and reveal. It’s structured the same way as the sample course above.

Articulate Rapid E-learning Blog - sample elearning course with interactions and a free PowerPoint template

Click here to view the elearning example.

Just like the first template, switch the character and the background image and you easily switch the context.

E-Learning Example: Interactive Bookshelf

The bookshelf is kind of common. But I like it. This makes for a great starting menu that connects to distinct modules. We used it at a workshop to show off some Storyline demos. The free template comes with some generic books you can title for your own modules.

All you need to do is add hyperlinks to the appropriate layers or slides.

Articulate Rapid E-learning Blog - free Bookshelf template and interaction includes a sample elearning course

Click here to view the elearning example.

Bonus tip:

If you don’t own Storyline, download the free trial and then use one of the templates to quickly create a module. For the most part, it’s just a matter of swapping out the text and graphics. If you’re fast enough, you can build a quick module for free.

If you use the free PowerPoint templates, you’ll have to set the hyperlinks and interactive el
ements yourself. That’s easy enough to do.

Either way, I hope you can find some use for the free templates. And if you have any questions about how to use them, just jump into the community and ask. We’d love to help you.

Events

Free E-Learning Resources

Want to learn more? Check out these articles and free resources in the community.

Here’s a great job board for e-learning, instructional design, and training jobs

Participate in the weekly e-learning challenges to sharpen your skills

Get your free PowerPoint templates and free graphics & stock images.

Lots of cool e-learning examples to check out and find inspiration.

Getting Started? This e-learning 101 series and the free e-books will help.


Articulate Rapid E-Learning Blog - download free PowerPoint templates for online training

Tab-style interactions are probably the most common type of elearning interactions and for good reason. They’re easy to build and add a bit of interactivity to what would normally be linear content.

They’re also a great way to deal with an issue that plagues many elearning courses—locked navigation. People should have as much freedom as possible when navigating their online training because it’s part of their learning experience. But we know that’s not always going to happen. Many course designers (or customers) want to force linear navigation.

Tab interactions allow the controlled navigation that the client prefers and still gives the learners some freedom to explore the content and navigate as they wish.

To help speed things up I pulled together some tab interactions for you to use. These free PowerPoint templates are available in the elearning community.

Free Vertical and Horizontal Tab Templates

Vertical and horizontal tabs typically consist of a navigation bar that contains the tabs; and the tabs are persistent across the screens with quick access to the other tabs. The examples below generally fit that description. I also included an accordion style interaction that meets the same qualifications. It just looks different.

Blue Tabs Interaction

Articulate Rapid E-Learning Blog - example of a tabs interaction and free PowerPoint template for online training

Color Tabs Interaction

Articulate Rapid E-Learning Blog - example of a multi colored tabs interaction and free PowerPoint template for online training

Accordion Tabs Interactions 

Articulate Rapid E-Learning Blog - example of a tabs interaction based on an accordian and free PowerPoint template for online training

Six Tabs Interactions

Articulate Rapid E-Learning Blog - example of a tabs interaction and free PowerPoint template for online training

Circle Gray Tabs Interaction

Articulate Rapid E-Learning Blog - example of a tabs interaction and free PowerPoint template for online training

Free Main Menu Tabs Templates

Main menu tabs are common as starting points in an online training course. They usually aren’t persistent once you leave the main menu. However, you’ll notice with a few of the templates below I added a persistent tab link at the bottom that matches the main tab screen.

Colored Bars Tabs Interaction

Articulate Rapid E-Learning Blog - example of a tabs interaction and free PowerPoint template for online training

Black & Gray Spoke Interaction

Articulate Rapid E-Learning Blog - example of a tabs interaction and free PowerPoint template for online training

Spectrum Tabs Interaction

Articulate Rapid E-Learning Blog - example of a tabs interaction and free PowerPoint template for online training

Glassy Blue Tabs Interaction

Articulate Rapid E-Learning Blog - e
xample of a tabs interaction and free PowerPoint template for online training

Green Bulb Interaction

Articulate Rapid E-Learning Blog - example of a tabs interaction and free PowerPoint template for online training

Blue Green Interaction

Articulate Rapid E-Learning Blog - example of a tabs interaction and free PowerPoint template for online training

Business Time Interaction

Articulate Rapid E-Learning Blog - example of a tabs interaction and free PowerPoint template for online training

Blue White Box Interaction

Articulate Rapid E-Learning Blog - example of a tabs interaction and free PowerPoint template for online training

Image-Based Menu Interaction

Articulate Rapid E-Learning Blog - example of a tabs interaction and free PowerPoint template for online training

Free Notebook Tab Templates

Interactive tabbed notebooks are pretty common. The templates below are more proof of concept as I was showing how to create the tabbed interactions in PowerPoint. Looking at them today, I think they’re due for a makeover (coming soon).

Multi-colored Notebook Tabs

Articulate Rapid E-Learning Blog - example of a tabs interaction and free PowerPoint template for online training and a tabbed notebook

Five & 3-tabs Interactive Notebook

Articulate Rapid E-Learning Blog - example of a tabs interaction and free PowerPoint template for online training and a tabbed notebook

Articulate Rapid E-Learning Blog - example of a tabs interaction and free PowerPoint template for online training and a tabbed notebook

Hope you enjoy the free PowerPoint templates and that you can find uses for them in your online training programs. And if you need any help figuring out how to customize, be sure to ask.

Events

Free E-Learning Resources

Want to learn more? Check out these articles and free resources in the community.

Here’s a great job board for e-learning, instructional design, and training jobs

Participate in the weekly e-learning challenges to sharpen your skills

Get your free PowerPoint templates and free graphics & stock images.

Lots of cool e-learning examples to check out and find inspiration.

Getting Started? This e-learning 101 series and the free e-books will help.


Articulate Rapid E-Learning Blog - how to manage emails for online training programs

Email is a reality for many of us. Often it’s a pain to manage and odds are that managing your emails plays a large part in managing your online training programs.

During a recent elearning workshop, someone brought up emails and asked how I managed mine. As can be expected I get quite a few between the blog and elearning community and sometimes it’s difficult to stay on top of them.

In an earlier post we looked at ways to communicate better with our subject matter experts when using email. Today I’ll share my strategy for managing my email inbox. Perhaps there’s something that will help you, too.

Create a Simple Way to Sort Emails

To me one of the biggest problems is that my inbox fills so rapidly that I lose track of what’s there and what I need to do. Years ago, when I got fewer emails I was able to use my inbox to manage my action items. But today that doesn’t work.

My goal is to limit how often I touch a particular email so I quickly review my inbox and then sort emails to their appropriate category.

This starts with four basic categories:

  • Read and delete. I review the email and determine if it needs any further action. If there’s no action required or need to archive the email, I delete it. There’s no reason to keep it around to clutter up my inbox and distract me when I come back in.
  • Forward to someone else. I get a lot of technical support questions. Fortunately I have four community managers who can help with these. So I divvy up those requests and forward to one of my community managers. This way the person who needs help isn’t waiting on me to respond. I also have some email responses set up with relevant links so that when I get technical questions I have quick access to the resources they need.
  • Move to “Answer this” folder. If I can’t quickly forward the email to someone else (or the email requires a more detailed response) I move it to my “Answer this” folder. I’ll get to it later during the time designated to answer emails.
  • Move to “Do this” folder. This is my highest priority folder. It contains emails related to projects or known deadlines. They are the things I need to do right away. So this is the first folder I go through to make sure that I am on top of things.

This simple sorting process has cut my time with emails significantly.

Set a Specific Time to Review Emails

I take about 30 minutes at the beginning of the day where I quickly sort new emails. I can do a quick review of what’s there and also stay abreast of any immediate concerns.

Articulate Rapid E-Learning Blog - example of a calendar schedule for managing email and the inbox

Later in the day, I set about 90 minutes or so (sometimes it takes a lot longer) to answer emails. I try to knock off the “to do” emails first, and then get to the “answer this” emails. This helps me stay on track with those things that have deadlines or due dates.

Before I set a specific time to answer emails I’d do it on the fly or in the time I had between meetings and projects. The problem was that I was less productive and there would always be things in the emails that pulled me away from more important tasks. Today I just let the emails sit until my designated time.

Turn off the Spigot

I get lots emails from blog readers and the community. I can control some of that by the channels I offer for self-service like the tutorials in the community and quick access to other resources.

I also get notifications from all sorts of social media sites and services like Twitter, Facebook, and LinkedIn. Most of that stuff is noise and will consume time; and even if they don’t consume a lot time, they are still the types of little distractions that can pull you out of the zone and not allow good concentration on completing tasks.

To counter this I turn off the notifications and visit the social media sites based on a schedule. Just like I have a set time for email and real projects, I have a set time to review social media alerts and other information. This has been a massive help to getting things done.

Articulate Rapid E-Learning Blog - hootsuite is a good tool to manage social media alerts

Here are some tools I use to manage my emails and other alerts:

  • Quick Steps in Outlook 2010 is your friend. I have a bunch of Quick Steps that let me filter and respond to emails in seconds. That is one of the biggest helps to me the past couple of years. I can also assign categories so it’s much easier to review the emails.
  • Find a social media tool. I’ve tried a few and settled on Hootsuite . It lets me manage my social media alerts and filters. For the most part it gives me a single point of contact for all of those sites. There are other good tools out there like TweetDeck. Find one and learn to use it.
  • Guide your time management. I have an iPad and use the 30/30 app. I set a specific time to work on a task and the app helps me stay focused. I’ve also been trying to get my kids to use it for their school work. I’ll let you know how that goes in a couple of years.

Articulate Rapid E-Learning Blog - good resources to help manage email and the inbox - hamster revolution and getting things done

Over the years I’ve read some good books on time management that have helped. I like the Hamster Revolution and the stuff I’ve read on Getting Things Done. Personally I’ve found that the key is to develop a good simple strategy and then work at sticking with it.  And the strategy that works best for me is one that is intuitive and works without requiring a whole new personality. The links to Amazon books may produce a slight commission.

I’m no expert on email management and I’m sure there are hundreds of great resources available online. But the tips above have helped me thus far and perhaps they’ll help you, too especially when working on elearning projects.

What do you do to manage your emails? I’d love to know.

Events

Free E-Learning Resources

Want to learn more? Check out these articles and free resources in the community.

Here’s a great job board for e-learning, instructional design, and training jobs

Participate in the weekly e-learning challenges to sharpen your skills

Get your free PowerPoint templates and free graphics & stock images.

Lots of cool e-learning examples to check out and find inspiration.

Getting Started? This e-learning 101 series and the free e-books will help.


Articulate Rapid E-Learning Blog - how to create your own template for online training

Recently I shared some free PowerPoint templates to use for online learning and got a few questions about how I created one of them. So today I’ll share how I created the free template and some of the general considerations when designing your own templates and visual course design.

PowerPoint Enables Building E-Learning Templates

As many of you know I do a lot of my graphics work in PowerPoint because it’s a very capable tool. The free elearning template that I shared in a recent post is a good example of what you can in PowerPoint when it comes to building your own templates or doing any custom graphics work.

Articulate Rapid E-Learning Blog - example of a free PowerPoint elearning template

In this post I’ll walk through a few key productions techniques. Even if you don’t care about this template or building your own templates, the techniques can be applied to all sorts of custom graphics production using PowerPoint.

You Have Access to Free Stock Images

Initially I wanted to create an office themed template. So I downloaded the folder image below. The image was provided by Microsoft. Many of the pay stock image sites like istockphotos and Fotolio make images available through this site. They’re the smaller, low res versions. But that’s usually all you need. This is important to remember (especially if you have limited resources).

Articulate Rapid E-Learning Blog - how to find free stock images

  • Key point: You have access to all sorts of top quality images via the Microsoft site and clip art downloads. You just need to know what you need and then start searching.

Edit Your E-Learning Graphics in PowerPoint

The folder image is my background. So I intended to add a slight blur to it. The blur allows the image to set some context but not draw the focus from the content box that would be on top.

Articulate Rapid E-Learning Blog - example of a free stock image

Once I started messing around with the image I realized I wanted the texture of the blurred image, but not really make the folder evident. So I decided to add a more prominent blur. This gives the background some depth and texture without adding too much noise.

Starting with PowerPoint 2010, there are all sorts of artistic effects that can be applied to your images and blurring is one of them.

Articulate Rapid E-Learning Blog - use PowerPoint to do some simple image editing

  • Key point: PowerPoint offers a number of basic image editing capabilities. Take advantage of the opportunities to modify the images in PowerPoint. That could mean applying effects, cropping, or recoloring.

Create Custom Stock Images

Often we focus too heavily on written content and lose sight of the personality of the course. So I wanted to add a person to the screen to add some personality and to lighten the screen visually.

Articulate Rapid E-Learning Blog - example of how to remove the background of picture and photos

One of my favorite features in PowerPoint 2010 is that I can remove backgrounds. What I like to do is find images with people in them and then remove them so that I have an isolated person. The image above could easily become four isolated people images.

In the example from the free template it was really easy because the image I selected had a solid white background.

Articulate Rapid E-Learning Blog - example of background removed from picture using PowerPoint

  • Key point: Find people in images and then remove them from the image by isolating them. That gives you a lot more options when looking for free stock images and people to use in your online training courses.

Match the Color of Your Course Template to Your Stock Image

I needed a box to hold my objectives content so I added a box to the image. This served as my content placeholder. That’s easy enough to do. Just add a shape.

Articulate Rapid E-Learning Blog - use a color picker

To get the right colors I did a color pick from the background image. To do that I used Pixie which is a free application that makes color picking real easy. I believe PowerPoint 2013 has a color picker and if you use Articulate Storyline you’ll also find a color picker in the color format properties. If not, use a tool like Pixie.

  • Key point: Use colors from your background images to create a color palette. Pixie is a great tool, but you can do something similar with some of the other free color scheming tools.

Create Your Own Graphics

I created the arrow circles by combining shapes and then right-clicked to save the arrow as an image. Then I brought it back in as an image rather than shapes.

Articulate Rapid E-Learning Blog - save as image in PowerPoint

The reason I like to save as image is that I can then apply the image formatting to the graphics. In the case of the arrow, I recolored it as an end cap at the beginning and end of the interaction.

  • Key point: Create your graphics in PowerPoint and save them as images. I use .png format. This way you always have access to the images outside of the online training course and you can leverage the image formatting features in PowerPoint.

Control Eye Movement with Shadows

One thing I learned in a design class years ago was how to control eye movement using light and dark areas. In this example I can draw the focus away from the edge to the center of the screen.

Articulate Rapid E-Learning Blog - how to combine layers in PowerPoint to create custom stock images

To do this, I added a darker space that serves as a visual dead end. This was easy to do. I
created a rectangle shape and used a gradient fill.

One part of the fill used a darker color pick from the image. And the other part was transparent so it blended with the background.

  • Key point: There are a lot of things you can do to layer objects on the screen to create specific visual effects.

Additional bonus tips:

Hopefully the free templates provide value and help with your elearning projects. But my greater hope is that by learning these tips and tricks you’ll be able to create your own graphics and templates to enhance your online training programs.

Events

Free E-Learning Resources

Want to learn more? Check out these articles and free resources in the community.

Here’s a great job board for e-learning, instructional design, and training jobs

Participate in the weekly e-learning challenges to sharpen your skills

Get your free PowerPoint templates and free graphics & stock images.

Lots of cool e-learning examples to check out and find inspiration.

Getting Started? This e-learning 101 series and the free e-books will help.


Articulate Rapid E-Learning Blog - Compliance training proves no match for the Sharknado

One of the easiest things you can do to make your course look good is to find a great background. The background is the largest single graphic in your course and can set the tone for what you do.

Here are a few posts that will help you understand the importance of how the background image impacts your course design:

Articulate Rapid E-Learning Blog - free office theme graphics for online training

It’s good to be intentional about the background graphic that is used. But that doesn’t mean you need to be a professional graphics designer. In the image above, the essence of the course was “corporate office.”

To get the right look, David used a corkboard and some “office embellishments” like the folder tabs and labels. From there he had the option to place other content on the board. Pretty simple, huh?

Of course, sometimes you need a good starting point. So here’s a list of the free backgrounds available in the elearning community. You’re free to use them for your online training as you wish.

Free Blurred Background Graphics

Blurred backgrounds are great. They provide some texture and depth, but don’t conflict with the other visual content. In fact I used one of the blurred backgrounds in the demo I built below.

Articulate Rapid E-Learning Blog - example of an online training course that uses free graphics

Click here to view the elearning example.

Articulate Rapid E-Learning Blog - free background graphics that use a blur

Free Textured Background Images

Sometimes a solid colored background is fine. In fact, the flat look is pretty popular today. That is until some designer gets bored and then tells you how lame flat is.

Articulate Rapid E-Learning Blog - free textured backgrounds for online training programs

In either case, if you go with a solid color you may find the starting color looks too harsh. This is where softening the color makes sense. That is until some designer tells you softened colors are lame. If you don’t care what the designer says, here are three ways to soften the colors of your flat background design.

  • Add a colored shape to the screen and then modify its transparency so that the white background bleeds through a bit.
  • Use the three free background images from the community. They have a textured pattern that also softens the look.
  • Create your own color backgrounds and use the pattern template included with the download to soften the image. David does a great explaining how to do that in this tutorial.

Free Background Images that Add Depth to Your E-Learning Slides

In an earlier post I shared some tips on how to create slides for your online training courses that have some depth.  It’s the “wall, baseboard, and floor (WBF)” technique, or as one of the blog readers said, “Why be flat?”

Articulate Rapid E-Learning Blog - example of how to create your own free graphics

This is a simple way to change the most boring elearning course into one you’d print on a shirt and wear to the Mardi Gras. All joking aside, it is a great way to quickly change the look of the course and make it a bit more visually interesting. If you don’t have time to practice making your own, take advantage of the ones included below.

Articulate Rapid E-Learning Blog - some free backgrounds and templates for online training

5 Free Backgrounds to Use with Characters & Interactive Scenarios

With photographic characters it’s easy to get backgrounds because all you need is a photo. With vector characters it’s not that easy. That’s where these handy backgrounds really help.

Articulate Rapid E-Learning Blog - free backgrounds for interactive scenarios that use avatars or characters

You can go from confused characters to ones that are engaged and excited in just a few clicks. There are five office backgrounds to start.

Articulate Rapid E-Learning Blog - example of free backgrounds

Of course, you can use the “Why Be Flat” technique to create your own. And you’re not limited to the backgrounds listed above. All of those display graphics in the download section can also be used to help build your online training.

Articulate Rapid E-Learning Blog - more free backgrounds

In an ideal world, you have the graphics design resources to build a custom look for each course. But we know that’s not always possible. That’s where having the right background really comes in handy.

And if you’re just getting started or need something real quick, these backgrounds should help.

We’ll be adding some more soon, so be sure to bookmark the free downloads section so you can take advantage of all of the free assets for building your elearning courses.

Events

Free E-Learning Resources

Want to learn more? Check out these articles and free resources in the community.

Here’s a great job board for e-learning, instructional design, and training jobs

Participate in the weekly e-learning challenges to sharpen your skills

Get your free PowerPoint templates and free graphics & stock images.

Lots of cool e-learning examples to check out and find inspiration.

Getting Started? This e-learning 101 series and the free e-books will help.


Articulate Rapid E-Learning Blog - free PowerPoint templates

Who doesn’t like free elearning templates? I had a bunch of people email asking for the templates from last week’s post on how to create simple learning objectives screens.

Below you’ll find the two free PowerPoint templates from last week. And to sweeten the deal, I added an additional one based on a clip art image to show that even if that’s all you have, you can still use the images to create effective screens for your online training programs.

Free PowerPoint Template: Linear Objectives

Articulate Rapid E-Learning Blog - free PowerPoint template for online training courses

Download links:

Free PowerPoint Template: Circle Objectives

Articulate Rapid E-Learning Blog - free PowerPoint template for rapid elearning courses

Download links:

Free PowerPoint Template: Clip Art Circle Objectives

Articulate Rapid E-Learning Blog - free PowerPoint template based on a clip art image

Download links:

Let me know what you think of the templates and feel free to share a link if you use them for anything.

Events

Free E-Learning Resources

Want to learn more? Check out these articles and free resources in the community.

Here’s a great job board for e-learning, instructional design, and training jobs

Participate in the weekly e-learning challenges to sharpen your skills

Get your free PowerPoint templates and free graphics & stock images.

Lots of cool e-learning examples to check out and find inspiration.

Getting Started? This e-learning 101 series and the free e-books will help.


Articulate Rapid E-Learning  Blog - create learning objectives for online training courses with this simple tip

To tell the truth, I’m not a big fan of bullet point learning objectives. I prefer something more engaging that reveals the course objectives in a way that’s relevant to the user. But for many, having a bullet list of objectives is the expectation.

So if you’re required to list learning objectives then here’s a simple tip that helps you get away from the bullet point list and also removes some clutter from your screen.

Avoid the Bullet Point Objectives Screen

Typically courses include a list of learning objectives that looks something like the image below. This approach is pretty standard. In fact, when I first started learning to build online training courses that was how we were instructed—each course was to have an objectives screen with a list of objectives.

Articulate Rapid E-Learning  Blog - example of typical bullet point elearning objectives for online training

This isn’t a bad approach. Some people probably prefer a simple list of clear objectives than an interactive scenario that takes more time to share the same thing. I know I’ve taken plenty of elearning courses where I wish I could just see a quick list of objectives rather than sit through a long-winded interaction.

If you’re required to list the learning objectives it doesn’t necessarily mean they have to be presented as a list. You’ve probably seen those websites where there’s a top image and underneath it are some buttons to reveal additional images. Why not create something similar for the learning objectives of your elearning course?

Instead of listing all of the objectives as bullet points, create a single objective on each screen. Then add a button that allows the person to navigate through the objectives. It satisfies listing the objectives, but it doesn’t force them to a bullet point list.

Here’s a quick demo I did in PowerPoint to show the idea in action.

Articulate Rapid E-Learning  Blog - how to create progressive reveal objectives for online training programs

Click here to view the demo.

You’re not limited to arrows or back and forward buttons. I also like the idea of lining the bullets up on the bottom and then making them clickable. Here’s another quick demo to see how the objectives screen works with all of the clickable choices lined up on the bottom. If you feel a bit adventurous, put them on the top or to the side.

Articulate Rapid E-Learning  Blog - clickable learning objectives for online training and rapid elearning courses

Click here to view the demo.

Which concept do you like best? I like the second one because it gives the person viewing the online training course the option of going straight to a specific learning objective. The arrow option forces a linear progression backwards and forwards.

One overall benefit of both options is that you decrease the cognitive load by exposing a single piece of information at a time. Depending on how you structure the objectives screen, this may help with the learning experience.

So there you have it—two ideas the next time you need to create a bulleted objectives screen. What do you think?

Events

Free E-Learning Resources

Want to learn more? Check out these articles and free resources in the community.

Here’s a great job board for e-learning, instructional design, and training jobs

Participate in the weekly e-learning challenges to sharpen your skills

Get your free PowerPoint templates and free graphics & stock images.

Lots of cool e-learning examples to check out and find inspiration.

Getting Started? This e-learning 101 series and the free e-books will help.


Articulate Rapid E-Learning Blog - welcome screen layouts for elearning and online training courses

Many elearning courses have some sort of welcome screen or a start screen where you can review module choices and select where to go. They let you set the stage for your elearning course by selecting a few key images that fit the context of the course’s content. And then use them to create a visually welcoming experience.

Think of it like a welcome mat. The visual start screen is not going to replace good content. But it does set the tone and initial perception of the course. Use it to capture the person’s attention and from there pull them into the course.

Articulate Rapid E-Learning Blog - example of elearning welcome screen

Fill In Your Design Gaps with Good Stock Images

Most course developers aren’t graphic designers. If you have a graphic designer, then you are set. But if you don’t then you’re on your own. So the challenge is how to get a nice look with limited experience and no resources.

One of the easiest ways to make up for lack of graphic design is to find a few really strong images that fit the context of your course. Here’s a good post on listening to your visual voice to figure out which images are the best fit.

  • Action item: Find some good images that work for your content.

Create a Start Screen Layout

There are a number of ways to design the layout. I like a strong title image and then add some compartment images. They can link to other sections or slides.

Articulate Rapid E-Learning Blog - example of a layout for the elearning welcome screen

You may want to create an additional layout as the destination layout. This helps set some repetition and visual continuity.

Articulate Rapid E-Learning Blog - another example of an elearning welcome screen

The examples are basic. But you can create as many layouts as you want. They can be simple like the ones above or much more sophisticated. In an earlier post we discussed ways to determine layouts prior to building your course. I’d create some layouts similar to the ones above.

Play around with the layouts. Make some horizontal and some vertical. And then maybe some that are more like a visual grid similar to what you’d see in Pinterest or on an iPad screen.

  • Action item: Create a main layout and destination layout.

Add Images to the Start Screen Layout

Once you have layouts determined, it’s just a matter of adding the right images. As I stated earlier, I look for one image that sets the tone. It represents the essence of the module or section. It’s kind of like the title font. Then I look for additional images to represent the segment topics.

Articulate Rapid E-Learning Blog - example of visual welcome screen for online training

The key when working with the images is to use a consistent aspect ratio. You want all of the images to be the same and align properly. That will save you time. If you stick with a default aspect ratio, then you can crop to that aspect ratio and only worry about resizing the image.

Articulate Rapid E-Learning Blog - use crop to aspect ratio in PowerPoint for quick cropping

  • Action item: Determine how you’ll quickly align the images to the layout.

To help you out, I created a quick tutorial of how to create a simple start screen layout and then show a simple way to crop the images to the layout so that the alignment is proper and consistent.

Click here to view the tutorial.

To save time or practice doing this, you can download the free template I used.

The initial screen sets the tone of the course. What do you want that screen to look like? Is it inviting? or does it tell the learner that this is yet one more boring elearning course? Hopefully by starting with some pre-established layouts and the right images, you’ll be able to capture the person’s attention.

Let me know what you think.

Events

Free E-Learning Resources

Want to learn more? Check out these articles and free resources in the community.

Here’s a great job board for e-learning, instructional design, and training jobs

Participate in the weekly e-learning challenges to sharpen your skills

Get your free PowerPoint templates and free graphics & stock images.

Lots of cool e-learning examples to check out and find inspiration.

Getting Started? This e-learning 101 series and the free e-books will help.


Articulate Rapid E-learning Blog - become a font pro when building online training courses

None of us have time to get caught up in wonky font talk. But the reality is that when building your online training courses you’ll need to select a font to use.

In a previous post we looked at simple ways to create font pairs when building elearning courses. But that still requires some time on your part. In today’s post we’ll look at a time-saving tip when pairing fonts for course design.

For the budget-minded you can always use Google’s web fonts. They’re free and easy to download. One of the features I like best about Google web fonts is that they already do some font pairing for me. That’s a big time-saver.

Create Font Pairs in Google Web Fonts

The first step when trying to pair fonts with Google web fonts is to filter them. You can filter by four types: serif, sans serif, display, and handwriting. Once you have a type selected you can filter by thickness, slant, and width.

  • Start with the title font. Most likely the easiest place to start is with a heading or title font. They tend to have the most personality and contextual representation of the online course subject.
  • Pop out the font. At the bottom of each font line is a pop out icon. This lets you isolate the font and look at the entire character set.

Articulate Rapid E-learning Blog - example of Google web fonts pop out

  • Select the Pairings tab. Google pairs the selected font with other fonts so you can see how they look. If they look good and follow the simple rules, then make that font pair a keeper.

Articulate Rapid E-learning Blog - Google web fonts pairing tab to pair fonts for online training

Here’s a tutorial that shows how to locate and pair fonts in Google web fonts.

Create Theme Fonts in PowerPoint and Storyline

Once the font pair is identified, download the fonts and them to PowerPoint or Storyline’s design tab as a theme font. Then you always have quick access to the font pair which will save tons of time.

Articulate Rapid E-learning Blog - create custom theme fonts in PowerPoint and Articulate Storyline

When building your elearning course, you know you’ll use fonts. And you know that you’ll need to pick the right fonts. Now you know that you can do this a lot easier and with no cost using Google web fonts.

Events

Free E-Learning Resources

Want to learn more? Check out these articles and free resources in the community.

Here’s a great job board for e-learning, instructional design, and training jobs

Participate in the weekly e-learning challenges to sharpen your skills

Get your free PowerPoint templates and free graphics & stock images.

Lots of cool e-learning examples to check out and find inspiration.

Getting Started? This e-learning 101 series and the free e-books will help.