The Rapid Elearning Blog

Archive for the ‘Video’ Category


multimedia

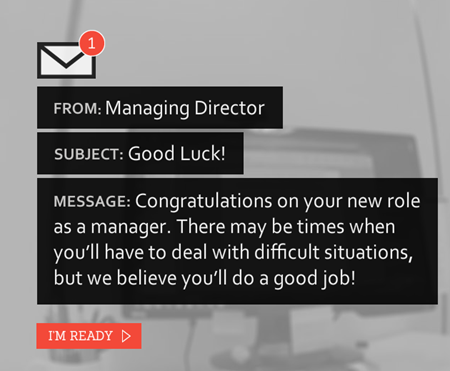
E-learning courses are mostly screens of content made up of media: text, shapes, illustrations, pictures, and video.

Adding those things to your course is simple, usually just a matter of inserting said media onto the screen. However, building a cohesive course is more than just inserting stuff on a screen. There are other considerations.

Design the Look of the E-Learning Course

What’s on a screen?

  • Fonts. They are more than the text you read; they’re also a graphic. Which fonts are you using in your course? Are they contextually aligned with your content?
  • Shapes. Shapes can have straight edges or rounded; they can have outlines or not. The shape can represent something elegant or informal.
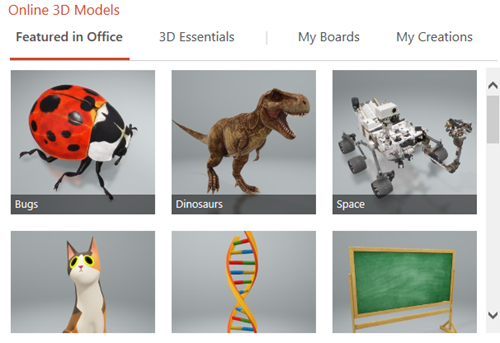
  • Illustrations. There are all sorts of illustrative styles. One popular style today is the corporate Memphis look. Of course, there are many designers who find it to be barren.

And this brings us to a key consideration when working with multimedia: the bullet points above speak to some visual design requirements. Who will design what you need? What is the correct imagery and use of fonts and desired color schemes?

A challenge for many e-learning developers: having ideas about what you want and executing on those ideas is not the same. I see lots of good courses that are not designed well. The cause is usually that the e-learning developer lacks the technical skill to construct the right media.

Create Audio and Video Resources

There are similar considerations for other multimedia such audio and video.

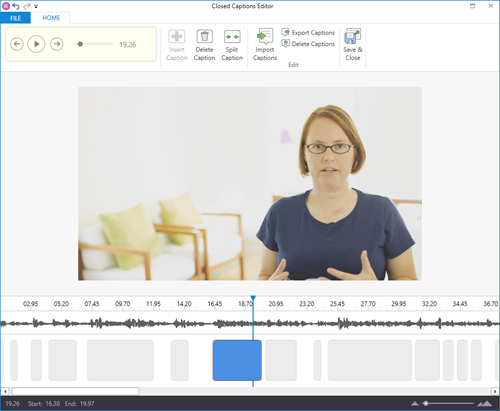
Recording audio is easy and straightforward in most of the authoring tools. However, they don’t tend to have a lot of sophistication when it comes to editing or managing the audio.

For simple audio, recording from the authoring tool is fine. But for longer audio, there are considerations about how to record, who will record it, and how it’s all managed.

You can do it all in-house or DIY, but you do get what you pay for. I figure non-professional talent gives you presentation quality audio. It’s inexpensive, gets the job done, yet isn’t going to be perfect. But it’s not the same as pro-quality narration.

The good thing today is that there are many voice over artists and talent services where getting professional audio at a reasonable cost is viable.

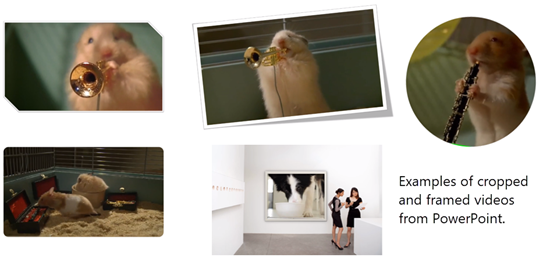
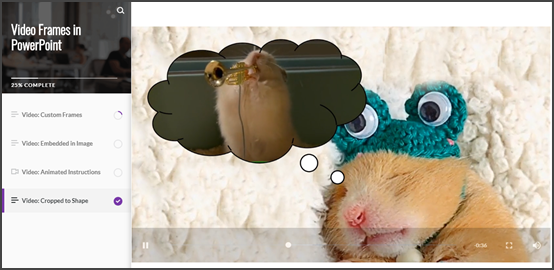
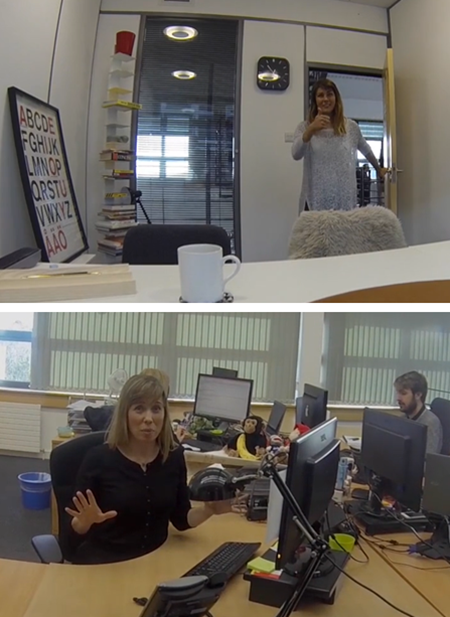
Video is another one of those tricky issues. Today’s smart phones have better capabilities than I had doing professional video work 25 years ago. It’s easy to shoot video and edit it. But there is a significant difference between a DIY video and getting something done professionally. Or at a minimum, spending time on edits to get things to look right and not drag on.

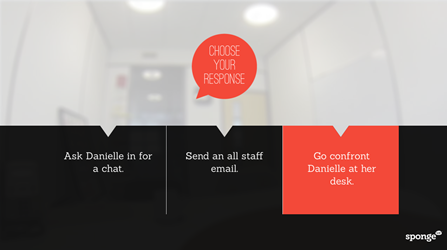
The big question for any of the course’s multimedia is who is going to determine and design what you need? And then who is going to produce the media?

I throw this out because the course will look like something. And you’ll put something on the screen. And there’s a cost associated with it. Doing it yourself may cost less money but may impact the quality of what you produce.

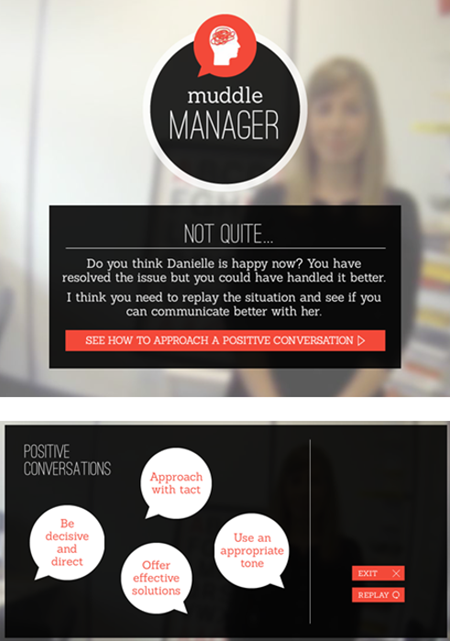
Thus, at the beginning of the project time needs to be spent on the media requirements and production considerations. And then determine if there needs to be a budget to accommodate those requirements.

How do you determine those things when you start an e-learning project?

Events

Free E-Learning Resources

Want to learn more? Check out these articles and free resources in the community.

Here’s a great job board for e-learning, instructional design, and training jobs

Participate in the weekly e-learning challenges to sharpen your skills

Get your free PowerPoint templates and free graphics & stock images.

Lots of cool e-learning examples to check out and find inspiration.

Getting Started? This e-learning 101 series and the free e-books will help.


how to export video for LMS

Recently, I did a webinar on transforming PowerPoint content into an interactive e-learning course. One of the tips is to save your PowerPoint file as a video. Here’s why I like that tip.

Save PowerPoint as Video

Assuming the PowerPoint slides look good and the content doesn’t need to be restructured, why spend a lot of time copy and pasting from PowerPoint into a different application? Save a lot of time by outputting your PowerPoint slideshow as a video.

All of your animations, narrations, inserted media, and slide transitions remain in a single file. If all you’re doing is sharing the content, this is an easy way to go. It’s one click to create the video.

Here’s an example from the Duarte group. They built this really dynamic presentation in PowerPoint that they shared in a previous version of PowerPoint. In includes animations, narration, slide transitions, and even other video. Here’s an example of the file as a video.

Click here to view the example on YouTube.

Assuming the slides are fine and you don’t need to rework your content, saving as video is a no brainer. The challenge is how to get the video into your LMS so you can track it as a course.

How to Get the Video Into Your LMS

Articulate 360 comes with a number of great authoring tools. It also comes with Review 360 where you can upload your courses and solicit feedback from your clients and subject matter experts.

Another nice feature is that you can upload a video into Review 360. And from there, export the video for LMS. This lets you set the LMS tracking options and how to measure completion.

upload video to LMS

You’ll get a .zip file with the video and all of the LMS required files so that you can load it on the LMS and treat the video like a trackable course. Super fast and super simple.

Click here to view the tutorial on YouTube.


Events

Free E-Learning Resources

Want to learn more? Check out these articles and free resources in the community.

Here’s a great job board for e-learning, instructional design, and training jobs

Participate in the weekly e-learning challenges to sharpen your skills

Get your free PowerPoint templates and free graphics & stock images.

Lots of cool e-learning examples to check out and find inspiration.

Getting Started? This e-learning 101 series and the free e-books will help.


create animated gif

Animated .gifs are great for e-learning. Often, I like to use them instead of videos for e-learning interactions, especially process interactions that go through a sequence of steps.

Here are a few previous posts on animated .gifs with some free resources:

Today I’ll show a simple way to convert a video of a process into smaller animated .gifs that you can insert into a slide, article, or process interaction.

Demo of the Animated Gifs in a Process Interaction

Here’s a demo I created using Rise and the Process Interaction.


animated gif example

Click here to view the example.

Animated Gifs Tutorials

Below are a couple of tutorials that go into it in more detail:

Animated Gifs: Create a Procedural Video

Record a video of the process. Don’t worry about the audio as it will be removed. To keep the edits to a minimum, make sure to be clear on the steps and to not waste a lot of movement. Get to the point quickly.

At our workshop in Milan, David and I quickly recorded the process to make an espresso with the machine in the back of the room. While we pretended to be working, it was really a way for us to sneak in a few more shots of espresso.

Here’s the original video.

Click to play the video on YouTube.

Animated Gifs: Convert the Video to Gif

There are a number of ways to convert video to animated .gifs. I like to use ScreenToGif because it’s free (which is always good) and it is really easy to use.

The conversion process is simple: import the video and convert it. However, there are some key considerations.

The original .MP4 video is 159 MB at 1920 x 1080 resolution. Animated .gifs can be large, really large.  Without any significant edits, the 159 MB video becomes a 470 MB animated .gif. That’s just not manageable.

There are a few things you can do to decrease the file size of the animated .gifs:

  • Scale the video down from it’s original resolution. There’s no need for an HD quality .gif. In this case 1920 x 1080 will be sized down to 500 x 281.
  • Crop the video to just the critical pieces of info. The fewer frames the smaller the file size. You can always duplicate frames to keep something on screen longer with minimal impact to size.
  • The less difference there is with the pixels from one frame to the next, the smaller the file will be. Unfortunately, video isn’t static and those millions of pixels are changing from frame to frame. You could try to shoot against a solid background and with a tripod. That may help, depending on your subject.
  • Video runs at about 30 frames per second (FPS). When you convert the video to .gif, you can modify the frame rate to something like 10 to 15. It just depends on how much motion is in the video. The less motion, the more you can lower the frame rate.

Animated Gifs: Edit to Individual Steps

Unless the steps are very short and can be shown in one file, it makes sense to break the steps up to individual parts. That helps reduce the file size and keeps the focus on very specific parts of the process.

  • You can import the entire video and then cut it down. Or cut the video into smaller videos first and work with them individually. It’s probably easier to edit the videos first and then import the smaller videos. This is more manageable and less strain on your system.
  • Get rid of what you don’t need, cut out extra frames.
  • The animated .gifs loop, so it may make sense to add a little buffer at the front or back end to let the user orient to the start and end of the process.

The original video was 1 minute long. Converted to an animated .gif without edits, it was 470 MB. After cutting it into pieces and creating four smaller gifs, the total ended up being about 15 MB. That’s a pretty significant difference and the output works well for the demo.

That’s basically it, shoot a video and then convert it to animated gif.

Events

Free E-Learning Resources

Want to learn more? Check out these articles and free resources in the community.

Here’s a great job board for e-learning, instructional design, and training jobs

Participate in the weekly e-learning challenges to sharpen your skills

Get your free PowerPoint templates and free graphics & stock images.

Lots of cool e-learning examples to check out and find inspiration.

Getting Started? This e-learning 101 series and the free e-books will help.


how to create animated gif

Some people asked how I created the animated .gifs similar to the ones I gave away for free in this recent blog post. So today I’ll share a simple way to create them.

Start with Animated .Gif Software

There are a number of tools to create animated .gifs. I’m going to focus on just one for this post.

ScreenToGif is free and you don’t need to install it. Just run the .EXE file. It’s a great product and I use it all the time for quick demos or some of the animations I use in the blog.

I’m not going to do an exhaustive overview, so I recommend downloading the app and playing with it a bit. It’s intuitive and easy to figure out. As a side note, if you do use it, I encourage supporting the developer.

Understanding the Cover Image .Gifs

Cover images are mostly decorative. And because of the responsive nature of the Rise courses, the cover image gets cropped based on the screen’s aspect ratio. That means what you see in portrait won’t look the same in landscape.

animated .gif responsive design

The key is keep the cover images simple. Animated .gifs can become very large files. The more visual information on the screen, the larger the file size. And if the file is too large, it’ll take too long to download and ruin the effect and experience.

Stick with fewer colors. Solid backgrounds are good because you don’t get that blocky color striping that you get with pictures.

We’ll look at two ways to create the cover image animated .gifs. One way is by recording something onscreen and the other is to import a video.

Record Screen to Create Animated .Gif

The easiest thing it to play a video and record the screen. Then do some basic editing. Since the animated .gif is decorative, you just need something simple. The key is not to have a massive file. The more you record, the larger the file.

View the animated .gif tutorial on Youtube

Once you have a recording, figure out what you want and where to cut it. Again, I look for something simple that looks good looping. Subtle movements or repeating animations (like a spinning gear) work perfectly.

It does take some messing around. I usually do a basic edit and then save the file to see how large it is. Then I play around with more edits and image size to find the right balance between quality and file size.

You’ll have a lot more luck recording vector images that are solid versus photos. The less the screen has to change from one frame to the next, the better quality you’ll get and smaller file size.

For the .gifs where the quality doesn’t look as good, I set the cover images’s overlay color darker. This way the text really pops off the screen and the animation quality isn’t as much of an issue. That’s what I did in this example where there were so many colors it just didn’t look as good as I wanted.

Import a Video to Create Animated .Gif

ScreenToGif makes it really easy to import a video. It breaks down all the frames and from there it’s just a matter of editing it to what you want.

Just like above, play around with different settings to see what gives you the right balance between file size and quality. And keep in mind, they’re header images so subtle movement is fine. For this overhead desk video, I just focused on the pencil moving and cut out hundreds of frames.

View the animated .gif tutorial on Youtube

Bonus tips:

  • You won’t get crisp images because the file size needs to be manageable. I try not to go over 1.5 MB. That’s why you have to play around with settings that strike the right balance.
  • You need to test different dimensions, but I generally keep the images somewhere between a 16:9 and 2:1 aspect ratio. There’s no golden rule. It’s mostly based on what you are showing. The image is going to crop based on the screen, anyway. I make different versions and modify the image size to see what I get for file size and quality.

animated gifs from vector videos

  • Solid and/or fewer colors is best. There are a lot of free or inexpensive ways to create simple vector-based animation videos. That’s what I did to create these two headers above which you can see in these two examples: Call Center and Team Meeting. I inserted some animated characters and published a video. Then I made the .gif from the video. Because I’m not building a big animated explainer video, this only took a few minutes to do and looks decent.

Animated .gifs add some flavor and visual novelty to your courses. And as you can see, they’re easy to create.

Events

Free E-Learning Resources

Want to learn more? Check out these articles and free resources in the community.

Here’s a great job board for e-learning, instructional design, and training jobs

Participate in the weekly e-learning challenges to sharpen your skills

Get your free PowerPoint templates and free graphics & stock images.

Lots of cool e-learning examples to check out and find inspiration.

Getting Started? This e-learning 101 series and the free e-books will help.


create videos in PowerPoint

One of my favorite features in PowerPoint is saving the PowerPoint slideshow as a video. That means anything you put on the PowerPoint slides (from animations to slide transitions) is output as video. With some creativity, you can pull together some pretty slick explainer-type presentations with a tool most of us already have.

Today, I want to show something simple that may give you some ideas for your own training videos.

Create Videos in PowerPoint: Examples

Before we get started, here’s a cool example from Duarte that Microsoft included in the PowerPoint 2010 template pack. The Duarte team created a great presentation that showed off what could be done with the new features back in PowerPoint 2010. And as you can see below, their presentation translates to video, as well.

Create Videos in PowerPoint: Slide or Slideshow?

While the example above was an entire slideshow that included some cool animations and effective transitions, you don’t need to create whole presentations. You can publish single slides, too.

And the slide doesn’t need to be normal slide content. It could be a single video. And that video can be formatted using the PowerPoint features.

That means you can insert video into a PowerPoint slide, make some simple edits, and then output that slide as a video. Pretty slick when you think about the possibilities.

And that’s the trick I want to share.

Customize Framed Videos in PowerPoint

Why do videos need to be rectangular? Why can’t they have frames or display as shapes? That’s all possible in PowerPoint.

Here are the basic steps to create framed videos in PowerPoint.

  • Insert a video on the slide.
  • Add whatever effect you want for the video.
  • Size the video to fit the slide.
  • Save the video as MP4.

Here’s a demo of some of the videos in a Rise.

Click here to view Rise demo.

As you can see, there are some neat things you can do, especially considering that you are doing all of this in PowerPoint and not required to use a more sophisticated video application.

Now it’s your turn.

Events

Free E-Learning Resources

Want to learn more? Check out these articles and free resources in the community.

Here’s a great job board for e-learning, instructional design, and training jobs

Participate in the weekly e-learning challenges to sharpen your skills

Get your free PowerPoint templates and free graphics & stock images.

Lots of cool e-learning examples to check out and find inspiration.

Getting Started? This e-learning 101 series and the free e-books will help.


custom video in PowerPoint

PowerPoint’s one of my favorite multimedia applications. It’s easy to use, almost everyone has a copy so it’s easy to share what’s created, and it does more than create presentations.

In fact, I regularly use PowerPoint to create the graphics and custom assets for my e-learning courses. Here are a few examples:

As you can see, PowerPoint is great for all sorts of multimedia production especially when combined with great e-learning software.

Create a Shaped Video

Recently someone in the community asked how to create a circle-shaped video for an e-learning interaction in Storyline.

circle video in PowerPoint

A real easy solution is to create an image with a circle hole in it and then place the video underneath only allowing the video to show through the circle hole. That’s fast and doesn’t require any editing of the video.

PowerPoint circle hole over video

If you want a circle-shaped video, you can create one in a video editing application. However, this requires having a video-editing application that allows you to do that and also having the expertise to use the video editor (which most of us don’t have).

And this is where PowerPoint comes in handy. It’s a tool most of us have, and it can do exactly what you need with minimal effort.

Here’s a video tutorial that quickly walks through the steps outlined below.

  • Customize slide size. A circle has a 1:1 aspect ratio. Change the custom slide size to 1:1 (something like 10″ wide and 10″ high). That should give you a video that’s almost 1000×1000 pixels.
  • Insert a video. Choose your favorite video.
  • Crop video to 1:1. Most likely the video is 16:9 or 4:3. You’ll need to crop it to 1:1 to get a perfect circle.
  • Scale the video to fill the slide. You want the video to be as big as possible inside the slide.
  • Save the file as video. Select .mp4. If you have an older version of PowerPoint you may have to save as .WMV. That’s OK, you can still use it in Storyline and Rise. You won’t get a circle video. The video is still going to be rectangular. But inside the rectangle will be the custom-shaped video.

Bonus tips:

  • Play around with some of the video formatting options in PowerPoint. There are lots of neat things you can do.
  • Same thing with animations and transitions. Anything you create in your PowerPoint slides can be save as video.
  • The corners are not going to be transparent. You’ll want the video background to match the course background to get a seamless experience.

Hope that helps and is something you can use in an upcoming e-learning course.

Events

Free E-Learning Resources

Want to learn more? Check out these articles and free resources in the community.

Here’s a great job board for e-learning, instructional design, and training jobs

Participate in the weekly e-learning challenges to sharpen your skills

Get your free PowerPoint templates and free graphics & stock images.

Lots of cool e-learning examples to check out and find inspiration.

Getting Started? This e-learning 101 series and the free e-books will help.


interactive video

This is part two of the series on working with 3D models and interactive video. In the previous post, we looked at how to create a video using 3D models in PowerPoint. Today, we’ll discover how to use them to create interactive videos in Storyline. And then of course, once you have an interaction you can also insert it into a Rise course, which is what I did in this Rise lesson.

Create the Interactive Videos in PowerPoint using 3D Models

If you want to create a different kind of interactive video, you can apply what you learn here. The process is similar. For this demo, make sure you understand how the video is created and how it plays all the way through because we’re going to add a trigger to pause it before it completes.

For this demo, I created a video where the object rotates in and then rotates back out. It was built using a three-slide PowerPoint file and exported as a video.

Tutorial: how to create a three-slide video using 3D models in PowerPoint.

A Teardown of the 3D Model Interactive Videos

There are a few nuanced steps in this process. Let’s review what happens and then we can look at how to create it in Storyline:

Interactive video in Storyline using 3D models in PowerPoint

  • User clicks on the side tab which shows a layer.
  • The layer plays the video we created in PowerPoint.
  • Since the 3D object in the video rotates in and out, we set the video to pause when the object is rotated in.
  • Then we add a trigger to resume the timeline (with a hotspot or button) which continues to play the video and shows the object rotate out as the video completes.
  • The completion of the media (the video) triggers the layer to hide which takes us back to the base slide with the side tabs.

Create the Interactive Videos in Storyline

The video I create in PowerPoint is the exact same aspect ratio as the Storyline file. For the most part, 16×9 is fine. But if you change the aspect ratio of your .story file make sure you do the same on the PowerPoint slide.

  • Go to slide 1 in PowerPoint and save it as a .PNG image. This image will be what the user sees on the base slide in Storyline and perfectly aligns with the videos that will be on the layers.
  • In the Storyline slide, insert the slide image from PowerPoint.
  • Create the appropriate number of layers based on how many interactive elements you have.
  • On each layer add the appropriate video. Each video should play automatically. I also recommend putting a hotspot over the video so the user can’t click on the video to start/stop it.
  • On the video layer, add a trigger to pause the video when it reaches either a certain time or cue point. I like to add cue points so I can nudge them without modifying the trigger. The video should pause at the apex of the object rotation.
  • Add a trigger to unpause the video. It could be a simple button or perhaps a hotspot.
  • Add a trigger to hide the layer when the media completes. This should take you back to the base slide.

Click here to view the tutorial on creating an interactive video.

That’s basically it. Of course, there’s a lot more you can do to decorate the layer or add additional content. It just depends on your needs. Practice the technique first and once you have it set, see what you can do.

If you do create something, please share it with us so we can see it.

Events

Free E-Learning Resources

Want to learn more? Check out these articles and free resources in the community.

Here’s a great job board for e-learning, instructional design, and training jobs

Participate in the weekly e-learning challenges to sharpen your skills

Get your free PowerPoint templates and free graphics & stock images.

Lots of cool e-learning examples to check out and find inspiration.

Getting Started? This e-learning 101 series and the free e-books will help.


3D models in PowerPoint

I shared a cool 3D interaction in a recent workshop demo and have had lots of people ask how I built it. You can check out the interaction in this Rise demo.

Creating the interaction is a two-step process:

  • The first step is creating a video of the 3D model as it rotates in and out.
  • The second step is to insert the video and add interactive elements in Storyline.
  • In the case of the Mars Rover module, there’s a third step because inserted the interactive Storyline module into Rise. This is pretty cool because it allows for really simple and fast authoring in Rise, and then when I need custom interactions, I just build them in Storyline. It’s a win-win.

Here’s a previous post where I detailed more of the construction of the Rise demo. For today’s post, I’ll show you how to create the 3D video you’ll use for a Storyline interaction. The tutorial below shows how to create the video using 3D models in PowerPoint.

Click here to view the tutorial on YouTube.

Insert 3D Models in PowerPoint

PowerPoint comes with a number of 3D models. It also supports inserting models shared by the community. You can also build your own 3D models and insert them using standard 3D formats

3D models in PowerPoint

Most likely you’ll want to insert your own 3D object. So it’s nice that PowerPoint supports the common 3D file formats. Here are the supported 3D formats for PowerPoint:

  • .FBX
  • .OBJ
  • .3MF
  • .PLY
  • .STL
  • .GLB

How to insert the 3D model in PowerPoint:

  • Create a slide and then select a 3D object.
  • Insert it just like you would a shape or picture.
  • Position the object on the screen.
  • Duplicate the slide (we’ll need this for the video).

Create the 3D Animation in PowerPoint

The first slide is the starting point from which the 3D object rotates. The second slide is the rotation point. You’ll need to rotate the object so that the position changes from slide 1 to slide 2. You can also move and scale it.

3D models in PowerPoint


  • Reposition the object by either scaling, rotating, or moving it on the slide.
  • Go to slide transitions and select a morph transition for slide 2.
  • Preview the slideshow.

3D models PowerPoint

On preview, you’ll see how the 3D object uses the morph transition to change positions. Pretty slick, huh?

Fine-tune Slide Transitions for 3D models in PowerPoint

That’s the essence of the 3D animation. Now it’s a matter of fine-tuning the animation by playing with the slide timings.

When all is done, the PowerPoint slides will be saved as a video file. That means the animations and transitions need to be automated.

3D models in PowerPoint 3D PowerPoint morph transition timing

  • In the Transitions tab, go to Advance Slide and select to advance after X time. That means the slide will automatically advance at a certain time and doesn’t require you to do anything to trigger the slide movement.
  • Slide 1 is just the starting point so it needs to advance as quickly as possible. I usually set it to advance after .25 seconds.
  • Slide 2 will trigger the morph animation. On slide 2 you can change the speed of the 3D animation by changing the slide duration.
  • Slide 3 (optional) is great if you want to create the sense that the object rotated in and out like the Mars Rover demo.

Save the PowerPoint file as a Video

When all is done, save the PowerPoint file as a video. You have two options: .MP4 and .WMV.

The MP4 format works well but I did find that when I use it with Storyline, the last part of the .MP4 always seems jumpy. It probably has to do with how the .MP4 is encoded by PowerPoint. So if I am using the video to build an interactive file, I save it as a .WMV. Then I let Storyline do the conversion. That resolves any issues you may experience.

That’s basically it for the 3D model video in PowerPoint. You create the two or three slides and save as video. Once you have the video, you can insert it into Storyline or anywhere else you use video. To make it an interactive video like I did with the 3D rover, you’ll need to tune in next week where I show how to create an interactive video in Storyline.

Events

Free E-Learning Resources

Want to learn more? Check out these articles and free resources in the community.

Here’s a great job board for e-learning, instructional design, and training jobs

Participate in the weekly e-learning challenges to sharpen your skills

Get your free PowerPoint templates and free graphics & stock images.

Lots of cool e-learning examples to check out and find inspiration.

Getting Started? This e-learning 101 series and the free e-books will help.


closed captions

We’ve discussed closed captions in a previous post. We looked at how to create them with free software or online tools. And we also explored how to build closed captions using a single text variable.

Today, we’ll look at how the closed captions feature works in Articulate Storyline 360. You’ll find it a lot easier to use. Here are three video tutorials that go into more detail regarding the steps below.

TUTORIALS

How to Create & Edit Closed Caption Text

Here’s how to add captions to audio narration or videos in your course. You can do it right inside of the authoring tool.

  • Insert the video (or audio) file.
  • From the toolbar, select Add Captions.
  • Storyline opens a caption editor where it analyzes the audio track and creates several placeholder caption boxes for you to insert text.
  • Select a caption box and start typing. Hit the return key to restart the caption box until you’re done. Hit the tab key to move to the next box.
  • Easy as that.

closed captions editor

TUTORIAL: Learn about creating and editing closed captions in Storyline 360.

Editing your captions is fairly straightforward. When you open the Closed Captions Editor, you see a timeline with the audio track and caption boxes.

  • You can extend or decrease the time of the caption.
  • Edit text.
  • Click and move the caption boxes.
  • Export the closed captions as a .VTT file, which is standard.

How to Import Closed Caption Text

Many people like to create their closed caption text in separate applications, export the .VTT (or another format), and import the text file into the authoring tool. That makes sense, especially if you have really long audio or video tracks.

Personally, I like to use Youtube to create my captions for long videos. I upload the video to Youtube and make sure it’s not public. Then, I take my text script and paste it into the field. Youtube does the rest. When it’s done, I can download a .VTT file to use in my e-learning course.

Here’s how it works in Storyline 360.

  • Insert a video or audio file into the slide.
  • Click on the video and in the ribbon, select Import to access your .VTT file.
  • Preview the slide and select the Captions button on the player.

closed captions example

TUTORIAL: Learn about importing closed captions.

How to Create a Closed Captions Button

By default, the course player has a captions button. To view captions during the course, click the captions button. That works great if you have the player and captions button enabled. However, some people prefer to diminish the player and want their own captions button on the slide to control when the captions display.

Here’s how to create a custom captions button:

  • Insert a button.
  • Add a trigger to the button to adjust the Player.Display.Captions variable.
  • The variable is like a True/False variable that can be either one or the other when clicked. Set the operator to =NOT Assignment.
  • When the button is clicked it toggles the variable value to what is not assigned to. Thus, clicking the button turns the captions or off.

closed captions variable

TUTORIAL: Learn about creating a custom closed captions button.

And that’s how you add closed captions to your e-learning courses. Pretty simple, huh?

Events

Free E-Learning Resources

Want to learn more? Check out these articles and free resources in the community.

Here’s a great job board for e-learning, instructional design, and training jobs

Participate in the weekly e-learning challenges to sharpen your skills

Get your free PowerPoint templates and free graphics & stock images.

Lots of cool e-learning examples to check out and find inspiration.

Getting Started? This e-learning 101 series and the free e-books will help.


screencast tips

Screencast tutorials are some of the most common forms of online training. This makes sense since a large part of e-learning is predicated on learning new software. One challenge is creating effective and engaging screencasts. So today, we’ll look at a few simple production tips to help you get started.

Screencast Tip: Establish Context Quickly

It helps to know what you’re learning and why. At the beginning of the screencast, introduce what you’re going to teach and why (or what the outcome should be). Many screencasts aren’t clear about what the value of the screencast is. They either jump into instruction with no context, or they spend too much time on non-essential content.

Screencast Tip: Get to the Point Quickly

The other day I was reviewing a product video for some new gadget. The video was about seven minutes long. I wanted to know how the gadget worked and what features it had but the guy in the video spent the first three minutes talking about a bunch of nonsense that had nothing to do with the video topic. As Archie Bunker used to say, “Get to the point, Edith.”

Screencast Tip: Don’t Focus on Features

Many of the screencasts I view go through a feature list. They spend way too much time on the user interface and the features buried within it. You don’t need to explain everything in the software or everything you can do with it. And not all features are created equal. Some are used all the time and some rarely. Skip the feature-by-feature dissertation. Focus on the key features and the ones most critical to the user’s objectives.

Screencast Tip: Focus on Action

What are people supposed to do with the software? Make a list of required actions or responsibilities. Then build your screencasts around actionable objectives and how to meet them. Give them real-life challenges and how the software meets them. For example, if I were teaching someone how to use a spreadsheet, instead of showing them how to to use specific features, I’d start with a real-world challenge: “You need to create a report using this data.” And then from there, I’d go through the process of instruction and focus on the features relevant to the objective.

Screencast Tip: Don’t Stop at One

People need multiple opportunities to practice. Many screencasts and the associated activities are built on a single action. This is fine. However, use the activities to reinforce a previous lesson as you introduce new skills. Give them opportunities to review and repeat the previous process.

The more practice, the more fluent they’ll be. This is really key with software training where you build on skills from previous training videos.

Screencast Tip: Keep it Short

Shorter videos are better. Stay focused and get to the point, as I noted above. It’s better to have a series of shorter videos than to have a single long one that forces the user to scrub through looking for relevant info. Try to stay focused on a single objective.

Screencast Tip: Provide Post-Screencast Resources

Because the screencast videos will be shorter and tied to specific actions there may be some learning gaps or other things the person wants to know. It’s always a good idea to curate a list of additional resources for the viewer to access after they’ve completed the screencast video.

Screencast Tip: Don’t Make a Screencast

Screencasts take time and some require multiple edits. And if the content changes (like a new interface or features) then they need to be redone. Often it’s easier to show a static screen and use labels to highlight specific areas. These are also easier to update when the subject matter is still in flux. And it helps you avoid long videos when they just need simple information.

I like this interactive screenshot prototype that David built a while ago. It looks good and it’s easy to build. It’s also available as a free download.

Here are some additional resources for those who want to create screencasts:

What tips do you have to share?

Events

Free E-Learning Resources

Want to learn more? Check out these articles and free resources in the community.

Here’s a great job board for e-learning, instructional design, and training jobs

Participate in the weekly e-learning challenges to sharpen your skills

Get your free PowerPoint templates and free graphics & stock images.

Lots of cool e-learning examples to check out and find inspiration.

Getting Started? This e-learning 101 series and the free e-books will help.


e-learning screencast webinar tutorials

If you create software training then odds are you show a lot of keyboard shortcuts. If that’s the case you’ll like today’s tip where I share a simple tool that makes it really easy to display the keyboard shortcuts on-screen.

How to Display Keyboard Shortcuts during Screencast Tutorials

Meet Carnac the Magnificent. It’s a keyboard utility that displays keyboard shortcuts as they are used during your demos. This is perfect for webinars and screencast tutorials. It’s also great for live presentations where people in the back of the room can’t always hear or see what’s going on.

Here’s a quick tutorial where I show how it works and how it would look in your software training.

Click here to view the Youtube video.

  • You can download Carnac here. Read more about it here.
  • Once you download the file, double-click to install it.
  • You’ll see the purple Carnac icon in your system tray.

Once it’s active in your system tray and you use a keyboard shortcut, you’ll see the shortcut displayed on the screen as in the image below.

screencast tutorials example

How to Customize the Keyboard Shortcut Display for Screencast Tutorials

You can modify how the keyboard shortcuts display.

  • Double-click on the Carnac icon and it opens a setting window.
  • You’ll see the option to select monitors and where the object is displayed. You start by selecting the screen and then adjust how much you want to offset it.

screencast tutorials set properties

  • You can also change the appearance of what’s displayed. This includes the width, font size, and color. I couldn’t get the sliders to work, but manually entering the values did work for me. Save your changes.

screencast tutorials change appearance

It’s a fairly easy to use and it’s free. But you get what you pay for, so if you need help, you’re stuck. But I’ve found it works fine and as expected.  If you need a way to display keyboard shortcuts, then this solution should work for you.

Events

Free E-Learning Resources

Want to learn more? Check out these articles and free resources in the community.

Here’s a great job board for e-learning, instructional design, and training jobs

Participate in the weekly e-learning challenges to sharpen your skills

Get your free PowerPoint templates and free graphics & stock images.

Lots of cool e-learning examples to check out and find inspiration.

Getting Started? This e-learning 101 series and the free e-books will help.


interactive video example

Earlier I shared a nice example of a gamified elearning course. Today I’d like to share a really neat example of an interactive video scenario. This example comes via the fine folks at SpongeUk who do some really cool work and said I can share it.

View the Interactive Video Example

interactive video

Click here to view the video interaction.

What I Like About This Interactive Video

  • I like the real life decision-making that they use. The situation is relevant, the choices are legitimate, and the consequences of the choice leads to more choices. It has a game-like feel to it and the timer adds a sense of urgency.
  • I really like the way they did the email treatment. It’s a clean design and novel. And overall their visual design has a simple elegance.

interactive video email

  • There’s something about video that’s much more engaging than reading slides of content. Setting up a quick video shoot like this doesn’t take long and the scripted dialogue is short enough to keep the home grown talent in check. My guess is they kept it simple and used a head-mounted GoPro camera (or a smart phone) to create the first person perspective. And it doesn’t sound like they used any special mics. Besides, you can’t go wrong with monkeys and bananas.

interactive video Go Pro

  • Despite how much we try to complicate things, interactive scenarios are essentially glorified multiple choice questions. I like the 3C model for scenarios: give the learner a challenge (what to do with employee), provide viable choices, and the choice produces a consequence (which could be immediate feedback or another challenge).

interactive video decision

  • I also like the way they pulled the feedback together to identify what type of manager you are and tips on how to be better.

interactive video feedback

  • Finally, I get a lot of questions about how to do this or that in elearning. Often people start by showing me examples of popular multimedia content they find online. I believe that was the case with this example. If I recall, it’s not a real project but a quick prototype based off of this popular Deloitte recruitment video.

Kudos to the folks at SpongeUK. They did a great job showing how Storyline can be used to create interactive scenarios that use video. They also did a great job reinterpreting the interactive video and creating something uniquely theirs. And as a bonus, once you build the foundation for this type of interactive, you can save it as a template and re-use it for other courses.

What did you like best about this example?

Events

Free E-Learning Resources

Want to learn more? Check out these articles and free resources in the community.

Here’s a great job board for e-learning, instructional design, and training jobs

Participate in the weekly e-learning challenges to sharpen your skills

Get your free PowerPoint templates and free graphics & stock images.

Lots of cool e-learning examples to check out and find inspiration.

Getting Started? This e-learning 101 series and the free e-books will help.