The Rapid Elearning Blog

Archive for the ‘Visual Design’ Category


create and edit AI illustrated characters

There’s a lot of promise to artificial intelligence (AI) for image generation. However, as it currently works it’s not as simple as prompting an image and getting something perfect to download and use. AI can generate a lot of nice results quickly. However, using the images for production work can be a challenge.

My key objective is to create viable (not necessarily perfect) characters that I can use in online training programs or PowerPoint presentations. I am not a professional illustrator or Photoshop pro, so I want some steps that are simple and not too time consuming.

Here are some previous posts where we looked at some ideas:

I’ve been playing around with some AI image generators to get a better feel for how they work and how I can use them when I create e-learning courses. I narrowed it down to a few basic steps that seem to work for me:

  • Create the character(s) using prompts in AI
  • Edit it to fix artefacts
  • Crop to isolate the character
  • Upscale for better quality
  • Remove background
  • Convert to vector

The Reality of Working with AI Illustrated Characters

AI generates a lot of weirdness with illustrated characters between the twisted hands, distorted faces, missing eyes, odd poses, and missing limbs and fingers. I don’t always find the same issue with photographic characters probably because there are more models from which to learn.

Consistency is the other issue. Getting one good character isn’t too hard but getting that same character in multiple poses is a challenge. Or getting different characters with the same style. It takes a little practice and willingness to settle for close enough.

Quick Microlearning Course for Creating AI Illustrated Characters

I used Rise 360 to put together a simple course that shows the process I go through to create the free illustrated characters I’ve been sharing. You’ll notice that my editing skills in Photoshop are basic, so hopefully you’ll be inspired to try creating characters yourself.

free microlearning course how to create AI illustrated characters

Click here to view the course.

I also added a quick survey if you want to share character ideas with me. I’ll use the results to test things out.

Events

Free E-Learning Resources

Want to learn more? Check out these articles and free resources in the community.

Here’s a great job board for e-learning, instructional design, and training jobs

Participate in the weekly e-learning challenges to sharpen your skills

Get your free PowerPoint templates and free graphics & stock images.

Lots of cool e-learning examples to check out and find inspiration.

Getting Started? This e-learning 101 series and the free e-books will help.


how to quickly create illustrated characters with AI

I see the promise of AI generated assets for e-learning. I’m not an illustrator. I have limited Photoshop skills. Because of this, my options for custom illustrations are slim. However, with AI I can find a balance of creating viable illustrated characters with minimal skills.

In previous posts we looked at:

Today, I’ll show some of the basic steps I use to create the illustrated characters I’ve shared in LinkedIn recently. In these three tutorials, I’ll give an overview on how to create simple, viable illustrated characters using AI. I am working with a few objectives: quick, simple, and minimal editing. I am willing to live with some imperfections.

Getting Started with AI Tip

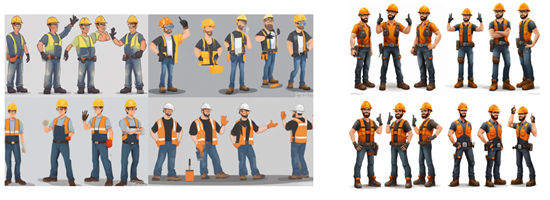
I am using Midjourney to create my AI illustrations. You can use whatever you want. The process is very similar regardless of application. I will add that not all tools offer the same quality. For example, here are two images using the same text prompt. The good example on the right comes from Midjourney. The other from one of the many of the tools that are out there trying to make money quickly from the AI gold rush. Buyer beware!

AI comparison

Step 1: How to Create a Character

I only cover the basics in the tutorials below and show some differences when you change the settings, but the secret with AI prompting is knowing how to adjust parameters such as style, seeding, and quality. The more you use those parameters the better control you have over your results. I will add that I find using fewer words is better.

There are a lot of videos on YouTube and elsewhere on getting consistent characters. I’m not going to get into the weeds on this. Here is a useful source for Midjourney users: John Walter: he has a good series on creating a consistent character.

  • Set up your prompt. I use character, action, style, and white background (so I can clean the image up after I download it).
  • Make parameter selections for style, etc.
  • Once you have a character style you like, change the character descriptions. This is where you can mitigate the bias that is built-into the AI model.

The video below walks through some of these tips, and we look at options in terms of unique styles and characters.

Click here to view the video tutorial on YouTube.

Step 2: Create a Quick Character Set from a Single Panel

This is easy and will give you five characters that are similar.

  • Generate a character.
  • Select a character to upscale.
  • Do another version (minimal variance) which will provide four more similar characters.
  • Download the characters and clean them up.

Click here to view the video tutorial on YouTube.

Step 3: Create a Character with Multiple Poses

A prompt with multiple poses will give you the same character but slightly different. You can play around with the number of poses, but three poses are a sweet spot. At a minimum you get three similar characters. Assuming the iterative characters are similar enough, you end up with fifteen similar characters.

  • Generate a character and include the number of poses.
  • Select a character panel to upscale.
  • Do another version (minimal variance) which will provide four more similar characters.
  • Download the characters and clean them up.

Click here to view the video tutorial on YouTube.

Step 4: Don’t Expect Perfection

This approach isn’t a perfect way to create characters. It’s a quick way to create good enough characters. My goal is to create viable characters quickly. So, I am willing to live with some imperfections.

  • The hands and faces are problematic. That’s OK. With multiple characters you’ll get enough parts you can mix and match to get some good characters.
  • You don’t need to use every character you get.
  • Once you edit the characters, you will fix some of the issues that AI instigates. I’ll cover that in the next post.

Hopefully, these tips help and be sure to download the free characters in the community.

Events

Free E-Learning Resources

Want to learn more? Check out these articles and free resources in the community.

Here’s a great job board for e-learning, instructional design, and training jobs

Participate in the weekly e-learning challenges to sharpen your skills

Get your free PowerPoint templates and free graphics & stock images.

Lots of cool e-learning examples to check out and find inspiration.

Getting Started? This e-learning 101 series and the free e-books will help.


create AI illustrations

I’ve been messing around with different generative AI apps, just like many of you. I’m trying to figure out how I can use them in my job and also get really good at using the various AI tools. Because I create online courses, I’ve been working on making my own illustrations that work well.

In a previous post, I shared some tips based on things I’ve learning using AI. I am using Midjourney for my examples, but there are a lot of tools out there for your initial experimentation.

Here are some tips I’ve picked up and how I make those free illustrated characters that I share on LinkedIn.

It Starts with Prompts

The secret to getting the right images is based on the prompting. The challenge with AI is that you never know what you’ll get and when you get something that you really like, you may not get it again.

  • I start simple and don’t try to overstate or be too descriptive initially. And then I work from there.
  • I also look at what images people share in the AI community and when I find something I like, I try their prompts to see what I get.
  • For prompts, I mostly use a character, an action, and then the style. Depending on what I need, I may add a location or something to provide more visual context.

The Character

There is a lot of bias built into the AI language models. For example, if I type in businessman, 99% of the time it will be a white businessman in a suit. Why white? Why a suit? That’s something you need to account for as you create characters.

Regardless of the bias, I start with something generic like businessman. That usually gives me a white guy in a suit. But that’s OK to start. Once I get the right look, I modify the descriptor. Some tips to get better initial characters:

  • Instead of just “businessman,” use an age to see what you get. I find 40-year-old is a good addition.
  • It doesn’t matter what you get, the main point is to see if you can come up with something consistent.
  • There are a lot of good videos now on how to write prompts. The more you practice and play around, the better you get.
  • At some point, I call it good and move on. My goal is to find a simple way to get a good enough image. Playing around in AI for hours (or days…which will happen) is fun, but not something I can afford to do for long.

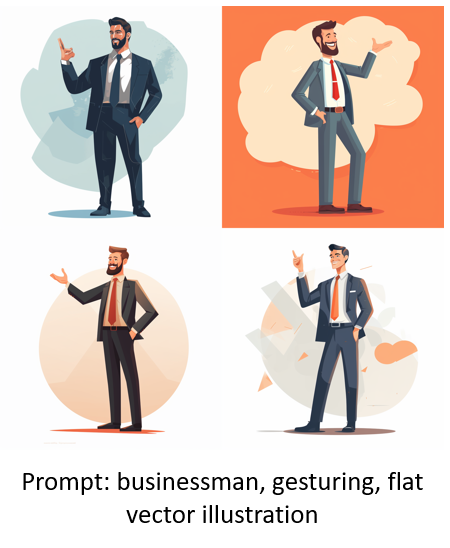
As you can see in the images below, you get some pretty decent initial images to start. I can work with these.

AI businessman prompt


The Action

Describing the action is where you get the pose you want and can use. I keep it simple.

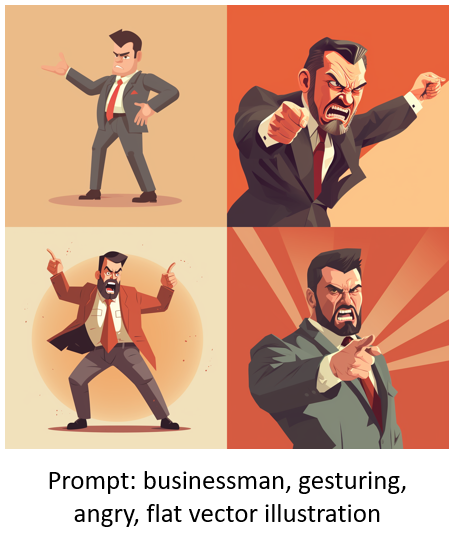
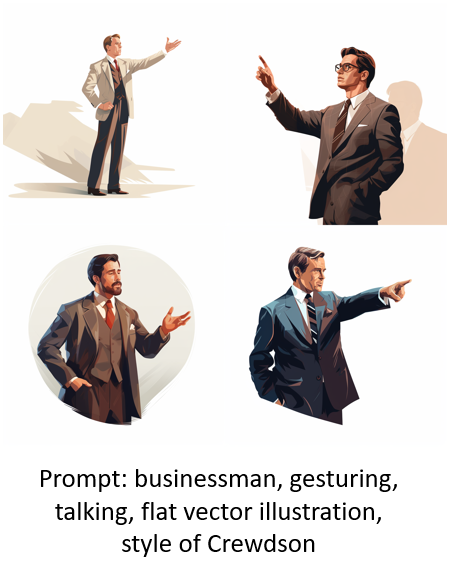
  • I like to insert “gesturing” as part of the prompt. It gives me more varied arm positions.
  • Add an emotion or state-of-being such as “confused” or “angry.”
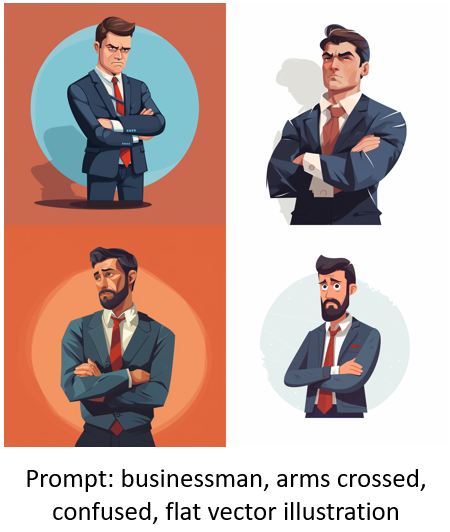
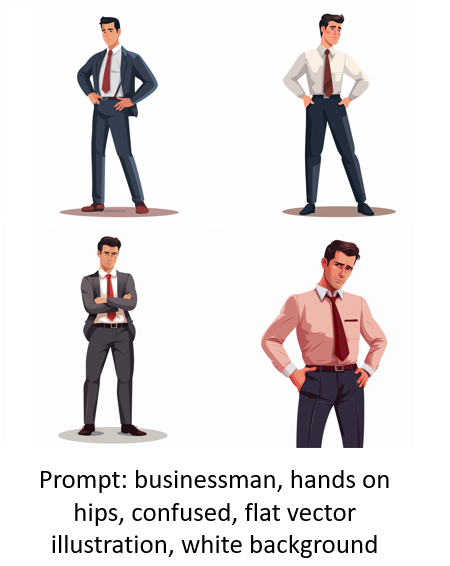
  • I also change the pose and may use “arms crossed” or “hands on hips.”
  • Play around and see what you get.

You’ll notice how the images change based on a few simple words.

confused AI businessman prompt

angry AI businessman

businessman AI arms crossed illustration

AI illustration hands on hips

As you review the images above, you’ll notice that the styles change quite a bit. You’ll also notice that you may not get the pose you expect. For example, “hands on hips” includes arms crossed. “Arms crossed” aren’t full body poses. That’s something you have to live with.

As you practice and get to know how to write prompts you will be able to design more consistent styles.

The Style

As mentioned above, getting a consistent style can be tough. A lot of it will come down to how you write prompts and the feel you get for them as you practice.

  • For illustrated characters, I want a similar style and no background so it’s easy to clean up.
  • My default prompt style is “flat vector illustration” because that works well for a lot of e-learning course design.
  • It also works consistently most of the time. And even if the illustrated characters aren’t the same, they often are close enough to use together.
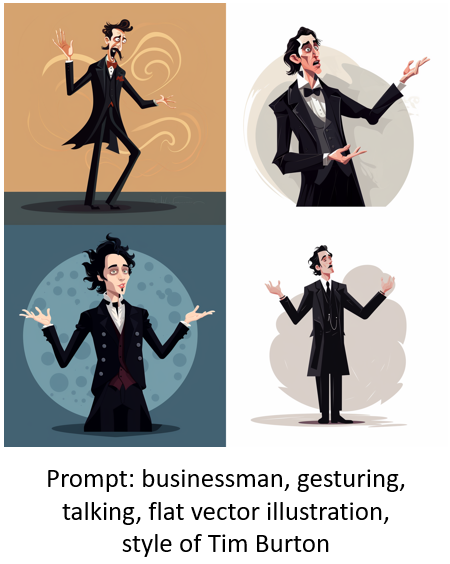
  • I do play around with unique style descriptions. For example, I will state “in the style of [add descriptor].”

AI prompt description with different style

AI prompt description with different style Burton

As you review the images above, you’ll notice that adding a style description to the “flat vector illustration” starts to provide a more specific style that gets closer to consistency.

Bonus Style Tip: Getting Rid of the Background

The AI image is just the starting point. Often you may have to do some edits to hands, faces, etc. One of the main things is getting a transparent background so that I can place the image where I want it.

To get as clean a background as possible, I add the prompt: “white background.” That works 90% of the time. The image below is the same “hands on hips” prompt as above with the addition of “white background” in the prompt.

AI illustration white background

Overcoming Bias with AI

As I noted above, there’s built-in bias which can include things like gender and race, but also style of clothes. You can mitigate some of that by changing the descriptor. Once I get an image style I like, I will start to add additional descriptions to get more diverse characters. In no time at all, I have a diverse set of characters from which to build.

diverse AI illustrated characters

One thing to consider is your own bias. For example, I may look for a specific image and then assume that it works because of how “I see” that character and what it should represent.

Those are some of the basic tips to get started creating your own characters with AI. In a follow up post, I’ll share my secret sauce and what I do to speed things up and how I edit the characters.

Don’t forget to download the characters I’ve already added. I’ll be adding more, so keep your eyes peeled.

Events

Free E-Learning Resources

Want to learn more? Check out these articles and free resources in the community.

Here’s a great job board for e-learning, instructional design, and training jobs

Participate in the weekly e-learning challenges to sharpen your skills

Get your free PowerPoint templates and free graphics & stock images.

Lots of cool e-learning examples to check out and find inspiration.

Getting Started? This e-learning 101 series and the free e-books will help.


360 images AI

There are a lot of really cool things you can do with 360° images in e-learning. You can see some examples here.

However, I’ve chatted with a lot of people and the single biggest challenge for them is getting usable images.

In most cases, 360° image interactions are exploratory and based on real-world context. In those case, stock imagery doesn’t work. This requires that the course author have a camera or other means to craft the images. However, it doesn’t mean you can’t create an interaction using stock 360° images.

Here is a cool site that creates stock 360° images using AI. The steps are simple:

  • Add a prompt and the site creates the imagery.
  • Download the image.
  • Insert into your course.
  • Build the interaction.

Here’s a simple example where I used the AI generated images and inserted them into Storyline 360.

AI generated office tour

Click to view the example.

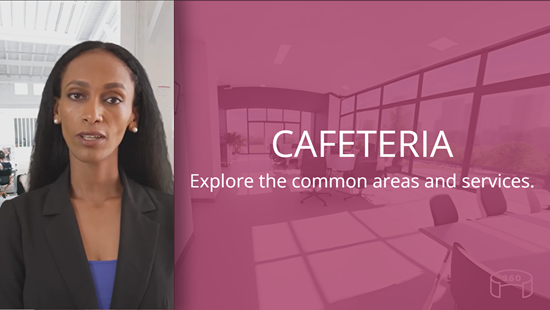
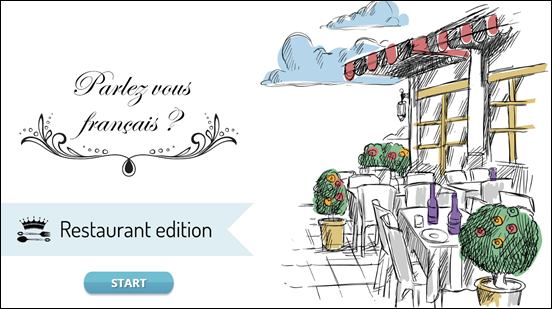
And here’s an example, recently shared in the community by Julie Bigot for the challenge we had on using AI in e-learning.

example AI demo

Click here to view the example.

Working with AI

A few key tips working with AI:

  • The power is in the prompt. There’s a lot of trial an error in figuring out how to get the right imagery. Although, now AI can also help you craft the right prompts for your images.
  • Craft a prompt and then use it to create complimentary spaces. In the examples below, I kept the prompt simple: modern business office. The first image produced a very distinct black and white office.

AI office

  • I wanted similar looking rooms that may look like they were part of the same office so I appended “modern business office” with other words such as meeting room and cafeteria. Surprisingly, as you can see from the images below, the rooms are very similar and usable. Normally, the prompts have to be more descriptive.

AI office

AI office

AI office

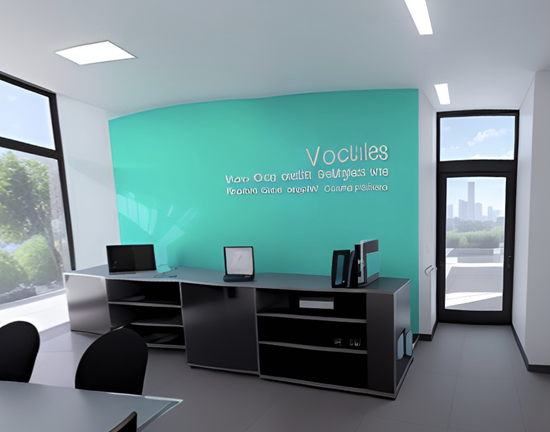
  • Sometimes you may get artifacts in the 360° images. You’ll notice my image below had some gibberish text on the wall. Those can be edited in an image editor. Here’s a tutorial that explains some options.

360° image needs editing

If you need to create 360° images for your e-learning interaction, this is a cool site to explore. Hope it helps.

Events

Free E-Learning Resources

Want to learn more? Check out these articles and free resources in the community.

Here’s a great job board for e-learning, instructional design, and training jobs

Participate in the weekly e-learning challenges to sharpen your skills

Get your free PowerPoint templates and free graphics & stock images.

Lots of cool e-learning examples to check out and find inspiration.

Getting Started? This e-learning 101 series and the free e-books will help.


color picker for e-learning

I’ve written about the Microsoft PowerToys in the past. They come with some handy applications. There’s an application that allows you to preview .SVG files. This is more important today than it was even a year ago as more and more courses are using .SVG. There’s also a feature to rename your files. This comes in handy if you want to convert a folder of images to match a project’s title.

I was looking at the updated PowerToys and thought I’d highlight the new color picker and how it has real practical value.

Color Picker for E-Learning

I use a color picker multiple times during the day. Many apps like Storyline and PowerPoint have color picking tools. However, they tend to be confined to working in the application. There are browser extensions for color picking websites. I use them sometimes when I work in Rise 360. I also use Color Cop (another free app).

However…

I think I’ve been able to consolidate all of my color picking needs in a single tool via the Color Picker in PowerToys. Three things I really like:

  • It’s simple and elegant.
  • I can pick colors from anywhere on my computer without being constrained by an app or browser.
  • I can edit the colors or get quick derivatives. For example, I could pick a fill color and use one of the derivatives for a border.

color picker for e-learning

Select Windows+Shift+C and it opens the color picker. From there you can pick any color. Using your mouse wheel to zoom in. And once you’re in the editor, you get the hex code and a range of tones within the color as an easy way to create a secondary color derivative.

Here’s a quick tutorial to show a little more detail.

Click to view the tutorial on YouTube.

If you need a color picker, you can’t beat the PowerToys. It works great and its price can’t be beat. 🙂

Events

Free E-Learning Resources

Want to learn more? Check out these articles and free resources in the community.

Here’s a great job board for e-learning, instructional design, and training jobs

Participate in the weekly e-learning challenges to sharpen your skills

Get your free PowerPoint templates and free graphics & stock images.

Lots of cool e-learning examples to check out and find inspiration.

Getting Started? This e-learning 101 series and the free e-books will help.


download images from website

Visually branding your e-learning courses is a common requirement. A great way to figure out how to brand the course is by mimicking what’s available publicly from the organization’s website (and intranet).

These sites tend to have all sorts of media assets that are already vetted to fit the organization’s brand and often work well for e-learning content. The challenge is how to get access to those assets.

Connect with the Marketing Team

Before you spend time scraping your sites for images, connect with the marketing (or web) team. In the past, I’ve found that the marketing team usually had access to more media assets than other teams.  Connect with that team (or the team that manages the website) and share what you want to do. Often, they can provide some guidance and give you access to the resources available to them.

Be prepared to dialogue about compliance to the company’s branding requirements. 🙂

Download Images from the Website

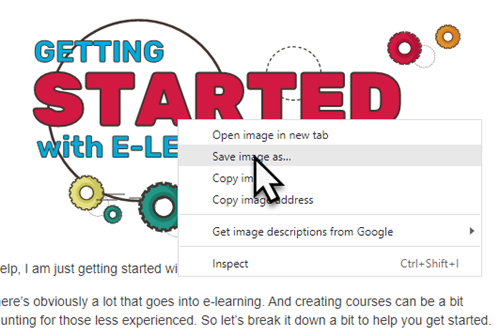
One option is to locate an image on the website, right-click and save to a folder.

media assets e-learning

That’s an easy and effective way. However, it’s also a bit cumbersome. And sometimes the sites are set up to not allow this.

Download Images via the Browser’s Site Inspection

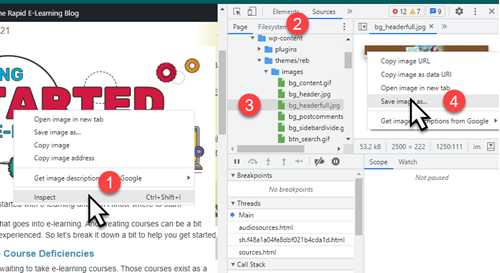
Another way to access the images on your site is via the browser’s ability to inspect the site.

  • Right-click on the page and select inspect
  • Click on the Sources tab
  • Locate the media in one of the folders
  • Access the source file and save it to your folder

e-learning inspect source

Download Images by Extracting from Your Website

I covered this in a previous post, you can use a browser extension or this website to extract images. Basically, they isolate and just show the images on the site. I like using the Image Extractor site because I can do a batch download of images which saves some time.

download media

As with anything like this, be sure to properly credit sources.

Events

Free E-Learning Resources

Want to learn more? Check out these articles and free resources in the community.

Here’s a great job board for e-learning, instructional design, and training jobs

Participate in the weekly e-learning challenges to sharpen your skills

Get your free PowerPoint templates and free graphics & stock images.

Lots of cool e-learning examples to check out and find inspiration.

Getting Started? This e-learning 101 series and the free e-books will help.


Articulate Rapid E-Learning Blog - create hand-drawn graphics

Earlier we looked at the essential guide to visual thinking where we discussed how to communicate visually. Coupled with that post, we explored practical ways to apply visual thinking skills to e-learning course design.

One advantage of visual thinking is learning to see the concepts and how to express them to others. Another advantage is that you gain the skills to create real assets that can be used in your e-learning courses.

Today we’ll look at ways to create our own hand-drawn graphics. And of course, you can always download some free hand-drawn graphics in the community:

How to Practice Sketching Hand-Drawn Graphics

Hand-drawn objects can create a personal and organic look. They are a stark contrast to the sterile corporate look that is so common in many courses. This contrast and the organic look can be used to craft an engaging look for the course. You don’t have to be an artist to create and use hand-drawn images.  It just takes some practice.

Articulate Rapid E-Learning Blog - create hand-drawn graphics examples

A while back, Blair Rorani facilitated a Twitter Draw-a-Thon. Each day several people submitted their sketch of that day’s object. This was a good exercise to think about the objects and how to draw them.

One thing I learned was to streamline my drawings and use less to communicate more. I also tried to practice different face styles. As you can see, I’m not going to sustain a career in graphic design, but with some practice, I can create a few usable objects.

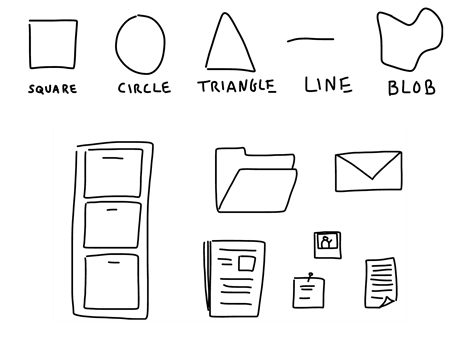
Start with Basic Shapes

Most objects are basic shapes, so you need to learn to see the basic shapes in the objects. Then practice drawing them. The more you practice, the better you get.

Articulate Rapid E-Learning Blog - create hand-drawn graphics by using basic shapes

Once you recognize the basic shapes, you’ll get better at streamlining your drawings. I find that the less detail, the better.

Practice Drawing Common Course Objects

There are a few objects that are common to many e-learning courses. Start by practicing sketching them. Break them into basic shapes and then see what you can sketch. Here are a few common objects to get started. Feel free to add to the list in the comments section.

  • File folder open & folder closed
  • Piece of paper & a stack of paper
  • Desktop & laptop computers
  • Envelope
  • Paper clip
  • Phones: mobile & stationary
  • Desk & overhead desktop
  • File cabinet
  • Whiteboard
  • Cork board

My Experience

As I mentioned in this blog post on overcoming instructional design challenges, Blair Rorani live sketched my presentation.

Articulate Rapid E-Learning Blog - essential guide to visual thinking example of instructional design

I liked what he did, so I tried my hand at live sketching at a workshop. You can see the results below.

Articulate Rapid E-Learning Blog - visual thinking ideas

What I learned:

  • Find inspiration from what you like and copy it. I liked Blair’s style, so my first step was to mimic what he did. Now that I feel more comfortable, I can begin to craft my own style.
  • My initial sketches took too long between capturing the big idea and trying to make it work with technology (I used the iPad and Adobe Ideas). However, once I completed a few of the sketches, I developed some basic procedures that helped make it faster.
  • Spend some time practicing before doing it live or as you sketch for your e-learning courses. One idea is to capture something going on at home. This would also probably produce a lot of laughs, too. Or just turn on the news and sketch what’s being discussed. The main point is to practice and to apply the basic concepts discussed above: use basic shapes to create objects and then practice sketching ideas.
  • Don’t worry about everything being perfect. Just do it. They look nice as they are and there’s something engaging about the organic look. However, I do recommend that you practice writing text, especially if you’re using an iPad. For the iPad I use the Cosmonaut stylus because the thicker pen helps me hold it more like I would on a whiteboard than on a piece of paper. I feel like I have more control when I draw. The newer PC tablets have pen input, and some come with a stylus.

We’re not all going to be artists who can crank out the best graphics. However, with some practice we can learn to communicate visually and streamline our graphics, so they do work in our courses (assuming the proper context).

Do you draw your own objects?

Events

Free E-Learning Resources

Want to learn more? Check out these articles and free resources in the community.

Here’s a great job board for e-learning, instructional design, and training jobs

Participate in the weekly e-learning challenges to sharpen your skills

Get your free PowerPoint templates and free graphics & stock images.

Lots of cool e-learning examples to check out and find inspiration.

Getting Started? This e-learning 101 series and the free e-books will help.


Articulate Rapid E-Learning Blog - practice visual thinking skills for e-learning

In a previous post, we discussed visual thinking concepts and where they fit with e-learning design. Now, let’s look at ways to practice sketching your ideas so that you’re able to move past understanding the concepts and actually applying them to your course.

How to Practice Your Visual Thinking Skills

The first step is to get a handle on the basics:

  • Practice using the basic shapes to create specific objects. The more you practice the better you’ll become at seeing the shapes and sketching something that looks like what it’s supposed to be.

Articulate Rapid E-Learning Blog - practice visual thinking skills for e-learning by creating shapes

Practice Activities for Visual Thinking Skills

Some people have innate skills and sketching isn’t too hard to start. But many don’t have those skills and feel like they can’t do it. But they can. A key point is to feel comfortable sketching.

Remember, this isn’t about becoming a graphics design professional. You want to get a feel for the flow of drawing with your pen, especially if you’re using a computer or tablet. Then develop some fluency and clarity. And that will take a little practice.

Here are some practice activities.

Activity 1: Create basic shapes over and over again.

Work on getting lines straight and completing the desired shape in less strokes. Can you create the shape in one movement and still have it look like it’s supposed to? For example, I notice that if I create a triangle really fast, then the sides start to bow in. However, if I am more deliberate my lines remain straight. The goal is to get straighter lines at a faster speed. A circle should like a circle and not a blob.

Activity 2: Creating common objects.

Look around your office and identify 10 random objects. Break them down by the basic shapes and then create them a few times. For example, here’s a quick sketch of my desk. It’s mostly rectangles and a few circles.

Articulate Rapid E-Learning Blog - practice visual thinking skills for e-learning example

Another thing is to recognize what makes the shape unique and identifiable. For example, an elephant stands out because of the trunk and large ears. By focusing on the essential shapes you can convey the idea of an elephant without having to create the entire thing.

Activity 3: Convey concepts with your objects.

Start to practice sketching whole ideas. Identify three TED videos and capture the core concepts as sketches. It may be easier to just start with three main ideas from each video. Or if that is too much, just focus on a single point. The good thing about video is that you can pause it and rewind. Here are three to help you get started:

Activity 4: Improve your penmanship.

Sunni Brown has some good advice in her book Doodle Revolution where she says to trace over letters. Find a font type you like and type out the ABCs and save as an image. Then load the image into your drawing app and practice tracing over the letters. Eventually you’ll develop the muscle memory to create nice legible handwriting for your sketches.

When I was a Finance Specialist in the Army we were taught to use block letters so that our writing was more legible. To this day, I still do a lot of printing with block letters and it helps when I write, especially smaller text.

Examples of Visual Thinking Skills in E-Learning

Here are a three examples of people who do a great job sketching their ideas and are part of our industry. They also offer tips via twitter and their blogs.

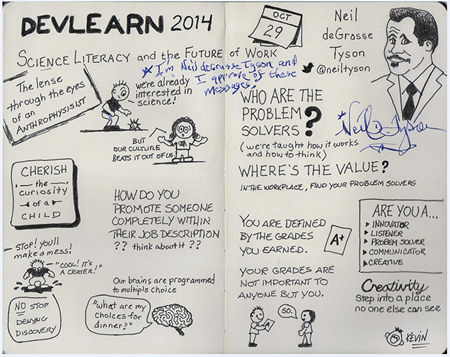
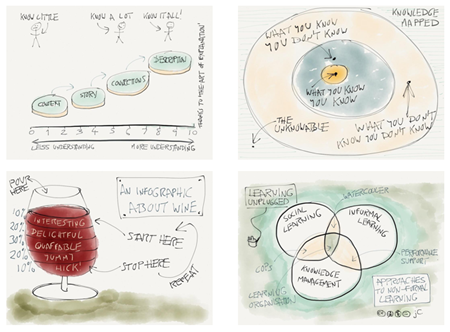
  • Kevin Thorn of NuggetHead Studioz. I ran into Kevin at a Devlearn conference. He showed me his sketch note of the Neil deGrasse Tyson keynote. Obviously we don’t all have Kevin’s innate drawing skills, but if you look past the drawings it’s mostly print and a few basic shapes.

Articulate Rapid E-Learning Blog - practice visual thinking skills for e-learning sketch

Articulate Rapid E-Learning Blog - practice visual thinking skills for e-learning ideas

  • John Curran of Designed for Learning. I love John’s sketches. Again, they’re not overly complicated to create,
    but they convey good information and the hand drawn style creates enough contrast to engage people visually.

Articulate Rapid E-Learning Blog - practice visual thinking skills for e-learning another example

The key in all of this isn’t to become a pro graphic designer. Instead it’s learning to think visually. E-learning is a mostly visual medium and anything we can do to better communicate our ideas will only serve to make the courses we create better.

Events

Free E-Learning Resources

Want to learn more? Check out these articles and free resources in the community.

Here’s a great job board for e-learning, instructional design, and training jobs

Participate in the weekly e-learning challenges to sharpen your skills

Get your free PowerPoint templates and free graphics & stock images.

Lots of cool e-learning examples to check out and find inspiration.

Getting Started? This e-learning 101 series and the free e-books will help.


 Articulate Rapid E-Learning Blog - essential guide to visual thinking for e-learning

Here are two common challenges when building online training courses: knowing what content needs to be in the course and then having the right visuals to support the learning of that content. One way to overcome these challenges is to increase your visual thinking skills. You’ll learn to focus on the right content and then find the right visuals to support what you’re teaching.

What is Visual Thinking?

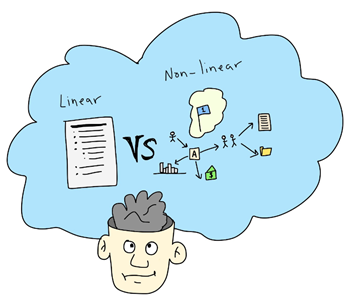
The essence of visual thinking is to convert your text-based information to images and text that show concepts and the flow of ideas. I like the way Dave Gray describes it as a way to “move beyond the linear world of the written word, lists, and spreadsheets and entering the non-linear world of spatial relationships, networks, maps, and diagrams.”

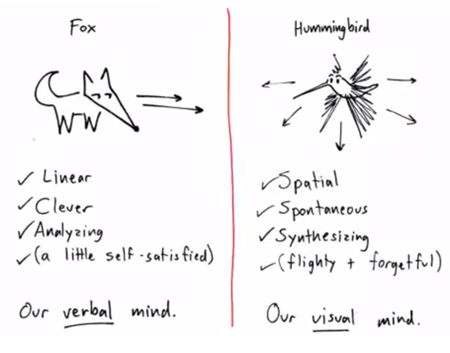
Dan Roam does a nice job drawing a distinction between our “verbal” and “visual” mind by using a fox and hummingbird analogy.

Articulate Rapid E-Learning Blog - essential guide to visual thinking dan roam linear nonlinear

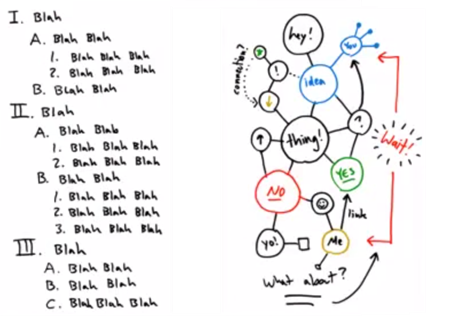
And this is where visual thinking is relevant to e-learning: most e-learning is on the fox side of things. We’re info-centric and lean on our verbal minds to push out information. Yet, e-learning is a mostly visual medium. So it’s ripe for us to use our visual minds to present information and concepts in a way that’s less dependent on text. This helps us move past bullet point lists.

Articulate Rapid E-Learning Blog - essential guide to visual thinking convert bullet to concept map

How to Learn More About Visual Thinking

There are all sorts of great resources on visual thinking. Below are some videos to get you started and a few good book recommendations for those who want to dig deeper.

In the videos below, both presenters share how to get started with basic shapes and a consistent approach to capturing the big ideas and concepts. The videos also complement each other because while they’re similar they do use slightly different approaches.

Of course there’s an investment of time watching the videos, however they’re not too long and you’ll learn quite a bit. Just treat them like a visual thinking workshop that you get to attend for free.

Dan Roam Presents

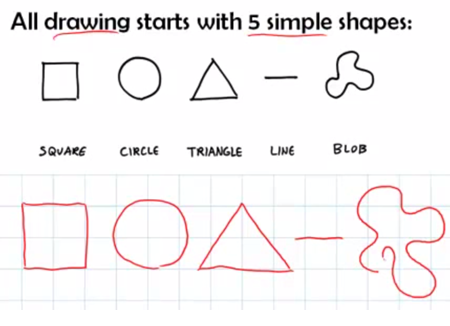
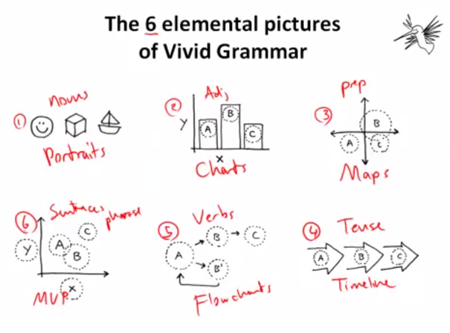
I like the work Dan Roam does. Here are some free videos that are part of his Napkin Academy. He shows how all drawings start with five simple shapes and also provides a grammar structure that guides what to draw.

Articulate Rapid E-Learning Blog - essential guide to visual thinking all shapes

Articulate Rapid E-Learning Blog - essential guide to visual thinking and visual grammar

Dave Gray Presents

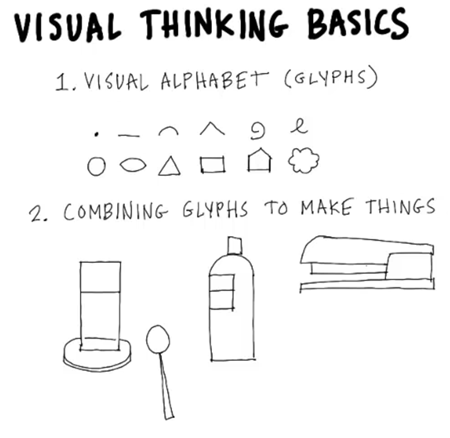
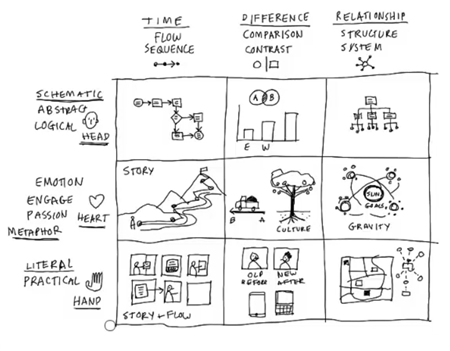
Here are three good videos by Dave Gray, founder of Xplane. He expands on Roam’s basic shapes using a visual alphabet (glyphs) and explains how to know what to draw and when to do it.

Articulate Rapid E-Learning Blog - essential guide to visual thinking and visual thinking basicsArticulate Rapid E-Learning Blog - essential guide to visual thinking and visual thinking concepta

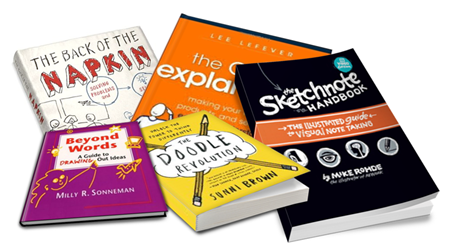
Good Books on Visual Thinking & Communication

I like videos, but I also like books. There’s something about holding them in my hand and making my own notes in the margin. Here are some good visual communication books to add to your elearning library.

Articulate Rapid E-Learning Blog - essential guide to visual thinking book recommendations

The links to Amazon books may produce a slight commission.

Your Next Steps…

Articulate Rapid E-Learning Blog - essential guide to visual thinking and creating images on your computer

Learning about visual thinking is one thing. Actually applying it to your course design is another. Here are some suggestions to help you get started:

  • Watch the videos above to get a good overview of concepts.
  • Practice sketching some basic shapes. For the image above and the header image, I used an iPad and Cosmonaut stylus.
  • Convert a bullet point slide in one of your courses from fox to hummingbird.
  • Don’t worry about being perfect. You’ll get better the more you do it.

The key point in all of this is to train yourself to think visually. And then apply those skills to the construction of your e-learning courses. Keep in mind, e-learning is mostly a visual medium and unfortunately most courses are heavily text-based with deficient visual consideration. Thus, if you learn to think and communicate visually, you’ll only get better at building your e-learning courses.

Have you applied any visual thinking concepts to your e-learning courses? If so, I’d love to learn more about what you did.

Events

Free E-Learning Resources

Want to learn more? Check out these articles and free resources in the community.

Here’s a great job board for e-learning, instructional design, and training jobs

Participate in the weekly e-learning challenges to sharpen your skills

Get your free PowerPoint templates and free graphics & stock images.

Lots of cool e-learning examples to check out and find inspiration.

Getting Started? This e-learning 101 series and the free e-books will help.


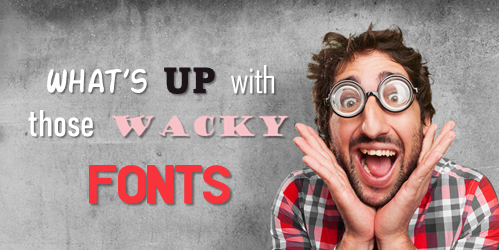
wacky fonts in e-learning

One of my pet peeves is when courses use too many font types. Most of the time it comes from a lack of forethought about how and when to use certain fonts. Some people like to change up the fonts to make the course more visually interesting. This is a noble goal but perhaps not the best reason.

An interesting font will not make the course more interesting. And it’s possible that the font distracts from the content.

Be Intentional

Understand why you’re using the font you’re using.

The font not only displays the text to read, but it also conveys meaning about the type of content. A comic font may imply the content is lighter or part of a conversation. While a handwritten font may imply less formal or organic content.

Keep it simple.

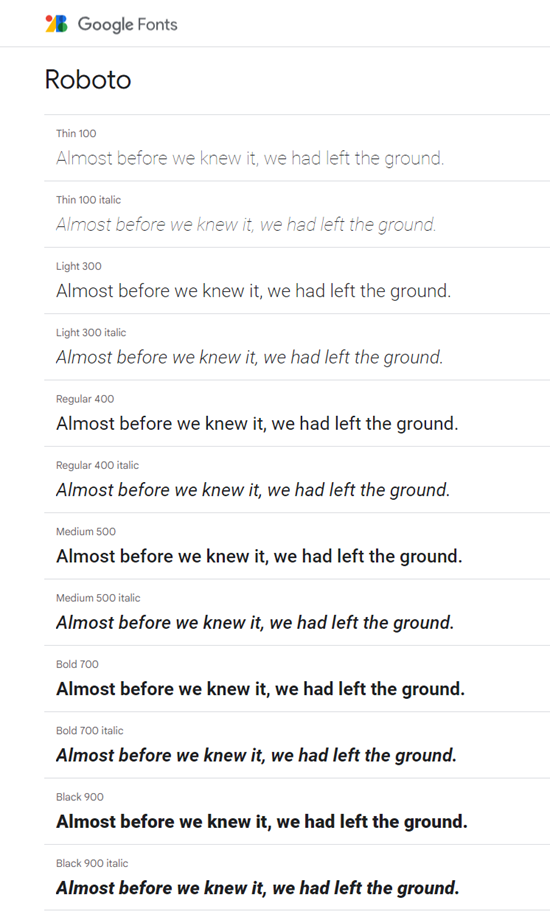
I usually recommend limiting the course to two or three fonts, at the most. Often you can find a single font family that has enough variety to provide options but still maintain visual cohesion as in the example below. The font is Roboto, but there are multiple styles of that font family to offer variation that still allow the course to look professional.

font family for e-learning

What are you displaying?

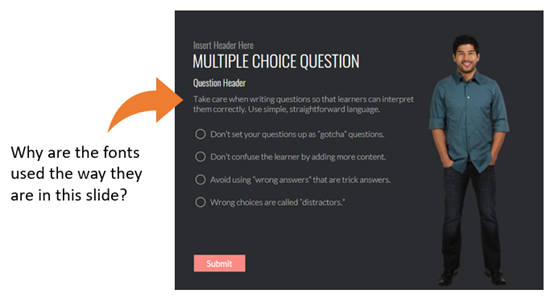
Look at the image below. How many variations are there for the onscreen text? Title, subtitle, question header, and body text.

font styles for e-learning

When you create onscreen text, the text may represent everything from titles to perhaps a quick point of emphasis. They need to look different to show a distinction between the type of content. But how much is too much? Here are a few key text considerations:

  • Title
  • Subtitle
  • Body font
  • Emphasis: this could be the body font bolded or recolored

You could use one font for all and just vary how it’s used. Or have one font for each. The key point is that you are deliberate and intentional about the text you place onscreen and how you want it to appear.

Understand what you need to display and why. Then be deliberate about the fonts used. Your courses will look more professional.

Events

Free E-Learning Resources

Want to learn more? Check out these articles and free resources in the community.

Here’s a great job board for e-learning, instructional design, and training jobs

Participate in the weekly e-learning challenges to sharpen your skills

Get your free PowerPoint templates and free graphics & stock images.

Lots of cool e-learning examples to check out and find inspiration.

Getting Started? This e-learning 101 series and the free e-books will help.


getting started with e-learning

I was reviewing some older presentations I found a slide regarding the topic of getting started with e-learning. On the slide I offered three helpful tips when getting started that still hold true today.

An E-Learning Course is Different from a Classroom Session

A challenge a lot of new e-learning developers have is that they start with existing content from classroom training. This is usually in PowerPoint; and it’s easy enough to import a PowerPoint slide into an e-learning application, add a quiz, and call it good.

This is fine for some compliance training or annual refresher content because they tend to be less about “learning” and more about sharing information. But it’s not ideal.

The better strategy is to craft a learning experience that’s different than the classroom experience. Focus on the objectives and activities required to demonstrate understanding. That will help build courses less about a content dump and more about meeting measurable objectives.

Here’s a good book that does a great job walking through a backwards course design where you focus on the learning experience and not just the content.

E-Learning is Mostly a Visual Medium

Accessibility is a primary consideration when building a course, but outside of that, the e-learning course is mostly visual. Make the investment to learn more about how to structure the onscreen content properly and the how to communicate in a visual medium.

Two good books: The Non-Designer’s Design Book to learn more about basic design and Slideology to learn more about visual communication. And while you’re at it, learn to support what you do visually with alt-text and other accessibility considerations.

You’re Only as Good as What You Know About the Software

If all you know is the basics, all you’ll be able to build is basic courses. The truth is that it takes time to learn to use software. You need to make an investment to learn how to really use the tools. Here’s why:

  • It speeds up your production as you become more efficient. This saves time and lets you spend your energy elsewhere.
  • You’ll learn advanced skills that let you problem solve. The software gives you specific features, but as you gain more advanced skills, you’ll produce unique ways to use the features. But you need to know how the features work to start.
  • You’ll design more engaging and effective e-learning. For example, if you don’t know how to use variables, you severely limit what you can do. But once you understand how that feature works, you’ll build all sorts of different courses and interactive experiences.

One of the best ways to learn is to build something. This can be a challenge at work where you may have some project constraints and build the same courses over and over again.

That’s why I highly recommend the weekly e-learning challenges. They’re designed to get you to think about some new idea and how you’d build it. They’re not intended to be fancy or big courses. You can build something simple or something elaborate, that’s up to you. The main thing is you’re spending time in the tools applying your creative juices. And you get to see some cool examples from others in the community.

If you don’t do the challenges, make it a goal to do one per quarter. And at a minimum, check out what others build every week. You’ll get some neat ideas for your own courses.

There you go, three simple tips to help you get moving in the right direction.

Events

Free E-Learning Resources

Want to learn more? Check out these articles and free resources in the community.

Here’s a great job board for e-learning, instructional design, and training jobs

Participate in the weekly e-learning challenges to sharpen your skills

Get your free PowerPoint templates and free graphics & stock images.

Lots of cool e-learning examples to check out and find inspiration.

Getting Started? This e-learning 101 series and the free e-books will help.


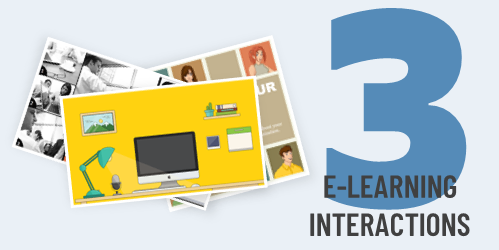
e-learning interactions

In a recent workshop on creating interactions, we looked at ways to take a single image and create interactive content. It’s a good practice activity because many of us aren’t graphic designers so it helps us see different ways to use stock imagery that doesn’t require a lot of editing. And it gets us to think about interactive content in ways we may not initially consider.

The general idea is to find a single image that you can use for an interaction. A few things I look for:

  • Visually interesting. I’m not a graphics designer and design fashion changes every few years. I try to find images that feel new and modern.
  • Content areas. Since I’m using a single image and it’s the unifying graphic, I look for places to add content. Sometimes it does require placing a box or some other container shape over the image, but I try to find open space in the image that works for content. In the three examples below, the computer has a good content area, the teens illustration has a middle section that is empty, and for the business collage I created a side panel.
  • Visual context. Try to find images that offer visual context so it fits the context of the course content. Generic things like offices and desks work great.

Here are three examples that we’ve covered in the past that demonstrate this idea of using a single image with some interactive elements.

Exploratory E-learning Interaction

zoom office e-learning interaction

Click here to view the demo interaction.

In this example, a single image provides some office-like context. This could be used as an exploratory interaction, when clicking on objects exposes additional content. Ask a question. Looks for clues to answer them.

Original post: Create an Interactive Course Using a Single Image includes free download.

Meet the Team E-Learning Interaction

meet team e-learning interaction

Click here to view the demo interaction.

The original example was used to highlight counting clicks with variables. However, the single image could be used to click on a character to glean more content such as a “meet the team” activity. The center area is a perfect place to display content.

Original post: E-Learning Tutorial – Easy Way to Make an Image Interactive

Business Collage E-Learning Interaction

business e-learning interaction

Click here to view the demo interaction.

I like these types of collage images because there are plenty of those types of images to be found. The original was built in PowerPoint. The demo above was rebuilt in Storyline. Here’s a download with both files if you want to deconstruct them.

Original post: Here’s a Simple Way to Convert Your Course to an Interactive Story

Hopefully, this gives you some inspiration. If you want a good starting point, do an image search for collages and you’ll find some interesting ideas.

Events

Free E-Learning Resources

Want to learn more? Check out these articles and free resources in the community.

Here’s a great job board for e-learning, instructional design, and training jobs

Participate in the weekly e-learning challenges to sharpen your skills

Get your free PowerPoint templates and free graphics & stock images.

Lots of cool e-learning examples to check out and find inspiration.

Getting Started? This e-learning 101 series and the free e-books will help.