The Rapid Elearning Blog

Archive for the ‘E-learning’ Category


360° Image e-learning

Storyline 360 includes a 360° image feature where one can insert interactive markers and labels. On top of that, one can also leverage all the other capabilities of Storyline and layer content on top of the image.

Last week, the e-learning challenge was to create some 360° image interactions. Some of the submissions intrigued me with how they used other layers and variables to track movement through the 360° image.

Here are four examples from the weekly challenge that demonstrate this:

360° Image Example: Once in a Lifetime

e-learning 360° images

This is a bit playful and outside the realm of e-learning, but what I like is that it’s a clever way to navigate through content. Each image represents one point of content versus a series of interactive markers and labels.

View 360° image example via Jonathan Hill

360° Image Example: Medical Industry

360° image example e-learning

This example shows some interesting ways to use variables throughout the interaction with the 360 image. It tracks movement, varies content displayed, and also includes some assessment.

View 360° image example via Montse Anderson

360° Image Example: Mi & Mo

360° Image example e-learning

This is another playful example that integrates animation and other layers rather than the default labels to collect information.

View 360° image example via Chris Hodgson

360° Image Example: Lotsen Station

360° Image

This demo is close to the type of interactions one might build in a real e-learning course. There’s layers of information and other clickable content, interactive dials, and an easy-to-spot quiz.

View 360° image example via Samuel Apata

This is just a sampling. There are a lot of other interesting ideas in the e-learning challenges, like this one with the fish animation. So be sure to check them out.

After looking at some of the demos, I am curious about how people actually use the 360° images in their e-learning courses. Are you using them to explore the office or facility? Are you using them to identify issues in the environment such as find the fire hazards? Or are you doing something novel?

If you use 360° in your courses, please share how you’re using them and any other recommendations.

Events

Free E-Learning Resources

Want to learn more? Check out these articles and free resources in the community.

Here’s a great job board for e-learning, instructional design, and training jobs

Participate in the weekly e-learning challenges to sharpen your skills

Get your free PowerPoint templates and free graphics & stock images.

Lots of cool e-learning examples to check out and find inspiration.

Getting Started? This e-learning 101 series and the free e-books will help.


extract image e-learning

When I create presentations for our webinars or workshops, I like to use the imagery from our e-learning community or the Articulate website. They’re on-brand and with the illustrations, we have a lot from which to choose. When I created training at previous organizations, I did something similar.

If you need to collect images from your company site to use in your training this tip should help.

Usually when I find an image, I right-click to save. However, this is a bit tedious.

website images

Here are two simple ways to see all the downloadable images and save them.

Image Extractor Extension

Use the image extractor extension in your browser. When you get to a page on your website, click the extension and it will isolate all the images. You can review what’s there and then download what you need.

free image extractor

Image Extractor Site

Another option is to use the Image Extractor site. Add a URL and it opens a browser via the server and extracts the images. It does an excellent job filtering images and removing tracking images. It also identifies the types of images and you can do a batch download.

image extractor

Here are a few considerations:

  • This is not intended to help you steal images and content from sites where you own no rights.
  • Be sure to properly credit sources.

There you go. Two simple ways to extract images from your website.

Events

Free E-Learning Resources

Want to learn more? Check out these articles and free resources in the community.

Here’s a great job board for e-learning, instructional design, and training jobs

Participate in the weekly e-learning challenges to sharpen your skills

Get your free PowerPoint templates and free graphics & stock images.

Lots of cool e-learning examples to check out and find inspiration.

Getting Started? This e-learning 101 series and the free e-books will help.


e-learning portfolio

At one point, I was hiring an e-learning course developer. I received hundreds of qualified applications; however I couldn’t screen them all, so I created a first filter based on their work portfolios. Most of the applicants tended to fall into one of two camps: they didn’t have an e-learning portfolio or the projects they worked on were proprietary so they couldn’t share them.

I know that many of you are in the same boat. And based on the tons of emails I get about finding work in this industry, I’d like to share some thoughts about why you need a portfolio and how it can help you get better at e-learning (even if you’re not looking for work).

Be at the Crossroads When Opportunity and Preparation Meet

Opportunities exist. However, when you’re not prepared, you don’t see them or bother looking. And if you do look, you don’t always know what to look for. If you have a portfolio ready-to-go, when you do hear of a potential job (or other opportunity), you can quickly jump on it. However, not having a portfolio might dissuade you from even attempting to pursue the opportunity.

In addition, because you maintain a portfolio of your skills, you’re more apt to think about the skills you need for the portfolio. It then becomes a motivator to learn more which will always help in your career.

Concerning my hiring experience, most of the people told me that they didn’t have portfolios and it would take them a week or so to pull them together.  Most opportunities have a limited shelf-life and a week (or sometimes a few days) might be too long. As an opportunity presents itself you need to be able to take advantage of it.

Control Your Own Destiny & How Your Skills Are Defined

Many e-learning developers face two common problems: all the work done is proprietary and can’t be shared with outsiders. And worst, the organization’s course expectations are lower than your skills.

A lot of people tell me they can’t share what they were working on. This makes sense for the organization, but not for you. Don’t allow their content to make your skills proprietary, as well. In the same sense, don’t let their lower expectations define your skills. This is not about being anti organization. Instead, it’s about being pro you.

Years ago, I worked for a small community healthcare organization. It was a wonderful place to work. However, they had no money, and I was forced to be creative with my projects.

This was a double-edged sword. On one hand, a lot of the tips and tricks I share today come from having to work with no money or resources. On the other hand, while I got points for creativity, the projects I produced weren’t the types of projects I could use to get a job elsewhere. I had to build and maintain a separate portfolio of skills that wasn’t defined by the organization’s constraints and limited expectations.

Here’s something that happens all the time and an important consideration: if you lose your job, you could be flushing a lot of your work down the drain. One day you’re happy at work and the next you’re out on the street with no access to your projects or the tools used to build them. For these reasons, it’s important to maintain a portfolio to document your skills and experience and maintain an archive of projects.

What Should Be in Your E-Learning Portfolio?

E-learning is a truly diverse industry. Some people work in one-person shops where they need to know a little of everything and others can focus on one thing like instructional design or course development. Personally, I think e-learning skills should be like a liberal arts education where you touch a little of everything.

Here is a list of skills you need and can highlight in your portfolio (and be able to speak to them in an interview):

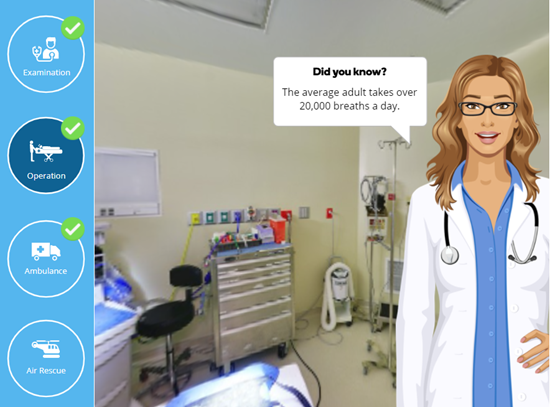
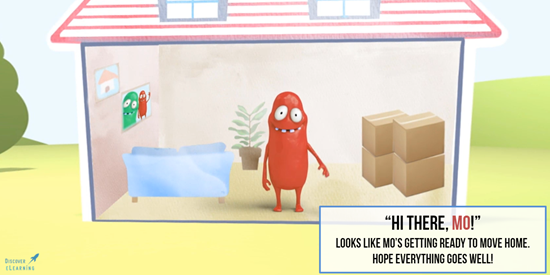
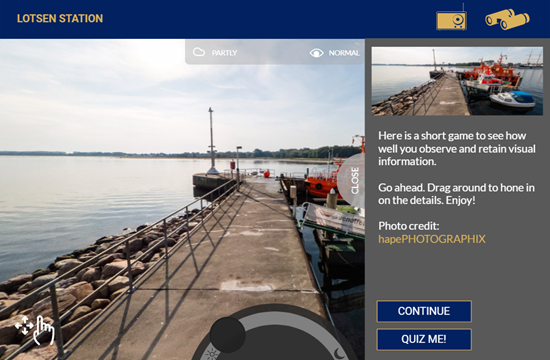
  • Instructional design: Do you have examples of different approaches to learning and course design? I look at a lot of courses and most of them are usually linear and kind of all the same. Have some examples of how to engage your learners and how they can interact with the content.
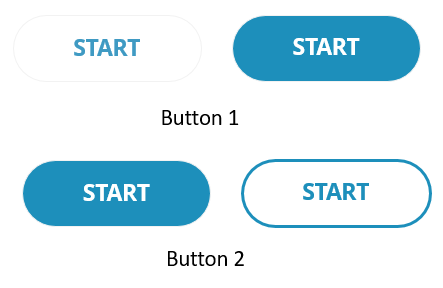
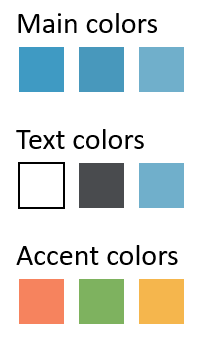
  • Graphic design: While everyone talks about instructional design, an equal consideration is the visual design. In fact, what separated many of the candidates that I considered were their visual design skills. If all things are equal, I’ll take someone with a keen sense of visual design because it crosses into other areas like engagement, communication, and usability.
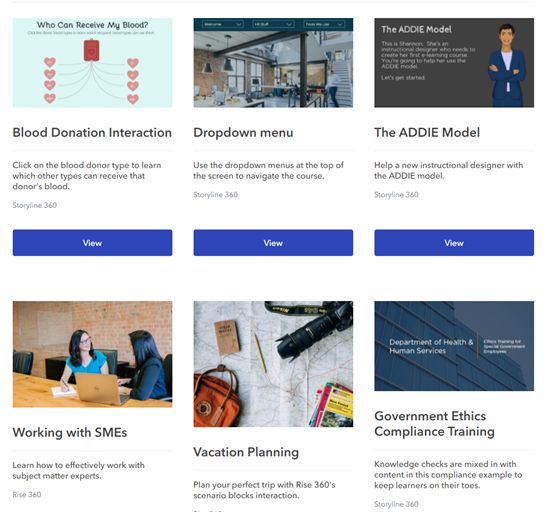
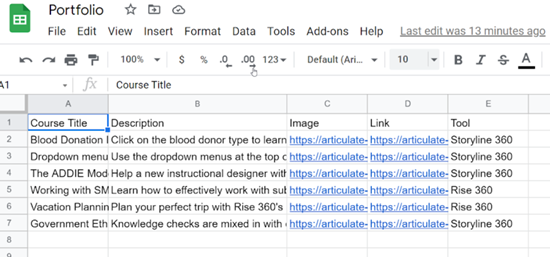
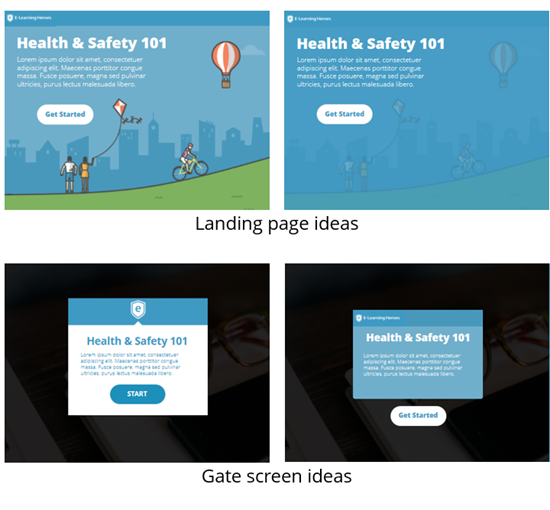
  • Present diverse projects: Don’t show twenty courses that all look the same. If that’s all you get to work on, then spend some time on your own and build out other examples. They don’t need to be complete courses. Build out an interaction or a scenario. Take one topic and try it three different ways. Do the weekly challenges for easy modules that work great for portfolio content.
  • Project management: You don’t need to be a project manager, but you should understand how to manage a project from start to finish. What is the production process for an e-learning course? How many hours does it take to build a course? What resources are required? What does it cost to produce a course? What types of assets are required? How will they be produced or procured?
  • Writing: I like to keep things simple. I look for two types of writing examples: technical and conversational. How well can you write to document procedures and provide the right level of guidance? On the other hand, some projects are not technical and require a more conversational tone.
  • Technology: You don’t need to be a software engineer, but you should know the essence of the technologies and how they work. In addition, the more tools you’re familiar with the better. The reality is that the more proficient you are with software, the more likely you’ll be a top candidate versus someone in the middle. And learn about building accessible e-learning. It’s no longer an excuse to not know.

How to Get Started with an E-Learning Portfolio

Here a few tips to help you get started:

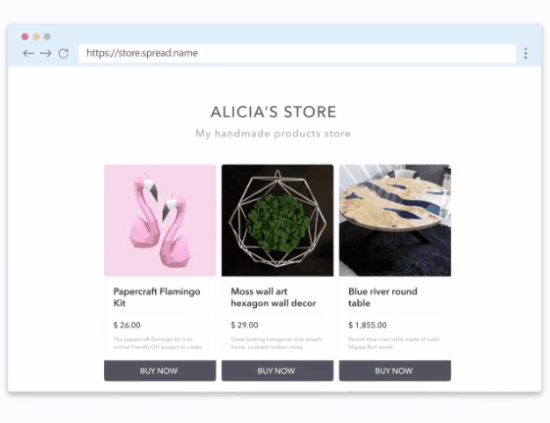
  1. Build a simple case study for each project. It doesn’t need to be overly fancy. Describe the project objectives, what you did, and the results. If you have examples add them. If not, at least try to add some screenshots. Focus on a professional and interesting visual presentation of those projects.
  2. Start a blog to document your learning. Use it to capture what you’re doing and thoughts you have during the production process. If you need ideas to get started, do a weekly challenge, and then share what you did and write about your process. Share your files.
  3. Network with others. Experience is no good if you have no place to show it (portfolio) or share it (your network). The good thing with blogging and other social tools like Facebook, LinkedIn, and Twitter and the e-learning community is that you connect with others in the industry. You’ll learn a lot and others will get to know you and your skills. It’s a wonderful way to prepare for opportunities. In fact, many e-learning developers I know got their jobs through their portfolios and sharing their work with others.

If you want to stay in this industry and keep up with your skills, then having a portfolio is critical. You can’t always control your circumstances, but you can control how you prepare for them.

What do you think is missing from the list?  What would you add?

Events

Free E-Learning Resources

Want to learn more? Check out these articles and free resources in the community.

Here’s a great job board for e-learning, instructional design, and training jobs

Participate in the weekly e-learning challenges to sharpen your skills

Get your free PowerPoint templates and free graphics & stock images.

Lots of cool e-learning examples to check out and find inspiration.

Getting Started? This e-learning 101 series and the free e-books will help.


e-learning interactions

In a recent workshop on creating interactions, we looked at ways to take a single image and create interactive content. It’s a good practice activity because many of us aren’t graphic designers so it helps us see different ways to use stock imagery that doesn’t require a lot of editing. And it gets us to think about interactive content in ways we may not initially consider.

The general idea is to find a single image that you can use for an interaction. A few things I look for:

  • Visually interesting. I’m not a graphics designer and design fashion changes every few years. I try to find images that feel new and modern.
  • Content areas. Since I’m using a single image and it’s the unifying graphic, I look for places to add content. Sometimes it does require placing a box or some other container shape over the image, but I try to find open space in the image that works for content. In the three examples below, the computer has a good content area, the teens illustration has a middle section that is empty, and for the business collage I created a side panel.
  • Visual context. Try to find images that offer visual context so it fits the context of the course content. Generic things like offices and desks work great.

Here are three examples that we’ve covered in the past that demonstrate this idea of using a single image with some interactive elements.

Exploratory E-learning Interaction

zoom office e-learning interaction

Click here to view the demo interaction.

In this example, a single image provides some office-like context. This could be used as an exploratory interaction, when clicking on objects exposes additional content. Ask a question. Looks for clues to answer them.

Original post: Create an Interactive Course Using a Single Image includes free download.

Meet the Team E-Learning Interaction

meet team e-learning interaction

Click here to view the demo interaction.

The original example was used to highlight counting clicks with variables. However, the single image could be used to click on a character to glean more content such as a “meet the team” activity. The center area is a perfect place to display content.

Original post: E-Learning Tutorial – Easy Way to Make an Image Interactive

Business Collage E-Learning Interaction

business e-learning interaction

Click here to view the demo interaction.

I like these types of collage images because there are plenty of those types of images to be found. The original was built in PowerPoint. The demo above was rebuilt in Storyline. Here’s a download with both files if you want to deconstruct them.

Original post: Here’s a Simple Way to Convert Your Course to an Interactive Story

Hopefully, this gives you some inspiration. If you want a good starting point, do an image search for collages and you’ll find some interesting ideas.

Events

Free E-Learning Resources

Want to learn more? Check out these articles and free resources in the community.

Here’s a great job board for e-learning, instructional design, and training jobs

Participate in the weekly e-learning challenges to sharpen your skills

Get your free PowerPoint templates and free graphics & stock images.

Lots of cool e-learning examples to check out and find inspiration.

Getting Started? This e-learning 101 series and the free e-books will help.


audio narration tips

In e-learning software like Storyline 360 and Rise 360 you can record (or import) audio narration into your courses. Since many e-learning developers tend to produce all media that belongs in the course, recording audio narration usually is one of those responsibilities. That means there are a lot of people that record audio narration who aren’t trained voice over talent.

If you have money and the time, using professional voice over talent makes sense. But most of us don’t have that luxury. So here are some tips to help you get started and get the best audio narration that you can get.

Audio Narration Script

  • Script approval. Narration (especially for non-professionals) can be time-consuming. You don’t want to do a lot of re-work. Get the script approved before you start any work on recording the narration. That will save a lot of time.
  • Text-to-speech. Use the text-to-speech feature to create demo narration for the review process. This way the subject matter experts and reviewers can hear the script and not just read it. And if you need to make changes, it’s just a matter of typing new text and not going through the process of recording new narration. Settle on a final, signed-off script.
  • Sound like a real person. Audio narration should sound like a real person. That means you need to move past the legalese and corporate way of saying things (assuming the legal department lets you). Write a script that sounds conversational and how you would talk and explain things in real life.

The Right Environment to Record Audio Narration

In an ideal world, you have a recording studio or one of those fancy whisper rooms. But odds are you have a cubicle or empty conference room.

  • Cubicles are good. The walls are designed to absorb sound. Unfortunately, in an open-air cubicle farm, you don’t get a lot of privacy and there’s a lot of background noise, so you’ll need to record when there aren’t many people around.
  • Minimize noise. Turn off office machines, fans, and air conditioners (if possible). Record about 15 seconds of ambient noise. Sometimes you can use that to create a filter and edit out the background noise when you do post-production. But the best option is to record the best quality you can. As a general rule, the best recording is the original recording.
  • Use sound buffers. Listen to the difference between using a sound box and not. There are several ways to buffer the sound coming into your mic. There are professional options with sound proof panels, mic boxes (you can make these with a fabric cube and foam wedge panels), and panels that connect to your mic. In my home office, I have a clothes rack and drape a thick blanket over it. Then I roll it behind me. Here’s an emergency option: the foambrero. If you have a budget, this recording booth looks interesting and seems very portable and easy to set up in a small office.
  • Headset mic. Sometimes you’re stuck in an office and cannot control the background noise, but a headset mic helps because it is unidirectional and will only record audio from one direction. This helps block out a lot of ambient noise.

Prepare Yourself to Record Audio Narration

  • Read the script aloud a few times. You’ll quickly identify areas where it doesn’t sound natural and when it doesn’t roll of the tongue right.
  • Record it first so you can hear it back. Just the act of recording often helps identity where it doesn’t sound right and where you flub over words and sentences.
  • Drink plenty of water. Hydration is key.
  • Don’t worry about being perfect. Remember, you’re not hiring a pro, so you’re not getting a pro.
  • Stand rather than sit. Standing helps you breath better and take in more air. The most important thing is to be comfortable and of course being able to reach your audio controls between takes.

The Right Tools to Record Audio Narration

I created a list of good audio accessories and mic recommendations that won’t break the bank. And there are plenty of affordable or DIY options like building a sound box or using an Ikea lamp as a mic boom. Regardless, here’s a general rundown of what you’ll need:

  • Good microphone: headset or desktop. I usually prefer a desktop mic, but a headset is much more mobile and the sound quality is decent.
  • Pop filter to remove those annoying mouth sounds and popping p’s.
  • Mic stand. I use a boom mic mounted to my desk. I like to swing it in and out of position. The Blue Compass is a nice-looking boom if you don’t want to make your own or break the bank.
  • Teleprompter (better than reading from a paper script). A lot of people use a second monitor or tablet.
  • Sound buffer to control ambient noise and get fuller sound quality.

How to Record Audio Narration

I won’t go into a lot of detail about recording because there are a lot of different applications. But I will narrow it down to a few basic tips.

  • Record in the authoring tool or outside? You can always record much of the audio narration with the e-learning software. That makes it super easy, especially if you’re doing all the work by yourself. Storyline 360 even has a simple audio editor for some post-production editing. However, I prefer to separate my multimedia production into distinct groups: video, audio, graphics, and course construction. I find it helps keep me focused on one thing and I can get it done right the first time. Because of this, I like to record my narration outside of the authoring tools. Then I can make any edits I need and upload the narration into the software. This works in both Storyline 360 and Rise 360.
  • Free audio editors. If you don’t have any money, Audacity is a free audio application that works fine for recording narration. Here’s a list of a few other free audio recording options. Levelator (although no longer supported) does a respectable job cleaning up your audio narration. There are also all sorts of apps you can use on your phones and tablets to record audio (iOS and Android).
  • How to save audio files. You can save as .MP3 or .WAV. Both should be fine. MP3 files will be much smaller and you won’t notice any degradation. It’s also a good idea to have a consistent naming strategy when you save your files. “Audio1.mp3” isn’t very good. However, “Safety101-Intro-Layer4.mp3” makes a lot more sense and you know where it goes in the course when you have to import it.

These are some good, basic getting started tips when recording audio narration. If you have some to share, feel free to add them to the comments.

Events

Free E-Learning Resources

Want to learn more? Check out these articles and free resources in the community.

Here’s a great job board for e-learning, instructional design, and training jobs

Participate in the weekly e-learning challenges to sharpen your skills

Get your free PowerPoint templates and free graphics & stock images.

Lots of cool e-learning examples to check out and find inspiration.

Getting Started? This e-learning 101 series and the free e-books will help.


free portfolio

A guest post by Elizabeth Pawlicki, Training Program Manager, Articulate.

You need a portfolio! Even if you’re not currently looking for a new job, maintaining a portfolio is important as an archive to highlight your work and experience.

In previous posts, we covered what should be in your portfolio and how to build one (with links to some potential sites).

However, I continue to get questions on how to host and manage a portfolio.  That’s what I’ll cover today.

Free Portfolio Site

Recently I came across a free tool called SpreadSimple, which is really cool because it builds websites out of Google Sheets (something many of us already know how to use). You create columns of information, and it takes a single line on a Google Sheet and turns it into a “card” on the site.

free portfolio demo

Demo Portfolio

I really liked that I didn’t need to do any programming and by adding content to Google Sheets I was able to create a simple website. So, I created a portfolio to test how easy it is to use. You can see it below.

free portfolio

Click here to view the portfolio.

How to Build the Portfolio

Keep in mind, the SpreadSimple site uses Google Sheets to pull in the data for the site. However, it doesn’t host your media. So, you’ll need a place to host your courses and images. There are a number of options here, but I used Amazon S3.

I added the portfolio content to my Google Sheet, added links to courses on Amazon S3, and in no time at all, I had a modern, professional looking web-based portfolio.

I really didn’t need much on my sheet, so I started with my course title, a description, the link to where the course was being hosted in S3, and the link to the course thumbnail, also in S3.

Later, I realized that SpreadSimple allowed for filtering when viewing the completed site, so I added a “Tools” column to my Google Sheet and organized my courses by whether they were built in Storyline 360 or Rise 360.

To give you an idea of just how little you really need to build a site, here’s a behind the scenes look at my Google Sheet.

free portfolio google sheet

It’s really easy to build and manage a portfolio this way. Here’s a quick tutorial where you can watch me add a new course to my portfolio just by adding a new line to Google Sheets, filling in the cells, and refreshing the SpreadSimple page.

Click here to view the tutorial.

If you don’t already have a portfolio, give SpreadSimple a try. The service is free if you don’t need to use any of the integrations or set up a custom domain. I found it quick and intuitive.

What do you think?


Elizabeth Pawlicki

Events

Free E-Learning Resources

Want to learn more? Check out these articles and free resources in the community.

Here’s a great job board for e-learning, instructional design, and training jobs

Participate in the weekly e-learning challenges to sharpen your skills

Get your free PowerPoint templates and free graphics & stock images.

Lots of cool e-learning examples to check out and find inspiration.

Getting Started? This e-learning 101 series and the free e-books will help.


free icons

I love free icons and illustrations that can be used in e-learning. Here are some good ones for the health and medical industries courtesy of Health Icons. What’s cool is that the icons are open source and free to use in commercial projects without any attribution requirement.

Why are the icons free?

Health Icons is a volunteer effort to create a ‘global good’ for health projects all over the world. These icons are available in the public domain for use in any type of project. The project is hosted by the public health not-for-profit Resolve to Save Lives as an expression of our commitment to offer the icons for free, forever.”

free icons

How do I give credit for the free icons?

Even though they don’t ask for attribution, I think it’s good to spread the word and give them credit where possible. Here’s a post I shared earlier on different ways to share attribution of resources in your e-learning courses.

free icons ideas

What can I share for free?

Also, while we’re on the topic of doing good, have you given blood yet? It’s easy to do, doesn’t cost much, and saves lives.

Hope these icons come in handy. And thanks to the volunteers who put them together.

Events

Free E-Learning Resources

Want to learn more? Check out these articles and free resources in the community.

Here’s a great job board for e-learning, instructional design, and training jobs

Participate in the weekly e-learning challenges to sharpen your skills

Get your free PowerPoint templates and free graphics & stock images.

Lots of cool e-learning examples to check out and find inspiration.

Getting Started? This e-learning 101 series and the free e-books will help.


motivation e-learning

We can put together great courses, but we can’t guarantee a person learns from them. Learning requires some level of interest and motivation from the person taking the course. The good news is there are things we can do to engage people and tap into their motivation. Here are a few ideas.

Add Value to Motivate Learners

Courses need to be relevant to the person. They need to know where the course fits in the scheme of things and how it impacts what they do. And people make that assessment right away. If they think the course has no value they’ll tune out. Compliance training is often a challenge, but if the content is reframed and not just slides of bullets, it can be engaging.

Turn the compliance content into a relevant case study. This reframes the perspective and adds more of a story-like element to the training. It also helps them see how the content is connected to what they do.

A Good Map Motivates People

Above we discussed adding value. When people understand why they’re taking the e-learning course and then know what to do in it, they’ll be more engaged. People like to know what’s expected, where they’re going, and what will happen when they get there.

Remove friction from the course so that things move well. Friction comes from things like lack of clear direction, unmeasurable objectives, poor instructions, novel interactions that don’t add value, and poor course design like mediocre-looking content or overbuilt animations and transitions.

Motivate Learners with a Reward

Find ways to reward people as they go through the course. A straightforward way is to track their progress and then offer some sort of affirmation. You can also encourage them as you affirm their progress.

One of the biggest rewards is assessing what they know and letting them skip ahead or test out. Why waste time and frustrate people with courses when they already know the content? Let them prove it and move on.

We ask people to spend their valuable time in the course, we need to respect that and make sure it’s a valuable experience. And a valuable experience will be more motivating.

Events

Free E-Learning Resources

Want to learn more? Check out these articles and free resources in the community.

Here’s a great job board for e-learning, instructional design, and training jobs

Participate in the weekly e-learning challenges to sharpen your skills

Get your free PowerPoint templates and free graphics & stock images.

Lots of cool e-learning examples to check out and find inspiration.

Getting Started? This e-learning 101 series and the free e-books will help.


e-learning save money

Online training is hot right now. And between video chat services like Zoom and course authoring tools like Articulate 360, there’s a lot of content creation.

Since creating the e-learning content is easy, there’s often an increased demand to create yet more online training. And with that demand is the need to manage resources, which for most training organizations is limited.

Any opportunity to save time (and money) is a good thing. Here are three ideas to help manage your e-learning resources. They help improve development time and decrease the costs to build courses.

Don’t Create an E-Learning Course

Organizations often think that their problems are solved through more training. Need better sales? Create a new training program. Have a new policy? Create a new training program? Want to change the world? Create a new training program.

See how that works?

There’s a cost to build the training and a cost for each person who must take it. If you can prevent the organization from creating training courses, do it.

The truth is training can help meet goals and solve problems. But it’s just one part of the solution. It’s important to help the organization better understand it’s needs and then guide them to the best solution. And sometimes, that means no training is required.

Use Kuhlmann’s E-Learning Hierarchy

I have a simple hierarchy model that that I started using years ago. All of the e-learning gets built with the fastest and easiest tool. And from there any deviation needs to be justified.

It doesn’t mean we don’t do other things. It just means we don’t do other things for the sake of novelty or because we can.

kuhlmann's e-learning hierachy

Look at Articulate 360. It comes with Rise 360 and Storyline 360. Rise 360 is formed based and extremely easy to use because most of the heavy lifting is done for you. Most e-learning content is on the explainer side of things. That type of content is easily assembled and delivered in Rise 360. Why spend extra time and resources on custom interactivity in Storyline 360?

There are times where custom interactivity is warranted. In that case, use Rise 360 and add custom interactions from Storyline 360. And then there are times where a form-based solution like Rise 360 isn’t the right tool and Storyline’s freeform authoring is the better choice.

Kuhlmann's e-learning hierarchy applied to Articulate 360

The hierarchy isn’t designed to NOT build good e-learning and avoid complex and custom courses. Instead, it’s designed to help manage the production process and your limited resources. The more you can do quickly for less, the more you have available when it’s really required.

Don’t Repurpose Existing Content

As noted above, most e-learning courses are explainer content and not performance-heavy. This is fine because the course is a lot like a book. You consume the content to get exposed to ideas and information, but the application (or interactivity) happens elsewhere, whether that’s personal reflection or activities in the real world.

Often the explainer content already exists in some other digital format in the organization. And what happens is the instructional designer converts that content into a “course.” Instead of repurposing the content, create a course that teaches how to find and use the information. This helps them learn to use the existing resources they may need, and they’ll always know where to locate them after the training event.

I like to set up mini real-world scenarios where the learner needs to make a decision. And the objective is to learn to locate and use the existing resources. Doing this makes the courses lighter and you don’t need to update them every time the source content is changed or modified.

You have limited resources. Hopefully, the steps above help think through how you’ll manage them.

Events

Free E-Learning Resources

Want to learn more? Check out these articles and free resources in the community.

Here’s a great job board for e-learning, instructional design, and training jobs

Participate in the weekly e-learning challenges to sharpen your skills

Get your free PowerPoint templates and free graphics & stock images.

Lots of cool e-learning examples to check out and find inspiration.

Getting Started? This e-learning 101 series and the free e-books will help.


e-learning branding

When I worked at this one place, we could only use a single PowerPoint slide for any presentation or anytime we created content in PowerPoint. There was nothing particularly special about the slide other than the fact it was the approved slide because it had the company logo and colors plastered all over it.

This became an issue when we transitioned to one of the early rapid e-learning applications. Since the courses started in PowerPoint, the branding was on every slide and took up limited screen space that we needed to actually teach people.

However, what we lacked in a great learning experience was made up covered by the fact that all employees knew where they worked.

A constant challenge with courses is how to deal with the organization’s visual identity and various branding requirements which usually have little to do with learning.

So, here are a few questions I’d like to pose for discussion:

  • Do you really need to brand your courses?
  • How does it contribute to the learning experience?
  • Does it help meet any learning objectives?
  • If there was no branding requirement, how would it change the course?
  • Should it be a requirement that even in live training sessions, the marketing team inserts a sign twirler who screams out the name of the company every few minutes?

I’ve built plenty of courses over the years and have spent more than enough hours with clients and marketing team. So, I know many of the reasons we have for adding the brand content to our courses. I just wonder if it really matters and what value it adds.

What do you think?

Events

Free E-Learning Resources

Want to learn more? Check out these articles and free resources in the community.

Here’s a great job board for e-learning, instructional design, and training jobs

Participate in the weekly e-learning challenges to sharpen your skills

Get your free PowerPoint templates and free graphics & stock images.

Lots of cool e-learning examples to check out and find inspiration.

Getting Started? This e-learning 101 series and the free e-books will help.


branded-e-learning-quote

One of the big challenges when building courses is having to deal with organization’s brand and visual identity and figuring out how to work it into the course. And to do it in a way so the course doesn’t look like a billboard or race car.

Here are some quick tips on how to incorporate the company’s brand into your courses without being overly intrusive on the learning objectives and actual course content.

Get Rid of the Branding

Before we get started, here’s a question worthy of debate: do you really need to brand your courses? What does it accomplish? Does it make a better learning experience? I understand the need for good looking design and meeting the organization’s need that way. But how does all of that branding fit into meeting the learning objectives (assuming there are some)?

I’ve built plenty of courses over the years and have spent more than enough hours with the customers and marketing folks. So I know all the reasons we have for adding the brand content to our courses. I just wonder if it really matters and what value it adds.

What do you think?

With that said here are a few ways to work your brand into the course that avoids some of the internal bickering and doesn’t get you fired. For this post, I’m going to use the E-learning Heroes community for my examples.

e-learning-community-1

Create a Landing Page

Instead of a course that features a logo and design on each screen, create a single-entry point that provides the branding info at the beginning of the course. After that, reserve the rest of the course for the learning part of the e-learning.

You can do this by creating a landing page or gate screen. The branding is offered upfront, and the rest of the course is mostly devoid of it.

  • Landing Pages. Do a search for landing pages to get some ideas on design and layout. And then build one for your organization. Use it at the beginning of all your courses.
  • Gate Screens. Build a gate screen. You can use one at the beginning or use them between sections or modules.

e-learning-screen-layouts-1

Above are some quick mockups based on the community page. I know a few companies that do this. I think it’s a workable solution because it adds the branding info that marketing and management requests. But it also reserves the rest of the screen space for the learning content and interactions.

Optimize the Player

Most e-learning courses include a player; and that player can be customized to some extent. What are the main brand elements for you to consider and how can they be incorporated into the player?

Generally, the visual part of the brand deals with some images like a logos and backgrounds, color schemes, typography, visual design, and screen layouts.

  • Incorporate the organization’s brand by colorizing the template to match the color schemes.
  • Leverage the logo or presenter panels for the company logo. Those can remain persistent which helps with the clients that want the logo on every screen.
  • Use the same (or similar fonts). Few corporate fonts are standard system fonts. Ask for the “official” font or try to find a similar one using What the Font. Often you can find comparable fonts that are free via Google Web Fonts. Most people won’t notice the subtle difference. And if they do, just tell them you’re using the “official” font for e-learning courses.

Mimic the Organization’s Web Site

Changing player colors and adding logos is easy enough. The more challenging issue is capturing the right visual design, especially if the organization’s made an investment to project a specific look and feel for the brand. And this is critical if what you build is presented outside the organization.

Ideally, you get the organization to help you brand the courses. But the reality is most of us won’t get access to a graphic designer to help. Considering this, here are a few ways you can glean the organization’s branding from the web site where they did hire a graphic designer.

  • Buttons are common. Each site has some sort of button or tab. Recreate those by copying their different states such as normal, hover, down, and selected.

buttons

  • Identify a few core screen layouts based on the web site. Make note of the way the items are arranged, especially things like white space and margins.
  • Look for potential content holders. I look for those individual elements like boxes and side panels that could become content holders or interactive items.
  • Where are the interactive elements? There are three things we do to interact with the screen: click, hover, and drag. How are those used in the website? Try to recreate them in your e-learning application. And if there aren’t interactive elements, what can you make interactive? For example, instead of static box, it has a hover state when moused over.
  • Colors are key. The company website already has an official brand. Mimic the general layout and use the correct colors. Here’s a more detailed post on how you can color pick colors or upload a screenshot of the site and have one of those color scheming sites pick colors for you.

sample-color-palette

If you need to brand your courses, these three suggestions should help. Start simple with a landing page and work your brand into the player and course screens by mimicking the organization’s web site and color schemes.

What do you do to incorporate the company’s brand into your courses?

Events

Free E-Learning Resources

Want to learn more? Check out these articles and free resources in the community.

Here’s a great job board for e-learning, instructional design, and training jobs

Participate in the weekly e-learning challenges to sharpen your skills

Get your free PowerPoint templates and free graphics & stock images.

Lots of cool e-learning examples to check out and find inspiration.

Getting Started? This e-learning 101 series and the free e-books will help.


e-learning mistake

A lot of e-learning is compliance-based and often how it has to be delivered is a bit rigid. I’ve heard plenty of examples where some compliance training requires X number of seat hours to certify the completion of the training.

This is ridiculous because the seat hours are completely disconnected from whether the learner demonstrates any semblance of understanding. But, like I said, that’s not going to change. And as an e-learning developer, you’re stuck.

Outside of compliance training, another large chunk is what I like to call regurgitative training. That’s where we repackage content that’s already available in some sort of digital format.

Policy training is a common type. The policies already exist online. We copy and paste the policies over a series of slides. Make the slides pretty. And then add a quiz.

Or, perhaps we need some ergonomics training; so, we copy and paste the ergonomics information that’s already available to the end user. We add some ergonomic pictures. Maybe get one of those cute comic-style animation makers so Susan can tell her cubicle mate Jack about her bad back, and then Terri the ergonomics person can pop in and tell Susan and Jack about ergonomics with almost Disney-like skill.

Maybe it’s time we rethink this approach to training for content that already exists. Here’s one idea:

  • The goal is for the person to use the content to make decisions or do things a certain way.
  • Instead of copying and pasting content that already exists in one digital format into another, focus on how to find and use the content.
  • Provide some instruction on what content is available, where it can be found, and why it exists.
  • For the assessment, skip the simple multiple choice quiz questions. Instead, create a series of quick decision-making scenarios that requires the person to locate the appropriate content to make the right decisions.

Some benefits to this type of approach are:

  • When content changes you don’t need to update the entire training program because the courses aren’t focused on specific content. Instead, they’re focused on where the content exists.
  • You’re teaching people to be resourceful and understand what’s available to help them do their jobs.
  • You also don’t need to cover every piece of information (which is a challenge when working with subject matter experts). All that information is freely available at the resource site.

How much of you e-learning courses already exist as content elsewhere? How do you approach these types of “training” requests?

Events

Free E-Learning Resources

Want to learn more? Check out these articles and free resources in the community.

Here’s a great job board for e-learning, instructional design, and training jobs

Participate in the weekly e-learning challenges to sharpen your skills

Get your free PowerPoint templates and free graphics & stock images.

Lots of cool e-learning examples to check out and find inspiration.

Getting Started? This e-learning 101 series and the free e-books will help.