The Rapid Elearning Blog

Archive for April, 2022


content dump e-learning

I’ve been at this e-learning game for close to 30 years. While the technology has changed over the years, I still see a lot of the same problems e-learning (and training for that matter) had 30 years ago.

The main problem is that pushing content passes for training. Thus a lot of what we call e-learning courses are mostly content dumps. Because the technology has made it easier to build “courses” the content looks better than it did 30 years ago; but courses like that are both ineffective training and a subpar learning experience.

This is when your instructional design skills should prevail. This is where you have an opportunity to exert some influence and craft a better learning experience.

Good E-Learning Goes Beyond E-Reading

A lot of courses (perhaps most) are content heavy with lots of text and videos. Maybe there’s some simple interactivity like a tabs interaction or one of those fancy images with labels and markers, but that’s just a different way to expose content.

There’s nothing wrong with content. Outside of e-learning, we still read text books and watch videos to learn. However, being exposed to content isn’t the same as learning which requires a few additional things: content WITH practice and feedback in some meaningful manner.

Want to move past the content dump? How are you building practice and feedback into your courses?

Good E-Learning Helps Demonstrates Understanding

Instructional design is about crafting an experience where people acquire information (content) and learn to use it (learning) in a meaningful way. In that process they are able to demonstrate their understanding of the content and how to apply it in a real-world context.

Here’s a real challenge, though.

I’ve worked in enough places where the organization didn’t really care about learning. All they wanted was a “course” with a final quiz so they can certify completion (and compliance) and say they provided training. In that environment, it’s really easy to copy and paste content into a “course” and call it good.

However, that’s not good e-learning. And it’s not effective training. It’s instructional laziness when we substitute content dumping for learning experience. And if that’s all we’re doing, there’s no need for an instructional design industry.

A course should be more than screen after screen of information. Ultimately, when a person takes a course they should be able to demonstrate a level of understanding that goes beyond simple quiz questions. It’s time to take the content dump to the dump.

As instructional designers and course builders, we should be able to push back. It helps our industry and it helps our organizations not waste time and money.

What do you think?

Events

Free E-Learning Resources

Want to learn more? Check out these articles and free resources in the community.

Here’s a great job board for e-learning, instructional design, and training jobs

Participate in the weekly e-learning challenges to sharpen your skills

Get your free PowerPoint templates and free graphics & stock images.

Lots of cool e-learning examples to check out and find inspiration.

Getting Started? This e-learning 101 series and the free e-books will help.


e-learning tips

I am a simple person and usually try to explain things in three steps. They’re easy to remember and share. Here is a round up of all previous posts that share three steps to do something to improve your course design and development.

General E-Learning Course Design Tips

Production Tips for E-Learning Course Design

PowerPoint Tips for E-Learning

Professional Development

Events

Free E-Learning Resources

Want to learn more? Check out these articles and free resources in the community.

Here’s a great job board for e-learning, instructional design, and training jobs

Participate in the weekly e-learning challenges to sharpen your skills

Get your free PowerPoint templates and free graphics & stock images.

Lots of cool e-learning examples to check out and find inspiration.

Getting Started? This e-learning 101 series and the free e-books will help.


back-up course files

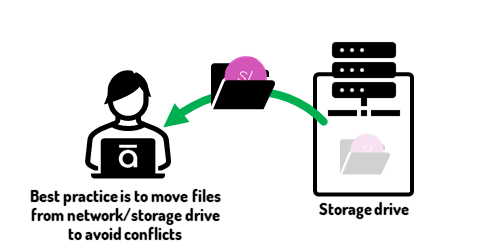
As a general rule, it’s good practice to edit files on your local drive and not a network drive (or online storage like Google Drive or Dropbox). For example, when I work with a .story file that’s on Dropbox, I’ll sometimes get some sort of syncing error or a series of duplicated or conflicted files. This makes sense because the drive is constantly monitoring changes in the file and updating the file. One tip for Dropbox is to pause syncing if you’re working from a Dropbox folder.

backup project files

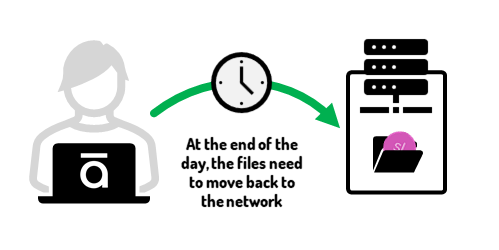
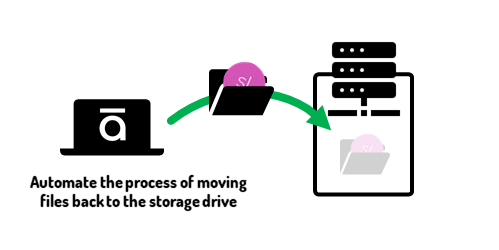
However, I like to move files from the network drive to my local drive to do production work and make the edits. However, that means what’s on the desktop is the most current and not backed up. If my computer crashed, I’d lose everything. Thus, I need to move things back to the storage drive when I’m done. The challenge is remembering to do that.

backup project files at night

I’ve had times where I work on a file and then go to eat and come back to find my computer crashed or maybe the app closed. Or every once in a while, there’s the quick power outage. Whatever it is, there’s always the chance you lose your work and because it wasn’t backed up, you can’t access the most recent one from your storage drive.

automatically backup project files

To avoid these issues, I use SyncToy, a free application from Microsoft to back-up my files at night. Here are the basic steps:

  • I work from an “active projects” folder on my desktop.
  • I create a duplicate folder on Dropbox (or any storage/network drive).
  • I set my folder on the desktop to automatically sync with the duplicate folder. This overwrites what’s in the storage drive folder, thus any changes I made during the day are preserved. An added benefit with some of the services like Dropbox is that there’s some versioning control, so that comes in handy, as well.

Using SyncToy

I wrote about this solution almost ten years ago. It’s still viable. Unfortunately, Microsoft doesn’t promote the application anymore, but you can still download SyncToy from here. I am on Windows 11 and as you see in the tutorials below, it still works fine.

Articulate Rapid E-Learning Blog - sync two folders using Microsoft SyncToy

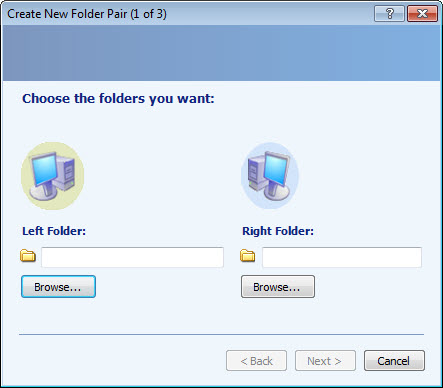
You select a “Left” and “Right” folder to sync, and then determine how and when you want to sync them.

The left folder is my “active projects” folder on the desktop. The right folder is my storage drive folder. I set it to sync every night at 8:00 PM. Here’s a tutorial that shows how to set up and sync two folders using Microsoft SyncToy.

To sync the folders, open SyncToy and select “Run.” Of course, that requires you remembering to do so, but that’s where the next step comes in.

View the SyncToy tutorial on YouTube.

Task Scheduler

Your Windows computer has a task scheduler that lets you schedule tasks to run at specific times. That’s why it has that fancy name.

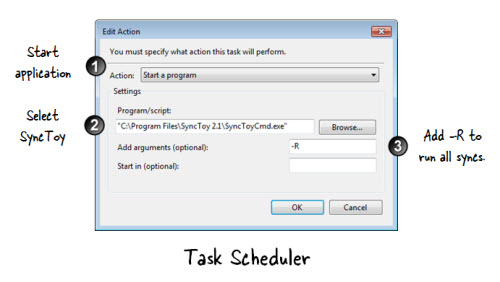
In this case, I want to create a task to run SyncToy at 8:00 PM daily. The tutorial below walks through the basic steps of creating a new task and when to run it.

Articulate Rapid E-Learning Blog - how to set up task schedule to run SyncToy

What I am showing you is relatively simple. There’s a lot you can do with Task Scheduler and I’m sure you can find a ton of information on the Microsoft site or on YouTube.

Let’s review the process:

  • Create a folder on your local computer to manage your e-learning projects.
  • Create a duplicate folder on your storage drive.
  • Set up a folder pair to sync the two folders.
  • Create a task with Task Scheduler to automate syncing the two folders at a specified time.

View the Task Scheduler tutorial on YouTube.

Too bad SyncToy isn’t going to be around forever and perhaps one of you have a comparable solution to offer. In the meantime, you can still download the application and it’s still a viable process.

What do you do to manage files between your local and network drives?

Events

Free E-Learning Resources

Want to learn more? Check out these articles and free resources in the community.

Here’s a great job board for e-learning, instructional design, and training jobs

Participate in the weekly e-learning challenges to sharpen your skills

Get your free PowerPoint templates and free graphics & stock images.

Lots of cool e-learning examples to check out and find inspiration.

Getting Started? This e-learning 101 series and the free e-books will help.


presentation tips

I do a lot of presentations live and online. I also record a ton of tutorials. During those presentations I’m usually showing how to do something and attendees need to see the mouse movement and where it’s at. Here are a few simple tips to highlight your mouse when presenting or recording your tutorial.

Here’s a video tutorial that walks through the tips below if you want more detail.


Click here to view the tutorial on YouTube.

Make the Mouse Pointer Extra Large

change mouse pointer size

In a presentation or tutorial you are trying to direct the viewer’s eye. This is especially true for software demos where it’s easy to lose track of what’s going on and where the mouse is moving, more so if the viewer isn’t familiar with the user interface.

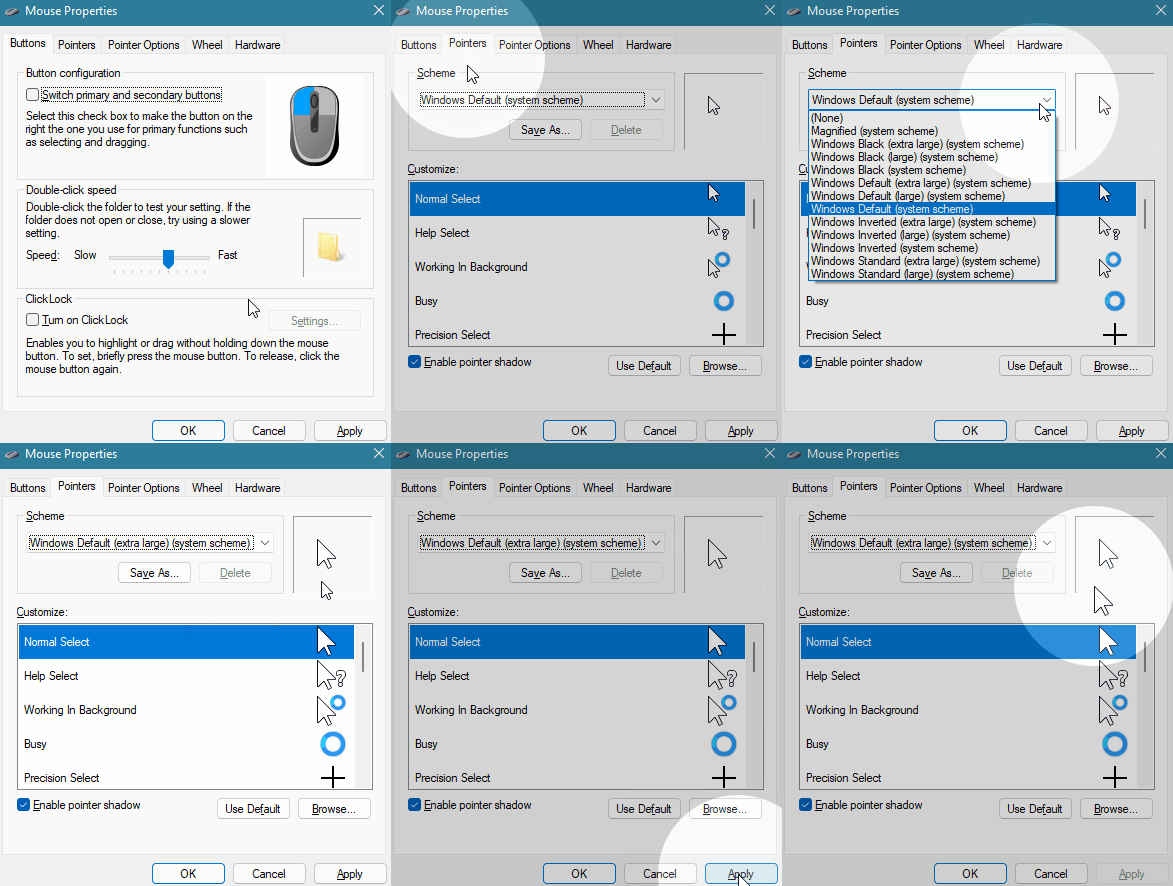
Go into the mouse properties and change the mouse point to extra large.

Use Keyboard Shortcut to Show Mouse Location

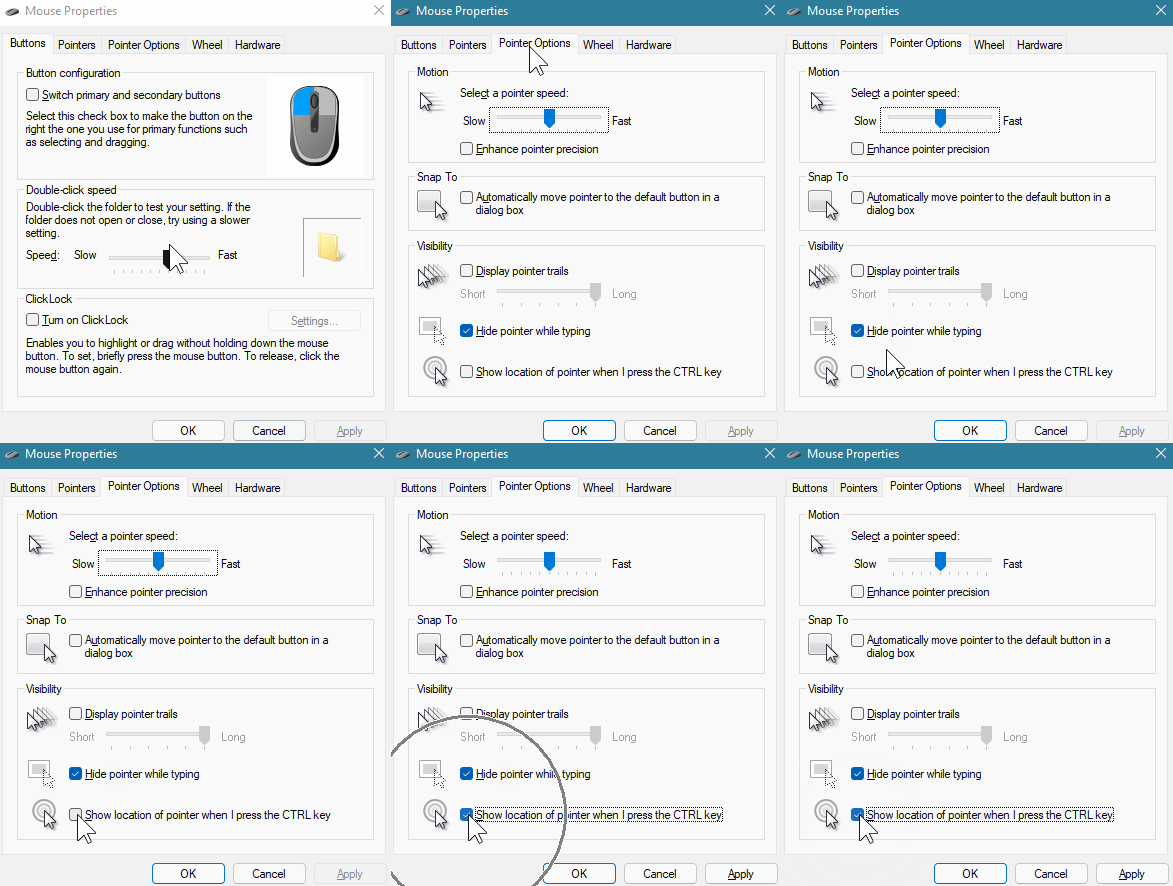
I use this quite a bit. In the Pointer Options of the mouse properties, set the mouse to show location when pressing the control key. Whenever you move the mouse to somewhere else, press the control key and you can direct the viewer to that part of the screen.

highlight mouse pointer location

Create a Spotlight Effect to Show Mouse Location

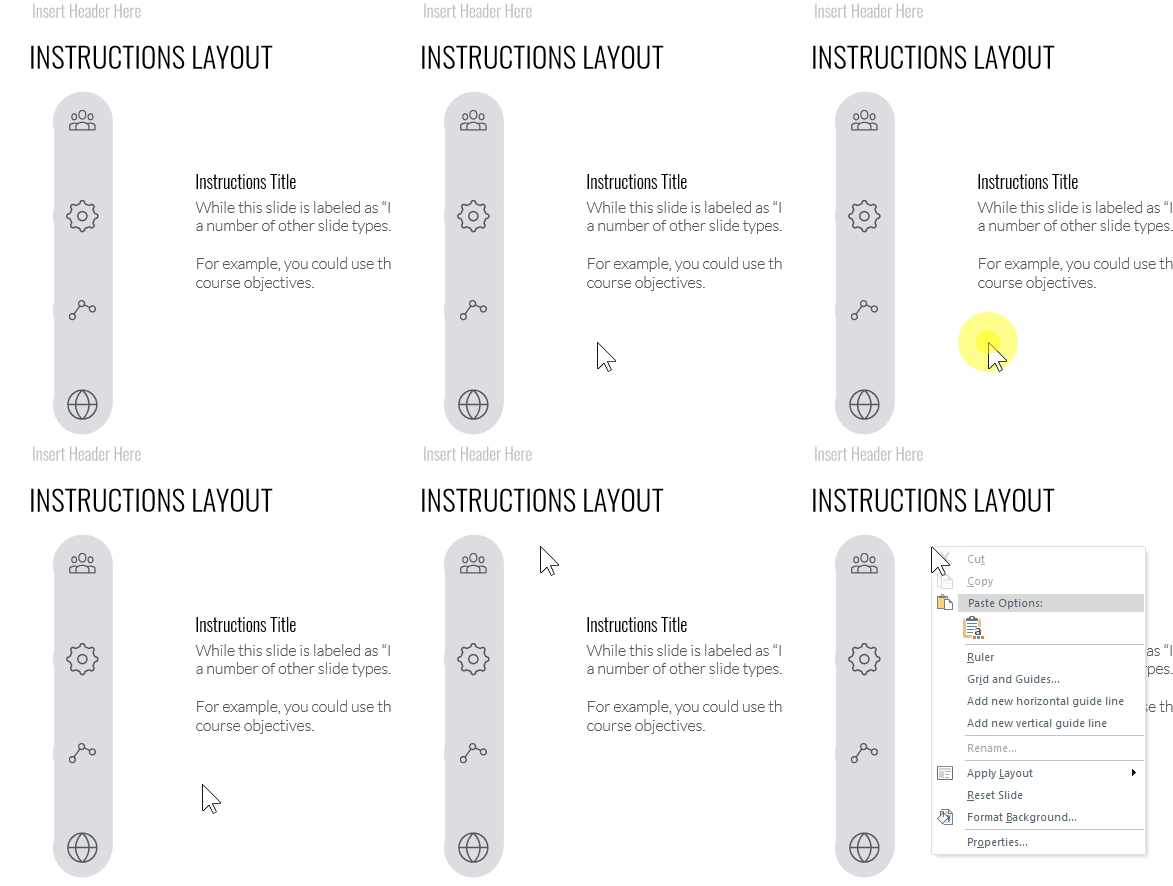
Microsoft PowerToys are little applications that add more functionality to Windows. In a previous post, we looked at how to install a simple color picker. That’s not all that comes with the PowerToys. There are three mouse related features that could come in handy. In fact, I use the spotlight effect instead of the control button feature above.

mouse pointer spotlight

Install PowerToys and then select the mouse features you want to enable. Play around with the settings and see what works best for you.

Highlight Onscreen Left and Right Clicks

If you want to show where the mouse is when you click, set the left and right click to different colors and as you click it’s easy to see where the mouse is and you’re doing. Press Windows+Shift+H and that activates the mouse click highlighter.

mouse click highlighter

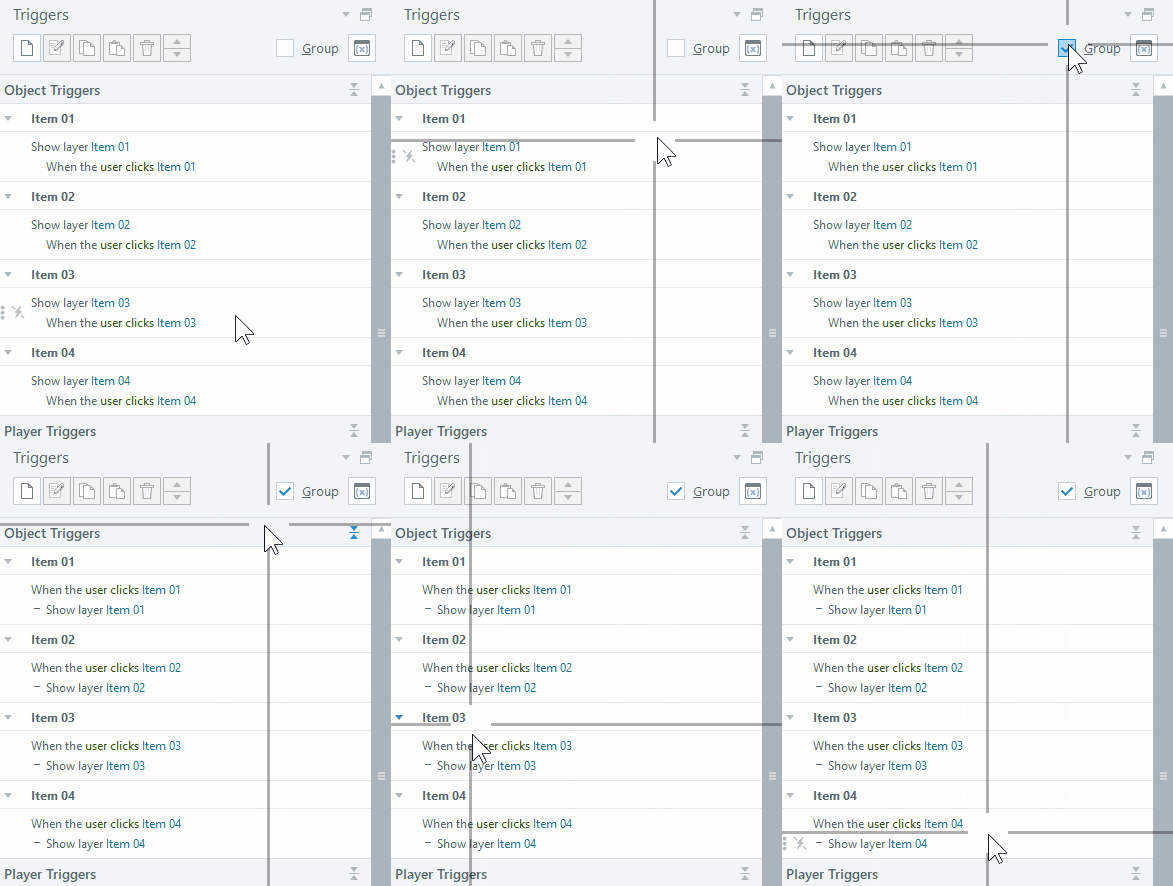
Highlight the Mouse Click with Crosshairs

Press Control+Alt+P and that activates the crosshairs. Personally, I don’t find this one as useful, but it is an option. I’m kind curious who would use this type of highlighter and when. Feel free to share in the comments.

mouse crosshairs

The PowerToys are nice. I use the spotlight effect all the time. It looks elegant and easy on the eyes. I always found the mouse options with the control click circles to be a bit old looking and kind of herky jerky.

Hope these tips come in handy when you do your next webinar, presentation, or screencast tutorial.

Events

Free E-Learning Resources

Want to learn more? Check out these articles and free resources in the community.

Here’s a great job board for e-learning, instructional design, and training jobs

Participate in the weekly e-learning challenges to sharpen your skills

Get your free PowerPoint templates and free graphics & stock images.

Lots of cool e-learning examples to check out and find inspiration.

Getting Started? This e-learning 101 series and the free e-books will help.