A Round Up of Three Good E-Learning Tips
April 19th, 2022
I am a simple person and usually try to explain things in three steps. They’re easy to remember and share. Here is a round up of all previous posts that share three steps to do something to improve your course design and development.
General E-Learning Course Design Tips
- A Successful Training Program Answers These Three Questions
- Three Ways to Motivate Your Online Learners
- Three Ways to Save Time & Money in E-learning
- Three Ways to Create Engaging Courses that Aren’t Boring
- Three Ways to Make Your E-Learning Content Meaningful
- 3 Reasons Why We Have Interactive E-Learning
- Are You Using These 3 Ways to Identify the Objectives of Your Online Training Program?
- 3 Things to Consider When Building Interactive E-Learning
- 3 Reasons Why Linear E-Learning May Be the Best Solution
- 3 Things to Consider When Building Your E-Learning Courses
- The 3 Essential Questions Every Learner Wants Answered
Production Tips for E-Learning Course Design
- Three Ways to Use Theme Colors in E-Learning Courses
- Three Things to Do Before Building Your E-Learning Course
- 3 E-learning Tips Before You Start Your E-Learning Project?
- Three E-Learning Tips to Help Build Better Courses
- Three Ways to Use Hotspots in Your E-Learning Courses
- Three Ways to Guide Learners Through Your Course
- How to Avoid These Three Pain Points for Online Learning
- Build Branched E-Learning Scenarios in Three Simple Steps
- 3 Things to Know When Getting Started with E-Learning
- 3 Reasons to Use Animated GIFs in E-learning
- 3 Super Easy Ways to Build E-Learning Templates
- 3 Rules When Selecting Fonts for Your Online Training Course
- 3 Graphic Design Principles for Instructional Design Success
- These 3 Tips Can Change Your Compliance E-learning Forever
PowerPoint Tips for E-Learning
- 3 Tips When Converting PowerPoint to E-Learning
- Here are 3 Free PowerPoint Templates for Online Training Courses
- 3 PowerPoint Shortcuts I Always Have at My Finger Tips
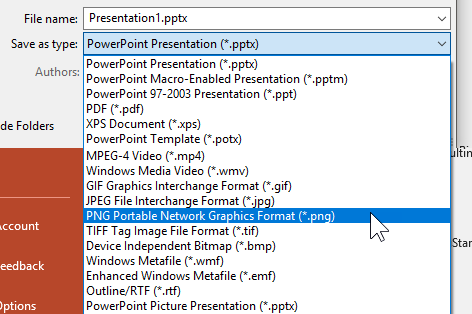
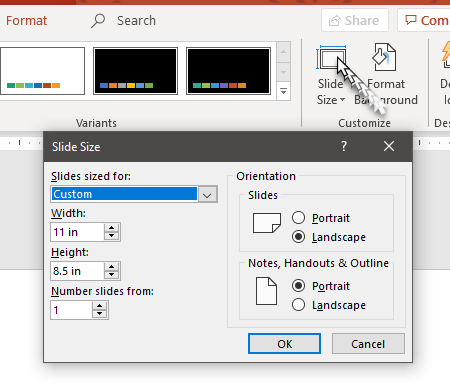
- 3 Tutorials to Help You Get More Out of PowerPoint’s Image Editing
Professional Development
- A Three-Step Process for Becoming an E-Learning Pro
- Three Good E-Learning Books to Finish Off the Summer
- A Three-Step Process to Build Your Skills the Right Way
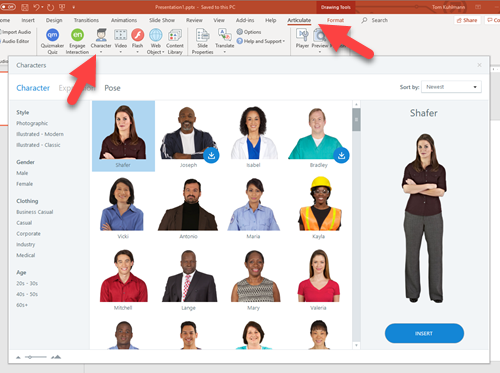
- A Three-Step Process to Create Hand Drawn Custom Characters
- Three Common E-Learning Design Issues & How to Avoid Them
- 3 Ways to Make Static Content Interactive
- 3 Production Tips for E-learning Developers
- 3 Ways to Save Your Training Job
- 3 Ways to Improve Your E-learning Design Skills
Events
- Everyday. Check out the weekly training webinars to learn more about Rise, Storyline, and instructional design.
Free E-Learning Resources
 |
 |
 |
|
Want to learn more? Check out these articles and free resources in the community. |
Here’s a great job board for e-learning, instructional design, and training jobs |
Participate in the weekly e-learning challenges to sharpen your skills |
 |
 |
 |
|
Get your free PowerPoint templates and free graphics & stock images. |
Lots of cool e-learning examples to check out and find inspiration. |
Getting Started? This e-learning 101 series and the free e-books will help. |